The best DIY room stuff lands somewhere between a free afternoon and a small hardware run, with the deciding factor being whether you can make a mess or need your security deposit back. Washi tape arches cover whole walls without paint, and a single roll costs about what a latte does. Renter-safe projects sit right next to ones that demand a stud finder and a drill, so the match depends on your walls as much as your taste.
1. Washi Tape Wall Art
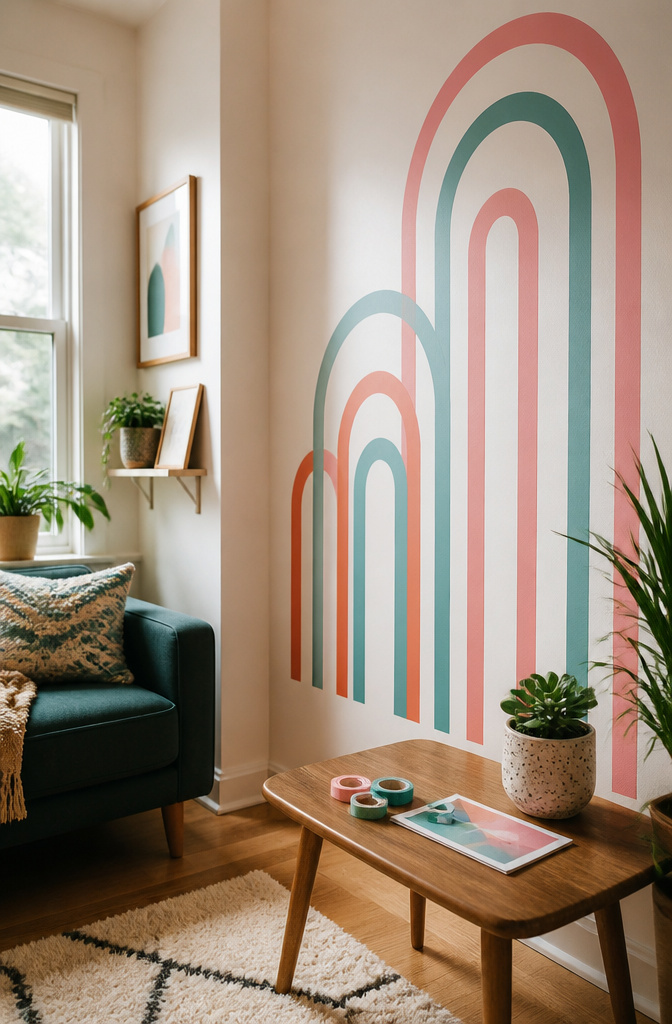
Colored paper tape sticks right to the wall and lifts off clean when the lease ends, which makes it one of the few renter-safe ways to cover a lot of wall without losing the security deposit. The tape is thin enough to tear by hand but wide enough to read from across the room, and a single roll costs about what a latte does.
The basic move is to mark your pattern lightly in pencil first, then lay strips down and press each flat to push out air bubbles. For a first try, arches work better than checkerboards because one curved cut hides a wobbly edge where a crooked grid line announces itself. Two or three colors, maybe a warm and a cool, keep the shape from flattening into wallpaper.
You will need washi tape, scissors, a ruler, and a pencil. Sunbursts and grids are other patterns to graduate into once the arch feels easy.
2. Macrame Wall Hanging
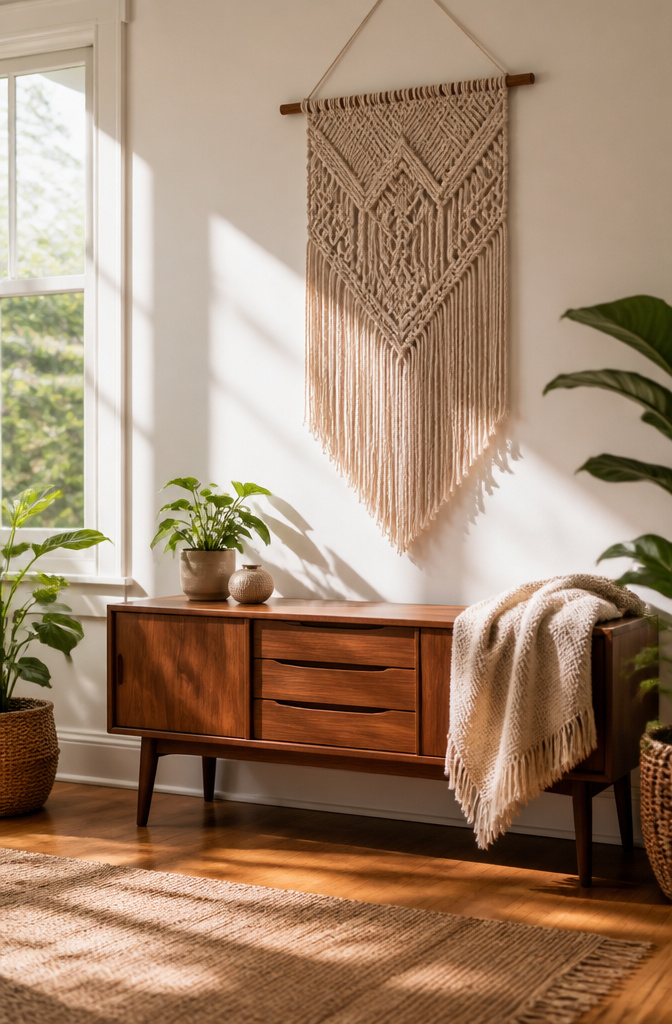
A macrame wall hanging brings soft texture to bare walls through nothing but knotted cord. Cut the cord into equal 6-foot lengths, fold each piece in half, and loop it over a wooden dowel to anchor the strands.
Natural cotton cord works best for neutral rooms; it softens hard wall surfaces without competing with other decor. The square knot builds the whole pattern from there: take four cords, pass the left outer strand over the two middle ones and under the right outer strand, then reverse it back the other way. Tie rows of these and you get stripes, diamonds, or layered sections depending on how you group the cords.
I have watched enough of these tutorials to know the cord type matters more than the pattern. A 4mm natural cotton cord holds its shape and fringes cleanly when you trim the bottom ends even. Skip anything labeled "craft cord" that feels slick or synthetic; it will not take the fringe and the knots look bulky.
The whole piece hangs by a length of string or ribbon looped to the dowel ends. One afternoon, basic scissors, and a single material. That is why this keeps surfacing in searches for diy room stuff: it looks handmade because it is, and the wall you were staring at finally has something worth noticing.
3. Painted Mason Jar Vases

Mason jars sit in most pantries long after the jam is gone, and that leftover glass is the start of a paint project that actually sticks. The catch is preparation: clean and dry the jars completely or the finish chips within a week. I learned that from watching a first coat bubble up on a jar that still held olive oil residue near the rim.
Acrylic paint is what most makers grab for this, and it works if you give it something to grip. A quick scuff with fine sandpaper helps, or you can buy formulas labeled specifically for glass and ceramic. Matte acrylic gives a soft, chalky look that reads farmhouse; metallic acrylic catches desk lamps and reads more evening than afternoon.
For the worn, handled-for-years look, paint your base color, let it cure overnight, then rub a candle or beeswax on the raised edges and corners. A second coat in a contrasting shade goes over that, and a light sanding with steel wool pulls away the top layer exactly where the wax sat. The color underneath shows through like honest wear rather than factory distressing, which is the point of doing it yourself.
4. Floating Wooden Shelves
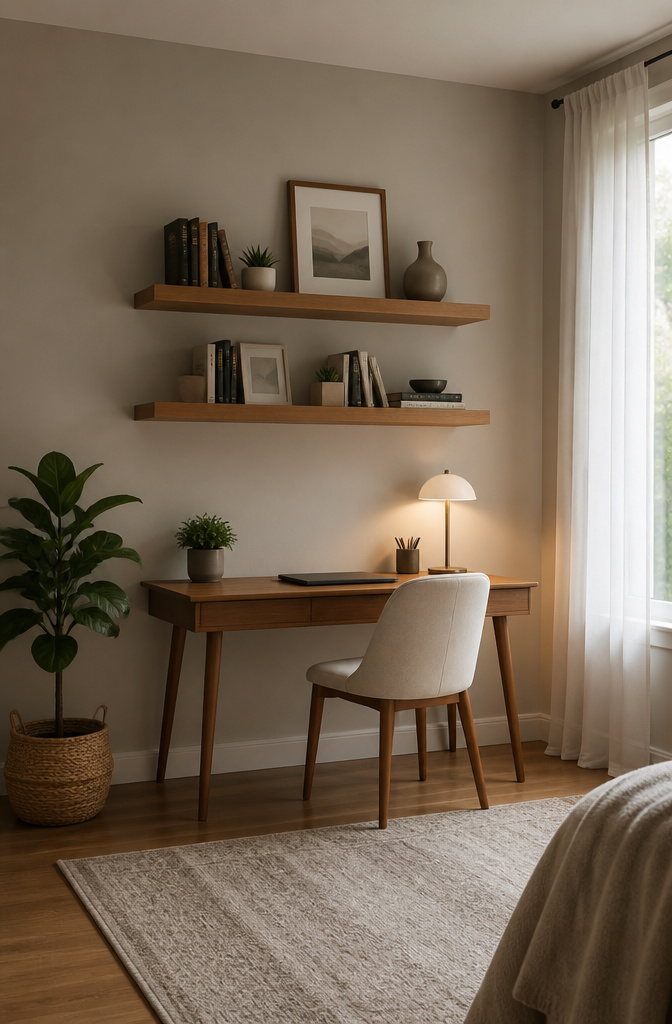
Wall brackets always show, so the floating look depends on hiding them inside the shelf itself. A hollow wood channel slips over a metal bracket screwed to studs, leaving no visible hardware beneath.
- Mark the shelf spot on the wall using a level. A crooked line here ruins everything that follows.
- Pick a bracket rated for the wood depth. Most standard hidden brackets support light objects only, think small plants, framed photos, candles, a few books.
- Drill the bracket directly into wall studs. Drywall anchors will not hold the torque once weight sits at the front edge.
- Slide the hollow wood board over the bracket arm and secure from underneath with screws that never show from above.
- Check it sits flat before adding anything to it. The slightest tilt makes every item look like it is sliding off.
Stain the wood to show its grain or paint it to match nearby furniture. A small plant, framed photo, candle, and a couple of books are often enough to make the setup feel balanced, and adding LED light underneath can create a soft glow at night.
5. DIY Canvas Painting
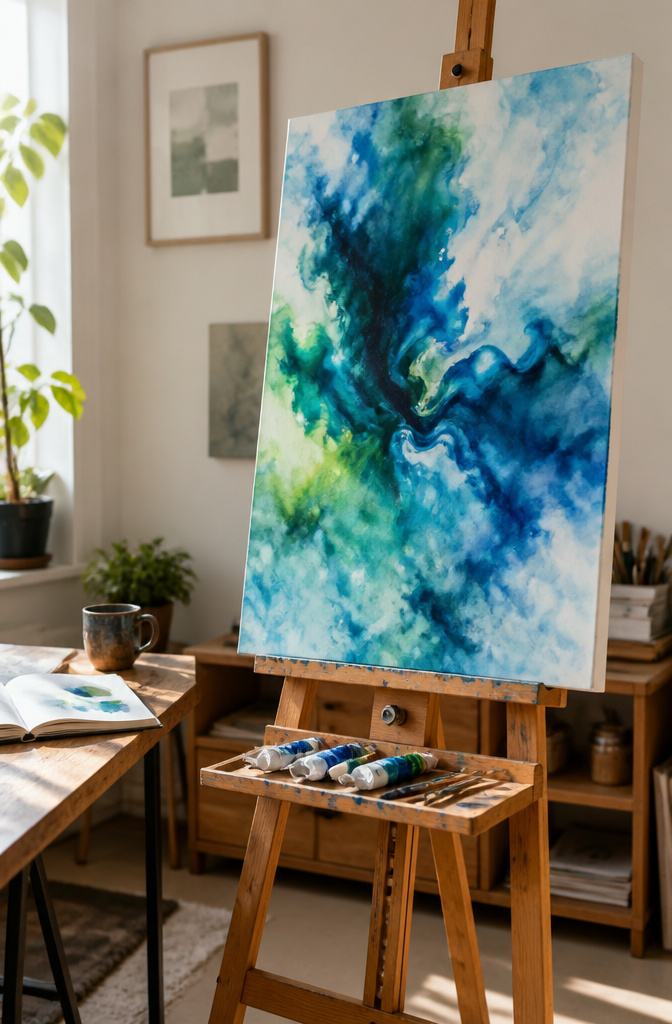
A blank canvas and a tube of acrylic paint can fill a wall better than anything store-bought if you pick one or two colors that match your room and stop there. I learned the wet-on-wet technique after watching a friend ruin a careful sketch, then paint over it in frustration with two colors still wet on her brush. The colors bled into each other in a soft, accidental gradient that looked intentional by the time it dried.
The method is simple. Load your brush with the first color and cover the canvas quickly while the paint is still wet. Rinse the brush, pick up the second color, and touch it to the wet surface before the first layer sets. The paint blends itself at the edges. No drawing required, no shapes to get right. Low-tack painter’s tape pressed firmly along any straight edge you want to keep clean will stop the bleed where you need a hard line.
Let each layer dry before hanging the piece. A few hours matters here, acrylic holds moisture longer than it looks.
6. Pressed Flower Frames
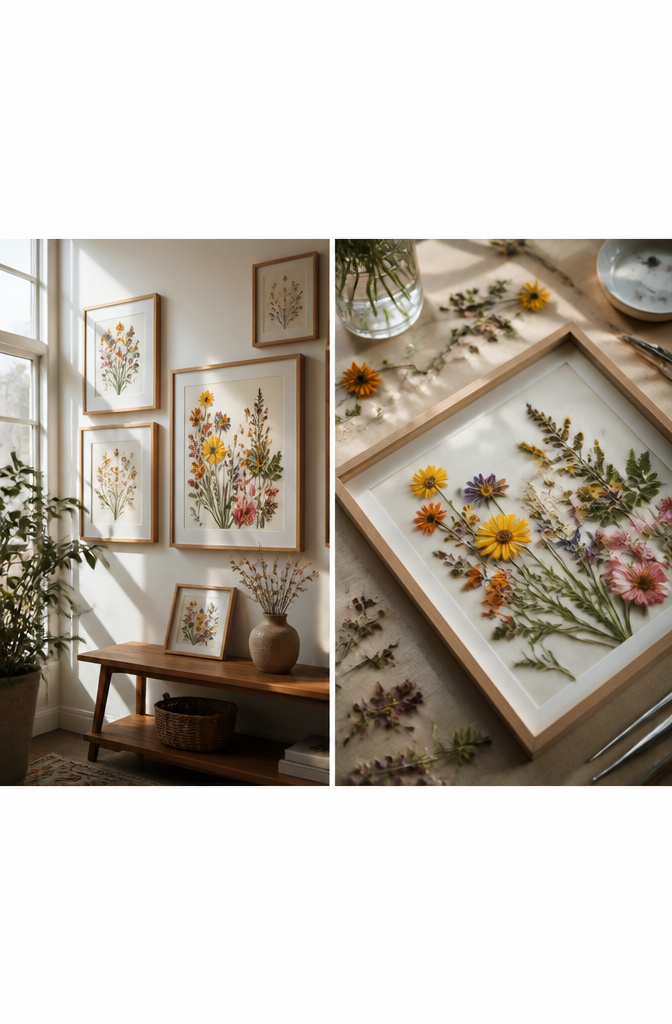
Pressed flowers keep a moment still: the wild daisies from a hike, the last roses of a bouquet, the ferns that filled a shady corner of the yard. The trick is getting them flat without browning, which means placing the flowers between two sheets of parchment paper before you weigh them down. Heavy books work fine; stack them and leave the whole thing alone for one to two weeks. The parchment pulls moisture out slowly, so the petals keep their color instead of turning to paper.
Once the stems and leaves feel crisp, arrangement is the fun part. A standard picture frame with the backing removed lets you build layers: one stem crossing another, a single leaf floated off-center. Double-glass floating frames give a different effect, almost three-dimensional, with the veins and color changes visible from both sides. Either way, seal the frame and hang it away from direct sun, or that preserved color fades faster than you’d think.
7. Stenciled Throw Pillow Covers
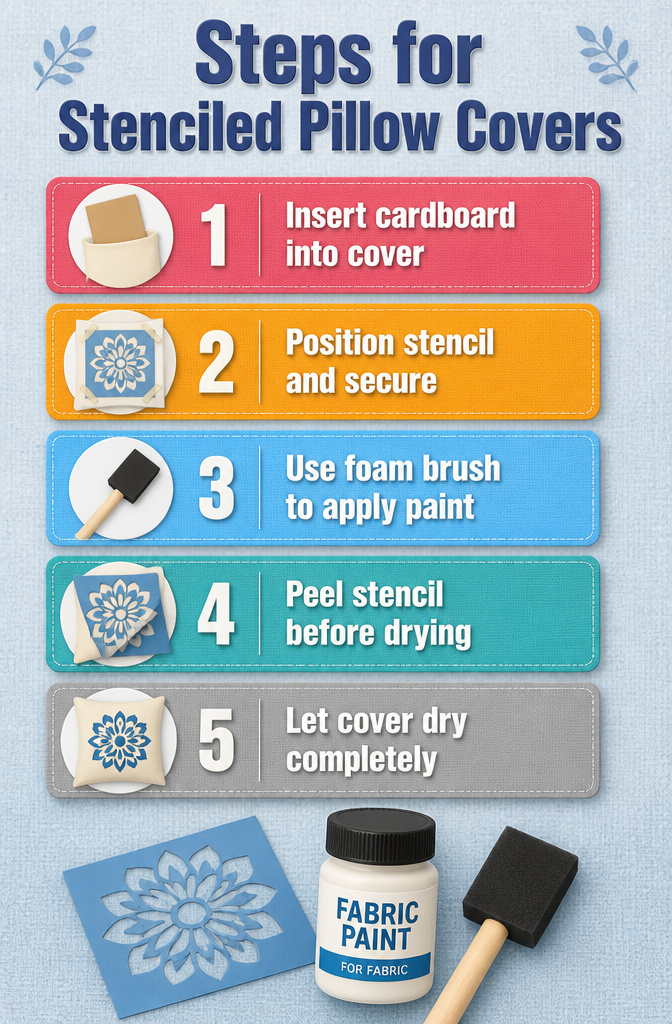
A stenciled throw pillow cover turns a plain couch accent into something that actually matches the room. Fabric paint matters more here than the stencil itself: standard acrylic stiffens fabric and cracks when you lean on it, so look for paint labeled specifically for fabric, which stays soft through washes.
Cardboard inside the cover keeps paint from bleeding to the back. Slide it in before you start, then position the stencil where you want it. Tape works for holding the stencil flat, but a light adhesive spray keeps edges from lifting under the brush, which is where most smudges come from.
A foam brush wins over bristles for this job. Bristles hold too much paint and push it under the stencil edges; foam loads lighter and dabs flat, giving you the even coat that keeps lines crisp. Apply in thin layers. The first coat looks too pale, but a heavy second coat is what pools and seeps.
Peel the stencil while the paint is still slightly wet. Waiting until it dries risks the stencil sticking and pulling half the design with it. Let the cover dry fully before you put the pillow back in.
8. Rope-Wrapped Mirror Frame
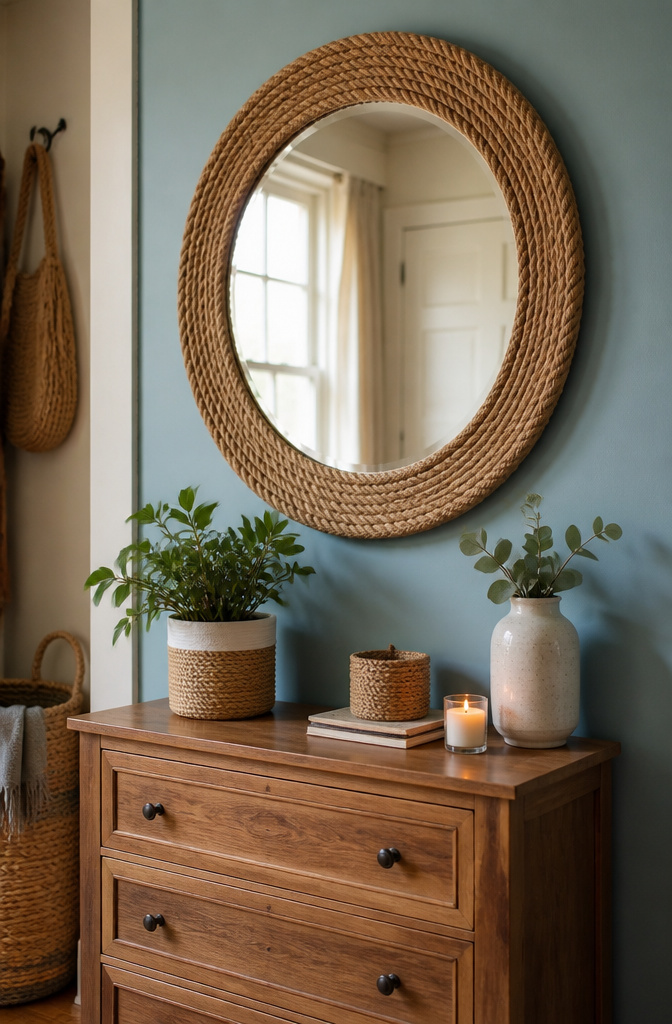
A rope-wrapped mirror frame turns a plain round mirror into something that reads coastal without trying too hard. Jute rope gives the rougher, beach-house texture; cotton rope runs softer and cleaner against a wall. The adhesive matters more than the rope choice. Hot glue is the one that actually holds rope to glass long-term; craft glues and epoxies slide on the slick surface or dry too slowly to keep the first wrap from shifting.
Start the first coil on the mirror’s edge, not the face, so the rope sits flush rather than hovering. Run a short line of glue, press the rope end down, and wrap tightly from there. A new dab every few inches keeps the tension even. Ending cleanly means stopping at the same point where you started and tucking the tail under the final wrap with one last dot of glue; the seam disappears into the spiral.
For a first attempt, a small round mirror, roughly the size of a dinner plate, keeps the project to an afternoon and forgives a wobbly coil or two. The rope builds out the diameter fast, so even a modest mirror ends up statement-sized above a dresser or desk. The finished piece looks deliberately designed, not patched together, which is the whole point of DIY room stuff that earns its wall space.
9. Tassel Garland Wall Hanging
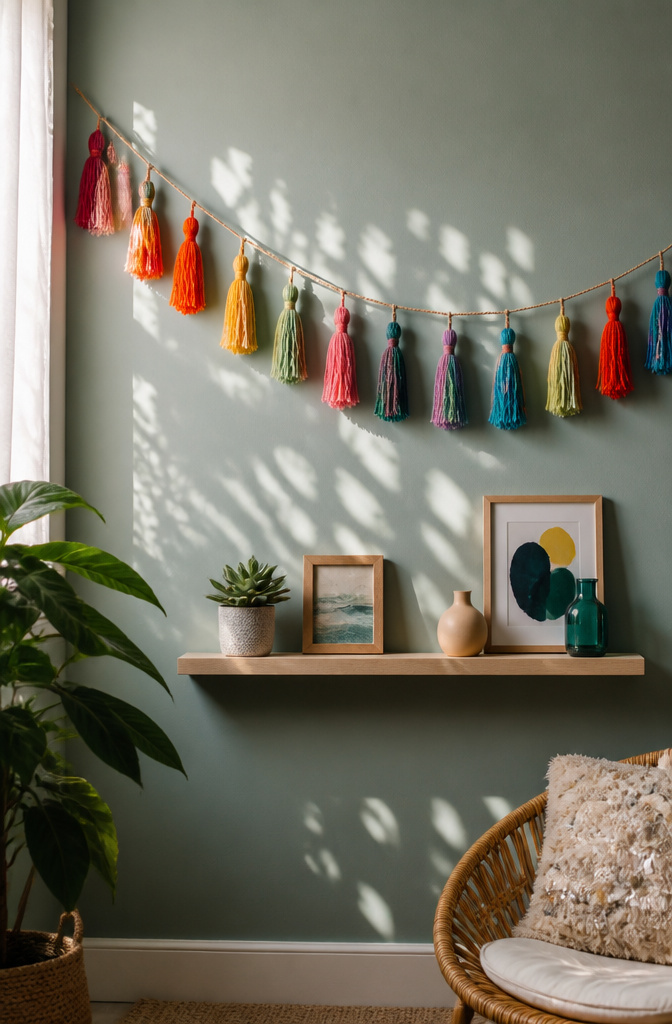
A tassel garland strings together small yarn bundles that add color and movement to a wall or shelf. Wrapping yarn around your fingers about 20 times makes each tassel, then tying the top tightly before sliding the bundle free and cutting the bottom loops open. Twine carries the finished pieces, and spacing them evenly means holding each one in place with a second tight tie rather than letting them slide.
No cutting patterns or measuring are involved, so the whole garland finishes in an afternoon with just yarn, scissors, and string. A full wall hanging needs enough tassels to read as a deliberate band of color rather than a few scattered accents, though the exact count depends on how wide your space is. Chunky yarn works faster; metallic cord or roving mixed in adds the woven texture people usually buy from expensive wall hangings.
10. Upcycled Tin Can Planters

Empty tin cans become small planters with a few minutes of prep. A masonry nail and a hammer punch drainage holes through the base so roots do not sit in water. The cut rim where the can opened stays sharp; wrapping it with twine covers the edge and adds texture.
Labels and glue residue wash off with hot soapy water. Once dry, the outside takes paint. Acrylic works for display pieces, but a can flexes when handled or when soil settles. Spray paint formulated for metal, followed by a clear sealant spray, bends without chipping.
Two coats of paint cover print well enough. Small herbs or succulents fit these sizes best, grouped on a sunny windowsill where the cluster becomes a miniature garden.
11. Ombre Dip-Dyed Curtains
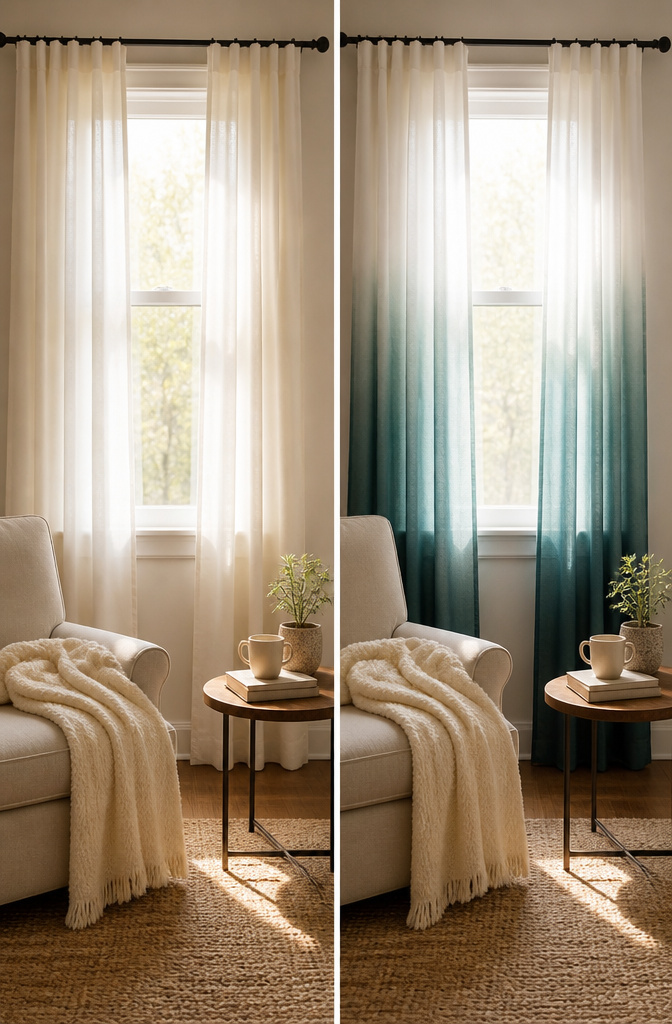
- Plain white cotton or linen curtains take dye evenly, so those are what to start with. Polyester blends resist the color and leave streaks.
- The dye bath mixes in a large bucket following the package instructions for water temperature and salt, but the trick for gradual color is using less dye concentrate in the same volume of water, then building the concentration in stages rather than one strong bath.
- Three buckets work best: light, medium, and full-strength dye. Dip the bottom third of the curtain into the lightest bath for two to three minutes, then lift it and let the excess drip back.
- For the middle band, lower the curtain to the halfway point and hold it in the medium bath another two minutes. The overlap zone between light and medium creates the fade.
- The bottom tier goes into the strongest dye. A clothespin on a yardstick or a binder clip on a dowel keeps the fabric at exactly the depth you want without your gloved hand tiring and drifting.
- Uneven lines happen when the fabric bunches or you move it mid-soak. Weight the hem with a stainless steel washer on a string so the curtain hangs straight and still.
- Rinse from top to bottom in cold water until it runs clear, then hang the curtains vertically to dry so the dye doesn’t migrate sideways and break the gradient.
12. DIY Headboard from Pallets

Pallet wood gives a bed that rustic, finished look without the cost of a store-bought frame, and the natural texture warms up almost any bedding style. For this headboard, three square, wood, decorative wall panels do the work instead of a full pallet frame: lighter to hang, easier to sand smooth, and simpler to arrange at the right height behind your mattress.
Start with 80 to 120 grit sandpaper to knock off splinters and rough patches, then work up to 220 grit if you want a softer hand against the wood. Check every board for loose nails and cracks before you stain. A clear protective coat preserves the natural grain if you prefer that pale, unfinished look over dark stain.
Wall brackets or heavy-duty screws into studs keep the panels from shifting when you lean. Mark your stud locations first, hold each panel against the wall at sitting height, and drill through the back panel into the wood. Two brackets per panel is the minimum I would trust; three if the wall is plaster and the studs run odd.
Battery-operated lights woven around the boards add gentle evening lighting without running cords down the wall.
13. Neon-Style Sign Wall Art

LED strip lights bent into a word or shape give the soft glow of neon without the price tag of a real glass-tube sign. The trick is picking something short, maybe four letters, with curves the strip can follow without kinking.
A dark backing board, cardboard or wood, makes the lit shape pop once the room goes dim. Sketch the word lightly first; the strip has to follow that path exactly, and freehanding while the glue is cooling is how you end up with a wobbly M.
Hot glue does the holding. Work in small sections, press the strip in while the glue is still warm, and let it dry fully before you plug in.
The adhesive backing on most LED strips will fail on painted walls, peeling off within days from the latex tension. Cable clips, the small plastic ones with a nail hole, solve this cleanly. Screw or adhesive-mount the clips along your sketched path, snap the strip in, and the shape stays put without fighting the paint.
14. Hanging Glass Terrarium
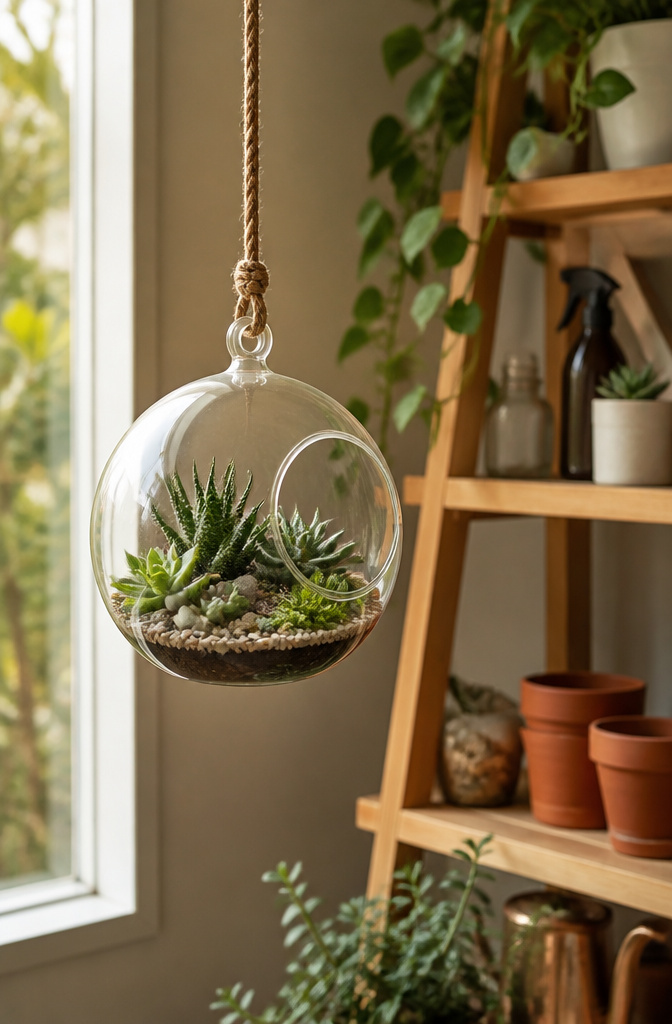
A hanging glass terrarium brings greenery into a room without eating up shelf space or floor area, which matters when square footage is already tight. The glass is fully enclosed, so plant choice needs more thought than an open pot would. Small succulents and air plants usually rot in trapped humidity; pothos and snake plants handle the moist air far better, and both forgive inconsistent watering.
Layering inside the jar works bottom to top: small rocks first for a false drainage bed, then a thin barrier of activated charcoal if you have it, then potting soil deep enough to anchor the root ball. No holes in the glass means water has nowhere to run off, so the rock layer is doing the work that a drainage hole normally would. I tend to underwater rather than overwater; standing water at the bottom breeds mold fast.
For the hanger itself, macrame or simple cord both work, but the ceiling side is where I slowed down. A hook screwed into drywall alone will pull out once the soil is wet and the glass weighs more than it looks. Spread the load across a ceiling joist with a stud finder, or use a toggle bolt rated for the full loaded weight if the joist lands in the wrong spot. The terrarium should sit near a window for the light, but check that the hanger length keeps it clear of the glass so condensation doesn’t pool on the pane.
15. DIY Aesthetic Mirrors
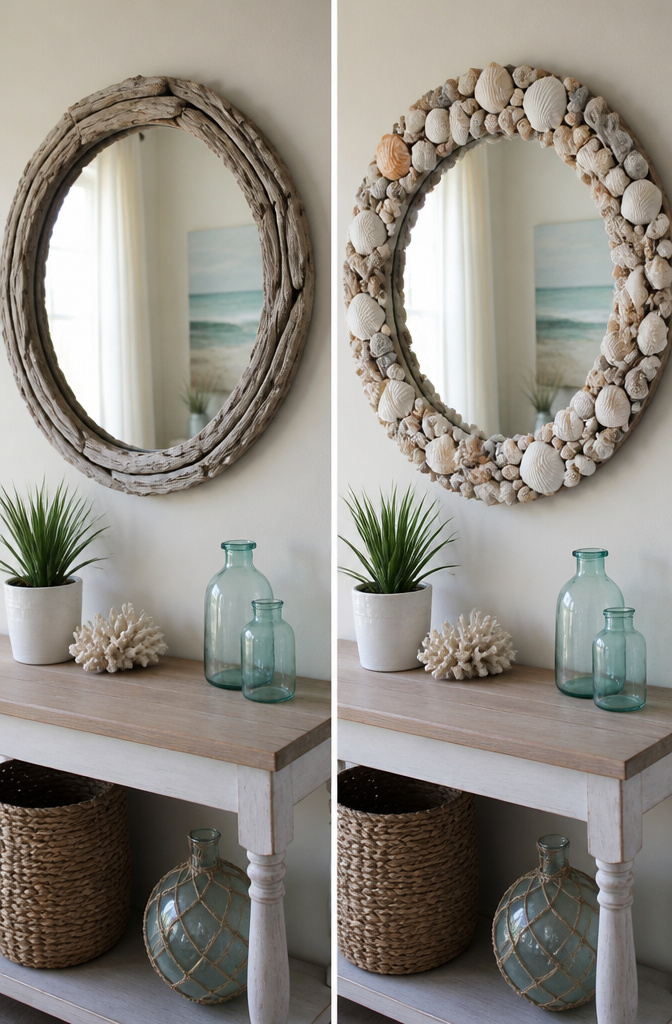
A rope-wrapped frame gets its texture from one continuous material, but an aesthetic mirror frame builds its look from collected objects. Shells, beads, and driftwood each sit on the surface as individual pieces, and the method changes to match.
For shells, the flat side wins. A dab of hot glue on the shell’s underside, pressed in overlapping rows like fish scales, keeps the edges from jutting out too far. Beads need more patience and a stronger bond. String them first in the pattern you want, then lay the strand against the frame with epoxy at every few beads so the weight doesn’t sag. Driftwood is the most forgiving. Pieces of different lengths get glued straight to the frame edge, ends pointing outward, and the irregular gaps are the whole point.
The clay blob mirror and foam mirror frames that show up in aesthetic rooms right now use the same principle: the frame becomes a surface for texture, not just a border. What separates the look from a basic nautical rope wrap is that each piece is placed, not wound, so the shadow pattern changes with the light.
One warning from the builds that fail: driftwood must be fully dry or the glue line will crack in a heated room. Beach-collected pieces need a week indoors before they touch the frame.
16. DIY Candle Holders
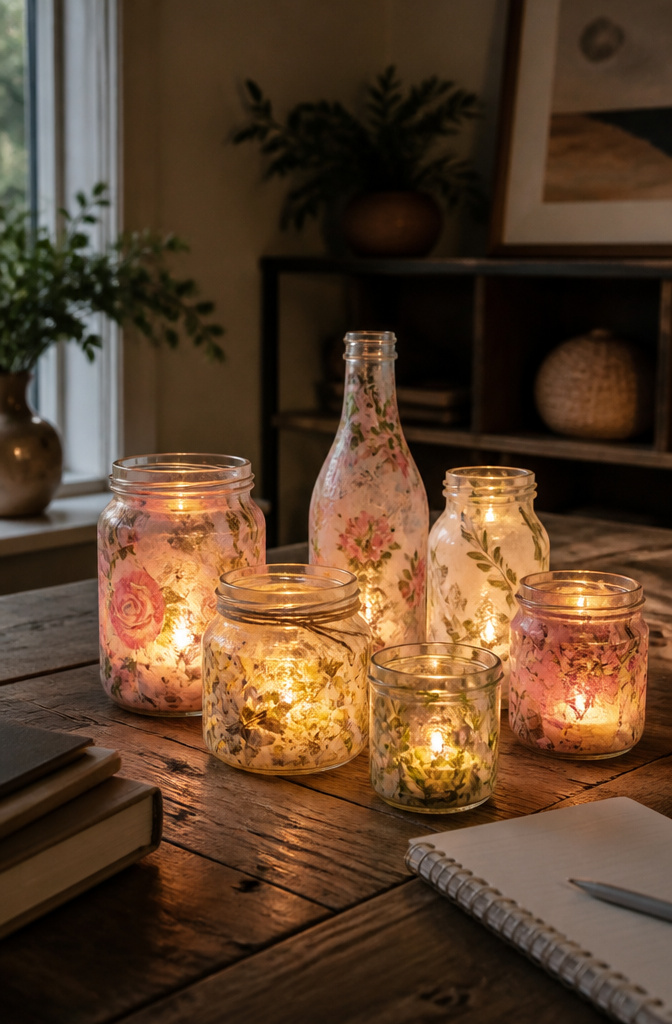
Glass jars and bottles from the recycling bin make the best starting material for candle holders. Amber, green, and clear finishes all work, as long as the label is scrubbed off so light refracts cleanly through the surface.
Two finishes dominate this project. Decoupage wins for speed: thin paper, napkins, or leftover wallpaper adhere with Mod Podge around the outside, leaving the interior untouched. Glass etching, done with cream or a tool, frosts the surface permanently and reads more modern, though it takes longer and demands a steadier hand.
Photos and scrapbooking supplies layer beautifully under decoupage, but placement matters for safety. Any paper or fabric must sit below the rim and at least two inches above where the flame will sit, creating a bare glass gap that lets heat escape and keeps combustibles from scorching. I skip decoupage on the inside entirely; the outside holds the decoration and the inside stays plain glass. A votive or tea light sits lower and safer than a taper in these holders, and the bare rim gives you a place to grip without smudging the finish.
17. DIY Desk Organizer
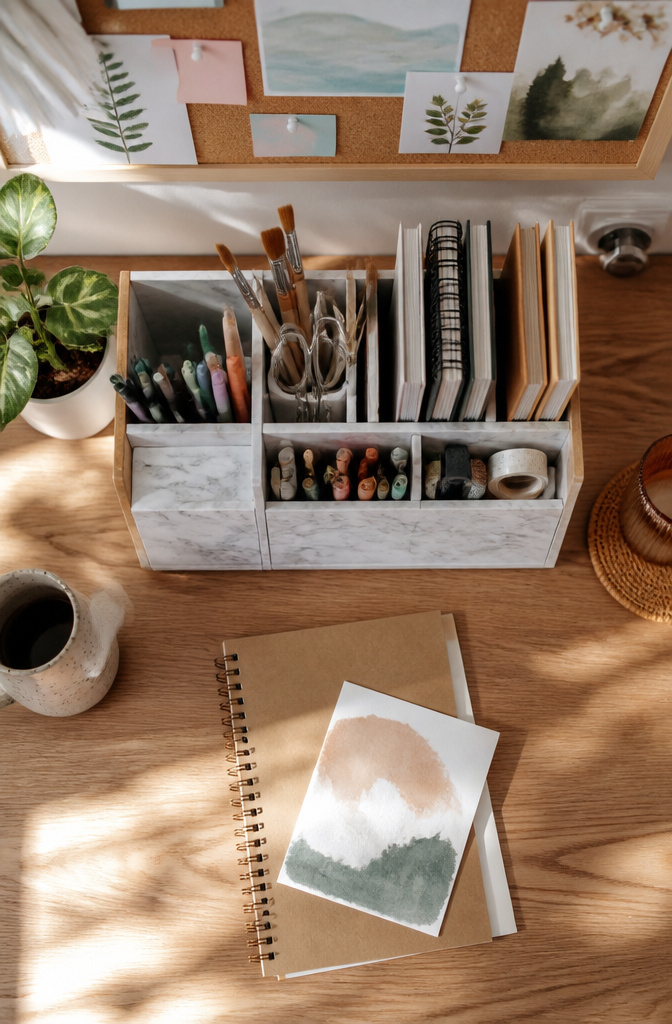
A desk organizer built from cardboard and wrapped in marble contact paper keeps pens, brushes, and notebooks visible without the cost of plastic bins. Heavy-duty hot glue joins the sections; the wrap hides every seam.
For something sturdier, a wood glue-up lasts longer and takes the weight of stacked letter trays. A standard letter tray measures 12 inches wide by 9.5 inches deep, so the base compartment needs at least that footprint plus a little wiggle room.
Cardboard works best for renters or anyone testing a layout. The wrapped finish looks intentional on a vanity or study desk, and angled cuts turn ordinary shoe boxes into slanted slots that face supplies toward you. Wood asks for a miter saw and clamps, but the resulting caddy will not soften at the corners after a year of use.
Two ways to play this: start with what you have in the recycling bin and upgrade if the shape proves useful, or commit to wood from the first cut and skip the interim version. The cardboard route wins if you are not sure which compartment sizes you actually need.
18. DIY Wall Art
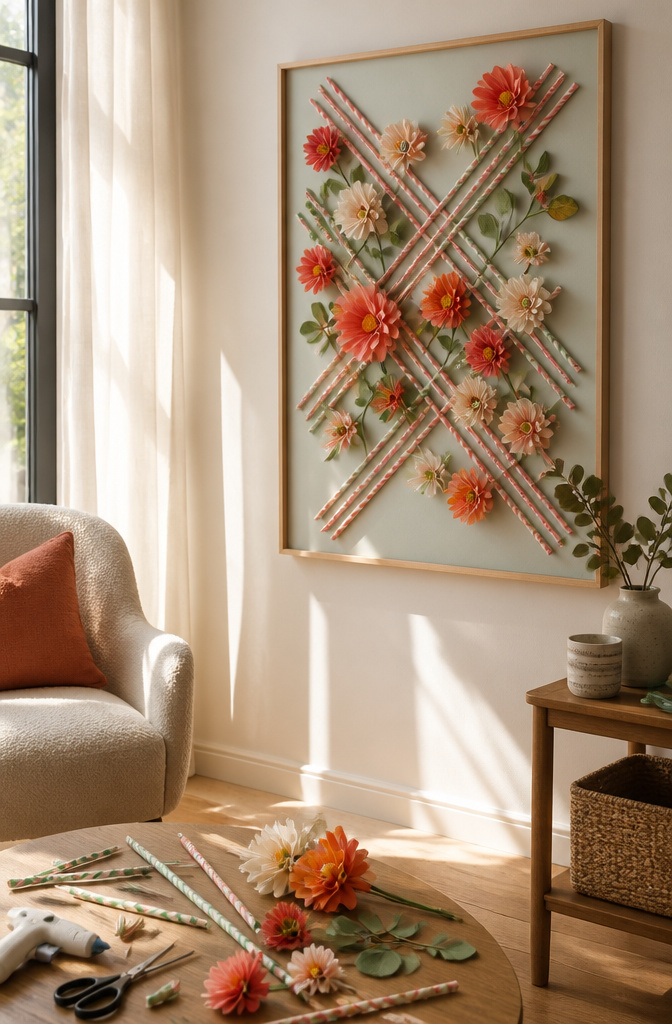
Wall art built from what is already in the house beats store-bought canvas for anyone who wants the afternoon back by dinner. These three approaches need only basic tools and leave room to adapt.
- Paper straws and fake flowers glued to foam board make a 3-D piece that reads as a vase on the wall. Hot glue the straws in a cluster for stems, layer tissue paper behind for depth, and arrange the flowers so they cast a shadow. The passages list paper straws, foam board, fake flowers and leaves, scissors, tissue paper, canvas, and a hot glue gun as the full material set.
- Washi tape patterns press flat to the wall and peel off clean when the lease ends. A ruler, pencil, and scissors are enough to lay out arches, checkerboards, mountain outlines, or simple poster borders. Two or three tape colors keep the pattern from flattening into noise.
- Stretched fabric on a simple frame adds warmth that paint cannot match. A large piece above the bed becomes the focal point without the weight of framed glass. Neutral or woven yardage works in boho spaces; the texture does the decorating.
The paper flower assemblage asks the most time for placement. The tape rewards renters who want color without commitment. Fabric sits between them: soft, permanent-looking, and forgiving if the stretch is slightly uneven.
19. DIY Plant Corner
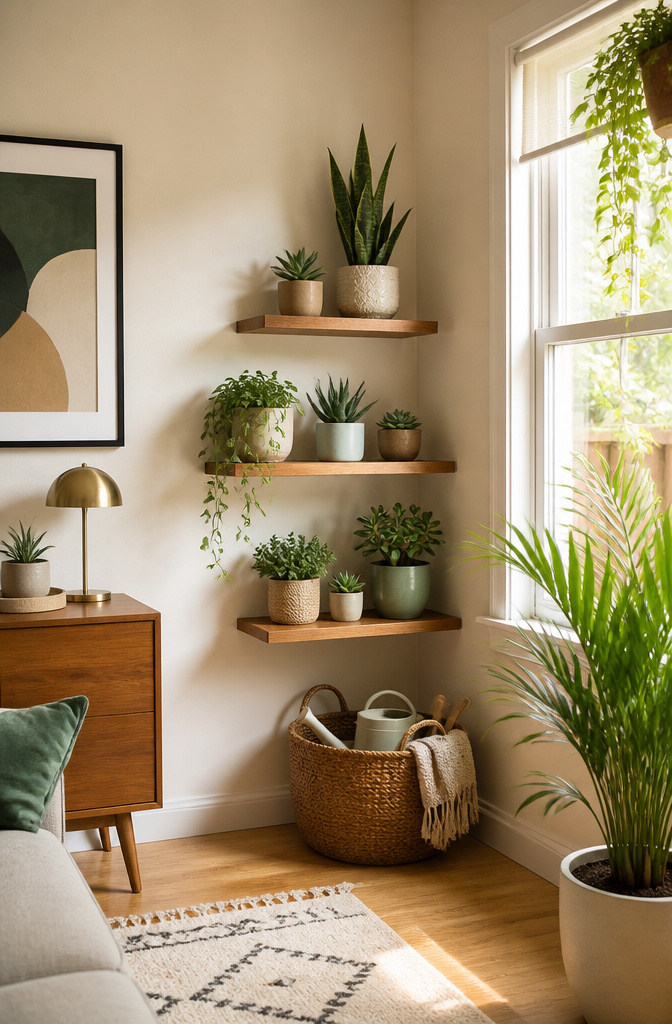
A single pothos on a windowsill is nice enough, but a real plant corner needs stacking. I use a pair of floating shelves at staggered heights, low enough that a trailing vine can reach the one below without crowding the snake plant sitting up top. Mixing different plant heights usually makes the arrangement look more natural, and the shelves give you that layering without buying anything taller than a six-inch pot.
Light is the part that kills the project if you skip it. A north-facing window means snake plants and pothos, the two beginner options that forgive low light. Anything south or west, and you can push into brighter plants, but check the leaves after a week. Yellowing means too much sun; leggy stretching means too little.
Drip trays are non-negotiable. Water runs straight through nursery pots, and saucers on shelves leave rings on wood. I set each pot inside a slightly larger outer tray, the kind that catches runoff but still looks finished from the front. Empty those trays after watering. Stagnant water breeds fungus gnats, and by the time you see them flying, the larvae have already chewed the roots.
20. DIY Fairy Light Setup
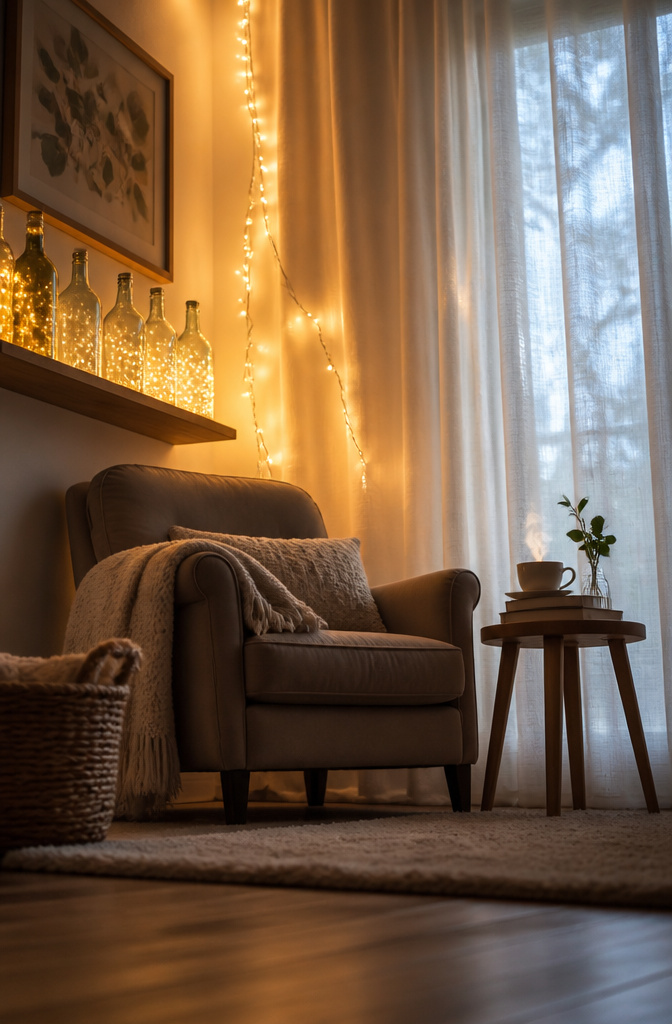
Fairy lights are the fastest way to shift a room from harsh to calm, but the power source matters more than most people expect. I keep plug-in strands for permanent setups behind my headboard and battery-operated ones anywhere I might want to move them next week. The battery strands cost more over time, yet they are the only practical choice for glass bottles on a nightstand or a cluster of paper lanterns hung at different heights in a reading corner.
The real mistake is treating the wall like a nail gun target. Small adhesive cord clips, the kind sold for holiday light mounting, hold a strand flush without leaving residue. Command strips work too, though they show more. For a corner that actually looks designed instead of like leftover Christmas, run lights in a loose cascade from ceiling to eye level, letting the strand dip in one or two soft curves rather than pulling it tight. Warm white bulbs, not bright white, keep the glow from feeling clinical. Sheer curtains in front of the strand diffuse it further if the LEDs still read too sharp at night.
Frequently Asked Questions
What are the easiest DIY room decor projects for beginners?
Start with washi tape wall art, tassel garlands, or painted mason jar vases. Each needs only basic supplies you probably already own, and none require power tools or sewing. The washi tape especially wins for first-timers because it lifts off clean if you change your mind.
How can I decorate bedroom walls without damaging paint or losing my security deposit?
Washi tape sticks to the wall and peels off without residue when your lease ends, making it one of the few renter-safe ways to cover a lot of surface. For hanging heavier pieces, the article also mentions cable clips for LED strips rather than adhesive that fights latex paint. Low-tack painter’s tape gives you clean edges on canvas projects without pulling wall color away.
What makes a bedroom feel more cozy?
Warm lighting and soft textures do most of the work. Fairy lights or LED strip signs cast a gentle glow compared to overhead fixtures, while macrame hangings and layered fabric wall art add warmth that hard surfaces lack. The article also notes that small plants in terrariums or tin can planters bring living texture in without demanding floor space.