Fifth grade craft ideas span everything from chemistry experiments to handmade gifts, but the deciding factor is how much adult help the room can spare. A vinegar-and-baking-soda balloon or a melt-and-pour soap project needs supervision for the hot or reactive moments, while a yarn wig or paper weaving runs solo once materials hit the table. The spare balloon matters more than you think; one torn neck and the afternoon stalls unless someone planned ahead.
1. Vinegar and Baking Soda Balloon
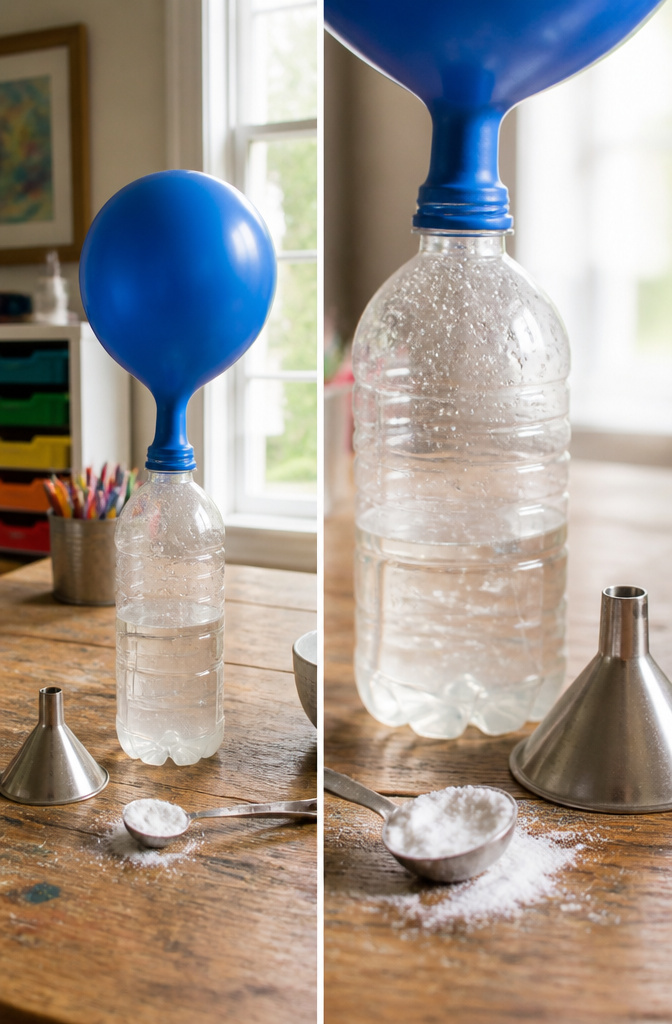
Carbon dioxide gas has to go somewhere, and a balloon stretched over the bottle neck gives it exactly one place. The classic mix is about a third of a cup of vinegar poured into a clean plastic bottle, with baking soda spooned into the balloon through a funnel first. Secure that balloon to the neck without letting the soda drop in yet, then lift it and watch the chemistry happen.
The acetic acid in vinegar reacts with sodium bicarbonate to produce carbon dioxide. That gas expands inside the closed space and has no choice but to inflate the balloon. A fifth grader holding the bottle can feel it grow slightly cooler as the reaction pulls heat in, an endothermic touch that most craft descriptions skip.
What this teaches sticks better than lecture: gases take up far more space than the liquids that made them. The balloon gives a visible measure of that expansion, and the proportions can be adjusted to test whether more baking soda fills it faster or fuller. I would keep a spare balloon on hand. The first one sometimes tears at the neck if a kid pulls too hard stretching it over the bottle, and waiting for a grocery run kills the afternoon.
2. Homemade Thermometer
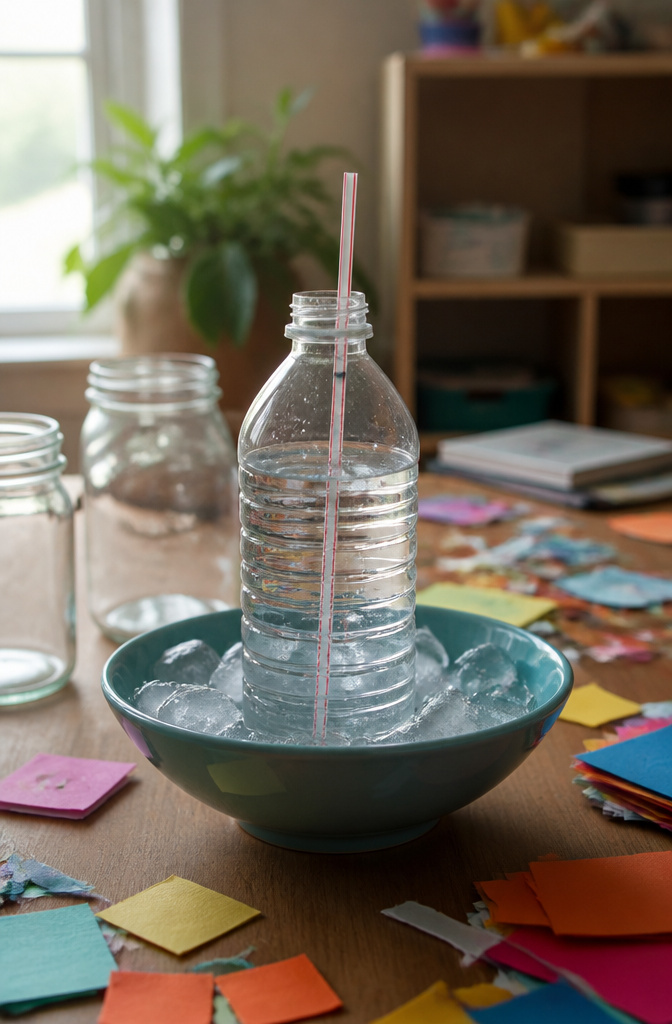
A plastic bottle, some water, and a straw turn into a working thermometer in about twenty minutes. The water inside expands when it warms and contracts when it cools, pushing up the straw or letting it sink back down. Clay packed around the straw where it enters the bottle neck seals the opening and holds the straw steady.
Calibration is rough but enough for a fifth grader to grasp the idea. Set the bottle in a bowl of ice water and mark the straw at the water line. Do the same in warm water. Those two marks become your personal scale, even if the numbers do not match a real thermometer exactly.
The trickiest part is the seal. If clay gaps let air in, the water level jumps around and nothing makes sense. Modeling clay or even sticky tack works; just press it firmly and check for leaks before you call the project done. I have watched kids spend ten minutes adjusting that seal, and the concentration is half the lesson.
3. Yarn Costume Wig
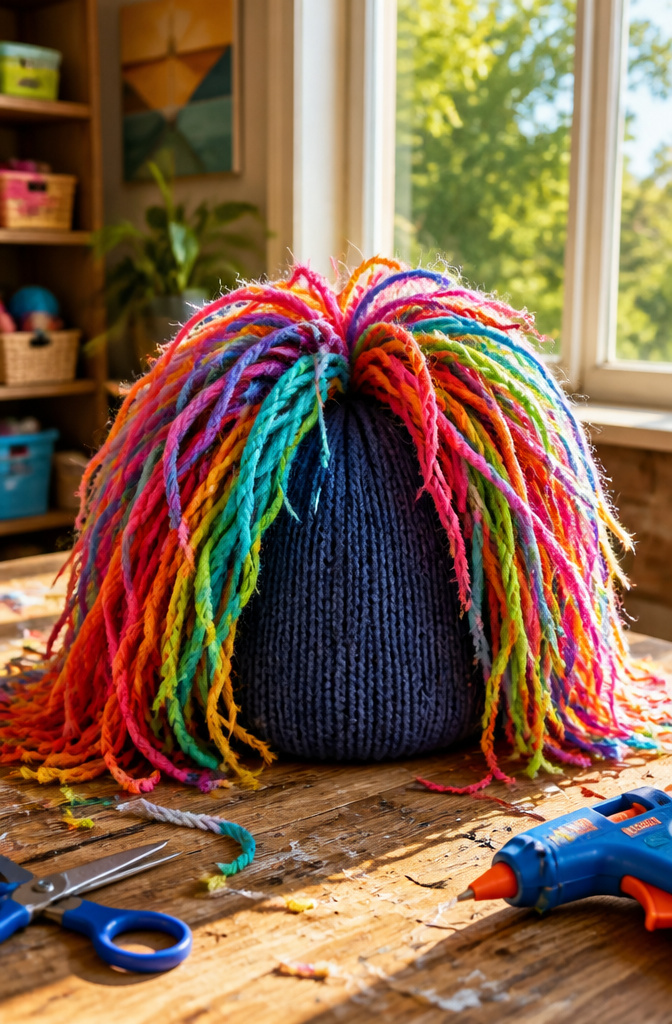
A swim cap or old beanie turns into a simple craft for Halloween with nothing but yarn and glue. Cut yarn into strands twice the length you want the hair to hang, then fold each bunch in half and glue the folded loop to the cap so the cut ends dangle free. Work from the bottom edge upward in rows, crowding the strands tight for a full look or spacing them for wispy mad-scientist energy.
Scissors and a ruler keep the job honest. Glue dries fast enough that you can trim the bangs and shape the style within the same afternoon, which matters when a fifth grader’s attention is already on the costume party. Blunt-tipped school scissors handle the cutting fine; the real trick is starting with the cap inside-out so the first row of glued loops hides against the head when you flip it right-side.
Variations come cheap. Neon yarn turns the same base into a punk rocker or space alien. Long brown strands with a middle part reads hobbit; short black yarn chopped unevenly gives Wednesday Addams. A swim cap runs tighter and shinier, which looks deliberately comic under bright strands. A stretched-out beanie is softer for all-day wear. Either way, the glue holds through one season of dress-up and usually survives to the next.
4. Handmade Soaps

Melt-and-pour soap bases let you skip the lye calculations entirely, which is why this project lands squarely in the afternoon-craft zone rather than the chemistry-lab zone. The base arrives as a solid block; you chop it, melt it in short bursts in a microwave or over a double boiler, and pour it into molds while it is still liquid. The soap base stays hot enough to burn for several minutes after melting, so the adult in the room handles the pouring while fifth graders pick colors, scents, and embeds.
For color, food-grade microwavesafe pigments or liquid soap dyes work without seizing the base. Fragrance oils meant for soap hold their scent far longer than essential oils, though the latter feel more like a real science experiment when a kid measures drops into the melted pot. A plain silicone mold from the baking aisle shapes the bars; the soap pops out in a few hours and is fully ready by morning.
The finished bars make genuinely useful teacher gifts or sleepover favors, and the process leaves enough room for error that a slightly over-scented batch still cleans perfectly well.
5. Eco-Friendly Thank-You Card

Cereal boxes make surprisingly sturdy card stock once you cut away the printed front and work with the plain brown back. I like to flatten the box completely, then trim it to a 5-by-7-inch rectangle for a standard folded card. Score down the middle with a dull knife or the edge of scissors, fold, and burnish the crease with your thumbnail so the card stays shut.
Scrap paper covers the outside neatly. Old maps, sheet music, or magazine pages with bold colors work well; glue them down with a thin layer of white glue and smooth from the center outward to avoid bubbles. Markers, colored pencils, or bits of yarn add the decoration. A loop of twine threaded through a hole punched near the top turns the card into a hanging tag if you want a variation.
The whole thing costs nothing but time you were going to spend anyway, and the weight of the cardboard feels more substantial than construction paper. The only real limit is that dark marker shows through lighter scrap paper, so test your colors first or stick to medium tones.
6. Nature Poetry Book

A pamphlet stitch with waxed thread holds up better than staples for a book kids will flip through dozens of times. Plain copy paper works fine for the pages, though a slightly heavier weight takes watercolor and marker without buckling.
The poems can be originals or borrowed. Fifth graders often write stronger lines when they start outside with a single object, a leaf or a stone, and record every sensory detail before trying to shape it into stanzas. The illustration technique matters most when it connects directly to the text. A poem about rain becomes more interesting when the reader has to tilt the page to catch silver pencil lines laid over blue wash, the words themselves seeming to fall through the image. Collage from actual pressed plants risks crumble by June; watercolor sketches of those same plants last.
The literacy goal here is not decoration slapped beside text. The image should carry information the words omit, or repeat it in a different register, so the reader moves back and forth between the two. One spreads across the gutter while the other stays tidy in the margin; that tension teaches more about composition than either skill taught alone.
7. DIY Bird Feeder

Pinecones make a mess on the porch until you flip the idea and turn them into a bird feeder. The materials sit in most pantries already: a dry, open pinecone, peanut butter, birdseed, and twine or string for hanging.
The assembly takes maybe ten minutes. A thin layer of peanut butter pressed into the cone’s scales gives the seed something to grip, and a roll through a shallow pan of birdseed coats the whole thing. Hang it where you can see it from a window, not tucked deep into a branch where the action hides. A low branch on a backyard tree, a shepherd’s hook just off the patio, or even a sturdy porch beam at eye level all work. Squirrels will find it regardless, so accept that or choose a spot they can’t leap to.
What shows up depends on your zip code and season. House finches, chickadees, and dark-eyed juncos are common visitors across most of the country, and a quiet kid at the window gets a better look than any nature documentary provides. The real learning isn’t the build; it’s the waiting, the first arrival, the argument over whether that flash of red was a cardinal or a house finch. A notebook by the glass turns the feeder into an ongoing project, not an afternoon’s craft.
8. Pysanky Egg Decorating

Pysanky egg decorating comes from Ukrainian tradition and works well for young artists ready to slow down and focus. Raw chicken eggs, beeswax, a kistka tool, and fabric dyes are the core materials. The kistka holds melted beeswax and draws thin lines onto the shell. Dye goes on in layers from light to dark, with wax covering every part meant to stay that color. Where the wax sits, the dye cannot reach. At the end, gentle heat melts the wax away and the pattern appears.
The designs carry meaning. Triangles symbolize the Holy Trinity, spirals represent the soul’s journey, and certain colors stand for specific blessings: black for eternity, red for joy and love, yellow for wisdom. Teaching this alongside the craft lets fifth graders understand they are participating in something older than their grandparents’ grandparents, not just making a pretty object.
A warm room keeps the wax flowing; cold wax clogs the kistka and frustrates the hand. Brown eggs take dye differently than white, which is worth testing before the class session. The finished eggs stay raw inside, so they remain fragile and should sit in a bowl rather than hunt for an egg cup.
9. Shadow Puppets
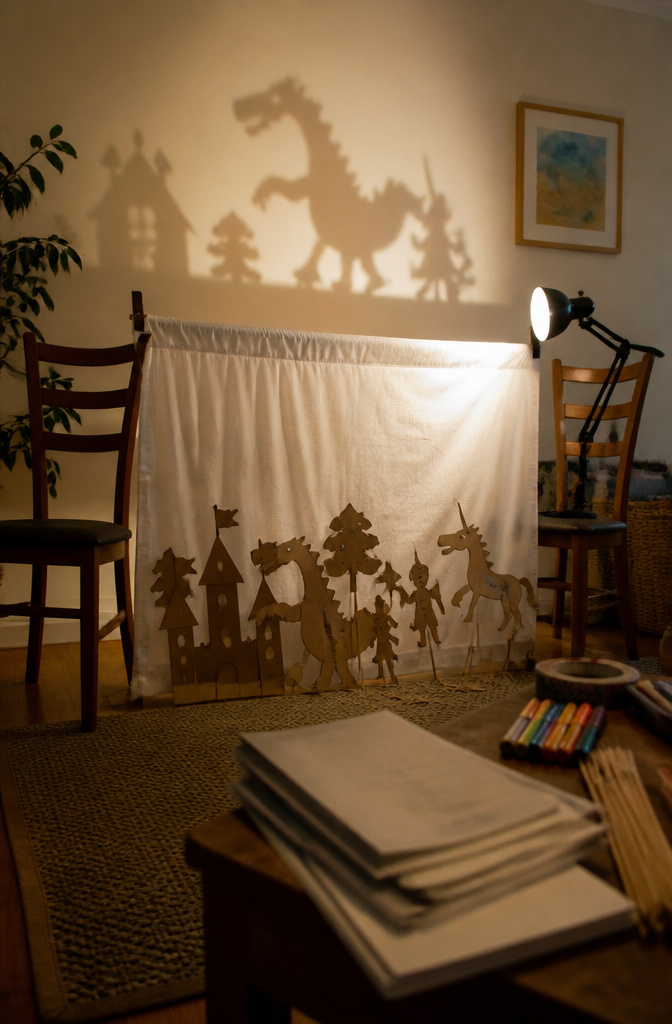
Cardboard shadow puppets are one of those projects where the storytelling matters more than the craftsmanship, which is exactly why they work so well with fifth graders. A cereal box or some heavy cardstock, a few bamboo skewers or popsicle sticks, tape, and a desk lamp pointed at a blank wall. That is the whole setup.
The real decision is whether to make fixed puppets or jointed ones. Fixed joints, just taping the stick straight to the back of a cutout character, keep the build under an hour and let kids focus on writing their script. Articulated joints, fastened with paper brads or even just thread loops, add maybe twenty minutes but let a rabbit ear twitch or a dragon wing flap. I have seen classes split the difference: one lead puppet with moving parts, the rest fixed, so the student directing gets the mechanical fun without everyone waiting on glue.
For the performance itself, a single sheet or shower curtain hung between two chairs becomes the screen. The light goes behind it, puppets in front, and suddenly a kid who would not read aloud in class is doing two voices and calling for sound effects. The learning goal is narrative sequencing and confident delivery, not puppet perfection. A wobbly shadow with a good punchline wins every time.
10. Cloud of Bats
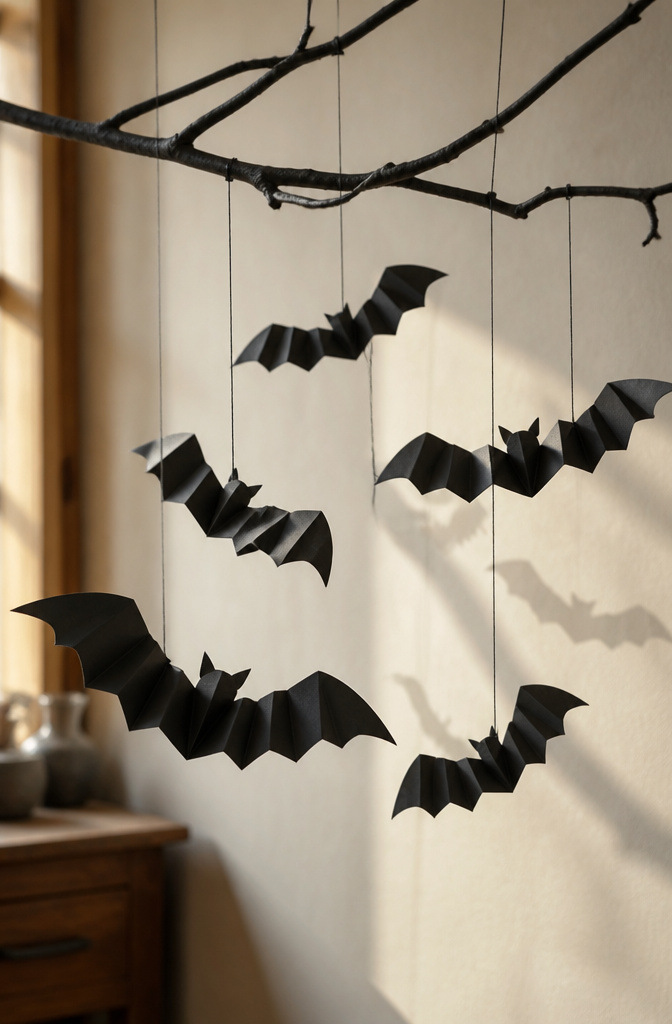
Black construction paper and a pair of scissors are all you need for a cloud of bats that reads as one creature mid-flight. The trick is the accordion fold: crease the paper in a back-and-forth zigzag about an inch wide, keeping each fold parallel and crisp. Stack enough layers and the cut shape multiplies without falling apart.
I draw half a bat along one folded edge, with the body sitting on the crease itself and the wing extending out to the open side. One cut through all layers gives you six or eight bodies linked at the wingtips. Unfold carefully; the paper is thin and eager to tear where the wings meet.
String them from a painted branch or a curtain rod at staggered heights. The slight rotation from a draft is what sells the effect, so leave enough slack in the thread for a slow spin. Too tight and they hang like ornaments; too loose and they tangle on each other. A dozen strands of varying lengths, hung in a rough cone shape, fills a doorway without looking arranged.
11. Personalized Clay Coin
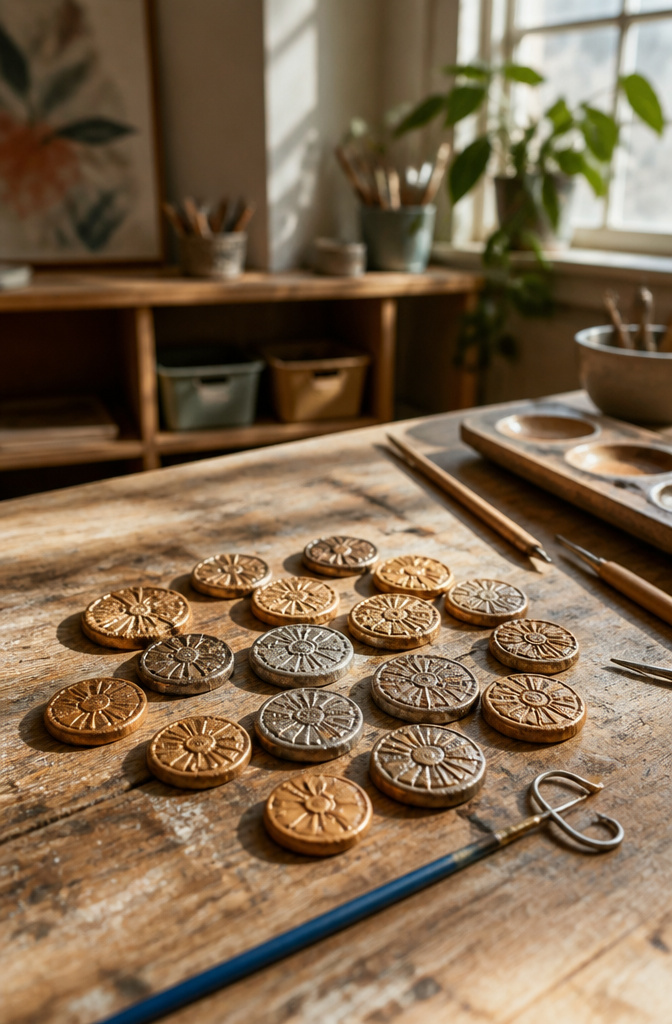
Air-dry clay makes this project easy to pull off in a single afternoon. A chunk about the size of a golf ball presses flat into a disc roughly two and a half inches across. Carve the design before the surface starts to skin over, within the first ten minutes or so. A bent paperclip works for raised borders and lettering. A pencil tip scores in a profile portrait or a simple ship, the kind of image Roman coins carried for centuries.
Metallic acrylic paint sells for a couple dollars at any craft store. Bronze or gold covers the clay once it is fully dry, usually overnight. A dry-brush of darker brown across the high points gives the relief some shadow.
The history connection sits right there in the making. Roman mints struck coins by pressing a heated blank between two engraved dies. Fifth graders feel that same transfer of image from tool to surface. The Latin phrase they carve does not have to be perfect; mangled spelling on ancient coins was common enough. What matters is the conversation afterward about why emperors put their faces on money, and what that told a trader in a distant province about who held power.
A sealable plastic bag keeps leftover clay workable for months.
12. Marbled Christmas Balls

Clear glass or plastic ornaments turn into marbled Christmas balls with nothing fancier than nail polish, water, and a disposable container you do not mind ruining. Fill the container about three-quarters with room-temperature water. Drizzle nail polish or thinned acrylic paint across the surface; it should spread in a film rather than sink. Dip the ornament straight down through the film and out the other side in one smooth motion to wrap the color around it. The polish grabs the curve and leaves a streaked, stone-like pattern no two baubles duplicate.
Water-marbling works fast and dries faster, which is half the trouble. The polish skin sets in minutes, but the underside stays tacky for an hour or longer depending on humidity. Hang ornaments by their caps over newspaper or a drying rack so nothing touches the wet surface. A light mist of clear acrylic sealer after twenty-four hours keeps the finish from chipping when the tree gets jostled. I would skip the sealer only if these are strictly a one-season classroom project; for gifts that come back out next December, the extra step pays off.
13. DIY Diffuser

A homemade reed diffuser teaches the basics of solubility and evaporation without looking like a school project. Rattan reeds draw scented oil up through their hollow channels and release it slowly into the air, which makes the science visible over days instead of seconds.
The materials stay simple: a small glass bottle with a narrow neck, fractionated coconut oil or another lightweight carrier, essential oils, and a bundle of rattan reeds. Mix about three parts carrier oil to one part essential oil directly in the bottle, then slide in six to eight reeds. Flip the reeds after the first hour so both ends get saturated; this jump-starts the capillary action. After that, flip them whenever the scent fades, usually once a week.
The chemistry lesson hides in plain sight. Carrier oils are non-volatile, meaning they do not evaporate quickly. Essential oils are volatile, so they leave the reed surface and disperse. The ratio controls how fast the scent travels and how long the bottle lasts, which is the same principle behind perfume formulation.
For gift-making, a fifth grader can decorate the bottle with glass paint or tie on a handwritten tag naming the scent blend. Refresh the diffuser by replacing the oil mixture when it runs low, or swap in new reeds if the old ones clog with dust.
14. Mixed Media Bird Nests

Oil pastels and various materials turn a simple nest into a real mixed-media piece. The project starts on a 6×6 inch square of manila tagboard. A pencil-drawn circle marks the nest shape, then blue oil pastel fills the background. Dark brown loops inward from a small black center, layered with lighter browns, yellows, and golds until the paper disappears under color. Short curved lines extending past the circle suggest twigs and hay poking out.
The oil pastels do more than color. Black circles drawn close together, radiating from the center, push the middle backward so the nest looks hollow, not flat. That depth is the whole trick.
Pre-cut painted paper strips glue on last for texture. Twigs, yarn scraps, or paper strips can bulk out the actual nest form if you build it in 3D instead of keeping it flat. The original lesson ran three 40-minute art classes, which paces this right for an afternoon with a 5th grader.
15. Optical Illusion Hearts
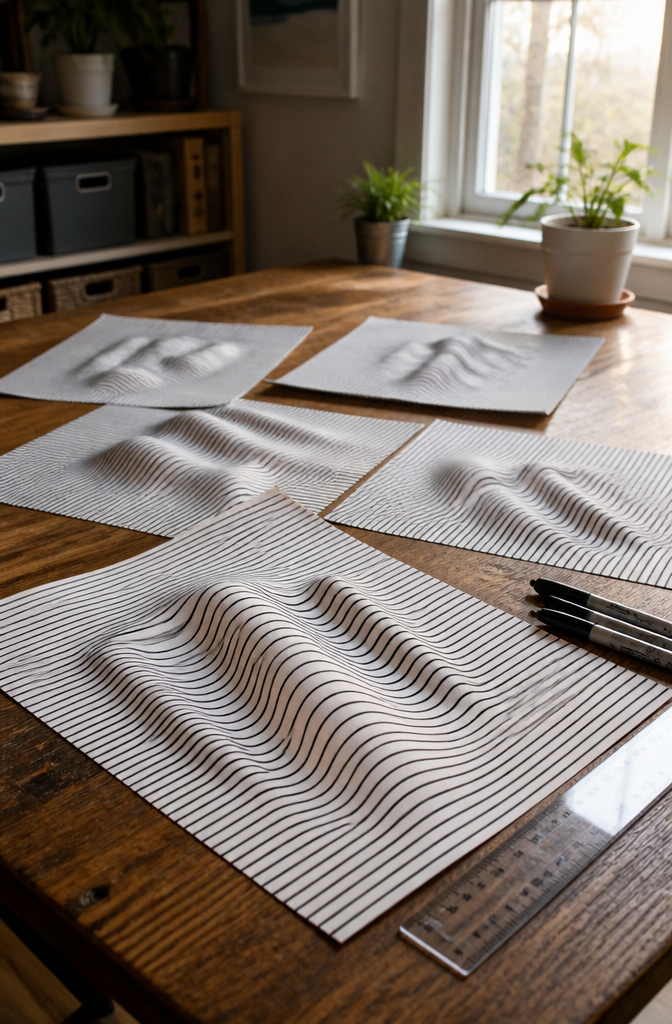
Sharpies and a clear ruler turn flat paper into something that seems to fold in midair. The trick is drawing curved lines that stay parallel, each one measured off with the ruler so the spacing stays tight and even. A slip of even a quarter inch breaks the illusion, which is why the precision matters as much as the marker itself.
The brain reads the curves as depth because the lines bunch where a real fold would catch light and spread where it would fall away. Kids can test this by holding the finished page at arm’s length, then close up, watching the 3D effect flip from subtle to almost touchable.
Start with a pencil grid lightly erased after the Sharpie work dries, or the graphite competes with the black ink and the eye loses the clean contrast that sells the trick.
16. Clay Cartoon Birthday Cakes
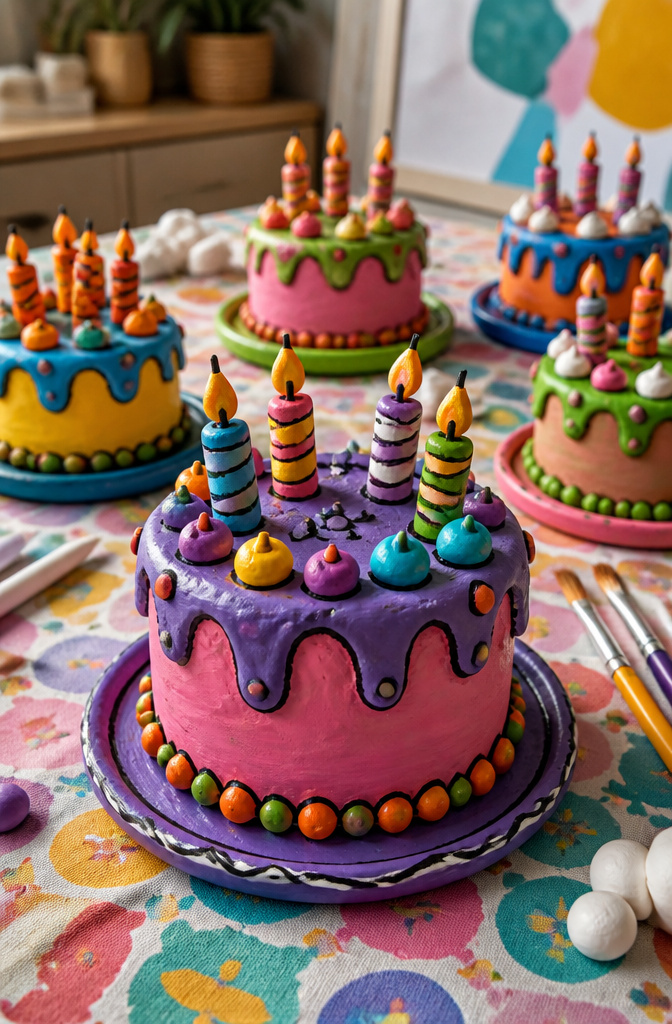
Air-dry clay keeps this sculpting project within reach of any kitchen table, no kiln required. The black edging is what sells the cartoon look, so a small brush and steady hand matter more than fancy tools here.
Start with a drawing. A single-layer round or a tiered stack both work, but the sketch locks in proportions before little fingers start squishing forms. Sculpting tools help score the seams between tiers so the layers grip rather than slide apart while drying. A toothpick works for candle nubs or tiny swirls.
Acrylic paint goes on after the clay is fully dry. Sealing before and after painting with acrylic varnish gives the same kind of shine you’d expect from kiln-fired work. The black outline comes last, tracing every edge and curve to make the cake look like it stepped out of an animation cel rather than a craft cabinet.
A sketch-first approach keeps the finished cake from collapsing under its own ambition.
17. Felt Emojis
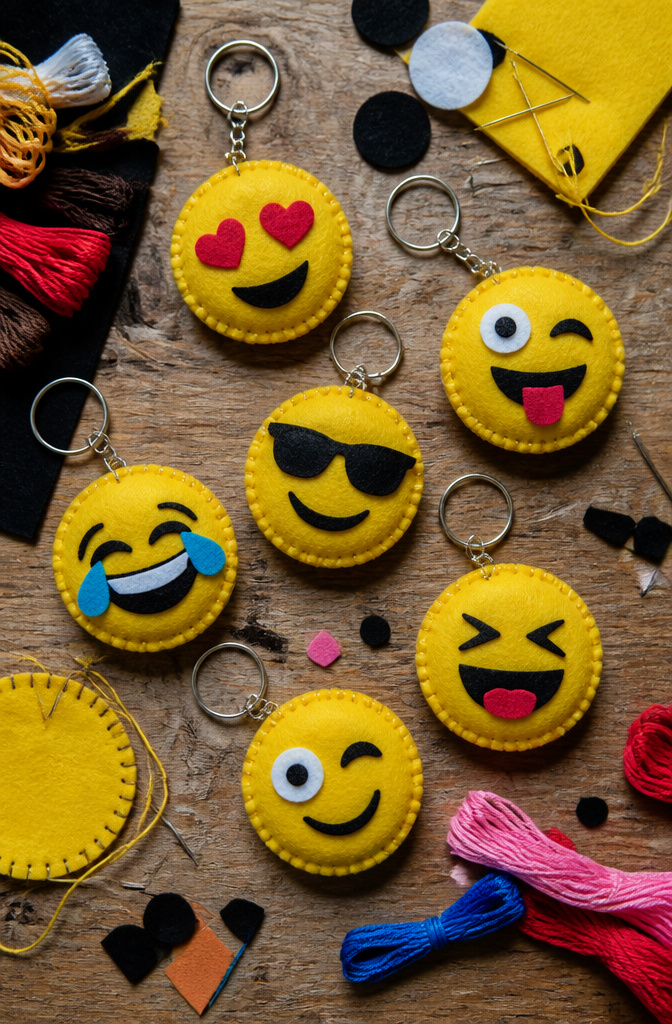
Felt emoji keychains give 5th graders a reason to learn basic sewing without the project feeling like a lesson in patience alone. The material list stays short: yellow felt for the classic face, smaller scraps of black, white, red, or whatever color matches the expression, embroidery floss to match or contrast, standard key rings from any craft aisle, and blunt needles sized for kids’ hands. I like starting with a paper sketch the actual size of the finished piece; that drawing becomes the template for every layer.
The construction is just sewing felt pieces together, nothing glued. A simple running stitch works for the edge seam, and a few straight stitches hold each facial feature before the front and back get joined. Stack the layers, pin or clip them, then stitch around the perimeter with the floss doubled for visibility and strength. Leave a gap for stuffing if you want dimension, or keep it flat for a quicker finish. Either way, the key ring gets stitched directly into the top layer so it will not pull loose in a backpack.
18. Paper Weaving
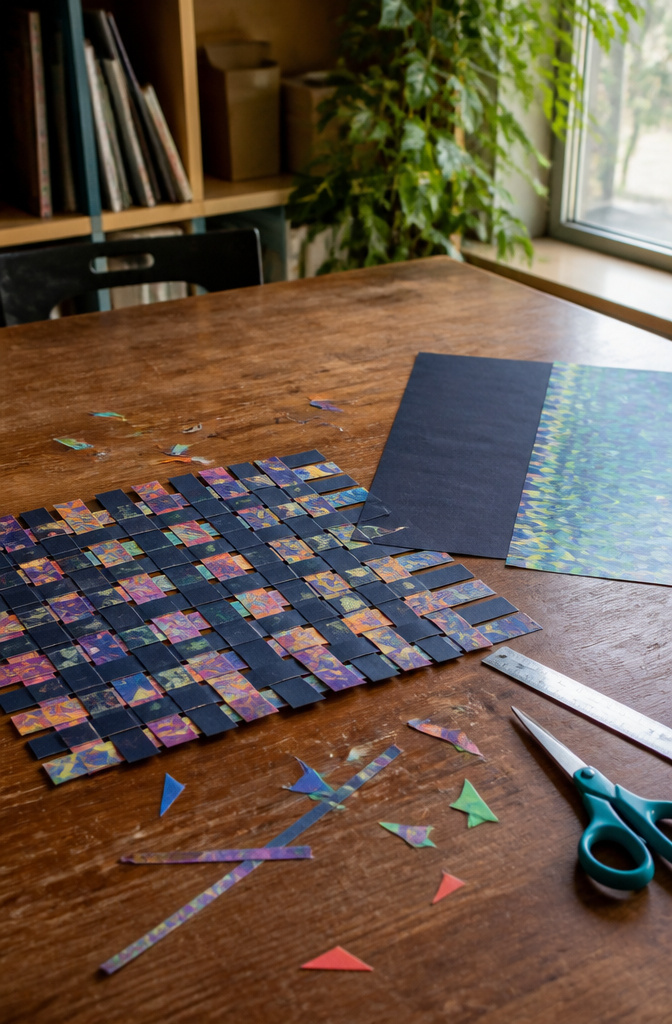
Two sheets of contrasting paper turn into a working loom in about ten minutes. I like to use a dark solid for the warp and a bright print for the weft so the pattern actually shows. Cut the base paper into vertical strips that stop about an inch short of the top edge, leaving a solid border to hold everything together. The strips should be even, a ruler helps here, but the width matters less than keeping them consistent because uneven warp throws off the whole rhythm.
Weaving starts simple: over one strip, under the next, working across. The second row reverses so the weave locks. A toothpick or folded corner of the weft strip helps thread through tight spaces. Once the basic tabby weave clicks, kids can try skipping two strips then catching one, or alternating row patterns to build diamonds and chevrons. A dot of glue at each end keeps the weft from sliding out.
The real payoff is watching them realize why a t-shirt stretches one way and not the other. Paper makes the warp and weft visible in a way cloth doesn’t, so the structure clicks before they ever touch yarn.
19. Four-Letter Word Art
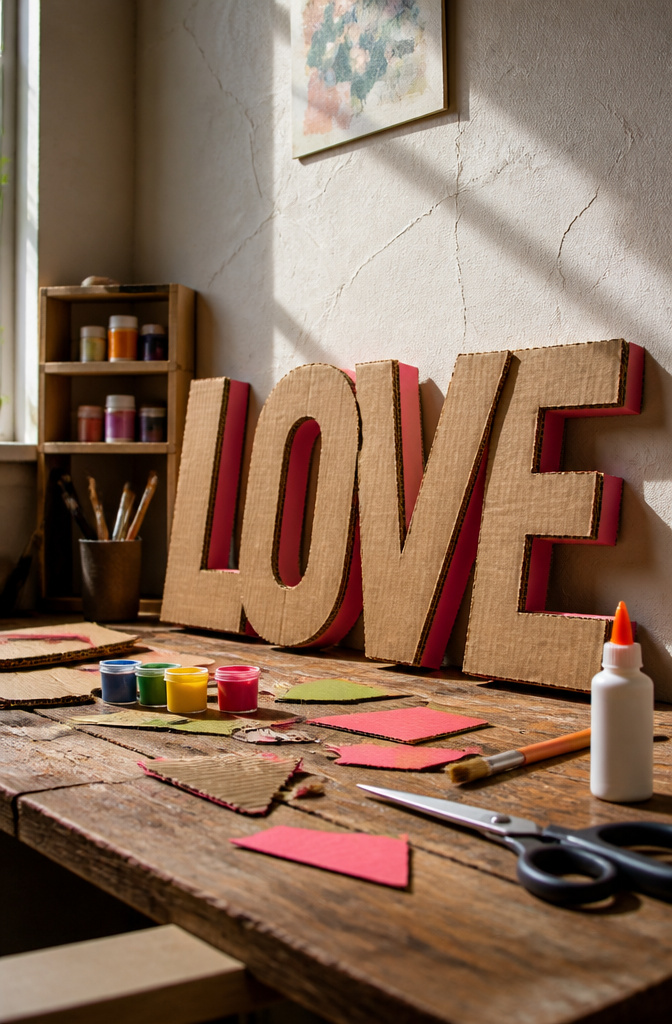
Robert Indiana’s LOVE sculpture, with its stacked red letters and tilted O, is the kind of public art that stops a fifth grader mid-step. The piece works because Indiana treated letters like architecture: thick planes, deep shadows, weight you could almost lift. That same idea translates to cardboard, scissors, and paint without losing the lesson.
Cardboard gives you the material for real depth. Cut a four-letter word, something that matters to the kid making it, then glue a second layer offset slightly behind the first. The shadow between the two layers reads as three-dimensional even before paint touches it. Leave the top layer unpainted and coat the back layer in black or a single bold color, and the word starts to lift off the wall the way Indiana’s steel letters lift off their base.
The art-history connection lands naturally here. Indiana was working in the 1960s, turning advertising graphics into fine-art objects. A fifth grader choosing their own word, their own color, and their own stacking order is making the same move: taking something common from daily life and giving it presence. The craft takes an afternoon. The recognition of how artists like Indiana worked with language and space lasts longer.
20. Peace Signs

Jason Naylor’s murals got me thinking about what a peace sign actually communicates before a single color hits the surface. The symbol started as a British nuclear-disarmament design in 1958, a combination of semaphore signals for N and D, and by the 1960s it had traveled far beyond that original meaning. That history matters for a 5th grade craft because kids this age are just starting to grasp that marks on paper carry layered messages.
For materials, paper or canvas both work, and bright acrylic paints or markers give the pop impact that makes the project hold a wall. Prismacolor pencils layer well if you want students to build color gradually, and Wonder Stix cover fast with that same saturated punch. The real teaching moment sits in the radial symmetry: the peace sign is three lines dividing a circle into six equal angles, which means color choices repeat or mirror across those angles. Students see warm against cool, complementary pairs, or monochode shifts without the lecture because the structure demands the decision.
The learning goal lands cleanly here. A symbol’s meaning shifts with context, and color theory gives students the lever to shift it themselves — aggressive red versus Naylor’s soft gradients carry entirely different tones using identical geometry. The project runs about 45 minutes, enough time for sketching the symmetry lightly in pencil, then committing to color.
Frequently Asked Questions
What are some fun craft ideas for 5th graders?
Hands-on projects like a vinegar and baking soda balloon, a homemade thermometer, a yarn costume wig, and felt emoji keychains all work well for this age group. The article also covers marbled Christmas balls, personalized clay coins, shadow puppets, and optical illusion hearts. Each project balances skill-building with enough creative freedom to keep a fifth grader engaged.
How can I incorporate art into science lessons?
The vinegar and baking soda balloon and homemade thermometer both use art and craft materials to make scientific principles visible. The balloon demonstrates gas expansion through an inflating rubber membrane, while the thermometer turns water’s thermal contraction and expansion into a readable scale on a straw. The DIY diffuser project does something similar with solubility and evaporation, using rattan reeds and scented oil over days rather than seconds.
What materials do I need for 5th-grade crafts?
Most projects in the article rely on basics you probably have: paper, scissors, glue, markers, and cardboard from cereal boxes. Specific crafts call for add-ons like air-dry clay, oil pastels, felt and embroidery floss, clear glass ornaments, nail polish, or a melt-and-pour soap base. The yarn wig needs a swim cap or old beanie plus craft glue; the bird feeder only requires a pinecone, peanut butter, birdseed, and twine.