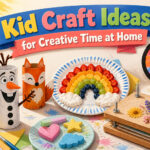
Kid crafts ideas in 2026 run from five-minute paper plate snacks to week-long flower presses, and the one that fits your afternoon depends almost entirely on drying time, not skill level. A toilet paper roll painted white in two thin coats becomes Olaf before lunch; soggy coffee filters tear and wait hours. The plaster of Paris chalk needs fifty degrees and patience, while contact-paper suncatchers glow the moment they hit the window.
1. Paper Rainbow
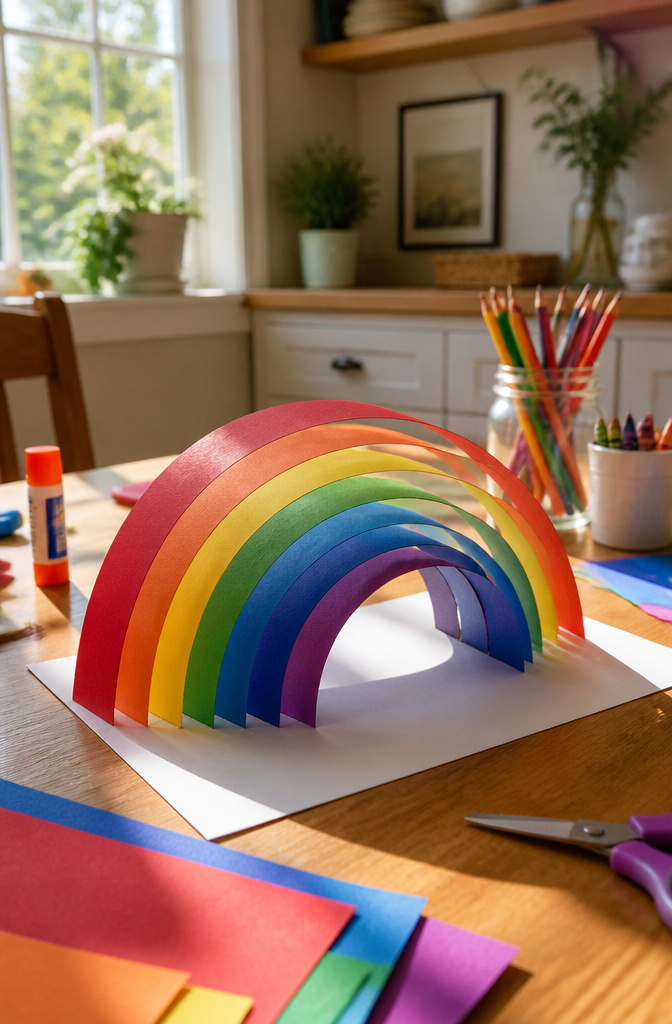
A white sheet of construction paper or cardstock gives the rainbow something to hold its shape against. Cut six or seven strips from the colors you have on hand, about an inch wide and long enough to bend from edge to edge with a little arch in the middle. Preschoolers tend to cut these into every width imaginable, which still works if you sort them before the glue comes out.
Lay the shortest color down first, glue both ends to the backing, then build each longer arc on top so the bands nest like a tunnel. The trick that keeps it from looking like a flat fan is pressing the center of each strip up with your finger while the glue is still wet, giving it a real curve instead of a droop. A line of white school glue across both ends of every strip holds fine for hanging; a dab in the center keeps the arc from flattening over the week it lives on the fridge.
2. Toilet Paper Roll Crafts
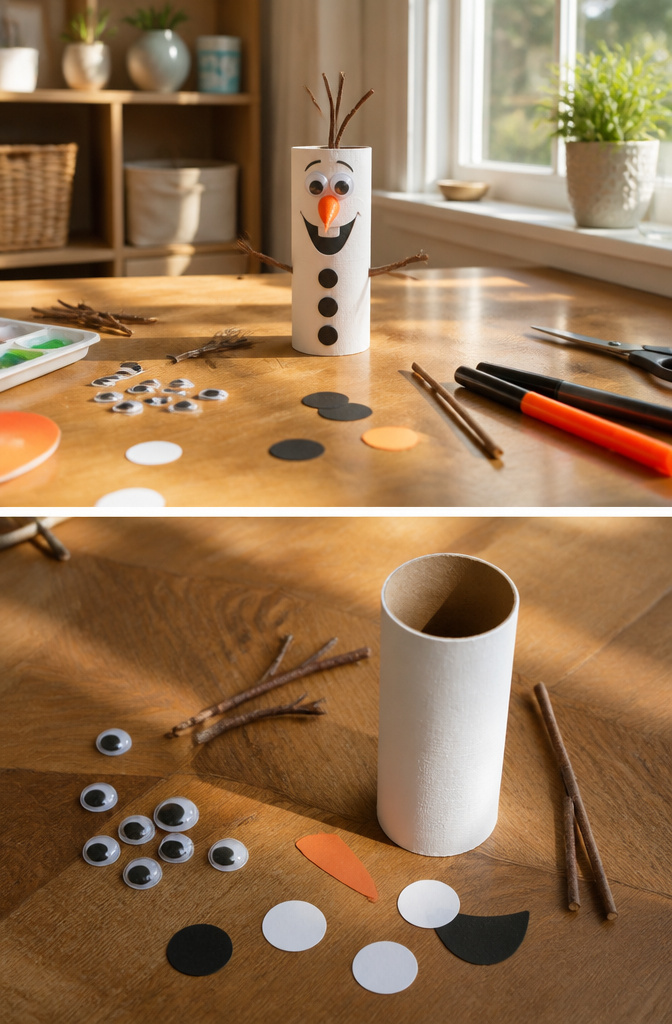
Empty toilet paper rolls stack up fast in most houses, and that makes them one of the better bases for kid crafts. The cardboard tube already holds its shape, so a child can paint it and glue on paper cut shapes without the whole thing collapsing mid-project.
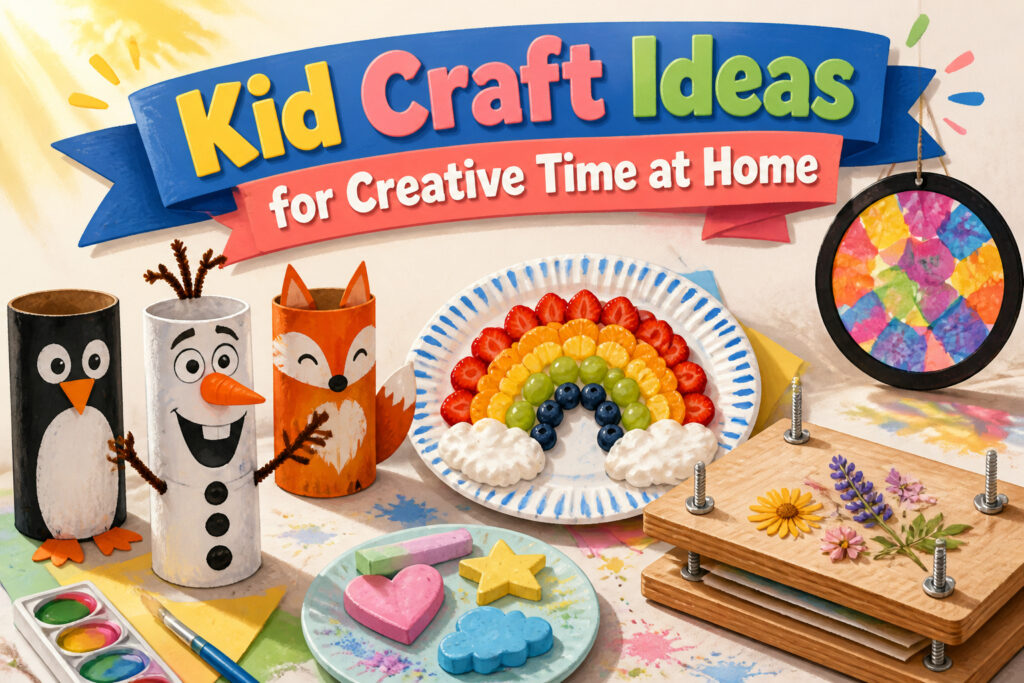
An Olaf figure starts with a white-painted roll. Paper circles for buttons, a carrot-shaped orange triangle for the nose, and two sizes of googly eyes give it the frozen-snowman look my kids recognized immediately. The arms are trickier; brown paper strips taped to the sides work fine if you do not mind them drooping after a day or two. Paint the white base in two thin coats rather than one thick one, or the cardboard buckles as it dries.
The ladybug version uses the same tube, just painted red. Black paper spots and a half-circle head glued to the top finish it in about twenty minutes of actual work, plus drying time. My daughter added pipe-cleaner antennae that stuck out at angles only a real insect would consider normal.
Both projects use materials already headed for recycling. That matters more than it should; when a craft stalls because we are out of craft foam, nobody wins. The rolls are free, the paint is the same acrylic set we keep for weekends, and the cleanup is a damp paper towel.
3. Paper Plate Crafts
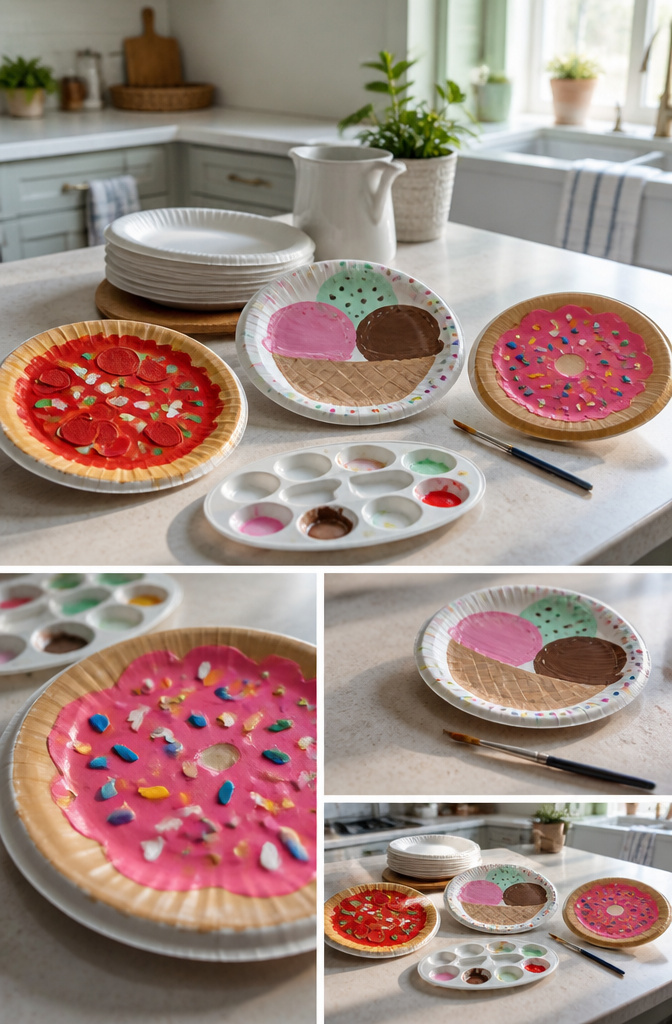
White paper plates are the base for three food-shaped crafts that keep showing up in every roundup I read through. For the ice cream cone, the plate gets cut into a scoop shape and painted whatever flavor the kid names, then a triangle of brown construction paper tapes underneath as the cone. The pizza version works the same wedge cut, only now the plate is painted red for sauce and dotted with paper circles for pepperoni. The doughnut might be the smartest of the three, because the center hole is already halfway there. Paint the ring, then add sprinkles with small strips of colored construction paper or just draw them on if the scissors are still too tricky. One tutorial I found suggests colored rice for the sprinkles, which is fine if you already have it, but paper strips are easier to sweep up. A glue stick holds everything, no hot glue needed.
4. Friendship Bracelets

A kitchen chair and a loop of embroidery floss anchored under one leg is all the setup you need. My daughter started with a simple three-strand braid at five, which let her finish something in one sitting and actually want to start another. The real payoff comes with patience: the knotted patterns that look impossible at first, like the forward knot and backward knot that build chevrons or diamonds, just need the same move repeated until muscle memory takes over. Fine motor skills sharpen fastest when a kid is motivated by giving the thing away, and a bracelet made for a friend beats a worksheet every time. Older kids can hunt down patterns online and lose an hour without noticing. Younger ones stay with braids or twist knots. Either way, yarn works if embroidery floss is not in the drawer; the knots just sit thicker on the wrist.
5. DIY Bird Feeders
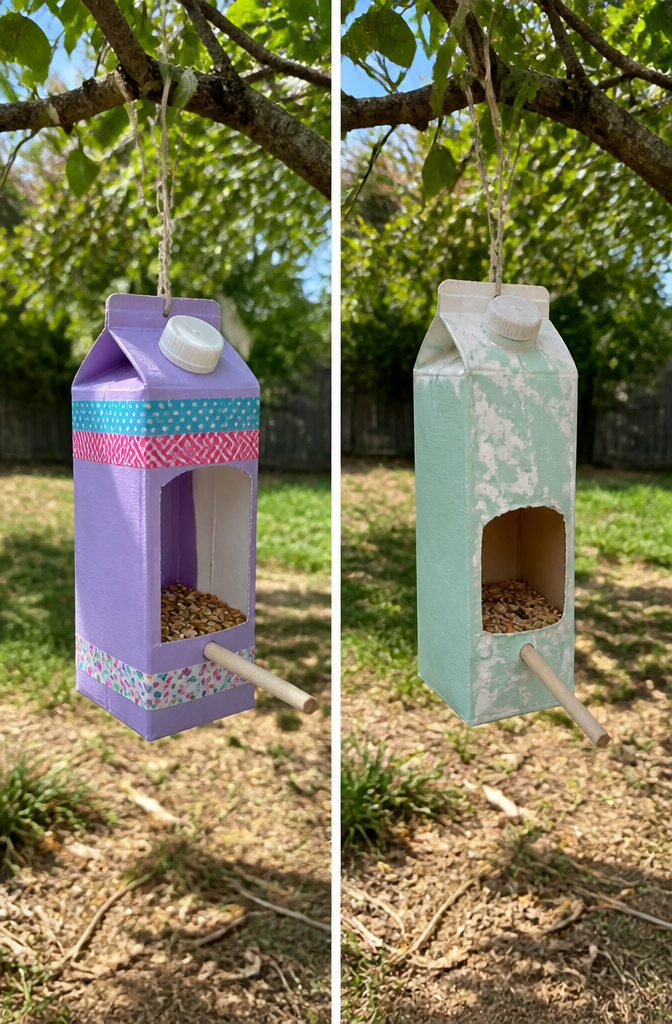
Milk cartons make a sturdy base for a hanging feeder if you cut a house-shaped hole in one large panel. A half-gallon size works best, since the opening leaves enough wall to hold birdseed without collapsing the corners. Paint the carton with craft paint and let it dry completely before you add washi tape for trim or details. A painted wooden dowel poked through just below the hole gives birds a place to stand, and a card stock eave glued above the opening keeps rain from spoiling the seed. Twine tied under the top fold lets you hang it from a branch.
Pine cones take almost no prep at all. String tied around the top stem becomes your hanger; then you fill the cone’s openings with peanut butter and roll the whole thing in birdseed until it is coated. Refill or replace once the seed is picked clean.
Both projects lean on what you already have, milk cartons or yard litter, so the material itself costs nothing and the lesson about reusing instead of buying new lands without a lecture.
6. Homemade Clay
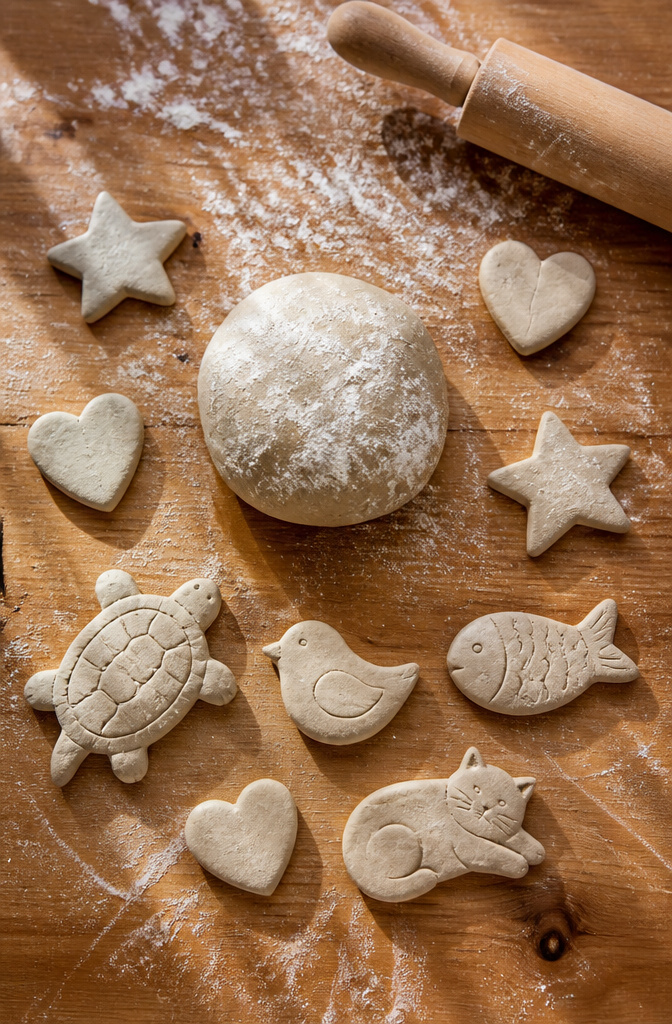
Homemade clay costs next to nothing and keeps my kids busy for an hour before the pieces even go into the oven. The standard salt dough mixes flour, salt, and water into a shaggy ball that smooths out after five minutes of kneading. A spoonful of oil helps the texture stay pliable longer, which matters when small hands work slowly.
Baking soda clay, made with baking soda instead of salt, dries whiter and smoother — worth the swap if you plan to paint. Either recipe bakes hard at a low temperature, or you can leave shapes on a sunny windowsill for a couple of days. Air-drying works fine for flat ornaments; baking is safer for anything 3-D that needs real strength.
After the pieces cool, acrylic paint and a quick brush-on sealant turn them into keepsakes. My kitchen table has permanent flour marks from skipping the newspaper layer. Lay something down first.
7. Suncatchers

The light hitting a suncatcher is what makes the project worth doing, not the object itself. Tissue paper cut into rough shapes, pressed between two layers of clear contact paper, turns a kitchen window into something that glows at breakfast. The adhesive film holds the color in place while light does the actual work, passing through the thin paper and splitting into the shade you chose. Kids can layer pieces however they want; the overlap creates new colors where blue crosses yellow, which matters more than any pattern you could plan.
Melted plastic beads in metal cookie cutters are the louder cousin. They go in the oven until the centers go translucent, then cool into something rigid enough to hang. The holes left by the cutters become the loop for string. Either way, the finish is the same: tape to a window that gets direct sun, step back, and let the light handle the rest.
8. Painted Flower Pots

Terracotta pots take paint differently than plastic ones, and that difference shapes the whole afternoon. Unglazed terracotta soaks up acrylic like a sponge, which means the first coat disappears in minutes and usually needs a second pass. Plastic slicked with a factory finish repels water-based paint unless you rough it up with fine sandpaper first, a step I learned to skip at my own cost. Either way, kid-safe acrylic paint is the right choice; the label matters more than the brand.
Base coating goes faster with a wide foam brush, especially for younger hands still figuring out pressure. One solid color across the whole pot sets up in about twenty minutes if the layer stays thin. After that, smaller brushes or cut sponges work for polka dots, simple flowers, or whatever pattern the kid invents on the spot. The sources that rank for this project keep returning to flowers and ferns as the natural next step, and the planting itself becomes part of the craft’s payoff.
Outdoor pots need a clear acrylic sealer brushed over the finished design, or rain and sun flake the paint off within a season. Indoor pots can stay as-is. The planting that follows, whether herbs or a small fern, gives the child something living to tend, which stretches one afternoon into weeks of small responsibilities.
9. Paper Bag Crafts

Paper bags stand open on their own once you fold the top inch inward twice and crease it sharp. That folded rim gives the bag enough stiffness to stay upright, so kids can turn a handful of lunch bags into a row of houses without any glue or tape. Cut windows on three sides and leave the fourth as a hinge so the flap opens like real shutters. Draw doors with a marker or crayon; my daughter drew mailboxes on hers that she filled with tiny folded notes.
The same bags flatten into material for folded paper stars. Open the bag fully, cut down one seam to make a single sheet, then fold that sheet accordion-style in strips about an inch wide. Cut a pointed or notched pattern into the folded edge, tie a string around the middle, and fan the layers out. The doubled paper from the bag makes the star hold its shape better than single-ply tissue, and kids can paint it or punch holes for light to come through.
10. Sidewalk Chalk
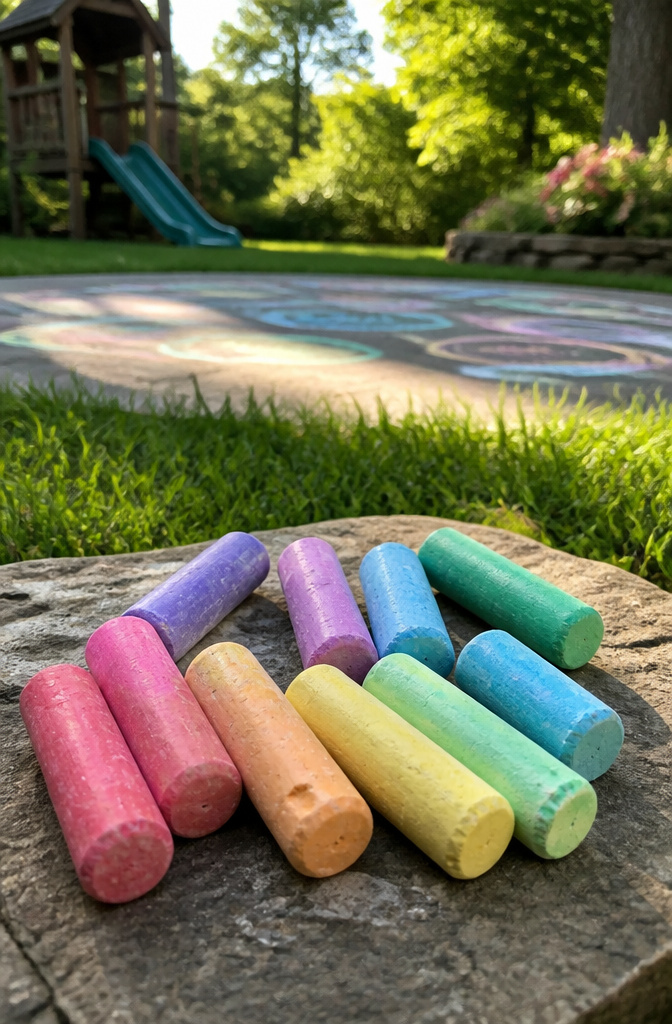
Warm afternoons are when sidewalk chalk earns its keep, and making your own starts with plaster of Paris, water, and liquid tempera paint. The plaster hardens through a simple chemical reaction, so kids get a small science lesson while they wait. I pour the mixture into silicone molds from the kitchen drawer, let them set, and pop out chunky sticks that hold up to real pressure.
Store-bought chalk works just as hard. Wet the pavement first and the colors turn almost neon, a trick my neighbor’s kids figured out before I did. They also map out four-square courts and cover the driveway in murals that wash away with the hose. Tempera paint in the homemade mix keeps the color bold, though the plaster dust can irritate skin, so gloves help.
This one belongs outside, and it waits for weather above fifty degrees or so. The batch I made last spring sat unused for weeks because I jumped too early; the damp cold kept everything soggy. Wait for the dry warmth, and both the making and the drawing happen in a single afternoon.
11. DIY Time Capsule

Mason jars and small metal boxes both work for this, though a metal box survives burial better if the kids choose to dig it up later. The seal matters more than the container itself; moisture ruins paper faster than time does.
The items inside matter less than the notes. A six-year-old’s handwriting, a list of favorite foods, a photo from that exact week: these become the artifacts that stop a parent in the hallway years later. My own mother kept a shoebox time capsule from 1987. The friendship bracelet crumbled, the polaroid faded, but the note in my brother’s block letters, "I like dinosars," still sits on her dresser.
Set the opening date before you seal it. Five years feels eternal to a child under ten; ten years feels reachable to a teenager. Write the date on the outside where it won’t get lost. Storage location follows from that: a closet shelf for five years, a corner of the yard for ten, a relative’s attic if you’re between houses. The craft is finished when the lid closes, but the project only starts then.
12. Paper Filter Flowers

Coffee filters and cupcake liners both work for this, but the filters spread wider and give you fuller blooms. The thin paper soaks up color in ways thicker craft paper never manages. Fold a filter in quarters, then again into a wedge, and snip petal shapes along the curved edge. Unfold and you have a ruffled disk that already looks like something from a garden. For color, scribble water-based markers across the surface, then mist with water from a spray bottle or drip water from a brush. The dye bleeds and pools in the folds, giving you soft gradients no careful coloring could match.
Layer three or four dyed filters, offset so the petals don’t stack perfectly, and bunch the center together. A pipe cleaner twisted around the base holds everything and gives you a stem; a twig from the yard works too if you wrap the connection with masking tape. The paper dries stiff but light, so the petals hold a little cupped shape that catches air like real blossoms. The mistake to avoid is using too much water; soggy filters tear when you bunch them and take hours to dry. A light misting does more than a soaking.
13. Cardboard Tube Binoculars

Two empty toilet paper tubes side by side make the frame. A strip of tape or a line of white glue down the joining edge holds them together well enough for play, though glue gives a cleaner seam if you have the patience to let it set.
Paint covers the cardboard best. Acrylics in two coats will do, or a layer of construction paper wrapped around each tube hides the print underneath. Markers work in a pinch, though they drag on the raw cardboard and the color stays paler than you’d expect.
A hole punch at the outer edge of each tube, about a thumb’s width from the front, is the spot for yarn. Thread a long strand through and knot the ends. The length should hang at mid-chest when the child lifts it to their eyes; too long and the tubes swing, too short and they fight the strap.
What sells this craft is what happens after the glue dries. Kids who would not walk a block will circle the yard with these pressed to their faces, calling out birds and squirrels as "discoveries." The yarn strap keeps the binoculars ready, so the play resumes the moment they step outside rather than starting with a hunt for where they left the thing.
14. Painted Wooden Bracelets
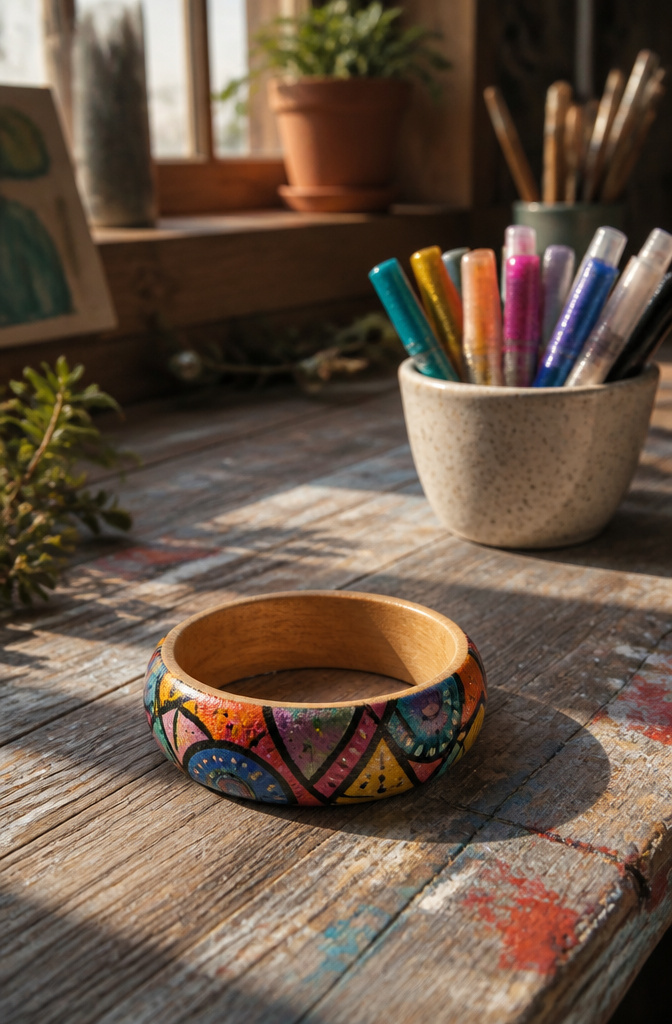
Wooden bangle blanks cost a few dollars for a bag, and popsicle sticks soaked in warm water bend into cuffs after twenty minutes. Either base works. Acrylic paint or paint pens cover the wood fast, and small brushes or dotting tools let kids lay in stripes, dots, or whatever pattern they settle on. A layer of Mod Podge seals the surface so the design survives a week of being taken on and off.
This one lands slightly older, maybe eight to twelve. Younger hands can manage the painting, but the finished piece actually gets worn by kids who care about that. The cuffs from popsicle sticks fit narrower wrists better than the store blanks, so size the base to the kid before the paint comes out.
15. Nature Crafts

Leaves, twigs, and seed pods make surprisingly good paintbrushes when the regular ones are buried somewhere in the craft drawer. A flat leaf holds paint like a foam brush and drags a soft green line across paper. Twigs split at the end into natural forks that splatter in controlled bursts. Seed pods roll unevenly, so each print comes out different, which most kids prefer anyway. The trick is matching the object to the paint consistency: thin acrylic runs off smooth bark but pools nicely in the cups of acorn caps. Rinse the finds first or grit scratches the paper.
Flower pressing demands more patience than most afternoon crafts allow. You lay the blooms between sheets of plain paper, stack heavy books on top, and wait two to three weeks while moisture seeps out. A hinged flower press with straps works faster than precarious book towers that topple when someone bumps the shelf. Either way, the dried petals come out crisp and flat, ready for glue onto cardstock or wax paper windows. The color fades, but that is part of the point.
16. DIY Bubble Wands

A wire coat hanger from the dry cleaners bends into a bubble wand with pliers and a little patience. The straightened wire forms a loop, maybe a heart or a star if you’re feeling ambitious, with the hooked end left as the handle. Pipe cleaners work too for smaller hands, though they hold less solution and the bubbles pop faster.
The bubble mix is just dish soap, water, and either glycerin or corn syrup if you have it. The glycerin buys you a few extra seconds before the pop; without it, the bubbles still form, they just don’t linger as long. A shallow pie pan makes dipping the wand easier than a tall jar.
The science sneaks in naturally. A circular loop pulls a sphere every time, but a heart-shaped wand surprises kids with a sphere that just happens to pass through a heart on its way out. The film always finds the smallest surface area, which means the wand shape only frames the bubble, never dictates it. Watching that contradiction play out in sunlight beats any lecture about surface tension.
Supplies to Keep on Hand
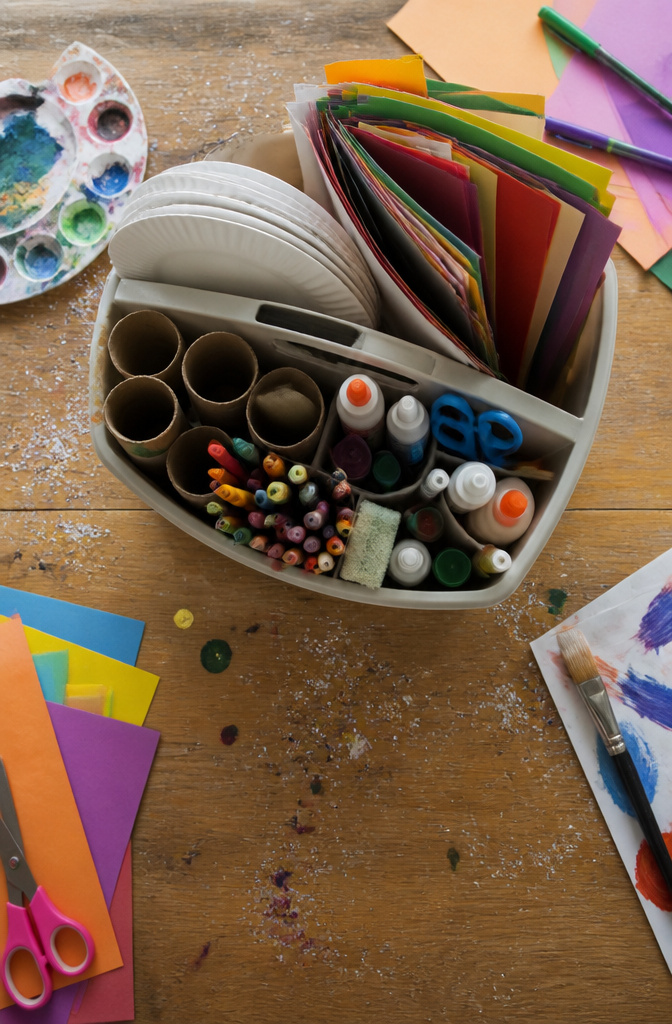
White paper plates and toilet paper rolls are the backbone of most of the projects that follow. They cost next to nothing and take paint or glue without complaint. Construction paper fills the gaps, and a basic set of crayons plus a few markers covers the coloring. Kid-safe paint, a glue stick and a bottle of white glue, and a pair of scissors that actually cut paper round out the core kit.
Googly eyes and pom poms are where the personality lives. They turn a plain tube into something with a face, a mood, a story. They are not strictly required, but keeping a bag of each on hand saves a trip to the store when inspiration strikes.
Optional extras expand what you can attempt without changing the fundamentals. String, tape, a hole punch, and some yarn live in the same drawer and get pulled out maybe a third of the time. The core list above handles the rest.
What Age Works for Which Craft
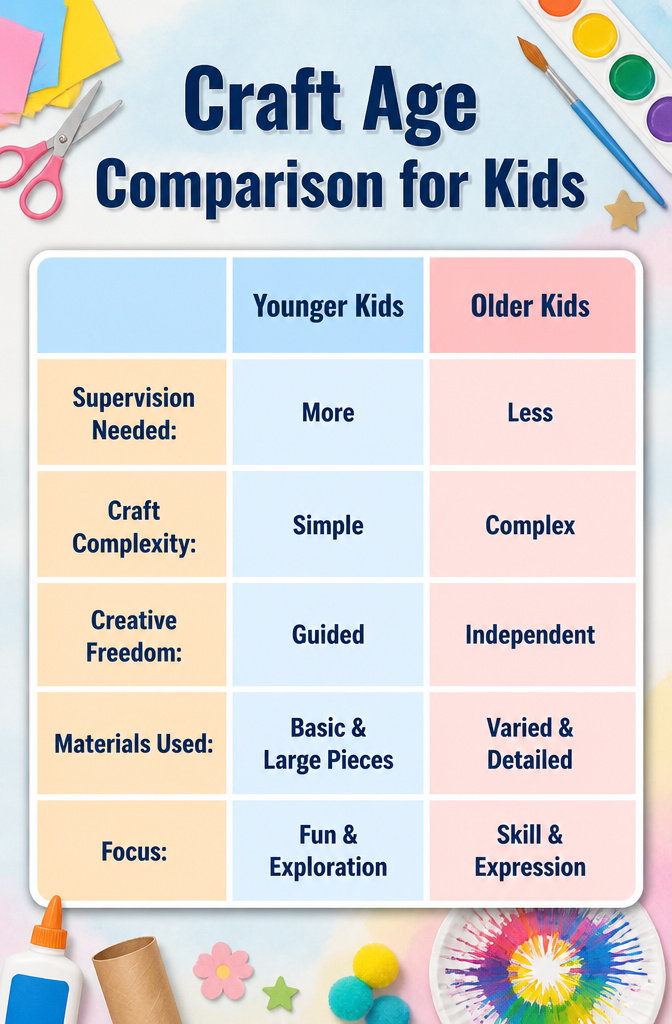
Most crafts labeled for kids land somewhere between ages 3 and 10, but the number on the package is a starting point, not a rule. The real test is what the child can grip and where their patience runs out. A three-year-old can handle the same paper plate or cardboard tube a ten-year-old uses, as long as someone else does the cutting first and the pieces are large enough that fumbling them does not end in tears. More supervision matters more than more skill at that age; the craft is the time together as much as the finished thing.
Older kids do not need a different project, just a harder version of the same one. Where a younger child slaps paint on a tube and calls it a telescope, a seven- or eight-year-old can plan a pattern, paint finer detail, or turn that tube into a stargazing tool with a specific job. Spin art works the same way: little ones watch the paint fly, bigger ones draw a maze on the dried plate and trace it with a finger. The materials stay cheap and familiar; only the expectation changes.
Age labels are flexible because children vary. One five-year-old has the fine motor control another will not touch until eight. Start with the simpler version, add complexity if boredom sets in, and drop back if frustration does. The goal is a finished afternoon, not a finished product that matches the photo.
Why I Craft With My Kids
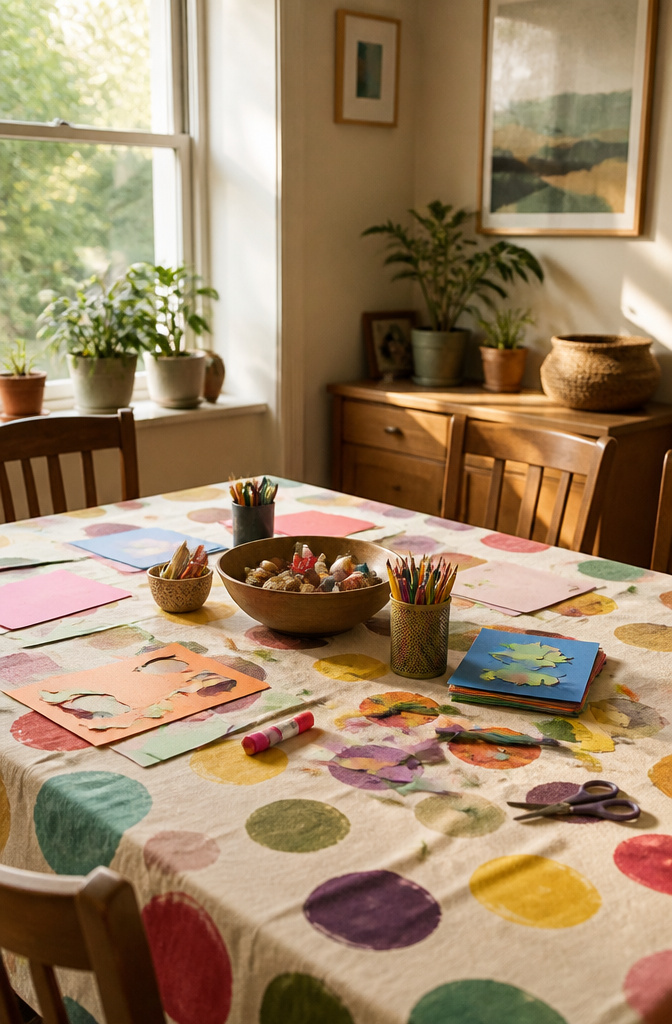
My daughter sat at the kitchen table last winter, tongue just barely showing at the corner of her mouth, threading a bead that kept slipping from her fingers. The bead was nothing special, a plastic pony bead from a variety pack, but her grip adjusted after six or seven tries. Fine motor work happens in the doing, not the drilling. Three weeks later she tied her own shoelaces for the first time, and I do not think that was coincidence.
The patience piece surprises me more than it should. When a paper filter flower tore at the stem, my son walked away, breathed at the window, came back. No lecture from me prompted that. Problem-solving shows up smaller: running out of green paint and mixing blue with yellow, figuring out how to slot cardboard tubes together so the binoculars actually hold. These are half-hour problems, not life crises, which is exactly why they work.
What keeps me clearing the table on Saturday mornings is the collaboration itself. My teens went through stretches where conversation felt like prying open a jammed drawer. Side-by-side building with interlocking cardboard blocks, no eye contact required, the talk just rose naturally. The things we made were rarely beautiful. The time was.
Frequently Asked Questions
What are some easy crafts for kids?
Paper rainbows, toilet paper roll figures, paper plate food shapes, friendship bracelets, DIY bird feeders, homemade clay, suncatchers, painted flower pots, paper bag houses and stars, sidewalk chalk, time capsules, coffee filter flowers, cardboard tube binoculars, painted wooden bracelets, nature paintbrushes, pressed flowers, and wire bubble wands all use common household items or yard finds. Most projects need only paper, paint, glue, and scissors, and many rely on recyclables like toilet paper rolls, milk cartons, and paper bags.
What supplies do I need for kids crafts?
Keep white paper plates, toilet paper rolls, construction paper, crayons, markers, kid-safe paint, a glue stick, white glue, and sharp scissors as your core kit. Googly eyes and pom-poms add personality and save a store run when inspiration hits. String, tape, a hole punch, and yarn in the same drawer handle about a third of the projects.
What age are these crafts suitable for?
Most fit ages 3 to 10, with the real test being what a child can grip and how long their patience lasts. A three-year-old can manage the same cardboard tube or paper plate as a ten-year-old if someone else does the cutting first and pieces are large enough not to end in tears. Older kids do not need different projects, just harder versions: finer detail, planned patterns, or added functions like turning a tube into a working stargazing tool.
How can I make crafts more educational?
Fine motor skills sharpen naturally through threading beads, tying knots, or pinching pipe cleaners. Problem-solving appears in running out of green paint and mixing blue with yellow, or figuring out how to slot tubes so binoculars hold together. The science of surface tension sneaks in when a heart-shaped bubble wand still pulls a sphere, and patience builds when a torn paper flower means walking away, breathing, and returning to try again.