
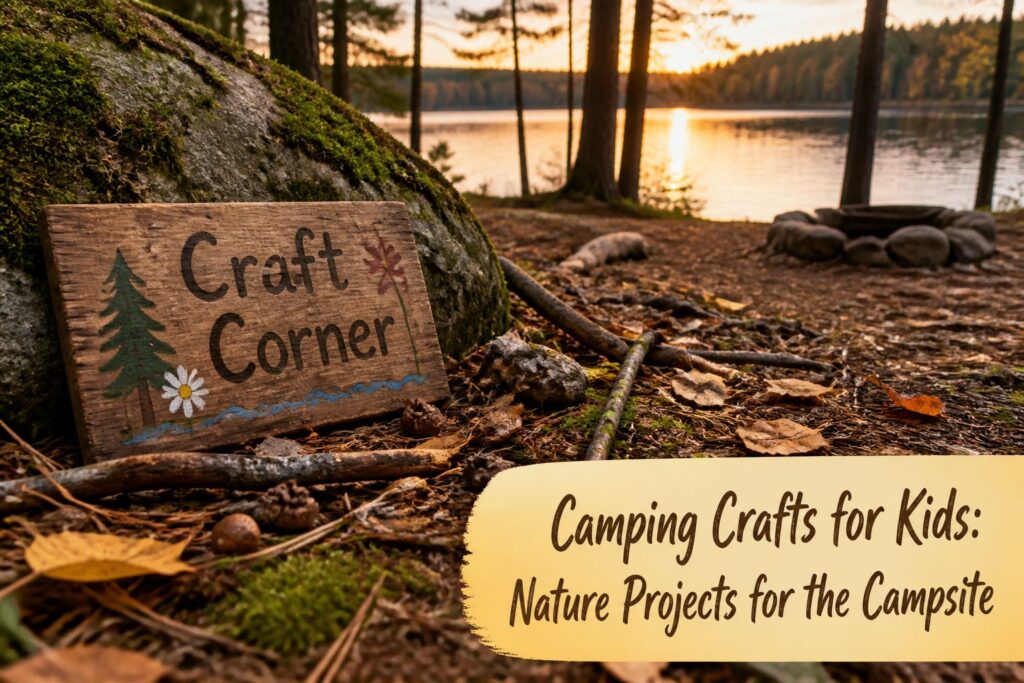
Camping kids crafts are low-mess projects made from what the campsite already offers: leaves, sticks, stones, mud and pine cones, plus a small kit from home.
The condition is collecting, since many parks ask visitors to leave natural objects in place, so check with the land manager first. Where it’s a no, leaf rubbings and sketches still work.
Pine Cone Fireflies
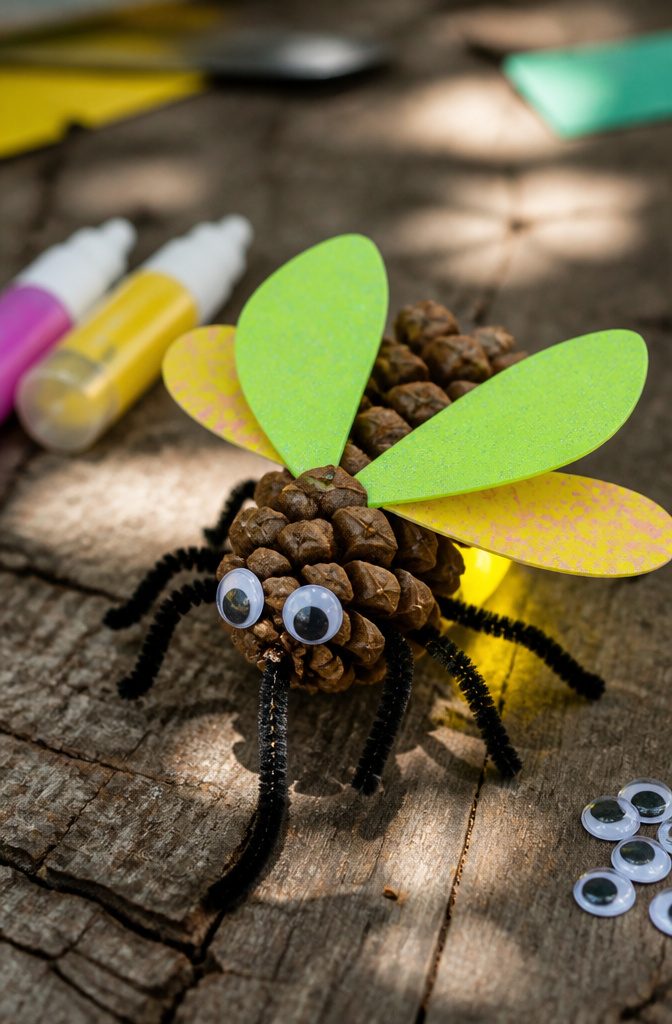
Pine cones make a good firefly body because the scales hold glue and pipe cleaner legs without any fuss.
The kids gather the cones on a walk; everything else comes from home: pipe cleaners, googly eyes and paper for the wings.
Cardstock wings hold their shape better than thin paper. Hot glue sets fast if you’re in a hurry, and regular glue works if nobody is.
The glow is where I’d be honest with you: a pine cone firefly only glows if the materials do. Plain paper wings and a brown cone give you a cute bug, not a lightning bug.
Yellow or glow-in-the-dark paper for the wings, or a yellow pipe cleaner tail, is what sells the effect. Skip the glow materials and the craft still works, but call it a firefly by name only.
Nature Mandala
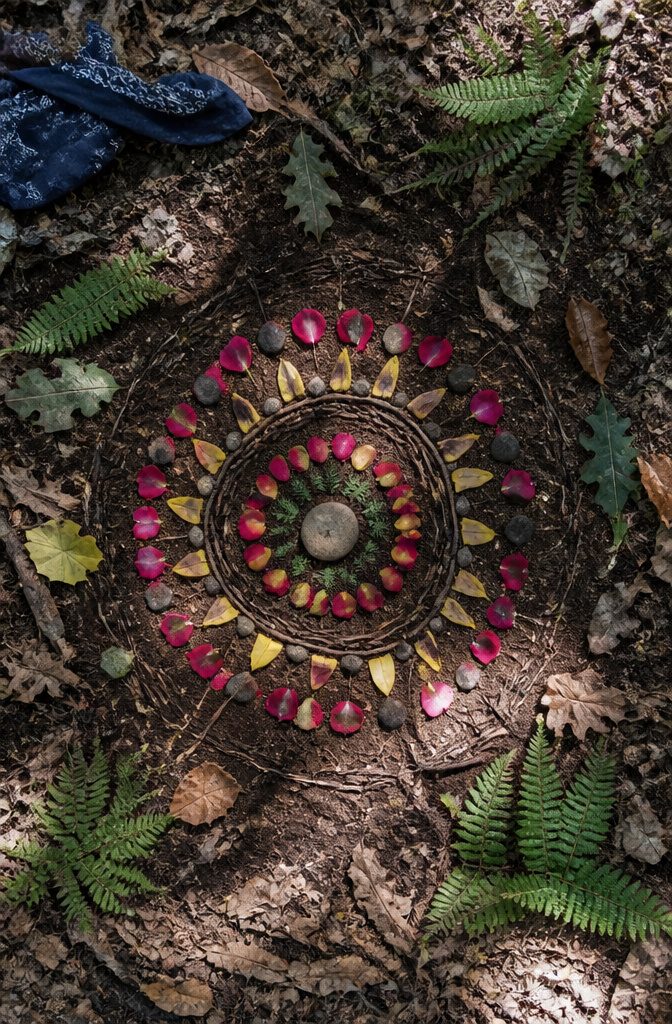
Start with a center object: a single stone, a pine cone or one bright leaf, then build outward in rings. Kids choose a flat patch of dirt or spread a bandana or dish towel so the pattern has an edge.
Each ring gets one kind of material, such as twigs for spokes, petals in a circle, and small pebbles along the rim.
Little ones will happily sort and place without caring how it looks, while older kids tend to plan symmetry and argue over color order. That range is why I like it for mixed-age groups.
Nothing gets glued, cut or carried home, so cleanup means scattering the pieces back where they came from. Take a photo before you do, since a mandala is gone with the first breeze or boot.
Pressed Flower Greeting Cards
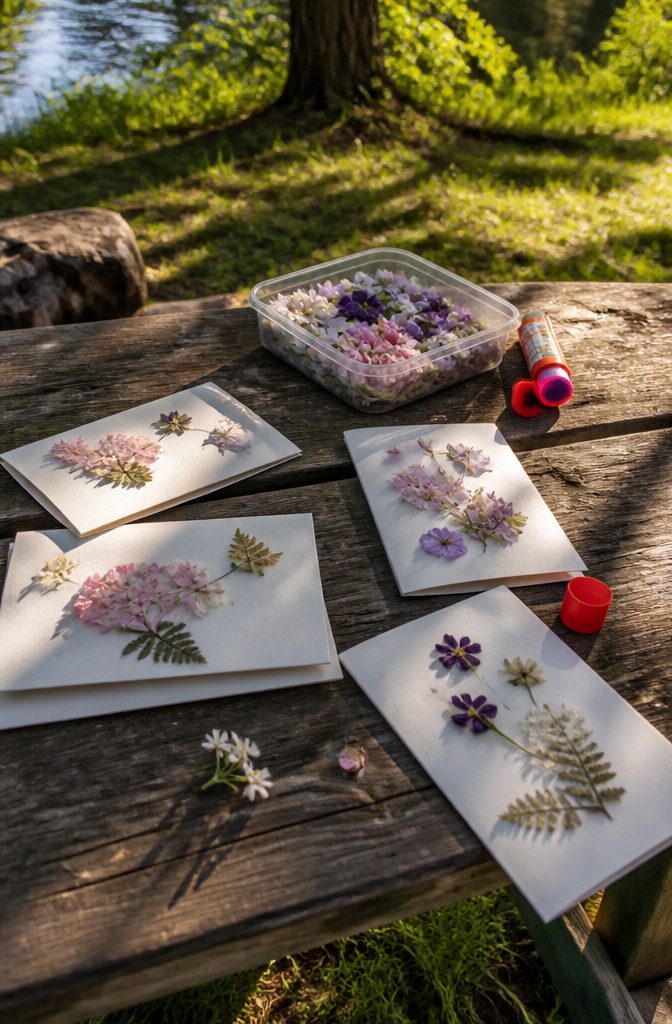
Blank cards are the only thing worth packing for this one, and a glue stick is the only adhesive you need. Liquid glue soaks into thin petals and leaves dark, wrinkled patches, while a glue stick lays them flat.
Have the kids pick small, flat flowers around the campground, and tell them to take only what is already growing in abundance.
Leave the blooms out to dry in the sun until they feel papery. Then paste them to the card front, pressing each petal down with a fingertip.
Dry flowers can wait, so the card-making can happen at camp or back home at the kitchen table.
I’d mail them from the campsite, though. A card that says what the trip is like, written from the picnic table, beats one made a week later.
DIY Bird Feeders
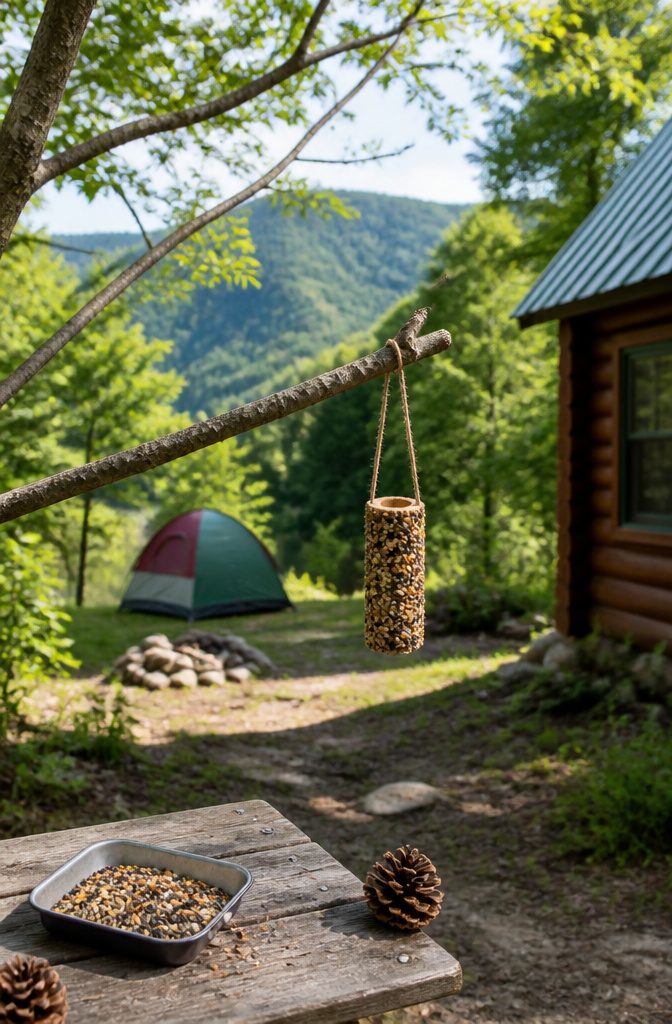
A toilet paper tube makes the faster feeder, and I’d pick it over the bottle for kids under about ten.
Smear the tube with peanut butter, roll it through a tray of birdseed, then push two pencil-sized twigs through a pair of holes about 1/2″ apart so they cross as perches.
Tie string through the top and hang it from a branch.
The bottle feeder holds more. Poke two sets of holes into a plastic water bottle, 180° apart, at "waist" and "knee" height, and slide a plastic or wooden spoon through each set of holes.
The spoon doubles as a perch and a seed tray. Fill the bottle with birdseed, cap it, and loop a cord around the neck to hang it from a tree.
Of every camp craft I’ve read about, this one is the most widely backed.
Marshmallow Constellations
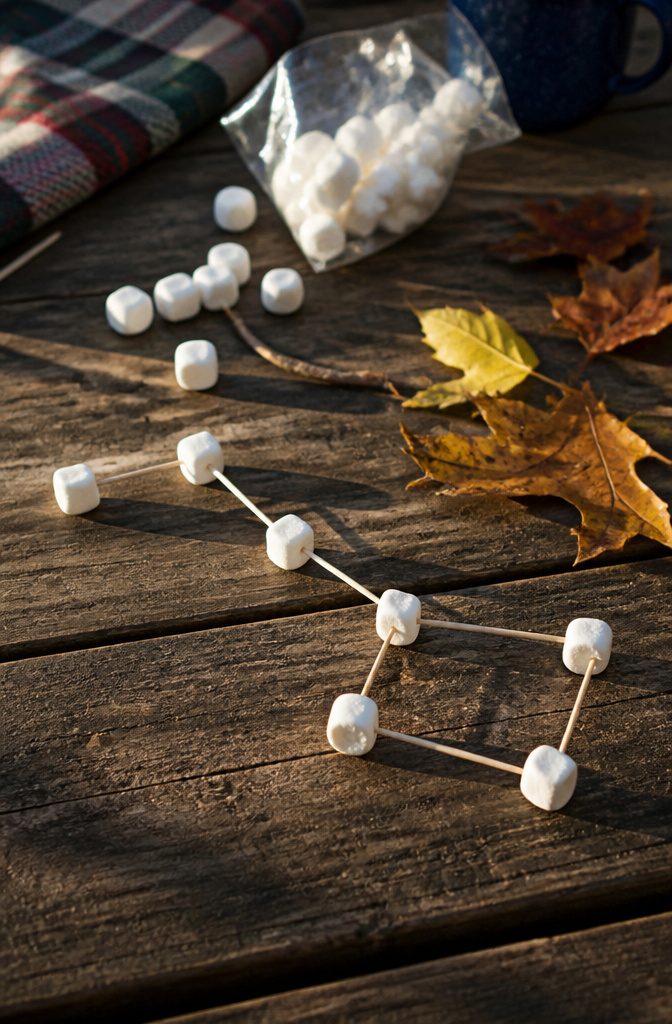
Mini marshmallows beat the regular size because each one is about the size of a bead, so a shape stays tight enough to look like a star pattern instead of a pile of lumps.
Their small, flat sides also grip a toothpick without splitting. Regular marshmallows get floppy and heavy, and the whole figure sags.
Push a toothpick into one marshmallow, then join the next, and keep going until you have the shape.
Big Dipper, Orion’s belt and Cassiopeia’s zigzag are easy starting points, and a handful of marshmallows per constellation is plenty. Fresh, slightly stale ones hold their shape better than sticky bags left in a warm car.
Build them in the afternoon, then carry them out after dark and match them to the real sky.
Hold each one up and let kids compare. Bring a few extra marshmallows, since some will get eaten.
Rock Painting
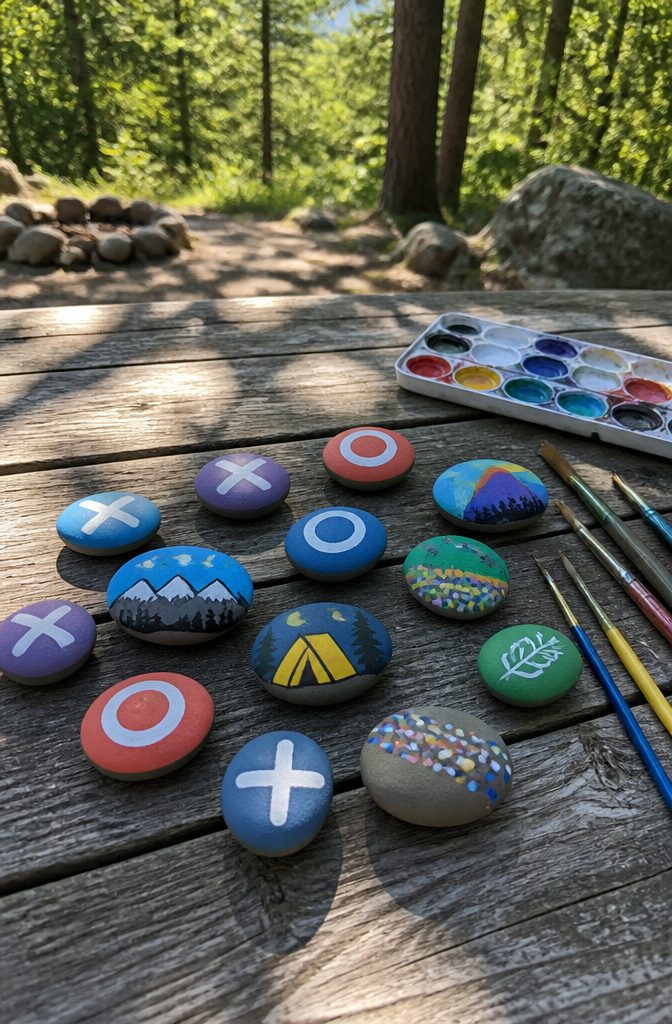
Smooth river stones take paint best, and a campground usually has plenty near the water. Skip anything flaky or rough, since the brush catches and the color goes on patchy.
For a game, paint 5 stones with an "X" and 5 with an "O," then use a cereal box or a baking dish as the board.
Let the paint dry fully before you pack up, or the stones will smear everything in the bag.
Kids who would rather skip the game can paint whatever catches their eye and keep the stones as camp decoration. If they like painting scenes from the trip, story stones turn the same rocks into a storytelling set.
Paper Plate Campfire
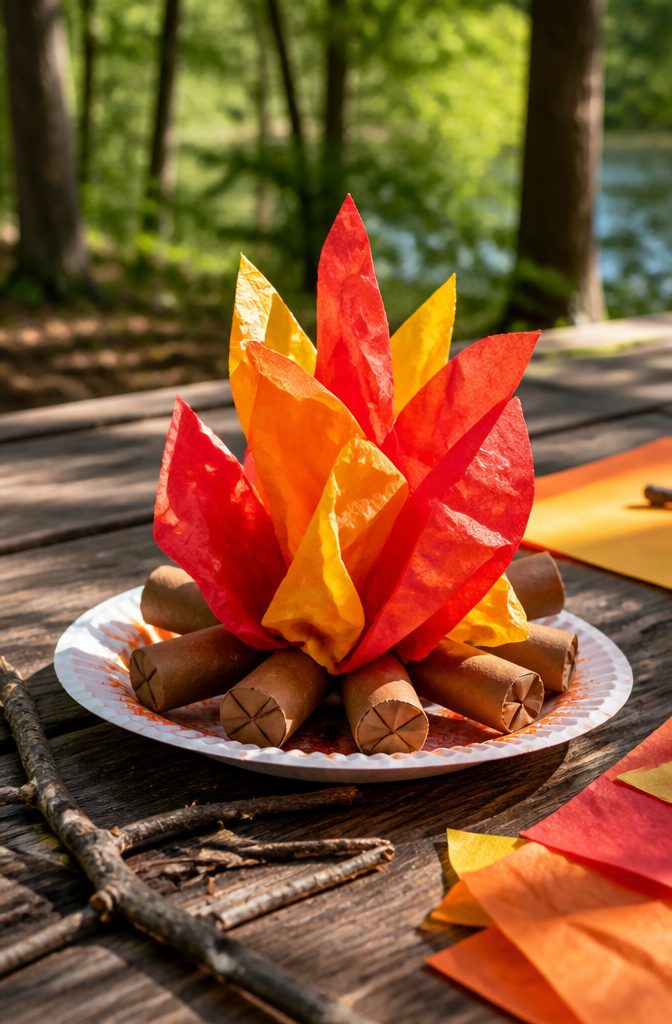
A paper plate campfire needs no real fire, which makes it the one campfire craft I’d hand to a preschooler without a second thought.
It also works when fire restrictions rule out the real thing, or when rain keeps everyone under a tarp.
Brown paper makes the logs, and red, orange and yellow paper makes the flames.
Twigs glued on top of the brown logs give the pile some texture. Layer the flames from the back, with yellow on top, so they read as a glow rather than a flat blob.
For a child ready for fine motor practice, punch holes around the plate and let them weave the flame strips through.
An adult should punch the holes and start the first lace. Most kids can finish the rest alone.
Twig Boats
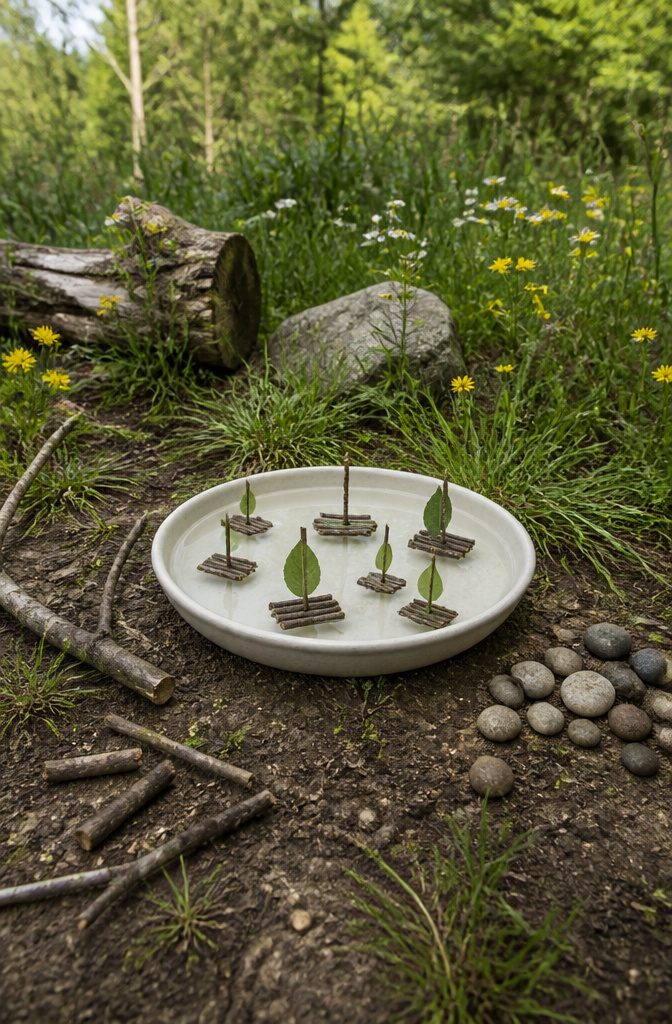
Straight, dry twigs about as thick as a pencil make the best hulls, because green wood is heavy and soaks up water until the boat sits low.
Line up five or six side by side and lash them with string or a rubber band at both ends, tying a few wraps tight before you knot.
Hot glue holds too, but it softens in a warm car and can let go in the water, so I lean toward string.
For the sail, push a thin stick into the center, slide a leaf onto it, and wedge the mast between two twigs so it stands upright. A wide, flat leaf catches more wind than a small one.
Race the boats in a shallow creek or a dish basin, and let kids blow on them.
Leaf Art
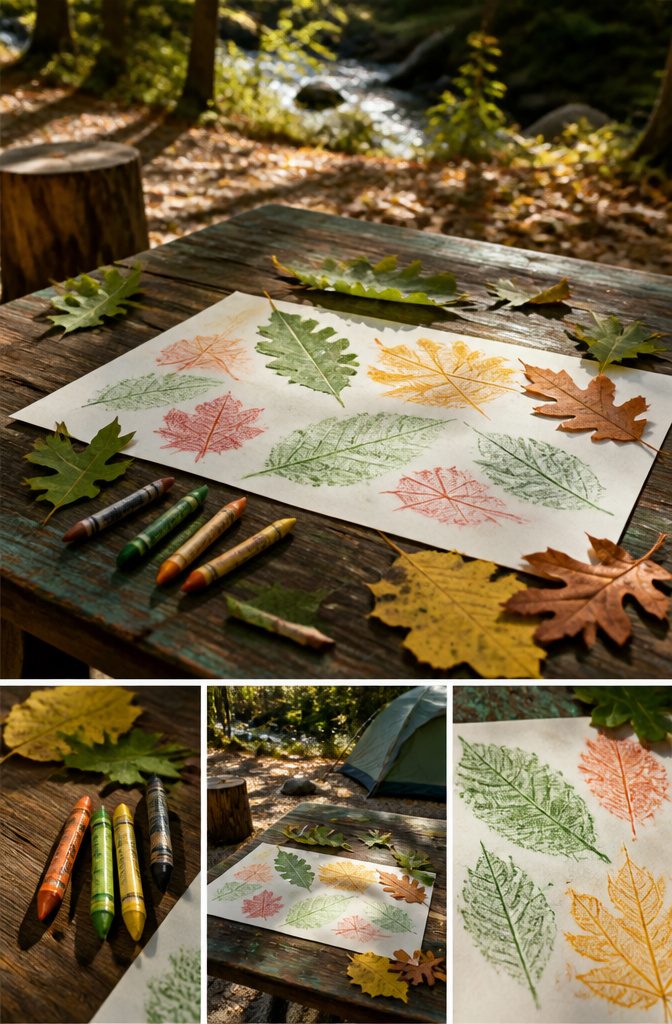
Leaves that are still attached to a plant, or lying right where they fell, are the best material for kids, because collecting is not always allowed.
Many parks protect natural objects and ask visitors to leave leaves, rocks and pinecones in place, so check with the park or land manager before anyone pockets a single leaf.
If collecting is a no, rubbings still work.
Lay a sheet of paper over a leaf and rub a crayon sideways until the veins and edge pattern show. Sketching the leaf’s overall shape, veins and color differences is another way to do it, and the leaf stays put.
Where collecting is clearly permitted, glue leaves to paper and arrange them into petals, stems and a flower. Kids look harder at the ground when they are building a picture from it.
Glow Stick Lanterns
Glow stick lanterns are the least proven idea on this list, and I’d rather say so up front.
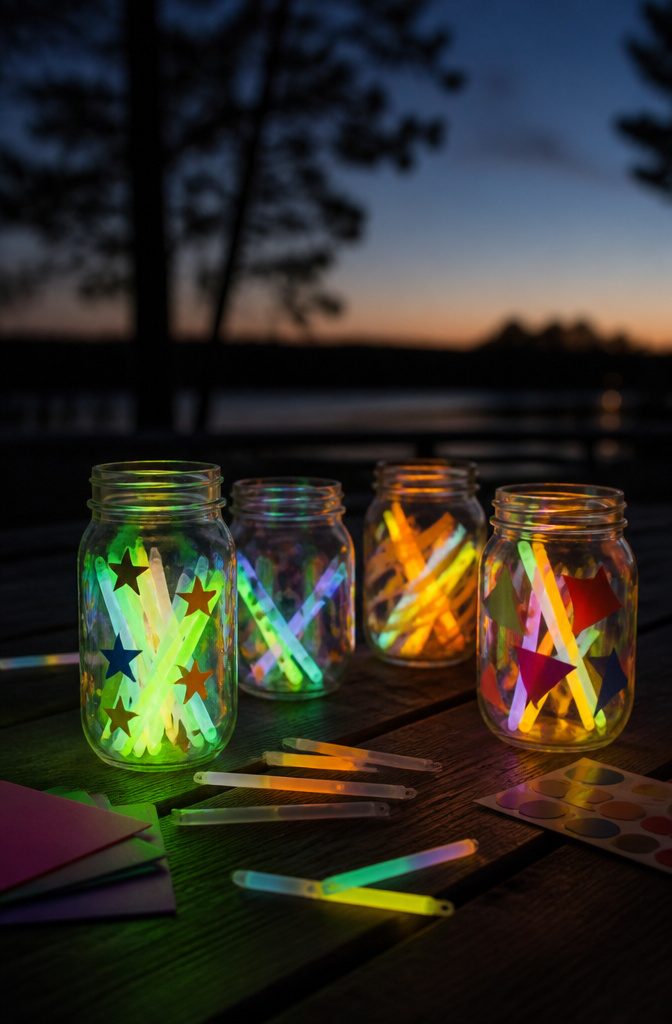
The concept is simple: snap a glow stick, drop it in a clear jar, and set the jar on a picnic table or hang it from a tent loop.
Kids love the snapping part, and the jar spreads the light into a soft lantern shape.
These only work after dark, so plan them for the evening when the day’s crafts are done. In daylight the glow is barely visible, and the kids will wonder why you bothered.
For a related idea, make a glow jar.
Let kids decorate the outside of the jar with tissue paper or stickers first, then add the glow stick. The light shines through the decoration and gives each jar its own look.
Use Natural Materials
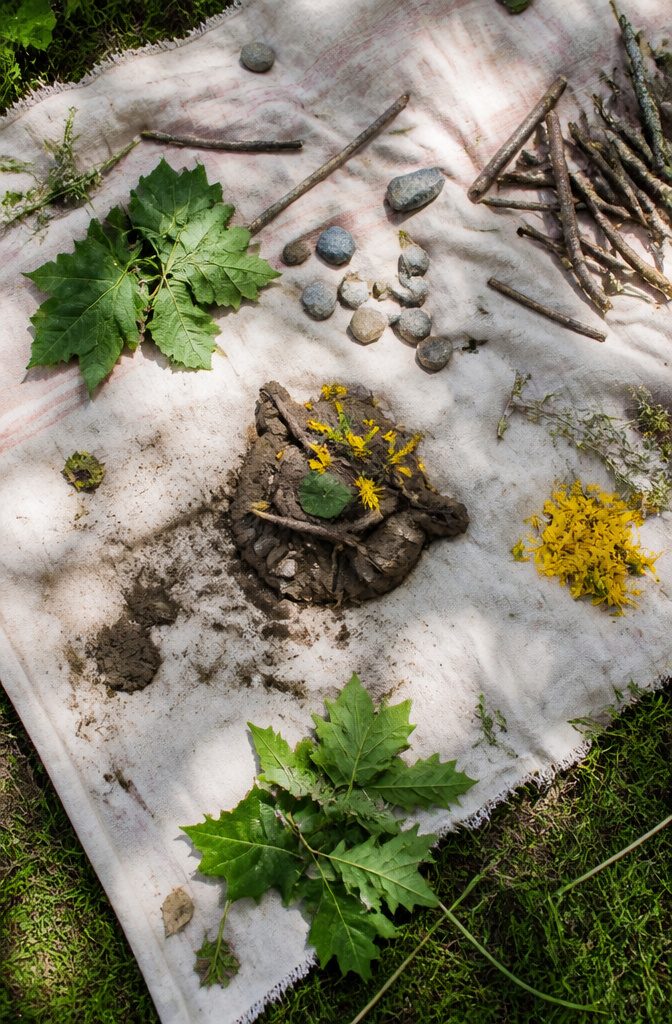
Forgot the craft bag? The campsite already stocks most of what these projects call for.
Leaves, sticks and small stones cover the Forest People, the stick-and-leaf butterflies and the robot puppets, and the only store-bought item any of them really wants is a little paint for color.
Mud is the one I’d push hardest. A handful dug from the ground and patted onto a tree becomes a clay face, and sticks, seeds and flowers turn it into hair and expressions.
Dig the mud, skip the modeling clay: it costs nothing and kids tend to stay at it longer. If the ground is dry, sand and water do the job.
Because the supplies vary, no two creations match, and kids end up looking closely at textures and shapes they’d walk past otherwise.
Easy Cleanup
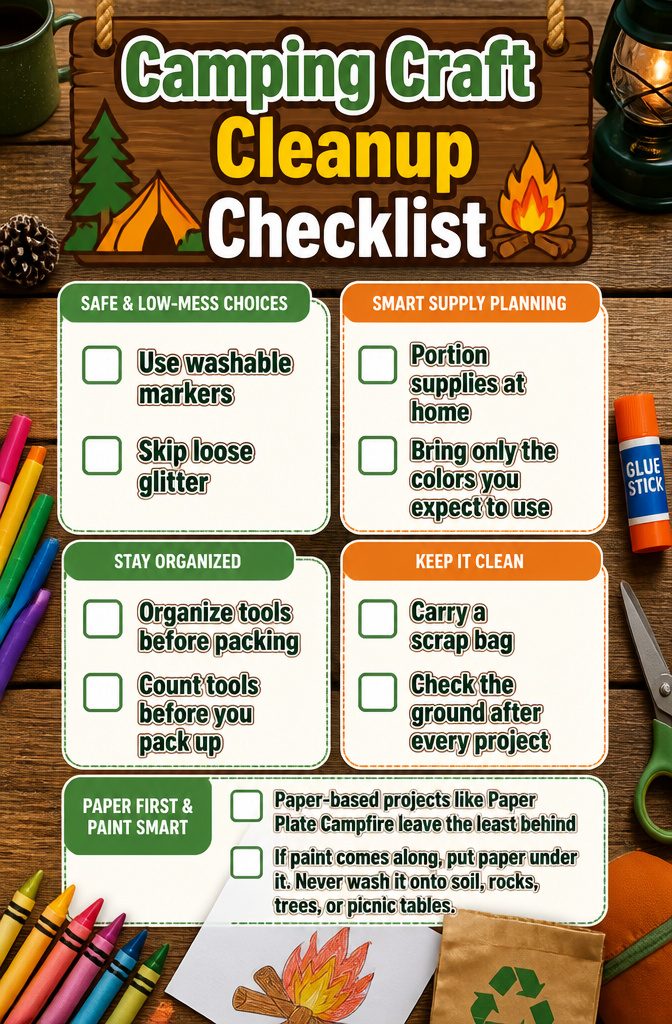
Low-mess crafts suit a campsite because nothing gets rinsed down a drain, and anything dropped stays on the ground. Here is what I’d pack and how I’d set it up:
- Use crayons or colored pencils before paint, and keep washable markers and glue sticks as the default kit. Glue sticks don’t spill, and markers stay in their caps.
- Skip loose glitter entirely.
- Portion supplies at home, and bring only the colors you expect to use.
- Keep scissors, markers, and glue in one organizer, then count the tools before you pack up.
- Carry a scrap bag, and check the ground after every project.
- Paper-based projects like Paper Plate Campfire leave the least behind.
- If paint comes along, put paper under it. Never wash it onto soil, rocks, trees, or picnic tables.
Matching Crafts to Age
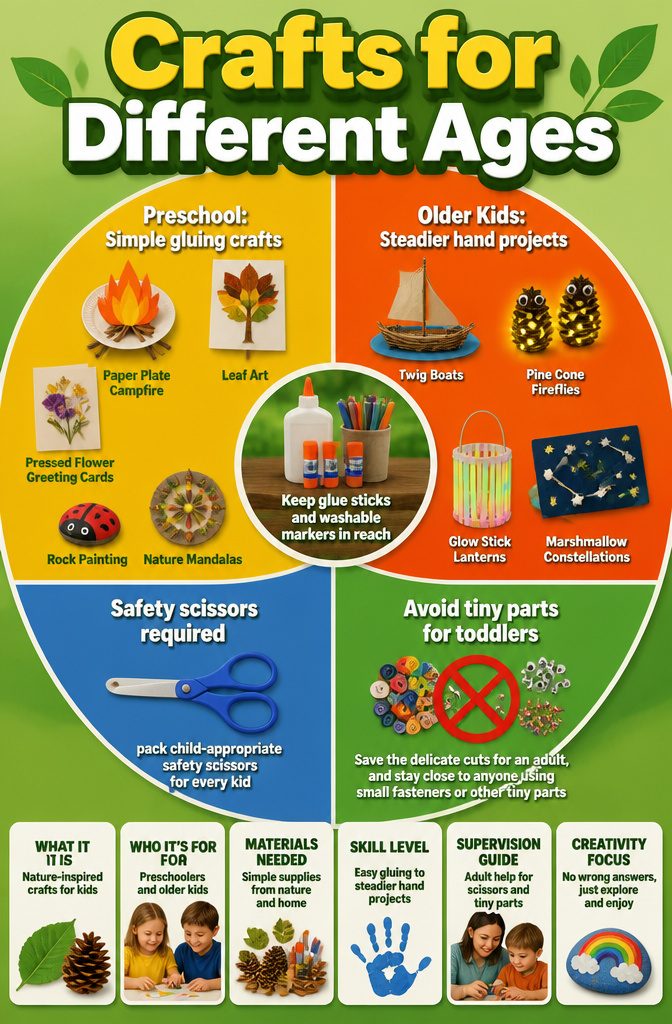
Preschoolers do best with crafts built on gluing, sticking and pressing: the Paper Plate Campfire, Leaf Art and Pressed Flower Greeting Cards all work, because nothing requires a precise cut.
Rock Painting and Nature Mandalas suit them too, since there is no wrong answer. Keep the glue sticks and washable markers in reach, and hand over one material at a time rather than the whole art kit.
Older kids can take on Twig Boats, Pine Cone Fireflies and Glow Stick Lanterns, which need steadier hands and a little planning. They can also handle the Marshmallow Constellations.
For scissors, pack child-appropriate safety scissors for every kid. Save the delicate cuts for an adult, and stay close to anyone using small fasteners or other tiny parts.
What Kids Learn
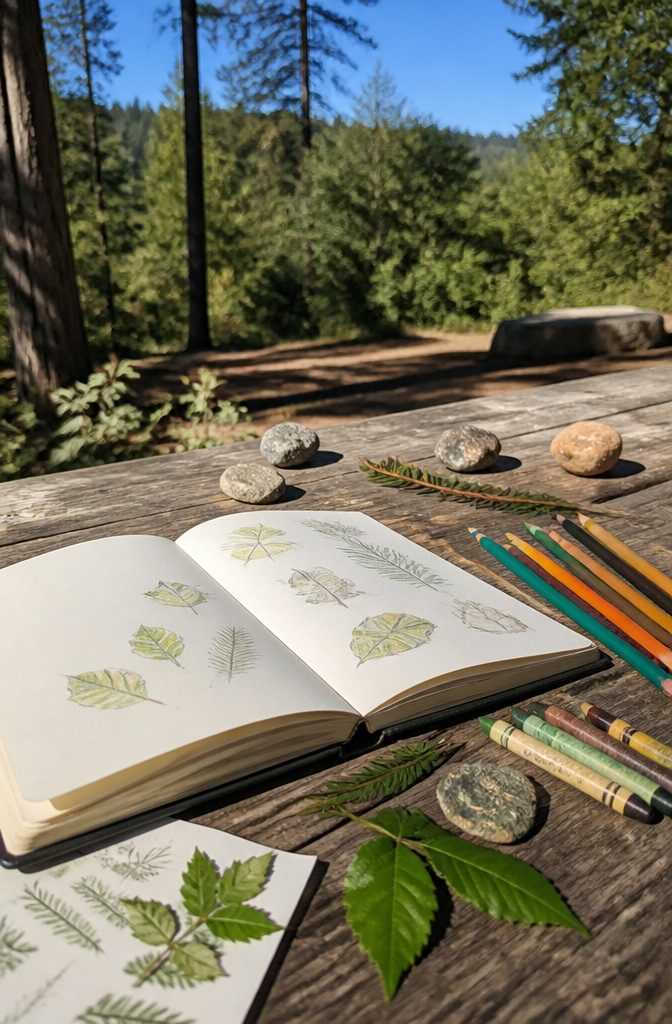
A nature journal teaches kids to look before they draw. Sketching a leaf or a rock right where it sits means they study its edges, veins and texture, and nothing has to leave the woods.
Bark-pattern drawings work the same way, and a photo of an interesting shape can be drawn later at the picnic table. Crayons, pencils and paper are plenty.
Color hunts teach sorting and naming. Ask a child to find something for every color on the wheel, then ask where it turned up and why it earned a spot.
That follow-up question does the teaching, because it turns a scavenger game into a talk about the place you’re camping in. I’d pick the hunt first for mixed ages: a 5-year-old and a 12-year-old can both play it.
Frequently Asked Questions
What are easy camping art activities for kids?
Nature journals, color hunts, campsite postcards and paper tent collages are the easiest.
They run on the same small set of crayons, pencils, paper and glue, so no big craft box is needed. Paper Plate Campfire and Rock Painting are also simple picks for younger kids.
What camping kids crafts work without collecting anything from nature?
Sketching leaves and rocks right where they sit is the simplest option, and the leaf stays put. Leaf rubbings with paper and a crayon, bark-pattern drawings and nature color palettes also work.
A Nature Mandala is another choice, since nothing gets glued or carried home. Check with the park or land manager before anyone collects.
What art supplies should I bring camping with kids?
Pack paper, cardstock, crayons, colored pencils, washable markers, glue sticks and child-appropriate safety scissors.
Washable markers and glue sticks make the best default kit because they don’t spill. Skip loose glitter, and bring only the colors you expect to use.
What are some fun camping projects for kids?
Pine Cone Fireflies, Nature Mandalas, DIY Bird Feeders, Marshmallow Constellations and Twig Boats are all popular.
Rock Painting and Paper Plate Campfires suit younger kids, while older kids can handle the boats and fireflies. If the craft bag got left behind, mud faces made from sticks, seeds and flowers cost nothing.





