
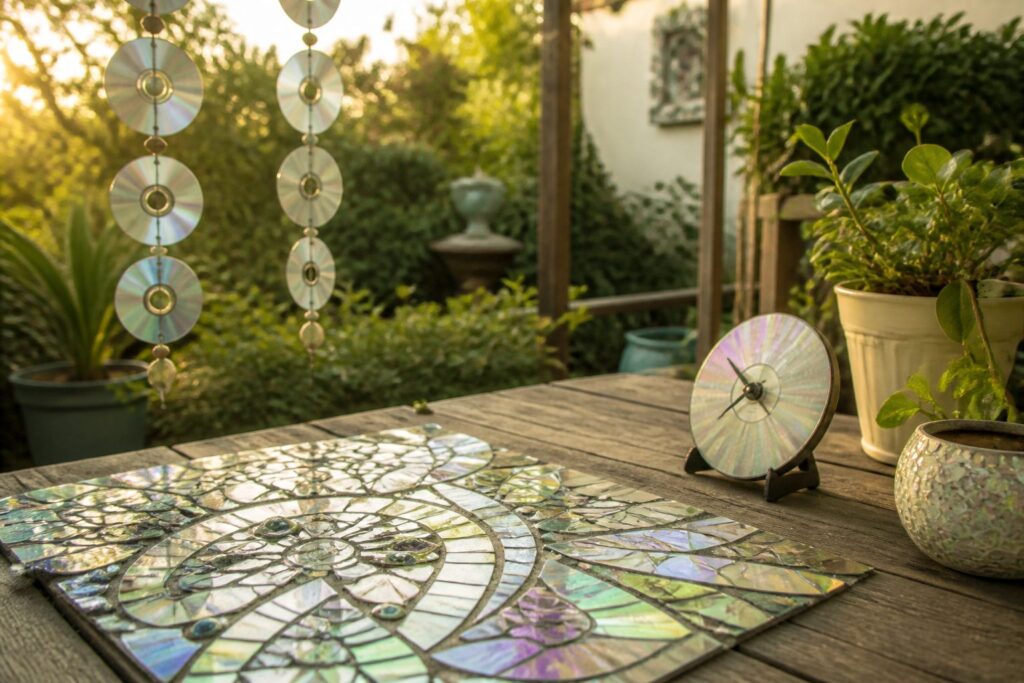
These projects run from a 2-minute clock kit to a wall of cut mosaic pieces, and the deciding factor is whether the finished piece stays indoors.
Hot glue and PVA hold inside, but anything on a porch or in a garden needs E6000 or silicone, plus 24 hours to cure before it meets the weather.
1. Mosaic Art
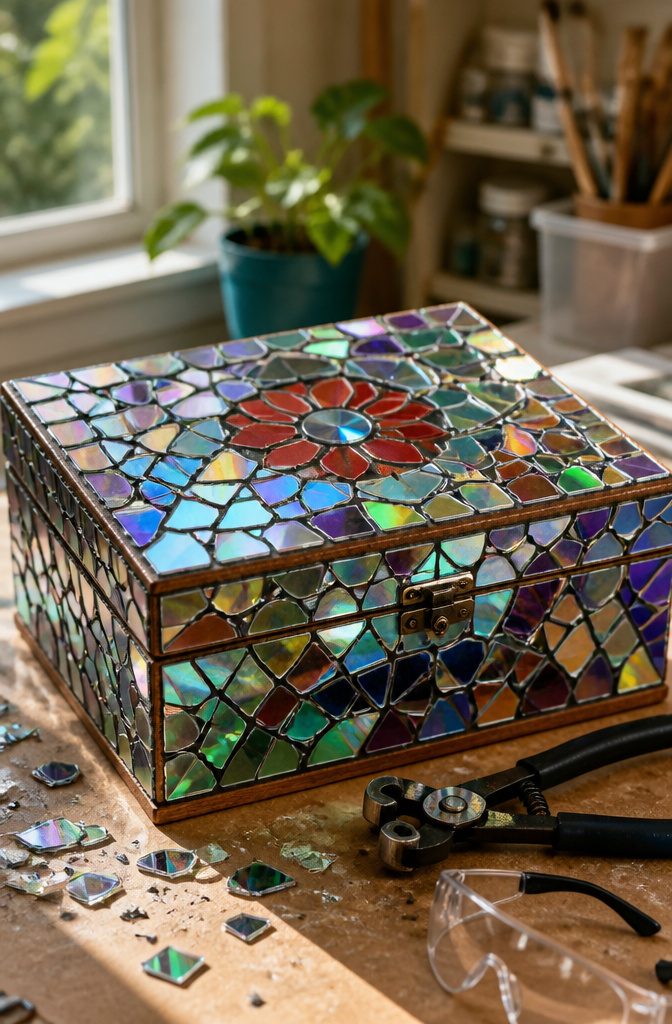
Soak the disc in hot water first, then cut it into small irregular pieces with tile nippers or heavy-duty snips.
Softened plastic snips cleanly instead of splintering. Gloves and safety glasses are not optional here, because every edge is sharp.
Lay the pieces shiny side up on your frame, box or flower pot and arrange them dry before gluing anything. For a frame, PVA works fine and the pieces can overlap slightly; it dries in about an hour.
For a box or pot, I would use hot glue indoors and press each piece down firmly, working in small sections so nothing slides.
DVDs split into two thin layers, which gives you twice the pieces and finer cuts for detailed work. Grout is optional; wipe it clean with a damp cloth.
2. CD Clock
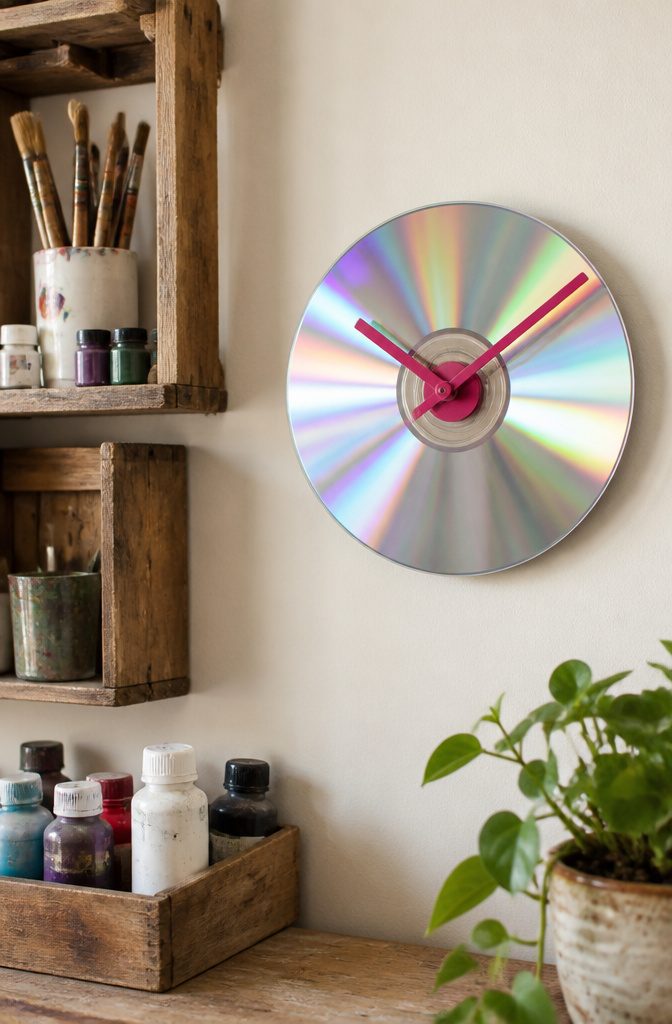
A standard CD has a center hole, and that hole decides whether the clock goes together in two minutes or needs a drill.
Buy a basic clock mechanism kit from a craft store; it comes with the hands, the motor and a spot for a battery.
A long-shaft, high-torque movement is the one I’d pick, since the shaft has to pass through the disc and still leave enough thread for the hands.
Test-fit the shaft before you paint anything. If it won’t pass through, widen the center hole slightly with a drill, going slowly so the disc doesn’t crack.
Push the shaft through from the back, with the disc sandwiched between the mechanism and the hands. Add numbers or plain tick marks with paint, stickers or contact paper, then insert the battery.
3. Mini Painting
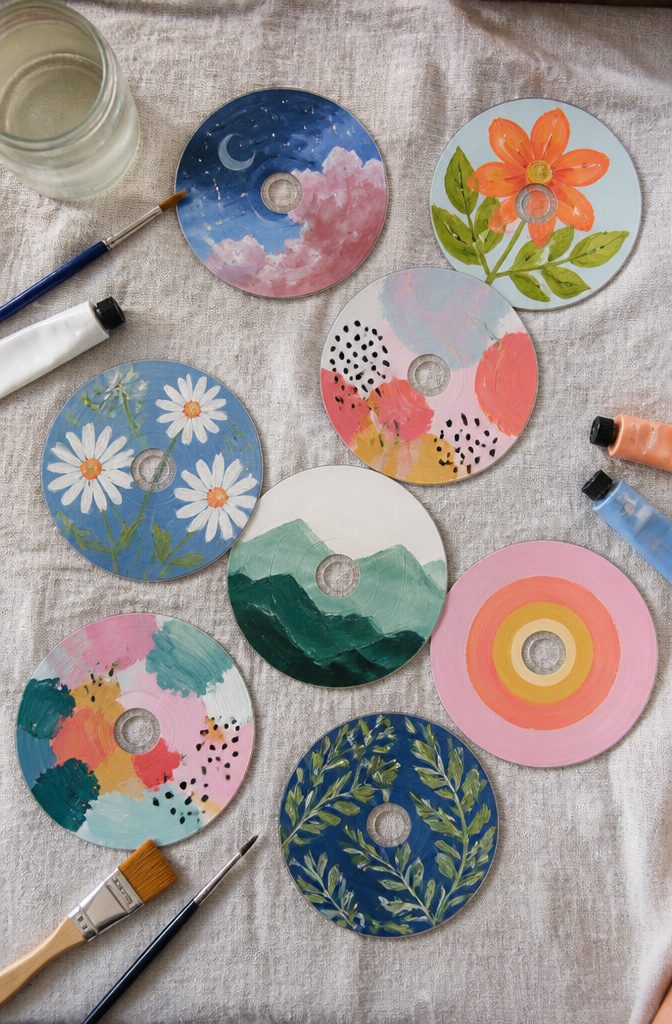
A CD’s shiny side makes a small round canvas that needs very little paint, because the surface is non-absorbent and the color sits on top instead of soaking in.
Acrylic and paint pens both work. Pens give you clean fine lines for faces, whiskers or dots, while acrylic covers the mirror finish in a coat or two with a small brush.
Wet paint can bead up and slide on the slick surface, so keep the first coat thin and let it dry before layering.
Dried paint may peel with handling, so prime and seal the disc if you plan to display it.
A pushpin through the center hole hangs it on the wall. Skip the sealer only for a kid’s one-afternoon experiment.
4. Suncatcher
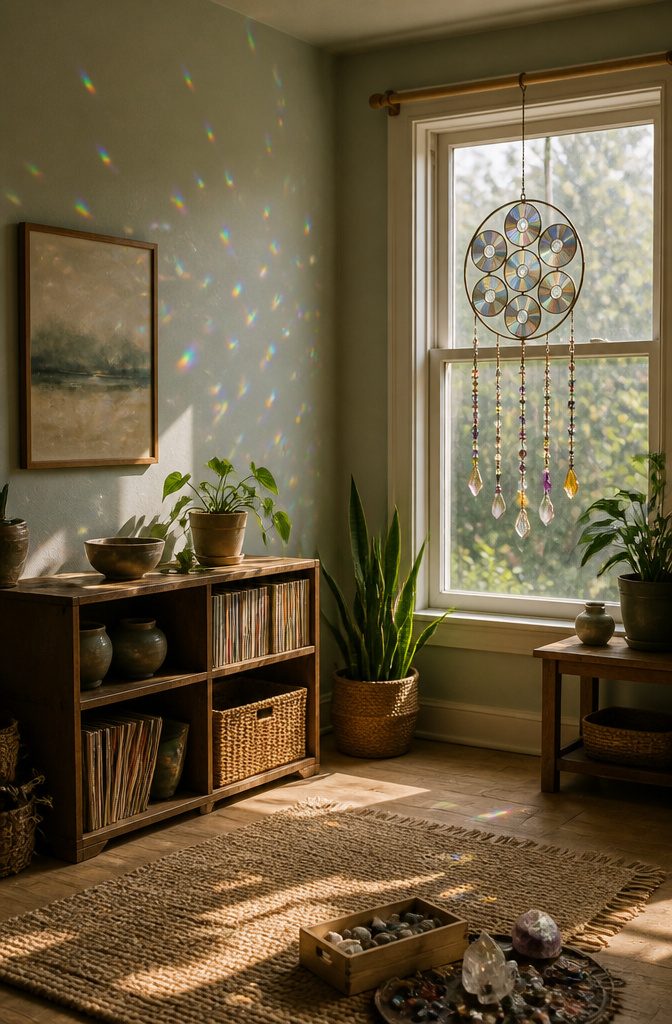
A CD throws rainbow reflections because of its data surface, so the disc doesn’t need paint to work.
Drill or punch a small hole near the edge, thread ribbon or fishing line through it, and add beads or charms below. It’s an under-30-minute project, and kids can handle most of it.
Hang it where direct sun lands and the spots of color will drift across the walls as the day moves.
Cutting a disc into shapes gives you more pieces to hang at different heights, which I find looks better than one lone disc.
For a porch or garden, skip hot glue on any added pieces. Use E6000 or a silicone-based adhesive, since hot glue gives out with temperature and moisture swings, and let E6000 cure at least 24 hours before it meets the weather.
5. Plant Markers
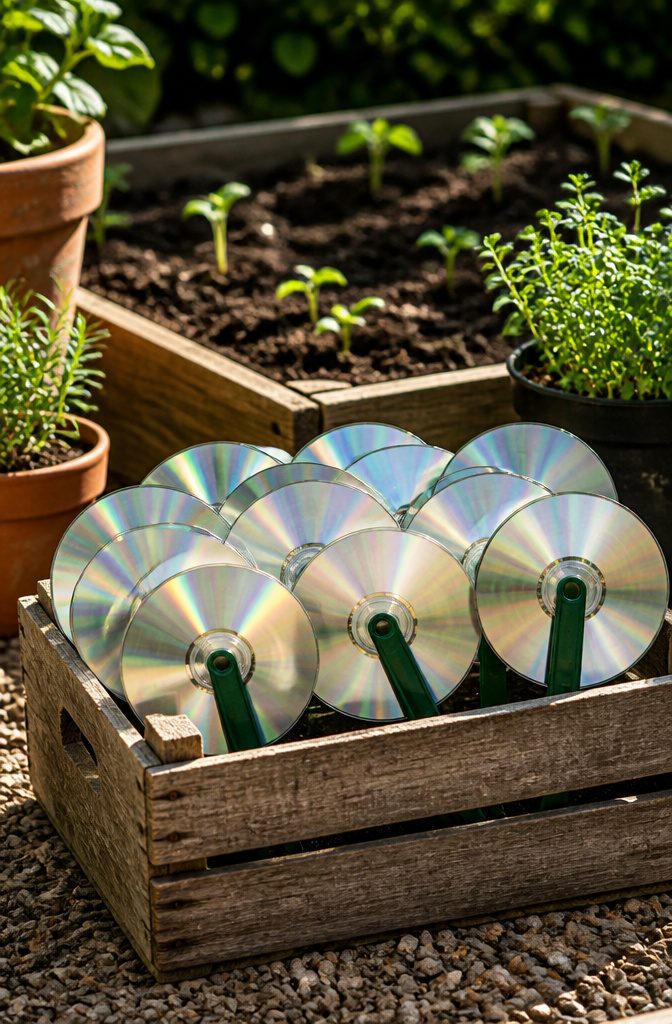
Plastic is the reason CDs work as garden labels: the polycarbonate-style disc won’t rot or wear down in rain and sun the way a wooden stake does.
Write the plant name straight on the disc with a permanent marker or paint pen, then glue the disc to a stick.
I’d pick a paint pen for anything that will sit out all season, since marker on a shiny surface tends to rub off first.
The silver side is easy to spot from across the bed, which helps in a crowded row.
If that looks too flashy, remove the reflective coating and use the clear plastic instead, so the label blends in. Use outdoor-safe adhesive such as E6000 or silicone rather than hot glue, because glue is what peels and fails outside.
For a hanging label, drill a hole near the edge and thread garden wire through it.
6. Bird Deterrent
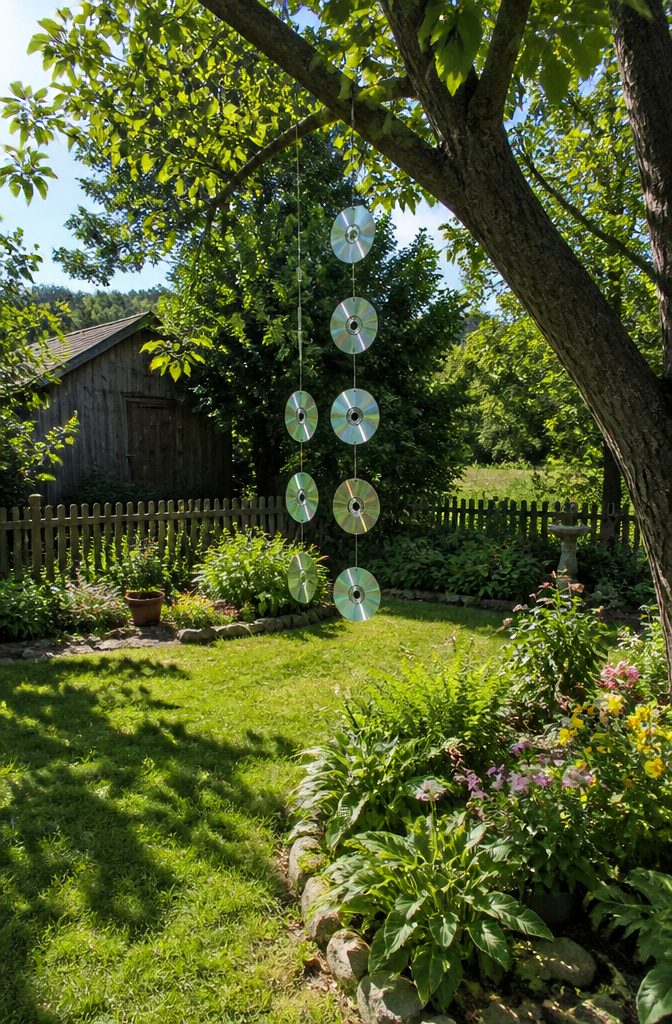
Old discs scare birds because they throw moving flashes of light, so hang them on string where they can swing and spin in the wind.
Hang each one loose enough to turn with the wind, from a branch, a fence, or a stake beside the bed. A disc pinned tight against a trunk just sits there and birds figure that out fast.
String, ribbon, or fishing line threaded through the center hole all work, and fishing line is my pick because it disappears.
For a stake, drill a hole near the edge, twist garden wire through it, and space several discs along one stake so they spin as a chain.
Sun and rain are hard on glue and string, so skip hot glue outdoors. E6000 or silicone adhesive holds up far better, and a UV-resistant sealant slows fading and peeling.
7. Accent Wall
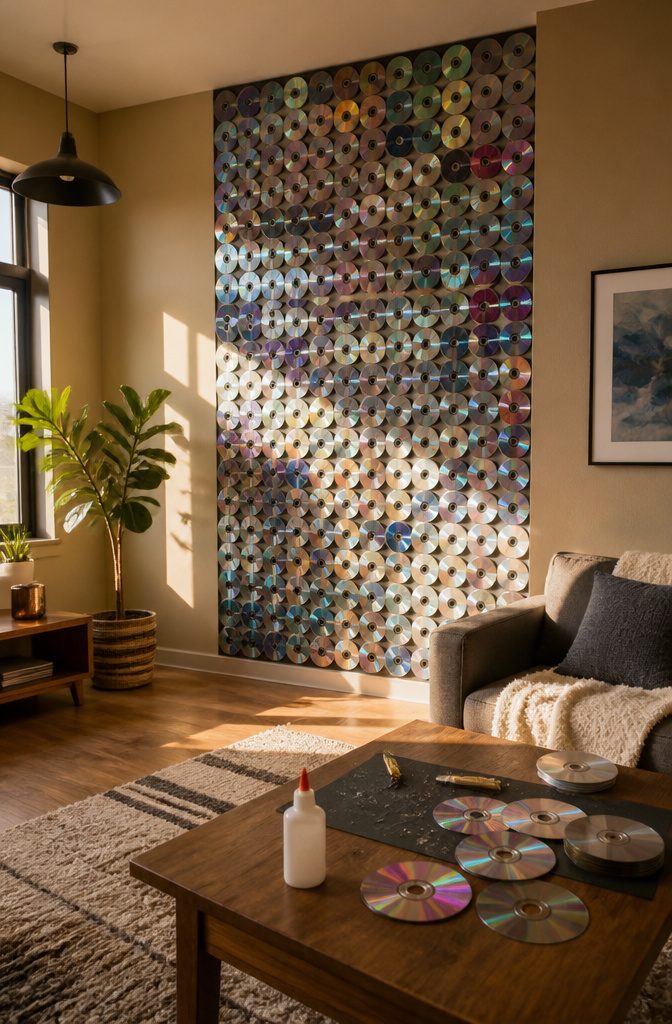
E6000 is the adhesive I’d pick for a wall of disc pieces, and tile adhesive is the other sound option.
Apply it to the back of each piece and press firmly. Leave the wall to cure for 24 hours before you touch it or fill any gaps.
Soak the discs in hot water first, then snip them into small irregular pieces with tile nippers or heavy-duty snips.
Wear gloves and eye protection. DVDs split into two thin layers, so each disc gives you twice the pieces, and the thinner layers cut finer.
Lay everything out shiny side up before gluing, since the way pieces catch light is the whole effect. Grout is optional; if you use it, wipe the surface with a damp cloth.
8. Coasters
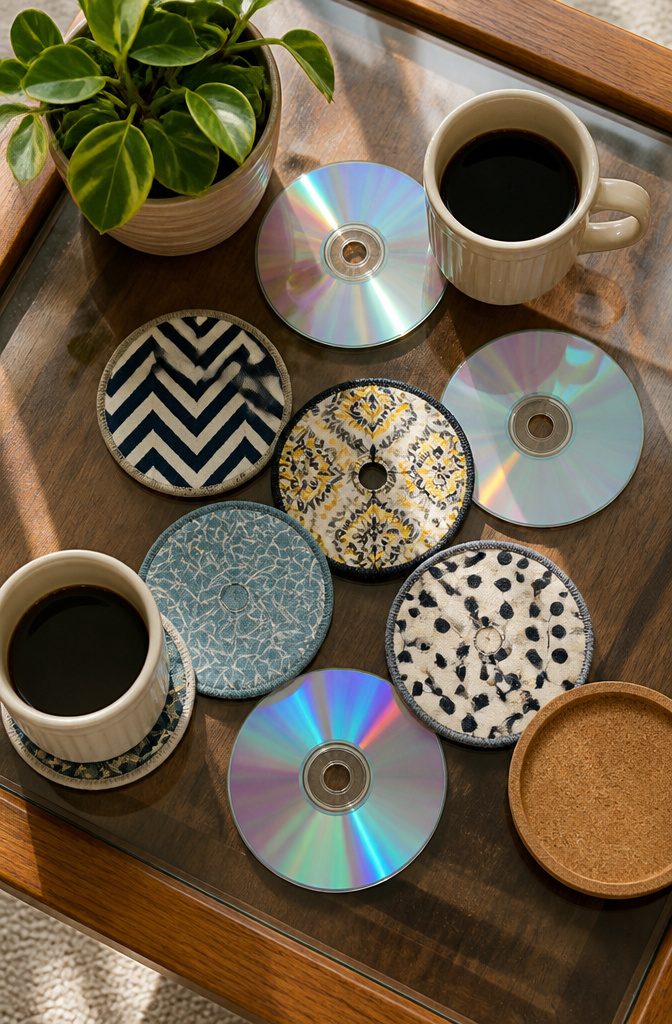
A CD is already the right size for a coaster, which is why this is one of the easiest afternoon projects on the list.
Paint the disc, cover it with fabric using Mod Podge, or leave the graphic side as it is if you like how it looks.
Backing is what turns a pretty disc into something you can set a mug on.
Cut cork, felt or thick card stock to match the disc, then glue it to the bottom. Cork or felt on the underside protects the table, and the extra layer adds heft and a little absorbency.
For a spill-resistant base, glue two discs label side to label side, hold them for 60 seconds, and decorate the outer faces.
I’d choose that over a single disc, since it feels sturdier. Let the glue cure fully before anyone uses them.
9. Earring Holder
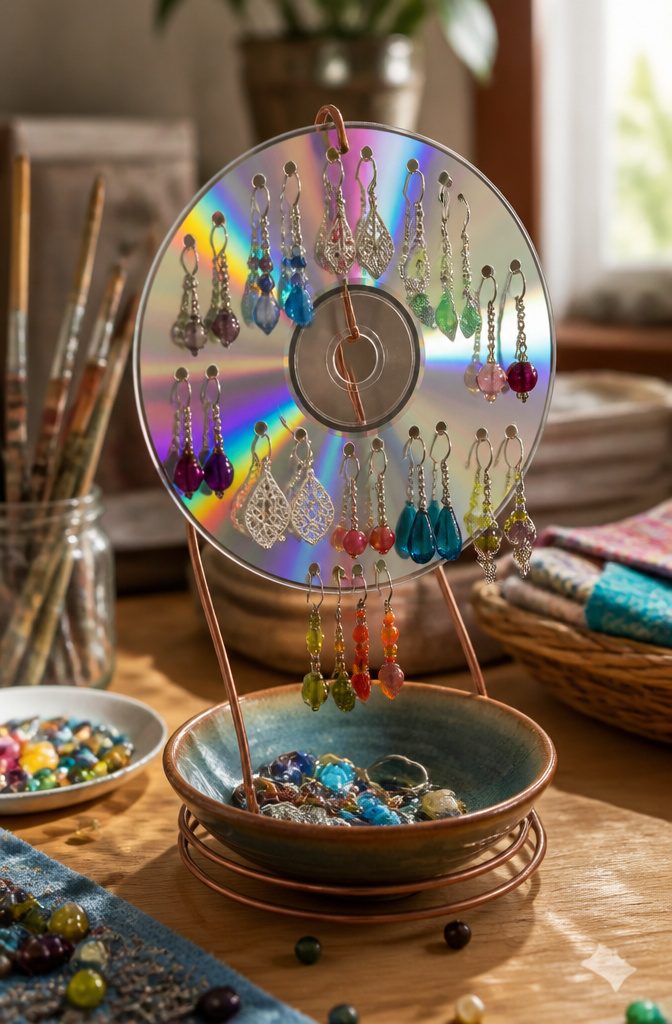
A CD is thin plastic, so punching holes for earrings takes almost no effort.
Heat the tip of a screwdriver and melt a ring of holes through the disc, and do it with real caution, since hot metal and melting plastic are an easy way to get burned. Work in a ventilated spot.
For a freestanding holder, stack a plate or bowl on the bottom, a plastic tube or candlestick in the middle, and the disc on top, all glued together.
Loop hooks or posts through the holes, and the bowl underneath catches rings and other small pieces.
I’d decorate the face before assembling anything, because the flat top is far easier to cover when it isn’t attached to the stand.
10. Planter
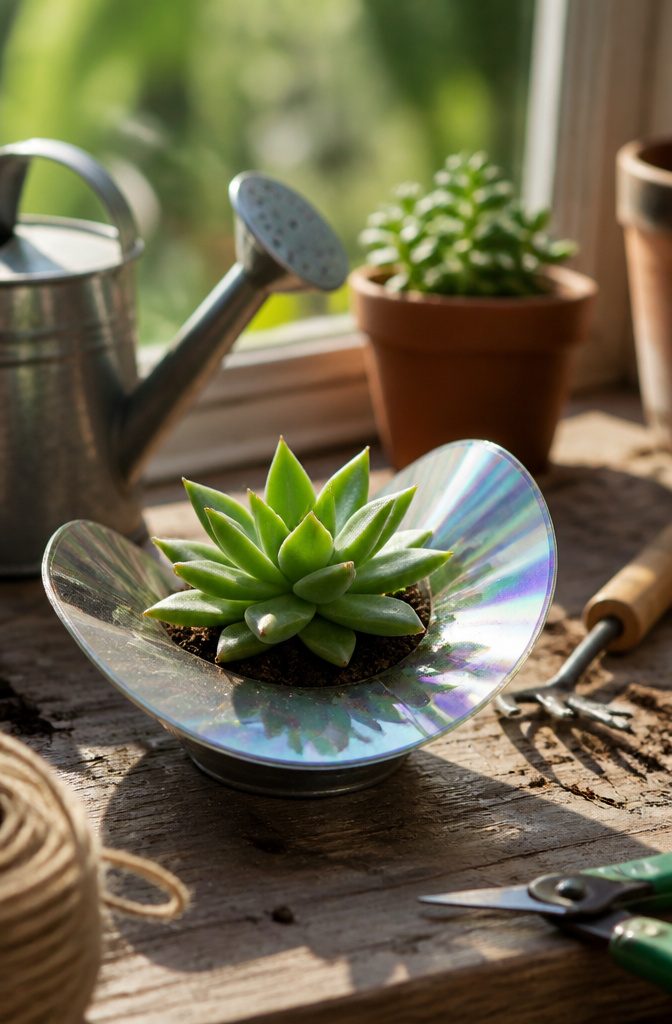
A softened disc drapes over an inverted oven-safe bowl in 1–2 minutes at 150°C, so this is a project where you stand at the oven door the whole time.
Lay the CD on baking paper over the bowl, pull it out the moment it sags, and press it into shape with gloved hands. It hardens as it cools.
Open a window first. The fumes are unpleasant and potentially harmful, and never melt discs on a stovetop or with a heat gun indoors without strong ventilation.
I’d sacrifice one scrap disc before the good one, since polycarbonate warps unevenly if you wander off.
The resulting dish is small, more a succulent cup than a real pot. For anything bigger, I’d glue pieces onto a store-bought pot instead and skip the oven.
11. Candle Holder
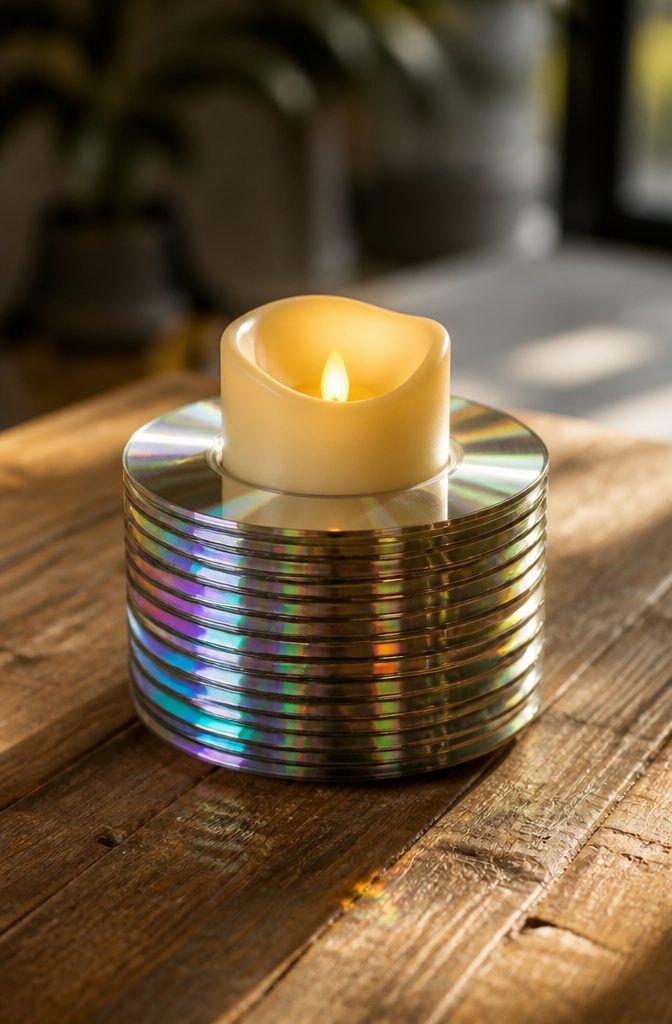
A CD works best as the base under a tea light, where its shiny face bounces the flame around and gives off a soft glow.
Glue two or three discs together if you want a sturdier stack that won’t slide across the table. Dress the top with marbles, beads or a little paint.
Heat is the limit. CDs melt and burn under excessive heat, so I would use an LED tea light and skip the real flame.
A flameless candle gives you the same glow with no risk to the plastic, and it’s the only version I’d set on a shelf and walk away from.
For a flatter look, paint a disc or cut a decorated paper circle to size, seal it, and set the candle on top.
12. Key Holder
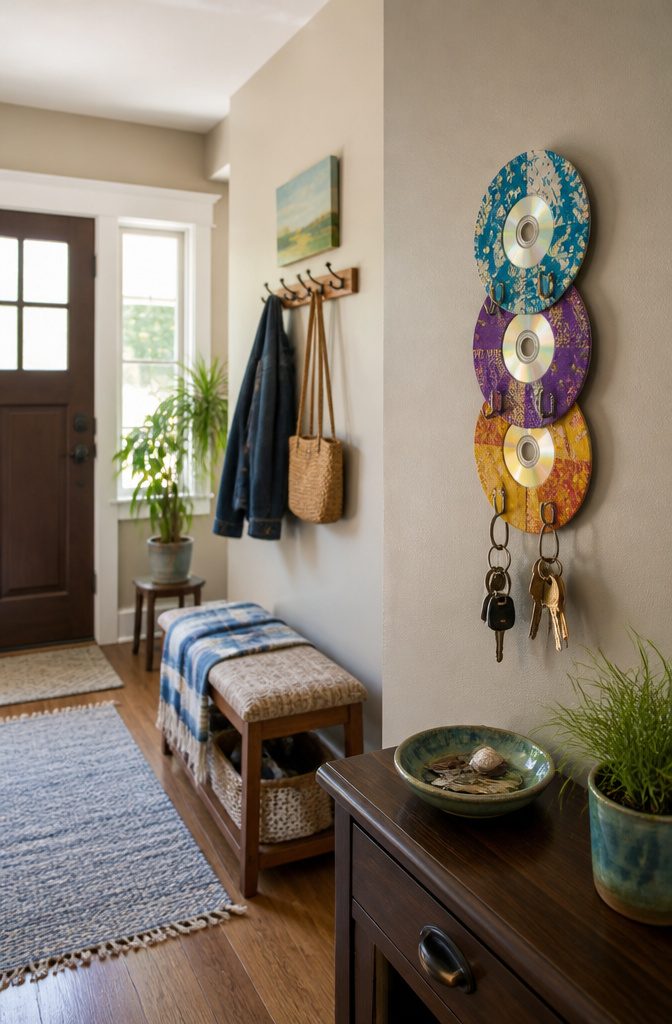
A single disc is too thin to hold a hook, so stack three and glue them with hot glue before you build anything.
Four stacks of three, glued side by side in a line, give you a row wide enough for four hooks, one per stack.
Wrap each stack in fabric or paper, then run twine around the outer edge, gluing as you go, so the layered plastic edge disappears.
I prefer fabric here: it hides glue seams better than paper and doesn’t show fingerprints near the door.
Glue the hooks to the front of each stack, then tie a string across the top for hanging.
Glue works for light keys. For a heavy ring of keys, I’d skip it and fasten the hooks with screws through the stack, because hot glue can let go under a daily tug.
13. Photo Stand
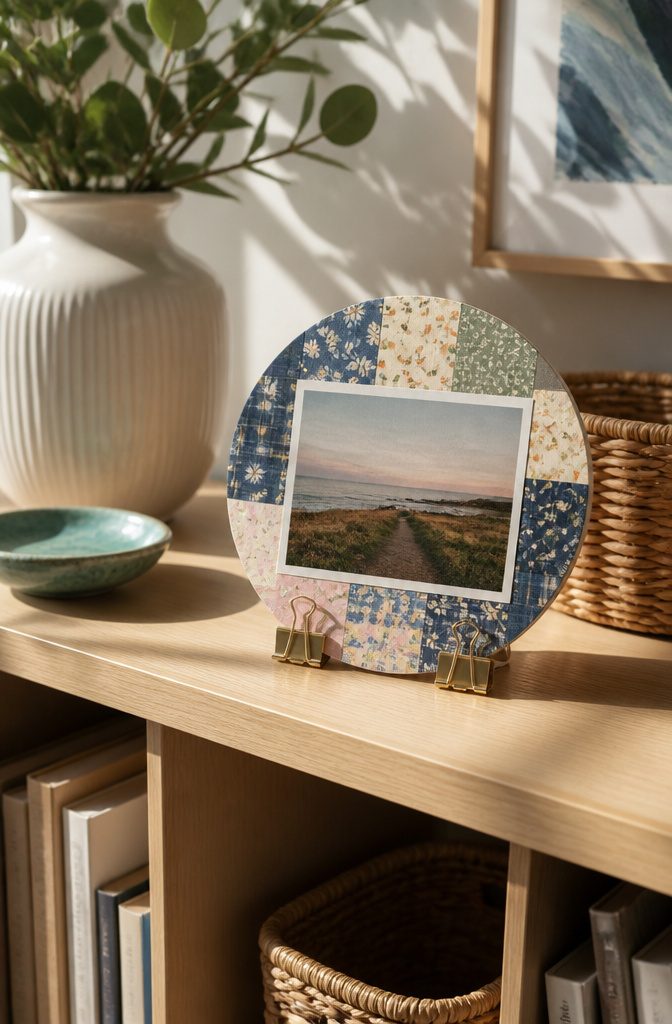
Two small binder clips on the bottom edge of a disc work as feet, so the frame stands without an easel. Spray paint the clips first (gold looks good), or they read as office supplies.
Trace the disc onto patterned scrapbook paper for the background, then trace a smaller circle around the photo with a cup or glass so the picture sits centered. Glue the paper to the disc, then the photo on top.
If clips aren’t handy, glue the disc to a piece of cardboard and it stays upright just as well. Cardboard hides better behind a busy background, but clips look neater on a shelf.
14. Curtain Pullbacks

A CD becomes a curtain pullback once you turn it into a ring.
Trace a circle in the center using a can as a template, then score it with a utility knife, working round several times rather than cutting through in one pass.
Pop the middle out and wrap the ring in ribbon, overlapping slightly and gluing the ends down. Hot glue a few artificial flowers on the front if you like.
To use it, gather the curtain, pull a small bunch of fabric through the ring, and push a chopstick or painted dowel through the fabric to hold it against the wall. Nothing gets screwed into the wall, which suits renters.
I would keep this to sheers and light fabrics. A heavy curtain can bow the plastic or snap it.
15. Floating Shelves

A CD shelf is smaller than it sounds, and the disc itself carries almost no load.
Warm the section you want to bend gently and gradually, either over a small candle flame or in an oven at 150°C or below with baking paper underneath.
Discs soften within one to two minutes, so stay in the room and open a window first. Work the softened disc into a right angle, let it cool completely, then hang it on a floating shelf bracket.
Practice on a scrap disc first, because polycarbonate behaves differently at different temperatures and can warp unevenly.
Treat these as shelves for knickknacks, small photos and light décor only. Polycarbonate bends under weight, so skip books, mugs and anything you would hate to hear fall.
16. Bookends
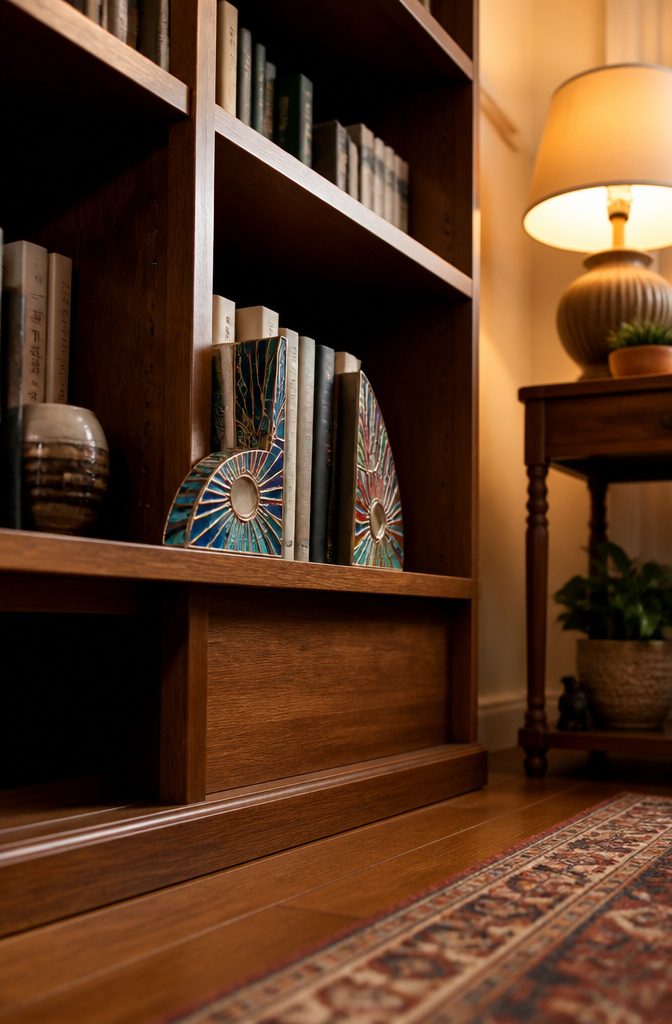
A single CD is too light and too thin to stop a row of books, so the design has to add weight.
The flame method bends a disc in half so one side slides under the books and the other stands against them.
Pass the disc through a candle flame without lingering on one spot, then let it cool. Slide the bent disc under the end of the row so the books’ own weight pins it down.
I’d skip the flame if kids are helping. A second option is to glue discs to a sturdy base, stacking several so the bookend has some heft, and press them upright against a solid backing.
Paint the finished piece, or cover it with fabric or paper, to hide the scratches and the shiny rainbow face.
17. Wreath
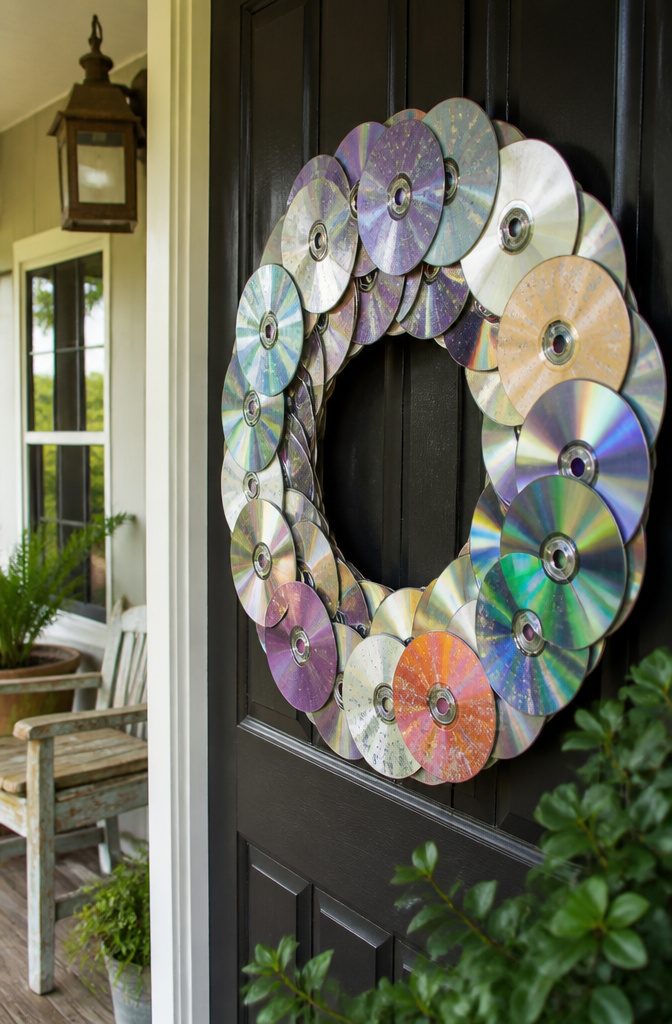
Hot glue holds a wreath together fine indoors, but a door outside is a different job.
Temperature swings and moisture make hot glue let go, so use E6000 or a silicone-based adhesive and give it at least 24 hours to cure before the wreath meets the weather.
A coat of Mod Podge Outdoor over the finished piece helps prevent peeling and fading.
Glue whole discs onto a ring form, overlapping them in a circle so no base shows through.
I like leaving them bare, because the mirrored surface throws light around the porch. Paint works if you want to match a holiday or theme.
Loop a piece of string through the top disc for hanging, then add ribbon, artificial flowers, or tinsel.
18. Christmas Ornaments
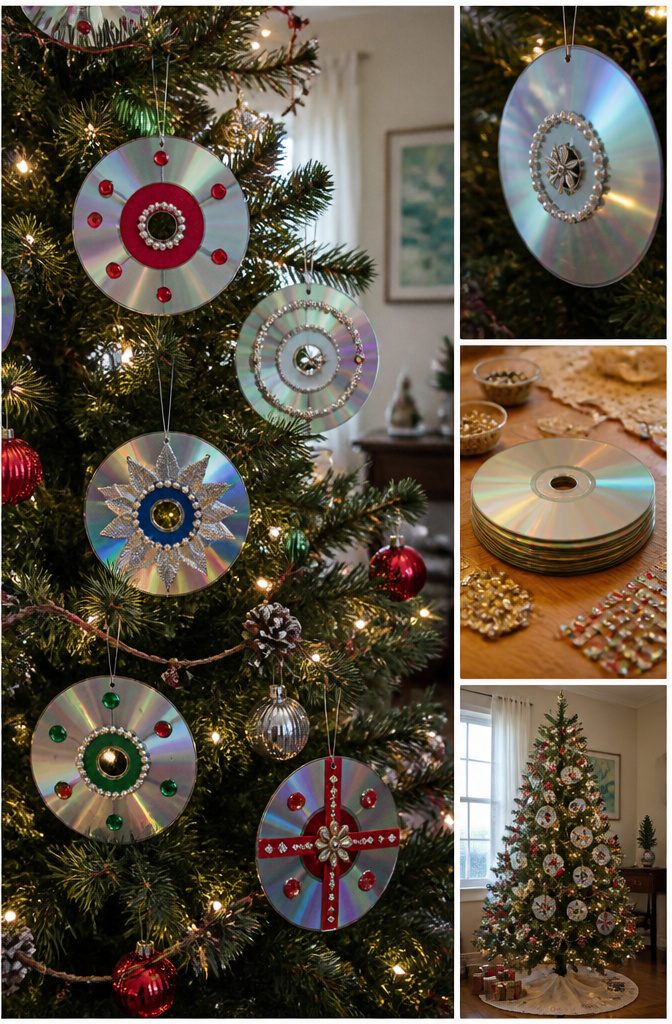
A CD already behaves like a tree ornament: the mirrored side throws light around the room, and a hole near the edge takes a ribbon loop.
Tape paper or foil behind the center hole, then decorate with puffy paint, markers, glitter glue, or a layer of wrapping paper or printed napkin.
For a finished look, I like the two-disc version. Tape a hanger to the back of one disc, then glue a second disc over it so the blank side is hidden and both faces sparkle.
Finish with a bow, or hot glue ribbon around the rim to cover the edge.
Kids can handle nearly all of this. Keep cutting for adults, since snipped stars and snowflakes have sharp edges, and tape or sand them before handing them over.
19. Mini Sewing Kit
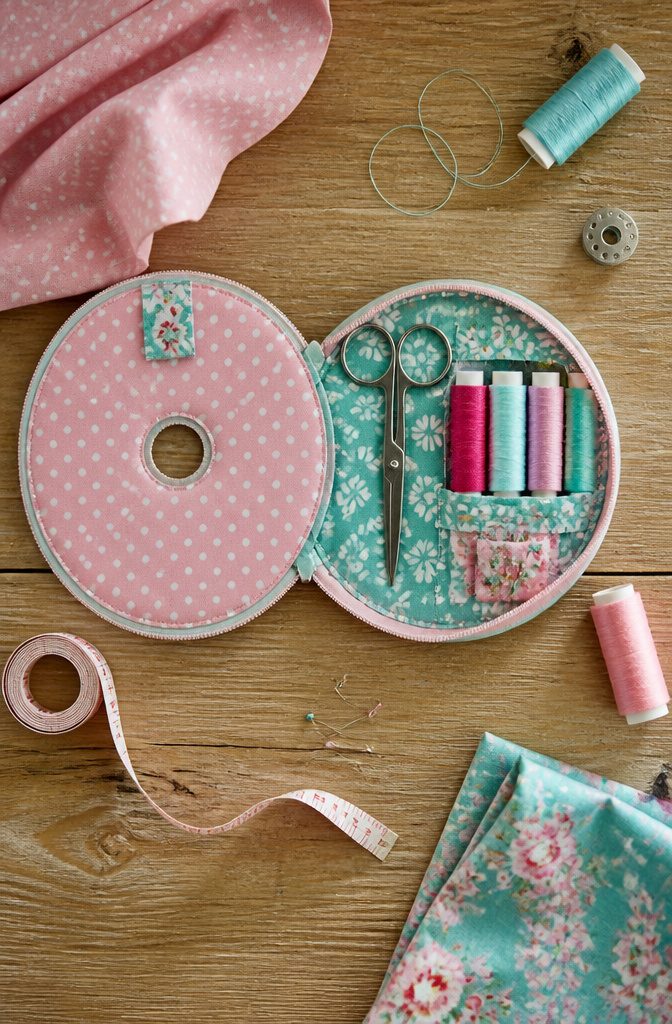
A CD works as a sewing kit because its flat face gives you something to build on and its center hole is already a hanging point.
Cover the disc with a layer of fabric, then glue a second layer over it, leaving the top open to make a pocket. Scissors and a spool of thread slide into that pocket.
Needles need a different spot. Use the fabric itself as the holder and push them straight through, where they stay put without rattling loose.
Fold a short piece of ribbon in half and glue it to the back, and the kit hangs from a hook or a nail.
Glue only the pocket’s side and bottom edges so the opening stays free. I’d pick a tightly woven fabric, since it holds needles better than a loose weave.
20. Napkin Holders
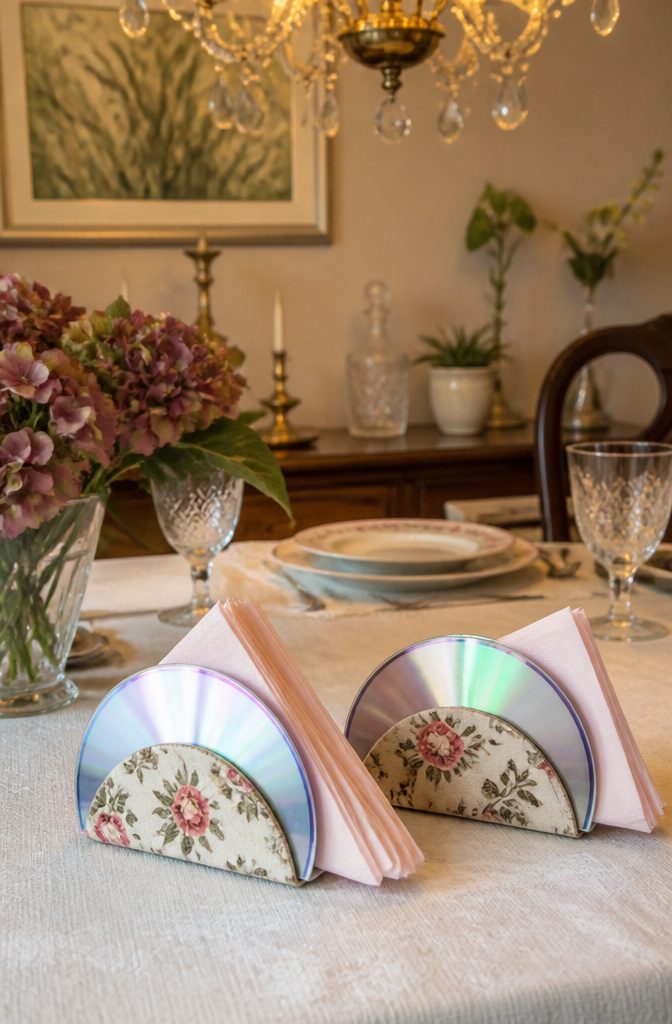
A CD is thin enough to cut with strong scissors, which is what makes this project work. Cut one disc in half as straight as you can, then cover both halves with paint, fabric, or paper.
Cut a strip from a second CD, cardboard, or flat plastic, matching the disc’s length and about 1 inch wide, and glue the two half circles to it as a base.
The finished holder should stand on its own, so test it before the napkins go in. If it tips, the base strip is the usual culprit, and a stiffer piece of cardboard or a second layer of plastic fixes it.
I’d cover the halves in paper or fabric rather than leave them bare, since the cut edge looks rough next to a napkin stack.
21. Trinket Dish
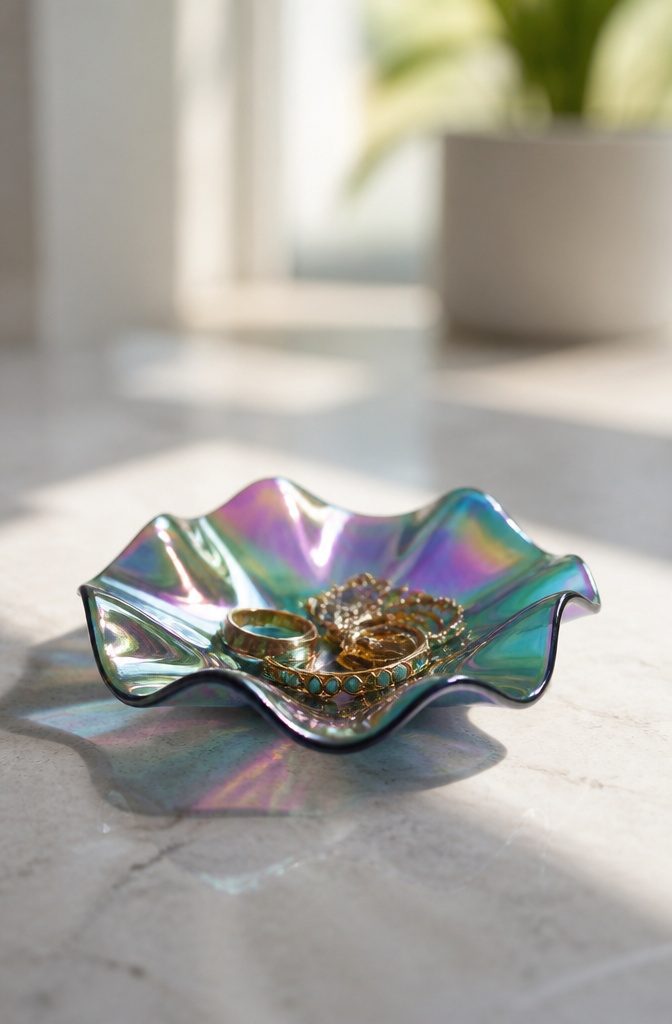
A CD softens at oven temperatures a home kitchen easily reaches, so a trinket dish takes minutes, not an afternoon.
Set the disc on baking paper over an inverted oven-safe bowl, or on a baking sheet over a 1–1.5 inch ball of aluminum foil.
The foil version is the one I’d pick for a small, ring-sized dish, since the disc puckers around the ball.
Heat the oven to 325°F. The disc starts to melt and take shape after about 10 minutes on foil, but over a bowl it can drape in 1–2 minutes.
Stay at the oven and watch the whole time, because a disc past softening is ruined.
Open a window, since melting plastic smells. Wear gloves to press the shape, then let it cool fully.
22. Mini Tiles
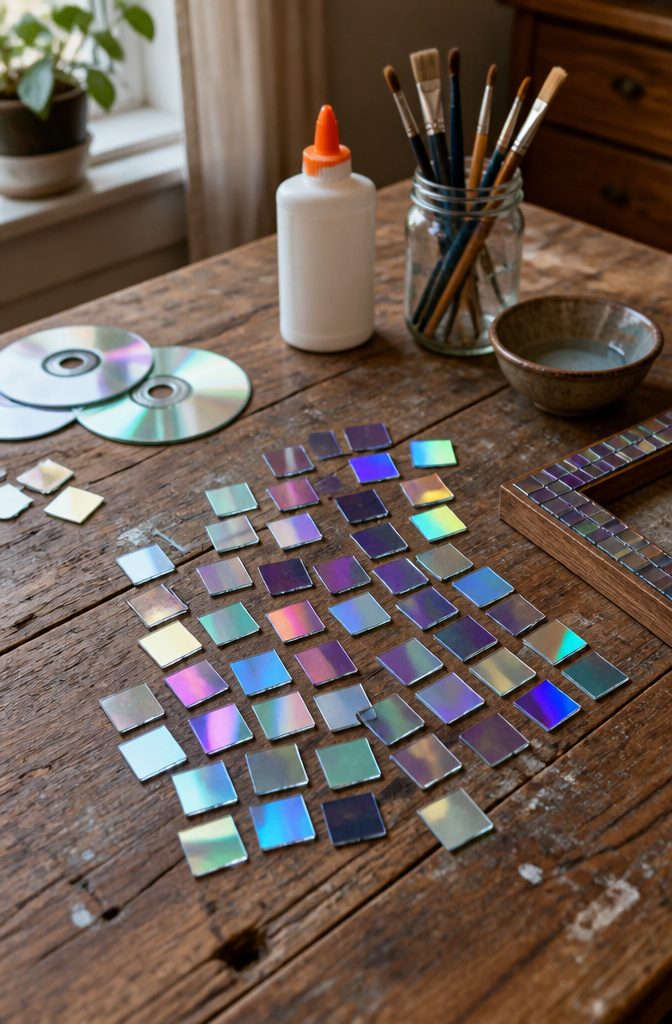
Cut the squares around 1 cm for a disco ball or garland, and larger for a frame, but stop before the pieces get tiny.
Below a certain size the two layers of the disc start separating on their own, which ruins the tile. Strong scissors or clippers handle the cutting.
For frames, two or three discs cover one small unfinished wood frame. Lay the squares out dry first to check you have enough.
Paint the frame and let it dry completely before any gluing, because the color underneath shows in the gaps. I like white, since it pushes back against the faint purple cast the discs carry.
Pry the layers apart if you want the strongest rainbow, since the metallic foil between them throws the real color. Keep fingers off the shiny face.
Cutting CDs Safely
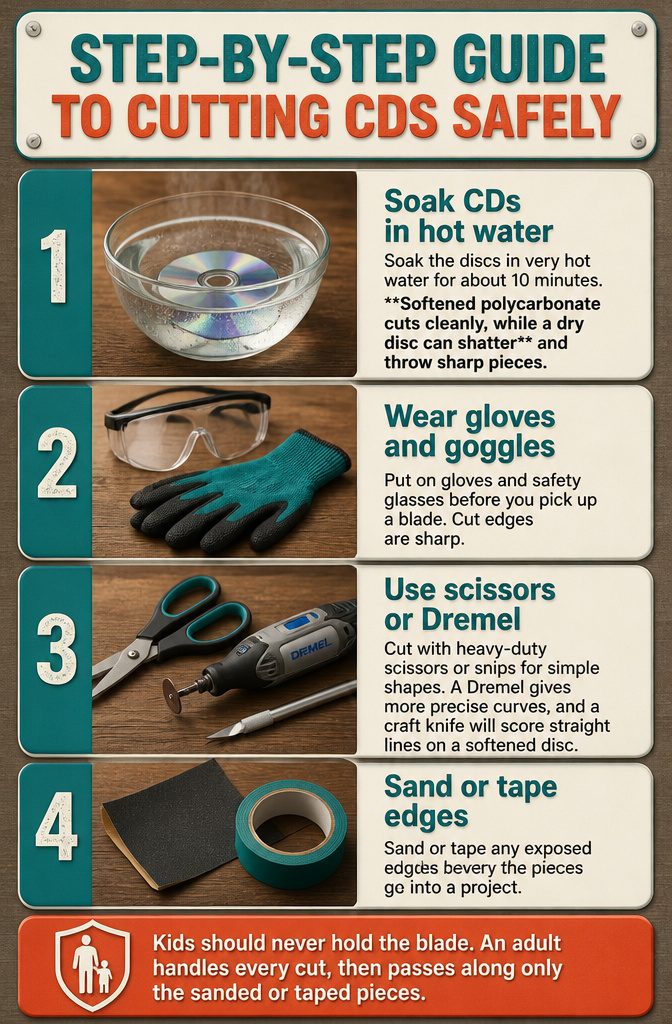
- Soak the discs in very hot water for about 10 minutes. Softened polycarbonate cuts cleanly, while a dry disc can shatter and throw sharp pieces.
- Put on gloves and safety glasses before you pick up a blade. Cut edges are sharp.
- Cut with heavy-duty scissors or snips for simple shapes. A Dremel gives more precise curves, and a craft knife will score straight lines on a softened disc.
- Sand or tape any exposed edges before the pieces go into a project.
Kids should never hold the blade.
An adult handles every cut, then passes along only the sanded or taped pieces. I would skip letting older kids "just try one" with scissors, because brittle plastic is what sends shards flying.
Glue for Indoors and Out
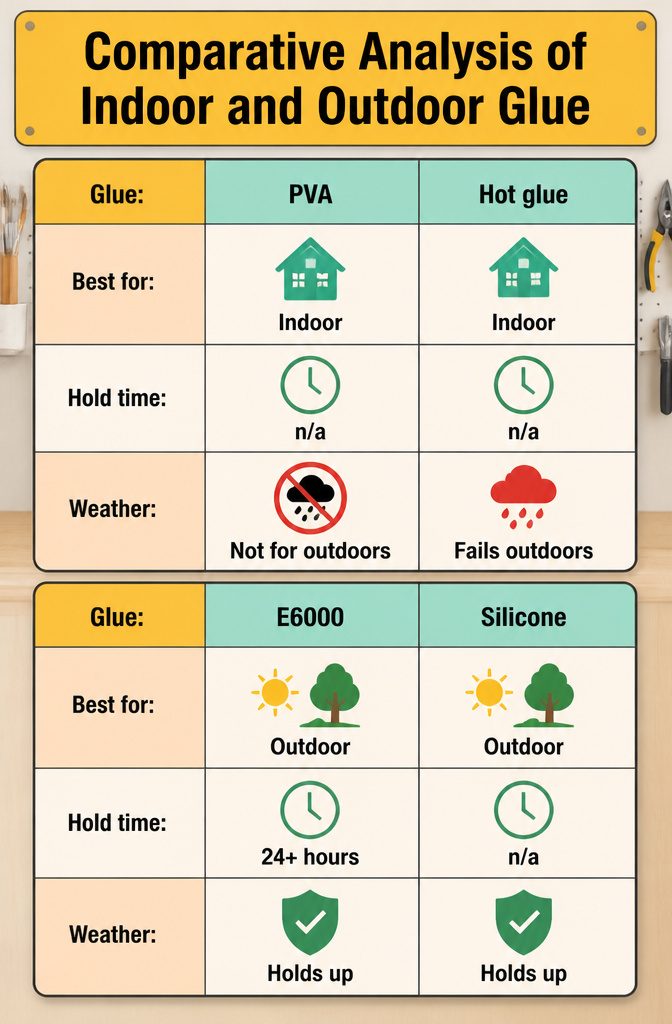
For indoor projects, PVA glue is the one I’d reach for first.
It costs very little and bonds well to polycarbonate, which is what a CD is. A standard hot-glue gun also works indoors and grips faster, so use it when you don’t want to hold a piece in place.
Hot glue fails outside, where temperature swings and moisture work it loose.
For anything that will hang in weather, use E6000 or a silicone-based adhesive, then seal the piece with a UV-resistant varnish or Mod Podge Outdoor to stop peeling and fading.
| Glue | Best for | Hold time | Weather |
|---|---|---|---|
| PVA | Indoor | n/a | Not for outdoors |
| Hot glue | Indoor | n/a | Fails outdoors |
| E6000 | Outdoor | Cure 24 hours or more | Holds up |
| Silicone | Outdoor | n/a | Holds up |
Give E6000 pieces at least 24 hours before they meet the weather.
Recycling Old CDs
Curbside bins are the wrong place for CDs, and the plastic jewel cases are turned away too.
Only the paper insert can go through a municipal program. Tossing the discs in the trash is no better, since they would take about a million years to decompose.
CDs typically cannot be placed in your traditional curbside recycling bin, and sending them to landfills is discouraged.
That leaves two routes.
A mail-in service is the one I’d pick: Back Thru the Future Technology Disposal, GreenDisk and CD Recycling of America all take discs. You pay a fee plus shipping, but the material gets reused.
The free route is a vintage music shop or a used goods store like Goodwill or the Salvation Army. Call first, because many locations no longer want CDs.
Frequently Asked Questions
How do you cut CDs safely?
Soak the discs in very hot water for about 10 minutes first, because softened polycarbonate cuts cleanly while a dry disc can shatter.
Wear gloves and safety glasses, cut with heavy-duty scissors or snips, and sand or tape the edges afterward. An adult should handle every cut when kids are helping.
What can I make with old CDs?
Popular projects include mosaic art, a clock, coasters, suncatchers, plant markers and a bird deterrent.
You can also make ornaments, a wreath, a trinket dish, a photo stand or a candle holder base. Many of them take under an hour, and kids can handle most of the non-cutting steps.
Can CDs be recycled?
Not in curbside bins. CDs and their plastic jewel cases are turned away there, and only the paper insert can go through a municipal program.
A mail-in service such as Back Thru the Future Technology Disposal, GreenDisk or CD Recycling of America is the best route, though you pay a fee plus shipping.
What should I do with my old music CDs?
Reuse them in a craft, donate them, or mail them to a recycler.
Vintage music shops and used goods stores like Goodwill or the Salvation Army may take them, but call first because many locations no longer do. Skip the trash, since discs would take about a million years to decompose.





