
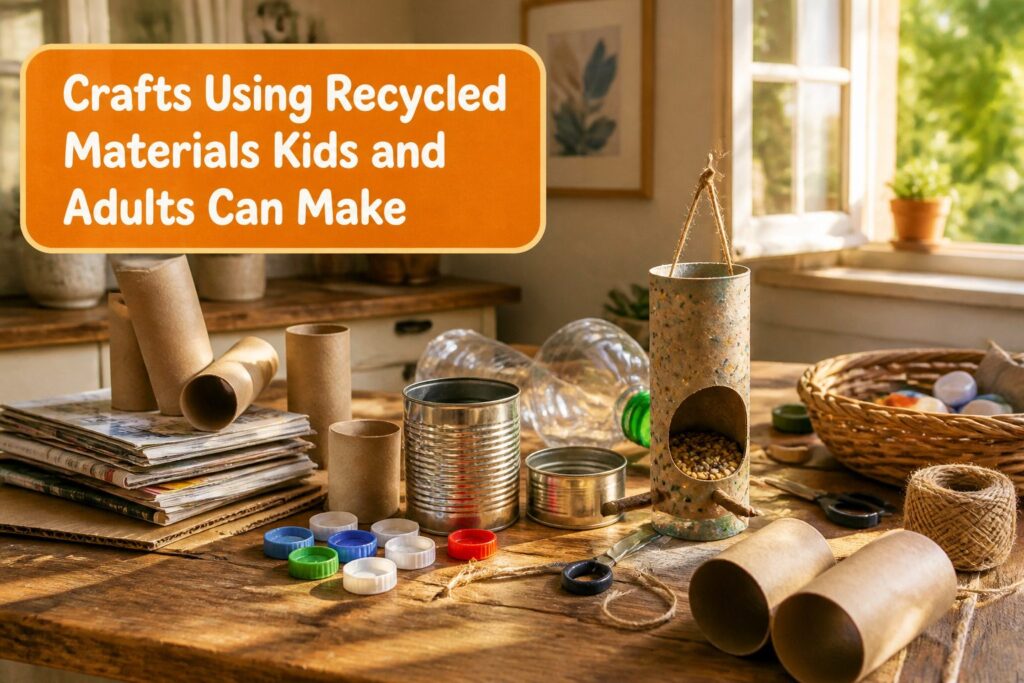
These projects run from free, 5-minute jobs like the toilet roll bird feeder to multi-layer papier-mâché pots, and the material you have on hand decides which to start with.
Plastic caps, cardboard and cans cost nothing. Cans and cut bottles leave sharp edges, so an adult should do the cutting for younger kids.
1. Bottle Cap Fish
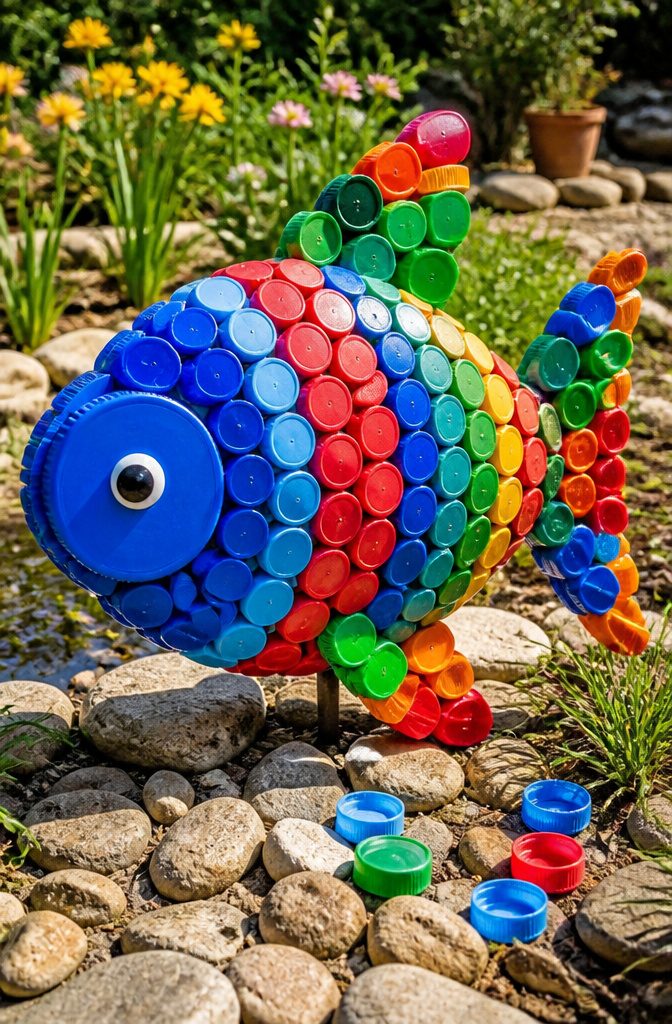
Plastic caps from water and drink bottles are the whole material list, plus paint. Collect a mix of sizes if you can, because a fish needs one big cap for the head and a cluster of smaller ones behind it.
For scales, glue caps in overlapping rows, open side up or down, and let each row step back from the one before.
Rows that taper toward a tail read as a body at a glance. Paint the caps bright colors before gluing, so you never have to reach into the gaps.
Choose acrylic craft paint, and scuff the glossy cap lightly or prime it first, since plain paint tends to bead and peel on slick plastic. Make a few fish and group them into a school, with bubbles from leftover caps.
2. Toilet Roll Bird Feeder
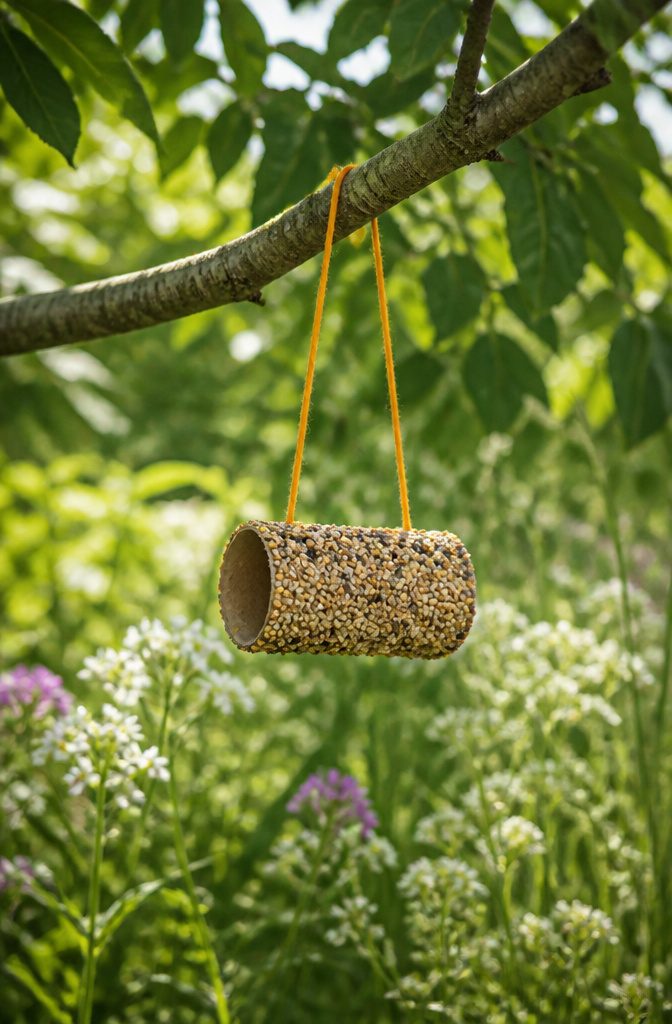
- Save an empty toilet paper roll. Cardboard is the only structure this feeder needs, so no cutting or gluing is involved.
- Spread peanut butter over the whole outside of the roll with a spoon or butter knife. A thin, even coat holds seed better than a thick glob, which slides and drips.
- Pour birdseed onto a plate and roll the coated tube through it, pressing as you go until no bare spots show.
- Slide a loop of string or yarn through the tube and tie it, or set the feeder in a branch crook.
- Hang it outside where you can watch from a window.
I’d skip washing the roll first; a dry tube grips the peanut butter better.
3. Egg Carton Dragonfly
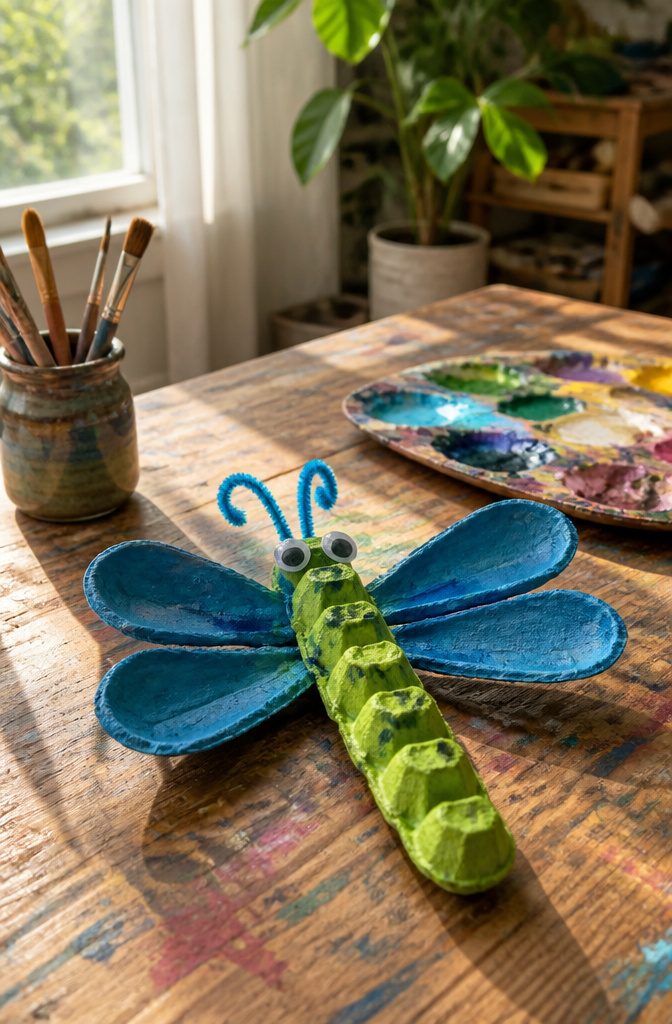
Egg cartons make good dragonflies because the cups already look like bodies and wings once you cut them apart. Paint is the only real cost, and the pipe cleaner antennas are the part that makes the whole thing look alive.
Kids can pick their own colors, which is why this one works so well for them. Let the paint dry before you attach anything, since wet paint on cardboard smears and soaks through the pipe cleaner joints.
Cut the carton with scissors first, and let an adult handle that step for younger kids, because the cardboard is thicker at the seams than it looks.
I’d choose bright, solid colors over mixed ones. A dragonfly in one bold shade reads clearly from across a room, and a pile of muddy blended paint doesn’t.
4. Tin Can Creatures
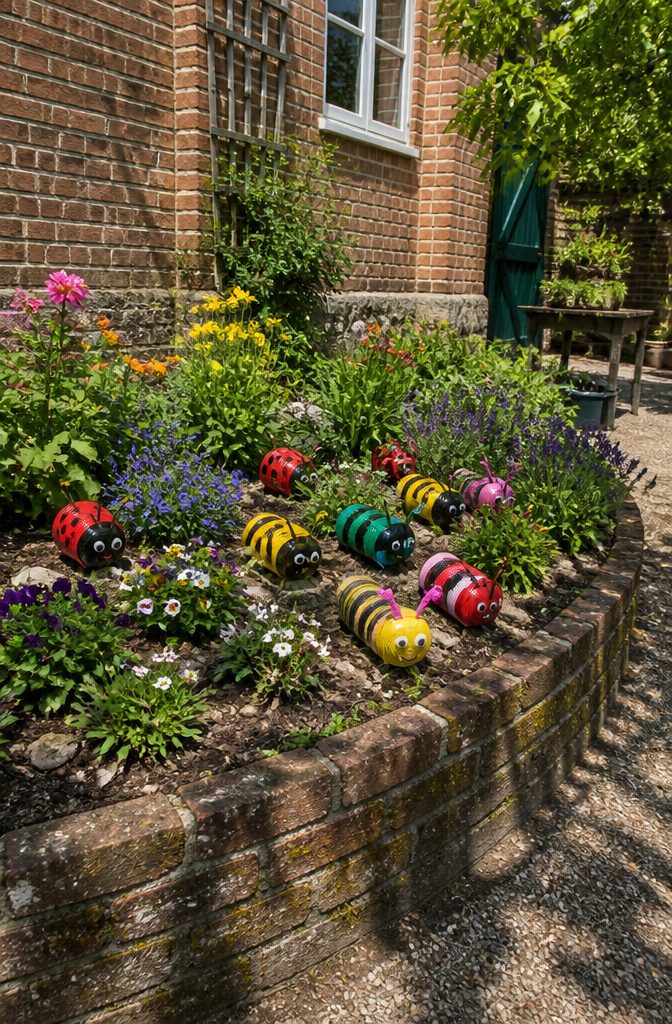
Tin cans make good garden creatures because the cylinder is already a body.
A coat of bright paint, a pair of googly eyes, and a can becomes a ladybug that sits in the flower bed. A small cluster of them looks better than one lonely can.
Cut edges are the trade-off. Choose cans that aren’t sharp, and smooth any rough rim before a child picks one up.
If a can will be handled a lot, I’d use one with its top still on and just peel off the label. Write what’s inside on the bottom so the contents don’t go to waste.
For the eyes, use strong tacky glue; googly eyes slide off on a damp can otherwise. Nuts, bolts and old keys also make decent legs and antennae.
5. Homemade Wind Chimes
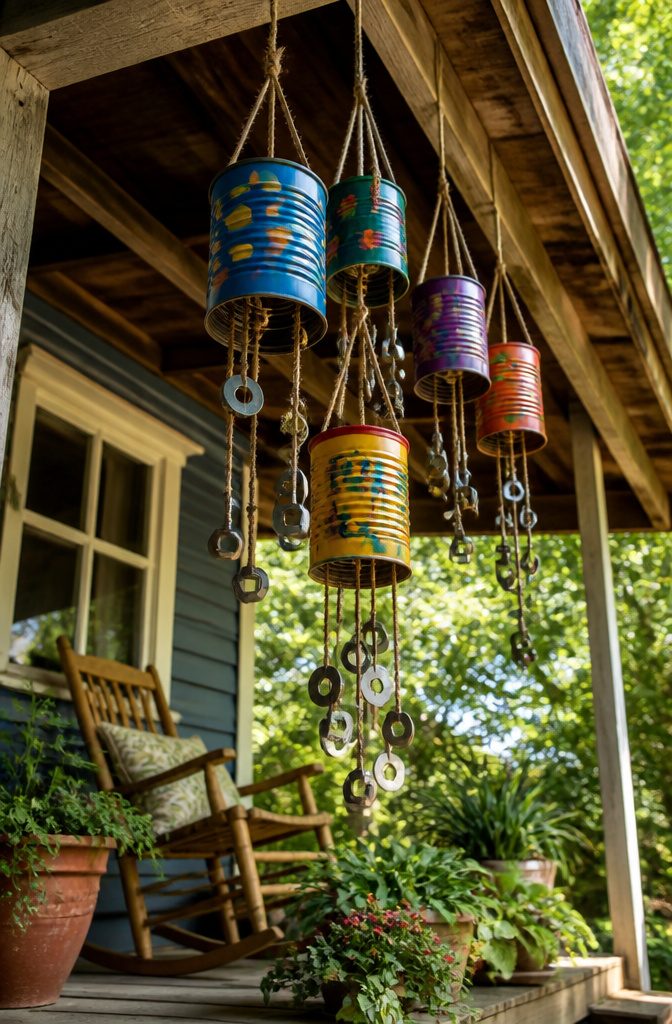
Tin cans make a loud, tinny wind chime, and the sound comes from what you hang inside them.
Paint and decorate each can first, then suspend washers or nuts from the inside so they swing against the metal when the wind moves.
Metal washers give a sharp, bright ring.
Nuts are heavier and knock with a duller clank. Mix both in the same can and you get a layered sound that changes with each gust, which beats a single repeated note.
I’d hang the cans on the porch, where a breeze reaches them but rain mostly doesn’t, since paint on bare tin tends to suffer outdoors.
Kids can handle the painting; an adult should do any hole punching, because cut can edges are sharp.
6. Hanging Planters
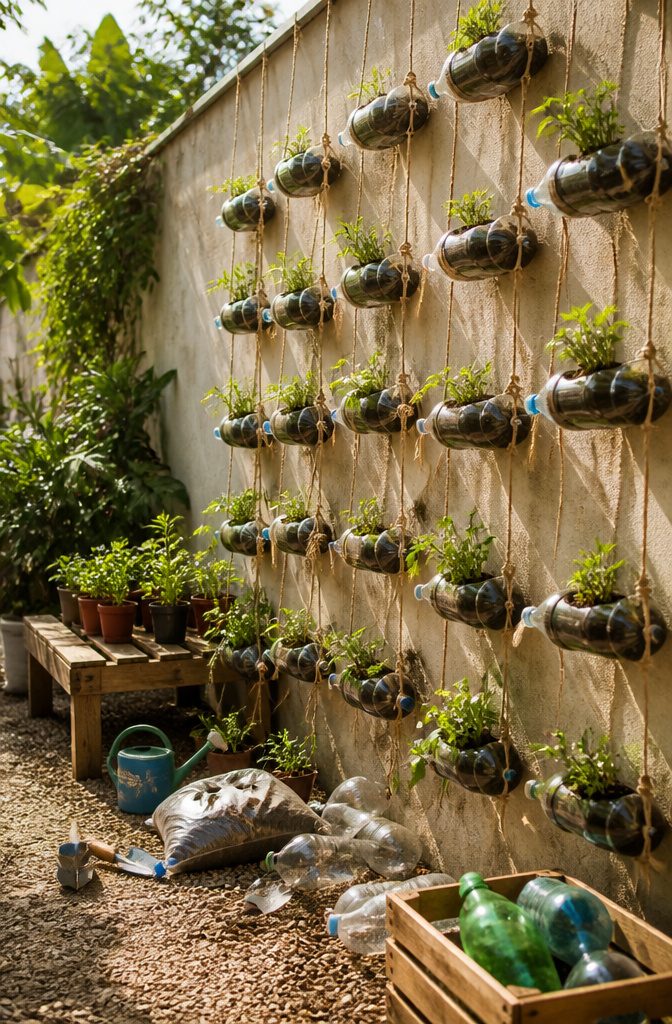
Large plastic bottles make the best hanging planters because the walls are already rigid enough to hold soil without sagging.
Gather a few and let kids do the filling, since scooping soil is the part they like most. Plant seeds directly in the soil, then water lightly so the seeds stay put.
Hanging is where I’d spend the most thought, because wet soil gets heavy.
Use a sturdy cord and knot it firmly before anything leaves the table. Hang the finished planters where kids can reach them, so the daily watching and watering stays part of the fun.
A bottle holds only a small amount of soil, so it suits seedlings and quick growers better than anything with a big root system.
7. Water Bottle Flowers
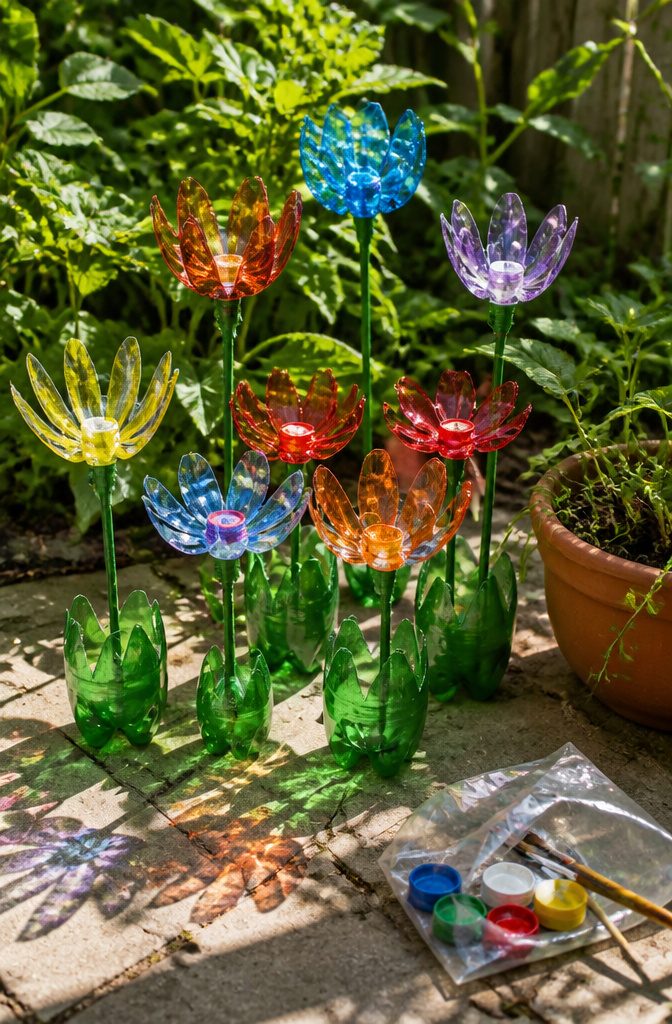
The base of a plastic water bottle already looks like a flower.
Those molded petal-shaped ridges on the bottom are the whole reason this craft works, so cut the bottle a couple of inches up from the base and you have a ready-made bloom.
Paint it on the inside rather than the outside.
Acrylic or craft paint on the outside scratches off with handling, while paint on the inside shows through the clear plastic and stays glossy. Dab glitter into the wet paint, then let it dry fully before you touch it.
Sticky fingers and sharp plastic edges are the two trade-offs. An adult should make the cut, since a snipped edge can be rough, and a quick pass with scissors to round the rim keeps small hands safe.
8. Cereal Box Monsters
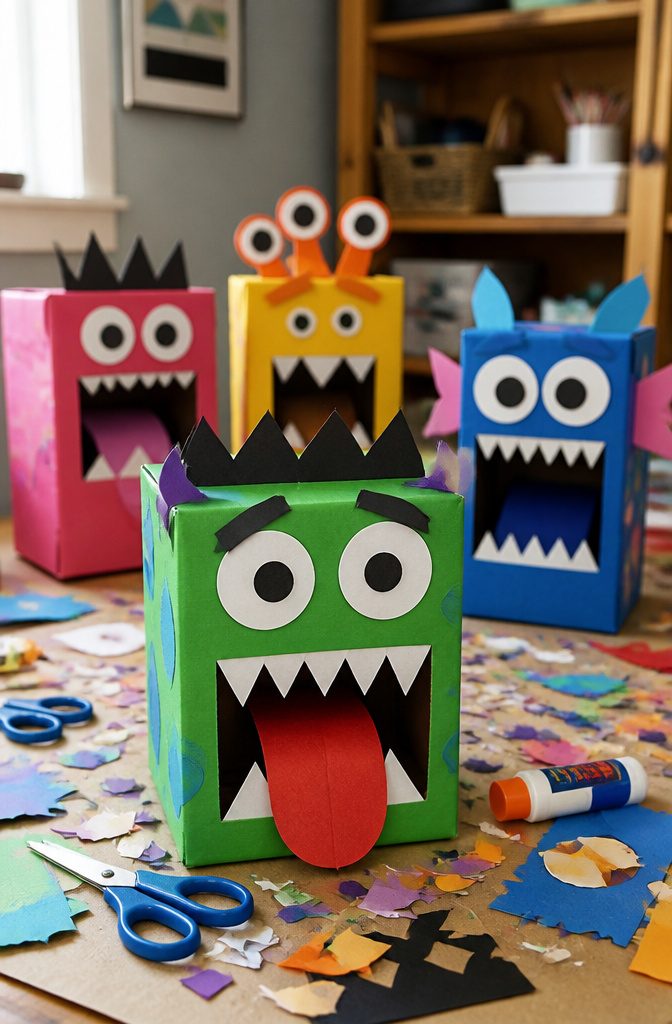
A cereal box is the right weight for a puppet: stiff enough to hold a shape, thin enough to cut with ordinary scissors.
Cut the box in half across the middle, then fold it back at the bottom crease so the two halves hinge like a mouth.
Slip your fingers into the top half and your thumb into the bottom, and the monster talks.
Glue construction paper over the printed side, because the cereal art shows through and muddies bright colors. Add teeth cut as zigzag strips, a long tongue, and horns or fuzzy edges.
Stick on googly eyes last, in mismatched sizes. Use white school glue, not a glue stick, since glue sticks let go of the waxy cardboard within a day or two.
9. Recycled CD Spring Birds
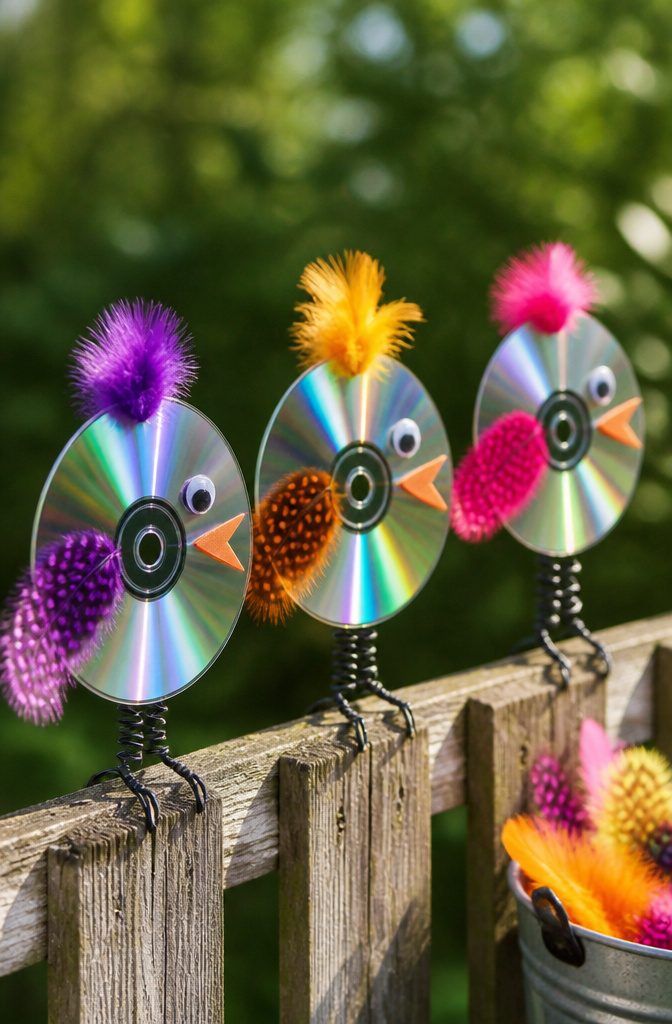
A CD already looks like a bird’s body: round, flat and shiny on one side. Old discs are the whole reason this craft costs nothing, and a stack in a drawer will make several birds in one sitting.
Glue the feathers to the back so the shiny side stays on show as the chest. Googly eyes go near the edge of the disc, and a beak cut from paper or craft foam finishes the face.
Pick the glue first, since feathers slide around on plastic and a plain school glue stick will not hold them.
Tacky craft glue or a hot glue gun sticks to the disc, but the gun needs an adult nearby when kids are making these.
Mix feather colors on one disc, or give each bird a different beak shape, and the flock looks far more varied than the materials suggest.
10. Papier-mâché Plant Pots
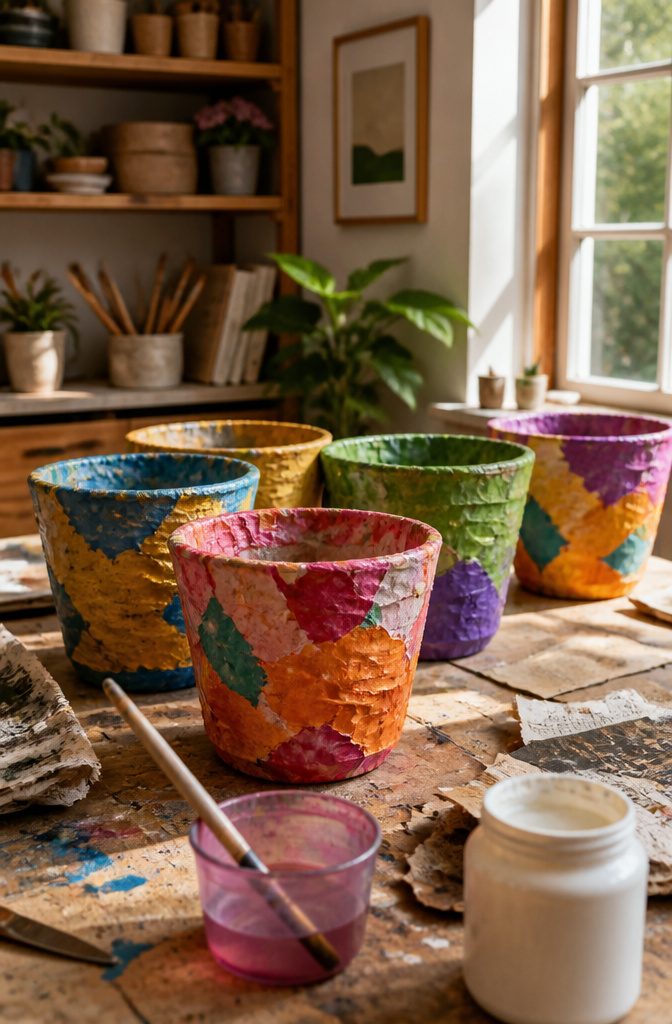
Papier-mâché pots start with a mold, and the best one is something you were about to throw out: a plastic cup, a yogurt tub, or a cut-down bottle.
Tear newspaper or scrap paper into strips rather than cutting it. Torn edges feather out and blend into the layers below, so the surface comes out smoother.
Brush on a runny mix of flour and water, or watered-down white glue, then lay strips over the form in overlapping layers.
I’d go for at least four layers for a pot that holds soil. Let each layer dry before adding the next, or the paper stays soft underneath.
Once it’s fully dry, slip the mold out and paint the pot.
Seal the inside with a coat of sealer, because paper and wet soil don’t get along. Keep the plant in its nursery pot and use this as a cover.
11. Decoupage Tin Can Wind Chime
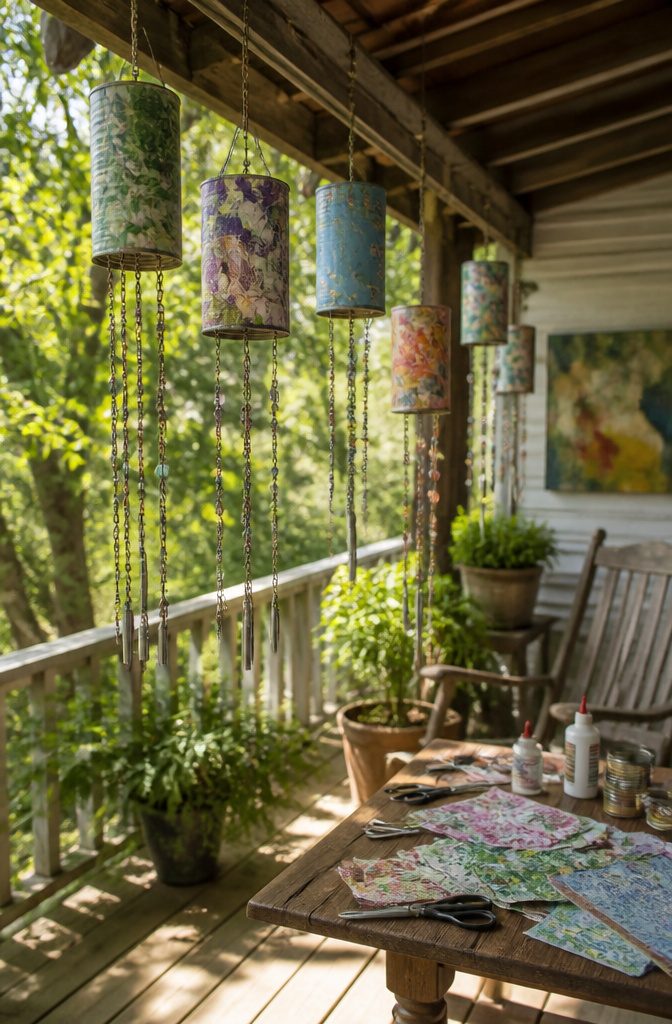
Paper changes how a tin can wind chime looks and sounds.
Torn tissue paper, napkin scraps or pages from an old book go on with a coat of decoupage glue, and the cans end up softer and more patterned than the painted set above.
The paper layer is thin, so the cans still ring, just a little duller.
Clean the cans and sand any sharp rims first.
Brush glue on a small patch, press the paper down, then brush another coat over the top. Overlap the scraps and smooth out bubbles as you go, because wrinkles trapped under the glue show up once it dries.
Rain is the weak spot. Glue softens when it gets wet, so I’d hang this one under a porch and add two or three coats of sealer over the paper.
12. Plastic Bottle Faux Succulents Terrarium
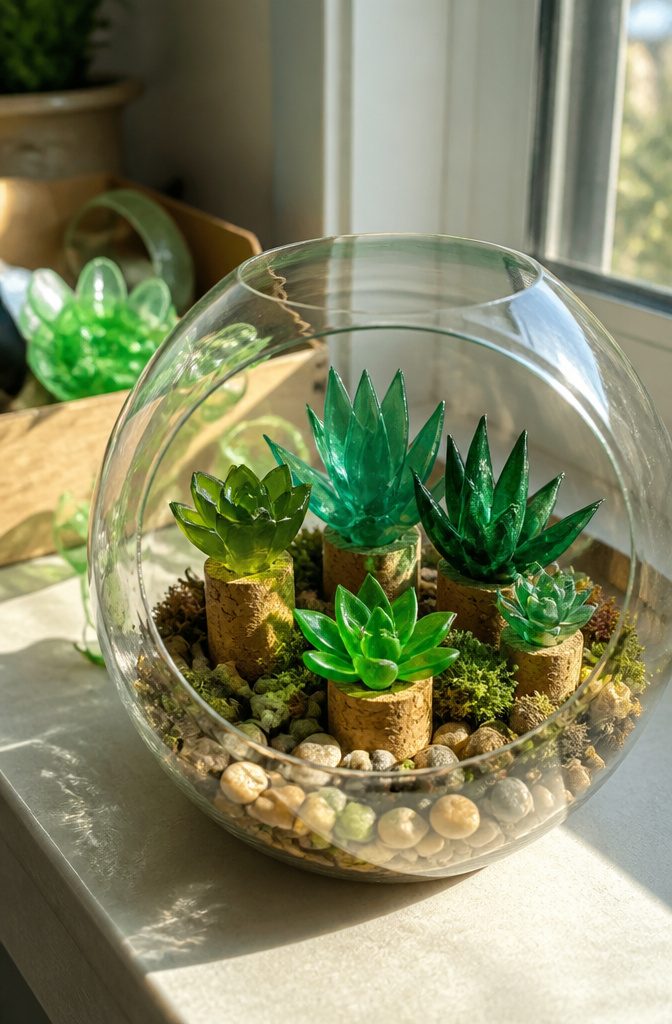
Plastic soda bottles make convincing succulents because the curved, ridged plastic already looks like a thick leaf. The bases are corks, which give each plant a pot and a bit of weight so it stands upright in the display.
For the glass-dome look, a plastic bottle can stand in as the cloche. That keeps the whole terrarium recycled, and I think it beats buying a glass dome for a project this small.
Faux plants have one real advantage over live ones: no watering, no light, no dead leaves. Cut the leaf shapes from the bottle, then set each plant into a cork base.
A cluster of different sizes looks more natural than a row of matching ones. Plastic edges can be sharp after cutting, so adults should handle that step for younger kids.
13. Egg Box Bunny Portraits
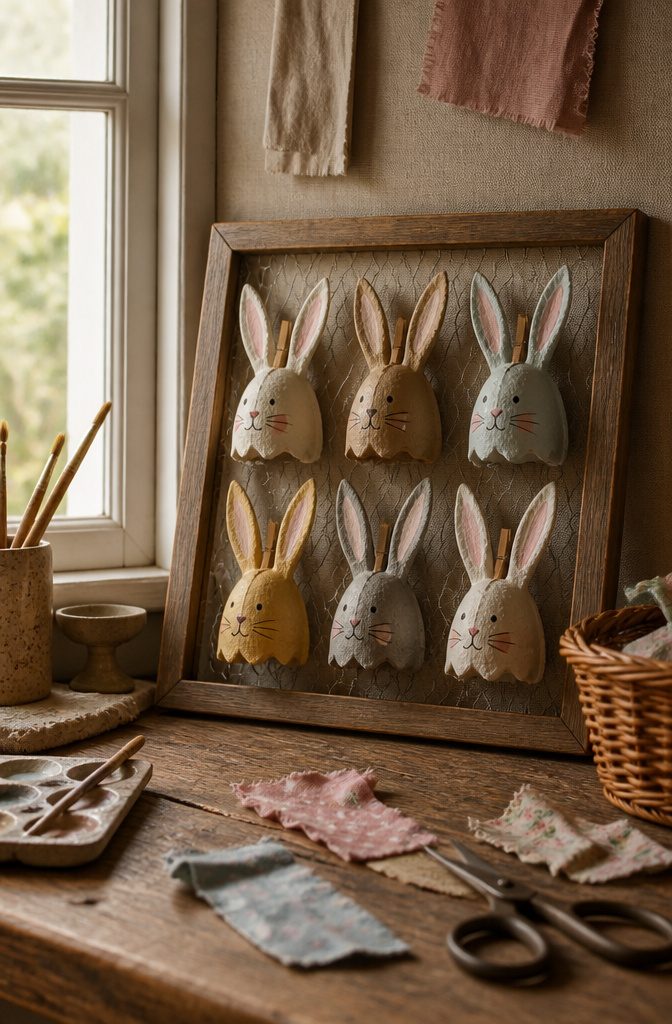
Egg carton cups make good bunny ears. Cut one cup into a long, narrow shape, and the natural curve gives each ear a soft, rounded fold that flat cardboard can’t copy.
Pair the ears with a face cut from another cup, then glue the pieces onto a backing of fabric scraps.
An old frame is what turns this from a kids’ craft into wall art.
Set the fabric inside the frame as the background, and glue the bunny on top. Pick a calm print so the cardboard texture stays the star.
I’d skip glossy paint on the carton. Matte colors keep the bunny looking like a portrait rather than a toy, and scraps in a few shades of one color hold a group of frames together on the wall.
14. Plastic Valentine Hearts
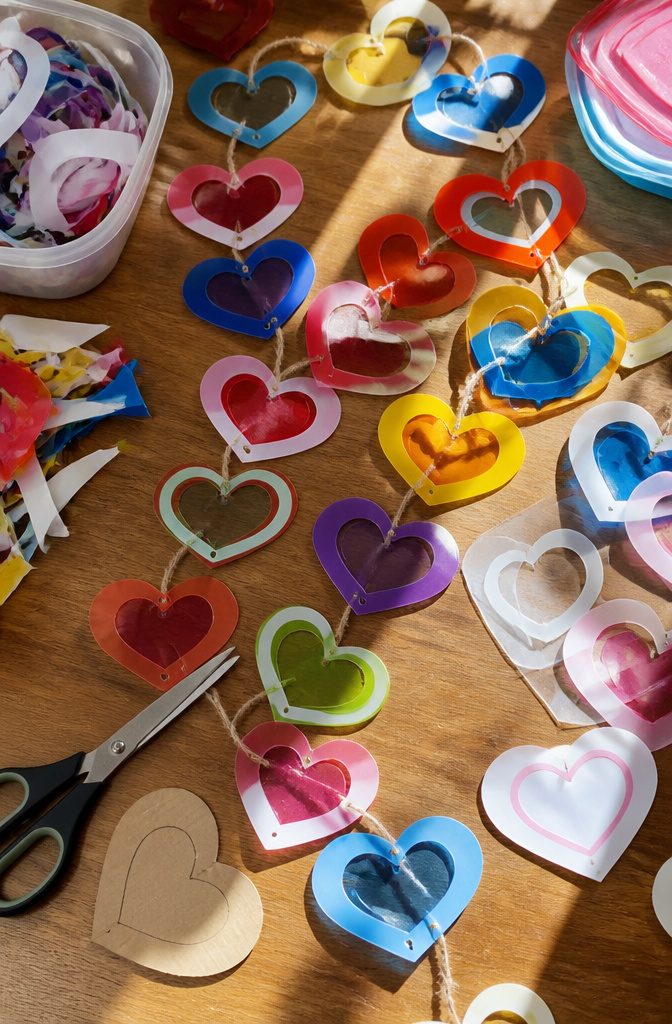
Plastic tubs make good Valentine hearts because the lid and sides are flat, stiff and already colored.
Yogurt, margarine and similar tubs can be cut into hearts with ordinary scissors once you trace a cardboard template onto the plastic with a marker.
Two uses win here. Punch a hole near the top of each heart and thread string through it, and you have a garland for a mantel or window.
Make the hearts smaller and write a name on each, and they become gift tags. I favor the garland, since one tub gives you several hearts and the plastic holds its shape without any backing.
Cut smooth curves at the top lobes; the plastic shows every wobble.
15. Halloween Lights With Old Bottles
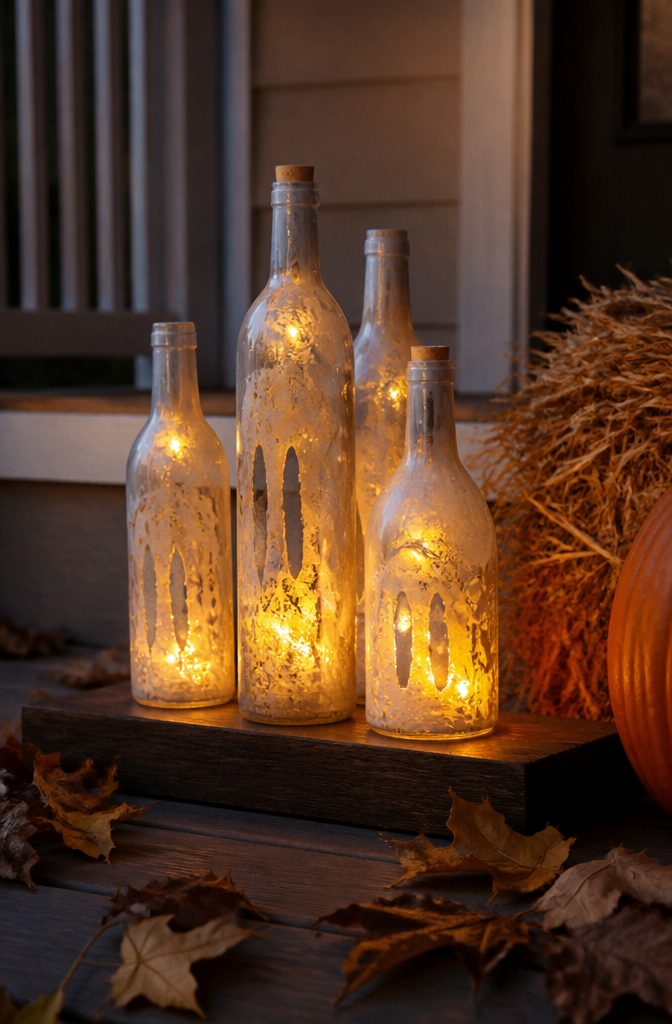
Glass bottles make the best Halloween lights because they hold paint, hide a string of lights, and glow a little like a jar of potion.
Rinse the bottle, peel off the label, and let it dry fully inside before anything goes in. Moisture near a plug-in cord is a risk I wouldn’t take.
For kids, skip the glass and use a clear plastic bottle with a face drawn on in black permanent marker. Adults can brush on thinned acrylic paint inside a wine bottle for a ghostly frosted look.
Pick battery-powered fairy lights, never a plug-in string, and feed the wire through the neck. They stay cool, and a small switch pack tucks behind the bottle.
Materials Worth Saving
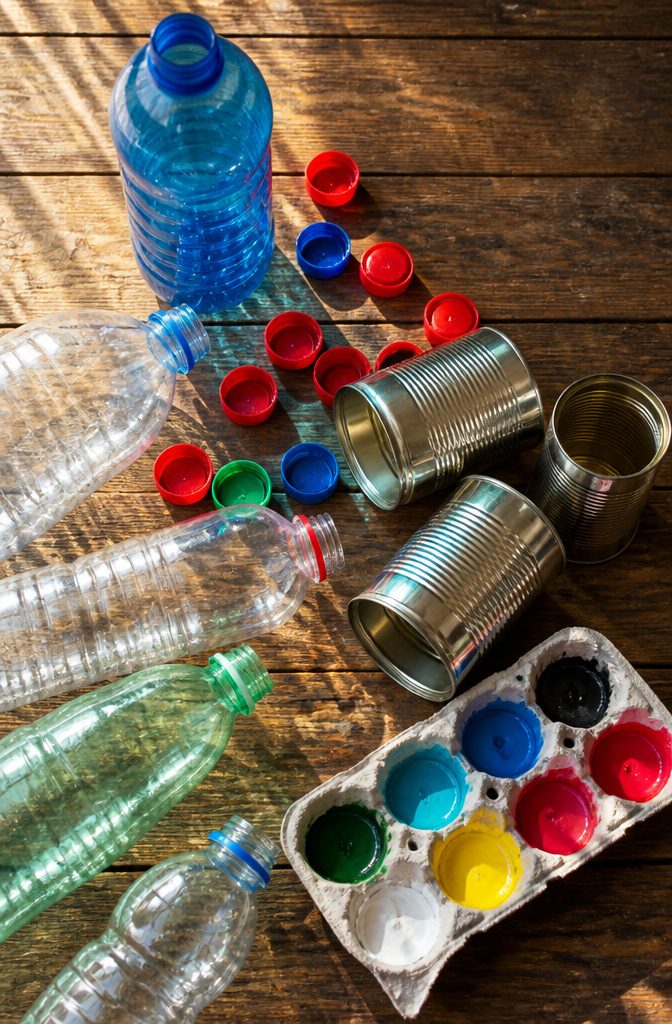
Your recycling bin already holds most of a craft closet. These are the items I’d save first:
- Plastic bottles and caps: Soda and water bottles, plus the caps, cover painted fish, planters and more. Caps are the easy win, since they’re free and nobody misses them.
- Tin cans: Soup and vegetable cans, washed and dried, hold silverware, pencils or paint. Soda cans cut with scissors.
- Egg cartons: Cardboard cups take paint well and cut easily.
- Cardboard: Toilet paper tubes, shoe boxes, cereal boxes and milk cartons are the workhorses.
- Odds and ends: Jars, corks and jar lids, plus wrapping paper and tissue.
Of the 40 million tons of plastic waste the US produced in 2021, only about 2 million tons was recycled. Every bottle you reuse stays out of that pile, and it costs you $0 in supplies.
Painting, Decoupage and Papier-mâché
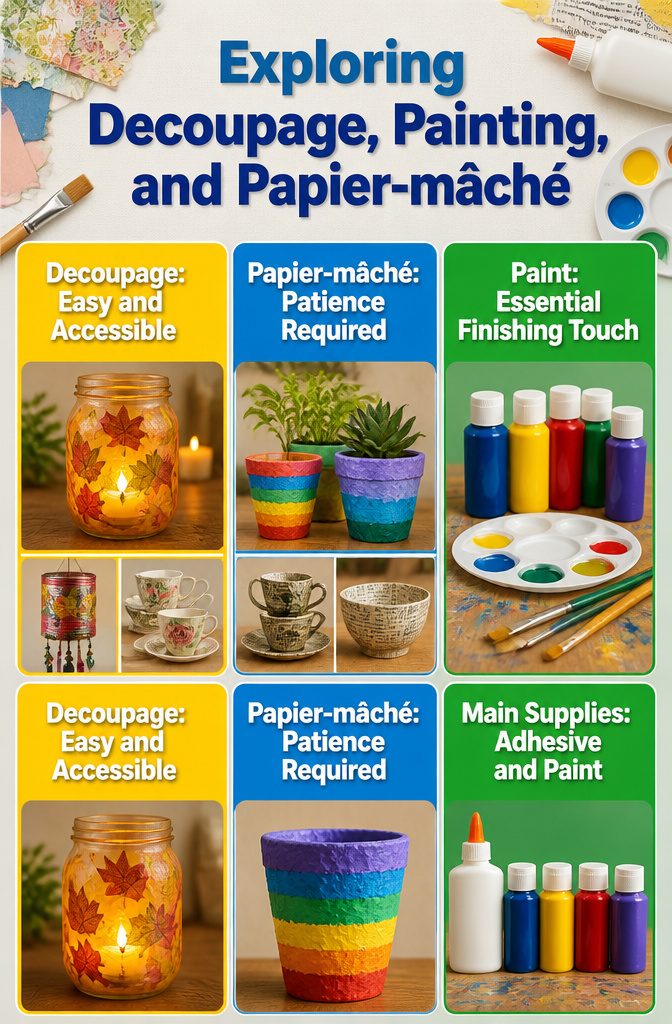
Decoupage is the easiest of the three. Glue paper to a clean surface, seal it, and the object takes on a new look.
A cleaned pasta jar with real leaves decoupaged on the outside glows when a candle sits inside, and I’d start there. The Decoupage Tin Can Wind Chime and the paper teacups use the same move.
Papier-mâché takes more patience but covers more ground.
Newspaper, scraps and glue build up over a bottle or food container, which is how the plant pots get their rainbow of colors. Old newspaper also makes the teacups and a matching bowl.
Paint is the finisher. Adhesive and paint are the only supplies you really have to own, and the rest comes out of the bin.
Teaching Kids About Recycling
Of the 40 million tons of plastic waste the United States generated in 2021, only five to six percent, about 2 million tons, was actually recycled.
That number is the best way I know to explain why a craft session matters to a kid: the bin is not the end of the story, and most of what goes in never comes back as anything.
Kids learn reuse by handling the material.
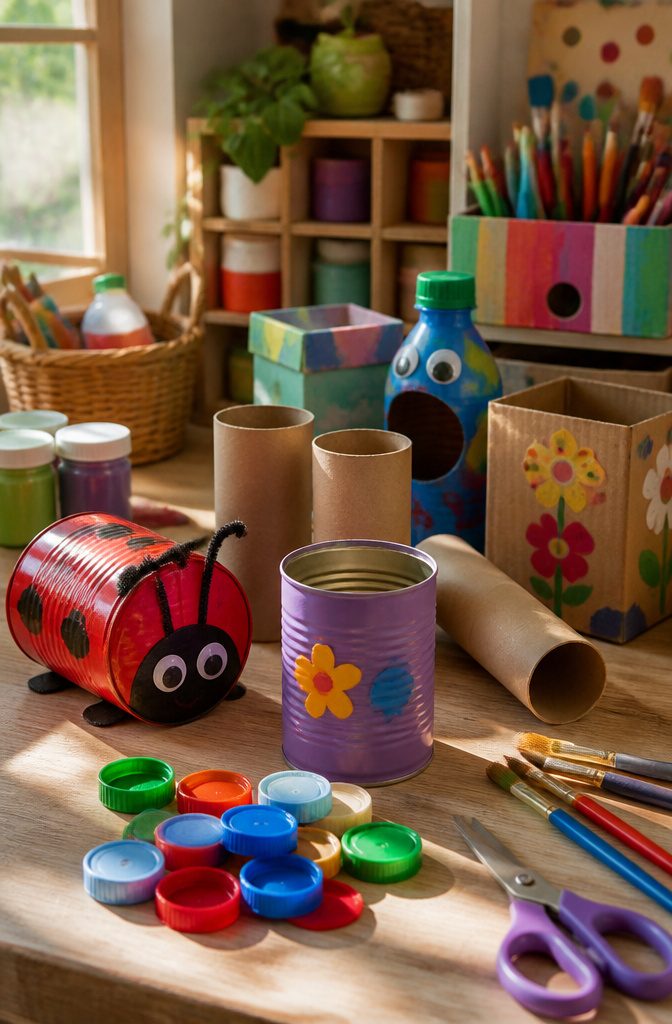
A toilet paper roll or a bottle cap stops being trash once it becomes a bird feeder or a fish, and a child who has painted a tin can into a ladybug will look at the next can differently.
Talk while you glue. Ask what else in the bin could become something, and let them pick the next one.
Frequently Asked Questions
What can I make with crafts using recycled materials?
Plastic bottles, caps, tin cans, egg cartons, cardboard tubes, cereal boxes, old CDs and glass jars all work. Most of the materials are already in your recycling bin.
How do you make a bird feeder from a toilet paper roll?
Spread a thin, even coat of peanut butter over the outside of an empty roll, then roll it in birdseed until no bare spots show.
Thread string or yarn through the tube to hang it, or set it in a branch crook. Skip washing the roll first, since a dry tube holds the peanut butter better.
What are some easy crafts for kids using recycled materials?
Bottle cap fish, egg carton dragonflies, tin can ladybugs and cereal box monster puppets are good starting points.
Kids can pick colors, paint and glue on the eyes. Adults should handle the cutting, hole punching and hot glue, since cut cardboard seams, can rims and plastic edges can be sharp.





