
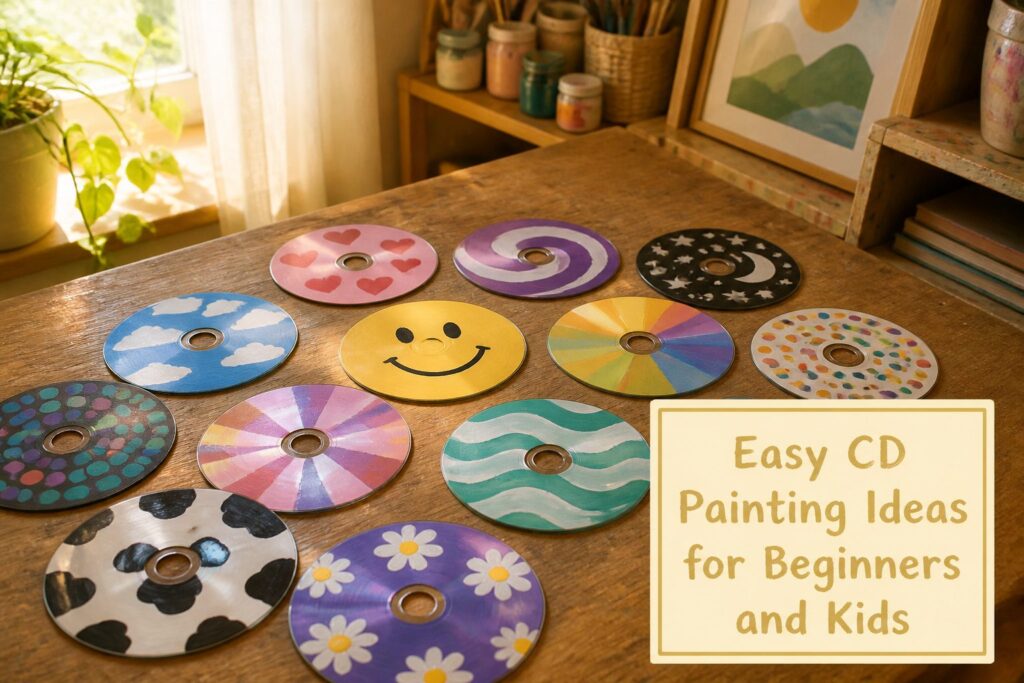
Every design here is one or two coats of acrylic on a shiny disc, and the ones that suit you depend on how steady your hand is.
Dots, waves and cow spots forgive wobble; stencils and fine lines like the 5 staff lines on Music Notes don’t. Wet paint turns muddy on a slick CD, so let each layer dry.
1. Monarch Butterfly Design
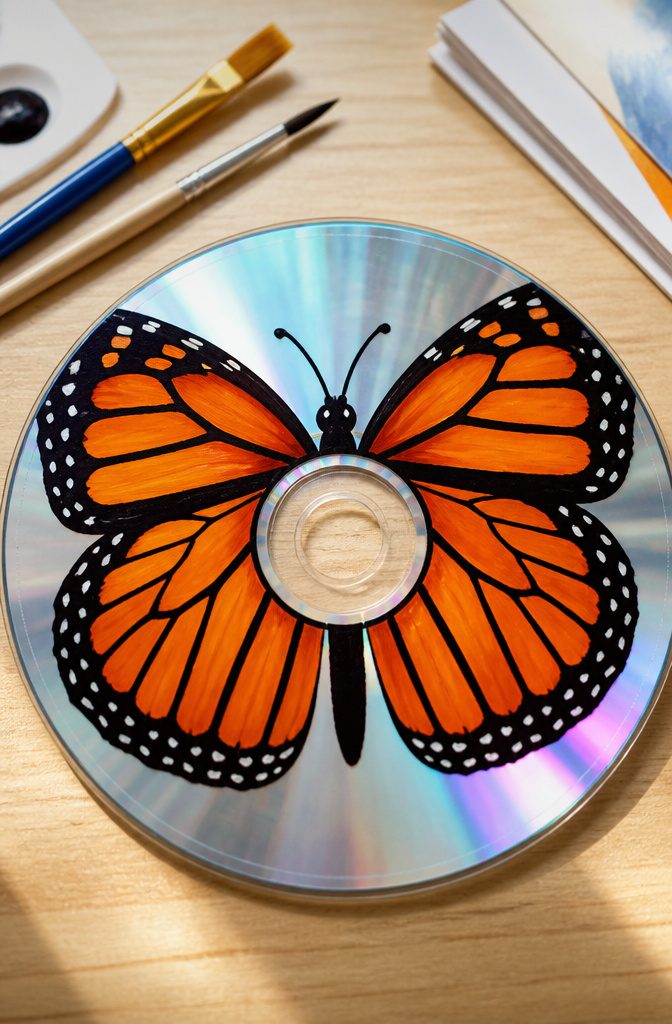
Orange and black wings are the whole design here, and a printable stencil does the hard part for you.
Save the free butterfly stencil to your device, print it on any standard printer, and cut it to the shape of your CD.
Slide it underneath a clear CD and paint directly over it, so the printed wing outline sits right under your brush. There’s no transfer step, which is why I’d pick this over sketching freehand.
Fill the wings with orange, then add the black veins and edge border once the orange is dry.
Black over wet orange turns muddy, so wait. A clear CD works better than a silver one for this, since the stencil has to show through from below.
2. Bubbles on Black Background
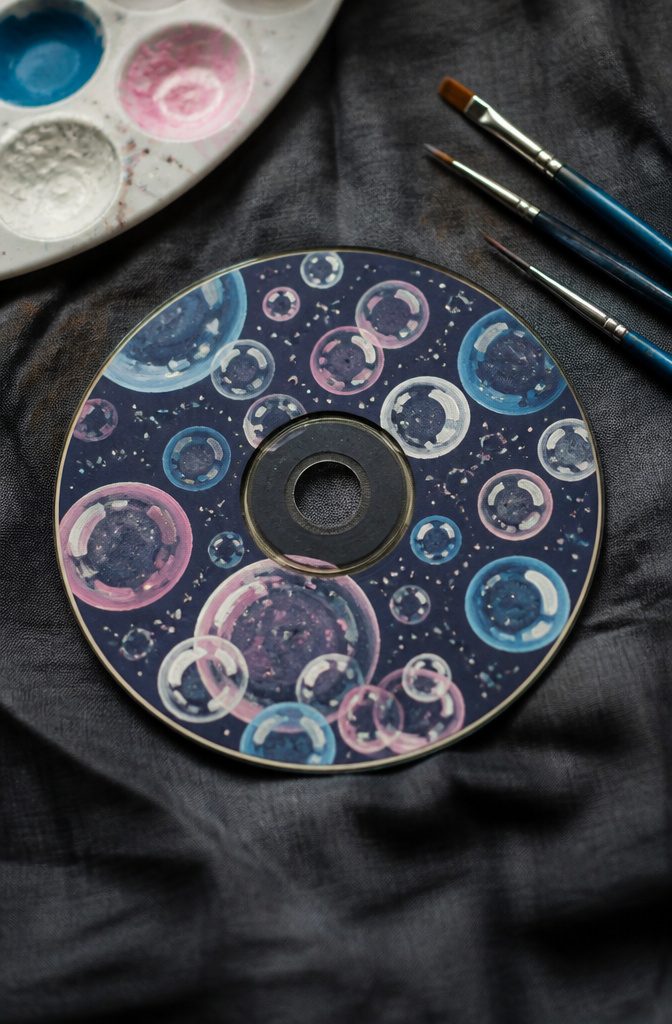
Black acrylic across the whole disc gives the colors a dark field to sit against, and that is why pale paint looks so bright on it.
White, light blue and pink read as glowing against black, where on the bare silver surface they would look chalky.
Paint the base first and let it dry fully; two thin coats cover better than one thick one, which tends to streak on a slick surface.
For the bubbles, dip the end of a paintbrush handle or a cotton swab in white or pale paint and press out rings of different sizes.
Fill a few with a tint of blue or pink, then add a small white curve inside each one as a highlight in the upper corner.
Overlap some rings and leave others alone, so the bubbles look like they are floating at different depths.
3. Matisse Abstract Flowers
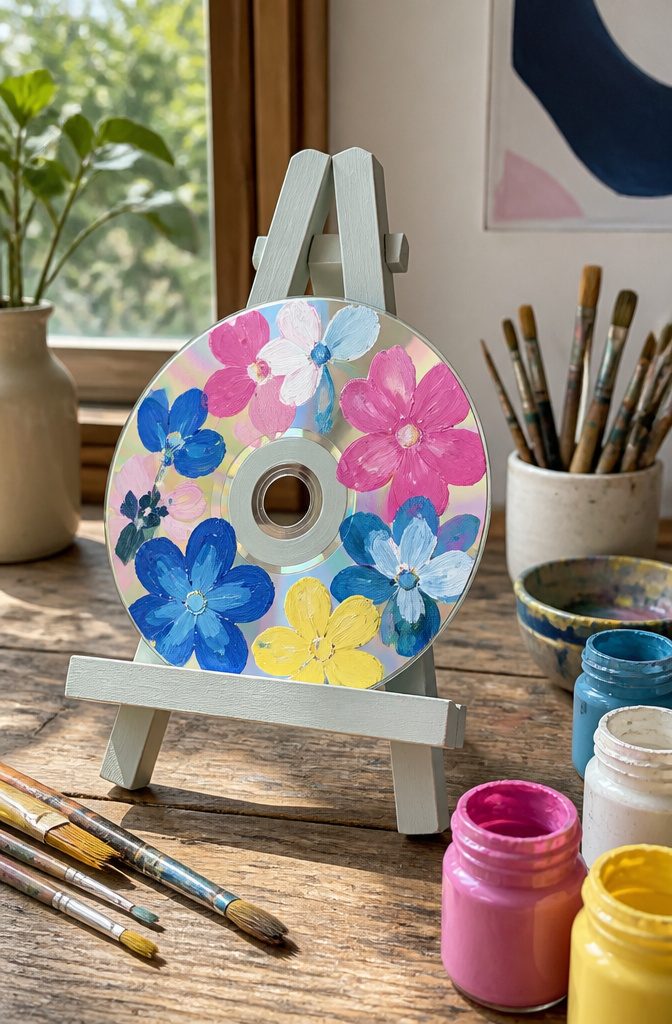
Matisse flowers suit a CD because nothing has to be exact. Start with a circle of blue paint near the middle, then brush loose, uneven petals around it.
The first coat looks thin and see-through, and that’s fine. Add a pink flower beside it, then keep going in whatever colors you like until the disc is full.
Crowd the shapes.
Overlapping petals and odd proportions are what give the cut-paper look, so I’d skip any pencil guide. Let the first coat dry, then paint a second one to turn the color opaque and get rid of streaks.
Two coats were enough for me to call it done on a clear disc. A third coat makes the colors punchier, and it’s worth the extra wait if you’re using light shades.
4. Milky Way Galaxy Night Sky
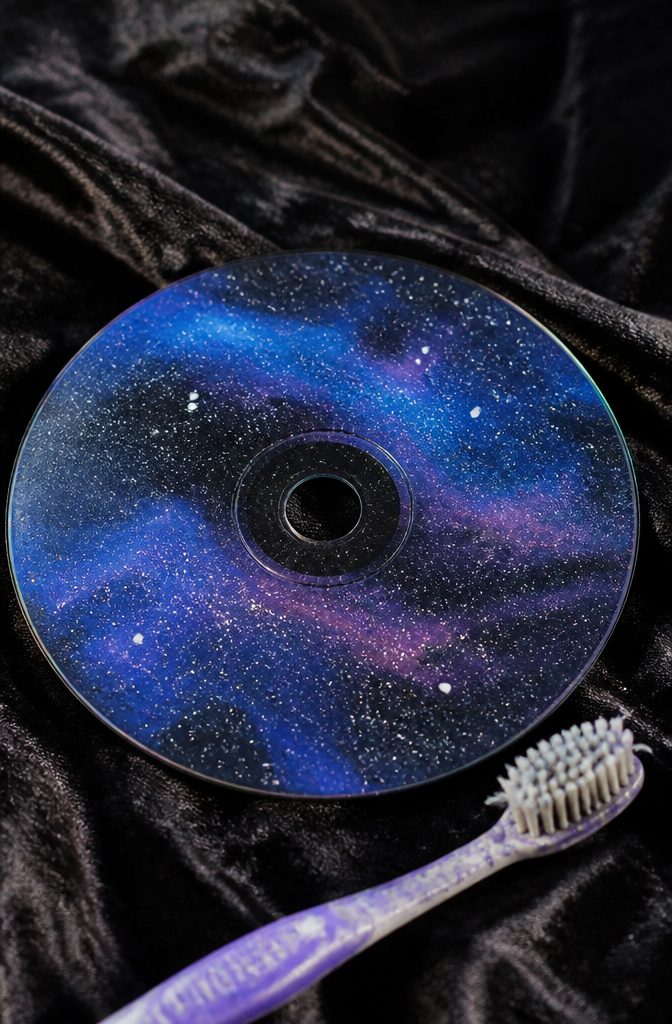
A CD is a slick, nonporous surface, so paint sits on top instead of soaking in, and that is exactly why a galaxy blend works here.
Dab dark blue and purple side by side while both are still wet, then tap the seam with a sponge or dry brush until the colors melt into each other.
Keep the touch light; heavy strokes drag the paint and leave bare streaks.
Let that layer dry fully before adding stars, or the white will bleed and turn muddy gray.
Dot the white on with a toothpick or the handle end of a brush, and flick a few tiny specks with an old toothbrush for the faint distant stars.
I’d paint the dark colors thickest near the edges and leave the middle lighter for a glow.
5. Easy Pink Donut Design
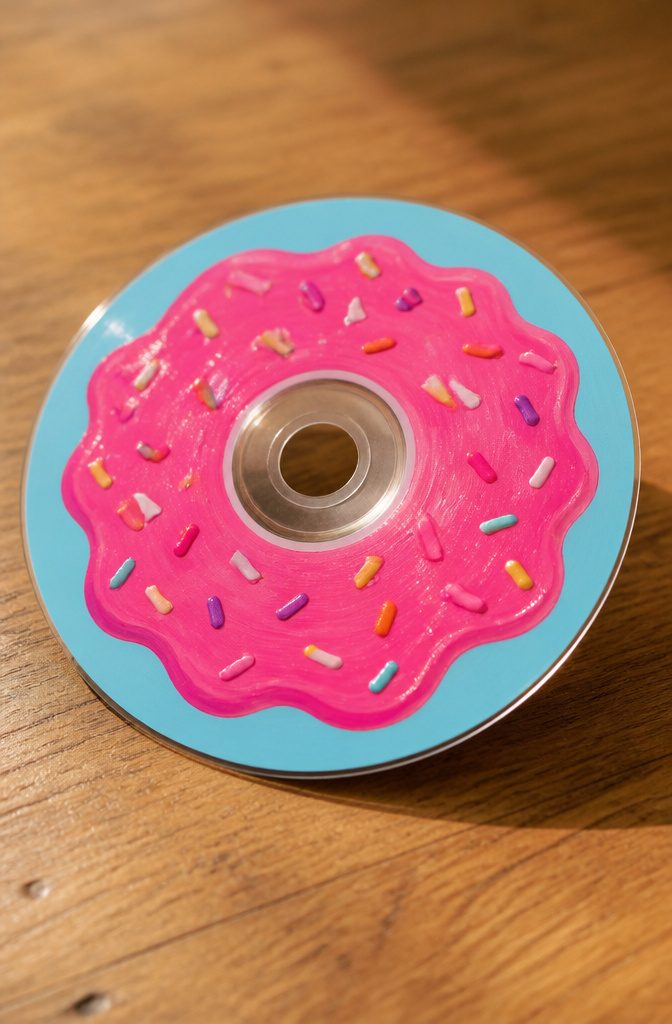
The CD hole does the hardest part of this design for you, since it is already a donut hole.
Paint the frosting as a wavy, rounded blob that circles the hole and stops short of the outer edge, so a ring of bare disc shows around it as the dough.
Pink frosting needs two coats on a shiny surface, and the second goes on only after the first is dry. Keep the edge wavy rather than neat; it reads as icing.
Once the pink is dry, dot on sprinkles in white, yellow, blue and green, and tilt each short dash in a different direction. Dry the frosting fully before you add sprinkles, or the colors drag into the pink.
Chocolate glaze with rainbow sprinkles or strawberry icing with a white drizzle works the same way. Pink is the easiest first pick.
6. Q-tip Lavender Flowers
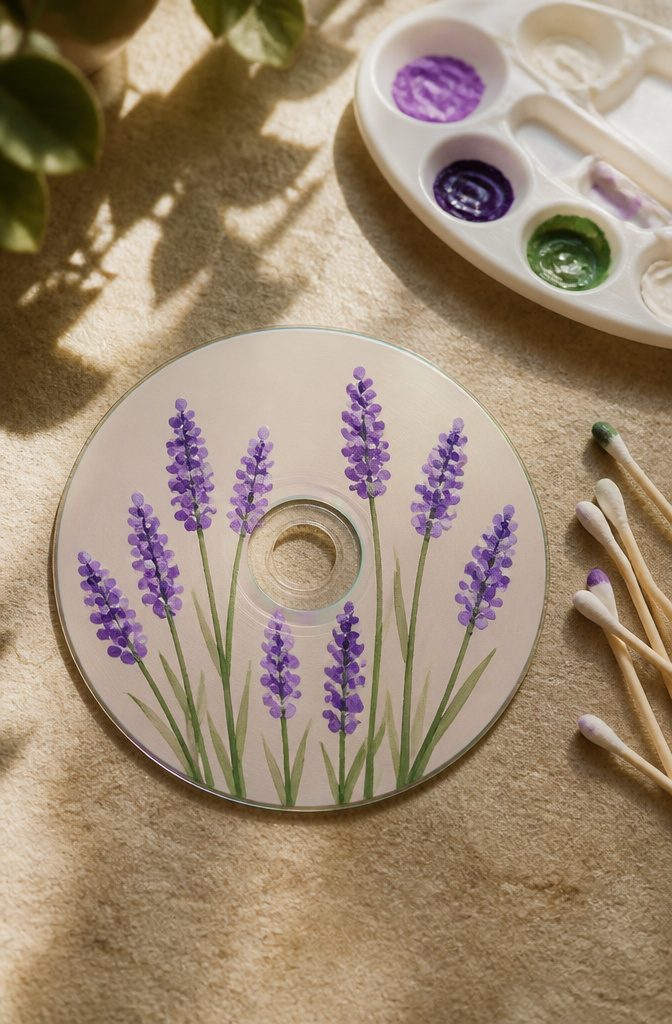
Cotton swabs make better lavender than a small brush does, because the soft tip leaves a rounded, slightly fuzzy dab that looks like a tiny bud.
Paint a thin green stem first, curving it up from the bottom of the disc. Then press a swab into purple paint and dab small blooms along the stem, working from the top down and stacking them close together.
Use one swab per color. A swab loaded with purple and then dipped in white turns muddy fast, and swabs cost almost nothing.
Let the green stems dry before you dab, or the purple drags the stem color into the blooms. A black or white disc both work, though I’d pick black because the purple stands out harder against it.
7. Blue Ocean Wave Design
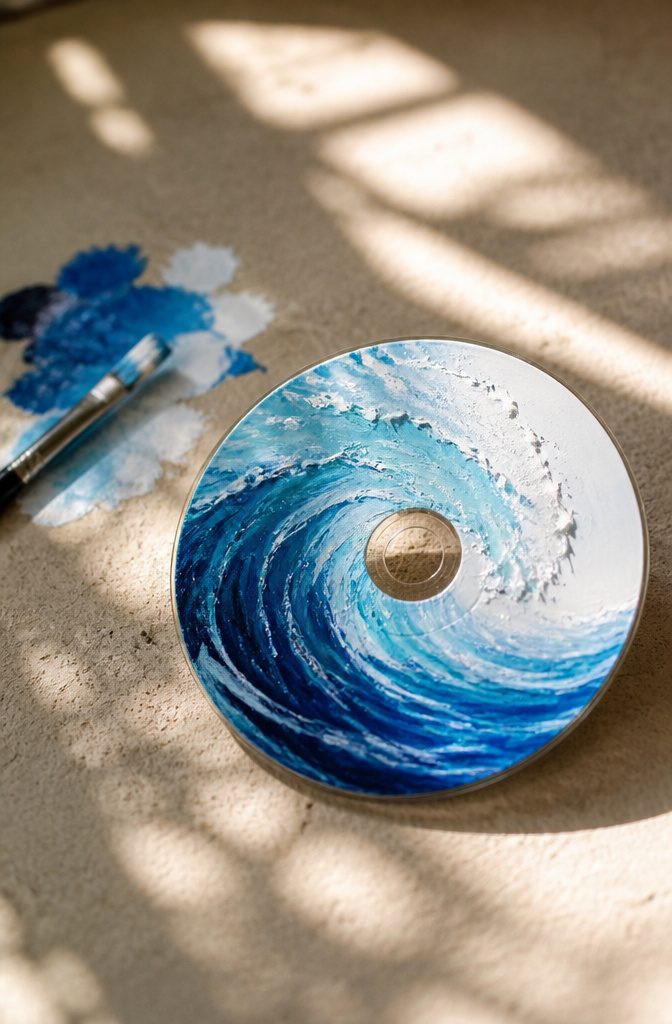
Deep blues against frothy whites give this design its depth, so the contrast is the whole job.
Start with the darkest blue along the bottom edge of the disc, then work upward in lighter blues so the water seems to rise toward the center hole.
Let each band dry before you add the next, or the colors will turn muddy where they meet.
For the foam, drag a small brush loaded with white along the top of each blue band in a curling, hooked stroke, like a letter C leaning on its side.
Repeat the curl a few times at different heights so the wave seems to roll.
I’d keep the curls irregular. Even, evenly spaced curls read as a pattern, not as water, and a little white dabbed below each crest adds the spray.
8. Kawaii Cute Characters
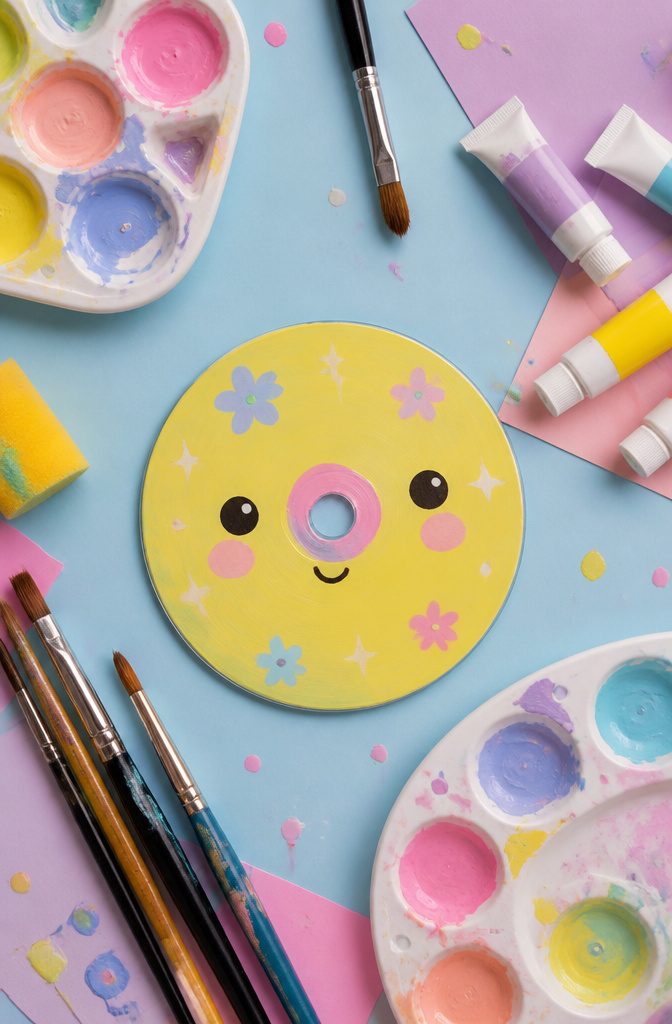
A kawaii face is about the easiest thing you can put on a CD: a round shape, two dot eyes set wide and low, and a tiny curved smile.
The disc is already a circle, so the hole in the middle can be a nose, a mouth, or the top of a bear’s head.
Paint the whole face in one pastel (mint, pale pink, butter yellow) and let it dry before adding any features.
For the eyes, I’d use the back end of a paintbrush or a pencil eraser dipped in black paint. It gives you even dots with no steady hand required.
Keep the eyes low and far apart, since that spacing is what reads as cute. Add pink cheeks with a fingertip, and finish the smile with a fine brush or paint pen.
9. Yin Yang
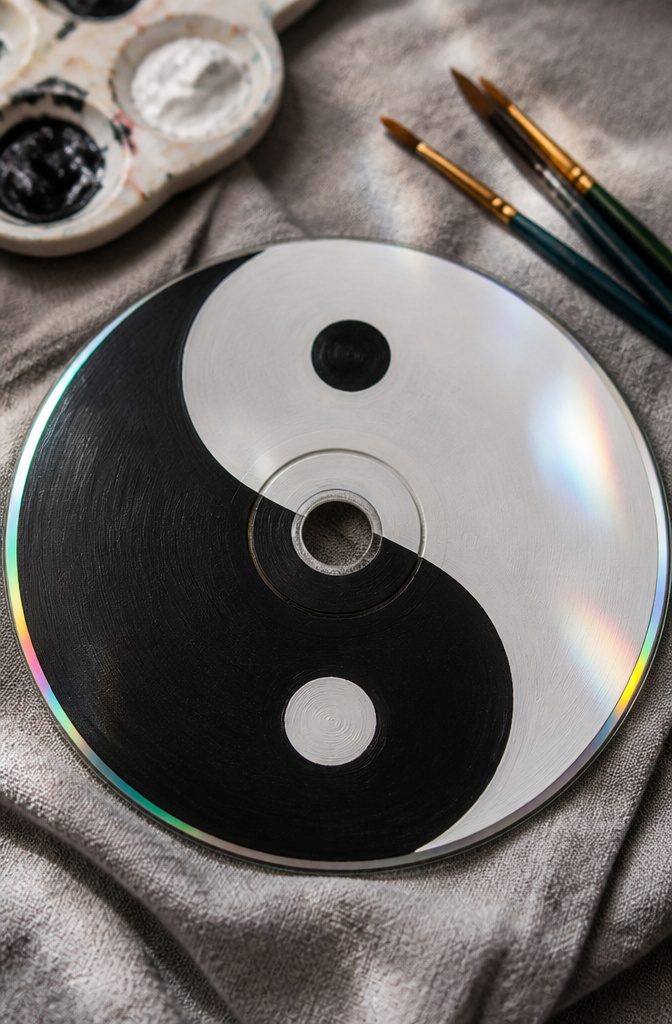
The center hole is the detail that makes this design work on a CD: it can stand in for one of the two dots, so you only have to paint the other.
Split the disc into two teardrop halves with a curved S line running through the middle, then fill one half black and one half white.
Put a small dot of the opposite color in each half’s round end, and let the empty hole serve as the dot in whichever half it falls.
Black over white is the better order on a shiny disc. Paint the white half first, let it dry, then trace the S curve in black so the edge stays crisp.
White acrylic tends to look streaky on a CD, so plan on a second coat. The symbol stands for balance and harmony, which makes it a simple pick for a gift.
10. Palm Trees
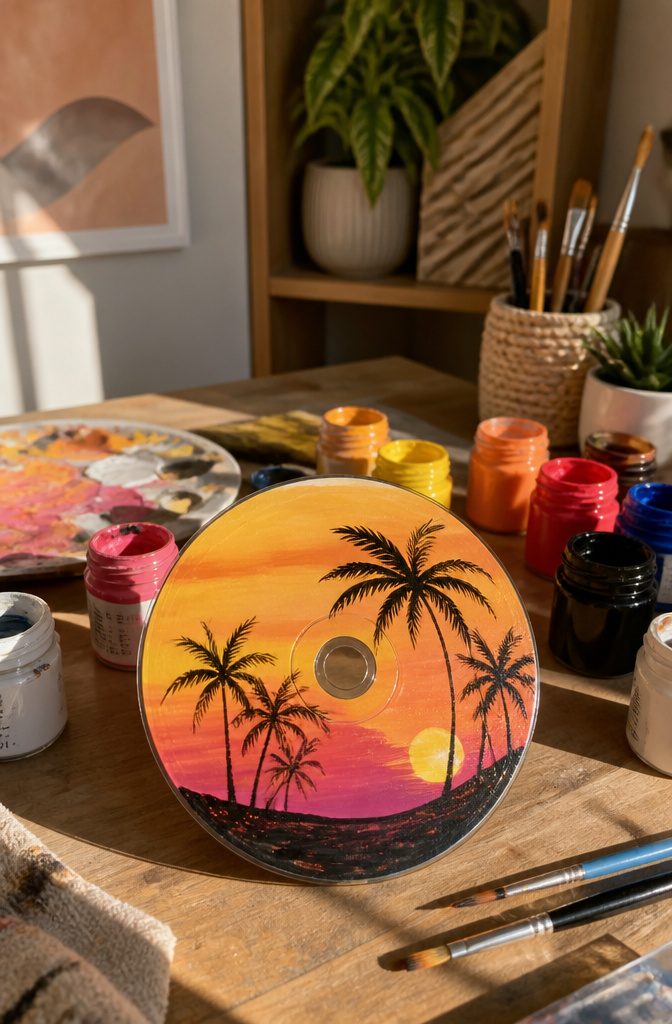
Paint the sunset first and the palms last.
Start with a wash of yellow near the bottom edge of the disc, blend orange above it, then pink or purple toward the center hole, and let the whole thing dry before you touch it again.
Wet colors blur together on a glossy CD, which is exactly what you want for a sky, so I’d use a sponge or a dry-ish brush and skip fine detail here.
For the trees, use black paint and a small round brush. Draw one slightly curved trunk, then flick 5–6 thin strokes outward from the top for fronds, each tapering to a point.
Wait until the sky is fully dry, or the black drags into the orange and turns muddy. A paint pen gives sharper fronds than a brush, and I’d pick one for kids.
11. Music Notes

A CD already looks like a record, so music notes on it read at once as a theme.
Paint the whole disc in one bright color first, such as yellow, turquoise or hot pink, and let it dry fully before the black goes on. Black over a bright base is the combination that reads from across a room.
For the staff, five thin parallel lines drawn straight across the disc look cleaner than curved ones. A fine liner brush or a paint pen gives steadier lines than a round brush.
Then add a few notes: a filled oval, a stem and a flag. Keep the notes to three or four so the lines still show.
The center hole can serve as a note head if you ring it with black. I’d skip glitter here; it blurs the thin lines.
12. Abstract Art
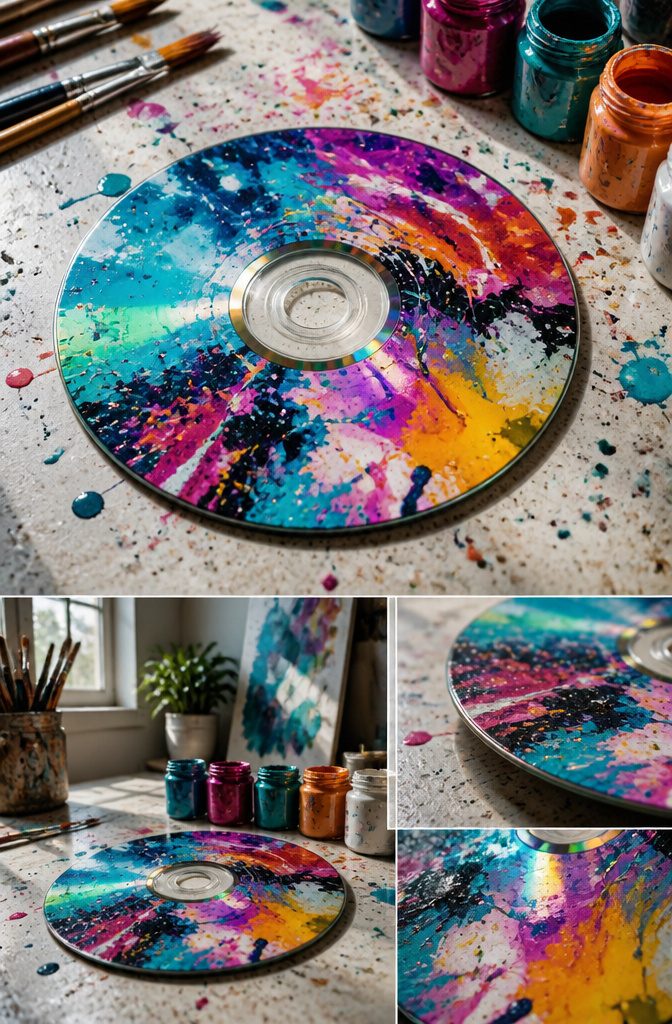
Abstract painting is the one CD idea with no way to get it wrong, which is why I’d hand it to the youngest crafter in the house first.
Squeeze or brush a few colors onto the shiny side, tilt the disc so the paint runs, and swirl a toothpick or the brush handle through the wet spots. Drips look deliberate on a round surface, so let them happen.
Leftover paint works well here, even the half-dried blobs in the bottom of a craft pot.
Keep the colors few, because three or four shades blend into something bright, while six or seven turn muddy where they meet. Let each layer set before adding a color on top, or the swirls will smear into brown.
13. Simple Waves
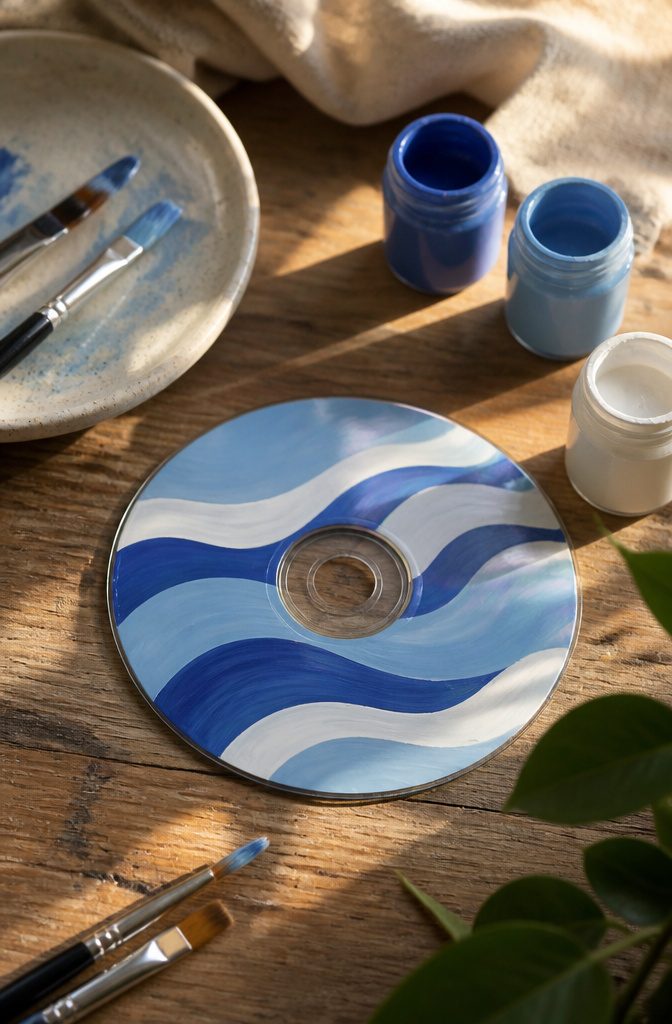
Simple Waves is the fastest design on this list because it is only lines.
Pick one or two paint colors, load a thin brush, and pull a wavy line across the disc in one steady stroke, like a snake crossing a road.
Repeat it in rows until the surface is full. Blue and white look like water, but black on a metallic silver disc is just as striking.
Skip the sketching, since a pencil line won’t show on a shiny surface anyway. Instead, let each row dry before painting the one beside it, or the colors drag together and the waves turn muddy.
Rows that don’t match perfectly look better than rows that do. Kids can do this one alone, and a whole disc takes only a few minutes.
14. Clouds
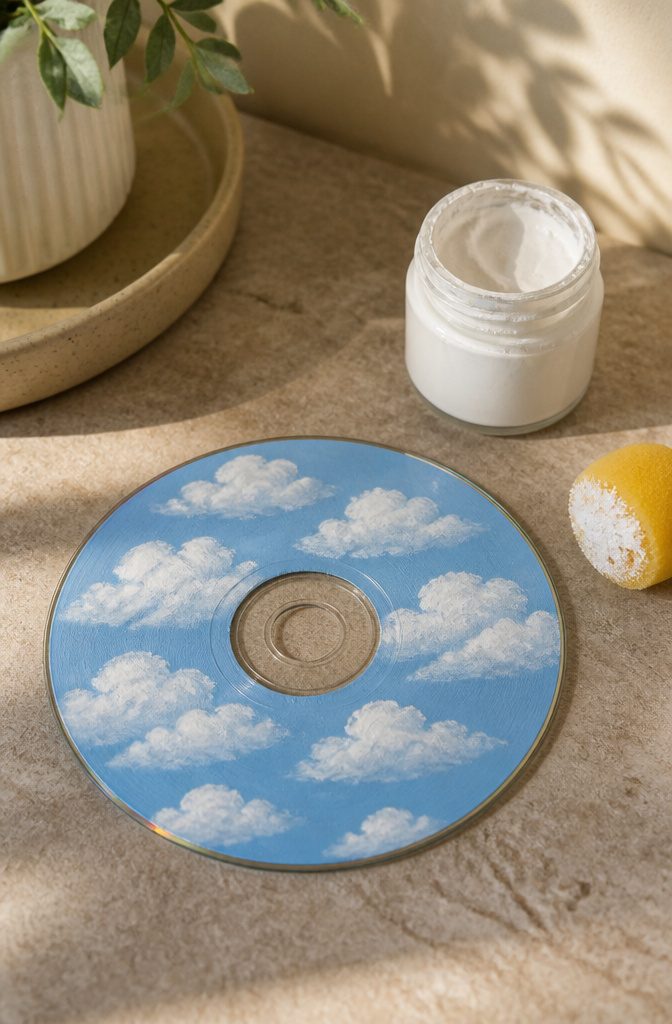
Blue paint goes down first and needs to dry completely before any white touches the disc.
A damp base turns the clouds gray and streaky, so give it a few minutes, or until the surface no longer feels cool or tacky.
For the clouds, I like a small sponge or a flat brush dabbed straight down, not dragged.
Load it with white, blot most of it off on a paper towel, and tap in overlapping clusters. Flat bottoms and rounded tops read as clouds right away.
Two coats of white beat one thick one.
The first looks thin and patchy on a slick CD, and the second fills it in without leaving ridges. Skip a pure blue, too: a lighter sky shade near the hole makes the disc look like it has depth.
15. Cactus
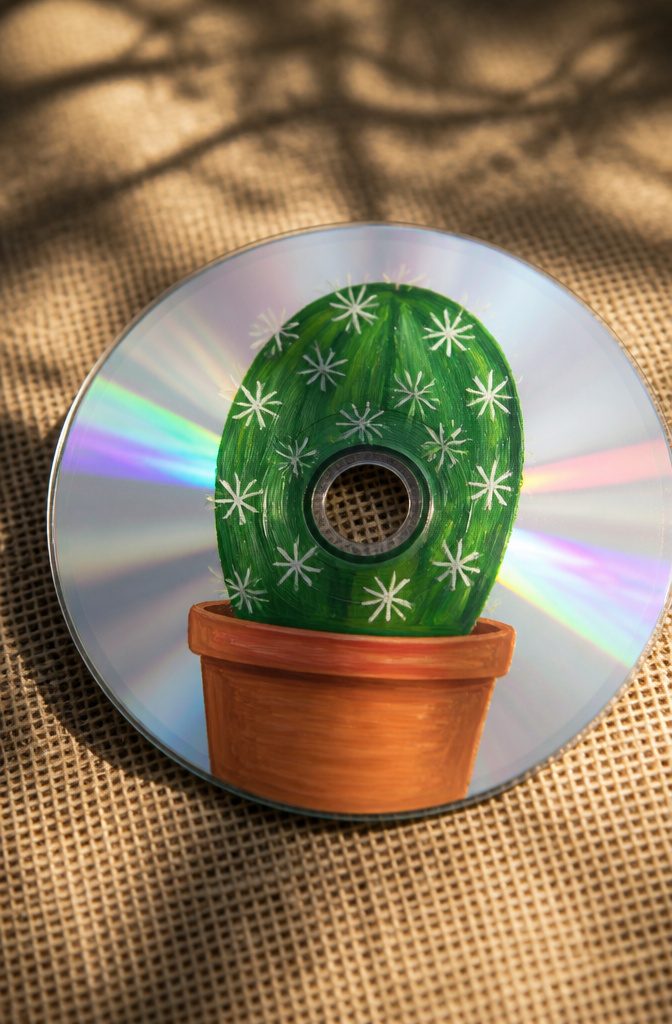
A CD is a round, glossy, slightly curved surface, which makes a barrel cactus in a pot an easy fit.
Paint the pot along the bottom edge of the disc as a flat terracotta shape, then set a fat green oval above it so the cactus seems to sit inside the rim.
Acrylic paint grips the shiny side better if you let the first coat dry before adding the second.
Keep the spines and flowers for last. A toothpick dipped in white or cream makes thin spines, and a dot of pink or yellow at the top of the cactus reads as a bloom.
Add the details only after the green is fully dry, or the lines will drag and smear into the base color.
I would skip a realistic shade of green and go with a slightly bluish one, since it stands out against a light pot and a plain background.
16. Nature Scenes
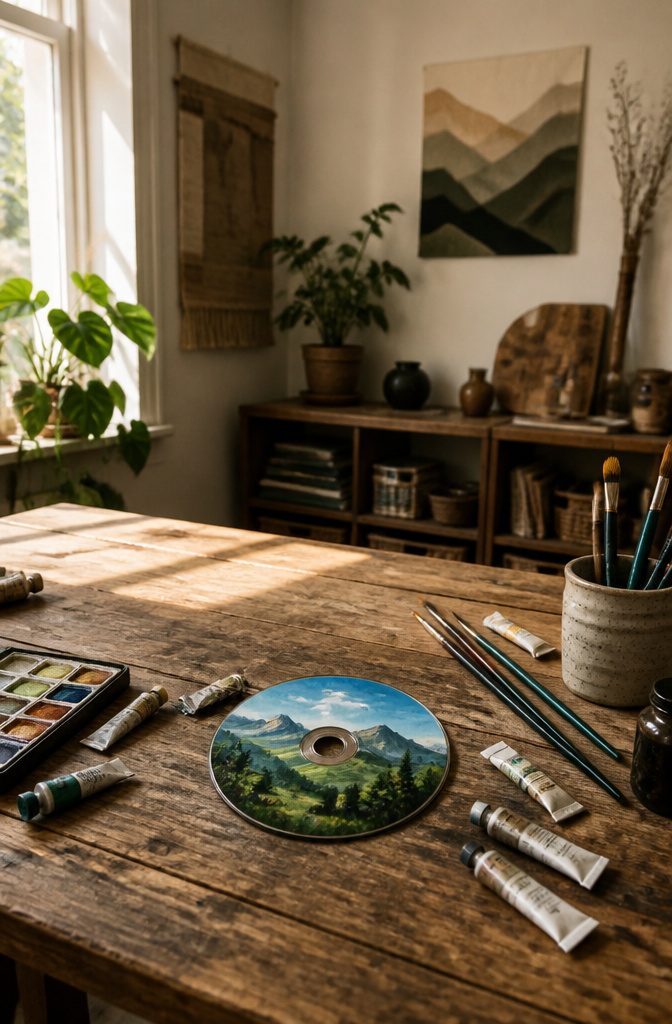
A CD gives you a circle about 4.7 inches across, and a landscape fits it best when you split the disc into three bands: sky on top, mountains in the middle, trees along the bottom.
Paint the sky first and let it dry completely, since mountains laid over wet blue turn muddy.
Mountains are just overlapping triangles.
Start with the farthest one in a lighter shade, then add a darker one in front so the layers read as distance. A dab of white at each peak looks like snow and takes one second.
Trees are the easy part for kids: stack three small triangles, or press a fingertip down for a trunk and a green blob above it.
Keep the scene to three or four colors, because the disc is small and the shiny surface already adds plenty of visual noise.
17. Polka Dots
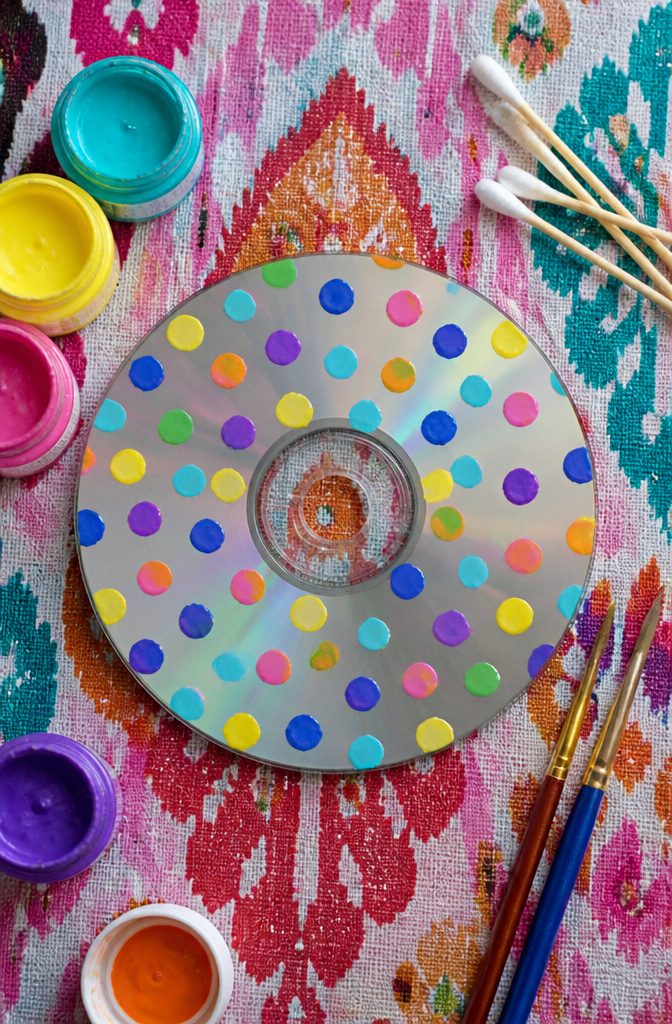
A brush handle end or a cotton swab makes a cleaner dot than the brush tip ever will, because the round tip presses down flat and leaves the same circle every time.
Dip it, touch the CD straight down, and lift without dragging. Reload the paint every dot or two, or the dots shrink as the tool runs dry.
For rows, I like to work left to right in a line, spacing each dot about one dot-width from the last.
Random sizes look best when you switch tools: a swab for small dots, the fat end of a paintbrush handle for big ones.
Let each color dry before adding dots beside it, since wet dots on a slick CD bleed into each other and turn muddy.
A dark base coat makes bright dots pop, though bare silver shines through nicely too.
18. Cow Print
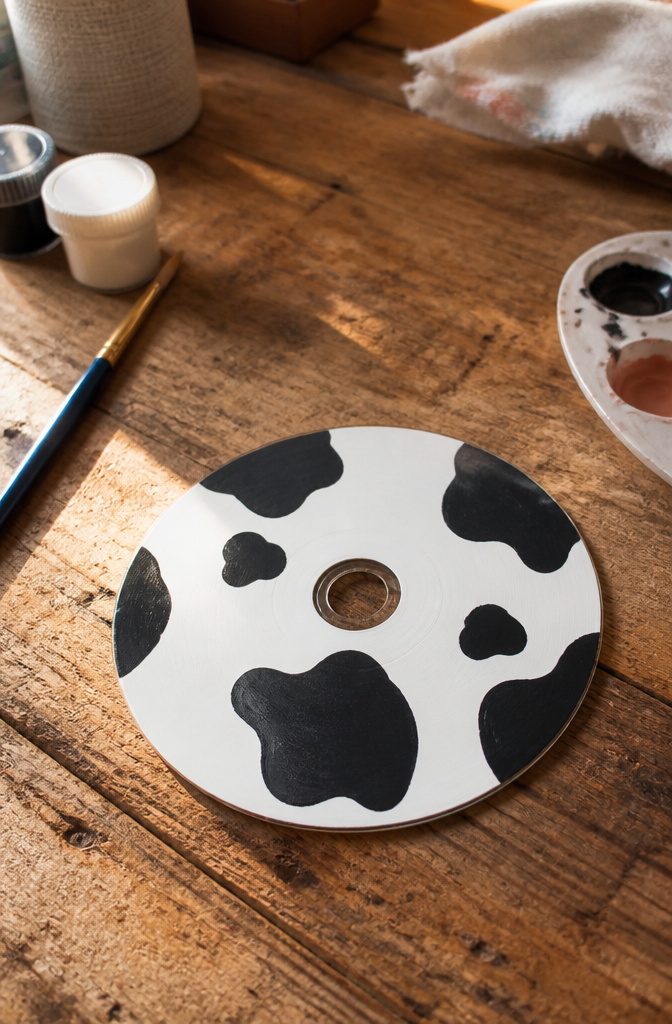
Cow print works for kids because the design is nothing but blobs, and a blob can’t be painted wrong.
Start with a white base coat across the whole disc and let it dry before any black goes on, or the two will smear into a gray that looks muddy instead of crisp.
Then hand over the brush and let the black go down in uneven patches, some round, some lumpy, a few touching the edge.
Irregular shapes read as cow spots; tidy circles read as polka dots. Leave plenty of white showing between them.
The one thing I’d skip is a tiny brush. A medium flat or round brush fills a spot in a single dab, which suits short attention spans and keeps little hands from fussing over edges.
19. Butterflies
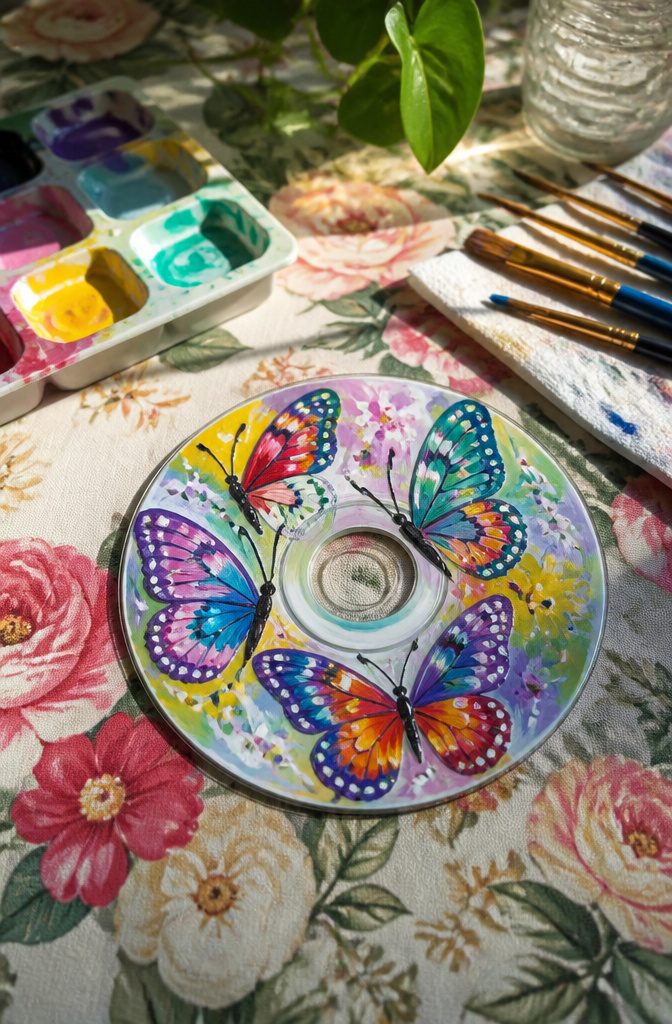
Butterflies are the easiest place to start on a CD because the shape does half the work.
Paint one wing, then mirror it on the other side of the center line, and your eye forgives a lot of wobble. Freehand is the point here, so skip stencils and let each wing come out a little different.
Bright, mixed colors suit this design better than a planned palette.
Give each butterfly its own combination, and add dots or loops inside the wings once the base coat sets. Paint both wings in the same color order, top to bottom, and the symmetry takes care of itself.
A thin dark line down the middle for the body ties it together. Kids can finish one in an afternoon, with time left to make a second.
20. Rainbows
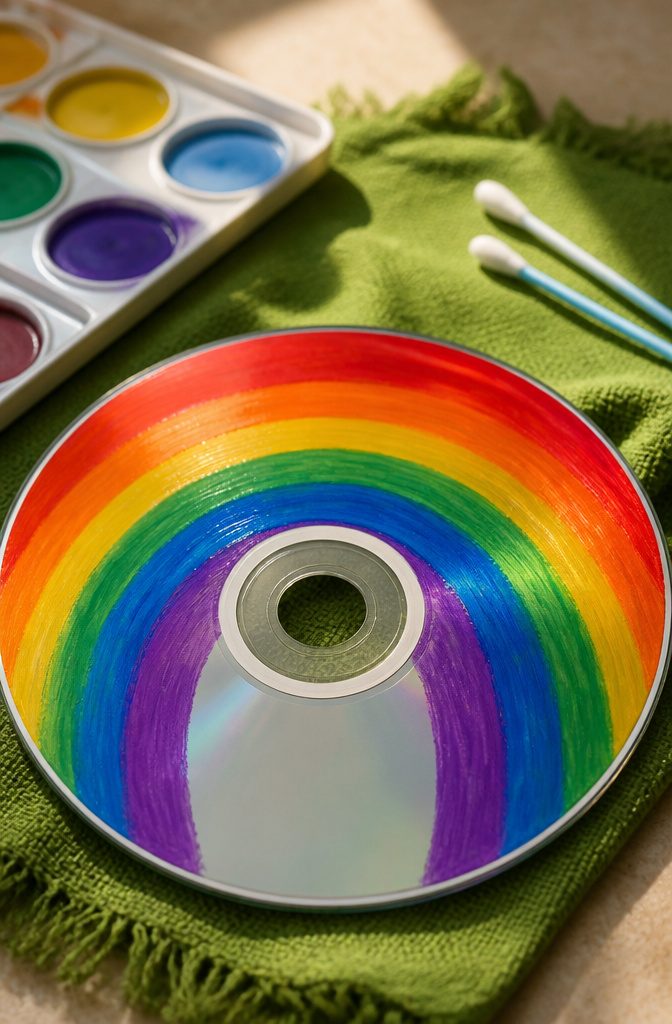
A rainbow suits a first CD project because the shape does the work: a few curved bands side by side, no drawing skill required.
Paint them as arcs across the disc, starting with the outer band and stepping inward so each color sits against the last. Little hands can follow the curve of the disc’s edge, which keeps the lines from wandering.
Let each band dry before the next color touches it, or red and yellow will blend into a muddy orange. For young kids I’d hand over a short list of colors and skip the fussy blending.
Fluffy white clouds at either end of the arc finish the picture and hide any shaky spots where the bands meet.
A dabbed cotton swab makes a good cloud, and the result is cheerful enough to hang in a bedroom window.
21. Unicorns
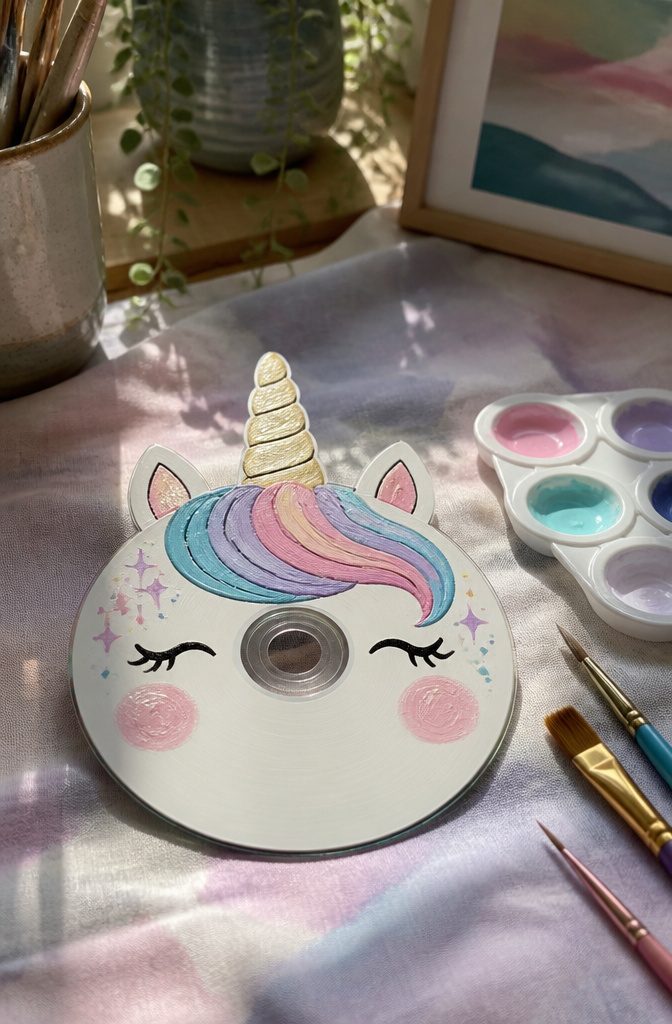
A unicorn suits a CD well because the circle already works as a face: the horn rises from the top edge, and the mane can wrap down one side like a curtain.
Pastel pink, purple and blue are the colors to reach for, and they read best when you paint the mane in loose, flowing stripes that follow the curve of the disc.
Start with the face and the horn, and let them dry before touching the mane. Pastels smear into each other when wet, so I’d keep the three mane colors in separate bands and add the sparkle last.
A little glitter on the horn is the one detail kids remember. For a first try, skip the eyes and mouth if they feel fussy; a unicorn with just a horn and a mane still looks like one.
22. Smiley Face

A yellow base and a plain black face is about as forgiving as CD painting gets, which is why it suits kids.
Paint the whole shiny side yellow first and let it dry fully; a second coat usually hides the silver, since the first tends to look streaky over a slick surface.
Wait until the yellow is completely dry before adding the face, or the black will drag the yellow into gray smears.
Two solid dots for eyes and one curved line for the mouth are all the design needs.
A small round brush or even a cotton swab handles the dots, and the center hole makes a handy nose if you want one. Younger kids can skip the curve and press on a fingertip of black for each eye.
Once the basic face works, winking eyes, sunglasses or a sticking-out tongue give each CD its own personality.
23. Minions
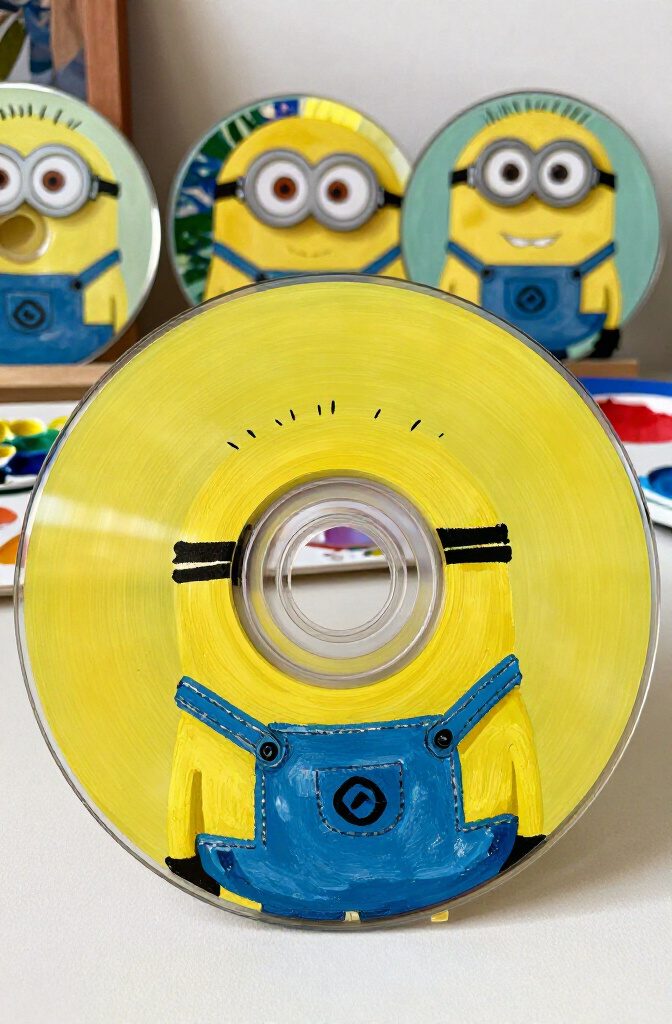
Yellow paint does most of the work here: a Minion is a yellow oval with a band of goggles across the middle, and kids recognize that shape from across the room.
Paint the whole CD yellow first and let it dry fully, since the goggle band sits right on top of that base.
Then add a gray or black strip for the strap, a gray circle with a white eye and a dark pupil, and blue for the overalls along the bottom.
A single Minion fills one disc nicely, but I’d make a group of them.
A row of three or four on a string looks like a little crowd and gives each kid a different face to invent, one eye or two, a smile or a shout.
Use a dot of black for pupils, not a brush tip, so little hands stay steady.
24. Halloween
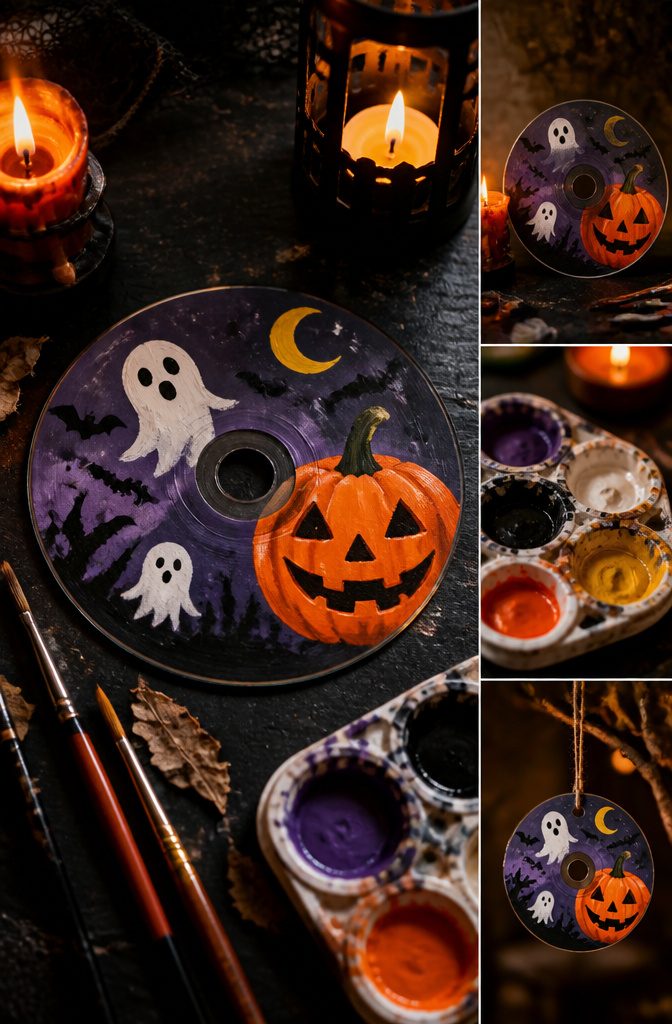
A CD is a round, shiny canvas, and that shape already does half the work for a pumpkin. Paint the whole disc orange, add a small green stem at the top, and carve the face on with black paint.
Ghosts need a white body, and the hole in the middle makes a ready-made mouth, so two dots for eyes finish it.
Bats suit the disc just as well: a black background with wing shapes pushed out to the edges looks good against the silver.
Ghouls and werewolves are fair game too, but I’d hold those for older kids, since fur and fangs take a steadier hand.
For young beginners, pumpkins and ghosts are the easiest start. Dark backgrounds make white and orange stand out, so a black base coat is worth the extra drying time.
Best Paint for CDs
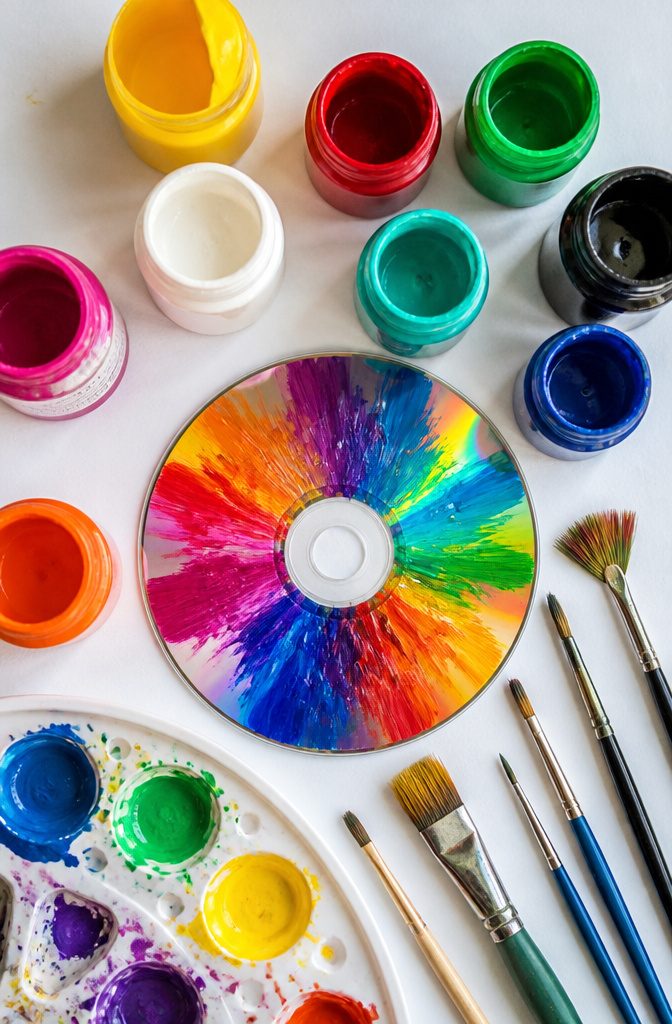
Acrylic paint wins for CDs, and the reason is the surface.
A CD is smooth and slick, and acrylic grips it better than most paints, dries fast, and gives you strong color in one or two coats. Acrylic is the one to buy first if you only want a single bottle.
Spray paint covers a whole disc quickly and evenly, but it needs ventilation and a protected workspace, so I’d skip it for kids at the kitchen table.
Glass paint also bonds to a slick surface, though the color range tends to be smaller.
Oil-based paint pens give clean lines for small details, and permanent markers handle outlines and dots well. Neither covers a large area without streaks or a lot of tedious filling in.
Frequently Asked Questions
How do you paint a CD?
Gather a CD, acrylic paint, a brush, scissors, and optionally clear gesso, then paint your design on the shiny side.
Put down a base coat first and let it dry fully, since a second thin coat covers better than one thick one on a slick surface.
Add details like dots, lines or stars only after the layer underneath is dry, so the colors don’t smear.
What kind of paint sticks to CDs?
Acrylic paint is the best choice because it grips the smooth surface, dries fast and gives strong color in one or two coats.
Glass paint also bonds well, though its color range tends to be smaller. Spray paint, oil-based paint pens and permanent markers work too, but spray paint needs ventilation and markers struggle to cover large areas without streaks.
What are some easy craft ideas for CDs?
Rainbows, smiley faces, polka dots, simple waves, clouds and cow print are among the easiest designs for beginners and kids.
Each one uses basic shapes, and the shape of the disc and its center hole do much of the work. Abstract swirls are the most forgiving of all, since there is no wrong way to do them.
What can I make from old CDs?
Painted CDs can become room decor, such as a gallery of discs hung together, or a window display.
They also make thoughtful gifts, and a row of painted Minions or butterflies strung together looks like a little crowd. Designs range from pumpkins and ghosts for Halloween to galaxies, donuts and cacti.





