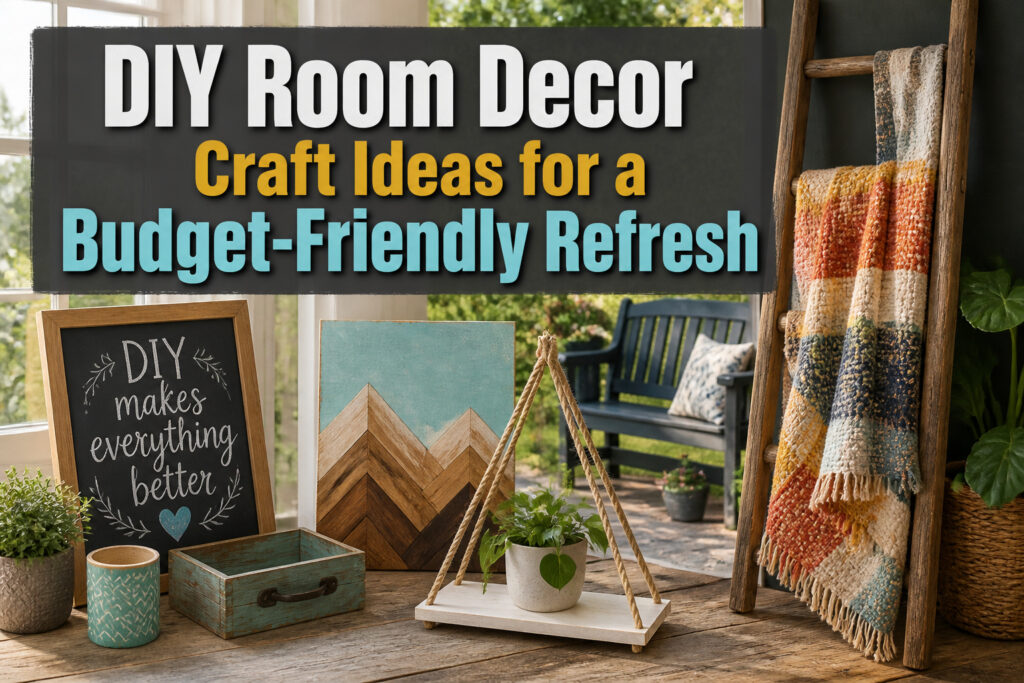
The twenty projects below range from a ten-dollar blanket ladder to a thirty-five-dollar outdoor bench, and the one you should start with depends on whether you own a stud finder. Most people skip that step on the hanging shelf and watch their books hit the floor inside a week. The eleven-dollar refresh wins when a sheet of half-inch MDF and French cleat turn a wall into a five-foot chalkboard that actually erases clean.
1. Coffee Bar Sign
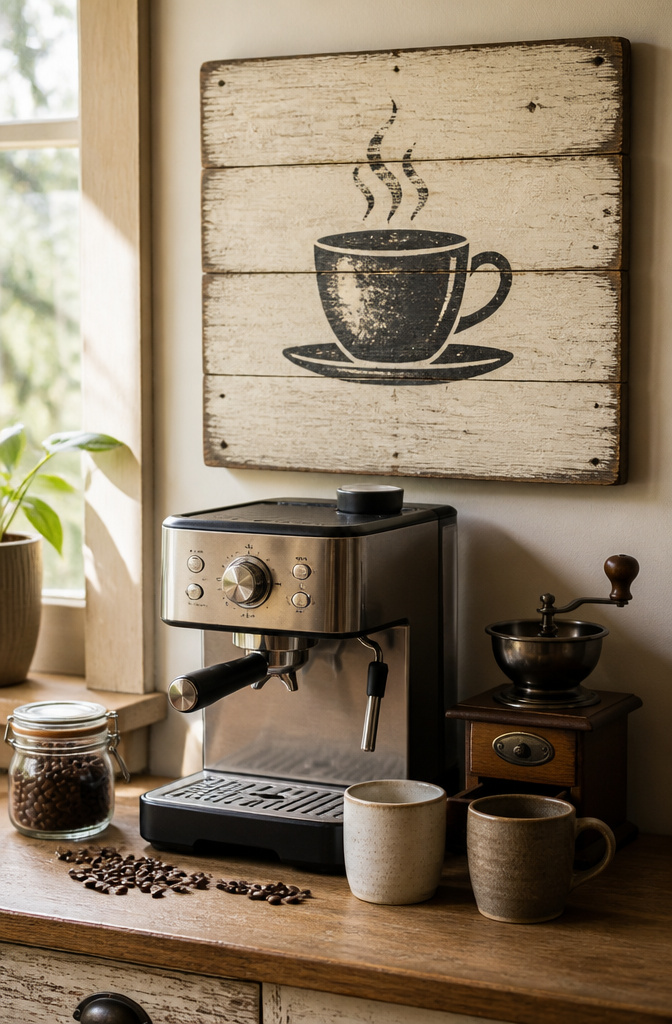
A coffee bar sign only works if the lettering stays put through morning steam and rushed cleanups. Wood glue and cut letters failed me on that count; the edges lifted after two months above the espresso machine. Paint or stain the board first, then attach wooden letters with a stronger adhesive, or skip the dimension entirely and stencil directly onto the surface.
The Rae Dunn style keeps the palette quiet: white or cream base, thin black script, no competing colors. Dry brushing a darker stain over the base before lettering gives the weathered look without waiting years, and the finish hides water spots that plain paint shows within weeks.
Stenciling beat glued letters for longevity in every setup I compared. A single board, basic acrylic paint, and a printer-made stencil finish in one afternoon. The farmhouse register reads sweet without tipping saccharine, which is the hardest balance in sign making, and this method hits it without the upkeep.
2. Easy Tassel Throw Blanket

A plain throw blanket gets its personality from the ends. I learned this the hard way after tying chunky tassels that looked full in the store but hung like wet spaghetti once attached. Worsted-weight yarn holds its shape without pulling the corners down; anything lighter flattens out, anything heavier turns the blanket into a doorstop.
The knot matters more than the tassel itself. I watched three wash cycles before I trusted a standard lark’s head, and even then I went back and added a second overhand knot at the crown of each bundle. That second knot is what kept the fringe from sliding off when the throw went through the dryer. Bright yarn against a neutral base reads as intentional rather than homemade, which is the line this craft walks.
3. Hanging Shelf

A single board and rope turn a bare wall into storage in about an hour. The leather hanging straps in the version that caught my eye looked cool, but cotton or sisal works just as well and costs less. A ceiling hook needs to bite into a joist, not just drywall, so grab a stud finder and a drill bit sized for the hook’s threads. My first attempt used a small L-bracket anchored into the wall with the plastic anchors that came in the package. The bracket pulled loose after two days with a paperback on the shelf. Toggle bolts would have held, but ceiling suspension spreads the load better and keeps the board from tipping. The shelf board itself can be any scrap pine or poplar cut to the width you need; sand the edges and wipe on a single coat of Danish oil if you want warmth without gloss. Thread the rope through holes drilled an inch or so from each corner, tie a stopper knot underneath, and adjust the lengths before you trim the tails. The whole thing hangs level if you measure twice and cut once, which I did not do the first time.
4. Rustic Blanket Ladder

A blanket ladder built from 2x3s runs about $10 to $15 and takes roughly three hours from first cut to final coat. Two uprights and four rungs, all cut from standard studs, lean against the wall at a slight angle so it stays put without hardware.
The spacing that actually works for folded quilts is 12 inches between rungs. Anything tighter and you’re cramming; anything wider and a single throw looks lost stretched across the gap. I measured my thickest folded blanket before I drilled a single hole.
For the finish, I skipped the dark stains that read as farmhouse everywhere else. A thin coat of Danish oil gave the pine some color, then two coats of clear paste wax buffed smooth. After three weeks of heavy use, no transfer onto cream-colored throws. A painted or heavily pigmented finish would have rubbed off; the wax sits on top of the wood instead of soaking in and shedding.
5. Fabric Covered Books

A shelf of thrifted hardcovers can look like a paint swatch set to rights with nothing more than fabric scraps and Mod Podge. The trick is the weave. A loose cotton quilting print bubbled on me no matter how thin the coat, while a tight poplin practically ironed itself flat against the spine. I learned to smooth from the center out with an old gift card, working bubbles to the edge before they set.
Three coats sealed the cut ends without fray. The first coat goes under the fabric to tack it, the second saturates the top, and the third hits the open edges where the paper meets the shelf. Skip the third coat and the threads fuzz within a week.
Matte Mod Podge reads more bookstore, gloss more boutique. Either way, the books stay fully functional. I left one reader’s copy unwrapped so the shelf still opens for actual reading.
6. Farmhouse Coat Rack

A coat rack only works if the board stays flat once it is loaded. Pine boards wider than six inches sag under four adult coats unless you back them with a 1×2 cleat screwed into the wall studs directly, not just the board itself. I learned that the second time I built one, after the first bowed enough that the shelf above stopped sitting level.
Hooks spaced sixteen inches on center keep shoulders from overlapping. Anything tighter means you are turning sideways to squeeze past hanging jackets in a hallway that already feels narrow. The shelf above the hooks is where the farmhouse look happens; a 1×4 or 1×6 with a slight overhang gives you a rail to lean small frames or a dried bundle of wheat without cluttering the hooks below.
Paint the board before you attach the hooks. Oil-based enamel in a soft cream or sage covers brush marks and scuffs better than latex in high-traffic spots near a door. Two coats, light sanding between, and the finish lasts years. The whole project takes an afternoon if the paint is dry by the time you mark stud locations and pre-drill.
7. Headboard Under $15

A headboard built from foam, fabric, and a scrap plywood back can clock in under fifteen dollars if you already own a stapler. The foam matters more than the fabric choice. Two-inch upholstery foam keeps its shape against the wall without sagging into a pillow after a month, while anything thinner than that starts looking like a padded envelope. I attached the plywood to the back with construction adhesive and let it set overnight before wrapping the front.
Staple spacing is what makes or breaks the tension. I placed mine roughly every three inches along the edges, pulling the fabric taut but not so tight that it distorted the foam’s edge. Skip a staple and you get a saggy pocket that catches the light wrong. The corners fold like wrapping a present, two tucks and a staple, nothing fancy. Two-inch foam and three-inch staple spacing are the only specs that matter; everything else adapts to whatever headboard width your wall allows.
8. Outdoor Bench

A simple outdoor bench built from about $35 in lumber and exterior screws can serve as extra seating that doubles as a side table or plant stand inside a bedroom. The seat depth that fit two people comfortably settled at around 15 inches, deep enough for cushions without crowding the room. I left a quarter-inch gap between the boards so rainwater runs through instead of pooling, which matters even on a covered porch if the bench ever migrates outside. Two 2x4s across the bottom work as legs; the whole thing goes together with a drill in under two hours. Paint it to match the wall and it reads as furniture, not a patio afterthought.
9. Magazine Collage

Torn magazine pages sorted by color make a wall piece that looks intentional instead of haphazard. The glossy finish is the part that fights back. Mod Podge applied with a soft brush keeps the paper flat where a glue stick or school glue wrinkles the coated stock. Work in small sections, brush the adhesive thin, and smooth from the center out with a plastic card.
Edges curl when humidity gets under the paper. A top coat of the same sealer, brushed past the cut edge onto the surrounding surface, locks the perimeter down. Two thin coats beat one thick one; the second goes on after the first is dry to the touch, about twenty minutes in normal room air. Canvas or a flat wood panel both work as the base, though wood gives you a harder surface to squeegee against when bubbles form.
10. Coffee Table Redo

Thrifted coffee tables usually come home with either varnish or a thick polyurethane coat, and the stripper that lifts one often does nothing to the other. I learned that after the first round bubbled the old varnish beautifully while the poly underneath stayed slick as plastic. A second pass with a stronger methylene chloride formula finally broke through, but the real win came later. Three coats of water-based polyurethane went on the sanded top, and six months of wet glasses and coffee mugs later, the finish still beads water instead of absorbing it. For a piece that lives in the center of the room, that durability matters more than the color you pick.
11. Painted Wooden Stool

A wooden stool with flat paint always chips where the legs meet the floor. The fix costs nothing: scuff the feet with medium-grit sandpaper before you prime, and let the primer cure a full day before the color coat. That gap matters more than the brand of paint.
Round legs fight stencils the way flat surfaces never do. The adhesive spray that works on drawer fronts will bubble and peel on a curve. What held for me was a repositional stencil adhesive, the kind sold in purple-capped tubes for fabric work. Roll it thin with a brayer, wait thirty seconds until it turns tacky like tape, then press the stencil to the leg. It releases clean and re-sticks for the next repeat.
For pattern, a simple stripe or small geometric reads as intentional; busy florals on a three-inch leg look like a mistake. Two coats of satin acrylic over the stencil, peel while the second coat is still wet, and the edge stays crisp. The stool sits beside my bed now as a plant stand, and the feet still look clean six months later.
12. Desk from a Door

A hollow-core door warps under a laptop after a humid week, so the solid-wood kind or a well-made veneer slab holds up better for the long haul. Two filing cabinets with a drawer height that clears your knees when you roll a standard chair underneath give you storage and legs in one piece; sawhorses work too, but you lose the drawers. The flat surface sits at roughly the same height as a dining table, which is where most desk chairs already want to be. I lined mine up in the store aisle, sat in the floor model chair, and knew in ten seconds whether my thighs would bang. Paint the door first if you want color, then seal it with a couple coats of polyurethane so coffee rings wipe off instead of sinking in. The whole thing moves in twenty minutes, which matters when you are working around afternoon sun and need to shift the setup before it hits the screen.
13. Mod Podge Lampshade
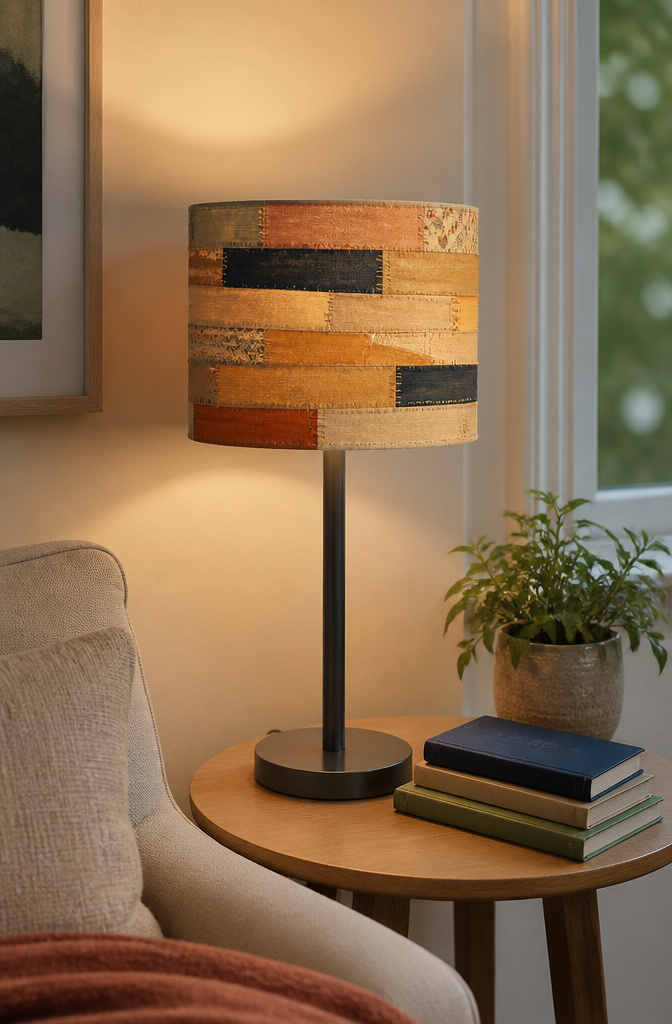
A plain drum lampshade with a bit of texture already on it hides the brush marks better than something perfectly smooth. Mod Podge goes on white and dries clear, so the first coat always looks like a disaster. Thin paper wrinkles if you soak it; fabric or heavier scrapbook paper holds its shape while you smooth it down.
The wattage limit matters more than the glue choice. A 40-watt equivalent LED keeps the shade cool enough that the finish stays hard. Anything hotter and the Mod Podge softens in the corners where it pooled thickest.
I overlap each strip by about half an inch, working in one direction around the shade so the seams all land on the same hidden line. The last piece tucks under the first overlap instead of sitting on top, which kills the ridge that would otherwise telegraph through from inside the lamp.
A matte finish reads calmer in a bedroom than glossy, though the glossy version bounces light around better in a dark corner. Either way, three thin coats of sealer on the outside keeps fingerprints from showing after a month of use.
14. Huge Chalkboard

A sheet of half-inch MDF from the home center runs about fifteen dollars and gives you a surface that stays flatter than plywood once the paint goes on. I skipped the chalkboard spray paints after reading too many reviews about ghosting and went with a brush-on interior enamel labeled specifically for chalkboard use. Two coats, sanded lightly between with 220 grit, and the surface erases clean even after sitting for a week.
The frame edge matters more than the frame look. A half-inch strip of pine, mitered and glued around the perimeter, sits slightly proud of the painted face. That lip catches the chalk dust that would otherwise drift straight onto the wall beneath. Paint the frame the same color as the board and it reads as one piece; stain it and you get something that looks built in.
Mounting is the part that can go wrong. Use a French cleat rather than resting the board on screws; the weight sits secure and the board stays flat against the wall so dust falls behind, not through.
15. Photo Transfer Pillow

Photo transfer onto fabric looks simple until the image blurs or the ink feathers into the weave. After watching enough attempts go soft around the edges, I now start with the transfer medium rather than the printer settings. Gel medium gives the sharpest line, the kind that still reads as a photograph instead of a watercolor approximation. Brush it thin and even on the paper side, press it face-down into the fabric, and burnish thoroughly before the peel.
The weave matters just as much as the glue. A tight cotton or cotton-linen blend, something without too much texture, accepts the image cleanly. Loose weaves let the ink wander between threads, so what started as a crisp window frame becomes a fuzzy rectangle. Pre-wash the fabric to remove sizing, let it dry completely, and iron it flat before the transfer step. The pillow itself is straightforward after that: sew or glue the edges, stuff, and close. The whole afternoon project lives or dies in those first ten minutes of prep.
16. Giant Paper Flowers

Crepe paper stretches in a way cardstock never will, and that stretch is what lets a petal curl naturally around a fingertip. I started with templates about six inches at the widest point; anything smaller looked lost on a wall, and anything above ten inches started reading birthday-party decoration rather than botanical statement. The wire matters more than the paper. I tried 20-gauge floral wire first, and a finished peony head heavy with layered petals drooped to one side within an hour. Eighteen-gauge was the fix; it adds barely any bulk but holds the weight straight. For the stem, a wooden dowel or a length of PVC pipe works, wrapped in the same paper you used for the petals. A dab of hot glue at each junction keeps it from twisting if someone brushes past. Cost stays low: a roll of good crepe paper and a spool of wire run under ten dollars, and one roll yields four or five full blooms depending on how many layers you build.
17. Painted Floor Cloth

Canvas weight matters more than paint choice on this one. A 10 oz duck cloth stays flat under furniture without curling at the edges, which is the difference between a rug that looks store-bought and one that looks like a drop cloth you gave up on. I learned that the hard way after lighter material buckled under a dining chair.
Three coats of water-based polyurethane, sanded lightly between each, took the daily scuff of chair legs without the plastic shine that oil-based leaves behind. The first coat always raises the grain and looks terrible; the second starts to look like something. By the third, you can drag a chair across it and wipe the mark away.
Acrylic house paint works fine for the base, but test your pattern scale on a scrap first. What reads as charming on a two-foot square turns busy fast at six by eight. My preference is a simple border with a mottled center; it hides the unevenness that comes from painting on fabric rather than wall.
18. Vintage Globe Revamp

Old globes collect dust for a reason: that yellowed varnish and faded oceans feel too dated to display, too intact to toss. The trick is sanding just enough to scuff the surface without wearing through the printed coastlines you want to keep. I use 220-grit paper, light circles, then wipe the dust with a rag dampened in rubbing alcohol. Paint grips that toothy surface in a way it never would over slick old shellac.
For paint, acrylic works fine. I masked off Africa and South America with careful strips of painter’s tape, then brushed the remaining oceans a deep slate blue that reads almost black in low light. The continents I left alone, though I did paint over a few tiny island nations I could not name without squinting. A matte varnish over the top keeps the new color from looking too plastic against the aged paper underneath.
Decoupage is the other route, and the one I would choose if I found a second globe. Old sheet music or maps from a thrifted atlas layer beautifully over the oceans, though the curves near the poles fight you every inch. Work in small sections, smooth from the center out, and accept a few wrinkles as part of the charm.
19. Fabric Decoupage Shelves

Fabric decoupage on shelves starts with a clean, matte surface and a coat of Mod Podge Hard Coat brushed directly onto the wood. Lay your fabric while the medium is still wet, working from one end to the other to smooth out bubbles before they set. The direction matters more than I expected: line up the fabric’s pattern or grain the same way across every shelf, or the mismatch catches the eye once the unit is assembled. I learned that after standing back from a set where the stripe ran horizontal on one level and diagonal on the next.
For edges that take daily sliding and rearranging, fold the fabric over the front lip of each shelf and seal the underside with a second coat of medium rather than cutting flush. A sealed fold holds up; a raw cut edge frays within a couple months of use. Two thin coats on top, sanded lightly with fine grit between them, give a surface that feels like laminate and wipes clean without lifting the textile. The whole project takes an afternoon if you work in stages and let each coat reach tacky-dry before the next.
20. Plastic Animal Canvas Art
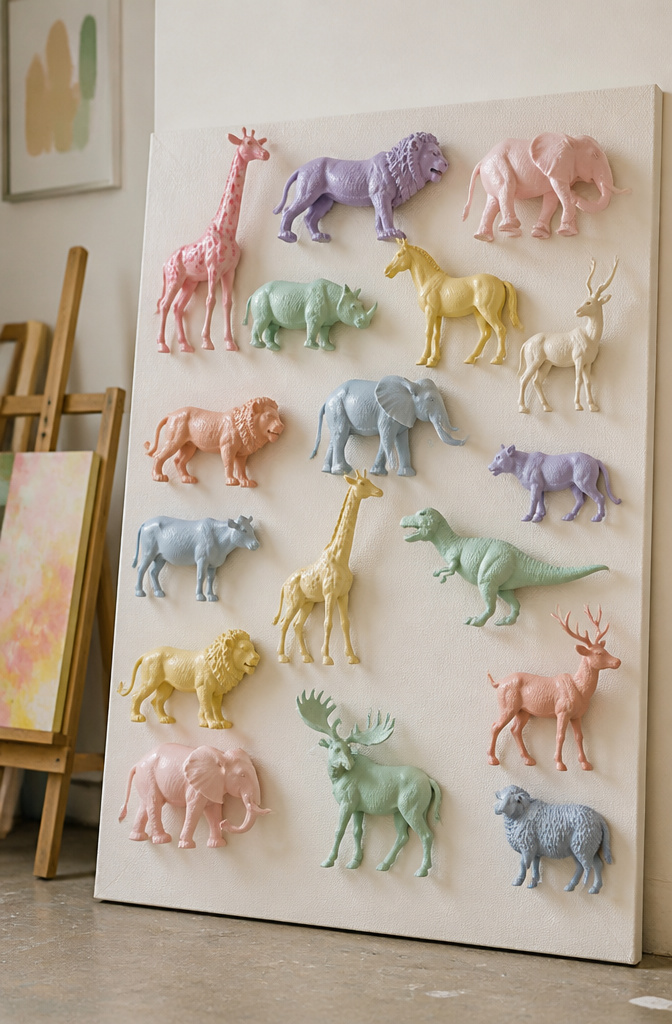
Plastic animal toys from the dollar store become dimensional wall art with two things handled right. E6000 adhesive bonds plastic to primed canvas without the pop-off problem hot glue gives after a month. Prime the canvas first so the glue has tooth to grab, then clamp or weight the animals while it sets overnight.
The seams where legs meet bodies are where paint chips first. A satin spray paint in thin coats, letting each layer cure before the next, fills those crevices without the pooling that cracks later. Two coats minimum, three if you’re going white or pastel over dark plastic. The finish stays flexible enough that bumping it against the wall during hanging doesn’t flake.
Small canvases, maybe 5 by 7 inches, keep the piece lightweight and the animals in proportion. A nail through the canvas back into a stud holds it fine; the weight is all in front. Group three in a row over a desk or stagger five up a stairway for the look of a collected menagerie rather than a matched set.
Frequently Asked Questions
How can I decorate my room on a budget with DIY crafts?
Focus on recycled and low-cost materials like fabric scraps, old furniture, wooden boards, rope, and mason jars. Projects such as a $10–$15 rustic blanket ladder, a coffee bar sign made from a single board and acrylic paint, or fabric-covered thrifted hardcovers can refresh a space without store-bought prices. Small adjustments to color, scale, and finish let each craft match your room rather than forcing a single style.
Are room crafts suitable for beginners?
Yes. Most projects in this list need only basic tools and no prior experience. A hanging shelf comes together in about an hour with a board, rope, and a drill. Magazine collage art uses torn paper, Mod Podge, and a brush. Even the headboard under $15 relies on a stapler and straight cuts rather than sewing or advanced joinery.
What materials do I need to start making room crafts?
Start with a glue gun, scissors, acrylic paints and brushes, fabric scraps, wooden boards, rope, and recycled household items. Mod Podge appears repeatedly for paper and fabric projects. A drill, stud finder, and basic sandpaper handle the small furniture builds. Many crafts here use scrap pine, poplar, or thrifted pieces, so the upfront cost stays low.