

Cardboard room decor runs from a ten-minute vase to a weekend wall panel, and the difference is almost always paint. Skip the sealing coat and even three layers of gold acrylic turns muddy brown on the fibers.
The same tube that holds your toilet paper can become a bedside lamp casting geometric shadows, but only if you cut the patterns before you pick up the brush.
1. Cardboard Tube Wall Art
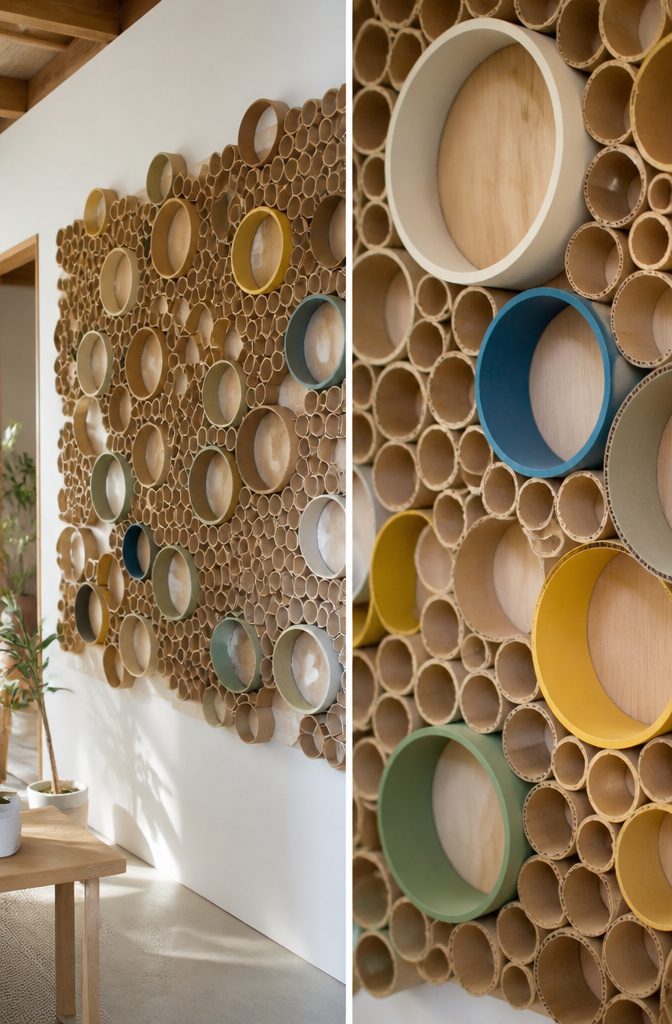
Cardboard tube wall art starts with the width you cut.
Thin rings, about half an inch, cluster into tight honeycomb patterns that read as delicate texture from across a room. Wider rings, closer to two inches, stand alone as bold circles with real shadow.
The source material suggests cutting tubes into rings and arranging them in different patterns for geometric designs, which is the core move: play with density before you ever pick up paint.
Paint changes everything, or nothing. Gloss acrylic in a single flat color turns the whole piece into something that reads as ceramic or molded plastic.
Leaving the cardboard bare, with its corrugated edge showing, gives a warmer, rougher look that works against white walls. Either way, hot glue is your best hold on the assembly table.
It grabs the curved surfaces fast and fills the slight gap where ring meets ring. Regular white glue will slide before it sets; if that is what you have, clamp or weight each joint and work in small sections.
For mounting, a sawtooth hanger on the back of a plywood base is the cleanest solution. That base also solves the alignment problem: lay your pattern on it, glue it down, then hang the whole panel.
Command strips can work for lighter pieces, but the cardboard rings themselves are too irregular for adhesive backing to grip well. A flat backing board is the bridge between your geometry and the wall.

Creative Crafting Tool: These paper tubes are suitable for various DIY projects, allowing children and adults to unleash their creativity through painting, drawing, and crafting

You Will Receive: You will receive 12 empty tissue rolls, in abundance, to easily meet your and your child's various craft needs

2. Decorative Vases
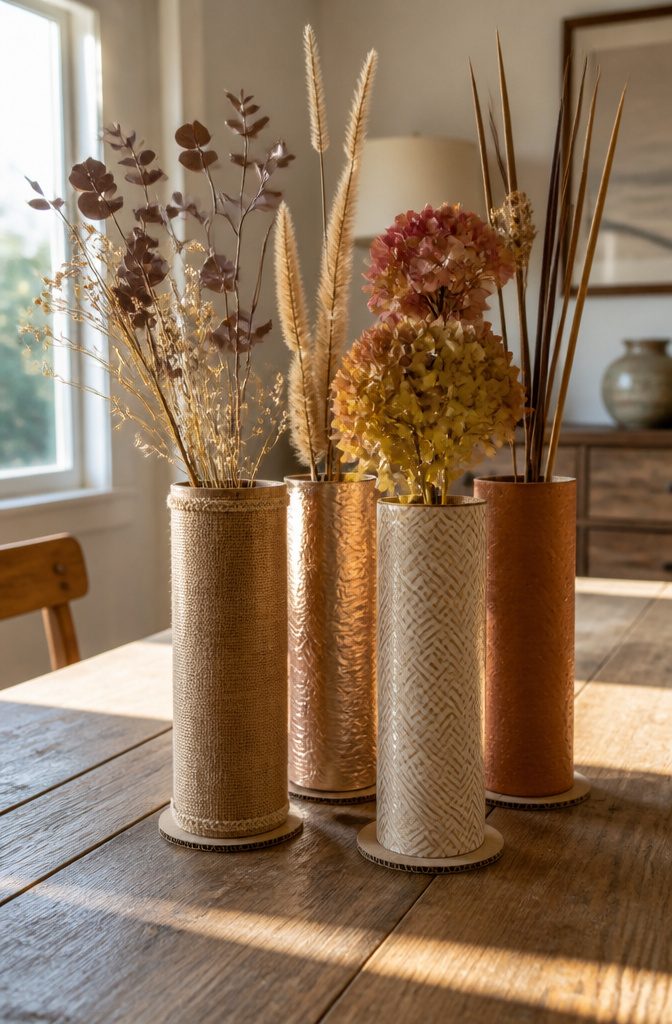
Cardboard tubes turn into vases faster than most projects, which is why they stay on my short list when someone wants something finished before dinner.
The trick that never gets mentioned is the base: without weight, a tall tube tips the second you brush past it.
I glue a stack of cardboard circles inside the bottom inch, each one a little smaller than the last, until the tube sits steady on a table.
Sand works too, poured through a slit and taped shut, but the layered cardboard method keeps everything recyclable.
A three-inch diameter tube holds dried branches and thick-stemmed flowers without crowding; anything under two inches is better for single stems or grasses.
Wrap tubes in decorative paper or fabric, then secure them with glue. Fabric frays less at the edges if you fold it under first, and paper with a busy pattern forgives the seam where the ends meet.
Metallic paint over the top layer reads as modern, but matte papers look warmer in a room that already has a lot of shine.
Artificial flowers or dried branches finish the piece; water is not an option unless you line the tube with a jar first, and even then the cardboard will eventually wick moisture.

Premium quality PVC 3d wall panels, light weight and fire resistant, easy DIY


LARGER DESIGN: Covering the same 32 sq. ft, each piece of our wall panels is bigger than others offer. Its larger design makes your room look more impressive and fast installation, suitable for big rooms.
3. Jewellery Organiser
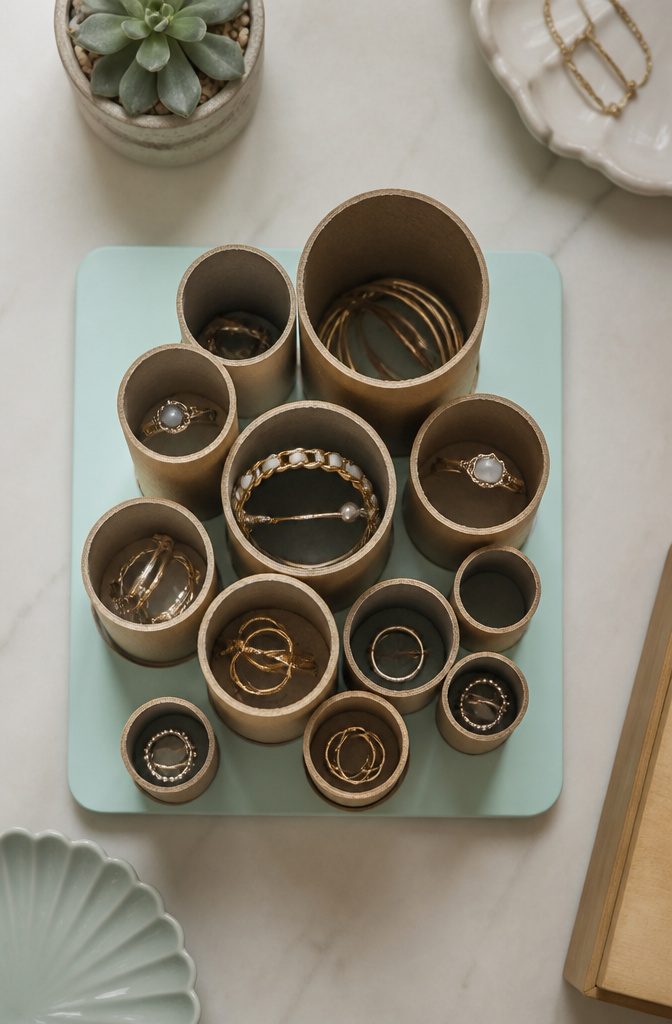
Cardboard tubes cut to various lengths and glued in a cluster make a jewellery organiser that actually keeps necklaces separated.
The height variation matters more than the decoration: a 12-inch tube holds a long chain without doubling it, while a 4-inch piece corrals stud earrings. Without that difference, everything slides to the same level and tangles anyway.
A backing board helps more than most people expect. Tubes glued only to each other wobble and eventually peel apart; a flat panel, even thin cardboard, gives the cluster the rigidity to survive drawer sliding.
Paint or cover the board first, before the tubes go on, since the gaps become hard to reach after.
Cut tubes into various lengths and glue them together in a cluster. Bracelets wrap around the wider tubes, rings drop into the narrow ones, and the varying heights let you scan what you own without lifting everything out.

1、【Hight-Quality】: Made of high borosilicate glass material,it has very high transparency, sturdy and practical.The mouth of the bottle is smooth and round and does not hurt your hands when planting. Note:the connecting rings are seprately, and your need connect the tubes by yourself as you want.

SINGLE FLOWER WATER POTTUBES: Floral water tubes measure 2.8 inch long and 0.8 inch diameter (or 7 x 2 cm), great size for single-stem flower. With opening on soft rubber-like cap, these flower tubes are flexible to hold stems of varying widths. Pack includes 20pcs floral water tubes in clear color.

Can be bent freely: 1 long vase/unit, comprised of 5 individual gold flower tubes hinged together, they can be bent and contorted into various lines, curves and clusters. Put some flowers in it to match your decor to make it looks beautiful.
4. Bedside Lamp

A large cardboard tube becomes a bedside lamp when you cut out patterns or designs into the tube, then place a battery-operated LED light inside.
The light shines through the cutouts and casts shadows across the walls, which turns an ordinary corner into something worth looking at.
LEDs matter here because real candles or plug-in bulbs against cardboard are a fire risk; battery-operated LEDs stay cool enough that the tube won’t scorch even after hours of use.
Geometric shapes cast the cleanest patterns. Circles, triangles, and repeating diamonds throw predictable shadows that read as intentional design instead of random holes.
Organic shapes work too, but the light bleeds at the edges and the effect softens into blobs unless you keep the cutouts small and spaced tight.
Stars and moons are the middle ground, sharp enough to read, forgiving enough that a wobbly freehand cut still looks deliberate.
The tube’s own thickness creates a beveled edge around each cutout, which throws a second, softer shadow behind the bright one.
A ship tube from a fabric store or the core of a rug roll runs about four inches across, which gives you enough surface for a pattern that wraps.
Smaller tubes from wrapping paper work for accent spots, not room-filling light.
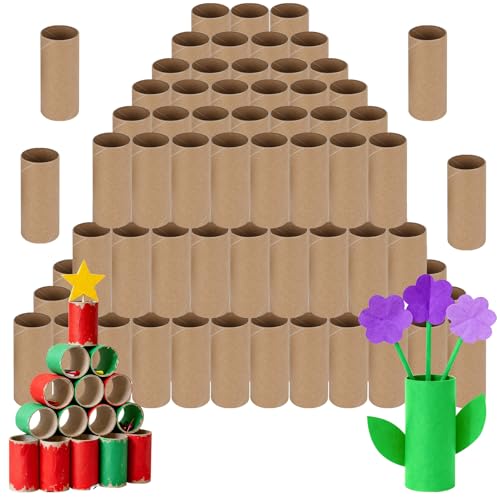
100 pcs cardboard tubes with box: You will got 100 pcs cardboard tubes for crafts with box , convenient for long-term storage, suitable for schools, families, and handicraft enthusiasts to use in bulk

Package: 30 Sturdy Craft Rolls (3 Sizes) – 10 Packs of 1.38x3.98", 10 Packs of 1.57x3.98", 10 Packs of 1.69x3.98". Long-Lasting Value Bundle with THICK, Heavy Pressure-Resistant Cardboard Tubes – A Durable Upgrade From Flimsy Standard Toilet Paper Roll Tubes.

Products include: 24 white craft rolls, long lasting value bundle, suitable quantity, perfect quality, small quantity packaging, ideal for handwork.
5. Cardboard Tube Spice Rack
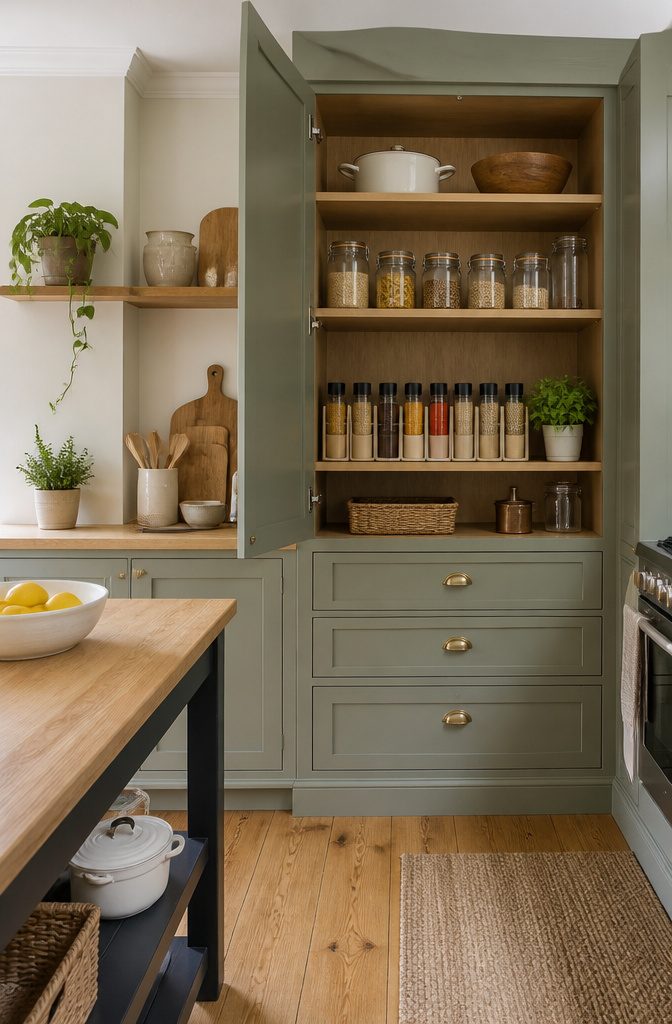
A standard kitchen cabinet shelf runs about twenty-four inches front to back, which means six to eight toilet-paper-sized tubes fit deep enough to stay put without wasting the space behind them.
Cut each tube to the height of your tallest spice jar, usually somewhere in the four-to-six-inch range, and keep the cut edge facing the wall so the label stays readable from the front.
Paint or cover the outside with whatever matches your kitchen: leftover wall paint, craft paper in a pattern you already use on the counter, or plain kraft with a band of washi tape at the rim.
The trick is making the outside look intentional enough that guests do not immediately register cardboard.
Glue the tubes to a thin cardboard base cut to the shelf depth, or arrange them loose if you prefer to pull the whole rack out at once.
Either way, weight them before the spices go in; an empty tube tips at the lightest bump.

High Quality & Leak-Proof Materials:Our flower vials tubes are made of high-quality clear plastic that is not easily broken and can be reused. Equipped with soft silicone caps, they provide an excellent seal, eliminating any worry about water spilling during use or transportation. This effectively maintains the moisture and beauty of your flowers.

SINGLE FLOWER WATER TUBES: Floral water tubes measure 1.6 inch long and 0.8 inch diameter (or 4 x 2 cm), great size for single-stem flower. With opening on soft rubber-like cap, these flower tubes are flexible to hold stems of varying widths. Pack includes 20pcs floral water tubes in clear color.

Versatile Crafting Tubes: Includes 12 sturdy cardboard tubes in 2 sizes (6pcs 1.37x15.7In and 6pcs 1.77x15.7In), perfect for a variety of DIY crafts and art projects.
6. Herb Planters
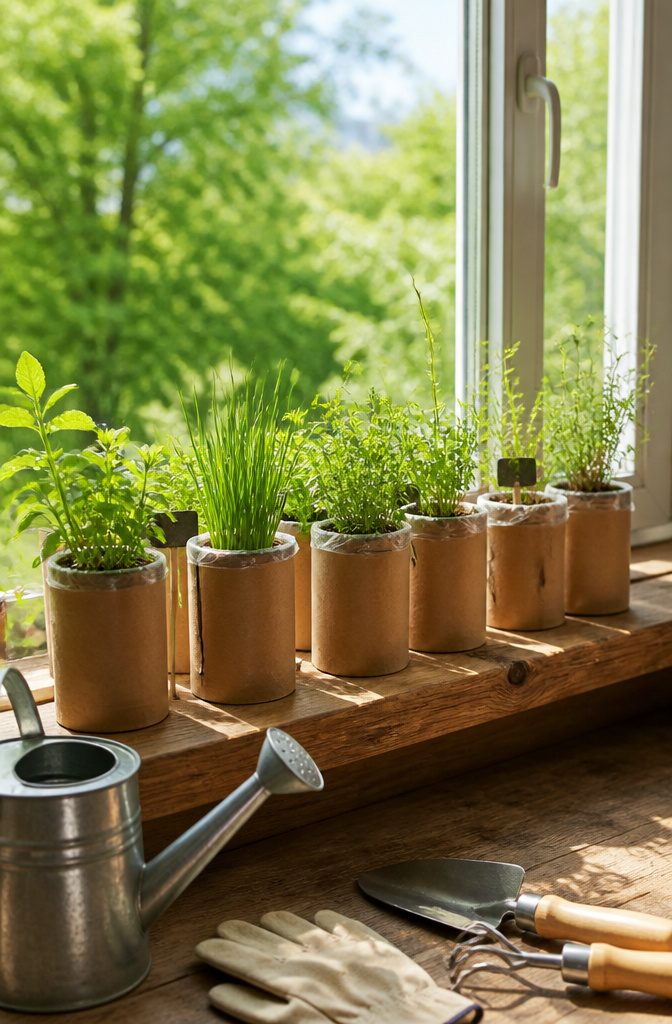
Cardboard tubes turn into herb planters faster than most people expect, and the trick is entirely in the lining.
Line the inside of the tubes with a plastic bag to prevent water damage, because cardboard left wet will soften in a matter of days.
The bag acts as a sleeve between soil and walls, holding moisture in for the roots while keeping the tube itself dry enough to hold shape through a full growing season.
Punch a few small holes through both layers at the bottom so water can escape without soaking the cardboard edge.
The narrow diameter suits herbs that stay compact. Thyme, oregano, and chives handle the tight root space well; rosemary or sage want more room and will dry out too fast.
A windowsill row of three or four lined tubes, each labeled with a marker, gives a kitchen the look of a miniature garden without the weight or cost of terracotta.
The cardboard will eventually soften at the base even with good drainage, so plan on a season or two before replacing.
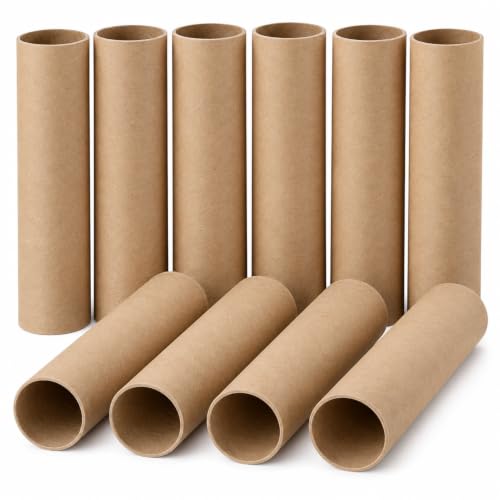
【3MM EXTRA-THICK CARDBOARD WALL】 Made with a sturdy 3 mm thick cardboard wall, approximately 0.12 inch, for a stronger structure that resists bending and crushing during craft projects.


Package Contents: 24 pieces total - 12 tubes 1.38" (3.5 cm) dia × 15.9" (40.4 cm) L and 12 tubes 1.77" (4.5 cm) dia × 15.9" (40.4 cm) L; Two diameters included for a variety of DIY crafts and art projects
7. DIY Toothbrush Holder
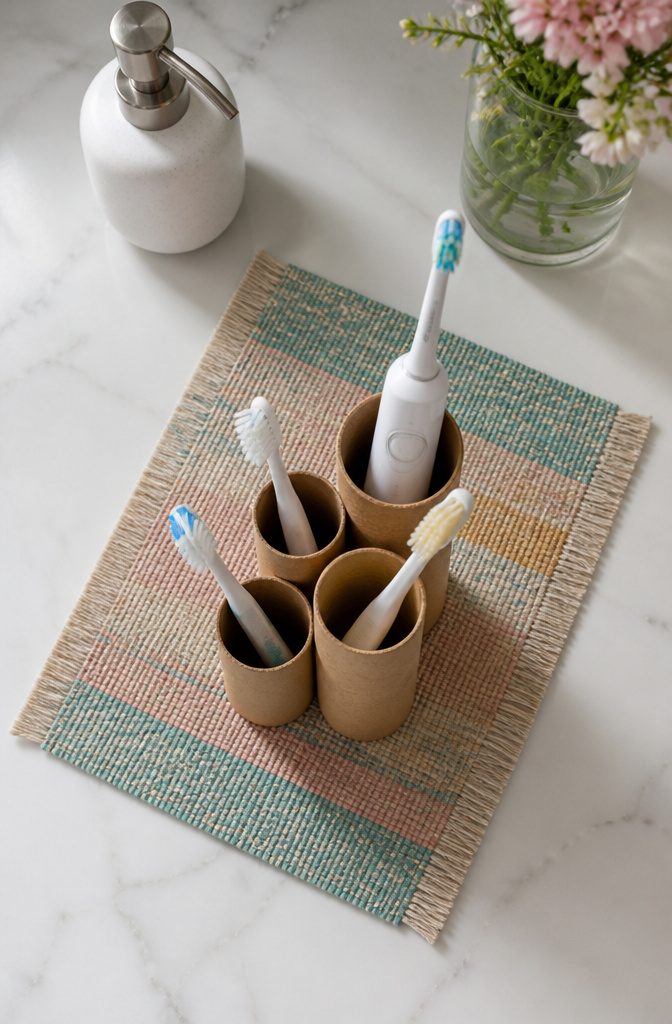
Stacking tubes of different lengths is the move that makes this holder actually work for real life.
A manual brush stands fine in a shorter tube, but an electric toothbrush with its thicker handle and charging base needs the extra height to sit upright without tipping the whole row.
Cut the tubes so the tallest sits about an inch above the shortest, then glue them in a tight cluster so each brush has its own slot.
Waterproof paint or decorative paper finishes the outside, but the inside stays raw cardboard and that matters for cleaning.
Every couple of weeks the tubes need a rinse and a full dry before the brushes go back in. Cardboard left damp sags and smells, so this holder lives longest on a counter that does not get splashed directly.
The cluster shape is up to you: a straight line, a staggered block, or a gentle curve to follow your sink edge.
Secure the cluster at two points, top and bottom, or the tubes drift apart when you pull one brush free.

Dual Ceiling & Wall Installation: Designed for versatile interior upgrades, these decorative panels work perfectly as both wall panels and ceiling tiles. They support glue-up installation with construction adhesive (not included) and are also compatible with standard drop ceiling grid systems for flexible decorating options.

Paintable surface and texture, so you can apply any colors you like
8. Makeup Brush Holder
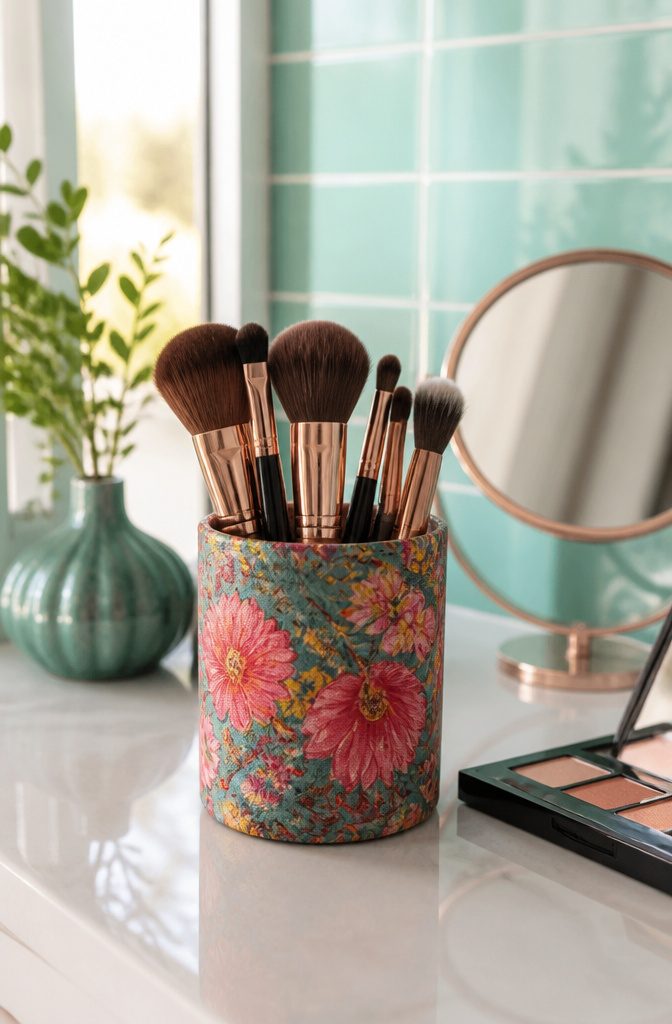
A single cardboard tube can hold a full set of brushes if the diameter matches how many you actually own.
A three-inch tube fits six to eight standard face brushes; anything narrower and the bristles cram together and bend. Paint or fabric covers the raw cardboard, but the finish you choose matters more than the color.
Flat latex paint looks sharp for about a week in a steamy bathroom, then it softens and peels at the edges. Fabric wrapped tight and sealed at both ends holds up better, since the cloth handles humidity shifts without cracking.
Satin or semi-gloss paint sits in the middle: it sheds water splashes if you give it two coats and keep the tube away from the sink’s direct spray.
Whichever finish you pick, the tube sits upright in a drawer or on a counter, bristles up, and the brushes stay clean and accessible.

There's a ceramic vase for every occasion! This petite ceramic vase is great to use in any room, and it comes with 8 different tubes so you can create an individualized look

1、【Hight-Quality】: Made of high borosilicate glass material,it has very high transparency, sturdy and practical.The mouth of the bottle is smooth and round and does not hurt your hands when planting. Note:the connecting rings are seprately, and your need connect the tubes by yourself as you want.

1.Elegant S-Shape Design This S Shape Wooden Base Vase features smooth curves and a fine linden wood board finish, adding a modern and natural touch to your home or workspace.
9. Cardboard Garden Mulch
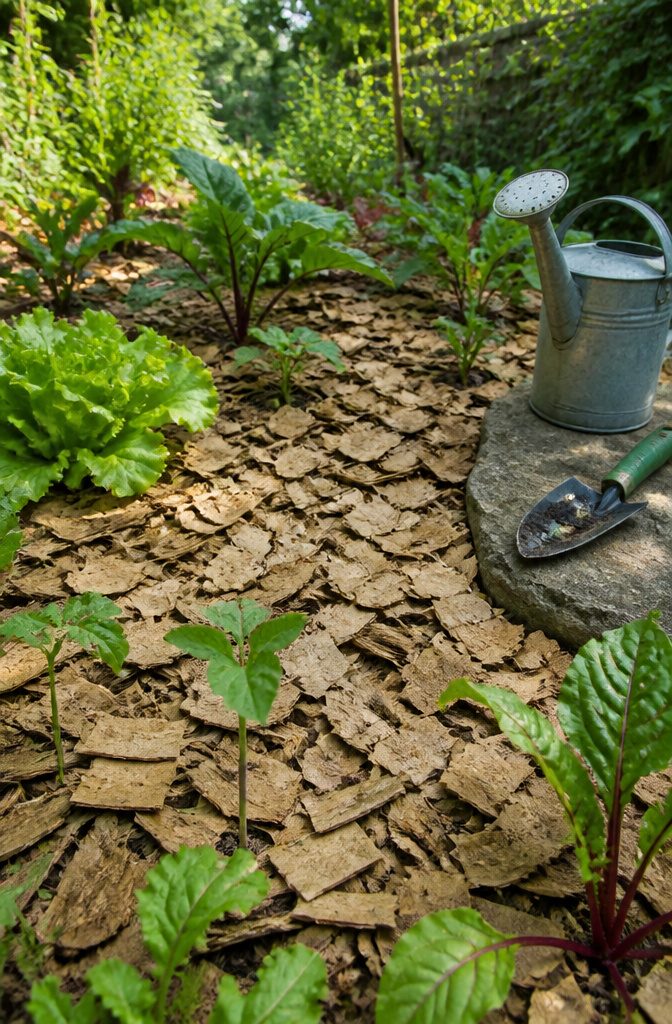
Cardboard tubes from paper towels, toilet paper, or wrapping paper break down into garden mulch that suppresses weeds, keeps soil moist, and regulates temperature while it decomposes.
The first step is removing any stickers or tape; those often contain plastics that do not biodegrade.
Shred or cut the tubes into smaller pieces using scissors or a shredder so they lie flat and interlock instead of rolling away in the wind.
A layer roughly two to three inches thick settles well and blocks most light from weed seeds below. Watering the mulch lightly after spreading helps it mat together and stay put.
The cardboard lasts about one full growing season before it has broken down enough to work into the soil as organic matter, which means you are feeding the bed even as the mulch disappears.
Vegetables with steady moisture needs, tomatoes and leafy greens especially, respond well to this kind of steady, slow-degrading cover.
Leave a small gap between the mulch and plant stems so the cardboard does not hold moisture against the stem and cause rot.

✔ GREAT VALUE: Contains 50 sturdy craft rolls, long lasting value bundle, sufficient quantity, high quality, perfect for handmade and sharing needs.

Package: 36 Sturdy Craft Rolls (3 Sizes) – 12 Packs of 1.38x3.98", 12 Packs of 1.57x3.98", 12 Packs of 1.69x3.98". Long-Lasting Value Bundle with THICK, Heavy Pressure-Resistant Cardboard Tubes – A Durable Upgrade From Flimsy Standard Toilet Paper Roll Tubes.

100 pcs cardboard tubes with box: You will got 100 pcs cardboard tubes for crafts with box , convenient for long-term storage, suitable for schools, families, and handicraft enthusiasts to use in bulk
10. Garden Markers
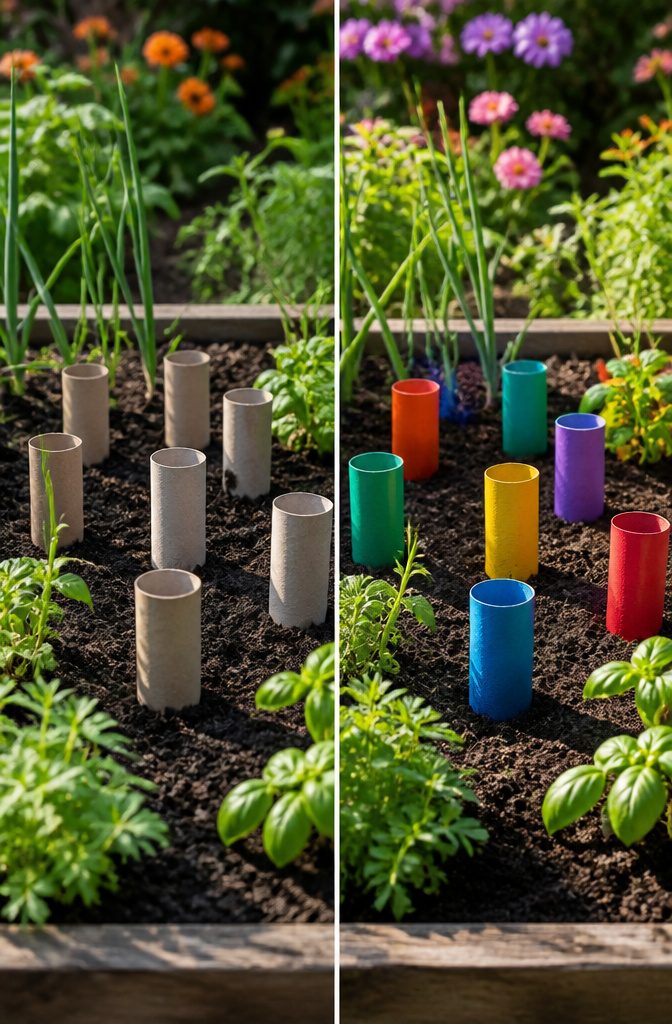
Cardboard tubes left over from paper towels or wrapping paper make garden markers that actually survive a season if you paint them right.
Cut the tubes into small sections, paint them in bright colours, then label each one with the plant name.
The paint matters more than the cardboard: acrylic craft paint holds up weeks longer if you seal it with a coat of outdoor Mod Podge or spray varnish.
Without that step, rain softens the tube in days and the colour bleeds into mud.
Height is the detail that saves your knees. A marker sunk two inches into soil and standing six inches clear of the ground stays visible even after the lettuce fills out.
Shorter pieces disappear under foliage, and taller ones catch wind and lean. A Sharpie works for labeling, but paint pen lines stay readable after a month of sun and sprinklers.
The bright colours help too; a tomato marker in fire-engine red catches your eye from across the bed where brown wood or green plastic would blend in.

Preserve Flower Freshness – These floral tubes with caps extend the life of fresh cut flowers by keeping stems hydrated and leak-free during transport or display.

Preserve Flower Freshness – These floral tubes with caps extend the life of fresh cut flowers by keeping stems hydrated and leak-free during transport or display.

Preserve Flower Freshness – These floral tubes with caps extend the life of fresh cut flowers by keeping stems hydrated and leak-free during transport or display.
Why Cardboard Works for Decor
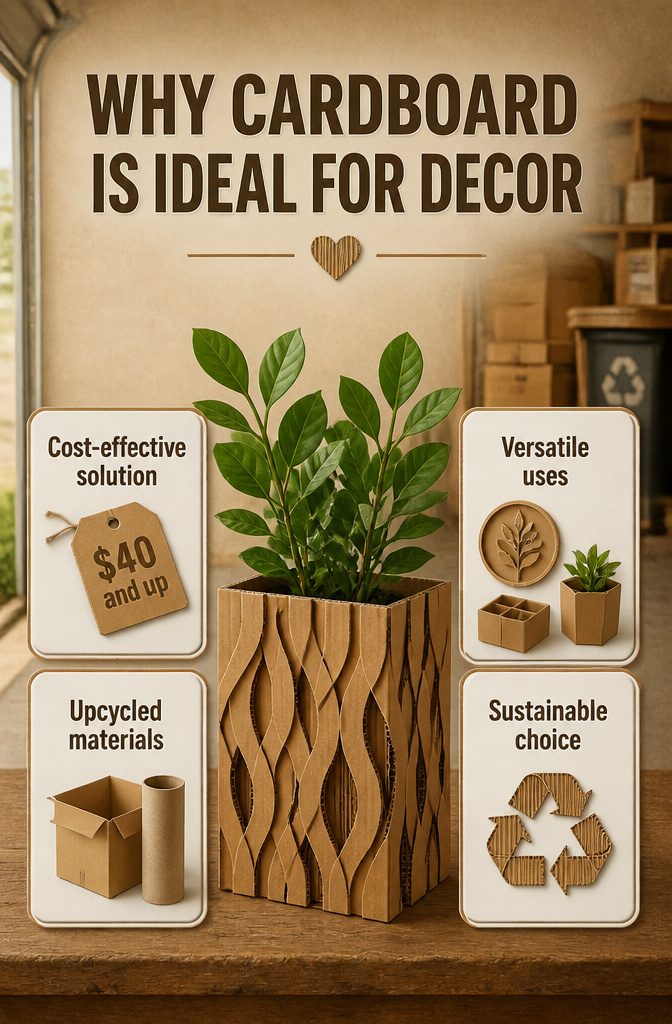
Cardboard sits in the garage anyway, flattened behind the recycling bin or stacked from the last Amazon order. Last spring I needed a side table for the guest room and priced out particleboard options at $40 and up.
A double-walled shipping box, some glue, and leftover paint cost me the time it took to drink coffee and watch it dry.
The finished piece held a lamp for six months before I passed it to a friend who was still using it last I checked.
What convinced me, reading through project after project, is how cardboard replaces materials that carry heavier costs in money and extraction.
Upcycling it skips the manufacturing footprint of new wood, metal, or resin decor. The same box becomes wall art, a planter, or drawer organizer depending on what room needs attention, and the technique shifts without buying fresh supplies.
Essex Tubes, a UK cardboard supplier, puts the range plainly:
Cardboard tubes offer endless possibilities for creative and sustainable home decor projects.
That applies to the reader too: the tubes from your finished paper towels, the boxes from your delivered groceries, the mailers piling by the door.
Each one is already paid for, already shaped, and waiting for the afternoon you decide to cut rather than carry it to the curb.
Paint and Finish That Lasts
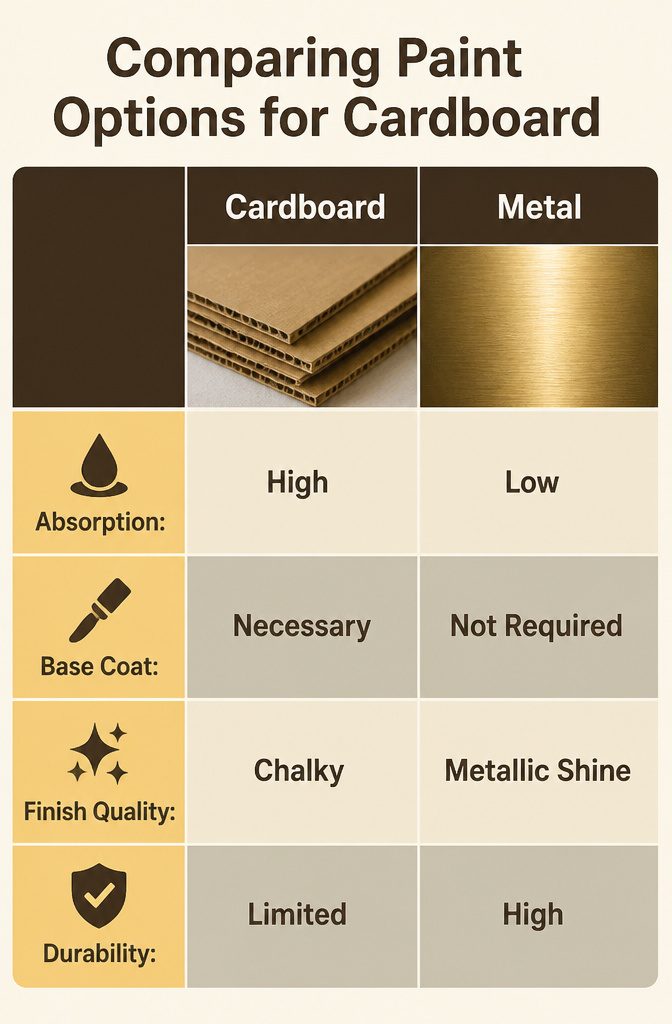
Cardboard sucks up paint like a sponge, which is the first thing that ruins a finish. Latex house paint sits on top and cracks; acrylic craft paint soaks in and looks chalky.
What works is a thin coat of gesso or white glue thinned with water, brushed on and left to dry. That seal keeps the next layer from disappearing.
Metallic paint needs that sealed surface even more.
Without it, the mica flakes catch on the fibers and the whole thing turns muddy brown. I have seen people skip the base coat, paint three layers of gold, and still end up with something that reads as mustard.
Two thin coats over sealed cardboard, letting each dry to the touch, reads as actual metal from across the room.
Fabric wrapping covers the paint problem entirely.
White glue brushed on the back of a thin cotton, pressed smooth, and wrapped around the edges like a gift. Thick fabrics fight back; they bubble at the corners and the glue bleeds through in spots that stay stiff forever.
A light iron on cotton setting flattens the weave before you start, and that ten seconds saves an hour of pressing bubbles with a fingernail.
Sealant is where finishes die in humidity. Spray acrylic works for painted pieces; it does not flex enough for fabric.
A brush-on polycrylic, two coats, lets fabric shift slightly without cracking. I have seen pieces stored in bathrooms peel at the edges within a month because the sealant was wrong for the job.
Garden Uses Beyond the House
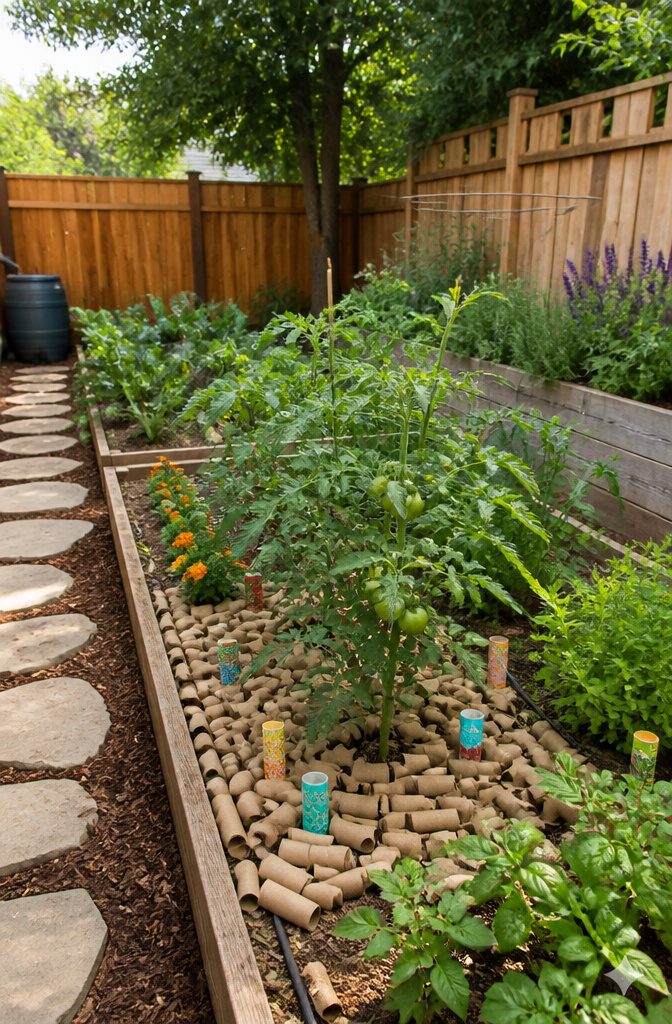
Cardboard in the garden surprised me the first time I tried it. I had a stack of paper towel tubes sitting on the workbench after a weekend of indoor projects, and the compost bin was already full.
Spreading them around the tomato plants felt like admitting defeat, as if I had run out of proper gardening supplies. A season later, those same plants had the cleanest root zone in the bed.
Shred or cut tubes into small pieces and leave a gap between the mulch and plant stems so the cardboard does not trap moisture against the stem and cause rotting.
Water lightly after spreading to help the pieces settle. Over the season, the cardboard breaks down and adds organic matter to the soil while it suppresses weeds and holds moisture in place of bark or straw.
Markers from toilet paper tubes are simpler still. Cut each tube into sections, paint them in bright colors, and write the plant name directly on the surface.
The color coding helps spot herbs from across the garden, and replacing a faded marker costs nothing when the next roll runs out.
The gap spacing for mulch matters more than I expected. Push cardboard right against a stem and the dampness collects; leave that small space and the cardboard does the work of commercial mulch without the trip to the garden center.
Frequently Asked Questions
What can I make with cardboard for home decor?
Cardboard tubes and boxes become wall art, vases, jewelry organizers, bedside lamps, spice racks, toothbrush holders, and makeup brush holders.
A standard shipping box with glue and leftover paint can also become a side table that holds a lamp for months.
The material is already shaped and paid for, so each project skips the cost and manufacturing footprint of new wood, metal, or resin decor.
How do you make a cardboard tube lamp?
Cut geometric or patterned shapes into a large cardboard tube, then place a battery-operated LED light inside so the light shines through and casts shadows on the walls.
LEDs are required because real candles or plug-in bulbs against cardboard create a fire risk. A tube about four inches across, like a fabric store ship tube or rug roll core, gives enough surface for a pattern that wraps around.
Can I use cardboard for garden mulch?
Yes, cardboard tubes from paper towels, toilet paper, or wrapping paper break down into mulch that suppresses weeds, keeps soil moist, and regulates temperature.
Shred or cut them into small pieces so they lie flat and interlock instead of rolling away.
Spread a layer two to three inches thick, water lightly to help it mat together, and leave a small gap between the mulch and plant stems so moisture does not cause rot.





