
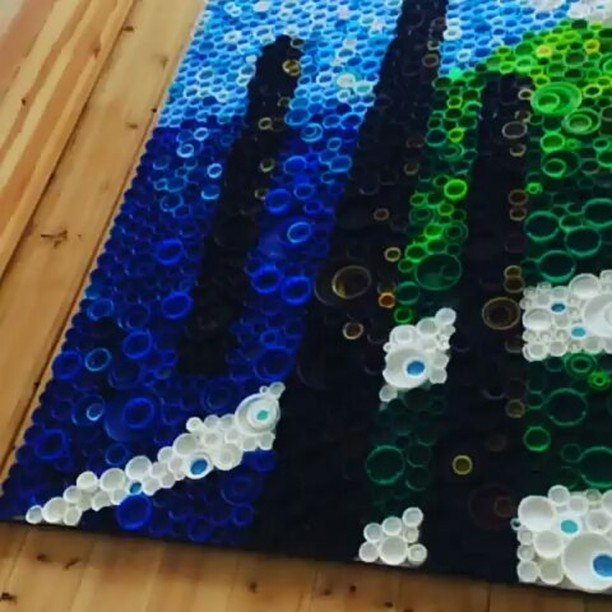
Your caps decide a lot here: metal ones hold up to resin, glitter and paint, while plastic ones suit the lampshade and curtain, since light passes through them and the edges are smooth.
These ideas run from a clock with caps marking the hours to a pile of tiny pies, and most fit into an afternoon.
Sorting caps by material and color before you choose a project saves frustration, since gathering enough of them is the slowest step in several of these.
1. Bottle Cap Wall Art
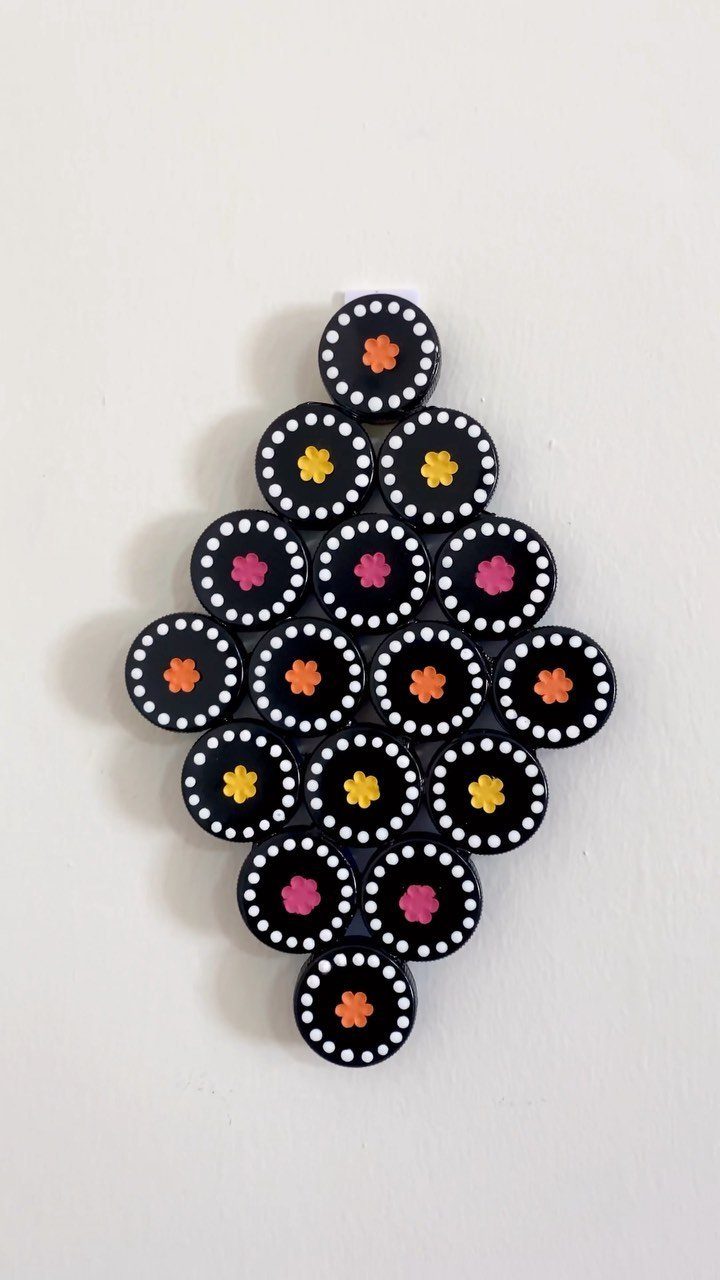
Black caps make a strong base for a diamond layout, because the color lets whatever sits in the center do the talking. Painting each center a different shade, or gluing in a small flower, keeps the pattern from feeling flat.
Lay the whole diamond out on the floor before gluing anything. Spacing mistakes are easier to fix on carpet than on a finished wall.
2. Bottle Cap Clock
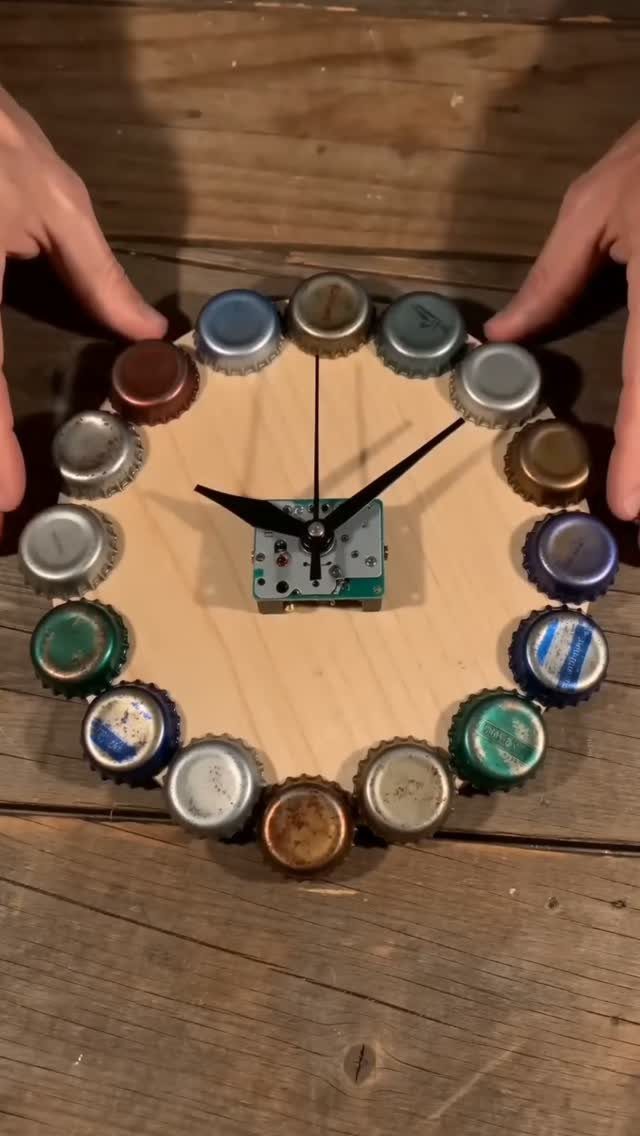
A clock like this lets the bottle caps stand in for the numbers, so the hour markers are the whole design. Wooden discs are easy to find at craft stores, and the project fits an afternoon.
Mark 12, 3, 6 and 9 first, then fill the gaps between them.
That keeps the spacing even without any measuring skill. A clock movement kit supplies the hands and the mechanism, and you drill a small center hole for it.
3. Bottle Cap Serving Tray
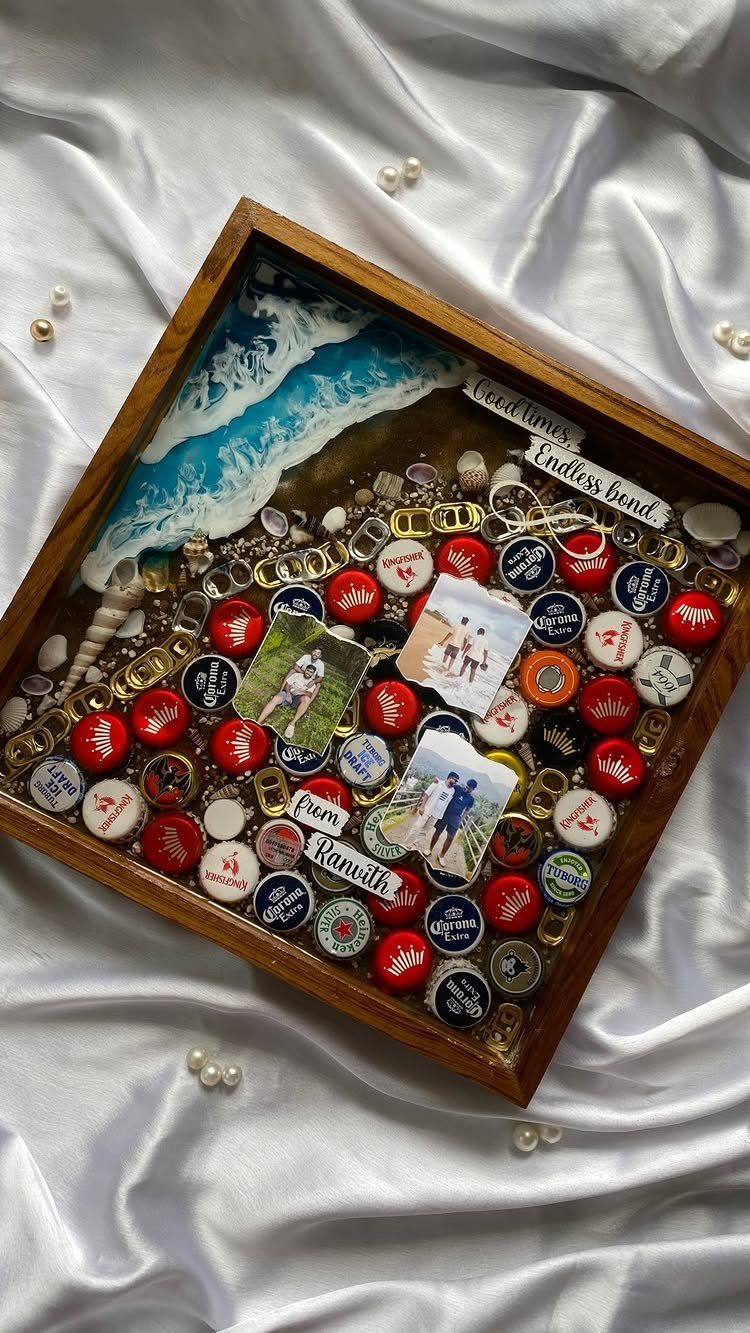
Anyone who has a jar of caps and no idea what to do with it should consider a tray. Here the caps are set into resin alongside shells, so the tray becomes a keepsake more than a serving piece.
According to its maker, this one used beer caps, alcohol bottle caps, beach sand and shells. Sand and shells make a good swap-in if you don’t have enough caps.
Add printed photos if you want a gift. Seal them well under the resin, since paper soaks up moisture.
4. Bottle Cap Snowman Ornaments
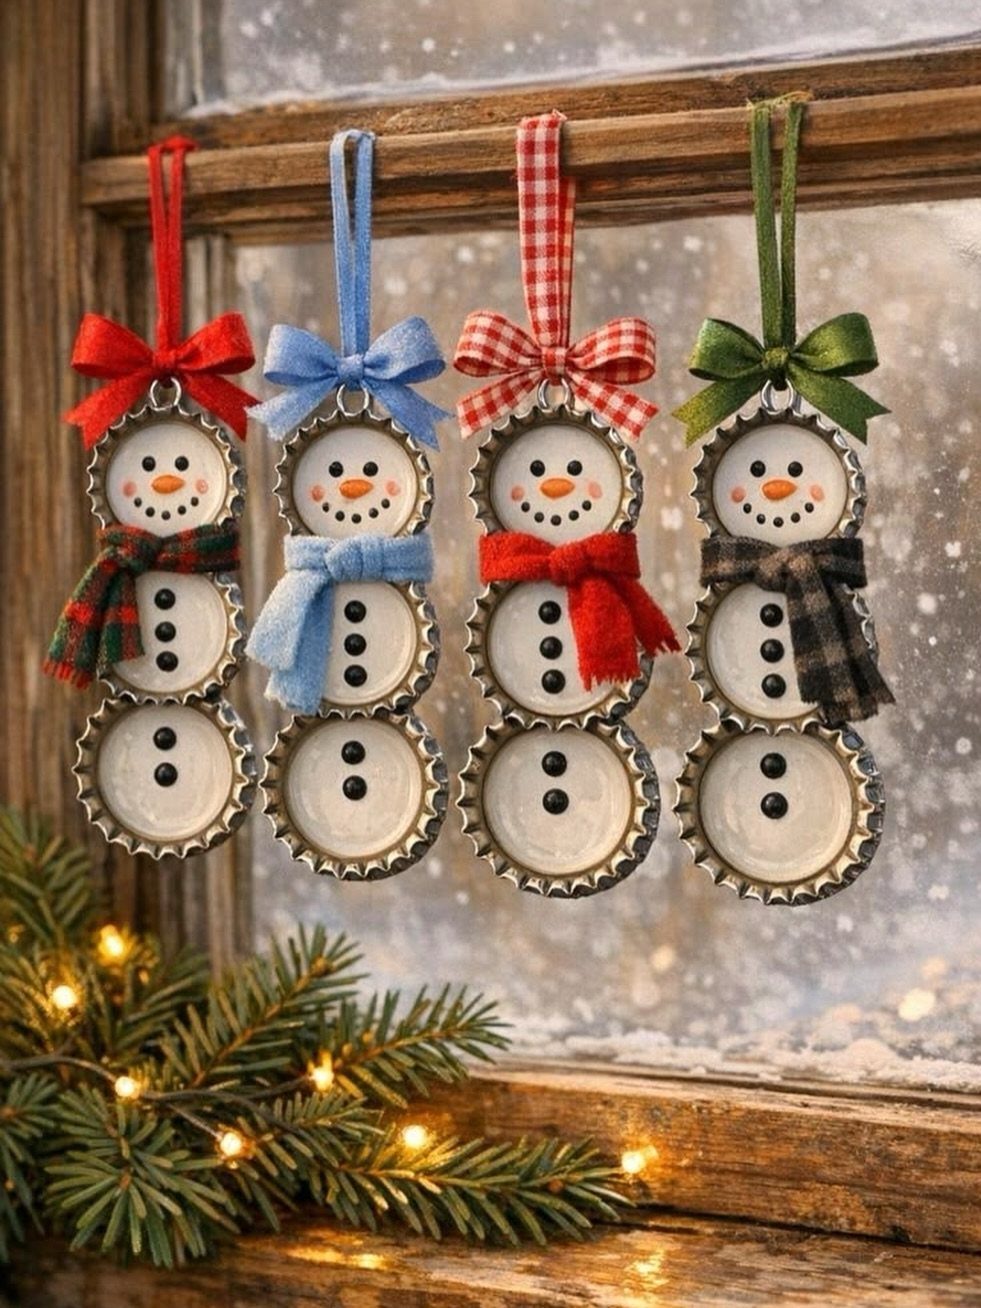
Stacked caps turn into a snowman faster than you would expect, and four of them will fill a window.
Ribbon scarves and button details give each one its own personality, and hanging them on the same glass keeps the look cohesive.
White paint on the caps is my pick for the body. Glue the stack together before adding the ribbon loop, and let it dry fully so the layers don’t slide.
This is a good one for kids, since the pieces are small but forgiving.
5. Bottle Cap Necklaces
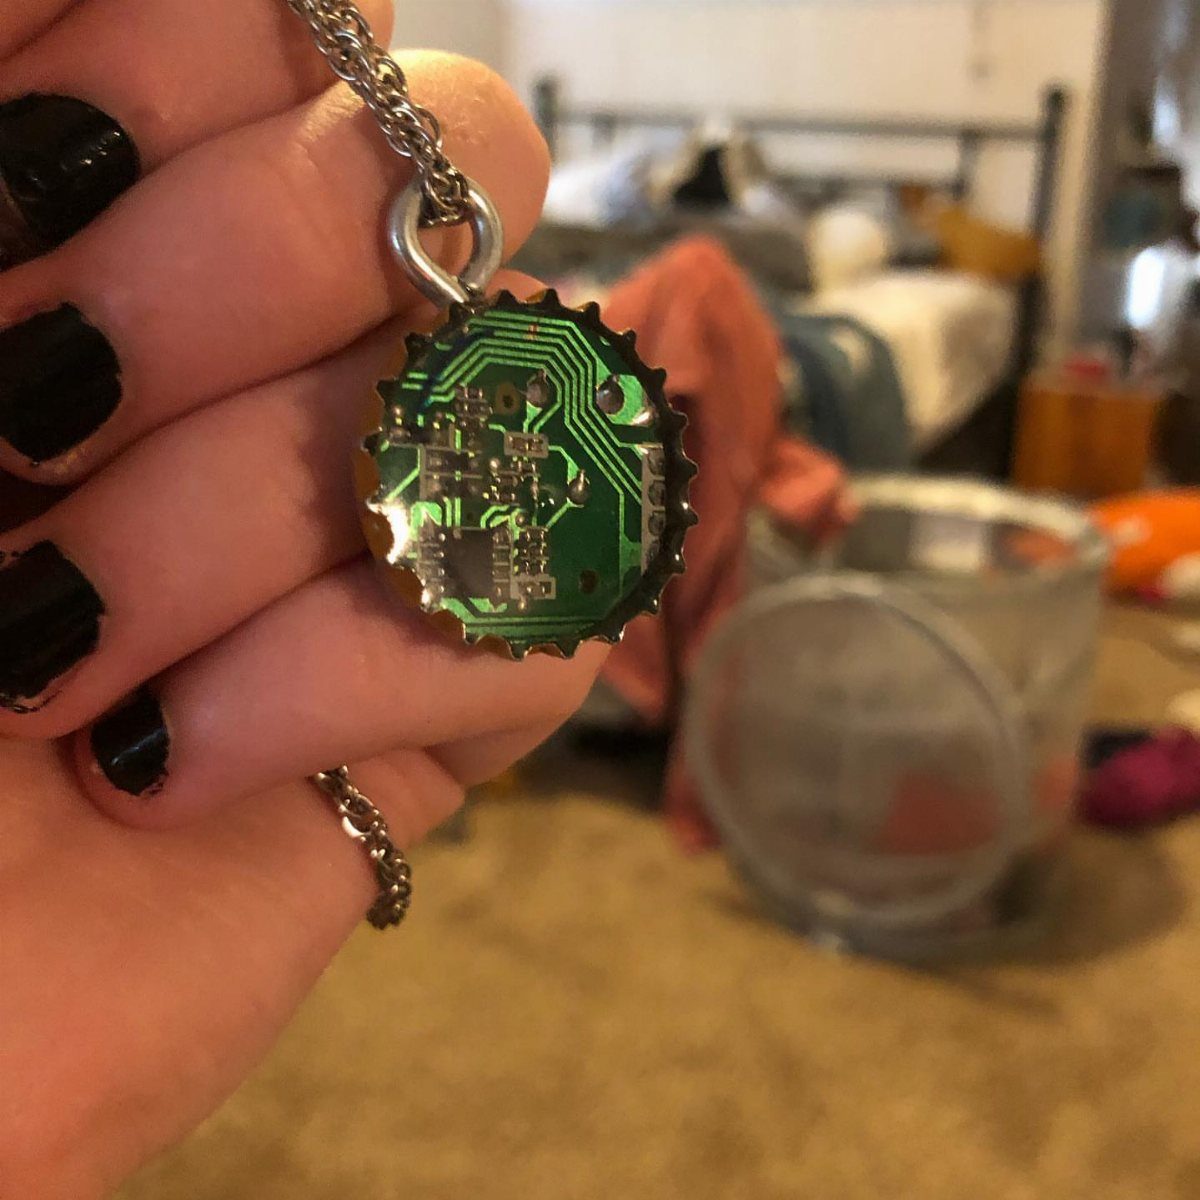
A bottle cap makes a ready-made pendant setting, and the shallow well holds more than you would guess.
A tiny circuit board is a clever fill, but a photo, a dried flower or a bit of paper works the same way.
Press the filling in, cover it with clear resin or a domed sticker, and glue a loop or bail to the back.
Add a chain and the gift is done. Cheap, quick, and easy to personalize.
6. Bottle Cap Windchime
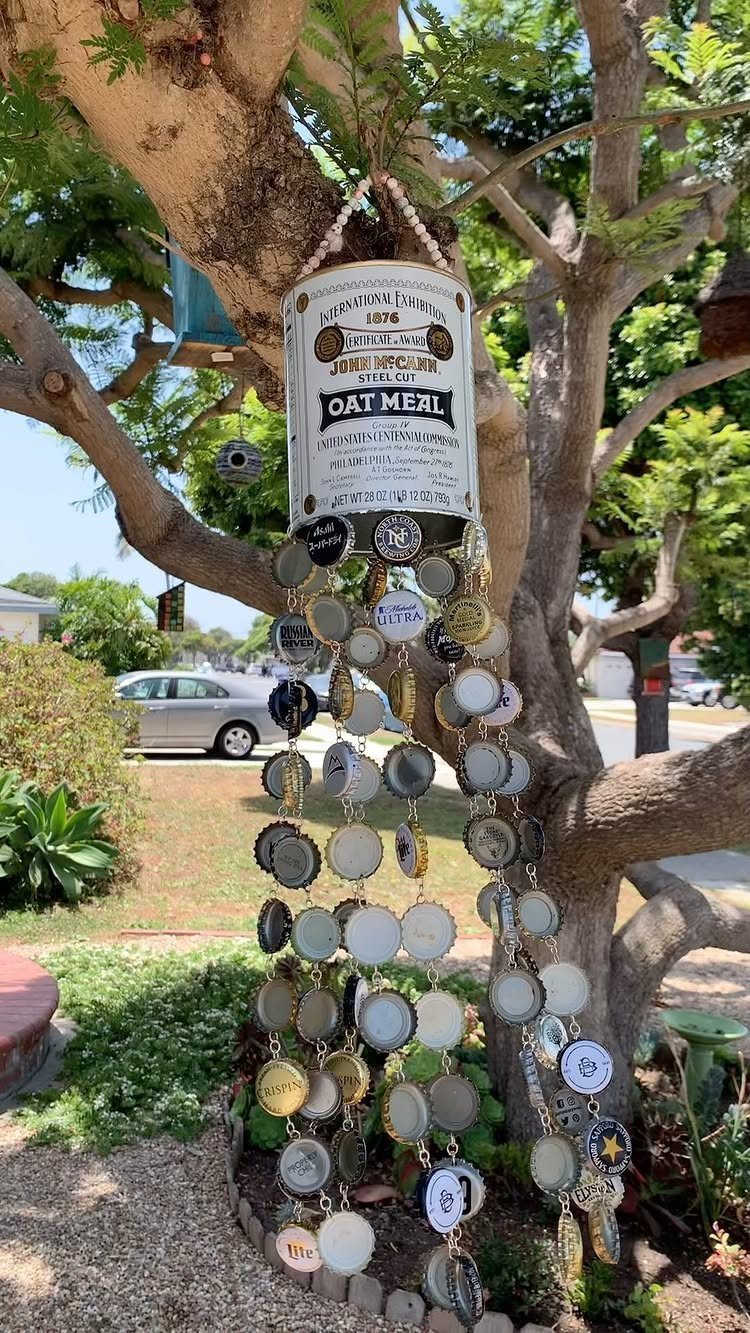
Caps clinking against a metal tin sound very different from glass or bamboo chimes: sharper and more rattly than musical. That suits a casual porch, not a quiet reading nook.
An old tin works well as the top piece, with caps hanging below it on strings.
Poke a hole in each cap with a nail first, and vary the string lengths so the caps knock together in the breeze. Hang it from a sturdy branch.
7. Bottle Cap Keychains
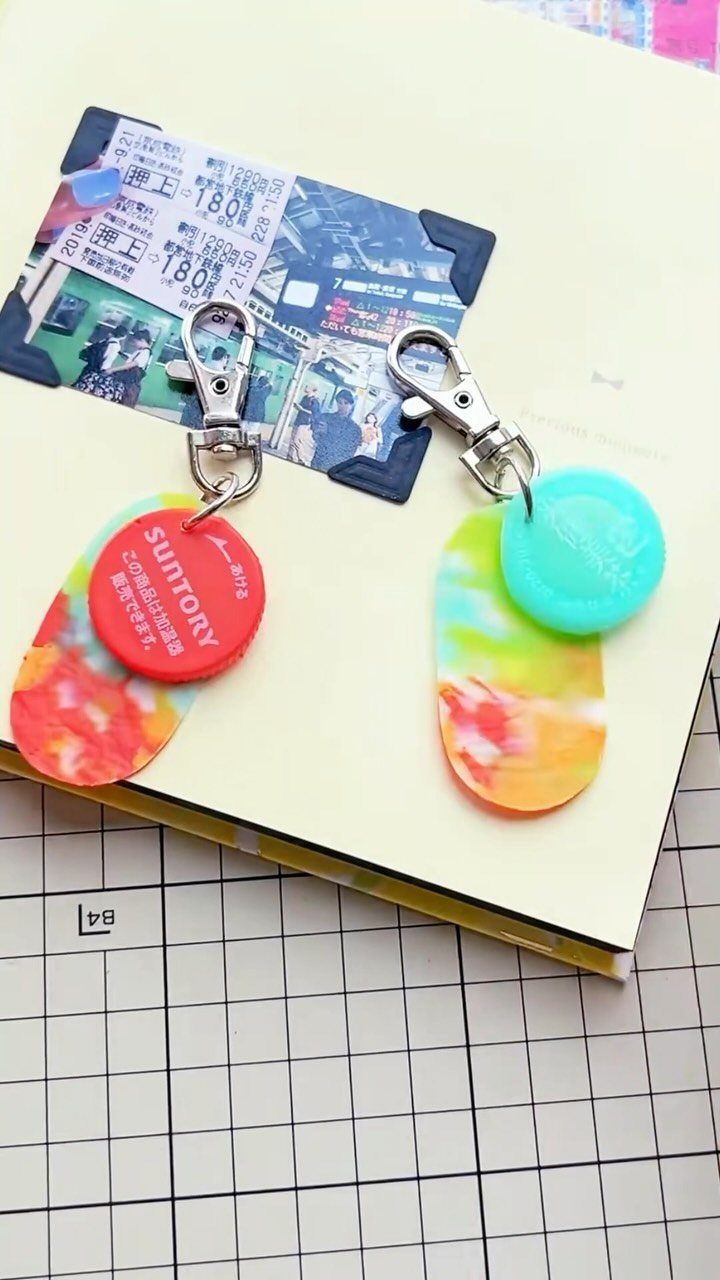
Resin charms and a bottle cap make a pair that looks far more finished than the materials suggest.
A cap with a bold logo or a bright color does the design work on its own, so the charm only needs to complement it.
Glue a small eye pin or loop to the back of the cap, then thread on a key ring. Pick caps that match the charm colors.
Cheap enough to make in batches for gifts.
8. Bottle Cap Bag
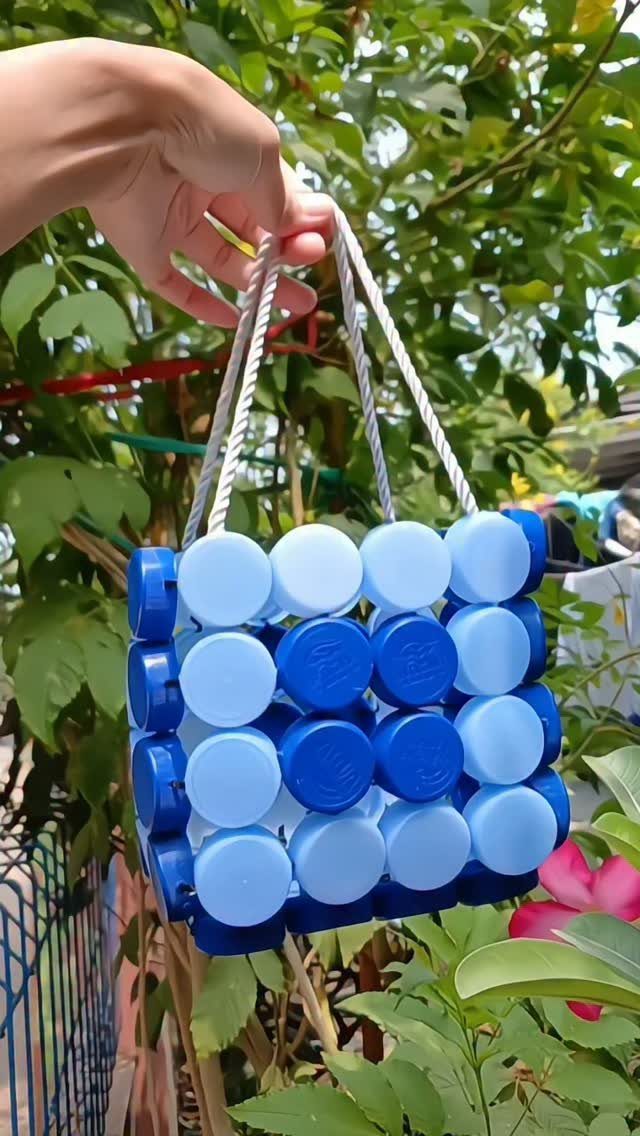
Plastic caps in 2 colors are what make a bag like this work, since a simple blue and white pattern reads as deliberate.
Plastic is the better choice here over metal because the caps are lighter and have no sharp edges.
Collecting enough caps is the real job, so start saving well before you plan to build. Rope handles keep the look casual and cost very little.
Expect a small bag, not a tote. A bag this size suits a few light items.
9. Bottle Cap Toys
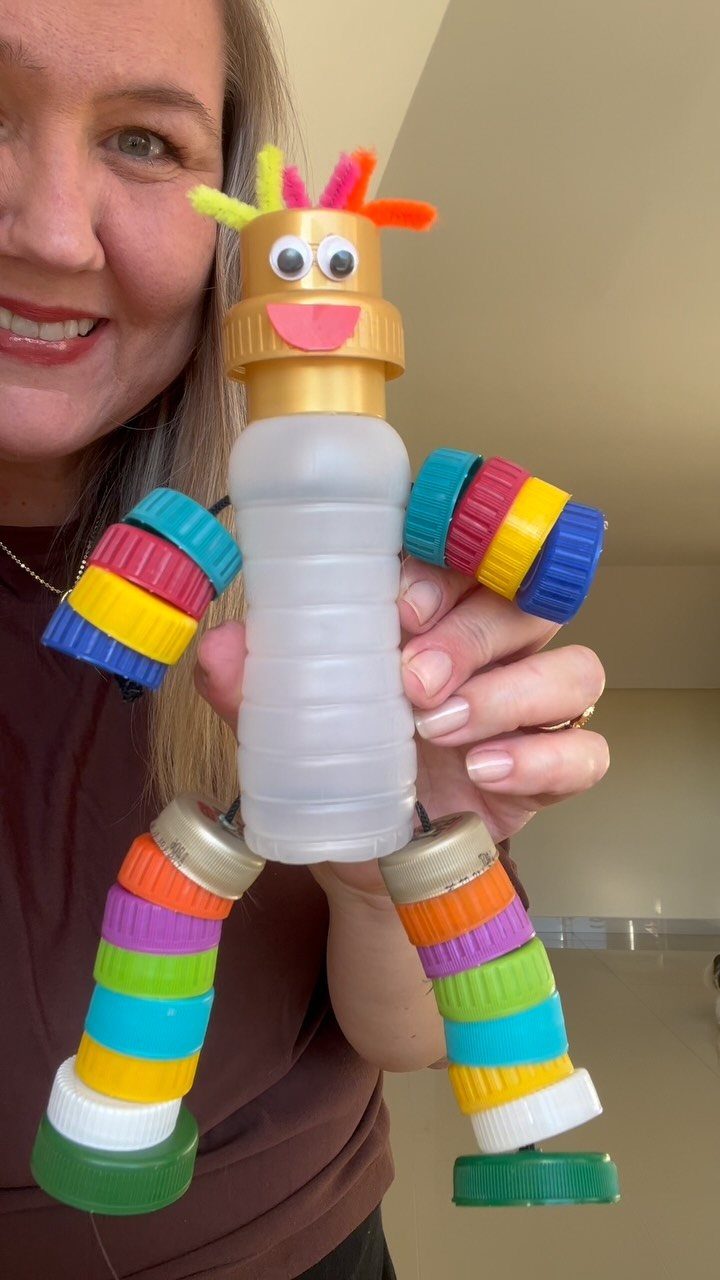
A plastic bottle becomes a robot body once colorful caps go on as buttons, hands and feet. Googly eyes and pipe cleaners finish the face and add bendy arms, so no sewing or cutting is needed beyond the basics.
I would hot glue the caps for a quick afternoon build, though white craft glue works if little kids are doing it alone and can wait for it to dry.
Let each child choose the cap colors. No 2 robots will match, and that is the fun of it.
10. Bottle Cap Sculptures
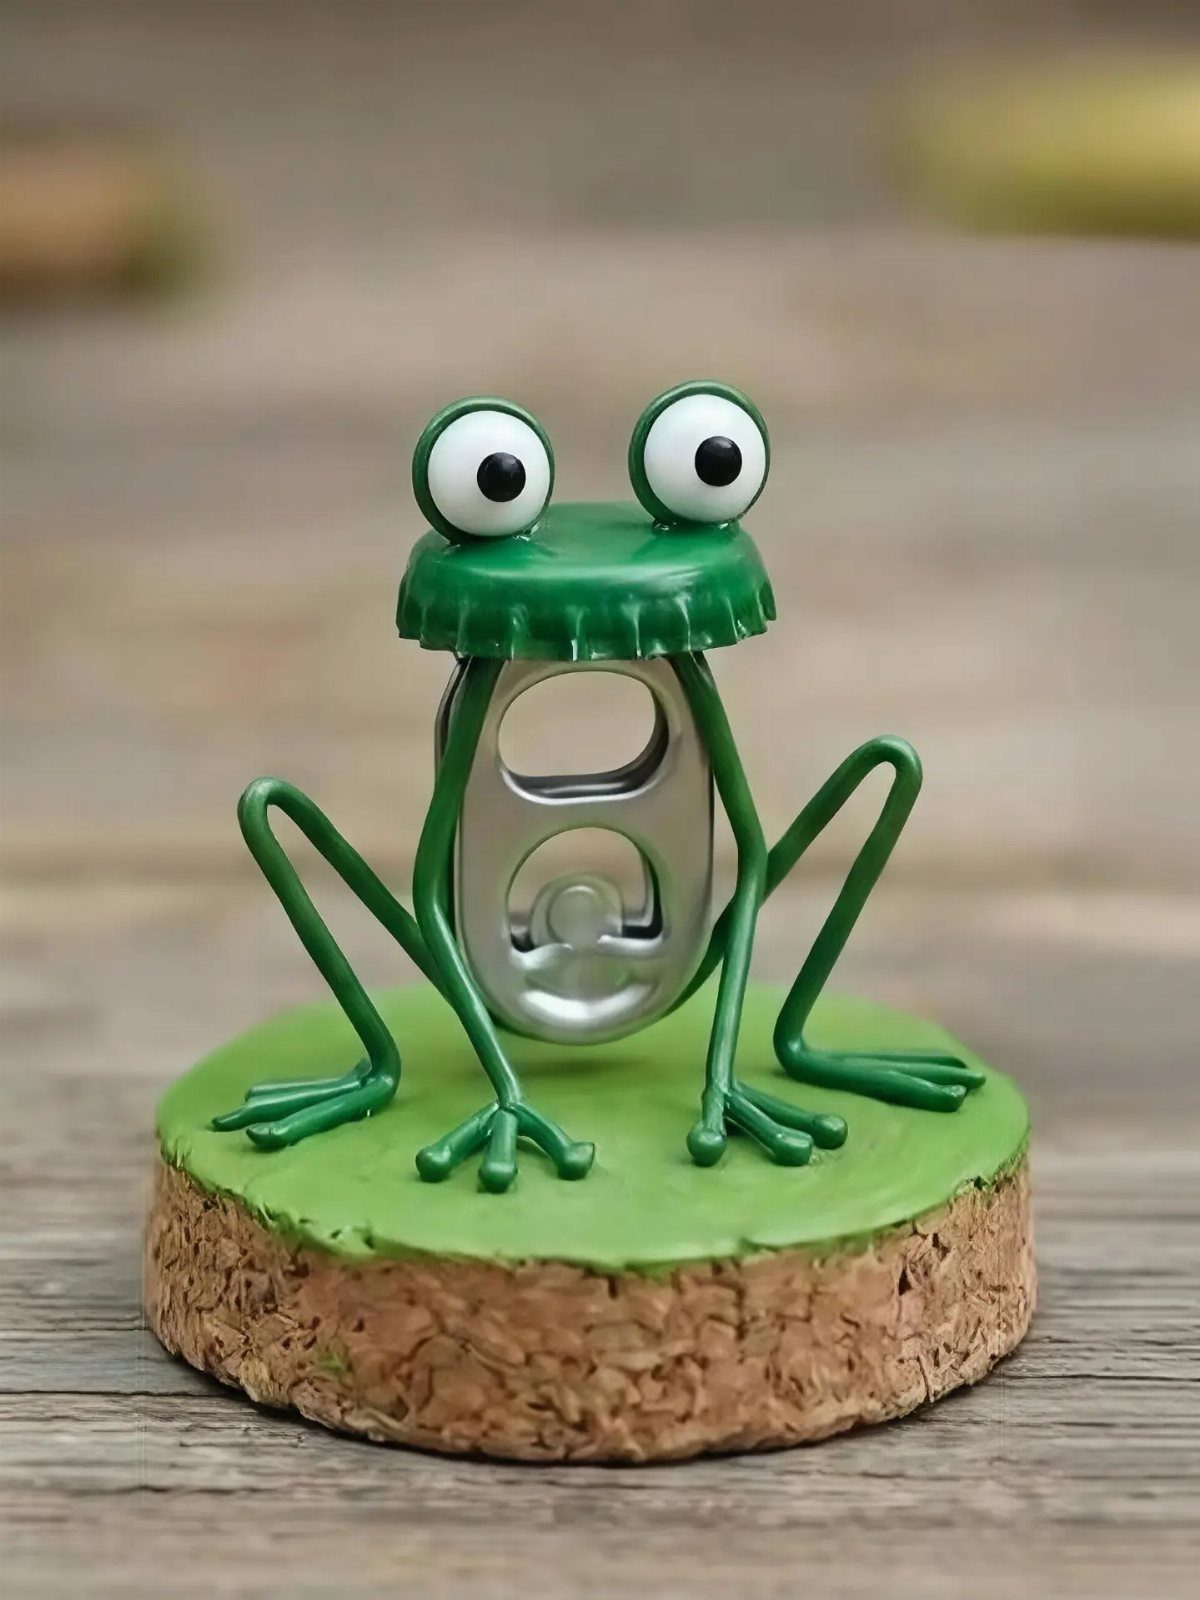
A frog is a good first sculpture because the cap already gives you the round body. Wire makes the legs, and a can pull-tab can serve as a small detail piece.
A cork painted green makes a good base for a bottle cap frog, since it gives the sculpture a weighted foot to stand on and keeps it upright on a shelf.
Bend the wire legs before gluing so you can adjust the pose.
Small figures like this finish quickly, which makes a few of them a reasonable afternoon project.
11. Bottle Cap Fishing Lures
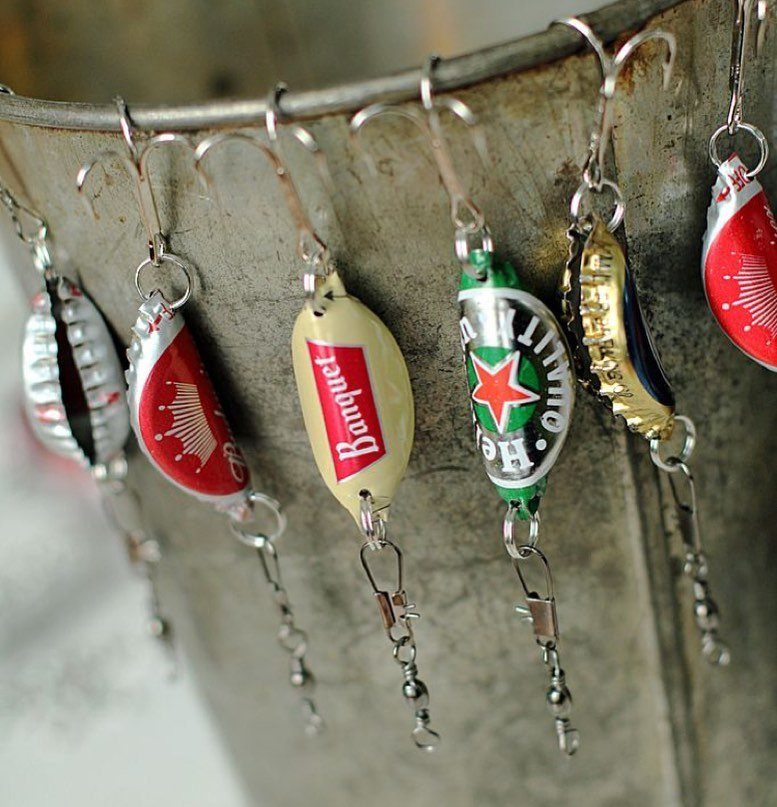
Flattening the cap is the step that turns it into a lure, since a flat, shiny disc flashes the way a lure should. Brand logos such as Banquet or Heineken stay visible, which makes each lure a little different.
Hammer the cap flat on a hard surface, then attach a hook. I would wear gloves for the flattening, because the crimped edges are sharp.
12. Bottle Cap Snakes
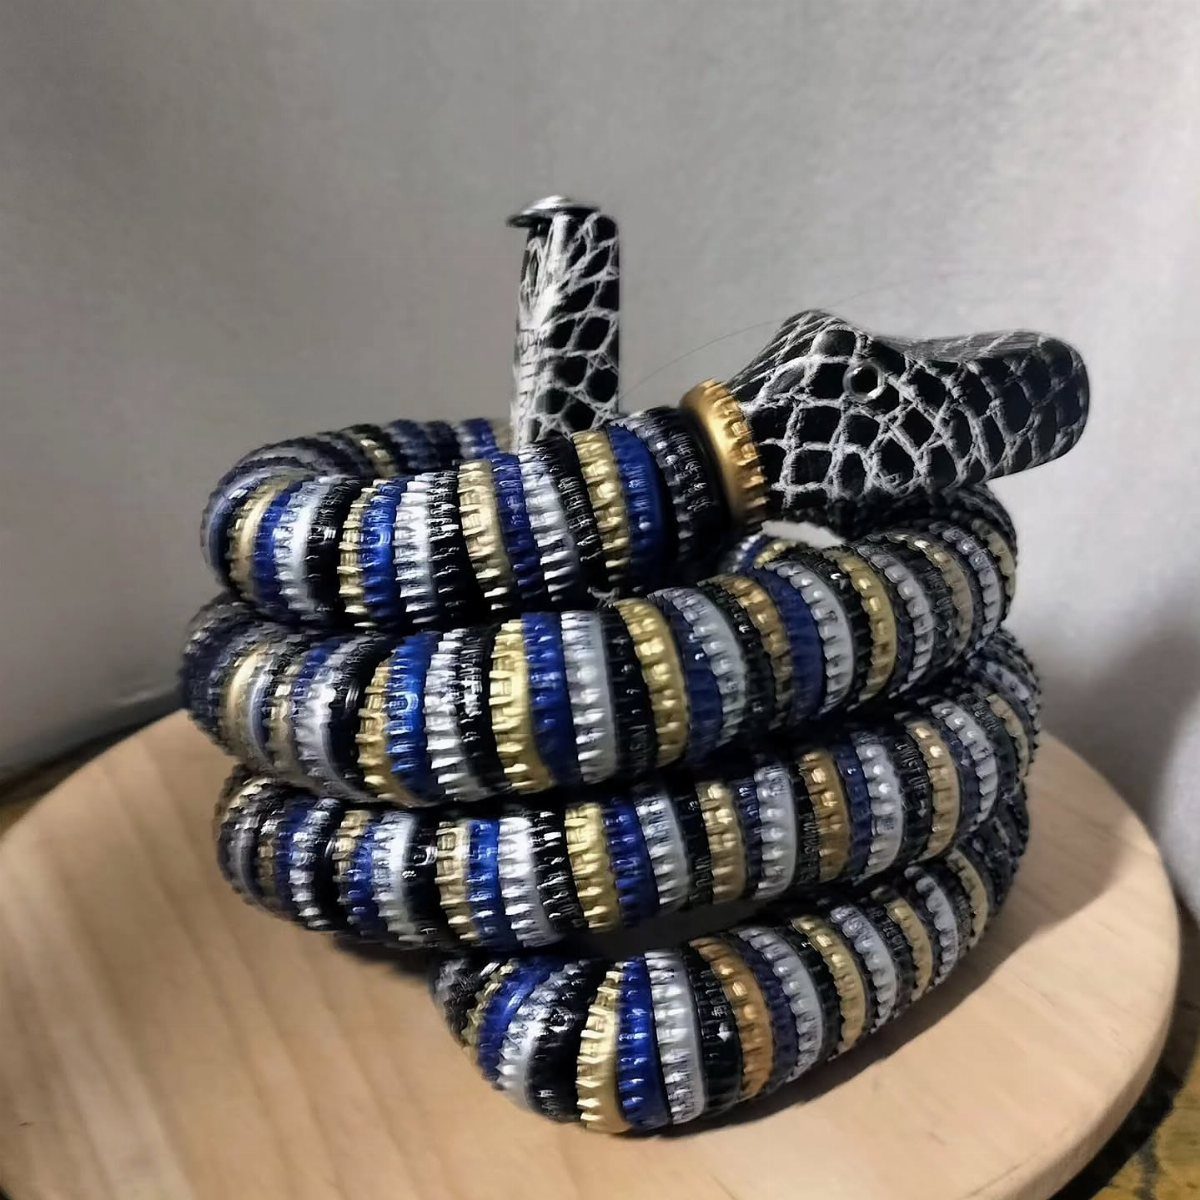
Snakes suit bottle caps because a coiled body is just caps stacked in a spiral. Alternating blue, gold and silver paint gives the scales a pattern without any fine brushwork.
Start the coil on a wooden round base, gluing each cap slightly overlapping the last. Save the head for last and paint it with a contrasting pattern so it stands out from the body.
Expect to use a lot of caps, so start collecting early.
13. Bottle Cap Miniature Pies
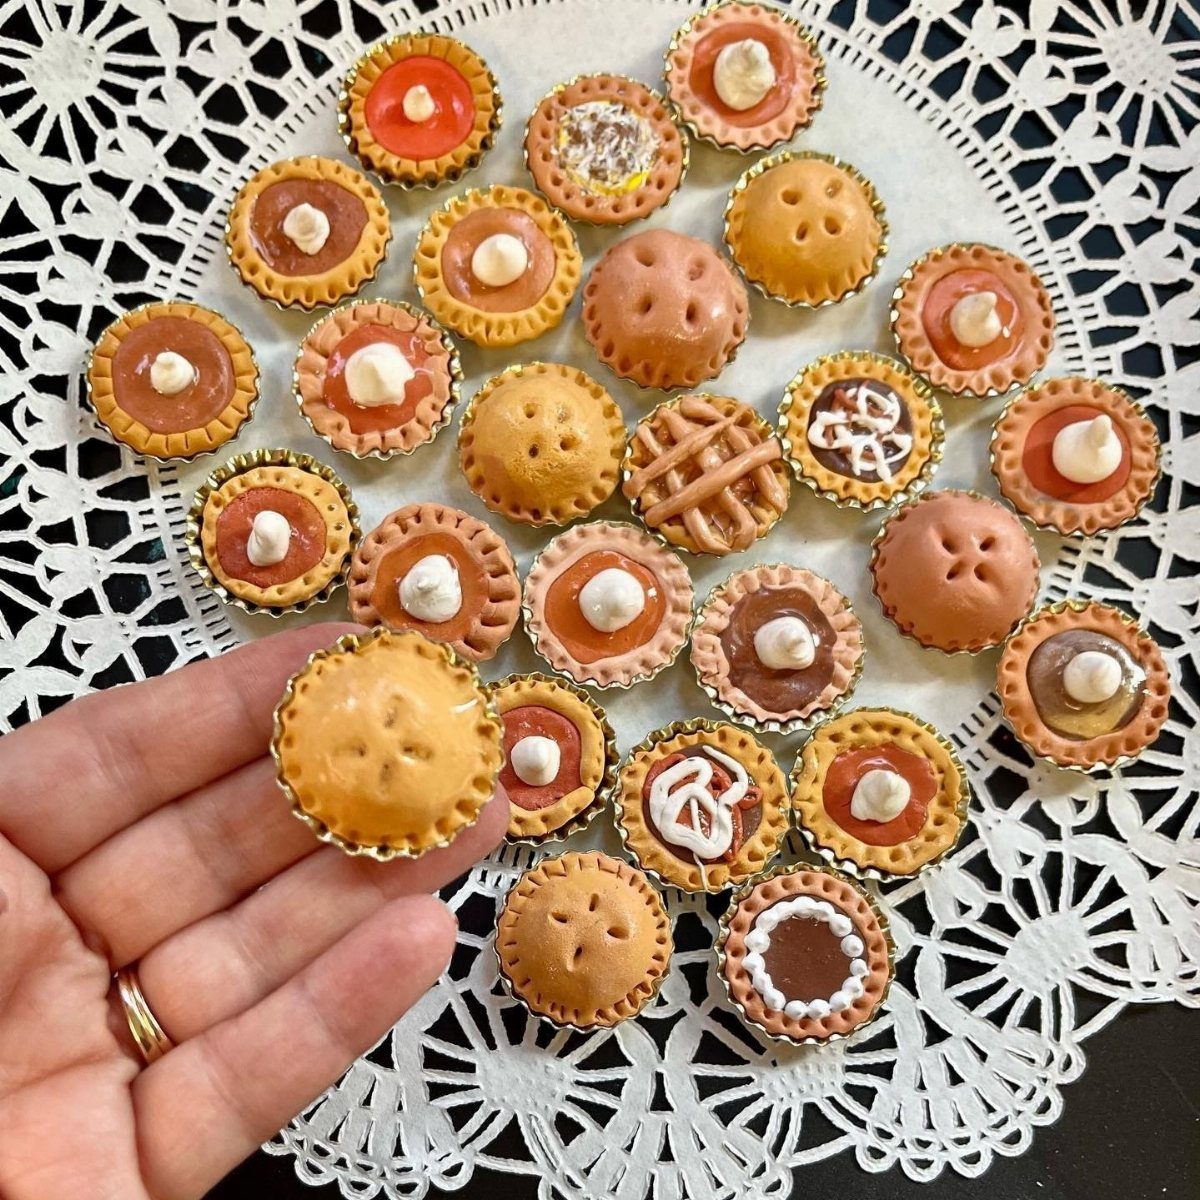
The shallow well and ridged rim of a standard bottle cap already look like a tiny pie dish, so the shaping is done before you start.
Fill each one with colored clay, then add a lattice strip or a dotted rim in a second shade.
Gold caps give a baked look before you add anything. Make a batch of them and the filling colors do the variety for you.
These are sized for dollhouses, so they suit a shelf or a play kitchen better than any real serving.
14. Bottle Cap Lampshade
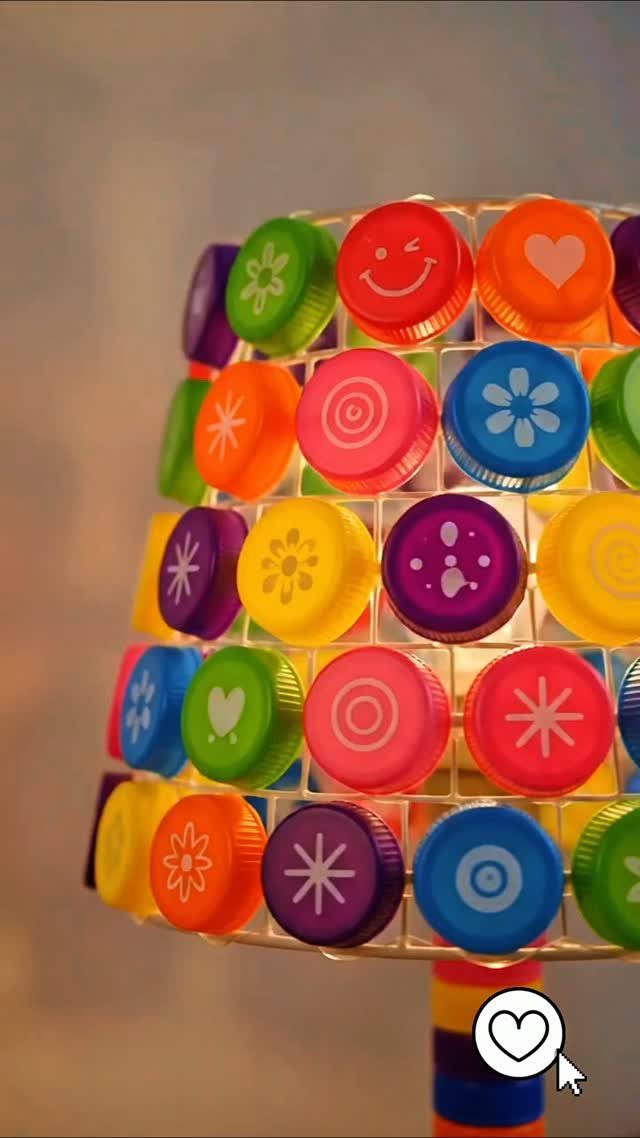
Plastic caps with printed symbols work for a lampshade because light passes through the thin plastic and lets the colors glow. Metal caps would block it, so stick with plastic.
Build the grid on a frame in rows, keeping the caps flush so the pattern reads as a clean checkerboard of color. Sort the caps by shade before you start.
Collecting enough caps is the slow part, so save them for a while first.
15. Fairy Garden Bottle Cap Roof
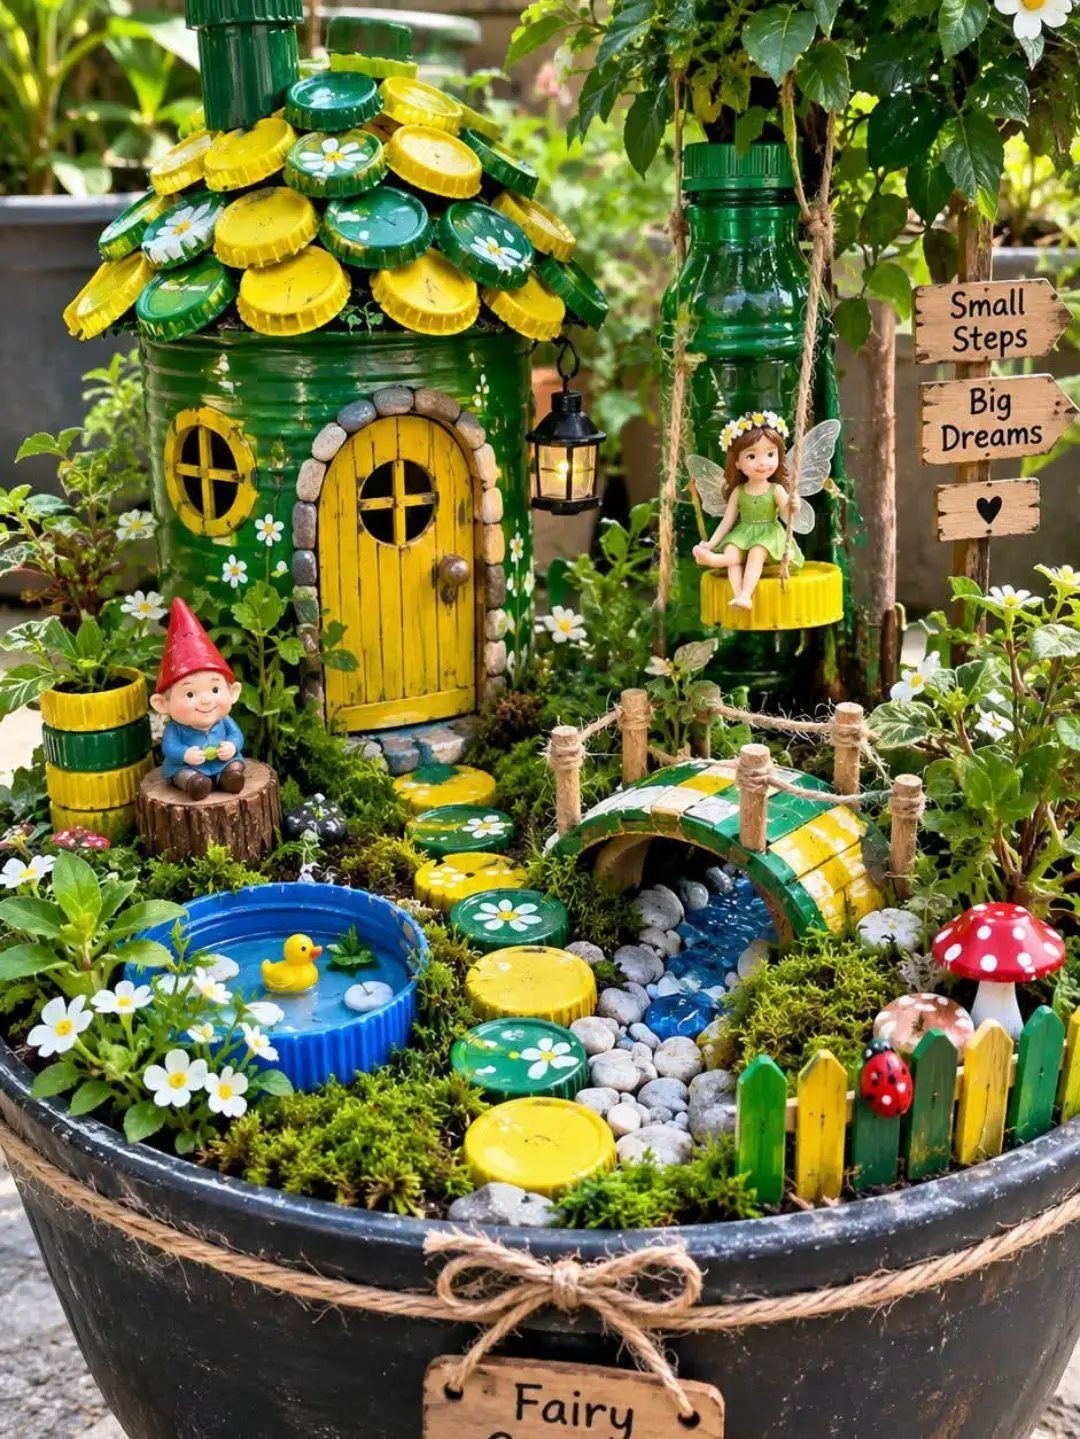
Overlapping caps in rows make a fairy house roof look shingled, and the mix of colors reads as playful from across a garden bed.
Start at the bottom edge and work upward so each row covers the glue line below it.
Use outdoor-safe glue and paint the caps first if you want a color scheme that matches your pot. Small signs and a bridge fill out the scene, but the roof is the piece that carries it.
16. Painted Bottle Cap Emojis
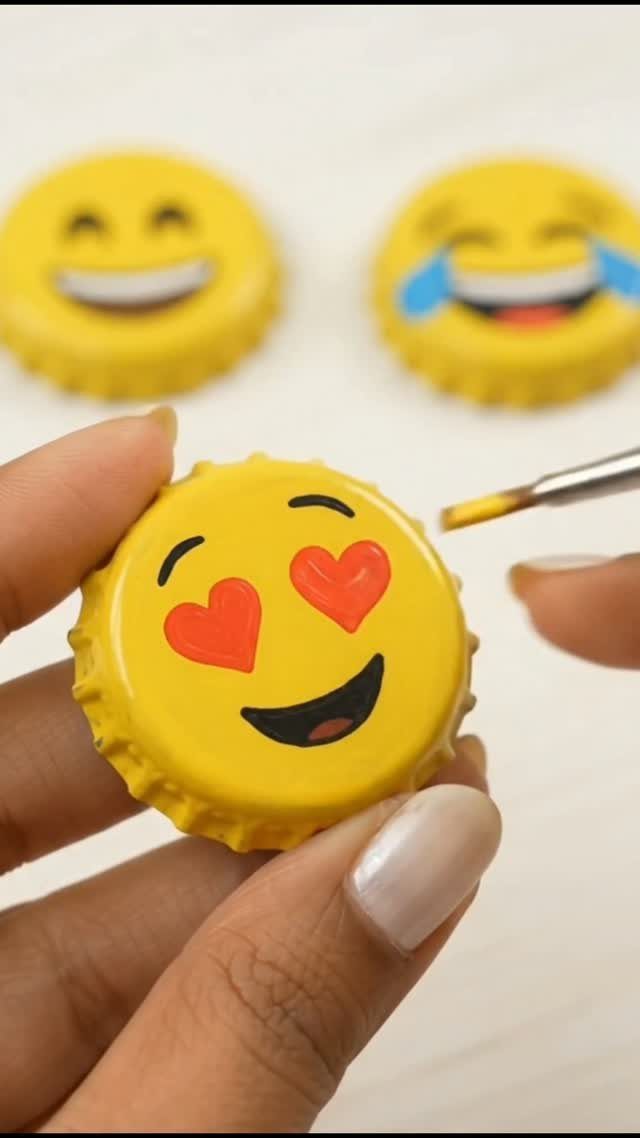
Yellow metal caps are already the right color for an emoji, so all you add is the face. A fine-tip paint pen is easier to control than a brush on a surface this small.
Sketch the eyes and mouth lightly first, then fill them in. Heart eyes, winks and grins are the easiest to start with.
Let the paint dry fully before handling. Cheap, quick, and a good one to make in a set for a gift.
17. Miniature Bottle Cap Garden
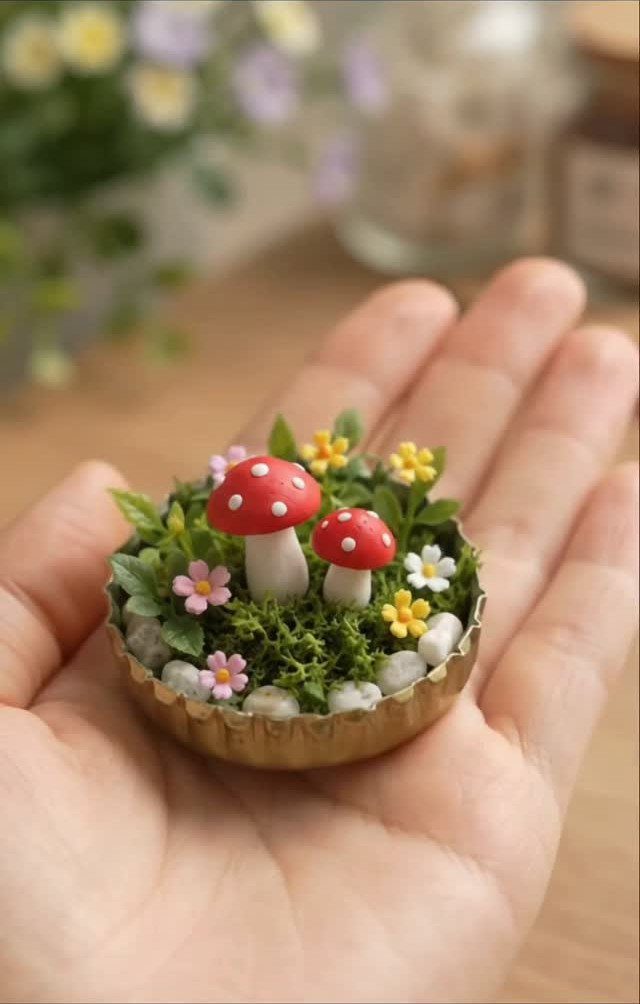
A metal cap works as a tiny planter-like dish for a scene, and the shallow well gives you just enough room for a few details.
Press a layer of moss in first, then set red mushrooms and small flowers on top.
White pebbles scattered around cover any visible glue. Tweezers help a lot with placing the pieces.
I would glue everything down, since a cap this small gets handled and tipped easily.
18. Bottle Cap Picture Frames
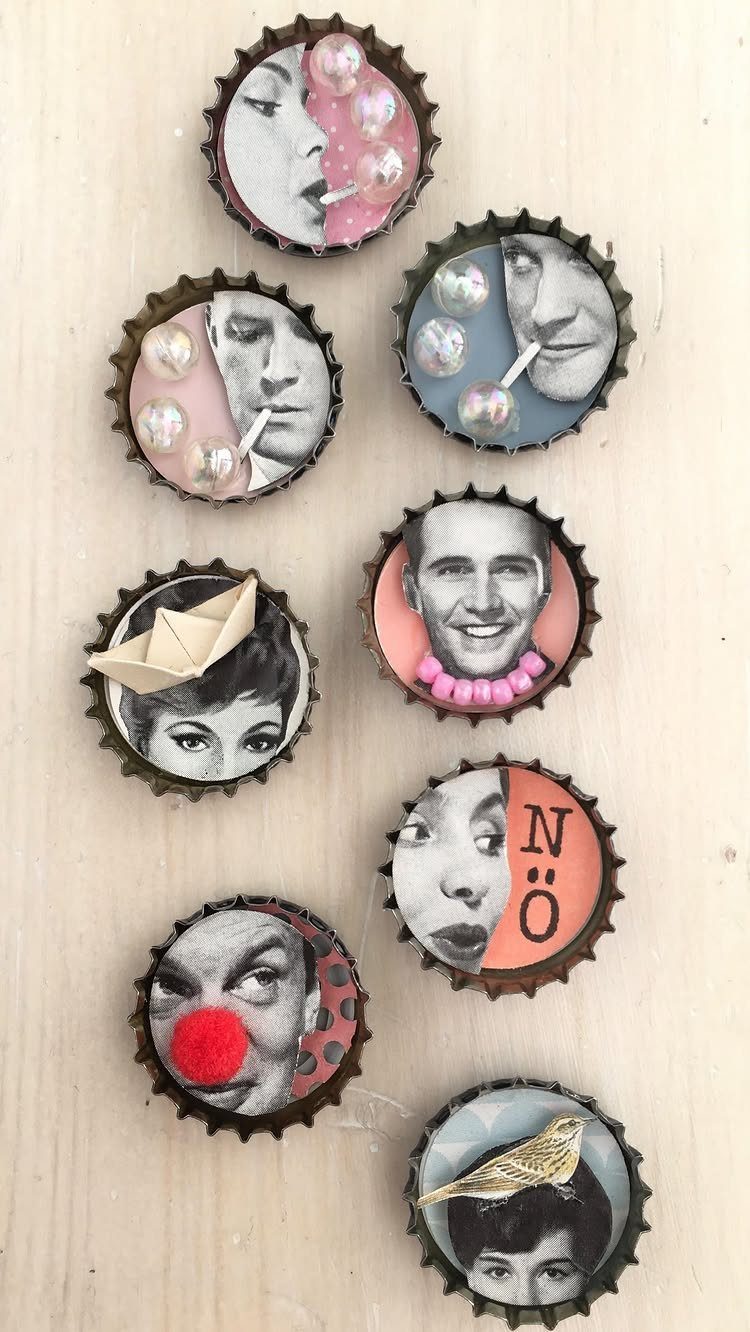
A bottle cap frames a portrait the way a locket does, and black-and-white photos look best because the metal rim and the plain tones keep the cap from competing with the face.
Print the photo small, trim it to fit the well, and glue it in. Small beads or charms around the edge add a bit of depth, so a little 3D detail goes a long way.
Press the photo flat before sealing so it doesn’t lift at the edges.
19. Glitter Bottle Cap Holiday Ornaments
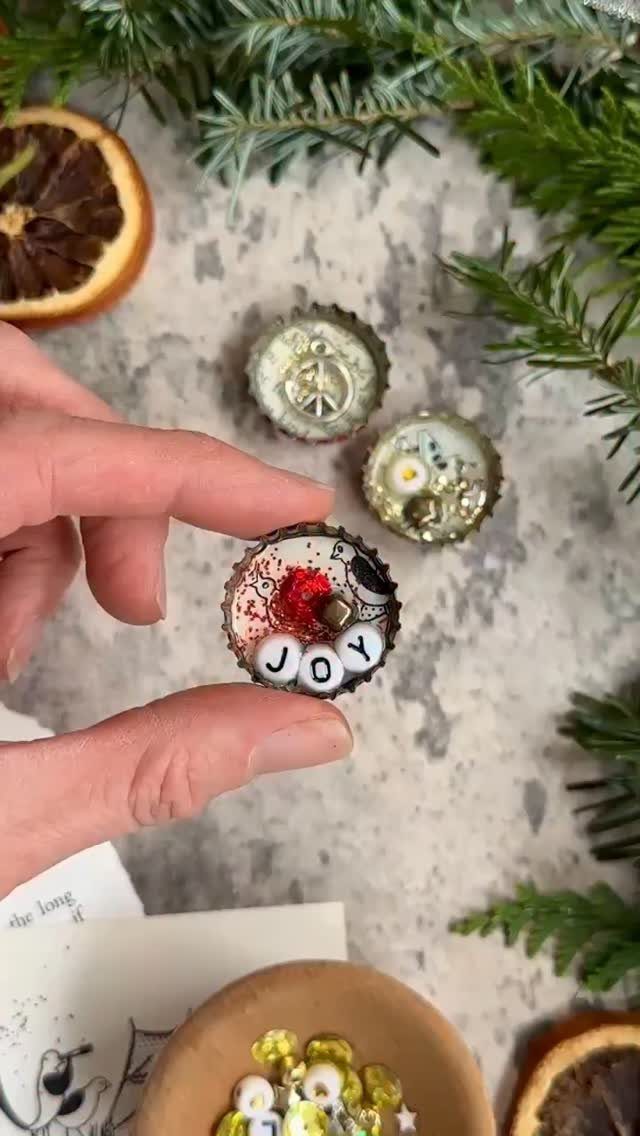
Red glitter packed into a metal cap makes a small ornament that catches light from every angle, and beads spelling out JOY give it a message without any painting.
Greenery and a dried orange slice around it suit a holiday table or garland.
Spoon the glitter in, set the letters on top, and seal it so nothing shakes loose. I would add a ribbon loop on the back to hang it.
20. Bottle Cap Bead Resin Charms
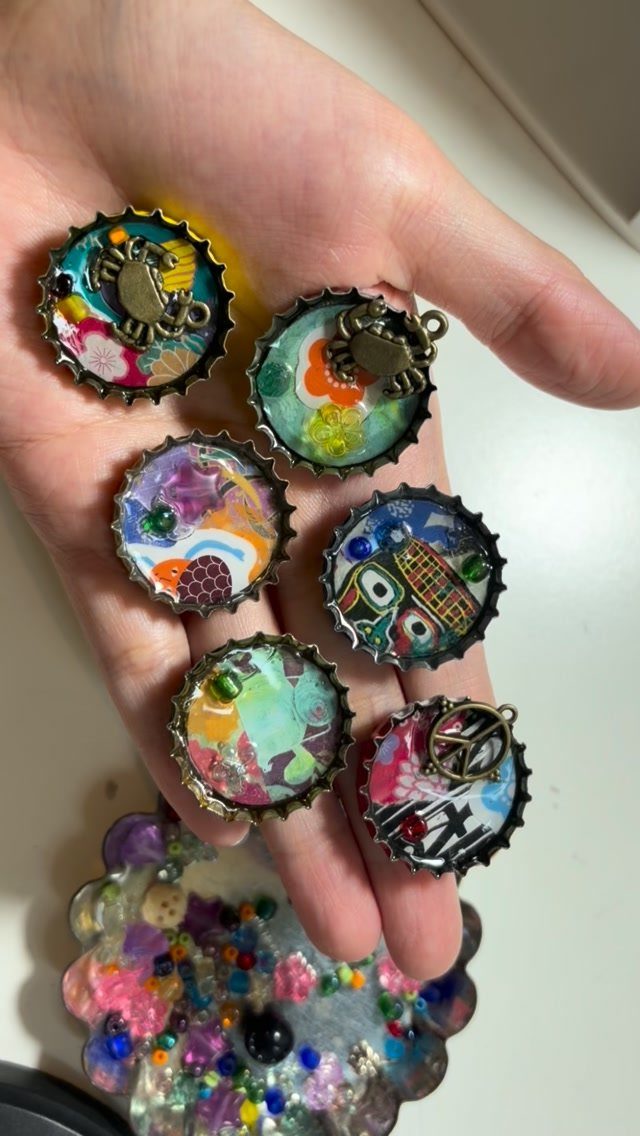
Glossy resin turns a plain metal cap into a tiny jewel, and a small metal charm suspended inside gives each one a focal point.
Tinting the resin or painting the well first lets 6 caps look like a matched set without repeating a single design.
Pour slowly to avoid bubbles, and let each cap cure fully before you touch it. A flat tray keeps the caps level while they set.
21. Bottle Cap Curtain
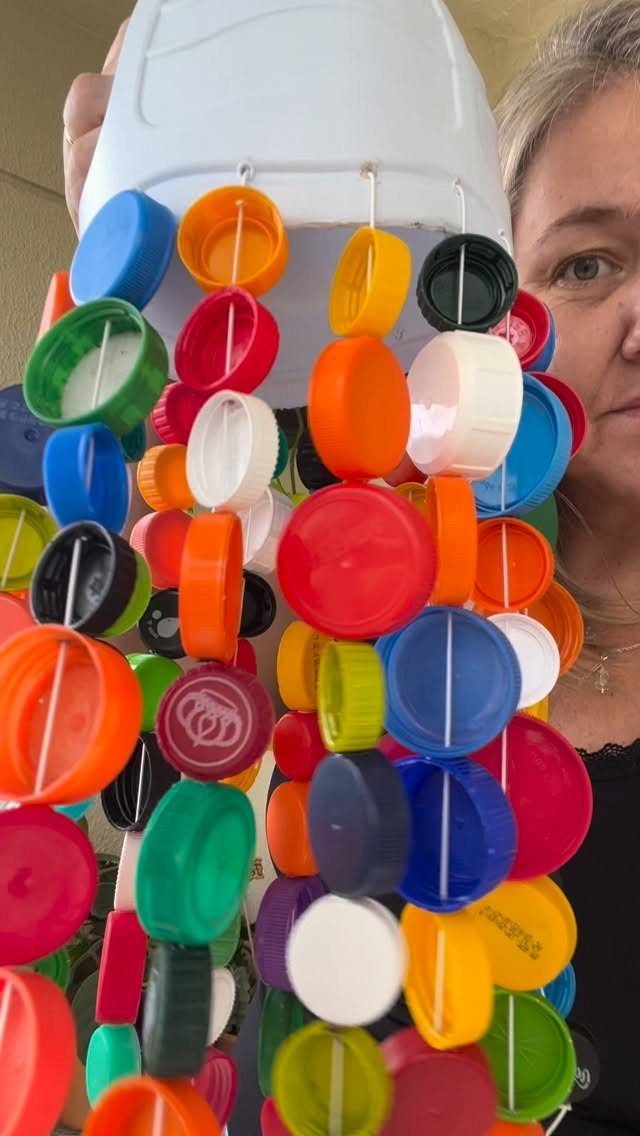
A curtain of plastic caps is mostly patience: string the caps on long vertical strands, then hang the strands side by side from a bar or rim.
Use a nail to poke a hole through each cap, then thread them on cord or fishing line with a knot at the bottom.
Sort colors first so each strand has its own look, and expect to need a big pile of caps.
22. Bottle Cap Perpetual Calendar
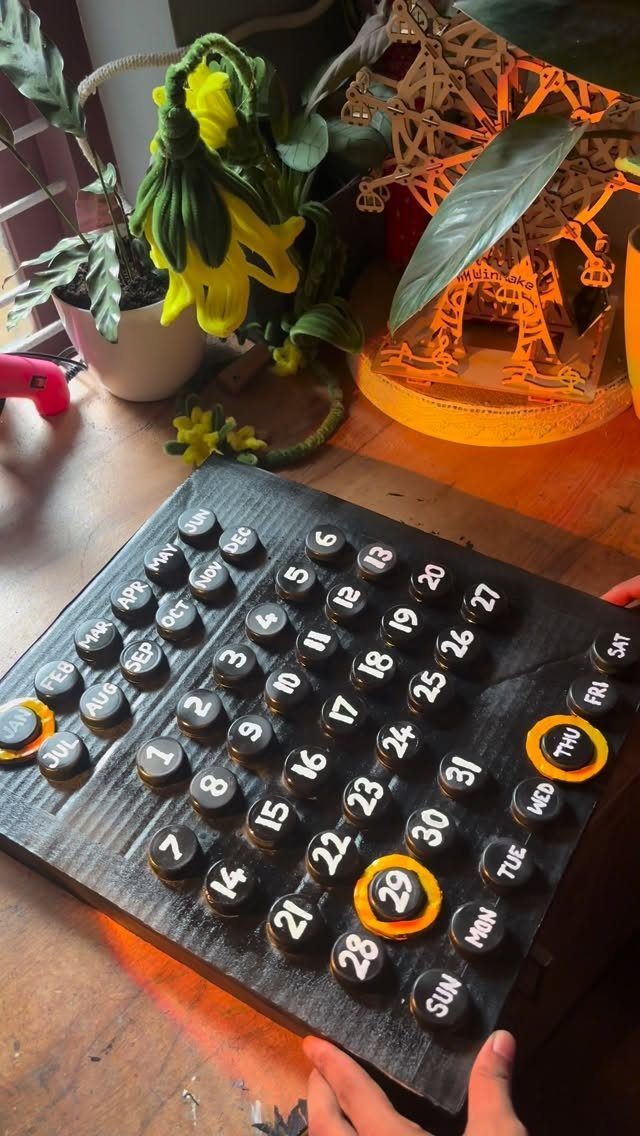
Numbered caps on a black board make a calendar you never have to replace. Black paint on both caps and board keeps the look unified, so the numbers and day names do all the talking.
Glue the caps down in a grid, with a set of loose numbered caps for the dates that change.
Magnets on the back of each loose cap are my pick, since you can move them every morning without prying anything off.
23. Bottle Cap Fish Paper Plate Craft
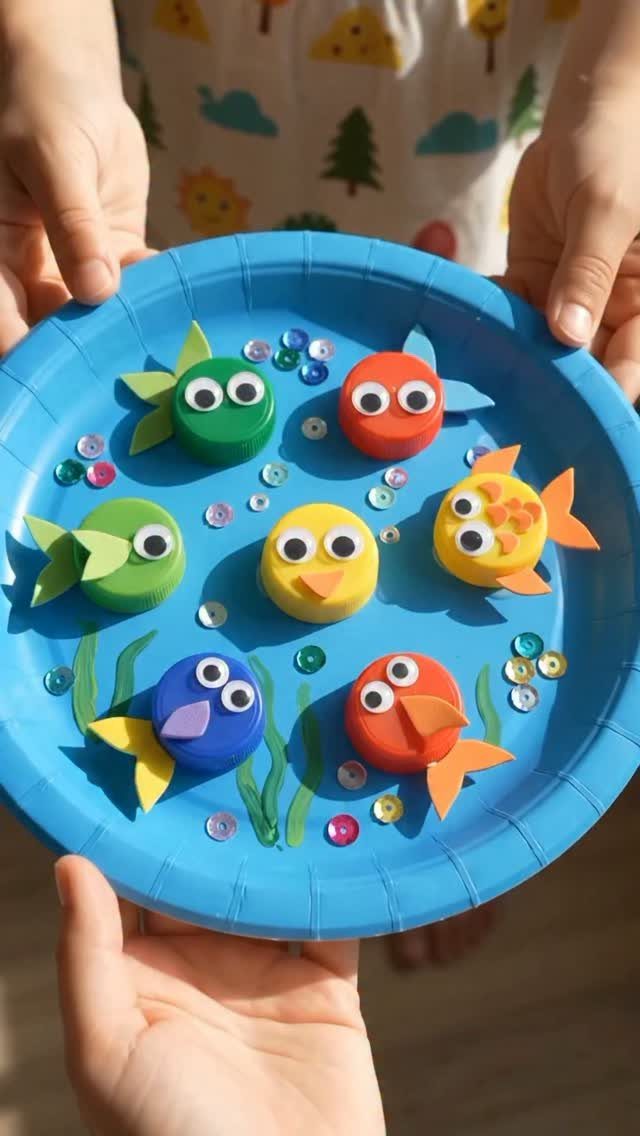
A paper plate painted blue is the whole ocean, and plastic caps become fish once they get googly eyes and cut-paper fins. Sequins scattered between them read as bubbles or scales.
Paint the plate first and let it dry. White craft glue holds paper and sequins fine, but hot glue is better for the caps, so an adult should handle that step.
24. Miniature Twig and Bottle Cap Furniture
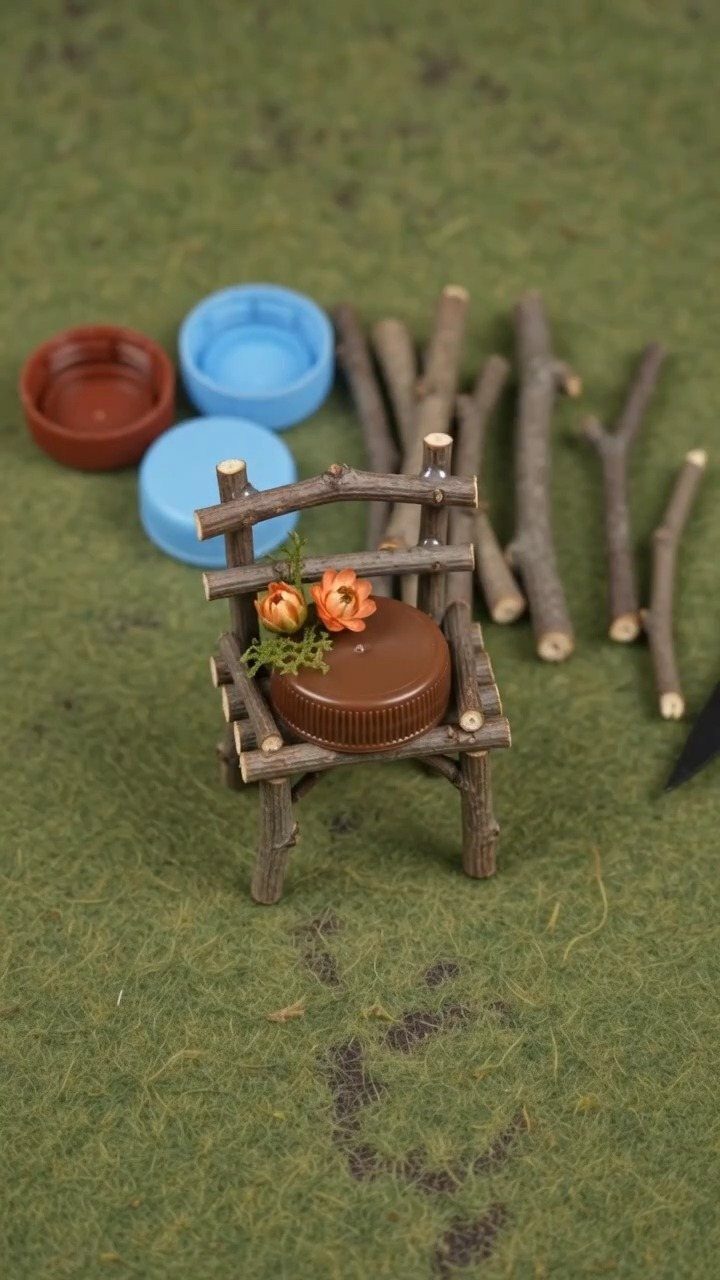
A twig chair with a bottle cap seat is a fairy garden piece you can build in minutes, since the cap is already a round, shallow seat.
Snap twigs to length, glue the legs to the cap so they stand evenly, then add a back from a couple more twigs.
Tiny flowers glued to the seat finish it. Hold each joint for a moment while the glue grabs, and use outdoor-safe glue if the chair will sit in a garden bed.





