
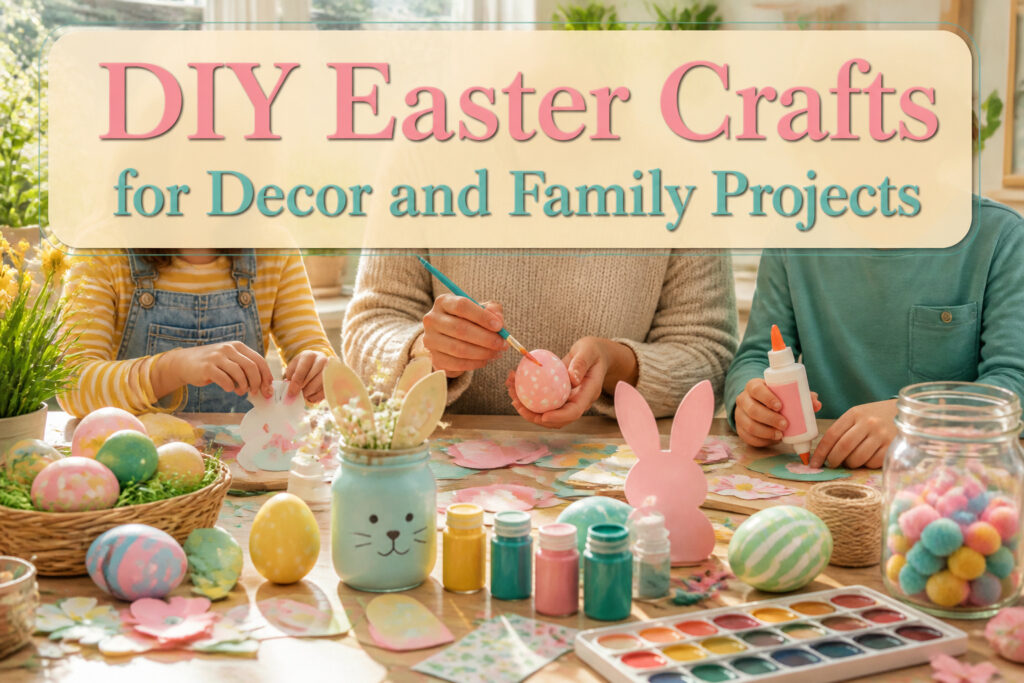
Easter crafts DIY projects run from twenty-minute origami eggs to an afternoon spent waiting for mason-jar paint to cure. The one that fits your afternoon depends on whether you already own the glue; when the materials sit in a kitchen drawer, the project actually happens, and when the supply list sends you to a store first, the mood passes.
1. Origami Paper Easter Eggs
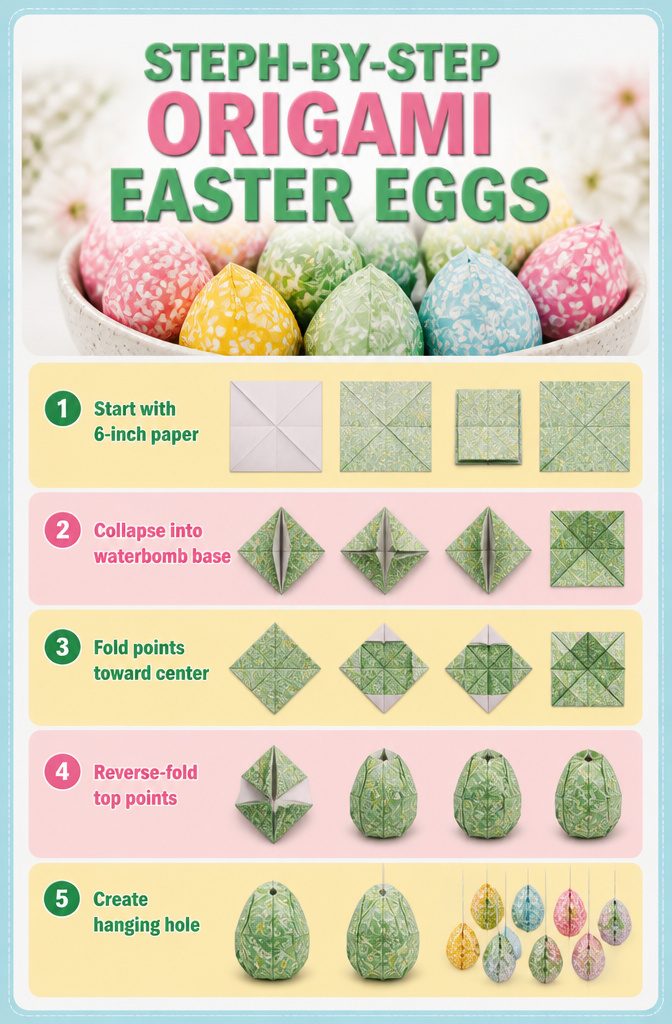
Patterned origami paper turns into hollow eggs that hold their shape without a drop of glue. The waterbomb base does the heavy lifting; a small tweak to the fold pattern gives it that rounded, egg-like curve instead of the sharp square it wants to make.
- Start with a square of 6-inch origami paper, patterned side down. Fold it in half diagonally both ways, then unfold. Turn it over and fold in half edge-to-edge both ways, then unfold again. You now have creases making an X and a plus across the square.
- Collapse the paper along those creases into a smaller square, the waterbomb base. Two flaps point up, two point down.
- Fold each of the four loose points up toward the center line, about a third of the way in. This shortens the points and starts the taper.
- Open one flap and reverse-fold the top point inward, tucking it between layers. Repeat on all four flaps. The shape rounds out; press gently from inside with a finger to push it into a hollow egg.
- A single hole at the narrow end lets you thread fishing line for hanging. A bowlful at staggered heights looks like something that took far longer than the twenty minutes it actually eats.

Double Sided Scrapbook Paper Packs : This Easter scrapbook paper includes 24 sheets featuring 12 distinct designs, with 2 sheets per design. Each sheet measures 30cm x 30cm (11.8'' x 11.8''), perfect for all your DIY decorating and craft projects

【 Double Sided Printed Scrapbook Paper 】 This set of 24 colorful scrapbook paper pad contains 12 designs, 2 sheets of each design, each sheet measures 30cm x 30cm/11.8 inch x 11.8 inch. Plenty of sheets to meet your DIY decorations and crafts needs.

2. Potted Paper Easter Lilies
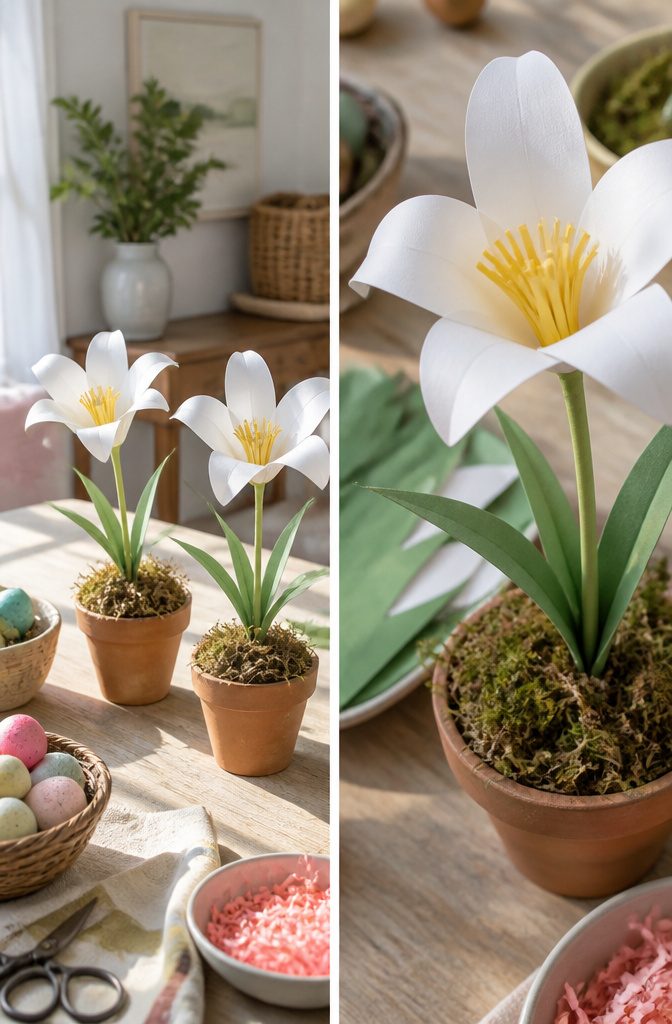
White paper curls into a believable petal when you drag the blade of scissors along the strip the same way you’d curl ribbon. The pressure matters more than the speed; too light and nothing happens, too heavy and the paper creases instead of rolling.
- Cut six teardrop-shaped petals from white copy paper, roughly four inches long. Narrower at the tip, wider where they’ll attach.
- Curl each petal by running scissors from base to tip along the outer edge. The curl faces outward, so the petal cups naturally.
- Roll a tight yellow center from a half-inch strip of paper for the stamen. Six or eight thin yellow fringes cut into one end get curled the same way; these stick out the top.
- Glue petal bases around the stamen in a spiral, overlapping slightly. Three inner petals first, then three outer ones offset between the gaps.
- Anchor finished lilies into floral foam cut to fit small terra cotta pots. Moss or shredded paper hides the foam.
The hand-curling is what saves this from looking like grade-school art. Machine-curled petals hold too uniform a roll; the slight irregularity from your own thumb pressure reads as growth, not manufacture.


Creative Origami: folding origami is also a great way for you to spend quality time ,express yourself in creative and imaginative ways with this fun and rewarding hobby!
3. Glittery Easter Candy Jars
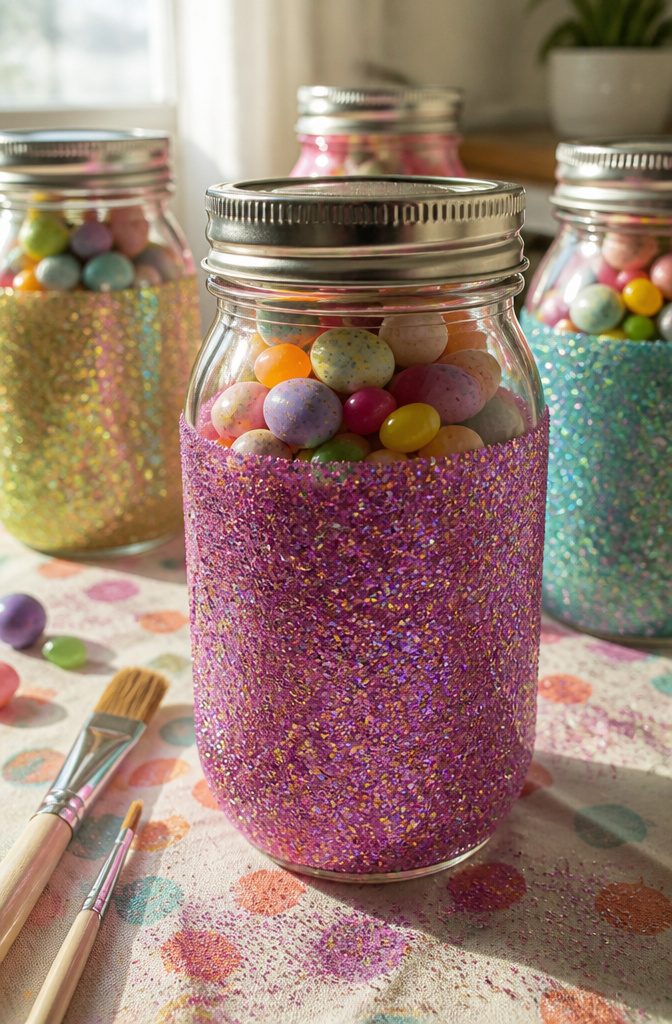
Glitter catches light on a windowsill in a way paint never quite manages, which is why these jars stay out past Easter at my house. A clean mason jar with a two-piece lid gives you two surfaces to work with: the flat disk and the ring, or the glass itself if you want the whole thing to shimmer. Mod Podge brushed thin and even holds fine glitter without the clumps that make a project look like a kindergarten table. I learned the hard way that a clear acrylic sealant sprayed over the dried glitter is the step that keeps it off your hands and out of the jelly beans you will inevitably reach for without looking. One light coat, let it dry, then another. The sealant dulls the sparkle slightly, but unsealed glitter travels to every corner of the kitchen and the dog’s water bowl. Fill with chocolate eggs or jelly beans, and the lid comes off clean when the candy runs low.
4. Pom-Pom Chicks
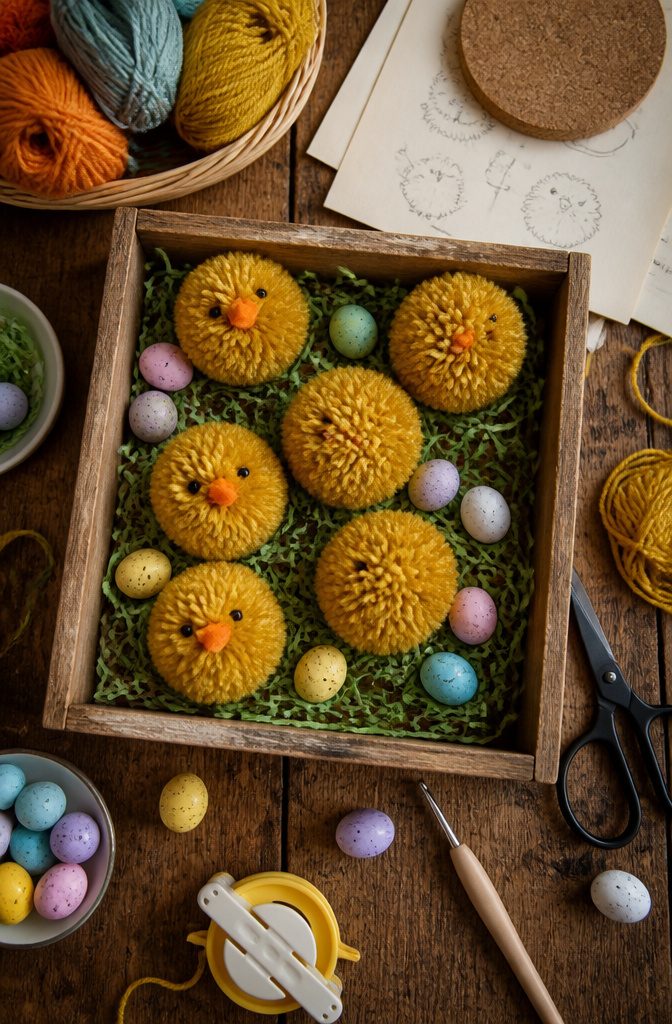
- A fork is the fastest way to get the body started, though two cardboard U-shapes traced from a spice jar lid work if you want a bigger chick. Wind the yarn around until the bundle looks too thick to hold, then slip it off and tie another length around the middle.
- Cut every loop open with sharp scissors and fluff the strands into a sphere. The first one I made stayed lopsided until I learned to trim the stragglers like a haircut, turning it in my hands.
- Beaks need that triangle shape, not a diamond, or the chick looks surprised instead of pecking. A single stitch of regular thread through the center holds it fine; glue melts through cheap felt and shows.
- Bead eyes sink into the yarn if you push straight in. Thread them on a needle first, then come up from underneath so they sit on the surface like they belong there.
- The yarn color matters more than the felt. A mustard body with orange beak and brown eyes reads as chick. My niece used purple and teal, and hers read as space creature, which she preferred.

Mini ceramic Easter canister with bunny lid accent

Easter Bunny Glass Jar Set: you'll receive 3 glass Easter candy jars, featuring a clever combination of Easter bunny elements and Mason jars; The transparent jars allow you to see the candy and cookies inside; They're not only a perfect addition to your Easter home decor, but also practical

Package: you will receive 4 cute Easter bunny candy jars; The jars are transparent, and each lid features a brown resin bunny sitting on it; The bunny is chocolate-themed, with exquisite details and is full of fun, adding a touch of elegance to the jars and making them the perfect decoration for Easter celebrations
5. Wooden Bunnies
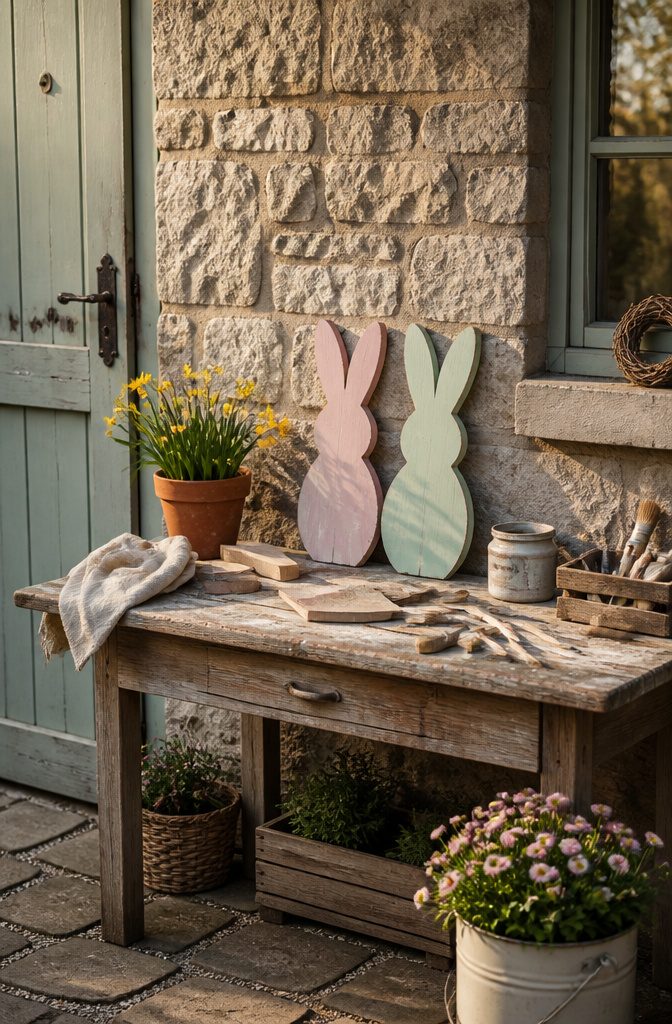
Scrap wood from a previous project works better than buying anything new for this one. A one-inch pine offcut, already straight-edged, saved me from wrestling with a full board. I traced a simple rabbit silhouette, ears up and body rounded, then roughed it out with a coping saw. The blade wandered on my first try; a second piece let me cut outside the line and sand down to the pencil mark instead.
Sand through 120 to 220 grit before paint touches the surface. Acrylic craft paint in soft pink and mint covered in two thin coats, though the grain drank up the first layer faster than I expected. A matte sealer after keeps the color from going dusty on a shelf.
A hand saw and a coping saw handle the whole cut if you do not own a scroll saw. Clamp the wood, cut close, and let sandpaper do the finishing. The slight unevenness from hand tools looks handmade in a way a laser-perfect edge never quite manages.

Create Beautiful Handmade Beaded Flowers: Design stunning 3D crystal flower arrangements with this complete DIY beaded flower kit. Use colorful beads, wire, moss, and mini flower pots to craft elegant floral displays that brighten any desk, shelf, bedroom, or office

Unique Design: Whiskey barrel planter with rustic touch; Imitation wine barrel retro style reflects flower pots texture; Bring quiet rural comfort to garden or front yard planting.
6. Sock Easter Bunnies
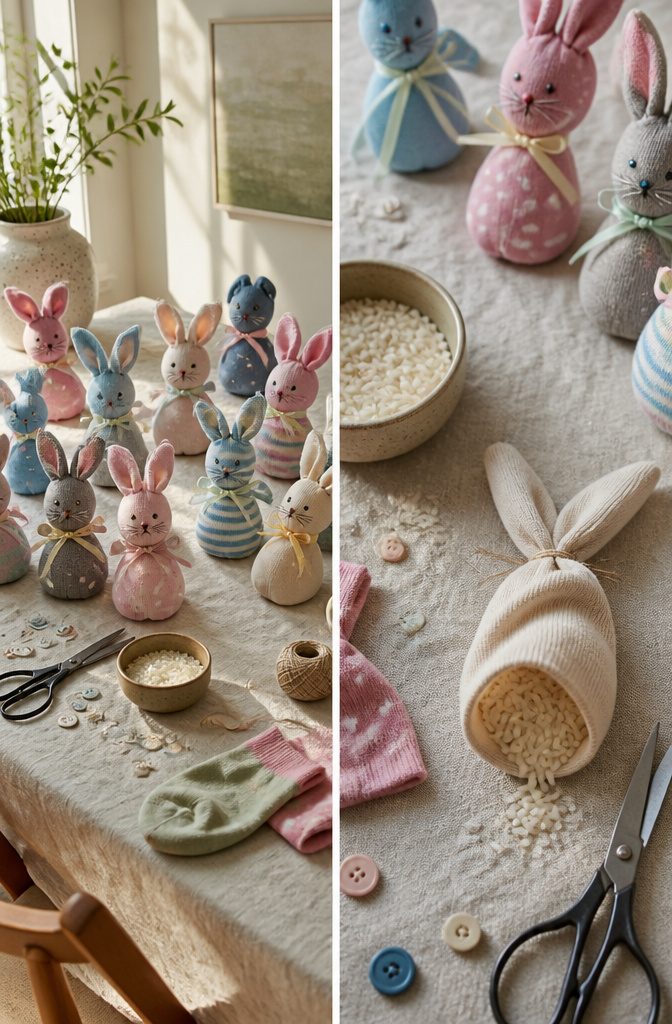
Mismatched socks multiply in every laundry room, and this project finally gives them a job. A sock, some rice or fiberfill, a ribbon, and either a marker or a couple buttons are enough to build a small stuffed rabbit from start to finish.
- Fill the sock with rice or fiberfill until it forms a firm oval about the size of your fist. The heel of the sock becomes the bunny’s face, so position it centered.
- Close the opening by gathering the loose fabric above the filling and tying it off tight with string or a rubber band. The tied-off excess forms the ears; split it down the middle with scissors to create two floppy lengths.
- Shape the head by cinching the sock just below the heel with another string or ribbon. This raises the face and gives the ears something to stand up from.
- Add the face with a fine-tip marker for eyes and whiskers, or sew on small buttons if the bunny is for display and not for a toddler who mouths toys.
- Tie a ribbon around the neck to hide the cinch and give the bunny a finished look.
These sock bunny dolls are the perfect last minute DIY Easter craft, whether you need a quick gift for a kid or something soft to tuck into an Easter display. The whole thing takes under an hour, and the materials cost nothing if the sock was already waiting in the drawer.

Watercolor Designs - Featuring 12 beautifully illustrated Easter-themed patterns with delicate watercolor-style eggs, rabbits, and spring motifs—perfect for capturing the soft, artistic trend in seasonal crafts.

Package Contents: You will receive 24 Pcs Easter scrapbook paper pad sheets, each sized at 6x6 inches, featuring 12 Pcs unique designs with two sheets of each design. This set equips you with endless creative space. Not only can it be used for origami crafting, but it is also suitable for collage art and creating gift tags, adding inspiration and fun to your creative handcrafting journey

7. DIY Easter Egg Garland
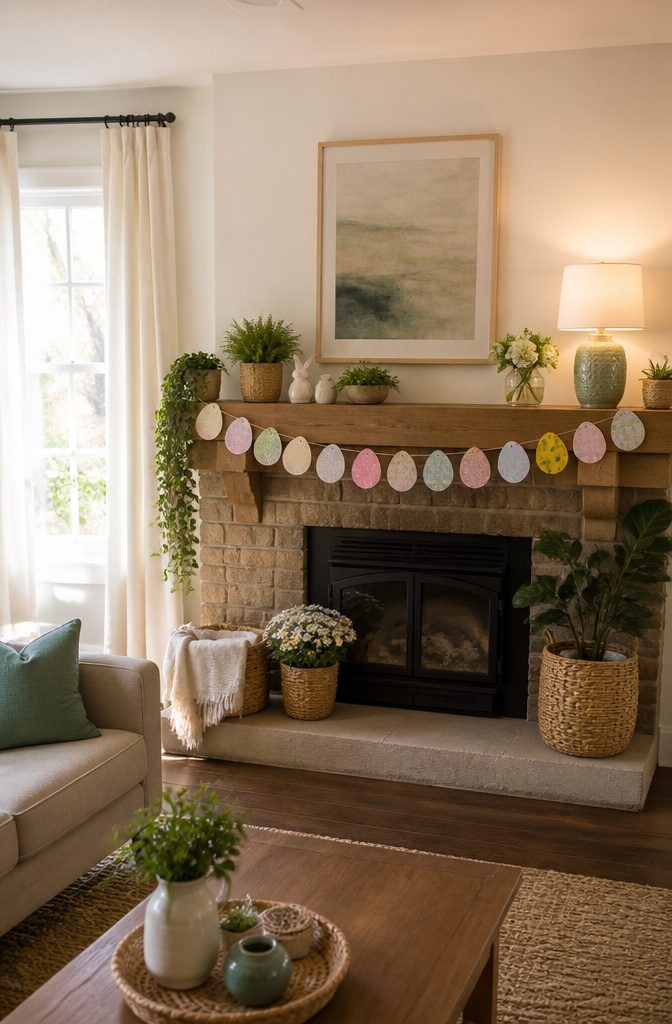
Paper eggs strung along twine make a garland that actually stays put if you get the spacing right. The first time I tried this, I spaced everything evenly and knotted each egg in place, only to watch the knots shrink to nothing when the twine stretched under the eggs’ weight. Now I leave six inches between cutouts and tie a double overhand knot on each side of every egg, snugged tight so the paper or fabric can’t slide past. Wooden cutouts need the same treatment, though their extra weight means you might want to shorten the gap to four inches so the strand doesn’t sag.
Ribbon works instead of twine for a softer look, but wide grosgrain will twist. If you go that route, punch two holes through each egg and thread the ribbon through like a sewing stitch; the doubled-back loop holds steadier than a single tie. For doorways, plan the strand to hang with a slight dip rather than pulled taut. That curve hides any minor spacing inconsistencies that show up dead straight across a mantel.


Paper Size: Each paper is 6 x 6 inches (15 cm x 15 cm), which is perfect size for origami paper, express your creativity

8. Salt Dough Easter Eggs
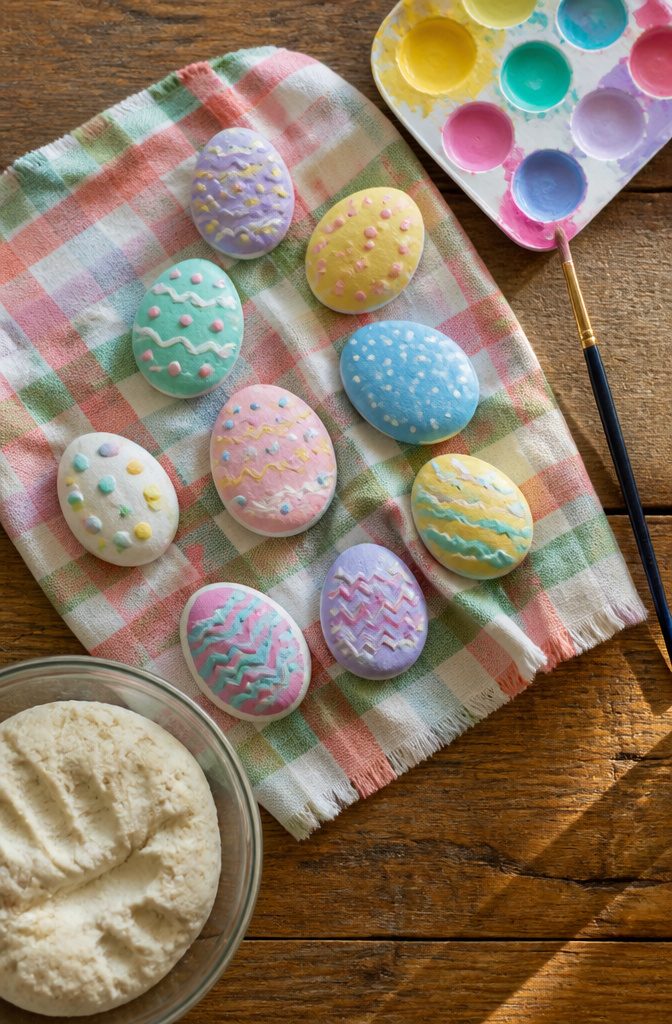
Salt dough keeps indefinitely in a sealed container, so I usually mix a batch in January and pull from it all spring. The ratio is 2 parts plain flour to 1 part salt and 1 part water; a kitchen scale makes this faster, but a measuring cup works fine if you level it properly. The dough should feel like stiff Play-Doh, not sticky, so add flour by the tablespoon if your tap water runs soft.
Roll it to about a quarter inch on parchment paper, cut egg shapes with a cookie cutter or a hand-drawn cardboard template, and transfer the whole sheet to a baking pan. A straw poked near the top before baking leaves a clean hole for twine or ribbon later. Bake at a low oven, roughly 200°F, until the pieces sound hollow when tapped; mine usually take two to three hours depending on thickness. Let them cool completely on the pan, then paint with acrylics and seal with a matte varnish so the colors survive a few Easters. Unsealed dough weeps in humid weather and attracts every curious dog in the house.
9. Bunny Ear Crowns
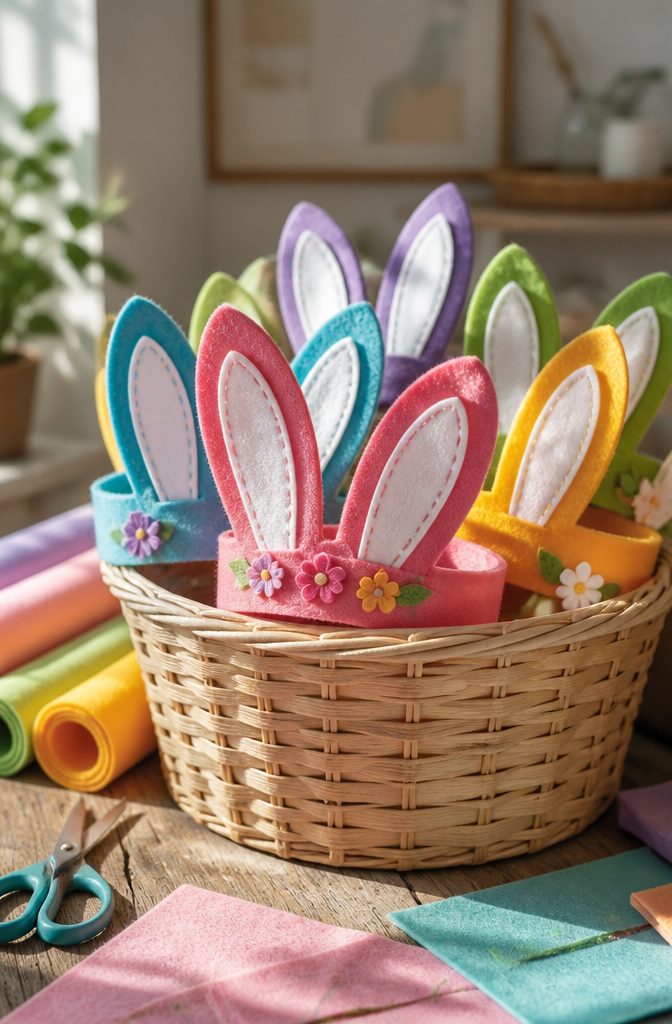
A pipe cleaner ring bent into a circle is the fastest base for a bunny ear crown, though a fabric-wrapped headband stays put better on slippery hair. The ears themselves cut from felt or cardstock: an outer ear about six inches tall for an adult head, scaled down to four inches for a child under five. Leave an extra centimeter at the base to fold under the band and hot-glue, which the sources agree on even when they disagree on everything else.
One approach presses a crease down the middle of each ear with a hot iron so they bend inward like real rabbit ears. Another skips that step and just tapes flat ears to a paper crown, which works fine for the half-hour before jelly beans take priority. The felt version needs that glue gun, so an adult handles the hot parts while the kid picks colors and placement.
Sizing the ring takes a real measurement, not a guess. Wrap a strip around the head where the crown will sit, overlap by an inch, and cut. Pipe cleaners twist together at that overlap; cardstock needs tape or a stapler. Two ears spaced a finger’s width apart sit straight up; overlap the bases and angle them outward for a lopsided, storybook look that photographs better anyway.

Premium Glass Construction: Crafted from borosilicate glass with seamless Easter themed designs like bunnies and hatching chick, combining candy storage with artistic decor

Charming Bunny Jar Set of 3: Features 3 uniquely designed rabbit jars (bunny ears, jade rabbit & couple rabbits) in vintage antique gold — a delightful addition to any kitchen counter, coffee table, or display shelf year-round

Product Include:As Easter table decorations, you will receive four high-quality glass jars with a bunny print. The prints are beautiful and perfect for use as Easter table decorations.
10. Egg Carton Flowers
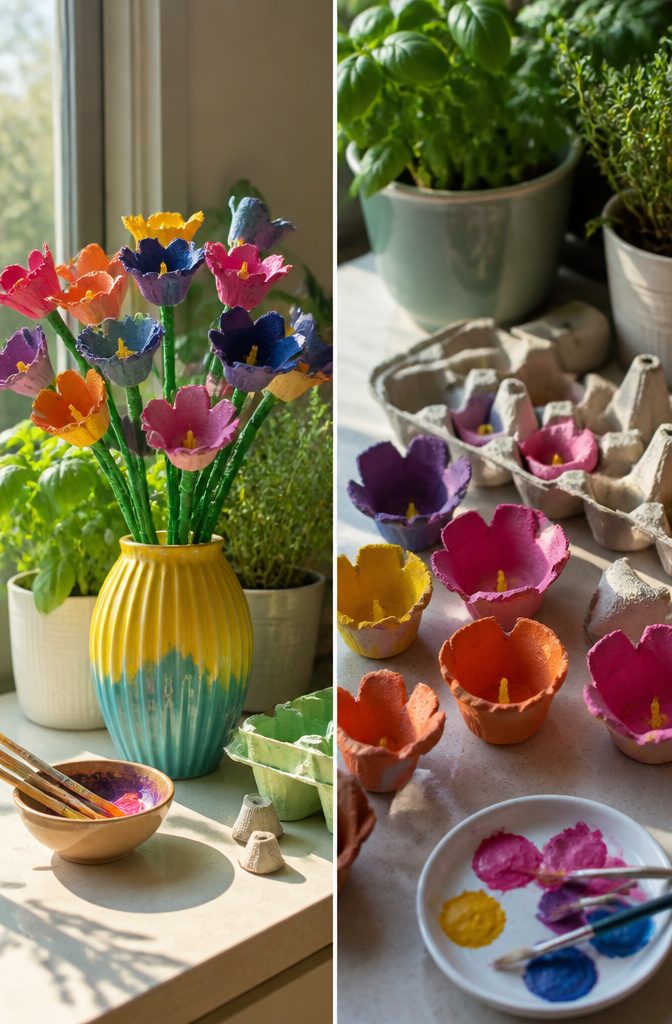
Egg carton flowers start with the cups themselves. Each bump in the carton becomes a petal once you cut it free from the rest. Scissors work fine for this; nothing fancy needed.
The cups take paint surprisingly well once the glossy surface is roughed slightly. Acrylics in Easter pastels or bold spring colors both work. Paint the inside and outside, since both surfaces show once the flower opens.
Shaping happens after the paint dries. Press the cup flat for tulips, cut notches around the rim for daisy petals, or spiral-cut toward the center for roses. A pencil curled around each strip makes the rose petals bend naturally.
Pipe cleaners serve as stems. Poke one through the center bottom of the cup, fold the end into a small knot inside, and secure with a dot of glue. The knot keeps the flower from sliding down when someone inevitably holds it by the stem.
These cluster nicely into a wreath, or stand alone in a jar. The carton’s ridged texture catches light in a way flat paper never manages, and the whole project costs nothing beyond paint you probably already own.
11. Nature Printed Dyed Eggs
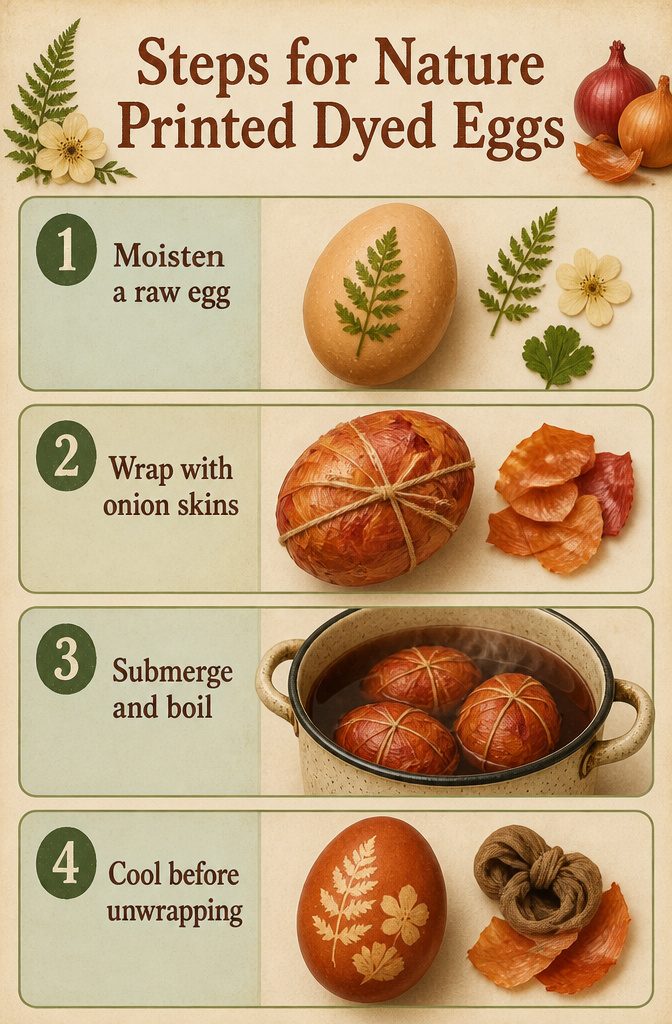
Botanical prints on eggs work because onion skins carry enough tannin to act as a built-in mordant, fixing the dye to the shell so the leaf silhouette stays sharp after boiling.
- Moisten a raw egg with water so the plant material will stick flat. Press a small leaf, fern frond, or flower face-down against the shell; the veins should touch the surface directly.
- Hold the plant in place while you wrap the egg with yellow or red onion skins, papery side against the shell. The more skin you layer on, the deeper the background color. Secure with string or tuck the ends into a knee-high nylon stocking and knot it tight.
- Submerge the wrapped eggs in water, bring to a gentle boil, and let them cook until the shells take on a rich amber or rust tone. The tannin in the onion skin both dyes the shell and binds that dye, so the area protected by the leaf stays pale and the silhouette reads clearly.
- Cool completely before unwrapping. The stocking sometimes leaves faint lines where it pressed hardest; spacing the knots away from the featured side of the egg helps avoid that.
12. Bunny Treat Bags
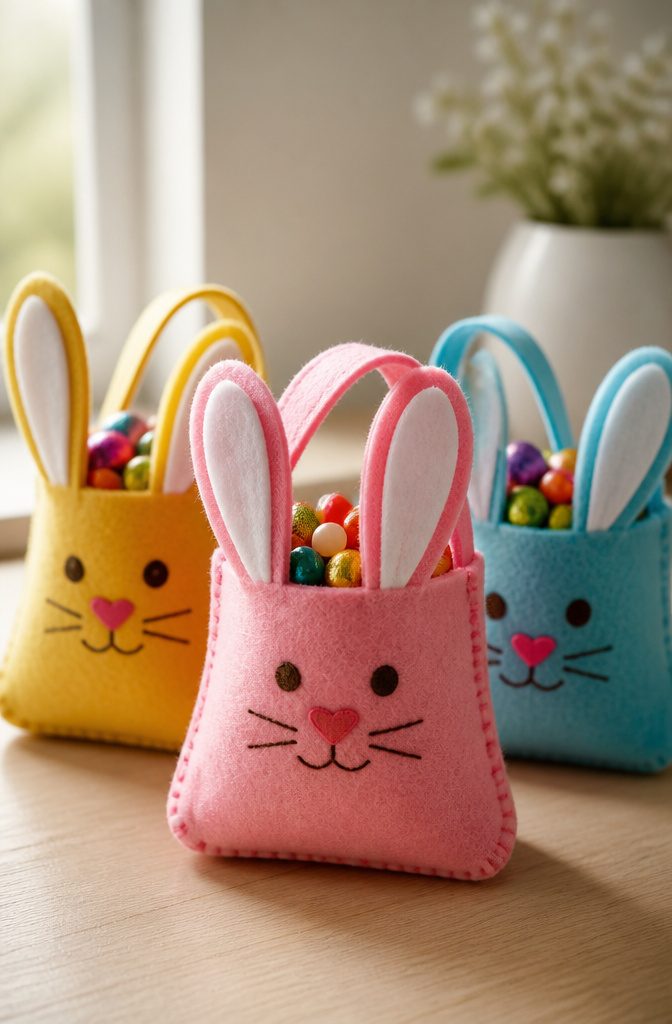
Felt turns into a bunny pouch faster than you would expect. Two matching rectangles become the body, a rounded top edge on each forms the ears, and a strip of the same felt sewn across the bottom closes the bag while leaving a gap at the center for candy to slip through.
A sewing machine finishes the edge in a straight line, but fusible web tape works if you iron it between the layers and press hard. Hot glue holds too, though it stiffens the seam and can pull away if the bag gets stuffed too full. For classroom drops, glue is fine. For a neighbor gift that might sit in a basket for a day, the tape or a quick stitch holds better.
The ears need stuffing or they flop flat. A scrap of felt balled inside each one before you close the back layer keeps them upright without buying polyfill.
Candy shows through the gap, which is half the point. Jelly beans or foil-wrapped eggs sit right where the ears split, so the face reads even without eyes stitched on. Add a nose if you want, or skip it and let the shape do the work.
13. Easter Bunny Mason Jars
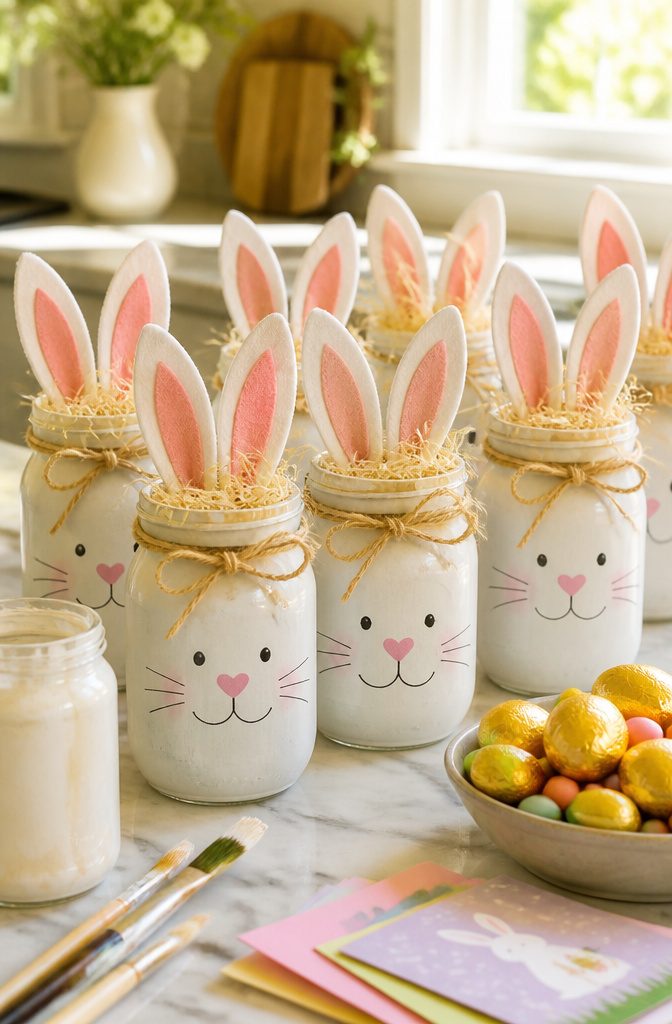
The paint needs two coats with full drying between them, and that circle you leave bare on the front? It becomes the bunny’s face. I learned the hard way that rushing the second coat makes the first lift and streak. Permanent marker draws the features once everything cures, and craft paint formulated for glass actually grips a jar that will hold water or sit in a windowsill.
Ears come from patterned card with a one-centimeter flap bent back for gluing to the lid. Pompoms add texture if you want them. The finished jar works as a vase, a utensil holder, or a container for chocolate eggs and coins. This craft is a little more involved than it first seems, mostly because the drying time stretches the project across an afternoon rather than an hour of active work. A vinyl cutter can shortcut the face shapes, but hand-painting and card ears keep it doable with supplies already in the house.
14. DIY Easter Tree
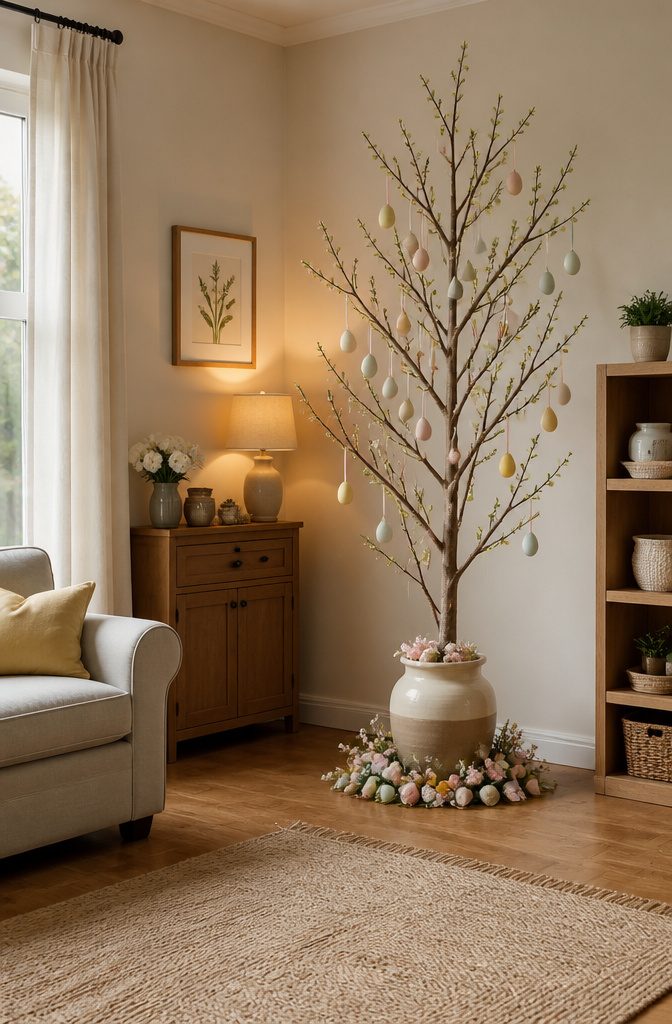
A fake tree that just screams spring sits on my mantel every March now, but the first one came together from branches the neighbor trimmed off her birch. Either route works. Real branches need a heavy base, something the craft store sells as a floral frog or a jar filled with sand. The fake route skips the hunt and the sap.
Decorated eggs hang best with ribbon loops, not the wire hangers that spin and face the wall. Paper shapes cut from last year’s wrapping paper fill gaps cheaply, and the egg carton cups mentioned for storage double as molds if you want papier-mâché shells instead of plastic craft eggs. Small ornaments, the kind sold for miniature trees, cluster toward the trunk where the eye lands first.
The color palette is yours. One year I went all cream and robins-egg blue; another, every neon shade the kids picked. The fake tree wins if you want it up six weeks, bare branches if you prefer the project itself to last an afternoon.
15. DIY Bird Feeder
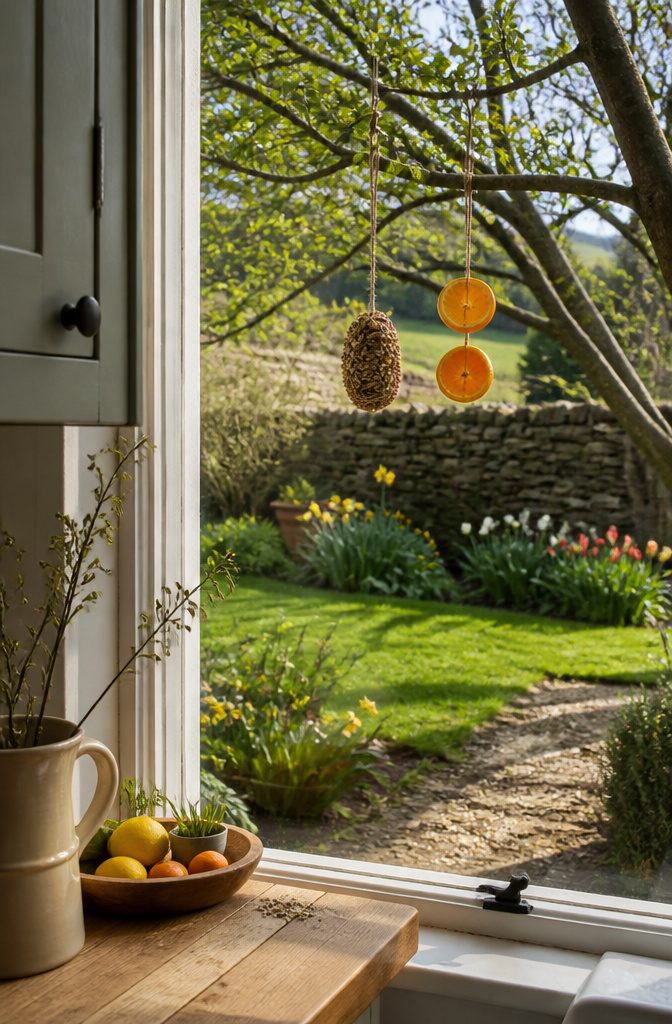
- Pinecones work best when they are fully open and dry; the scales hold the seed mix like a built-in cup. A halved orange peel is a one-season option that eventually composts itself, but the oils seem to slow squirrels down a little.
- For the coating, peanut butter thinned with a little vegetable oil spreads easier than straight from the jar, and it carries the seeds without crumbling. A gelatin mix sets firmer in warm weather and washes off the feeder less in rain. Either way, roll the coated base in a tray of black oil sunflower seed and cracked corn.
- Hang the finished feeder at least ten feet from any trunk or branch thick enough for a squirrel to leap from, and use a length of fishing line or thin wire rather than twine. Squirrels chew twine in an afternoon. A simple baffle made from a two-liter bottle, slit up the side and slipped over the hanging line, stops most climbers without adding much cost.
- Set it where you can see it from a window. Migrating birds find new feeders faster when there is some open lawn or bare ground beneath for the cautious ones who prefer to pick up what falls.
Materials That Show Up Again and Again
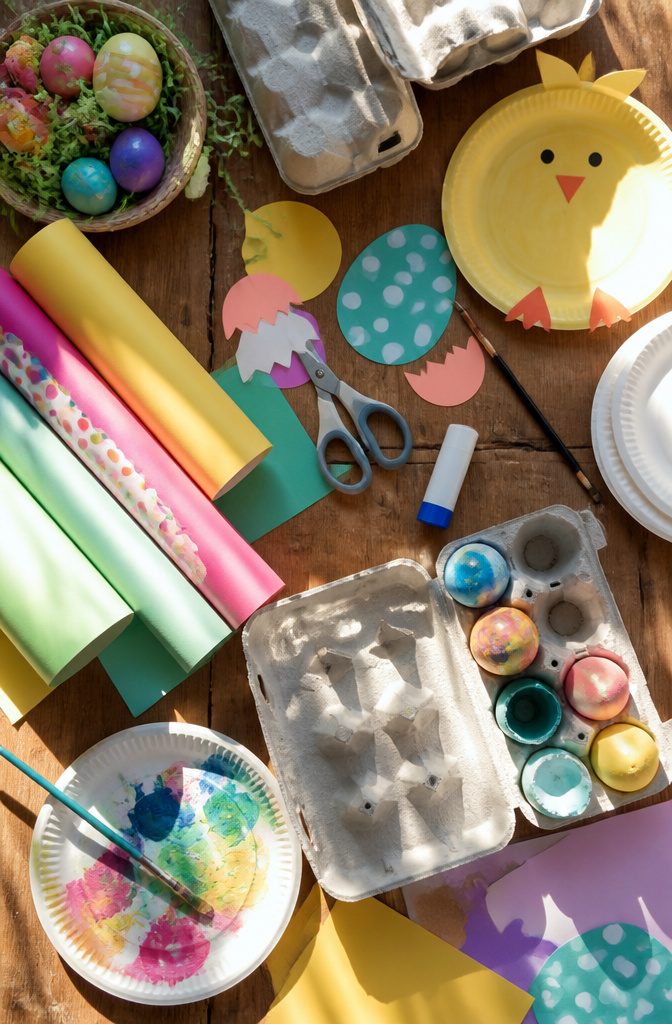
Paper, glue, and scissors sit in most kitchen drawers already, which means an Easter project can start the minute the idea hits. Yarn and the cardboard tube from a finished toilet paper roll round out the same basic set, and an empty egg carton left from breakfast works as a paint palette, a sorting tray, or the craft itself. The cost of a project often comes down to whether you already own the glue. One centerpiece built from Dollar Store supplies ran under $3 because the container, the glue, and the display vase were already in the house.
That accessibility shapes which crafts actually get made. A paper plate bunny needs only cotton balls and pipe cleaners beyond what most families keep on hand, so it finishes in a single afternoon. A bird nest built from pipe cleaners, yarn, and shredded paper works the same way, with an optional walk outside to gather moss and twigs. The egg carton cups, cut apart, become individual gift boxes with a little Easter grass tucked inside. When the materials are already on the counter, the project happens. When the supply list sends you to a store first, the mood passes.
What I Keep on Hand for Kid Projects
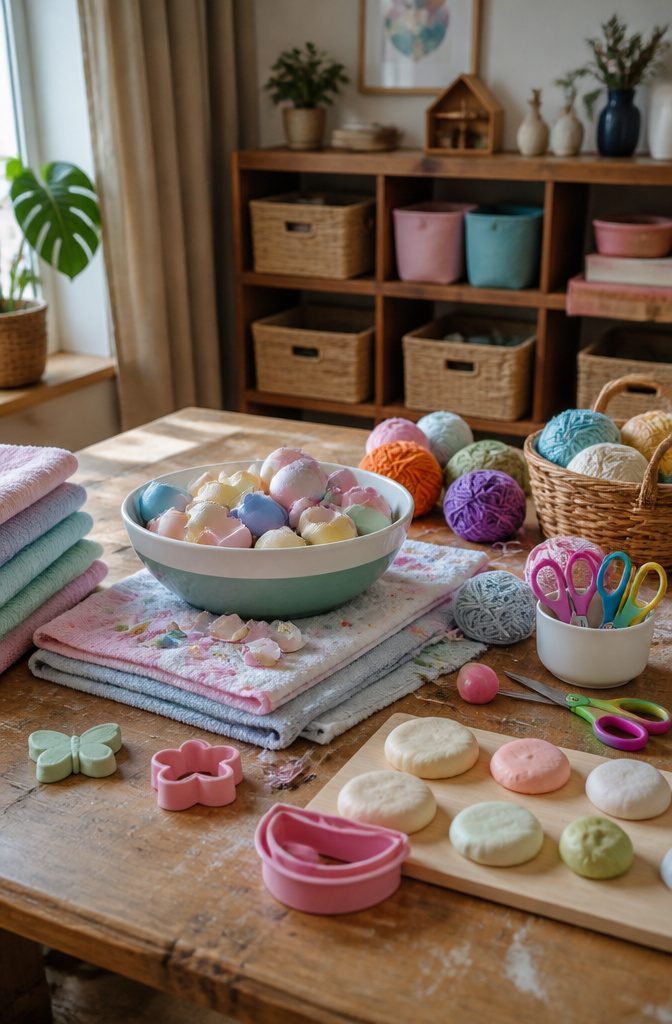
Not every project on the list suits every age, so the afternoon runs smoother when toddlers get sensory play and older kids get real steps to finish. The ice eggs work for both: a two-year-old stirs the frozen shells in a bowl of water and watches them melt, while a six-year-old chips away with a spoon to free the toy trapped inside. I set those up at the kitchen table with a towel underneath and a second towel within arm’s reach; the water spreads, but it spreads on fabric, not into the floorboards.
For the salt dough eggs and the bunny ear crowns, I pre-cut the pieces for anyone under five and let the eight-and-ups roll and shape their own. The sock bunnies go to the older group entirely; turning a sock into a body plus stuffing it takes finger strength that frustrates a four-year-old by minute ten. Paper projects like the origami eggs or the egg carton flowers sit in the middle: a seven-year-old can fold the creases if I demo once first, and even a younger child can glue pre-cut petals onto a stem.
The workspace rule that saves the afternoon is one material per station, not one child per station. Moving between paper, dough, and water keeps them busy longer than fighting over a single glue stick.
Decor That Outlasts the Weekend

Some Easter crafts earn their spot on the mantel straight through May if you pick the palette right. I skip the neon pinks and saturated purples that read "holiday" from across the room. Instead, soft pastels, warm whites, and muted sage sit on my shelf from March until the peonies take over. The painted taper candlesticks I did last year, carrots and vines in acrylic paint pen, still look like spring rather than leftover Easter because the colors stay in that dusty range.
Storage is where paper projects either survive or crumple. My crepe paper lilies and origami eggs go into a shallow shoebox with sheets of tissue between layers, not stacked more than three deep. The paper eggs especially keep their shape this way; one year I tossed them in a bag and spent an afternoon re-creasing every panel. Pressed-flower suncatchers need flat storage, face-up, or the contact paper seal warps and the petals shift.
The beeswax egg candles are the easiest keepers. Once the wicks burn down, the shells get tucked back into their carton with a little craft moss still packed around them. I pull the whole thing out intact next spring.
Where I Find the Steps
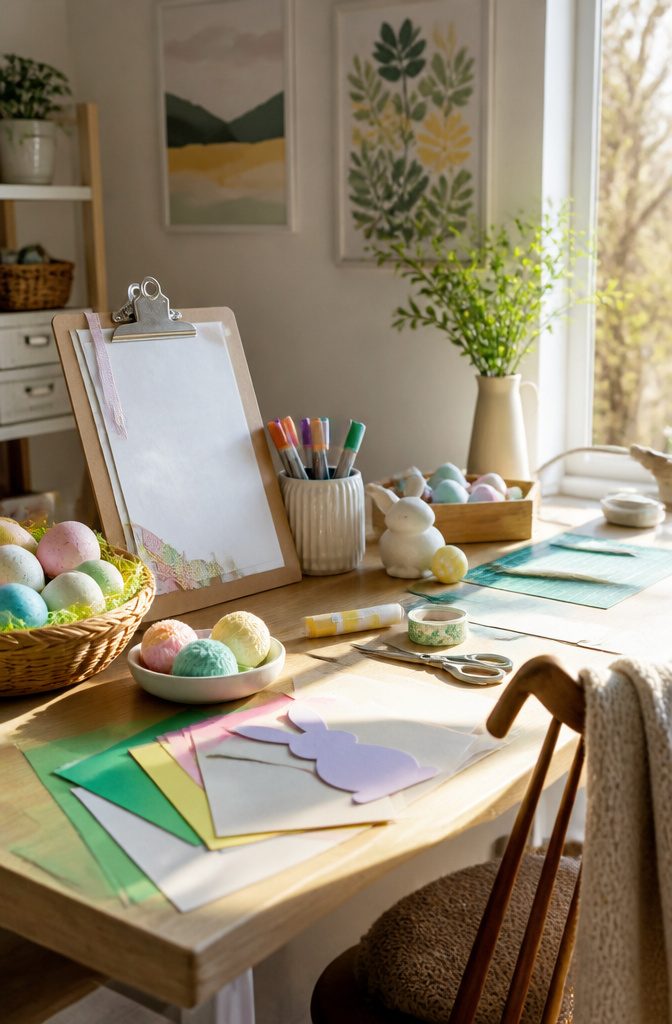
A tutorial lives or dies in the first thirty seconds of reading. I scan for three things: a photo of the finished piece, a materials list with real quantities, and one step I can already picture doing. If the blogger skips the yarn weight or calls for "a handful of beads," I close the tab. A project without measurements is a project without a finish line.
When I do commit, I copy the instructions into a notes app and rewrite them in my own order, adding the numbers the original left out. Last spring I wanted to make paper lilies; the source said "cut a petal shape." I held a real lily petal against the screen, sketched around it, and wrote "petal template: 4 inches at widest point, 6 inches tall" in my notes. That became the working pattern.
Materials almost never match exactly. My craft store stocks a different brand of tissue paper, my kids lose the good scissors, I forget to buy pipe cleaners. I substitute by weight and behavior, not by name. Crinkly lightweight paper works like tissue; a chenille stem bends like a pipe cleaner. If the hold feels wrong, I stop before the glue dries and try the other thing.
Frequently Asked Questions
What are some easy Easter crafts for kids?
Pom-pom chicks, sock bunnies, and egg carton flowers are all simple enough for children to finish with minimal help. The article also covers bunny ear crowns, salt dough eggs, and origami paper eggs that suit a range of ages. For toddlers, sensory projects like ice eggs work well, while older kids can handle the sewing and stuffing steps in sock bunnies.
How do you make salt dough Easter eggs?
Mix two parts plain flour to one part salt and one part water until the dough feels like stiff Play-Doh. Roll it to about a quarter inch, cut egg shapes, poke a hole for hanging with a straw, and bake at roughly 200°F for two to three hours until hollow-sounding. Cool completely before painting with acrylics and sealing with matte varnish so the colors survive humid weather.
What materials do I need for Easter crafts?
Paper, glue, and scissors cover most projects, with yarn and empty toilet paper rolls rounding out the basics. Egg cartons double as paint palettes, sorting trays, or the craft itself. Many of the fifteen projects need nothing beyond what already sits in a kitchen drawer, which keeps the cost near zero if you already own the adhesive.





