
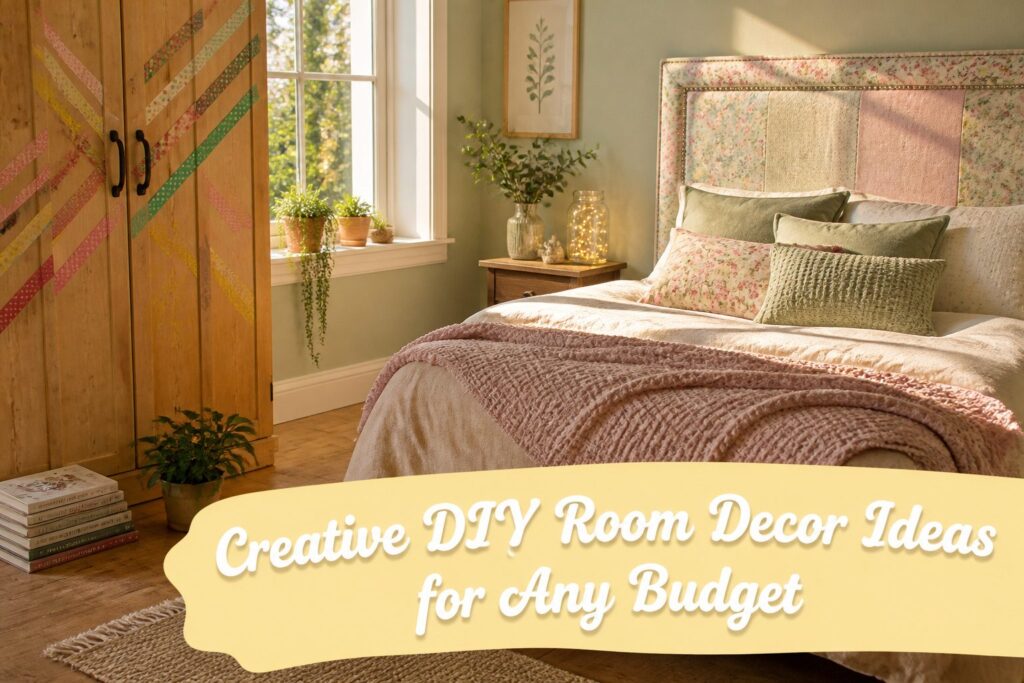
The projects run from a $0 jar-and-lights cluster to a padded fabric headboard, and the deciding factor is whether you rent.
Washi tape, clips and string leave the paint intact; drilled shelves and a mounted headboard don’t. Skip the glue on the clothing rack too, since dry-fit joints let you take it apart for a move.
1. Aesthetic Photo Wall Collage
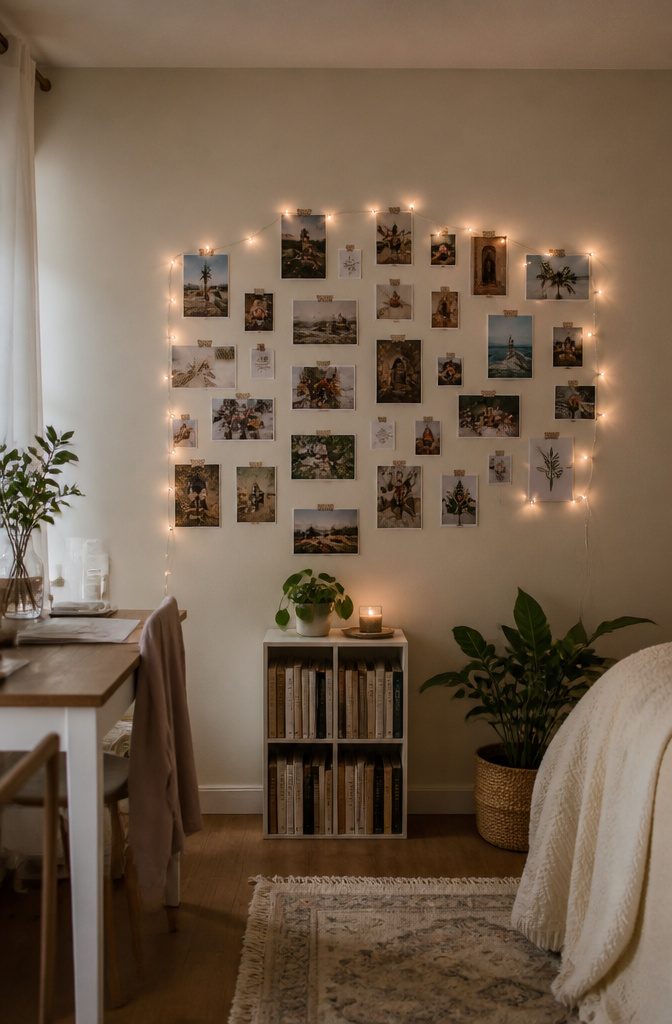
Print 20–30 photos, because a wall collage only works when the count is high enough to read as one big shape instead of a few stray pictures.
Lay everything out on the floor first, then move it to the wall once the spacing looks right.
Washi tape or small clips keep the paint intact, and washi tape peels off cleanly, so you can rearrange the whole wall later.
A grid looks tidy, a heart shape feels playful, and a loose scatter is the most forgiving if your prints are mixed sizes.
I’d mix personal photos with artwork or quotes in your room’s color theme.
Travel shots and friends make the wall yours; the aesthetic images fill gaps. Fairy lights woven around the edge add a cozy glow.
2. Fairy Light Wall
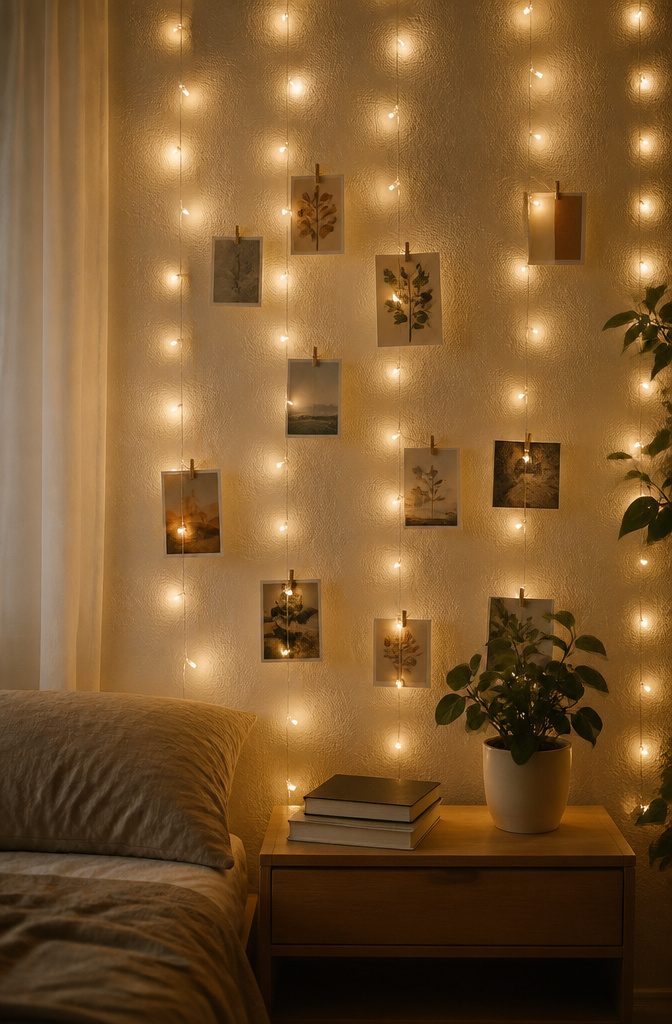
Warm white fairy lights give a bedroom wall a soft, candle-like glow, and that is why I would pick them over cool white every time.
Cool white reads as bluish and clinical, closer to an office or a bathroom mirror, which is the opposite of what you want an hour before sleep. Warm white feels like lamplight and makes the room look cozy.
Run the strands vertically so they hang like a curtain across the wall. Then clip on photos, postcards or small artwork with mini clips, and the lights become a display instead of just a glow.
Buy warm white only, and check the box before you pay, because mixed packs turn up often. Fairy lights are inexpensive, so the whole project costs very little.
3. Floating Shelves
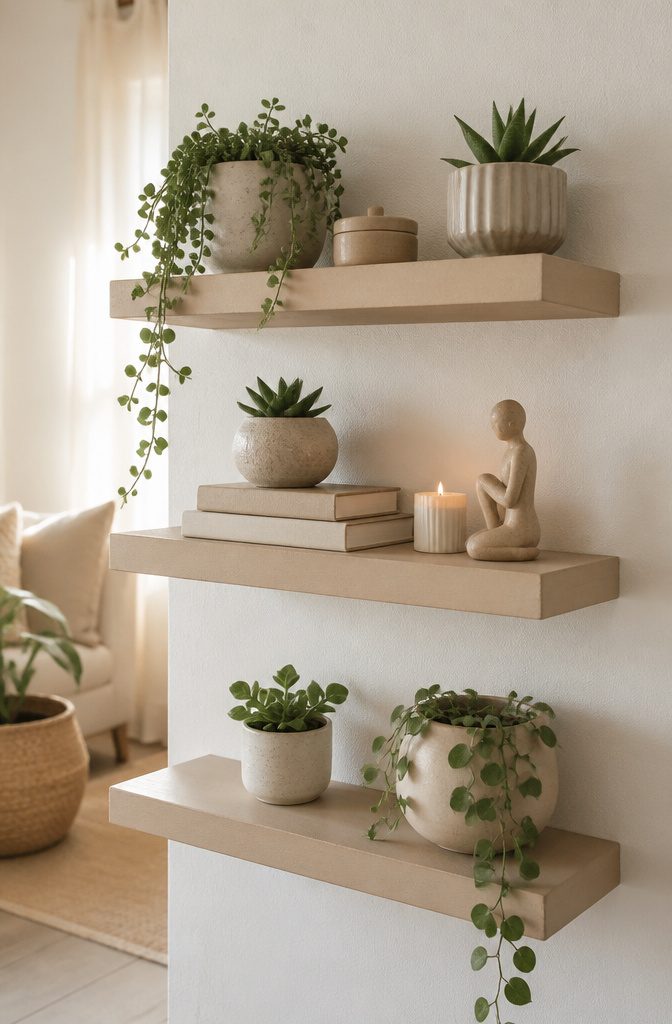
Floating shelves add display space without eating any floor, which is why they suit small bedrooms best.
A plain wooden board is enough, and a drill, a level, a pencil and a stud finder from the junk drawer will get it on the wall.
Styling matters more than the board itself.
Small plants or succulents soften the straight lines, a few books stacked horizontally give candles or a figurine something to sit on, and I like leaving one stretch of shelf empty so the wall can breathe.
Pick one color family, such as beige, white or pastel, and the whole shelf reads as deliberate instead of cluttered. Mixed colors are the quickest way to make it look crowded.
4. Mirror Decor Frame
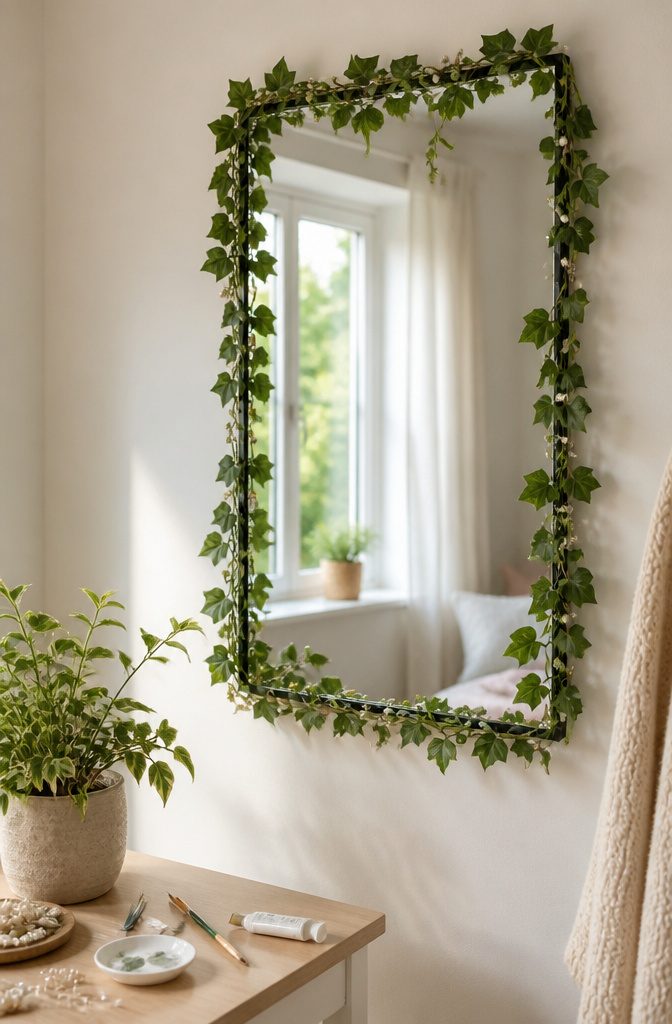
A plain mirror takes a frame well because the glass already does half the work.
Artificial flowers, vines, pearls, or small decorative stickers all stick or tie around the edge, so you can finish the whole thing in an afternoon with what’s in the craft drawer.
I’d pick artificial vines over flowers for a first try.
A vine follows any shape, wraps a corner without fuss, and hides its own seams under a few leaves. Pearls look softer but ask for more patience, since each one needs its own dab of glue.
For a glow, run LED strip lights around the back edge of the mirror so the light spills onto the wall rather than shining at you.
It’s optional, and it turns a corner of the bedroom into something that feels planned. Set the mirror near natural light, and the room reads brighter and bigger by day.
5. Handmade Wall Art
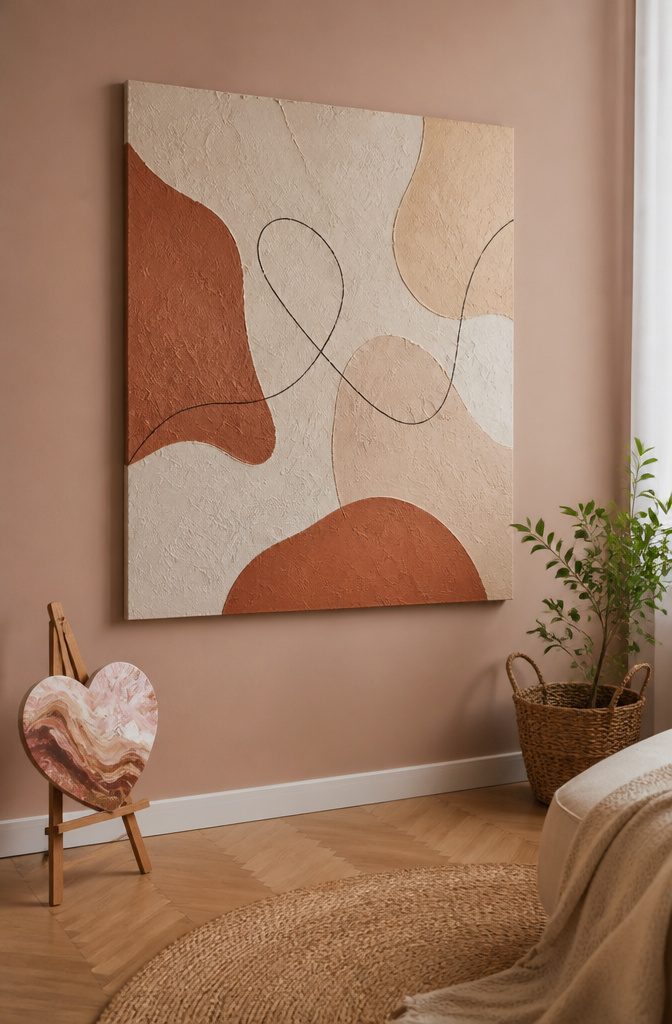
Canvas and acrylic paint are the cheapest way to get real art on a wall, and neither one asks for drawing skill.
Abstract shapes, minimal line art and textured plaster all look deliberate, which is why I’d pick them over anything that needs a steady hand.
For texture, build tissue paper up under the paint on a small canvas. The hearts then sit proud of the surface instead of lying flat, and a raised pink pattern on a mini easel reads as gallery work.
Tie it to your memories by choosing the shapes yourself, such as a heart for a person or a date.
Stick to neutrals like beige, white and terracotta if the room already has a color scheme, since they blend with almost anything.
Washi tape is the fallback for renters: geometric patterns or a simple frame around a poster peel off without damaging the paint.
6. Mason Jar Lights
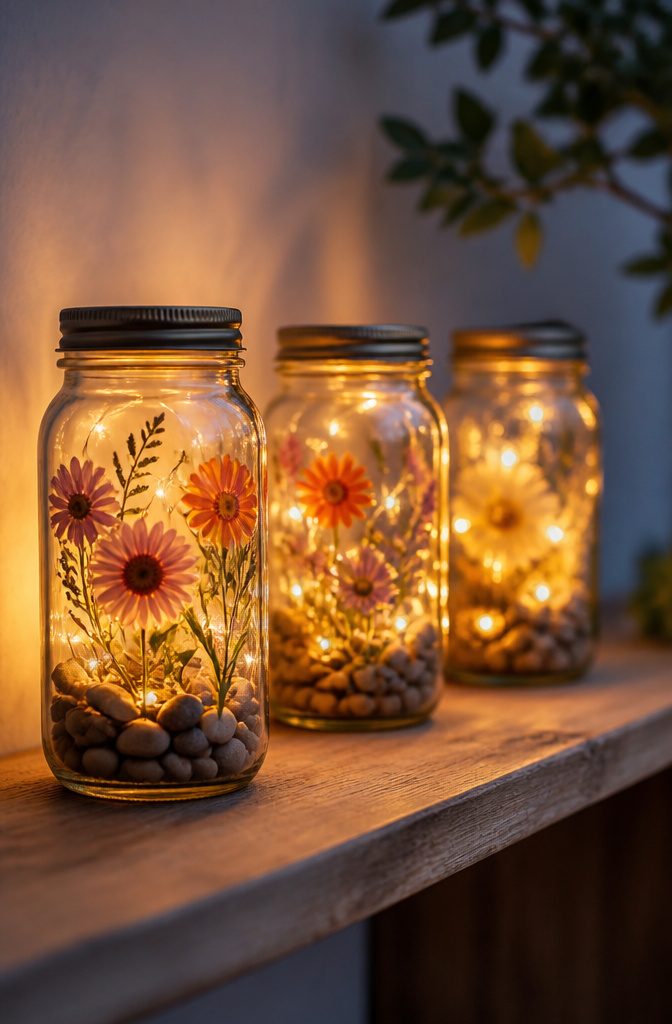
A mason jar already sitting in the cupboard is most of this project.
Drop a string of fairy lights inside, tuck in a handful of decorative stones or dried flowers, screw on the lid, and set it on a shelf or table. Nothing needs buying except the lights.
Pressed flowers lined against the glass, with the lights tucked in behind them, give the jar a lantern look. They don’t have to be perfect, because the glow hides every flaw.
I’d group 2–3 jars together rather than scattering single ones. One jar looks like a nightlight; a cluster gives a warm ambient glow that fills a nightstand or shelf corner.
7. Plant Corner
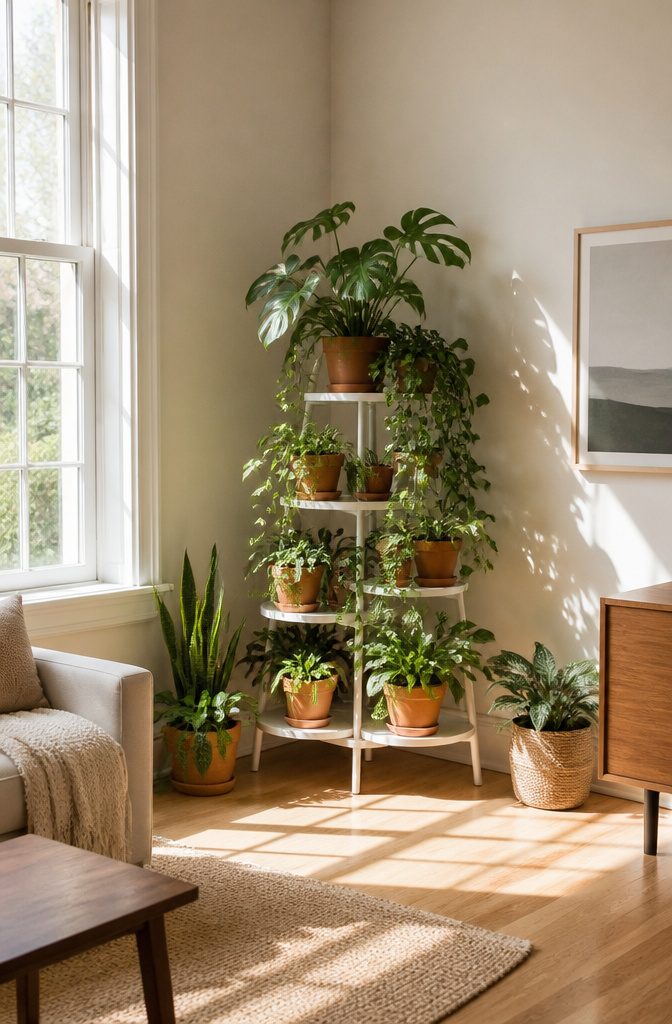
A bare corner is usually the easiest spot in a room to fix, because nobody has claimed it yet.
Set a tall shelf or a tiered stand against the two walls and you get height, which is what makes a few pots look like a deliberate display instead of a pile of plants on the floor.
I’d put the biggest plant on the floor beside the stand and fill the shelves with smaller pots that trail or spill over the edges.
Mixing leaf shapes does more for the color than any paint job. Keep the plants that want the most light on the shelf nearest the window, and skip the corner altogether if it stays dark all day.
Check the light before you build anything, since a handsome corner full of struggling plants looks worse than an empty one. Painting plain terra cotta pots in one or two shades ties the whole thing together on a small budget.
8. Fabric Headboard
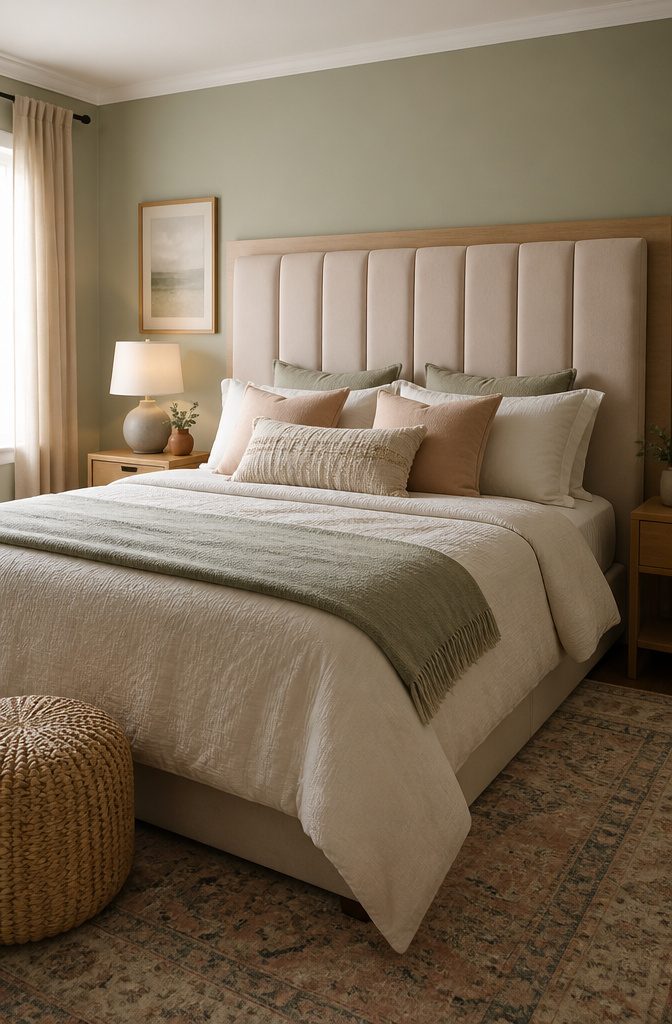
Foam over a plain wooden board is what gives this headboard its padded, upholstered look. Build it in three moves: attach the foam to the board, pull the fabric over the foam, then mount the whole thing behind the bed.
Fabric color decides how the bed reads.
I’d go with cream, beige or a soft pastel, because a light, muted fabric looks like a store-bought upholstered headboard and blends with most room themes. A bold print can work, but it competes with everything else on the wall.
Cost is the appeal here. Three materials and a mounting job get you a luxurious look without spending much, and the finished piece makes a flat, plain bed look finished.
9. Hanging Photo Clips
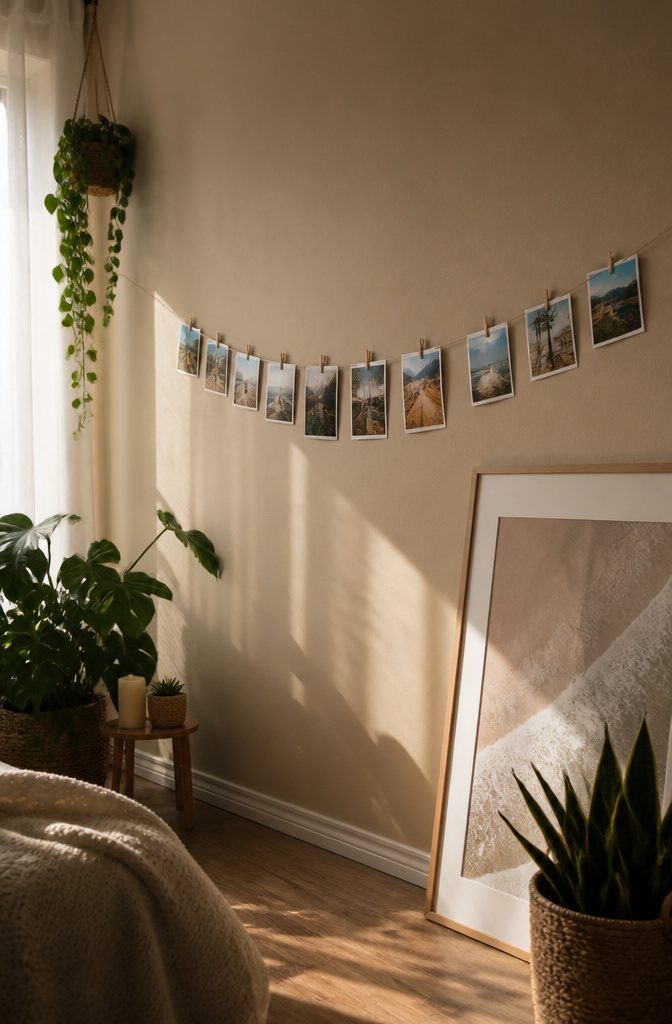
Rope or plain string pulled taut across a wall does the job of a gallery rail for almost nothing.
Mini wooden clips hold the photos, and swapping a picture takes about five seconds, so the wall can change as often as you get bored of it.
Renters get the most from this one.
The whole display hangs from two anchor points, which means two small holes at most, or none if you hang each end from removable hooks. A framed collage can’t say the same.
Clips also hold more than prints.
Postcards, quotes and small artwork all grip fine, and I’d weave fairy lights along the rope if the corner needs a glow. Keep the string snug, since a sagging line tilts every photo on it.
10. Decorative Bedside Tray
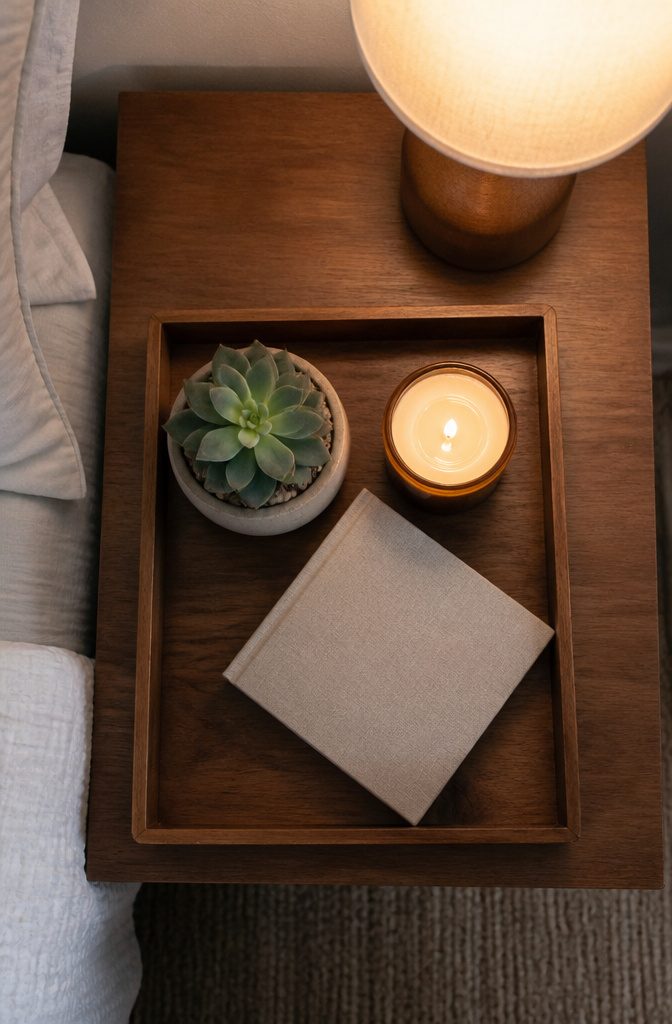
A tray is the cheapest way I know to make a bedside table look planned instead of piled. Everything that lands on the nightstand gets a border, so the clutter reads as a set.
A plain wooden tray works as is.
For a tray you already own, or one with a worn finish, paint it to match your room theme. Thrift stores keep the cost low, and a dated tray takes paint just fine.
Arrange a scented candle, a small plant, your favorite book and a perfume bottle on it.
Keep to those four or so items, because a crowded tray looks like the clutter you started with. Put the book flat as a base and set the candle on top of it or beside it.
11. Wall Tapestry
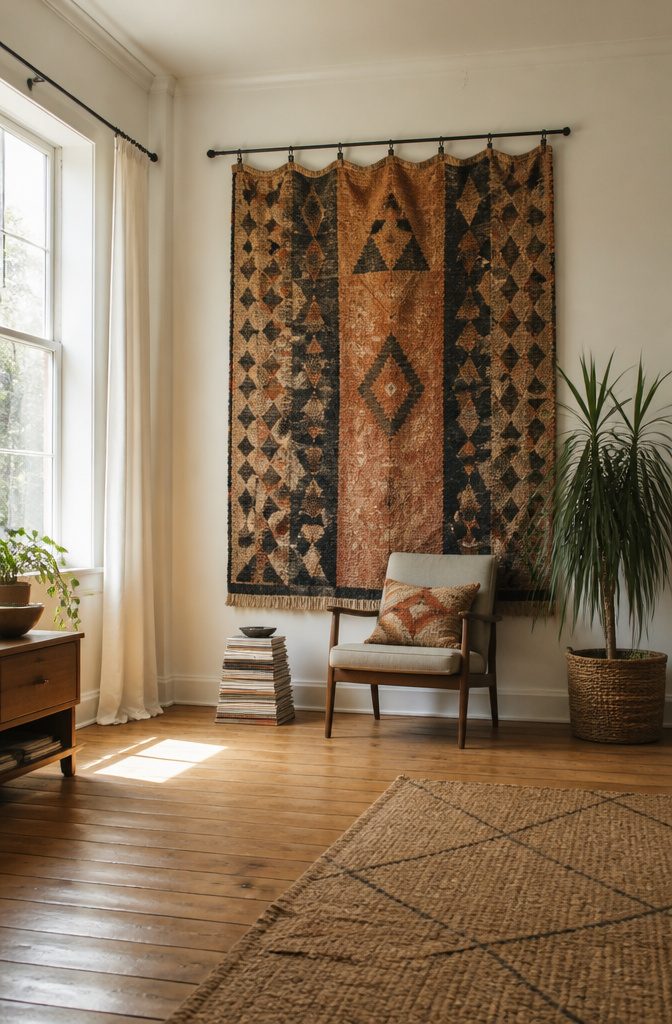
A large empty wall is where fabric earns its keep, and a plain wooden rod or curtain rod is all the hardware you need.
Printed fabric, boho cloth and hand-painted cloth all work, but I’d pick a heavier, tightly woven piece over anything thin. It hangs flatter and won’t ripple at the clips.
For hanging, slide the rod through a sewn hem, or clip the fabric along the rod with evenly spaced clips.
Clips win for renters and for anyone who likes to swap fabrics, since nothing gets sewn or cut. Hooks work too if the rod needs to sit off the wall.
Visually, one big piece of cloth softens a bare wall in minutes, and it’s one of the easiest ways to add color and texture.
12. Pegboard Wall Organizer
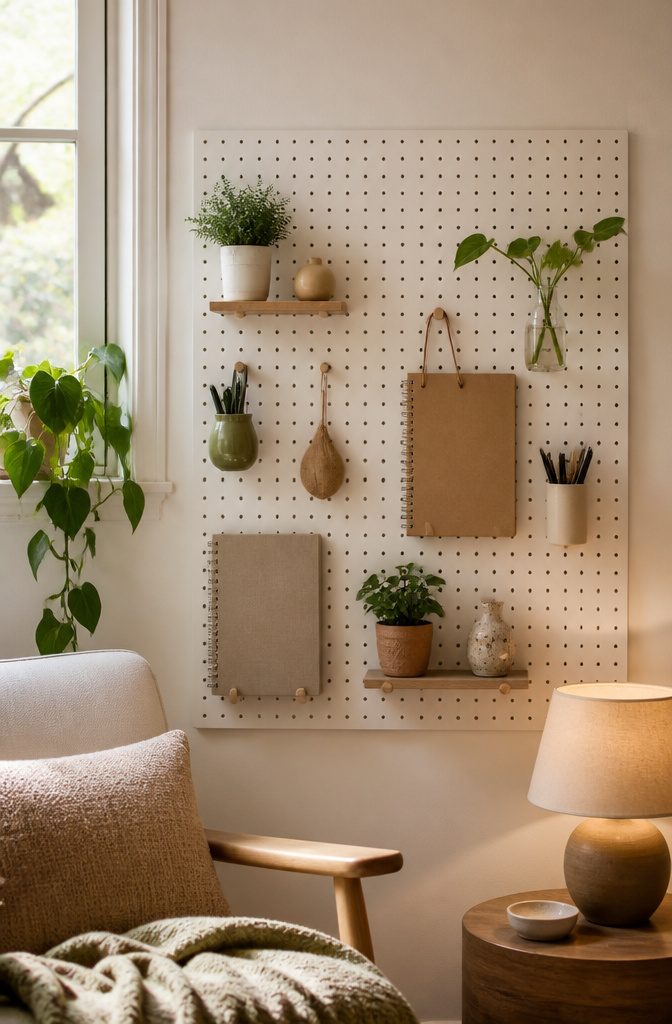
A pegboard works as storage and as wall art at once, which is why it suits a small bedroom. You can buy a wooden one or cut your own, and either way the paint decides how it reads.
White, beige, or a soft pastel keeps the board clean and calm, so the clutter you hang on it becomes the decoration instead of competing with it.
Once the paint dries, add hooks, mini shelves, or hanging baskets. Small plants, notebooks, and a few decorative pieces are enough to fill it.
I’d keep the board half empty at first. A pegboard looks best when you can see the paint between the objects, and it’s easy to add more later.
13. String Light Decor
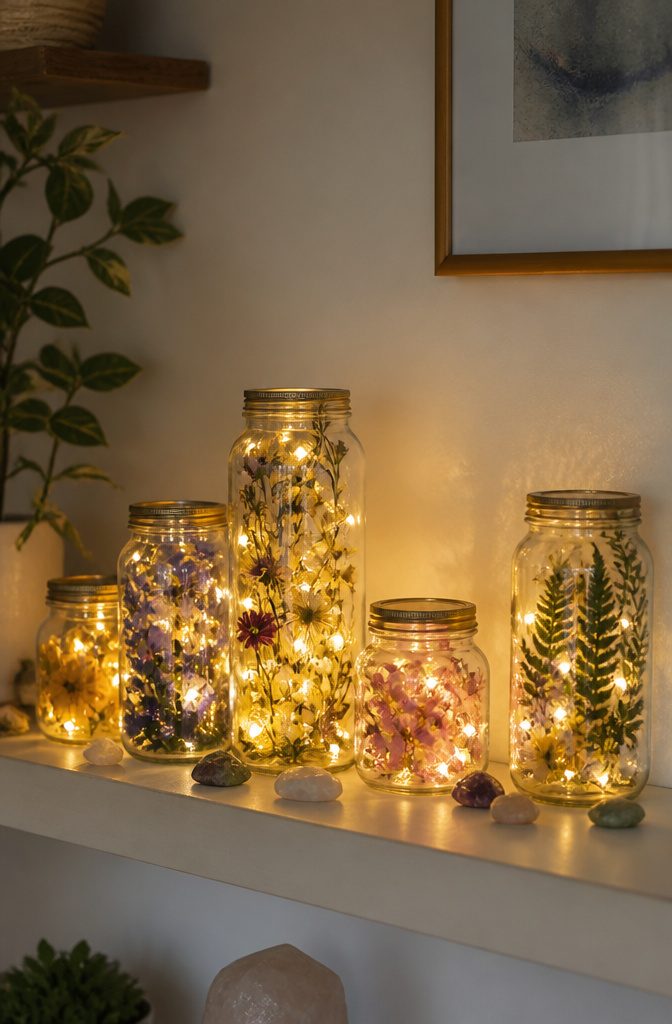
Enclosed spaces turn a loose string of lights into a lantern. Paper cups work, and so do mason jars and paper lanterns, because the container diffuses each bulb into one soft glow instead of a row of bright dots.
Jars give the best result of the three. Line the inside with pressed flowers, then drop the string in behind them, and the lights hide every flaw in the petals.
Decorative stones or dried flowers in the bottom also work, and the lid closes on top. I’d group 2–3 jars together on a shelf or nightstand rather than spreading singles around the room.
Paper lanterns suit the ceiling. Hang them with clear thread, put small LED lights inside, and mix sizes so the cluster looks uneven on purpose.
14. Decorative Pillows
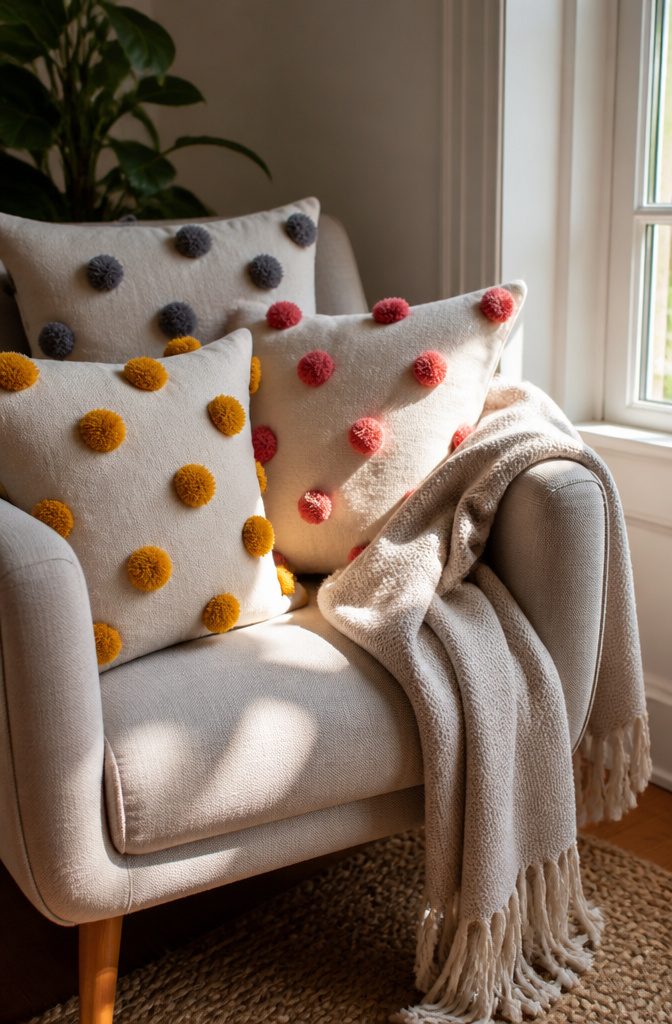
A plain pillow cover is the best starting point for pom poms, because the only real cost is yarn.
Chunky yarn and a Clover pom pom maker in two or three sizes will cover a whole front, and a hot glue gun fixes each one to the cover.
That version is simple but not fast, so I’d save it for a long evening when your hands want something to do.
Covering the entire front reads as a statement piece, not a throw cushion. If you’d rather keep it quiet, stitch or glue a row of pom poms along the sides only.
They still catch the eye, and they’re hard to resist poking. Leftover skeins nobody wants make good fuel for either version.
15. Clothing Rack
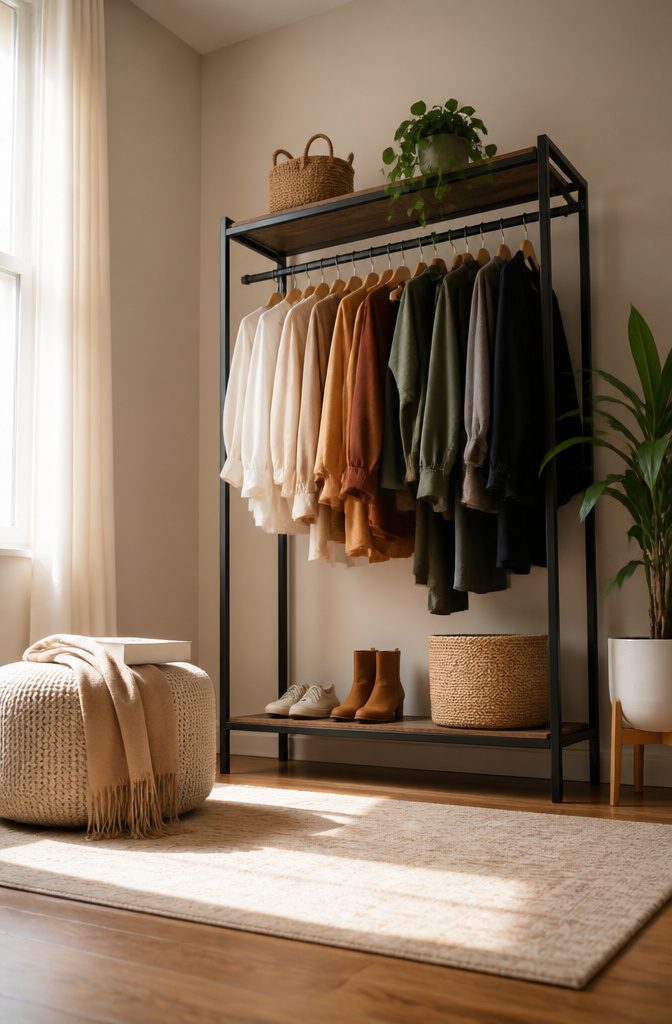
Skip the wood glue if you plan to take this rack apart for a move or a seasonal swap.
Dry-fit joints let you disassemble it in minutes, and the rack stays a piece of decor you can reconfigure instead of a permanent fixture.
Overloading is the way this project fails.
An open rack looks best, and holds up best, when it carries only what you plan to wear this week. Hang a week’s worth of outfits, not your whole closet, and the frame stays light and tidy.
I also like that the bare frame reads as part of the room. A neat row of hangers with a few chosen pieces does more for the look than a packed rail.
16. Succulent Pot
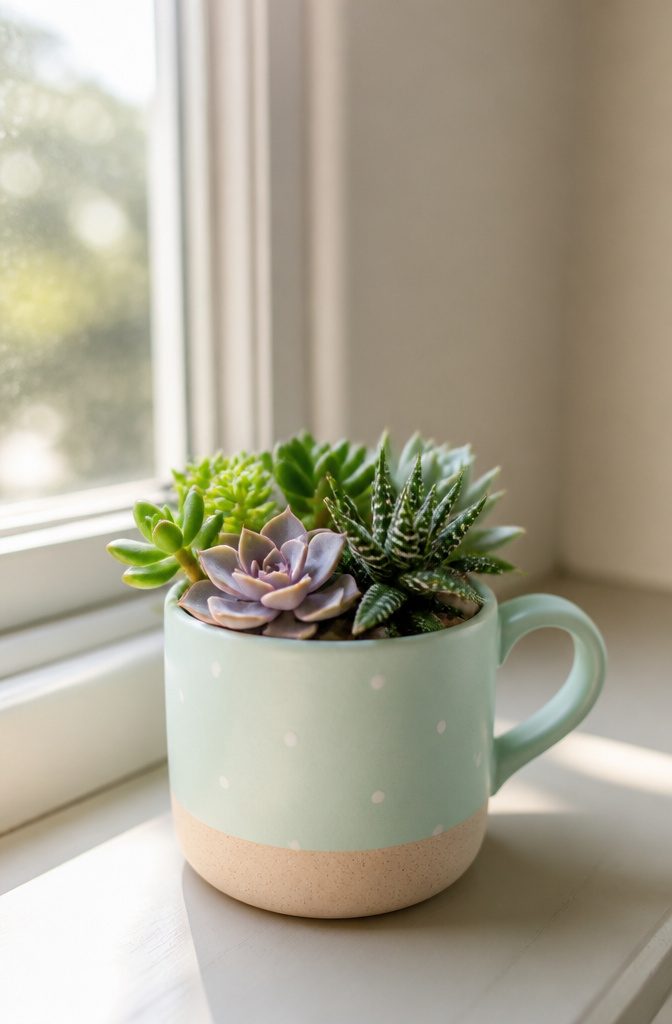
Glue decides whether a succulent pot lasts. Watering sends spills down the sides, so use waterproof glue on anything you stick to the outside, or the decoration will peel the first time you tip the can.
Jars, mugs and small baskets all work as the base, and a mug is my pick because it already has a finished look and a sturdy wall.
Paint it with acrylic in minimal dots, stripes or soft pastels, then seal it with clear varnish so the design survives handling and damp hands.
Skip the sealer and the paint will wear first at the rim, where your fingers grip.
Match the colors to the rest of your room, and the pot reads as part of the decor rather than a leftover container.
17. Dreamcatcher
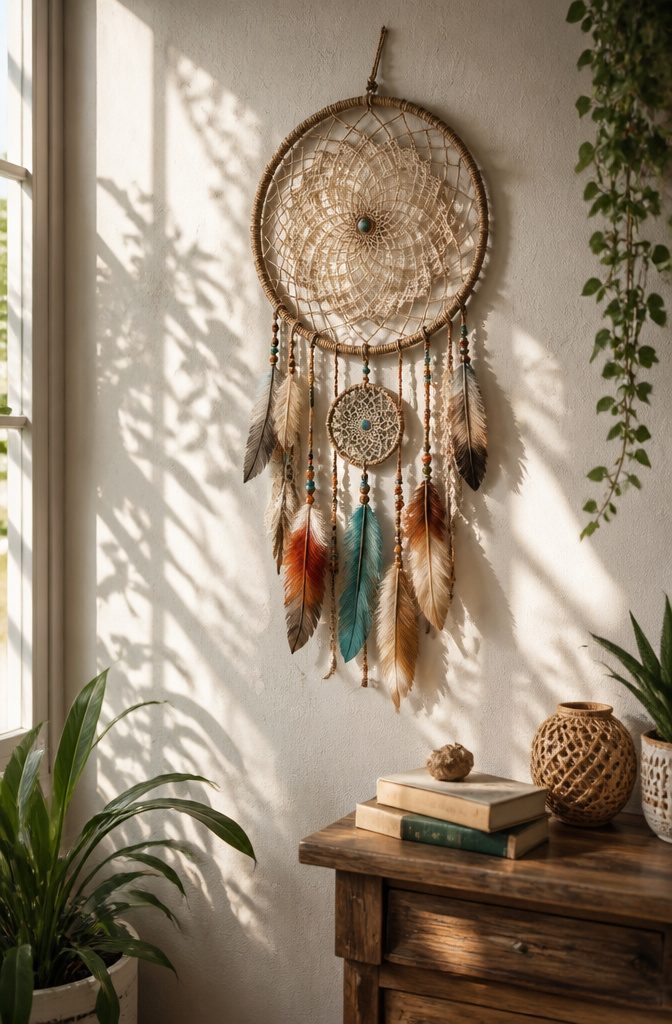
Pull every knot snug before you move on to the next section of the web.
Tighten each knot fully before starting the next one, because a loose knot is what makes a dreamcatcher sag and look sloppy. Once the web is built, the hoop can’t take up the slack for you.
Work in small sections and stop to check each one.
If a knot feels slightly loose, undo it and redo it now. Fixing one is easy; fixing five after the pattern is built means unpicking the whole thing.
I’d also keep a steady, even pull from knot to knot. Tension that changes halfway around warps the web, and the center ends up lopsided.
18. Faux Cactus
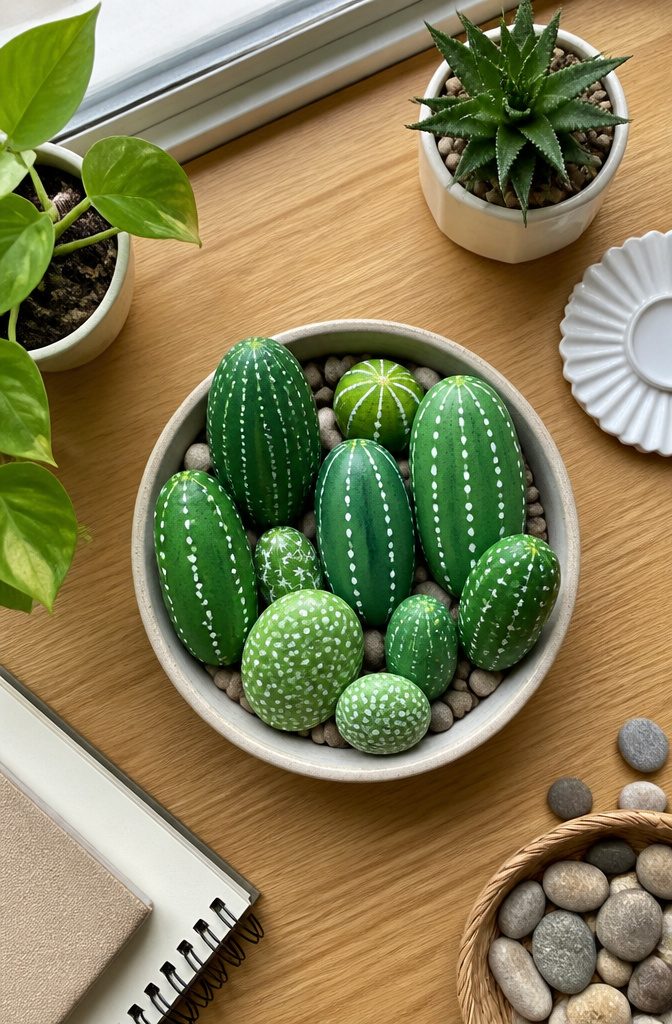
A painted rock cactus is the one plant on this list that never needs water, light, or a second thought.
Gather rocks in different sizes, since a small cluster of mixed heights looks more like a real cactus garden than a row of matching stones.
Green and white paint is all the color you need.
Mixing the two in small amounts gives you several shades of green from just two bottles, so one rock can be a deep green, another a pale sage, and a third nearly mint.
I’d keep white for the details, like spines or dots, and paint those last so the base coat can dry first.
Set the group on a shelf or desk, where the rocks hold their shape without any care.
19. Gem Mirror
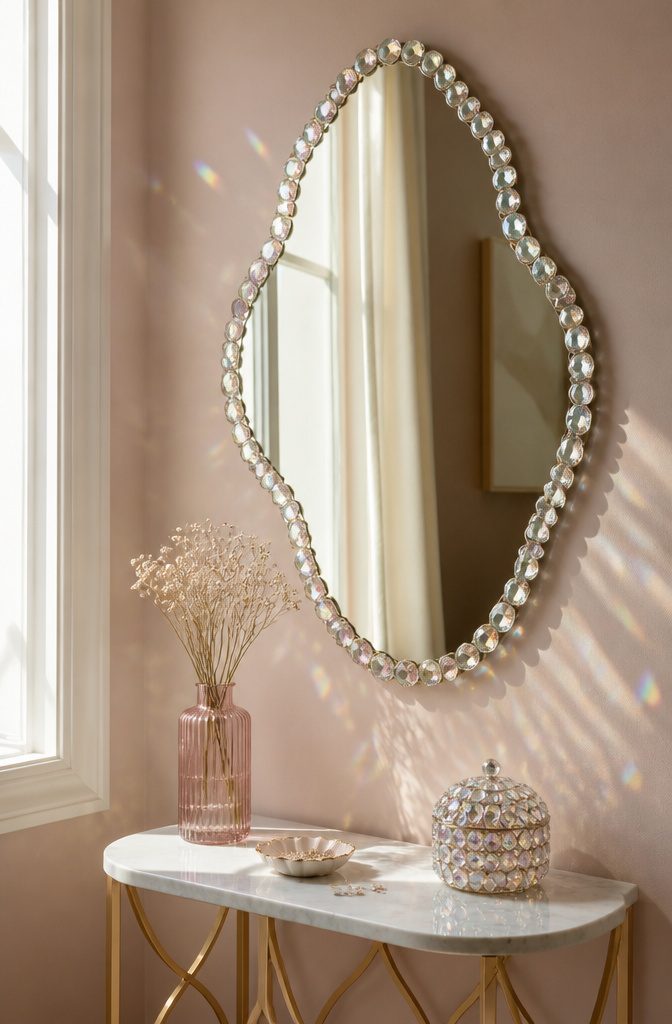
Thin lines look best on a gem mirror, and the contact paper is what controls them.
Stick the paper to the glass, cut the lines out, and measure 1/8" on each side of your guide line. That gives you a 1/4" channel, just wide enough for a single row of small gems.
Gems go into the cut-out channels, so the glass stays clean everywhere else. Wide bands tend to look cluttered, and a thin line reads as a deliberate border rather than a craft-store spill.
Leave the paper on until the last gem is placed, because it keeps stray glue off the mirror.
A mirror with an interesting shape, such as a round or arched one, shows off a 1/4" line of gems better than a plain rectangle does.
20. Watercolor Clock
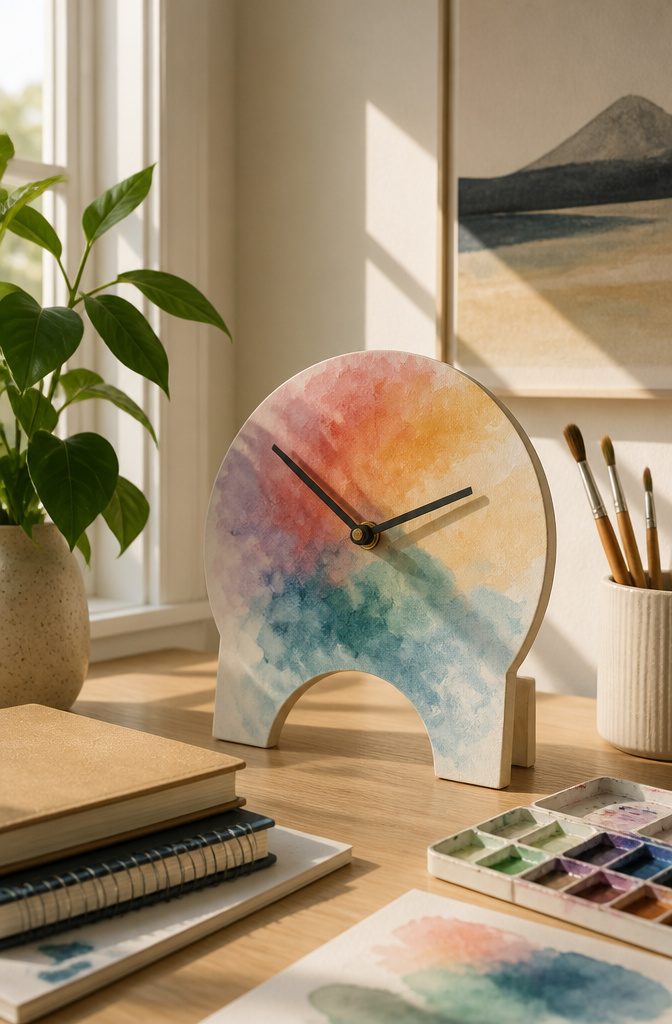
Start the face with the lightest wash.
Watercolor goes on in layers, and you can’t lift a dark color back out of paper once it has set, so lay down the pale tints first and save the deepest shades for last.
Size matters before any paint comes out. Measure the clock hands and make the painted base larger than the hands, or the sweep of the minute hand will run off the edge of the art.
I’d cut the base to match the hand length plus a generous border, then paint.
The one thing I’d skip is painting numerals freehand if your hand shakes. Plain washes with no numbers read as modern and hide mistakes, which makes them the forgiving choice for a first clock.
21. Fun Cork Board
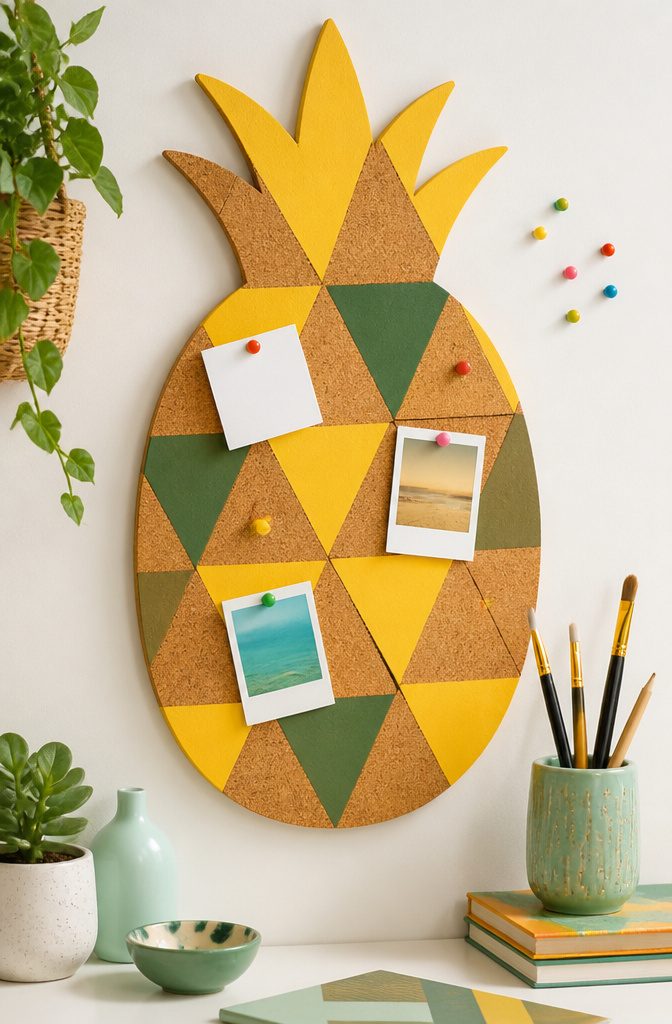
A pineapple cut straight from a cork board is the version I’d make first, because the shape does the decorating for you.
Cut the outline from the cork, then draw triangles of different sizes across the body for the scaly skin pattern. Paint a bit of green on top for the leaves, and fill some of the triangles with yellow.
Leave some triangles bare cork so the board still grips pins and photos. Paint every one and you cover the surface that does the work.
Acrylic is the safer pick for cork, since it sits on the surface and dries quickly.
Mixed sizes look better than a neat grid, which is the quirky part. Pin up photos and reminders, and keep notes clear of the painted areas so the color stays visible.
Budget-Friendly Materials
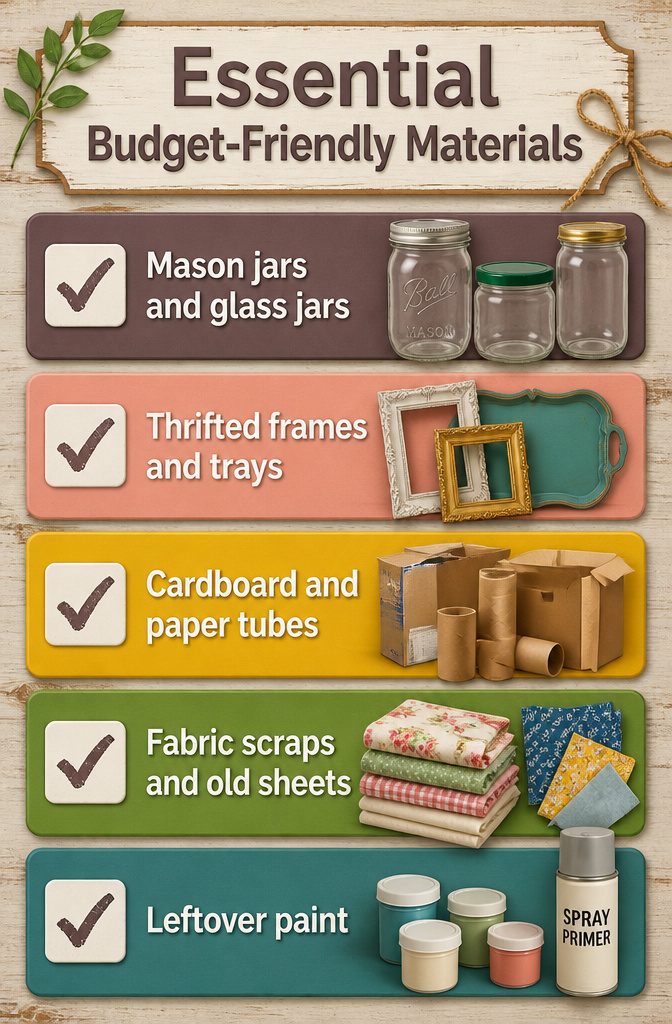
Most of what you need for a room makeover is already sitting in a closet, a recycling bin, or a thrift store shelf.
- Mason jars and glass food jars: Pasta sauce and pickle jars cost nothing. Soak off the labels in hot, soapy water and rub the leftover glue away with cooking oil.
- Thrifted frames and trays: Mismatched frames look cheap until a coat of spray paint unifies them. Skip any with warped backing.
- Cardboard and paper tubes: Toilet paper rolls, shipping boxes and cereal boxes cut easily and take paint well.
- Fabric scraps and old sheets: Worn bedding and thrifted curtains give you yards of pattern for pennies.
- Leftover paint: Small sample pots are enough for accents, and a single coat of spray primer helps paint grip glossy thrifted pieces.
I’d skip buying new craft supplies until you’ve gone through this list.
Making It Personal
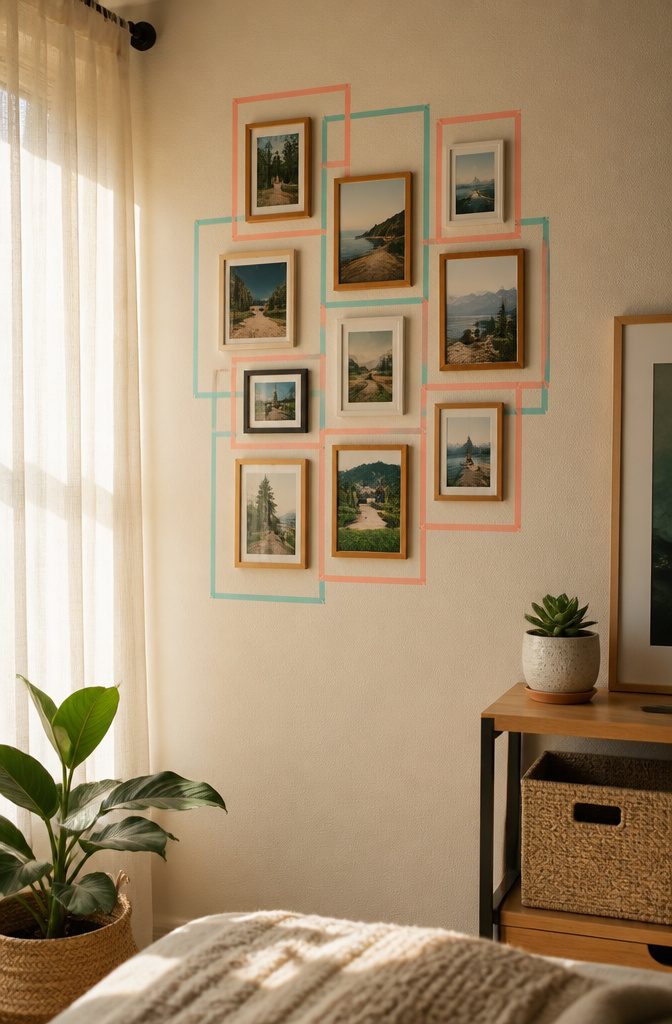
Washi tape does the quiet work in a personal room. Strips of it outline a photo on the wall, which gives you a frame with no drill and no damage to the paint, so renters can have it too.
The same tape makes geometric patterns or simple line shapes, and you peel it off when you tire of the look.
Pick your colors first, then print photos to match.
If the room is cream, small inexpensive frames filled with family snapshots add warmth without fighting the walls. Choose tape in one or two shades from your palette and the wall will look planned instead of cluttered.
For seasonal swaps, I’d change only the tape and a few prints. It costs little, takes minutes, and the room feels new again.
Frequently Asked Questions
How can I create a photo wall?
Print 20–30 photos so the collage reads as one big shape, and lay them out on the floor before putting anything on the wall.
Hang them with washi tape or small clips, which won’t damage the paint and let you rearrange later. A grid, a heart or a loose scatter all work, and fairy lights around the edge add a cozy glow.
What are some easy DIY room decor ideas?
A fairy light wall, a photo collage, a decorative bedside tray and a string of hanging photo clips are all quick and cheap.
Mason jar lights are also simple, since most of the project is a jar you already own plus a string of lights. Most of these take an afternoon or less.
How can I personalize my room decor?
Start with your own photos, handmade art and a color palette you pick on purpose. Print snapshots to match the room, then outline them with washi tape in one or 2 shades from that palette so the wall looks planned.
Painted canvas works too, using shapes that mean something to you, like a heart for a person or a date.
How do I make my room unique?
Mix personal items with a few handmade pieces, such as travel photos, a painted canvas or a mirror framed with vines.
Sticking to one color family keeps the result looking deliberate instead of cluttered. Changing only the tape and a few prints each season keeps the room feeling new.





