
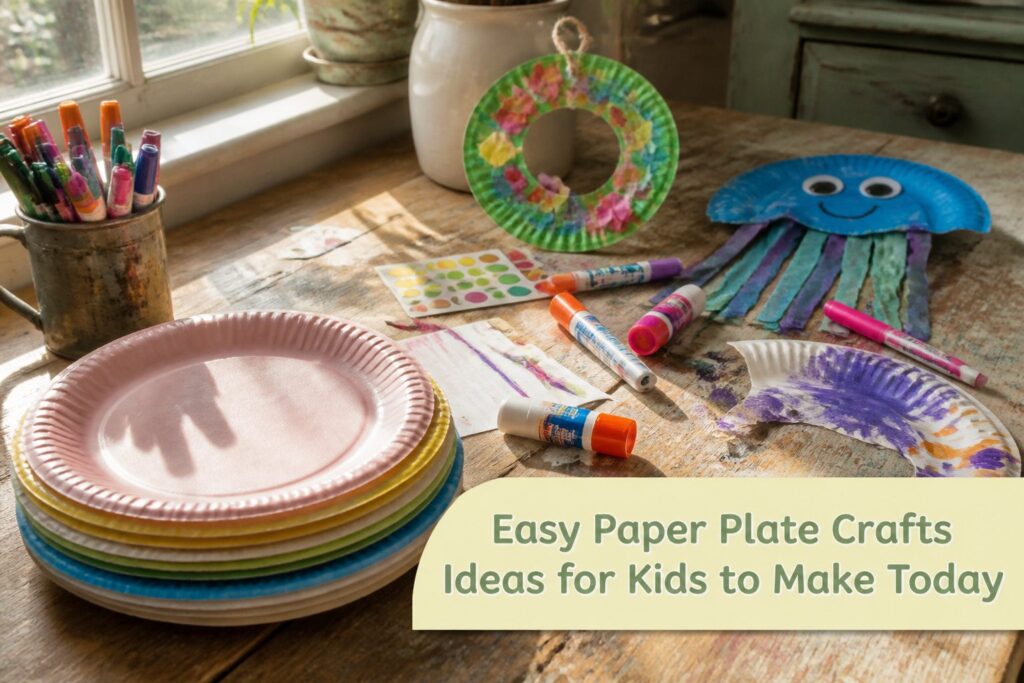
The projects run from a 30-minute marker-and-sticker toddler craft to a painted wreath or jellyfish that needs drying time, and the deciding factor is how long a child can wait.
Paint adds a pause before glue, tissue paper or cotton balls can go on. For cheap eyes, stack a black 1/2-inch label on a white 1-inch one.
1. Paper Plate Animals
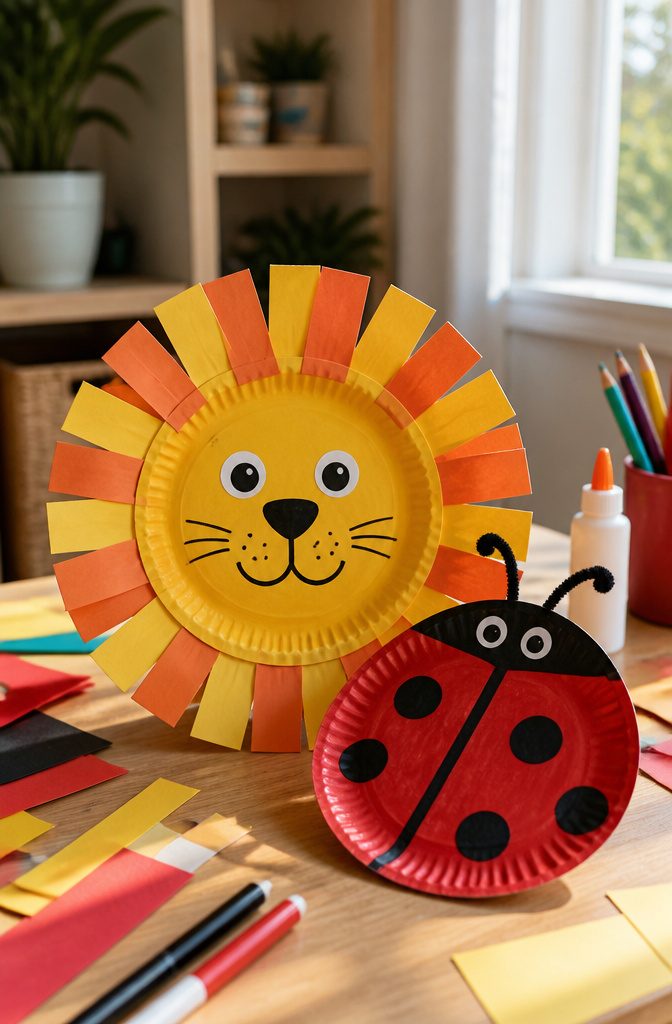
Standard dinner plates make the best animal bodies because the flat center gives you room to paint and the rim gives you a built-in frame.
A lion needs only yellow paint in the center, orange and yellow construction paper strips glued around the edge for a mane, and a marker for the nose, smile and whiskers.
A ladybug goes even faster: red paint across the back, a black semicircle for the head, a black line down the middle, and fingertip dots for spots.
For an owl or any animal with a separate head, glue a smaller dessert plate on top of the dinner plate and the shape reads right away.
Googly eyes get pricey in large sizes, so white 1-inch labels topped with black 1/2-inch labels work well. They don’t wiggle, but they’re cheap and look cute.
2. Paper Plate Masks
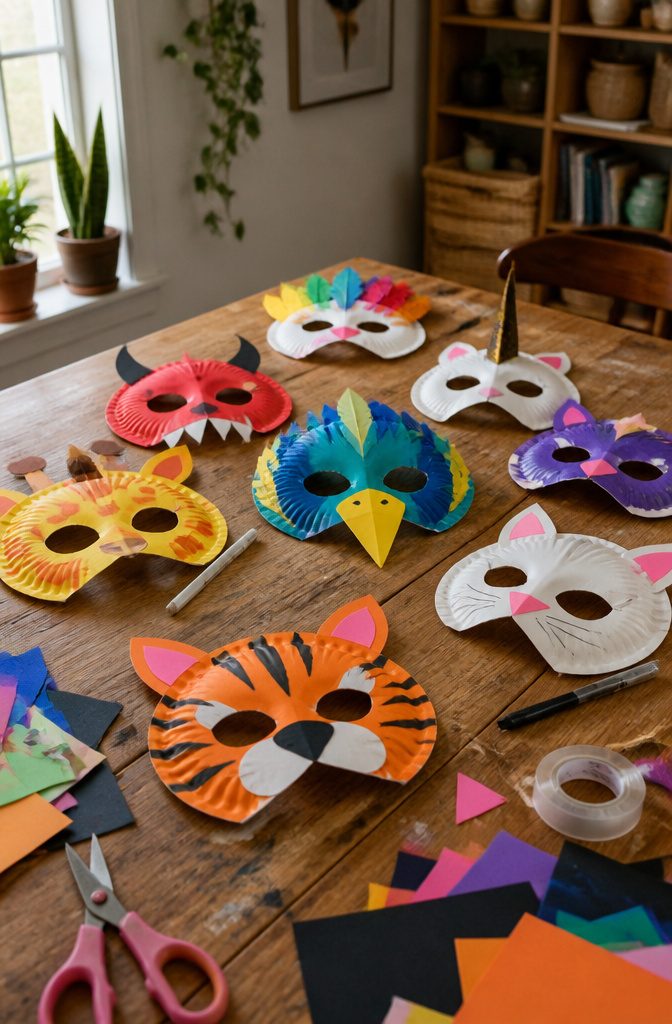
A whole plate with two eye holes is the simplest mask there is, and it works because the rim gives the face a sturdy frame.
Cutting the holes is the adult step for young kids: fold the plate in half, snip a small notch on the fold, then open it up and cut around that start.
Use sharp scissors, since a dull pair crushes the plate.
Decorate before you hold it up to a face.
Markers, paint and construction paper all stick well to the flat center, and glued-on paper ears, horns or a pointed nose turn a plain plate into a pig, a dog or Frankenstein.
For Halloween, a black-and-orange jack-o’-lantern is the quickest. Tape a popsicle stick to the bottom edge as a handle, and skip the elastic.
3. Paper Plate Wreaths
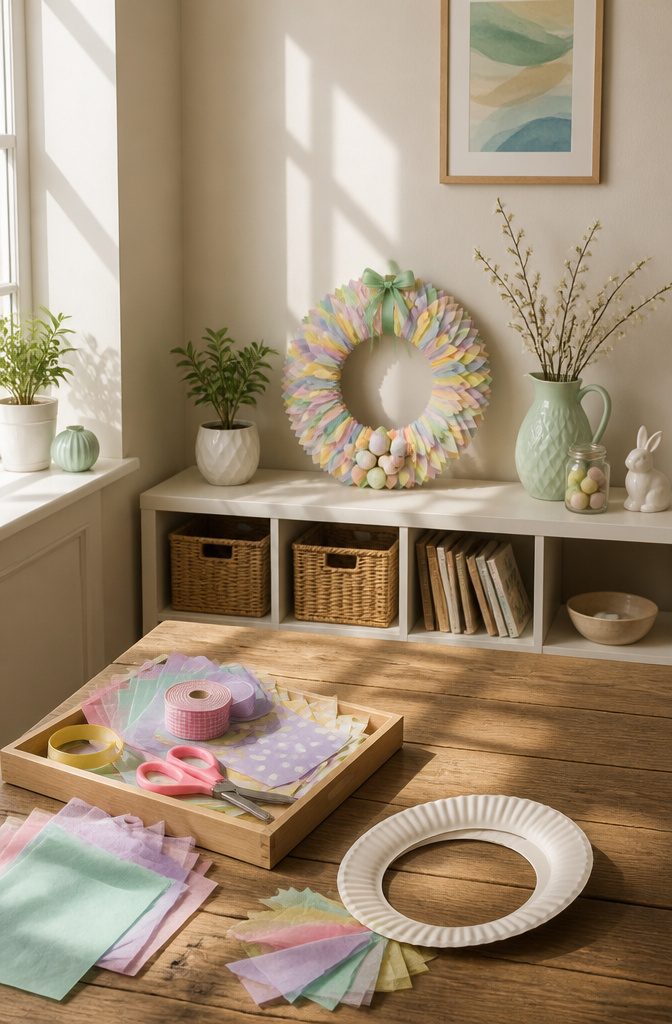
A paper plate wreath starts with one cut: remove the center circle and you have a ring that is ready to decorate.
Kids can paint it, glue on construction paper triangles for a sun, or cover it in scraps of tissue paper for a soft, layered look.
Seasons give the ring its job. For Easter, I like ribbons and brightly patterned eggs; the same base works for Halloween and Christmas with a change of paper and color.
Paint the ring and let it dry completely before gluing anything on, or the paper wrinkles and slides.
A dessert plate gives you a smaller wreath, which suits a bedroom door handle or a window better than a full-size plate does. I’d pick the larger plate for tissue paper, since it leaves more room for the layers.
4. Paper Plate Tambourines
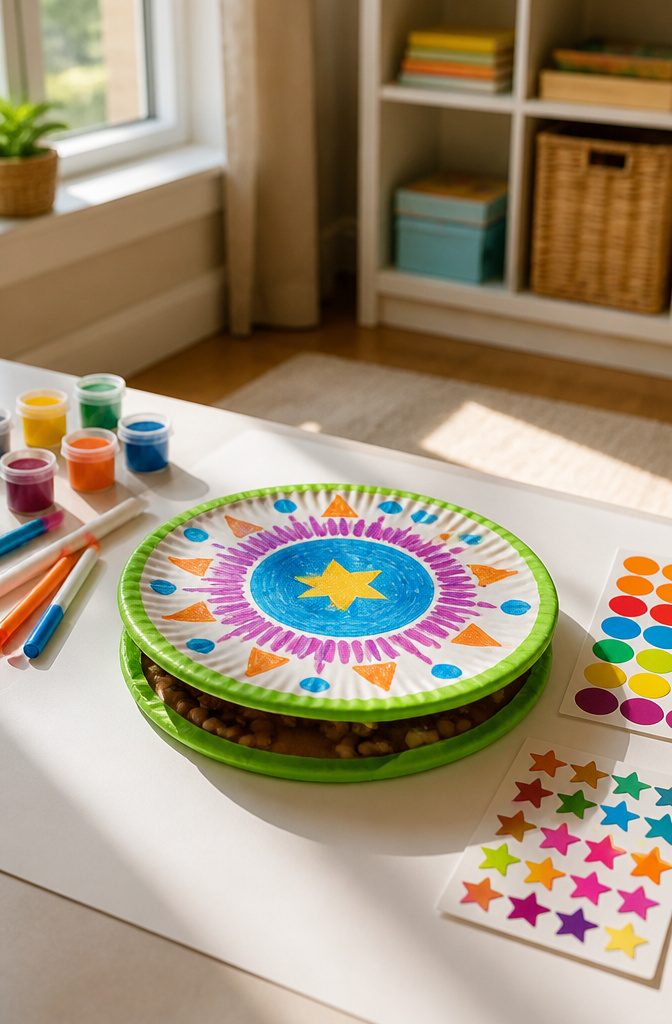
Two plates, rims facing in, make the body of a tambourine, and a small handful of dried beans or rice between them makes the rattle.
Pour the filling onto the center of one plate, flip the second plate over it, and seal the rim all the way around with a stapler or strong tape.
Seal the whole rim, because one gap lets the beans escape the first time a toddler shakes it.
Decorate before you close it up, since flat plates are easier to color.
Markers and stickers work right away. Paint looks bolder but needs time to dry before the plates go together, so I’d save it for a day with an afternoon to spare.
This is a good toddler and preschool project: the shaking is the best part, and little hands can handle the decorating while an adult runs the stapler.
5. Paper Plate Flowers
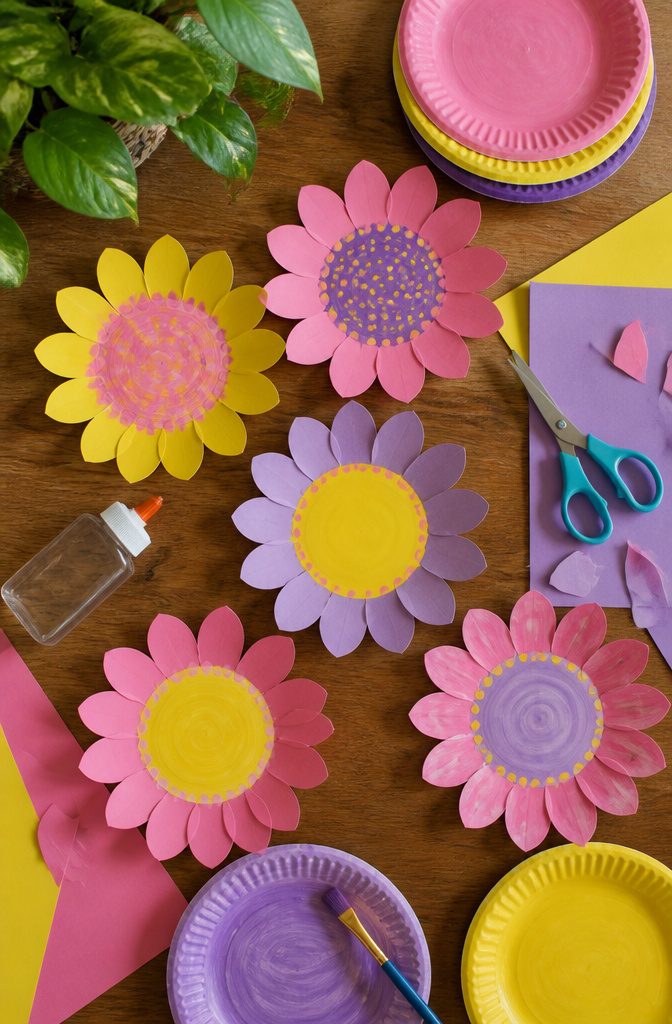
Paper plate flowers come together two ways. You can cut a plate into scalloped petals and use the whole thing as the bloom, or you can paint a small plate center and glue petals around it.
I prefer the second, because tissue paper or construction paper petals give you a layered, fuller look than a single cut plate can.
Paint the plate first and let it dry fully before you glue anything on.
Wet paint wrinkles tissue and can tear the paper when you press it down. Washable tempera dries fastest, so it suits a short afternoon.
Pink, yellow, and purple read as classic spring.
Orange and deep red petals work for fall sunflowers, and white tissue with a pale blue center looks like winter. A paper straw or green craft stick makes a decent stem.
6. Paper Plate Puppets
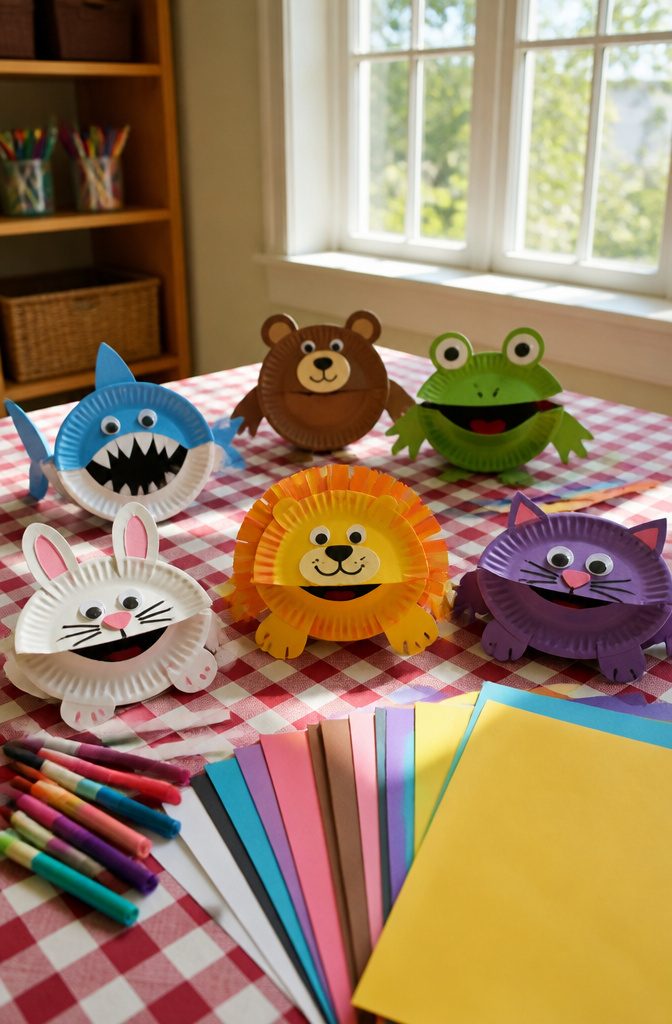
A whole plate on a popsicle stick is the easiest puppet to start with, and I’d pick it over the folded kind for preschoolers.
The flat face gives small hands plenty of room for markers, and the stick tapes to the back in under a minute.
Googly eyes, a marker smile and construction paper strips for hair or a mane carry the whole character. A lion needs only yellow paint on the center and orange and yellow strips glued around the rim.
Fold the plate in half if you want a talking mouth. Draw the face on the folded plate and let the crease act as the mouth, so a child’s fingers open and close it.
Tape the stick or hold it by hand. Either way, a puppet gives a preschooler something to talk through, and the story usually follows.
7. Paper Plate Dinosaurs
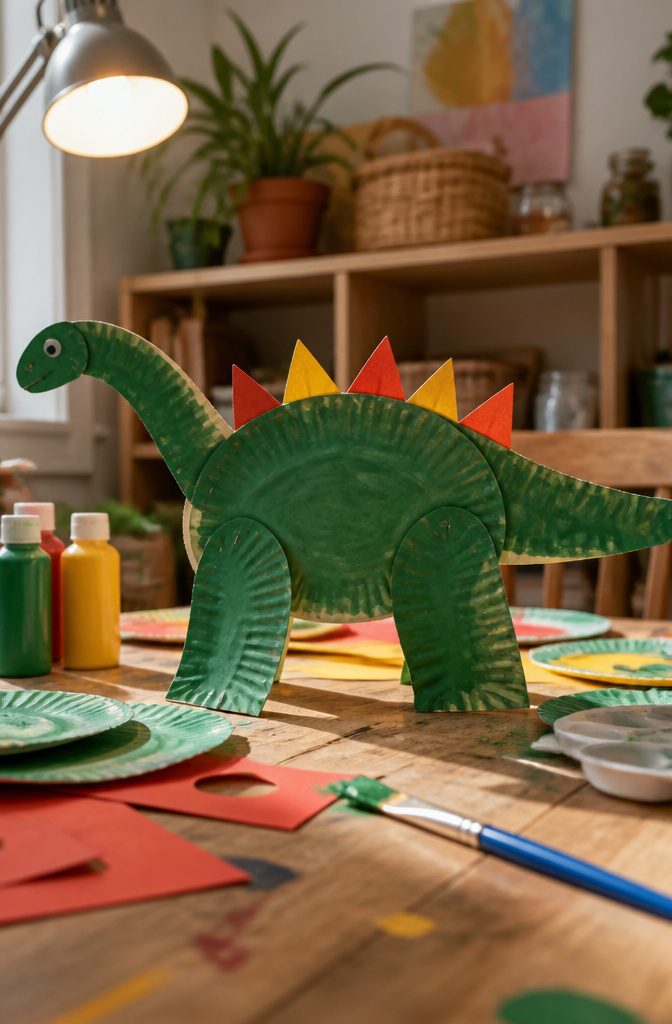
Cut one plate in half and the semicircle becomes the dinosaur’s body, curved and sturdy enough to stand on its own.
The leftover half gives you a long neck, a tail and legs, so one plate covers most of the job.
Staple those parts to the body instead of gluing them, because staples hold the limbs the moment you press them on and you can paint right away.
Paint the whole thing green, then add googly eyes. For a stegosaurus, cut a row of triangles from construction paper and tuck them along the curved back.
A brontosaurus gets the longest neck you can cut. A T. rex wants a short neck, a big head and small legs.
8. Paper Plate Jellyfish
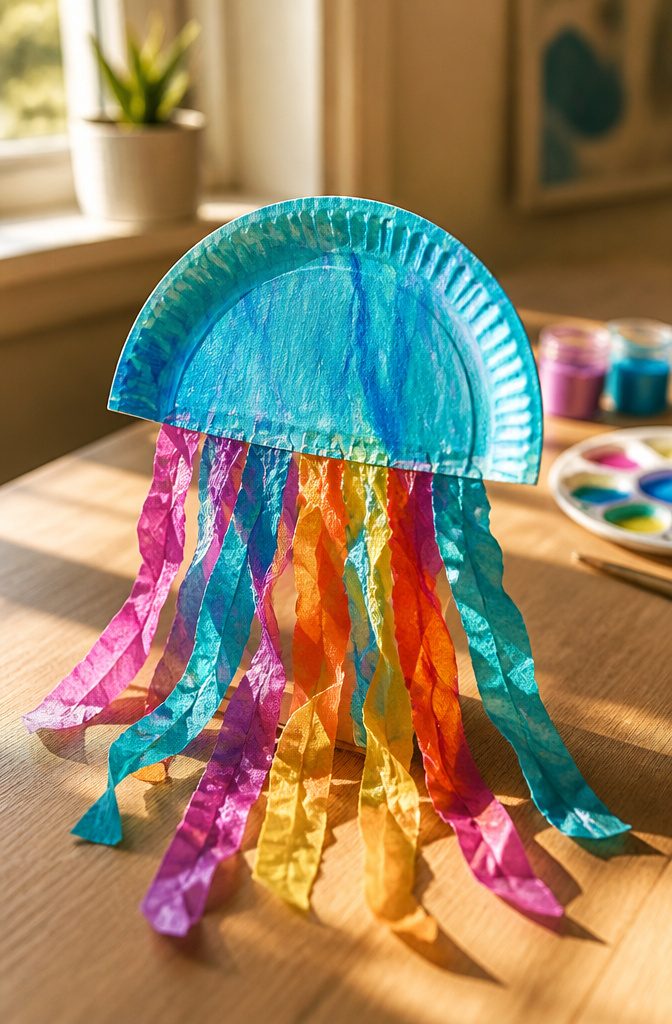
Cut the plate in half and the jellyfish is already most of the way there: the semicircle becomes the dome, and the straight edge is where the tentacles hang.
Paint it first, and give it time to dry before anything gets attached. Wet paint under glued tissue paper wrinkles and tears, so let the dome dry completely before the tentacles go on.
Toddlers can stamp the paint on with a pom-pom held in a clothespin, which keeps their fingers clean and gives a speckled, bubbly look.
For tentacles, I’d pick tissue paper cut into wavy strips and glued to the back. It’s light, it flutters, and it costs almost nothing.
Yarn or ribbon wins if the jellyfish will hang: punch evenly spaced holes along the bottom edge and tie each strand on. Add googly eyes last, once the paint is dry enough that they stay put.
9. Paper Plate Rainbows
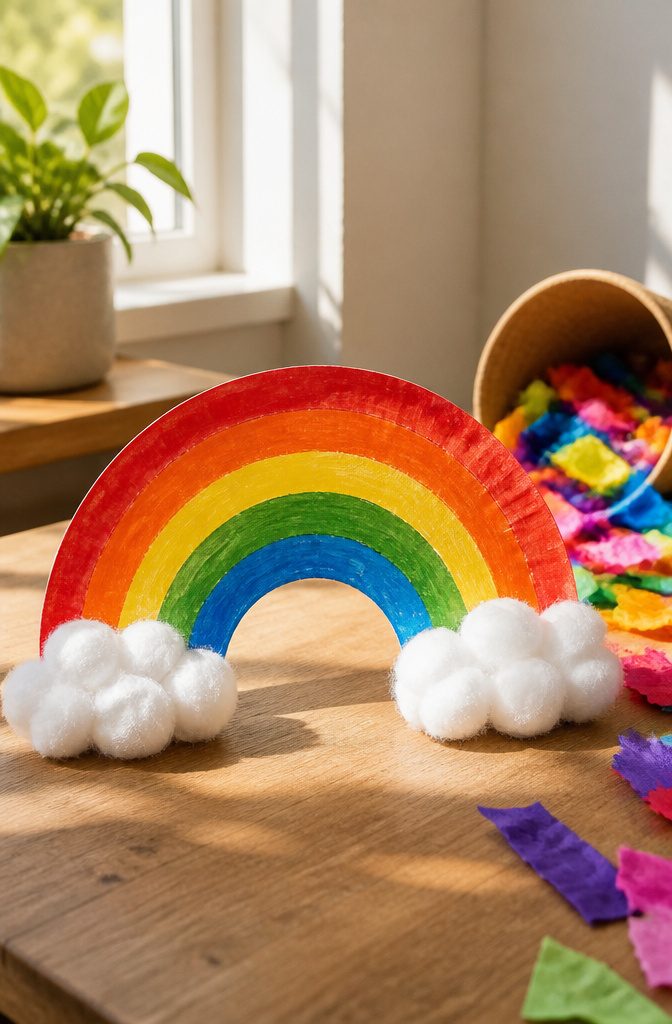
Cut a paper plate in half and you have the rainbow’s frame, with the rim already shaped like an arch.
Kids can paint stripes along the curve in red, orange, yellow, green, and blue, or glue on arcs of tissue paper or construction paper for a no-wait version.
Paint looks brightest, but it needs to dry fully before the clouds go on, or the cotton balls stick to wet stripes and pull color off.
Tissue and paper arcs skip that wait, so they suit younger kids or a short afternoon.
Glue a cotton ball cluster at each end of the arch, stretching the balls a little so they look fluffy. For spring, add paper raindrops or flowers underneath, and hang the rainbow in a window.
10. Paper Plate Caterpillars
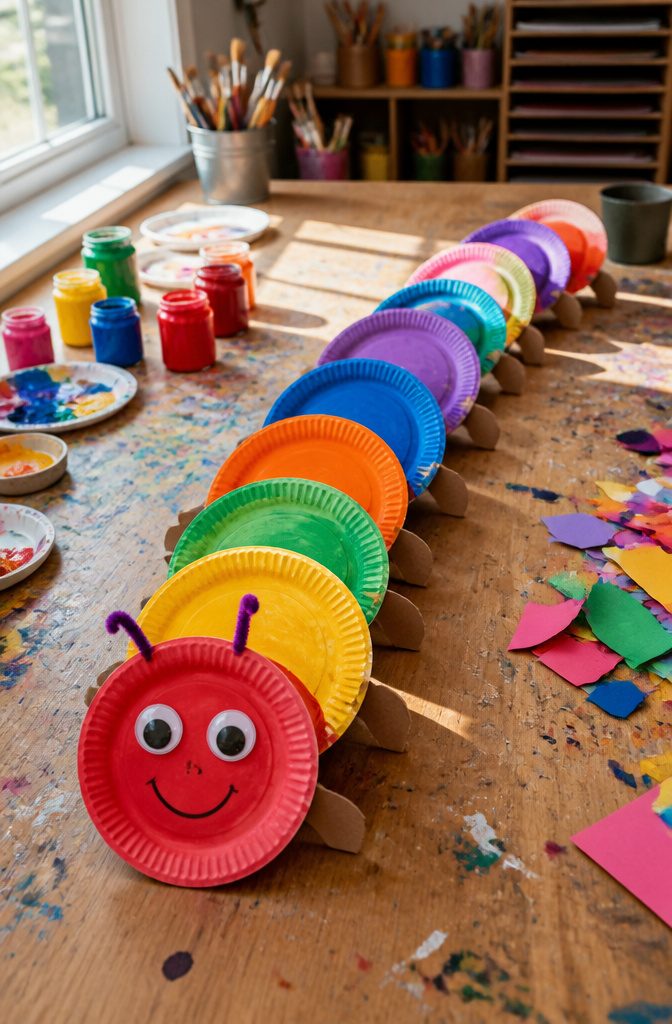
A caterpillar is the paper plate craft that scales best to the youngest crafters, because the body is just circles in a row and nothing has to be cut with precision.
Four or five plates stapled or glued edge to edge make a long, wiggly body. If plates feel bulky, cut each one down to a smaller circle, which also stretches a small stack further.
Paint is the better covering for toddlers, since a fat brush and one color per segment is all the skill required. Construction paper suits older kids who like gluing torn scraps or cutting stripes.
Put the face on the first segment only: googly eyes or round label stickers, plus a marker smile and two pipe cleaner antennae. Label eyes won’t slide while the glue dries.
Materials to Gather
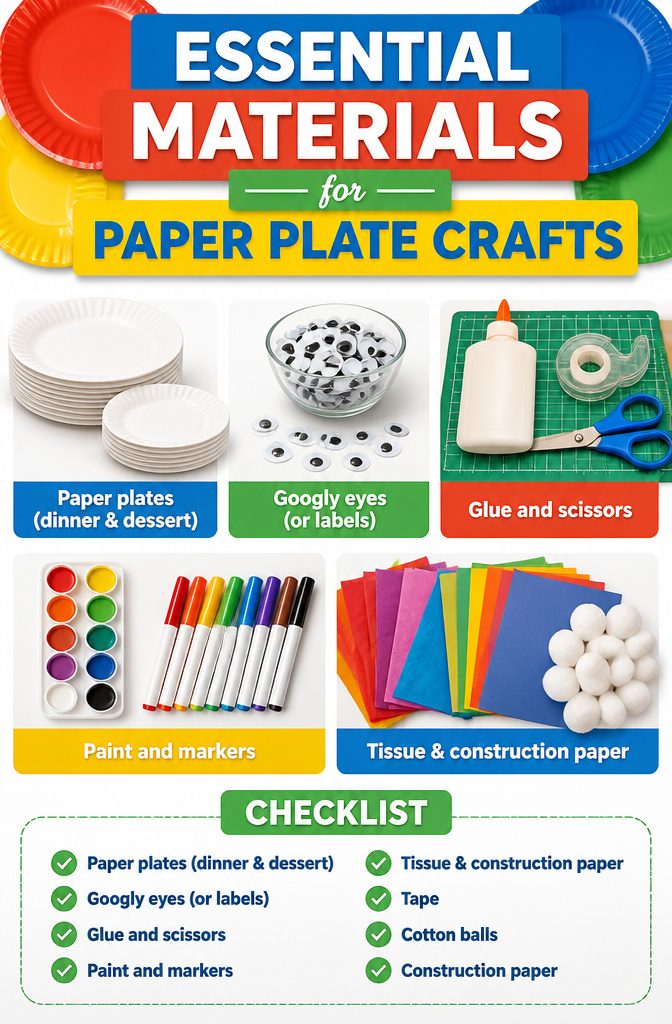
Most paper plate crafts need only a short list of supplies. Here is what to pull together:
- Paper plates: Standard dinner plates work for nearly everything. Smaller dessert plates also work if you want a smaller finished piece.
- Eyes: Large googly eyes get expensive fast. A roll of 1,000 white 1-inch labels plus a roll of 1,000 black 1/2-inch labels cost about $20 together, and stacking the small black label on the white one makes a cheap eye. They don’t wiggle, but they look good.
- Glue and scissors: Add tape for quick joins.
- Paint and markers: Paint means waiting for it to dry.
- Tissue paper, construction paper, cotton balls: These cover texture, color and fluff.
Paper plates cost little, and they are a lighter choice than plastic.
Ages and Time
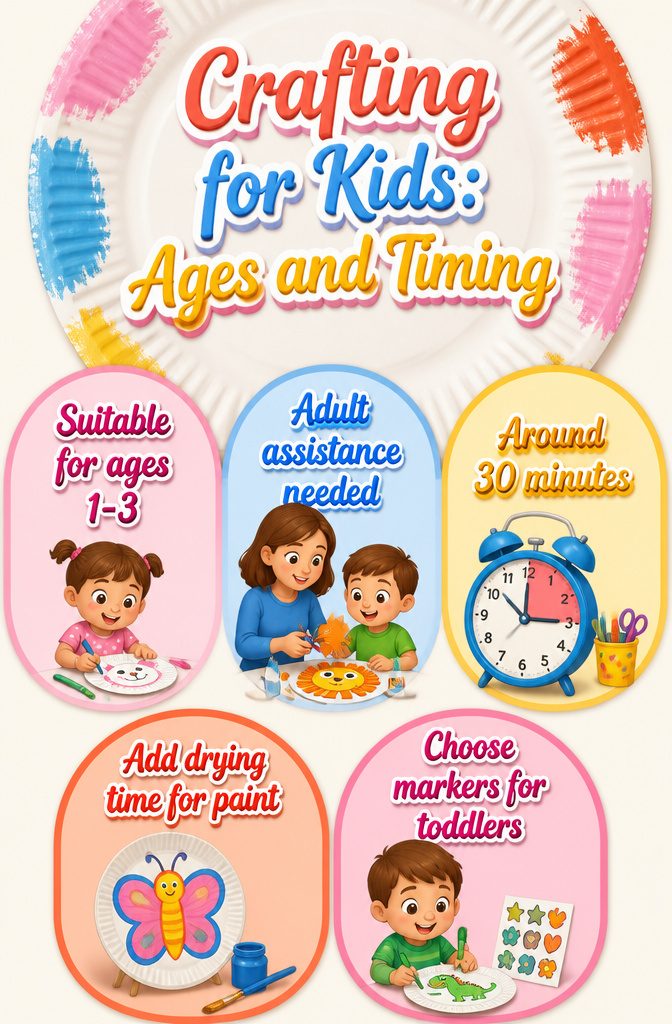
Toddlers and preschoolers can make nearly all of these, as long as an adult handles the cutting and the kids handle the coloring, gluing and sticking.
Paper plates suit 1-, 2- and 3-year-olds well, and they cost very little, so a ruined plate is no loss.
Older kids can take over the scissors and the finishing details, and how much you do versus how much they do should track their age.
Most of these crafts take about 30 minutes.
Anything with paint adds drying time, and the next step has to wait until the surface is dry. For a toddler with a short attention span, I would pick a marker-and-sticker version over a painted one and skip the wait.
Seasonal Versions
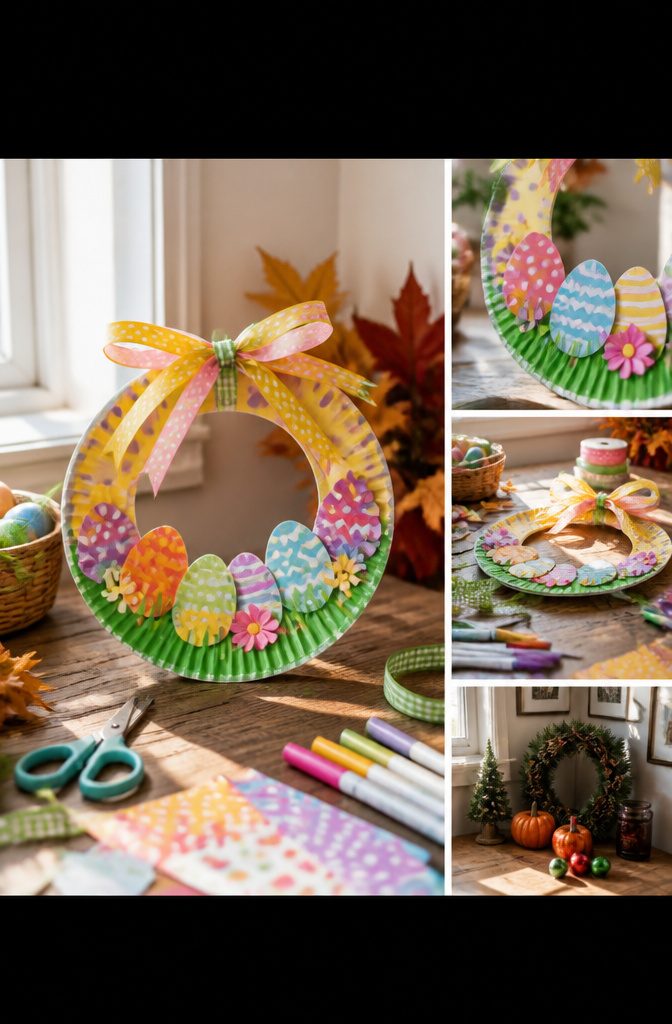
The easiest seasonal swap is the wreath, since a plate with the center cut out already looks like one.
For Easter, trim it with ribbon and brightly patterned eggs. The same base works for Halloween and Christmas, so one cut-out plate can cover three holidays, and I’d stock extras before October.
Christmas also stretches past wreaths. Sparkly trees and Santa masks both start from a plain plate, and a holly or winter wreath keeps the theme going into January without any new supplies.
If the holiday isn’t on your list, the cut-out wreath base takes nearly any theme: autumn, Thanksgiving, shamrocks, Fourth of July, even Mother’s Day. Change the colors and trim, and the plate stays the same.
Frequently Asked Questions
What can I make with paper plates?
You can make animals, masks, wreaths, tambourines, flowers, puppets, dinosaurs, jellyfish, rainbows and caterpillars.
Most start with a whole plate or a plate cut in half, then get paint, paper and a few simple extras. A cut-out wreath base also works for nearly any holiday.
Are paper plate crafts good for toddlers?
Yes. Paper plates suit 1-, 2- and 3-year-olds well, and they cost so little that a ruined plate is no loss.
An adult handles the cutting and stapling while the child colors, glues and sticks. A marker-and-sticker version skips the paint drying wait, which helps with short attention spans.
What materials do I need for paper plate crafts?
Paper plates, glue, scissors, tape, paint or markers, and a few decorations like tissue paper, construction paper and cotton balls cover most projects.
Dinner plates work for nearly everything, and smaller dessert plates make smaller pieces. For eyes, white 1-inch labels topped with black 1/2-inch labels are a cheap stand-in for large googly eyes.
How long do paper plate crafts take?
Most take about 30 minutes.
Anything with paint takes longer, because the paint has to dry before the next step. Tissue paper or construction paper versions skip that wait.





