
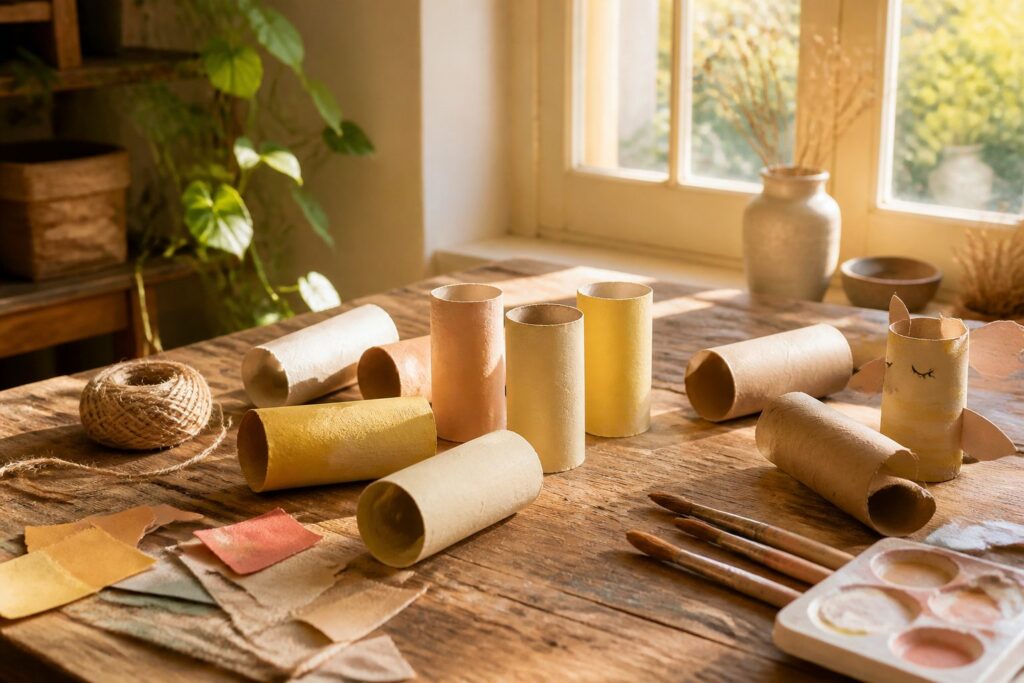
Most of these crafts run on one empty tube, glue and paint, and the thing that sorts them is drying time: markers or wrapped paper finish in one sitting, while a painted rocket needs about 1 hour before the cone and fins go on.
Bare cardboard also soaks up paint, so plan on two coats.
1. Bunny and Ducky Toys
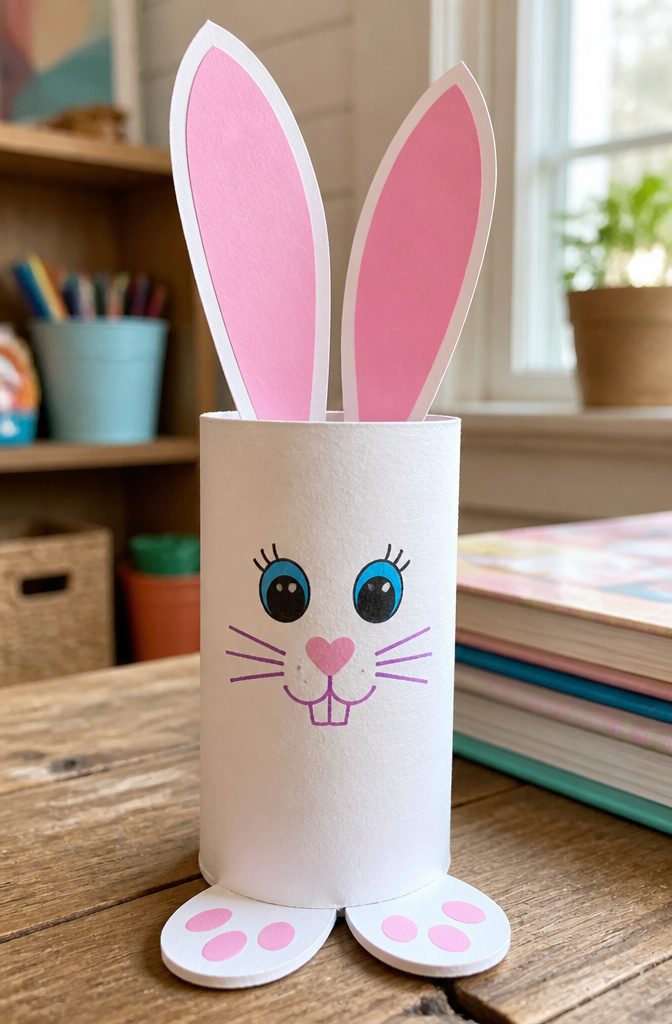
A bunny or ducky toy starts as one empty tube: paint or wrap it in colored paper, cut two long ears for the bunny or a small folded beak for the duck, then glue them on and draw the face with markers.
Cutting those shapes and tracing small eyes and whiskers is real fine motor practice for little hands, and it takes one sitting.
I’d pair the craft with a book. It’s Not Easy Being a Bunny, by Marilyn Sadler, follows P.J. Funnybunny, who decides he’d rather not be a bunny at all.
Read it first, then let the child decide what face their bunny gets. A spring chicken version works as a story starter: ask what the animal does next and let them write it.
2. Worm Pencil Holder
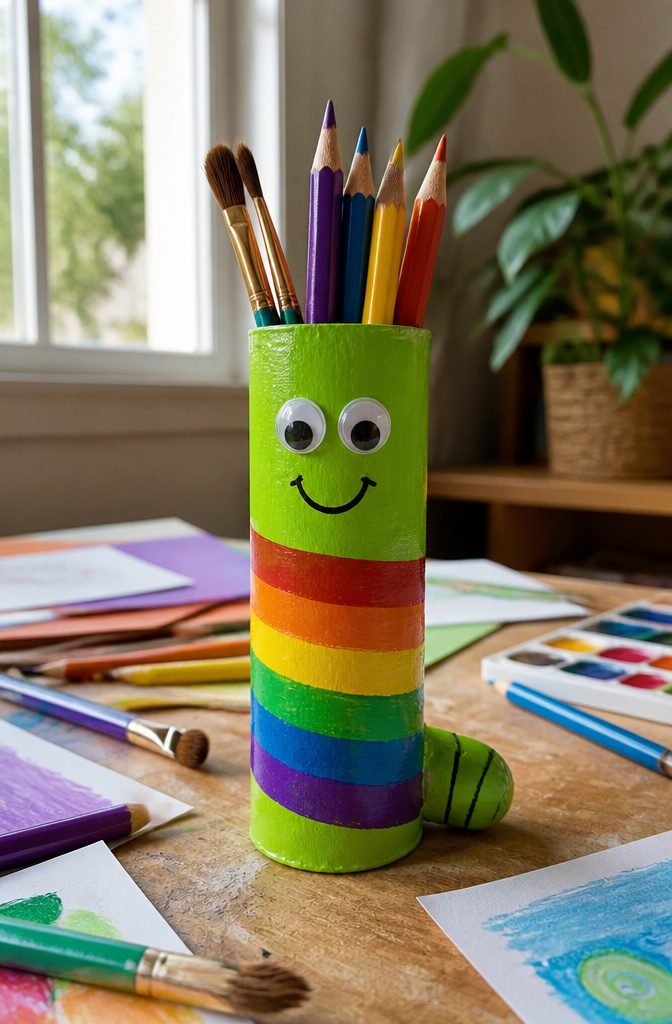
A worm pencil holder is a painted tube with googly eyes, and it works the moment the paint dries.
Kids can set it on a desk and drop pencils into it right away, so the craft earns its spot as a real desk item.
Paint the roll in one bright color, or wrap it in paper if you want to skip drying time.
Then glue on a pair of googly eyes near the top. Stripes or dots add personality, and they give small hands a reason to keep working.
Country Living puts the whole appeal of these projects simply:
Never toss a toilet paper roll in the trash again. These creative crafts are a fun and easy way to make the most out of this household item.
A worm holder is a good first pick from that pile, since it uses a single tube and puts the clutter to work.
3. Cardboard Tube Binoculars
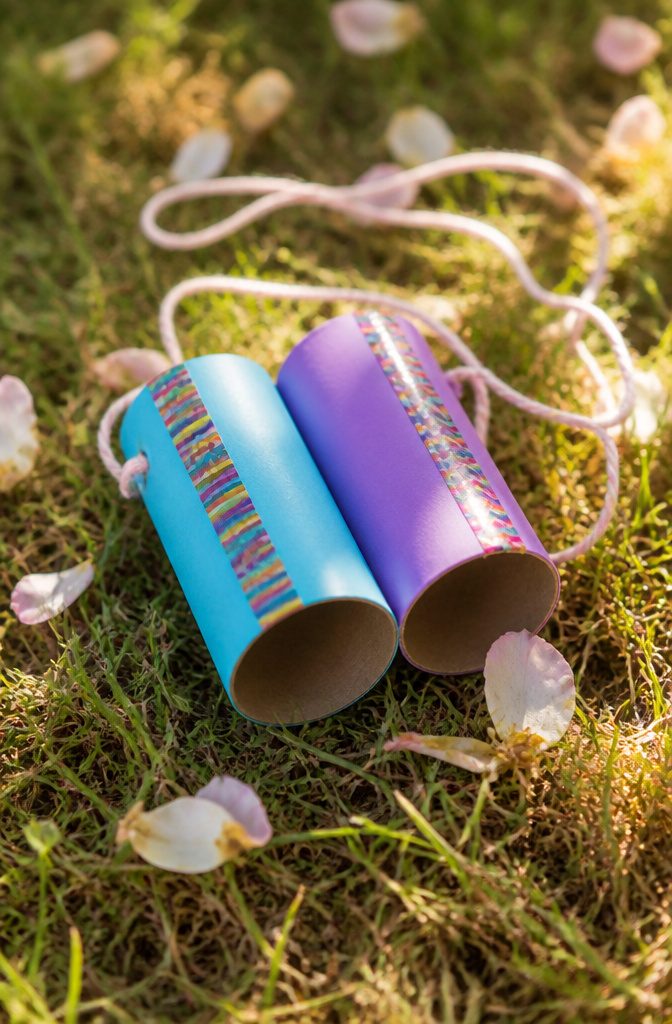
Two empty toilet paper rolls, a length of string and some colorful masking tape are the whole materials list, which is why this is one of my top picks for an afternoon.
Nothing needs buying, and a kid can finish it before snack time.
Set the two tubes side by side and tape them together along their length so they sit like a pair of eyepieces.
Wrap the tape around both tubes at once so the join holds when little hands grip them. Then punch a hole near the outer edge of each tube and knot a string through both to make the neck strap.
Tie the knots snugly inside the tube so the strap doesn’t slip out the first time someone swings the binoculars.
Masking tape doubles as decoration, so wrap stripes in different colors and skip the paint and drying time. I’d call it the best pick here for a window bird-watching session or a backyard walk.
4. Portable Garage with Race Track
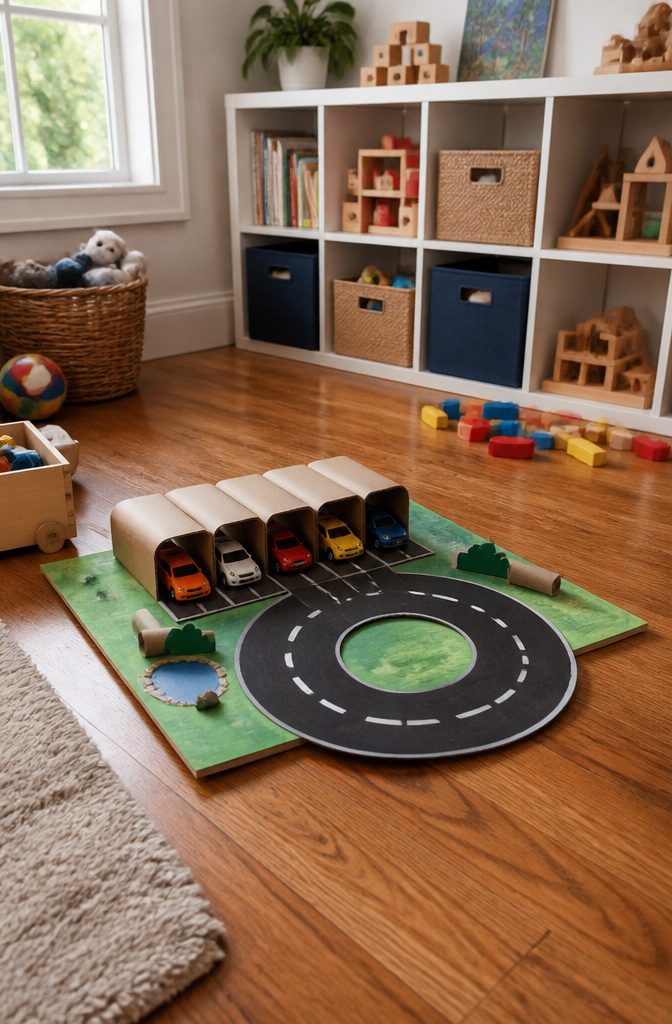
Cut a toilet paper roll in half lengthwise and the curved pieces become track walls, while whole rolls stood on their ends become the garage bays.
Glue the bays side by side on a cardboard base, then run the track out from the opening like a driveway. Small die-cast cars fit a standard roll with room to spare, so each bay parks one car nose-in.
I’d skip a fixed lid and use a flap that folds down over the bays.
Score the base along one fold line and the whole garage closes like a book, so it stores flat under a bed or in a backpack for the car ride.
Tape the track pieces down loosely so they peel off and lie flat too. White glue holds slowly; hot glue sets fast, but kids should get an adult for it.
5. Owl Craft
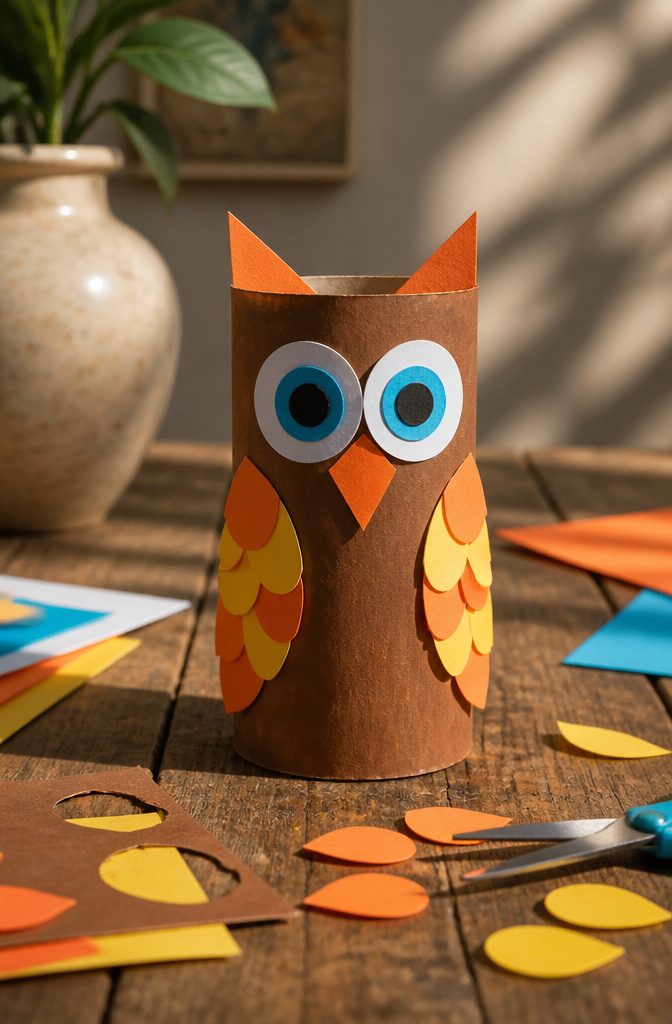
Pinch the top of the tube inward on opposite sides and fold each side down into a small triangle, so the two corners stand up like ears.
Crease each fold hard with a fingernail, since cardboard springs back and loose ears flop sideways. Paint or color the tube first and let it dry, because folding a wet roll weakens the fibers.
For the face, cut two circles of white paper and glue smaller colored circles on top for pupils. A diamond of orange or yellow paper folded in half makes the beak, and it sits best glued just below the eyes.
Feathers can be rows of small scalloped paper pieces, layered from the bottom up so each row overlaps the one below. Plain glue stick works, though white craft glue holds the layers better.
6. Rocket Craft
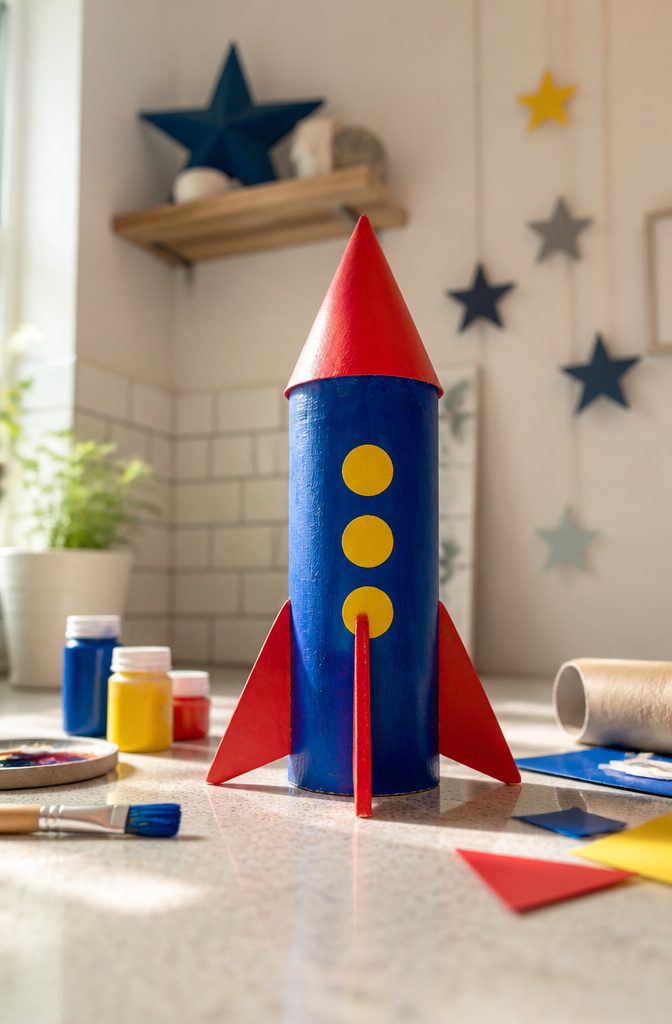
A single toilet paper tube makes a rocket body with a good proportion for small hands, and the nose cone is where the craft succeeds or fails.
Cut a circle from construction paper or cardstock, slice it to the center, and curl it into a cone until its base matches the tube opening.
Tape it on the inside so no seam shows. Cut 3 fins as triangles with a small folded tab on one side, then glue the tabs flat to the tube, spaced evenly around it.
Paint the tube before you attach anything. Acrylic or tempera both cover cardboard well, and a painted rocket needs about 1 hour to dry before the cone and fins go on, or the glue slides and the tabs peel.
Markers skip the wait entirely, and I’d pick them for younger kids.
7. Bird Feeder
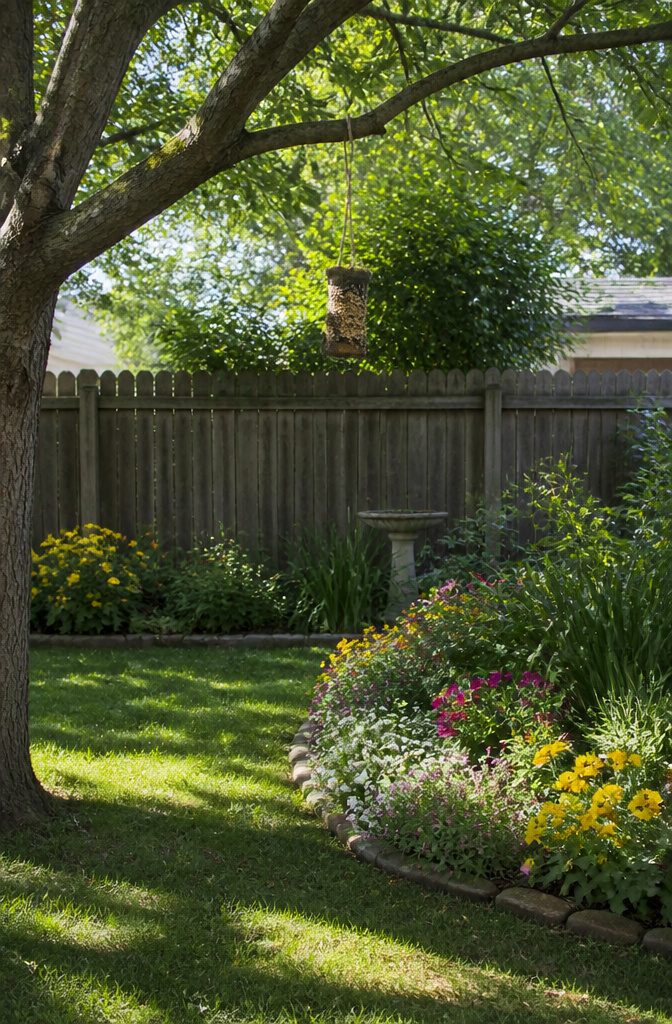
Shortening is the spread that holds this feeder together: smear it over the whole tube, then roll the tube in a plate of bird seed until the surface is covered.
The seeds stick on their own, so you need no glue and no tape. I’d press the seed in with your palm instead of just rolling, since bare patches show up fast.
For hanging, loop string through the top of the tube and tie it to a porch hook or a branch, or just wedge the roll onto a branch.
Expect crumbs and shortening on your hands, the table and the floor, so work over a tray or newspaper.
Cardboard is the weak point. Rain will soften it quickly, so I’d hang this under a porch roof and treat it as a short-lived feeder, not a permanent one.
8. Toilet Paper Roll Popsicles
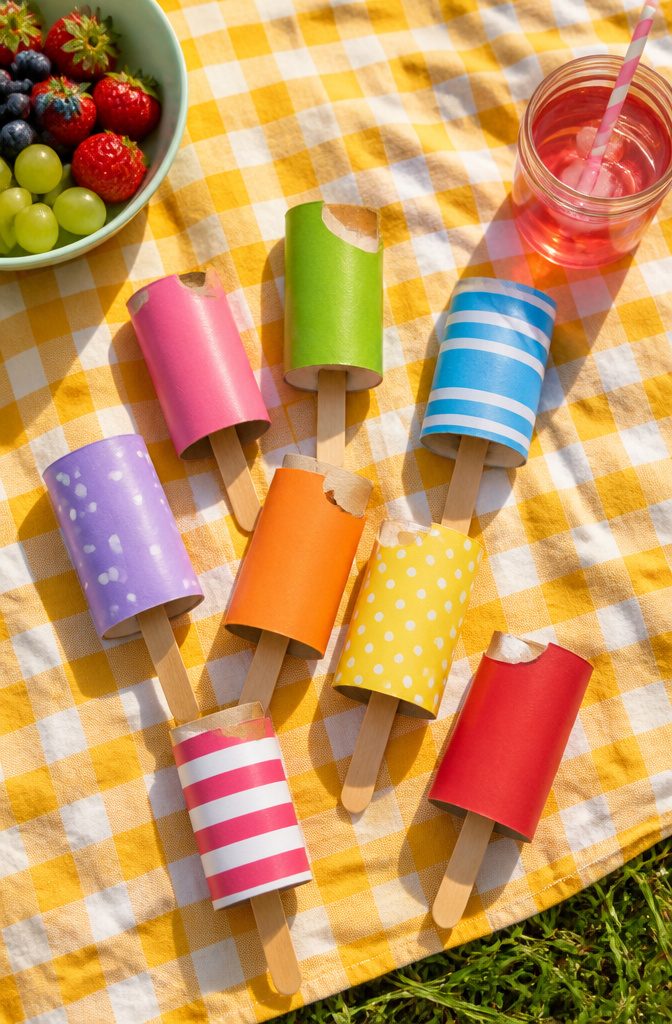
A toilet paper roll flattened and cut into a strip makes a popsicle with almost no effort. Slice the tube open, lay it flat, and trim a rounded top so it reads as a bar.
Colored paper does the rest: glue on a bright wrap, add a white "bite" at the top, or stripe the bar in two or three shades for a rocket-pop look.
Tube slices work too. A ring cut from the roll becomes a stripe of color when you stack a few rings, each wrapped in a different paper.
A flat craft stick pushed into the bottom for the handle gives the bar its shape, and thin cardstock holds color better than printer paper, which tends to wrinkle under wet glue.
I’d pick a glue stick over liquid glue here; it keeps edges crisp and dries fast enough for kids to finish the set in one sitting.
9. Heart Wreath
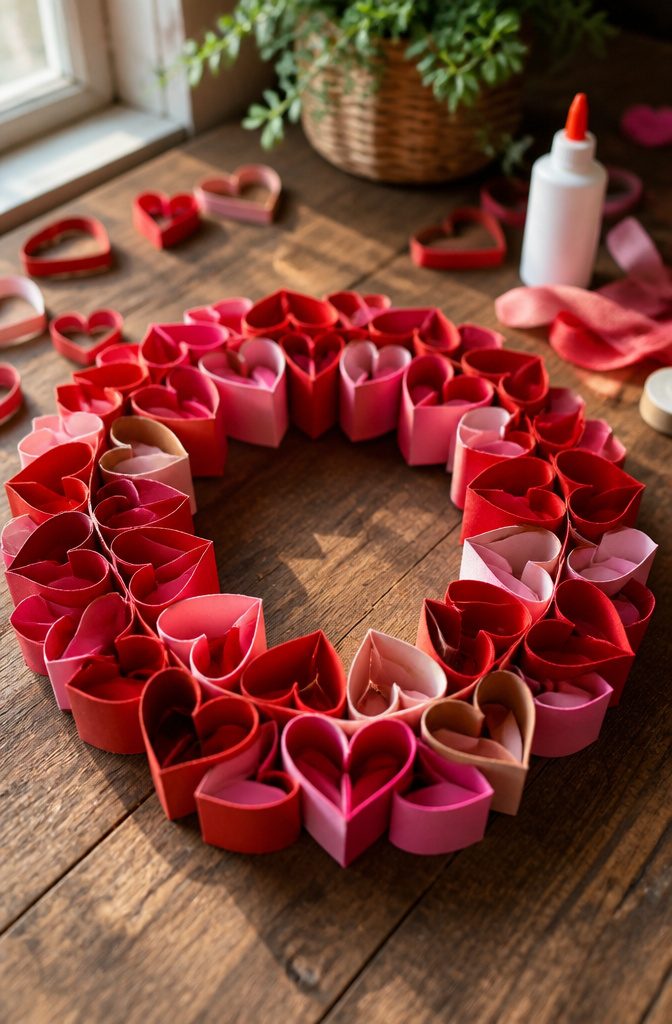
Pinch a flattened tube at both ends, then push each end inward so the crease folds toward the middle, and you get a heart with a point at the bottom.
Press the dip at the top firmly with a fingertip so the shape holds. Cardboard remembers a sharp fold better than a gentle one.
For a wreath, I’d use 8 to 10 hearts, enough to touch edge to edge without crowding. Set them in a circle with the points facing in, and glue the side walls together.
Tacky craft glue or a hot glue gun holds better than white school glue, which slides before it grabs. Hold each joint for about 30 seconds.
Paint the hearts before gluing, since the inner curves are hard to reach afterward. Tie a ribbon loop to the back for hanging.
10. Seedling Pots
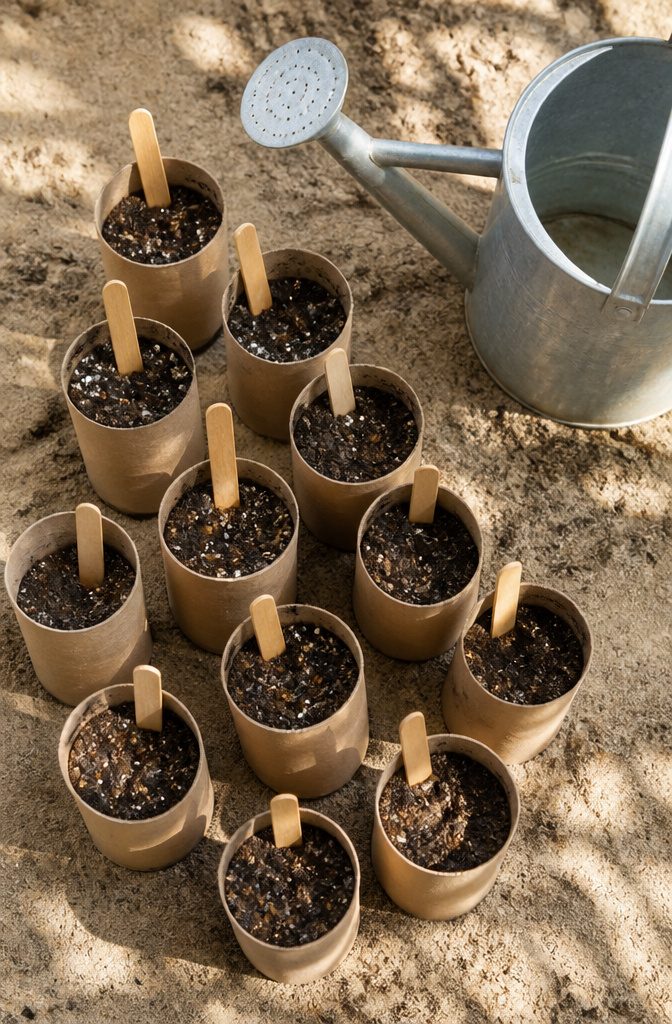
A toilet paper tube is already the right size for a seedling, and because it’s cardboard, the whole pot goes into the garden and breaks down in the soil.
Roots grow through the wall, so nothing gets pulled out or disturbed at transplant time.
To close the bottom, cut four slits about an inch long into one end and fold the flaps over each other, tucking the last one under the first.
Fold the flaps tightly and press them flat so the soil doesn’t spill out. Set the tubes upright in a tray, since the sides go soft once they’re wet.
Fill each tube with moist potting mix, not heavy garden dirt, and tap it down gently.
Press in your seeds at the depth the packet lists. Tear the base open slightly before planting for easier rooting.
11. Snowflakes
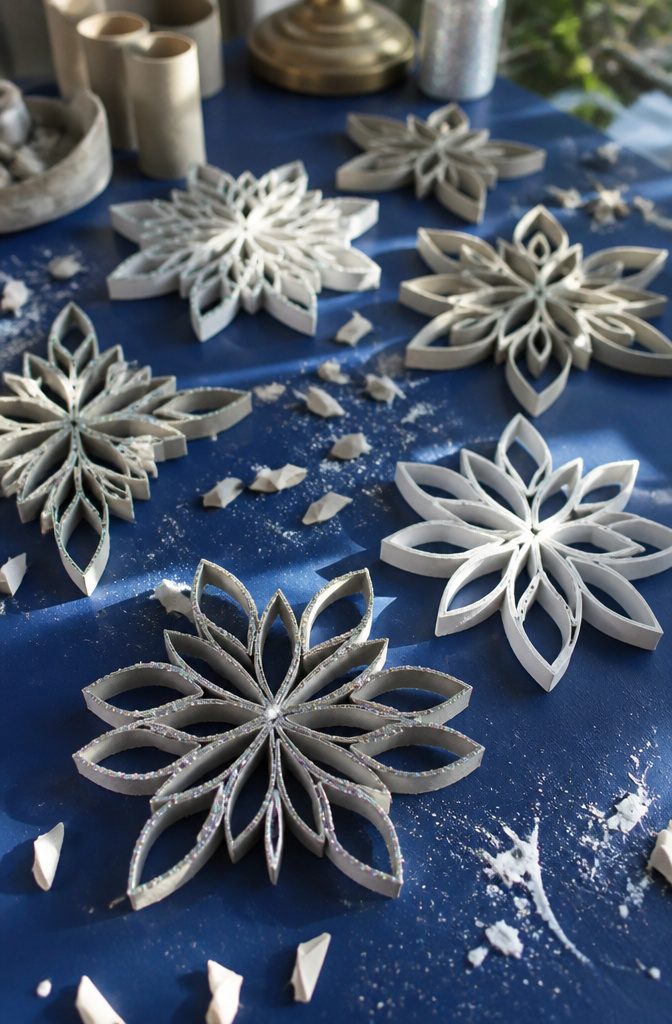
Flatten a tube and cut it crosswise into rings about half an inch wide, and you have the only part you need for a snowflake.
Pinch each ring into a teardrop or a loop, then glue the points together around a center ring so the shape spreads out like spokes.
Six arms look the most like a real snowflake, and it helps to lay them all out dry before any glue goes on.
Tacky glue holds cardboard better than a glue stick, and a hot glue gun works fastest if you’re the one handling it. Clothespins keep the joins tight while they set.
For the finish, paint the whole thing white before adding glitter while the paint is still wet.
Glitter on bare cardboard shows the brown through it. I’d choose white paint with a light glitter dusting over solid glitter, which tends to look heavy.
12. Mandala Wall Art
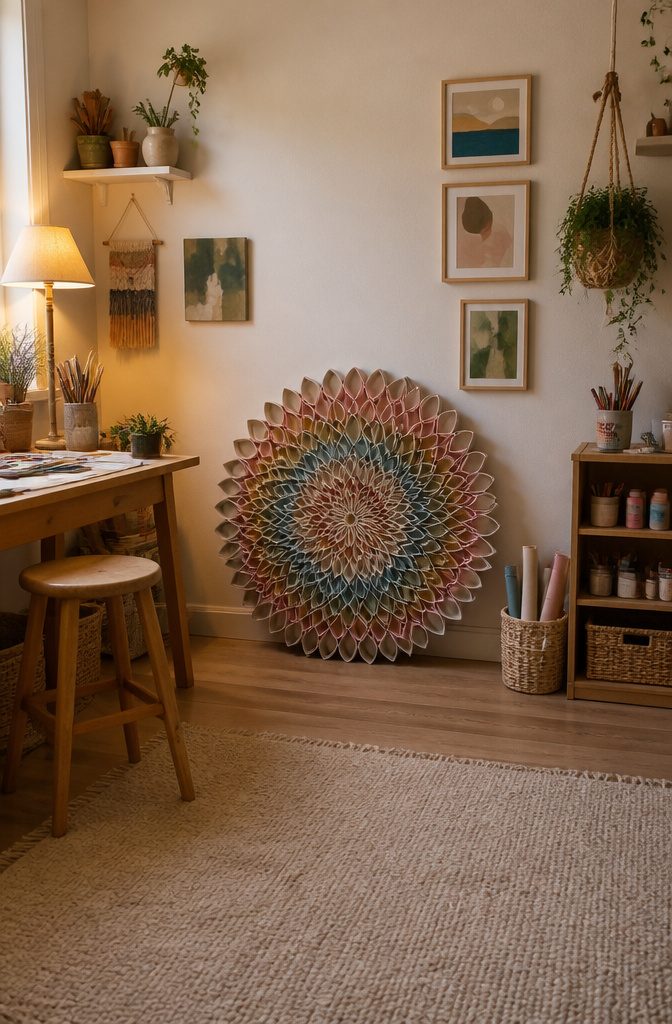
Flatten each tube with a firm press, then cut it crosswise into rings about the width of your thumb. Squeeze each ring into a teardrop or a loop and glue the pinched ends together.
Start in the center with 6 or 8 loops pointing outward like a flower, then build rings of larger loops around them, setting each round between the gaps of the one before.
Tacky glue holds better than a glue stick on cardboard, and each ring needs a minute to grab before you add the next.
Paint after the glue sets, not before. Cardboard drinks paint, so a coat of white acrylic first makes the colors on top look brighter.
I would stick to 3 or 4 colors per ring, because a mandala gets busy fast. Glue the finished piece to a round of cardboard or a thin wood circle, and hang it on a small nail.
13. Hello Kitty Craft
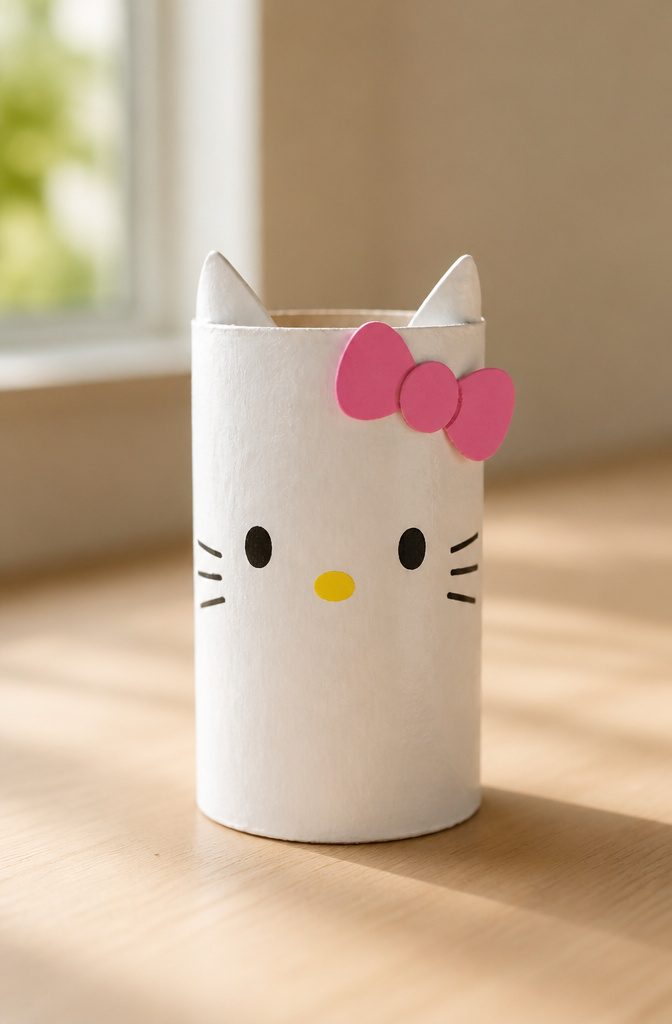
A standard tube makes a good Hello Kitty head because it is already a rounded, standing shape.
Paint or cover it white, then cut two small triangles from white paper and glue them inside the top rim, tilted slightly outward. Pinch the top of the tube flat first, and the ears sit more naturally on the corners.
For the face, black oval eyes, a small yellow nose and three whiskers on each cheek are all it needs.
Use a fine marker for the whiskers; paint tends to blob at that size. Keep the features low and wide apart, since that spacing is what reads as the character.
The bow decides whether anyone recognizes her. Cut it from red or pink paper, fold a small strip around the middle for the knot, and glue it over one ear, not centered.
Add a dot of glue, hold it for a few seconds, and let it set before you stand her up.
14. Grogu Craft
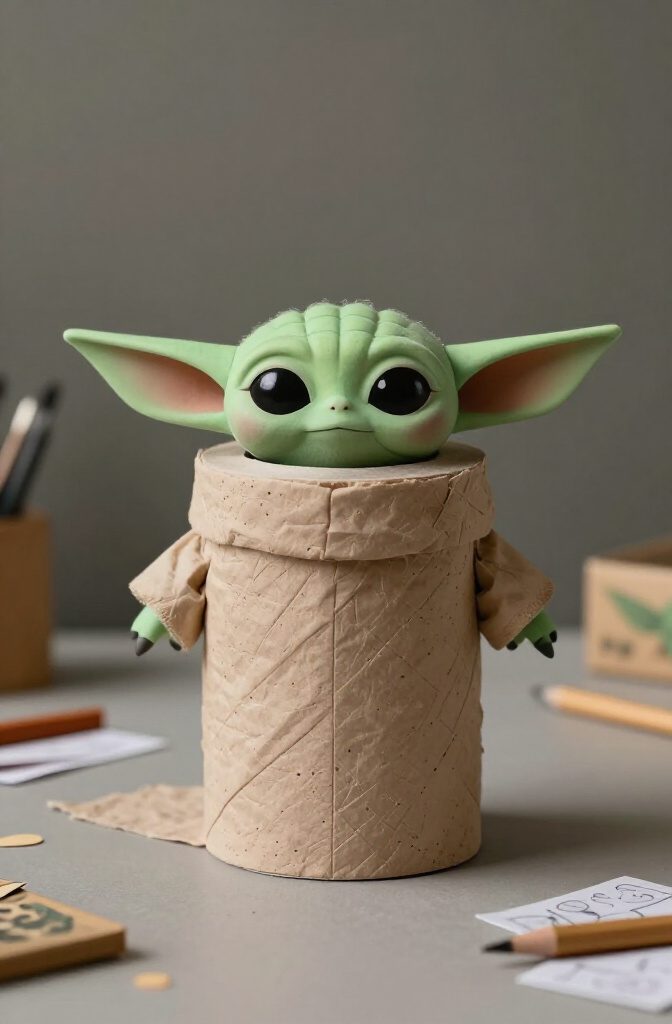
A single toilet paper roll makes a good Grogu body because its short, round shape already looks like the little robe-wrapped figure. Paint the whole tube green first, and give it two coats so the brown cardboard doesn’t show through.
Cut two large ears from green paper or cardstock, tapering each one to a rounded point, and glue them to the inside of the top rim so they stick out sideways.
Oversized ears are the whole character, so make them bigger than feels right.
For the robe, wrap a strip of tan or brown paper around the lower half and glue the seam in back.
Keep the green face showing above the robe so he reads as Grogu. Add two black dots for eyes and a small mouth.
15. Watermelon and Pineapple Crafts
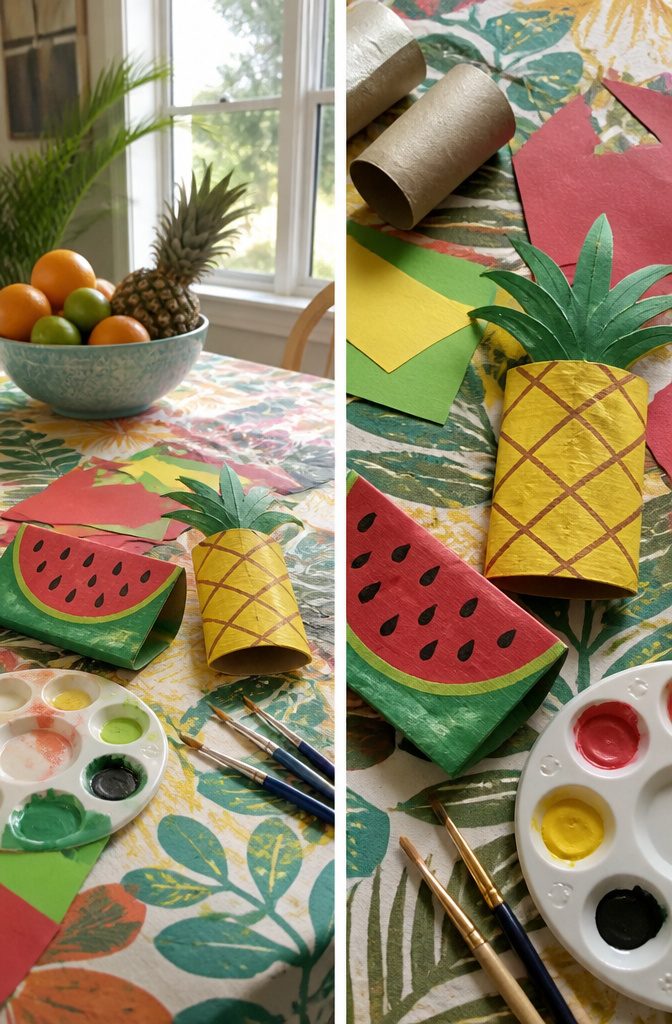
A watermelon slice is the easier of the two, and I’d start there with younger kids. Flatten a tube into a half-moon, paint the curve green with a pink or red face, then dot it with black marker seeds.
Paint the rind first and let it dry before adding the pink, so the colors don’t bleed into a muddy brown.
Pineapples ask for more patience. Paint the tube yellow, then draw a crisscross pattern with a brown or orange marker to mimic the skin.
The crown is the fun part: cut spiky leaves from green paper and tuck them inside the top opening. Glue the leaves inside the rim, not on the outside edge, and they’ll stand upright.
Both are bright, cheap and a natural fit for summer parties or a classroom unit on fruit.
16. Pillow Boxes
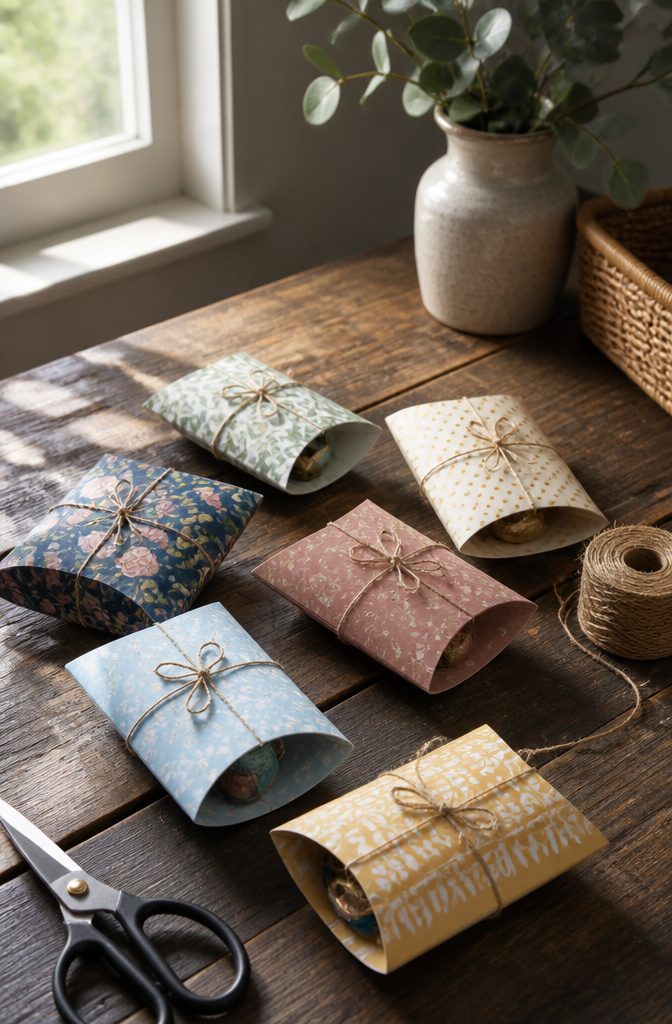
A pillow box starts as a plain cardboard tube pressed flat, then creased again so the two ends pinch together and the sides bow outward.
Fold the tube in half the short way, crease it hard with your thumbnail, then flip it and crease the other direction so the open ends sit on opposite edges.
Pushing the middle in a little at each end gives the curved, puffy look.
Small gifts fit best: a bracelet, a pair of earrings, wrapped candy, a gift card. Slip the gift in before you close the second end, because once both ends are folded the opening is tight.
A strip of ribbon or a loop of twine tied around the center holds the shape without glue. I would cover the tube in kraft paper or patterned scrapbook paper first, since bare cardboard looks unfinished.
17. Coastal Napkin Rings
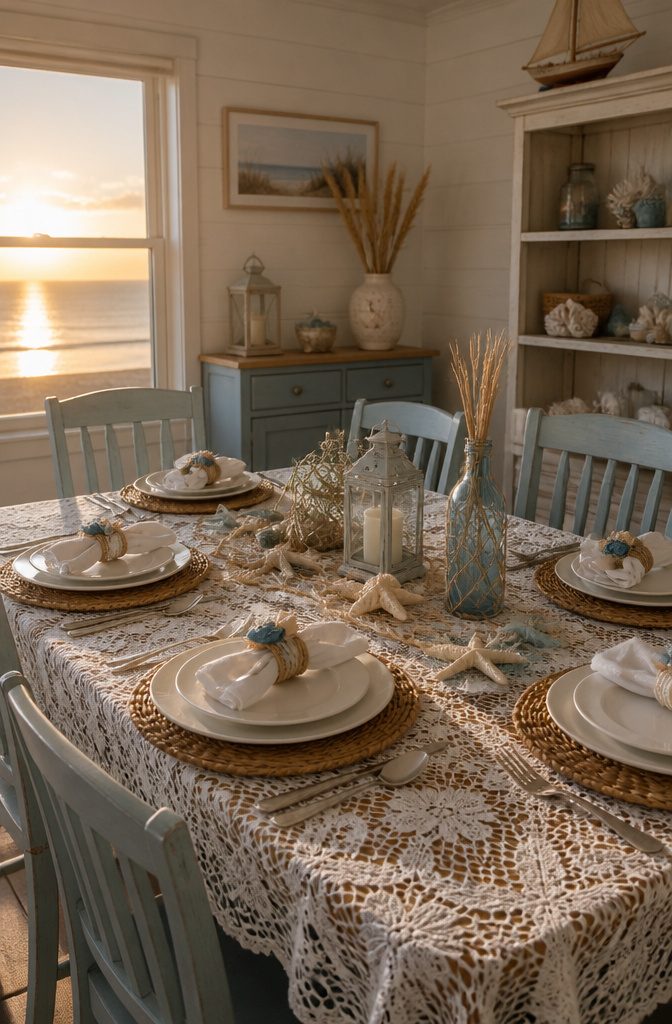
A standard toilet paper roll cuts into three or four napkin rings, and scissors work fine, though a craft knife gives a cleaner edge if you mark a pencil line all the way around first.
Sand any fuzzy cardboard lightly so the rope doesn’t snag.
Wrap with jute twine or thin natural rope, and dab a bead of hot glue inside the ring to anchor the starting end. Wind the rope tightly with each turn touching the last, so no cardboard shows through.
Gaps are the most common flaw, and they read as sloppy on a table. Glue the tail inside the ring and trim it flush.
I prefer a single ring of thicker rope for a nautical feel.
Thin twine looks better with a small shell or a scrap of blue ribbon tied at the front. White paint on the inside edge hides any bare cardboard.
18. Cactus Craft
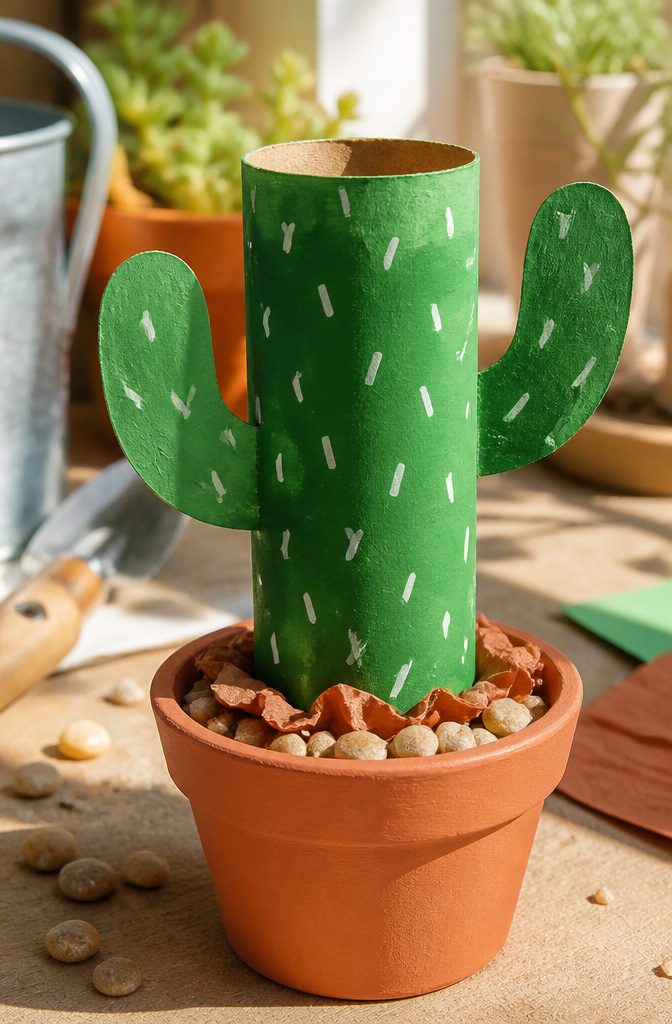
A cardboard tube already has the right shape for a saguaro, so paint it green and you’re most of the way there.
Use acrylic or craft paint, and give it two thin coats rather than one thick one, since printed cardboard shows through a single pass.
Cut the arms from construction paper or cereal-box scraps in the same green, then fold each into an L and glue the tabs to the sides.
Hold each arm in place for a full minute so the glue grabs; a tube wall is thin and the arms tip the whole thing if they slip.
For the pot, wrap a strip of terracotta-colored paper around the base and glue it down.
Draw the spines last with a fine black marker or white gel pen, using short dashes in pairs. Light spines read better on dark green.
19. Confetti Poppers
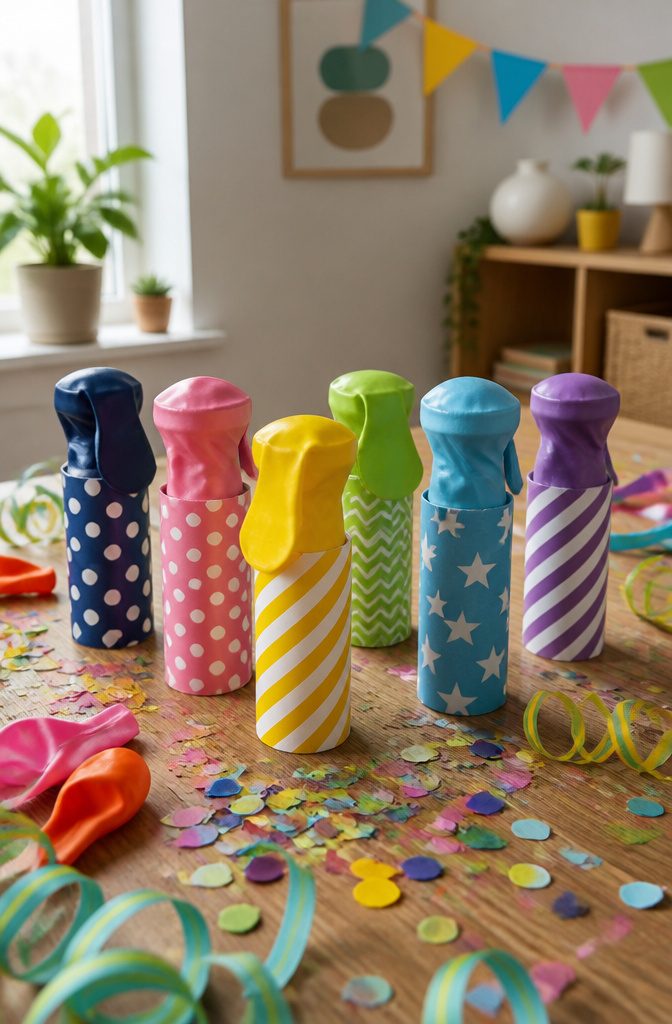
A tied balloon stretched over one end of a toilet paper roll is what makes a confetti popper work.
Cut the neck off the balloon, stretch the rounded part over one end of the tube, and tape it down all the way around so it can’t slip when you pull.
Pour confetti into the open end, then seal that end with a second piece of balloon or a circle of paper taped in place. Pull the knot on the balloon end gently and let go, and the confetti shoots out.
I’d go with balloon on both ends if you’re making a batch for a party. Paper is fine for the fixed end, but it tears under a hard pull, and kids pull hard.
20. Advent Calendar
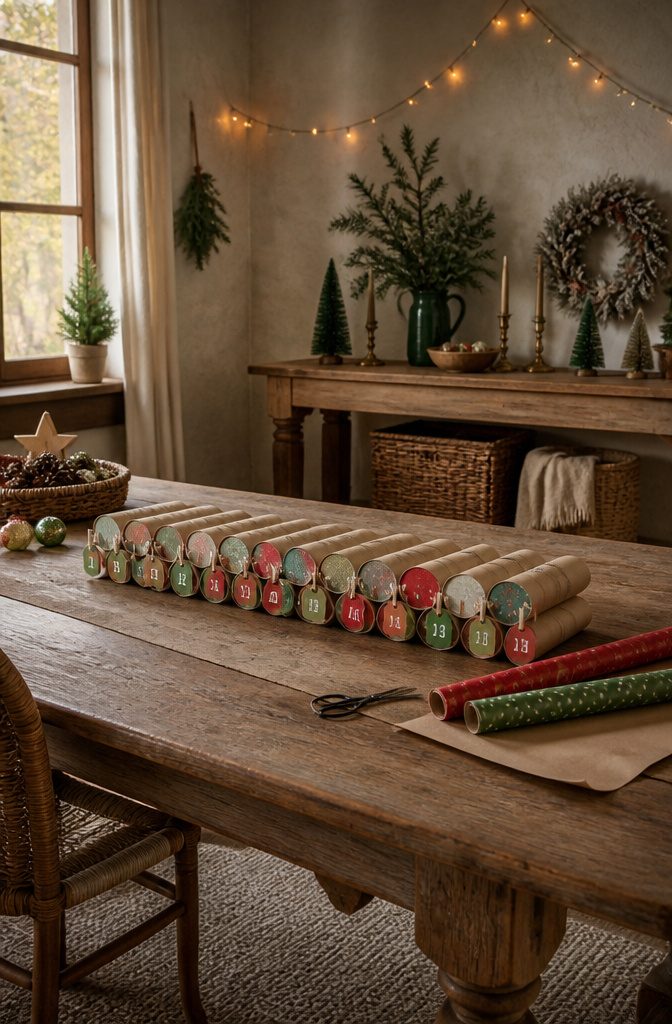
Twenty-four tubes make a calendar, or 25 if you count Christmas Day. Gather them a few weeks ahead, since a household goes through fewer rolls than you’d expect.
Line the tubes up in a shallow box lid or tray so they stand upright, and glue the sides together so the whole block holds its shape.
Number each tube with a marker or paper tag, then plug one end with a paper circle and glue it down.
Mix the numbers up instead of running them in order, which makes the daily search part of the fun. A tube holds small, flat or compact treats: wrapped candy, stickers, a coin, a folded note.
Close the top with tissue paper tucked in or a twist of string. Fill the tubes before you glue the block together if your fingers are big, because reaching in afterward is awkward.
21. Pumpkins
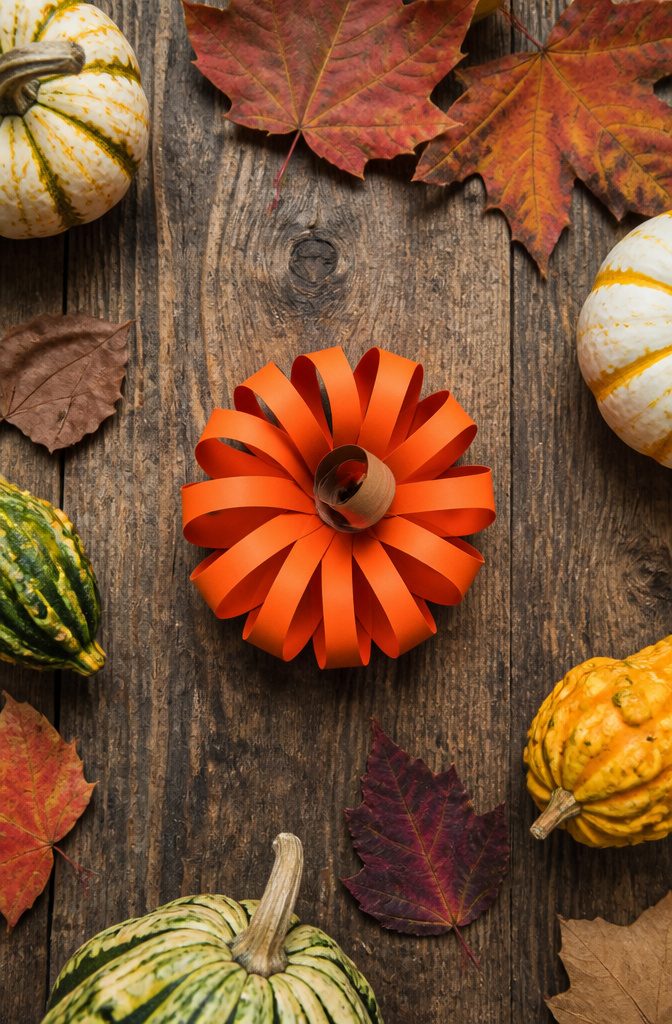
Cut a standard tube into rings about 1/2 inch wide, and you have the parts for a pumpkin.
Pinch each ring gently at two opposite sides so it turns oval, then slide 5 or 6 of them together, rotating each one slightly, until they fan into a round, ribbed shape.
A dab of hot glue at the center of each ring holds the stack.
Paint comes next, and I would do it before assembly.
Coat the strips orange while they are still loose, because a brush can’t reach the inside faces of a finished pumpkin. Cardboard drinks the first coat, so plan on two.
Brown paper works for the stem: roll a small scrap into a tight curl and glue it into the top gap, or use a short piece of twig. A green paper leaf adds a nice touch.
22. Ladybug Craft
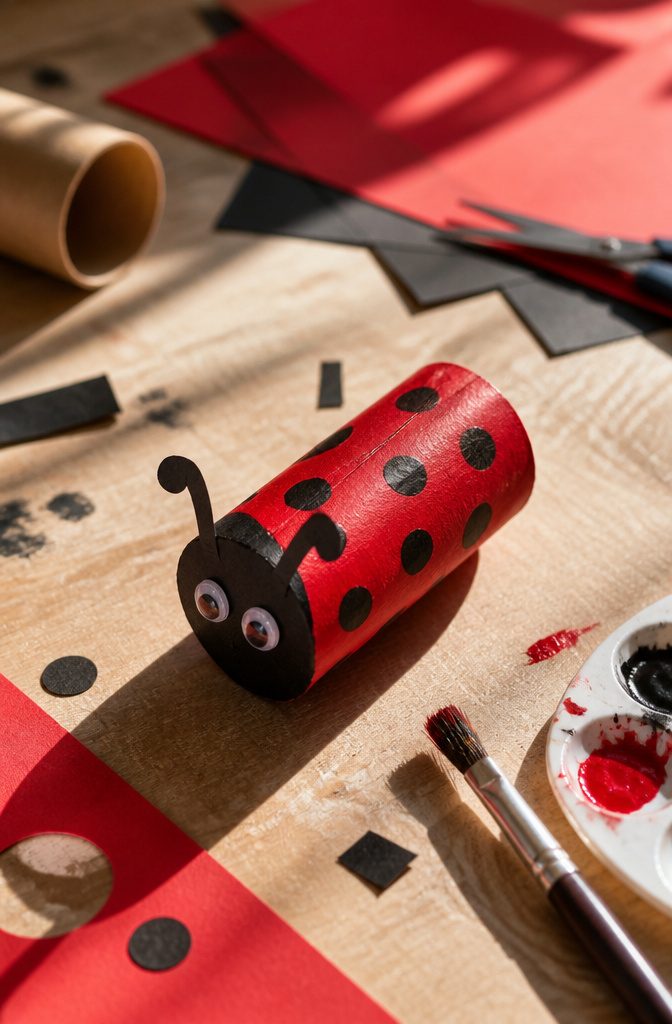
Red paint covers a cardboard tube better when the tube is brown, so give it two thin coats instead of one thick one.
Let the first coat dry before the second, or the cardboard will warp and the roll will lose its round shape. Acrylic craft paint works well here, and a flat brush is easier to control than a sponge.
Once the red is dry, dab on the spots with a round brush or a pencil eraser dipped in black paint.
Space the spots unevenly, since a ladybug with a perfect pattern looks more like a stamp than an insect. Paint a black strip down the center for the wing split, and a black patch at one end for the head.
Poke two small holes at the top of the head, thread in two pipe cleaner pieces, and curl the tips around a pencil. Add googly eyes with school glue.
23. Fire-Breathing Dragons
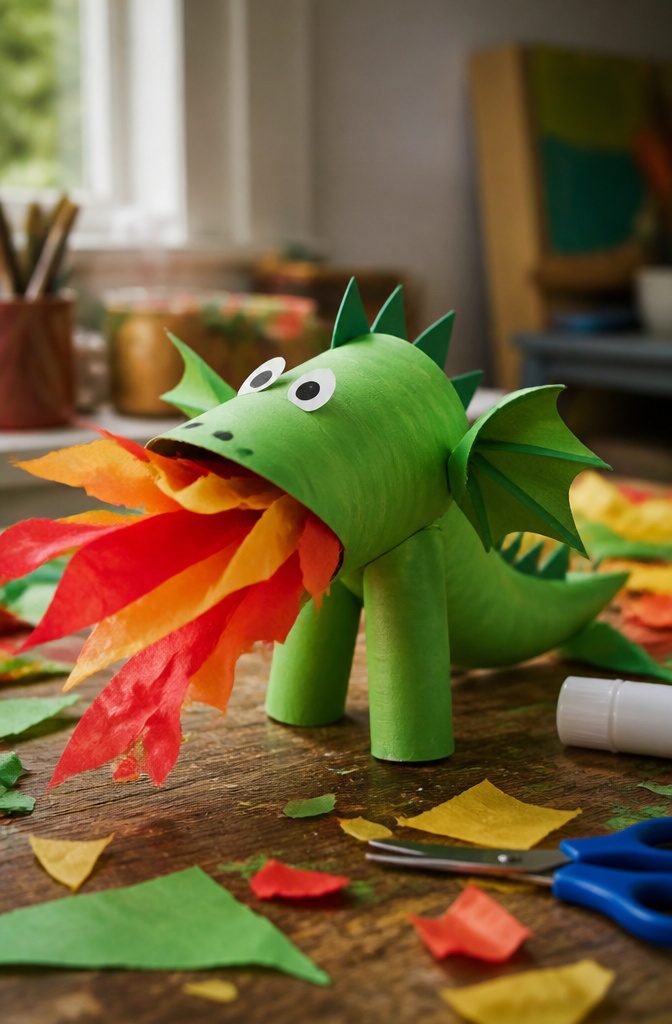
A toilet paper roll makes a good dragon because the tube is already a snout and a neck in one piece.
Paint it green, or any color you like, and let it dry before adding anything. Paper stays put on dry paint, and wet paint makes it wrinkle.
The flames are the fun part. Cut strips of red, orange and yellow tissue paper, then glue them inside one open end of the tube so they spill out like a burst of fire.
Layer the colors, with yellow deepest in the tube and red outermost. Tissue flutters when a kid blows on it, which is the real reason to choose it over construction paper.
Add paper eyes and a few triangle spikes down the back. I’d skip tape for the flames; glue holds thin tissue better.
24. Snowman Craft
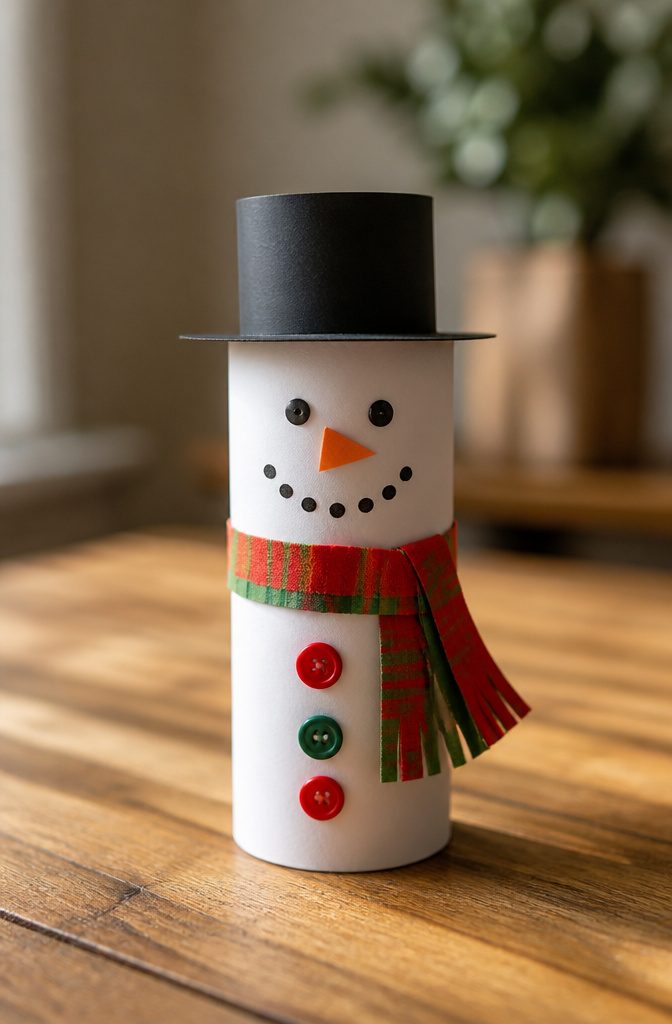
A snowman is one of the easiest toilet paper roll crafts to finish in an afternoon, because the tube is already the right shape for a body.
Paint it white, or wrap it in white paper if you’d rather skip drying time. Two coats of white paint cover the brown cardboard, and one coat tends to leave streaks that show through.
For the hat, cut a strip of black or colored paper, roll it into a small cylinder, and glue it to a flat circle for the brim.
Set it on top of the tube. A paper scarf is just a thin strip with snipped fringe at each end, wrapped around the middle and glued at the back.
Buttons can be paper dots or small pom-poms. I’d use a marker for the face, since eyes and a tiny orange nose draw better than they glue.
25. Phone Stand
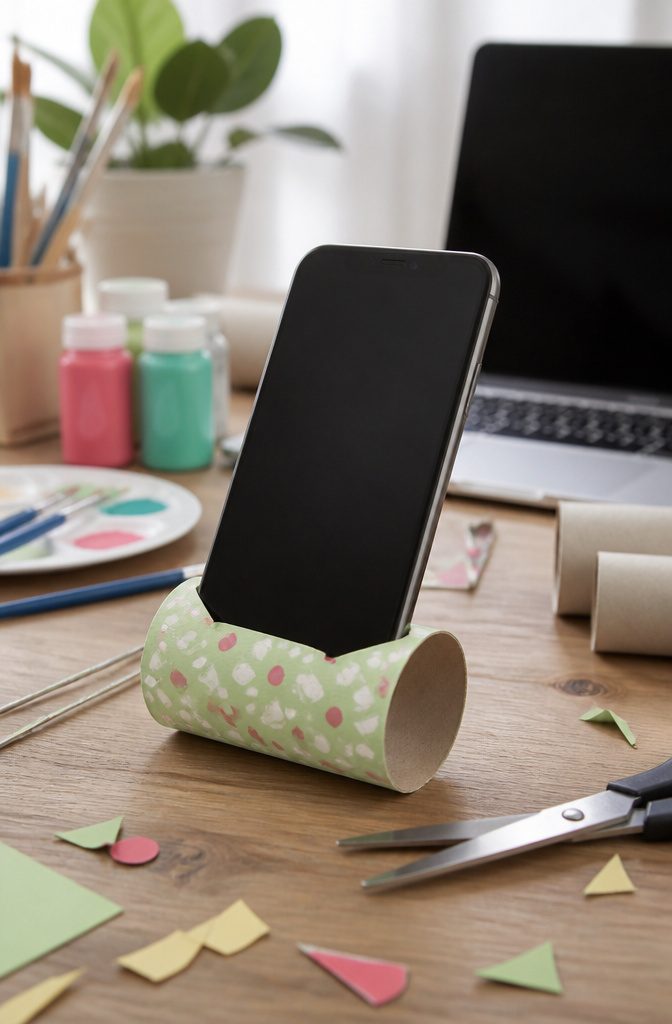
A phone stand is one of the few toilet paper roll crafts that earns a spot on a desk or nightstand for the job it does, not the way it looks.
Cut a slot across the middle of the tube, wide enough for the bottom edge of your phone, and the phone leans in it, upright and hands-free.
Cardboard this thin flexes, so I would cut the slot slightly narrower than you think you need.
You can always widen it with scissors, but a loose slot lets the phone tip. Angle the cut a little rather than going straight across, and the screen tilts back for easier viewing.
Lay the tube on its side, since a round base will roll.
Gluing it to a scrap of cardboard or flattening the bottom edge keeps it steady. A coat of paint or a wrap of patterned paper helps it blend in.
Frequently Asked Questions
What can I make with toilet paper rolls?
You can make animals like bunnies, owls, ladybugs and dragons, toys like rockets, binoculars and a race track garage, and useful items like a worm pencil holder, phone stand, seedling pots and napkin rings.
Seasonal pieces such as snowflakes, pumpkins, an advent calendar and a heart wreath work too. Most projects need only the tube, paint or paper, and glue.
Are toilet paper rolls safe to use for crafting?
Yes. Toilet paper rolls are generally fine for crafting, since there are no studies showing a problem with them, though some people feel uneasy because the rolls come from the bathroom.
If that bothers you, sanitize the tubes first or buy cardboard tubes made for crafting, which were never used with toilet paper.
How do I sanitize toilet paper rolls?
Bake the tubes in the oven on low heat, or spray them with a disinfectant such as Lysol and let them dry.
Setting them out in the sun is another option people use. Cardboard tubes sold for crafts skip the step entirely.





