
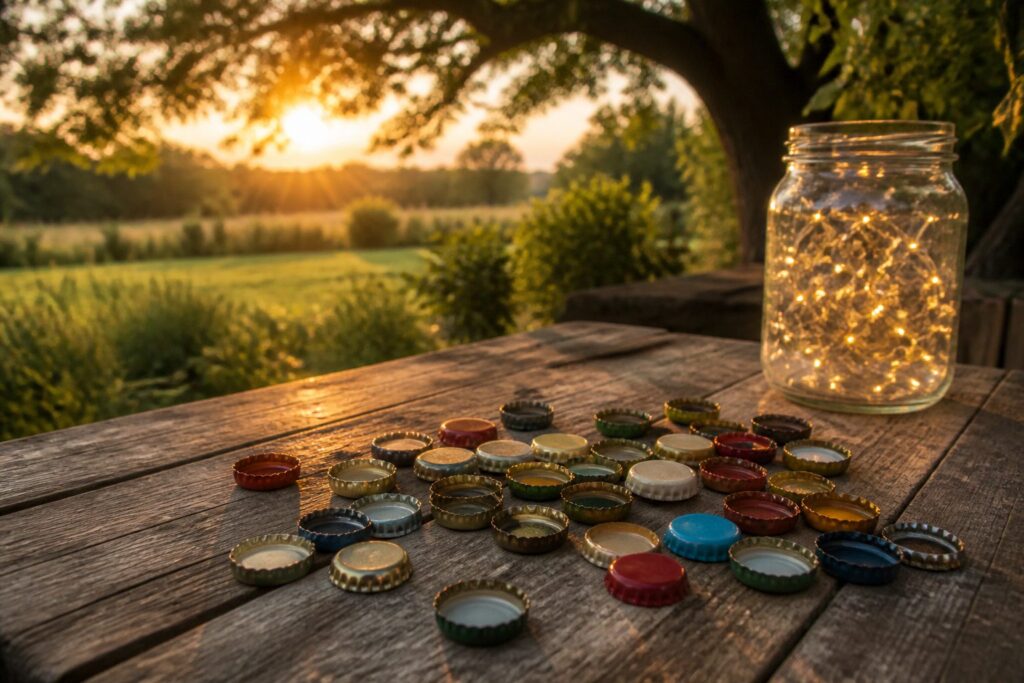
Projects run from a 3-supply fridge magnet to a table that takes a lot of caps and hours, and the cap material decides which suits you.
Metal caps give the click and clatter; plastic caps hold up outdoors and come in solid colors. Hot glue handles light builds, but a foam wreath needs strong glue.
1. Bottle Cap Magnets
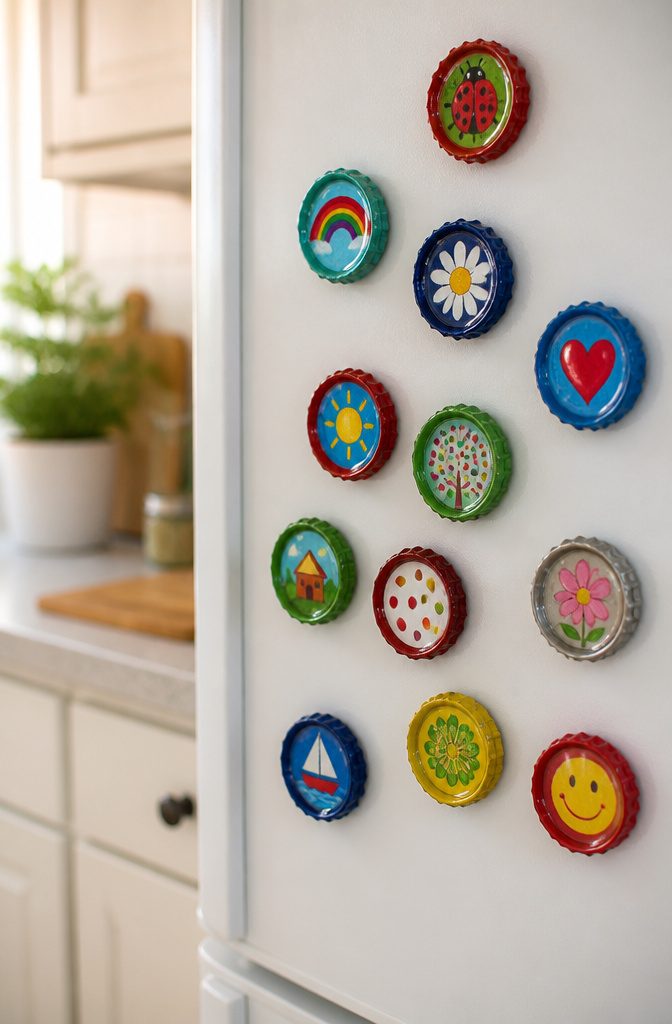
Magnets are the easiest bottle cap craft because the whole project is three supplies: a hot glue gun, caps, and magnets.
Put a little hot glue on the back of the magnet, then press it into the cap so it sits inside the rim. That keeps the magnet flat against the fridge and hides it from the side.
I’d paint the caps first. Acrylic craft paint covers metal well, and it dries fast enough that you can move on to the front within the hour.
Photos, beads, and resin all work for the top. A small drawing from a kid turns a plain cap into a treasure magnet that holds up the next drawing.
Skip weak craft magnets. A cap with a bead or resin dome weighs more than it looks, so choose a magnet that grips.
2. Bottle Cap Wind Chimes
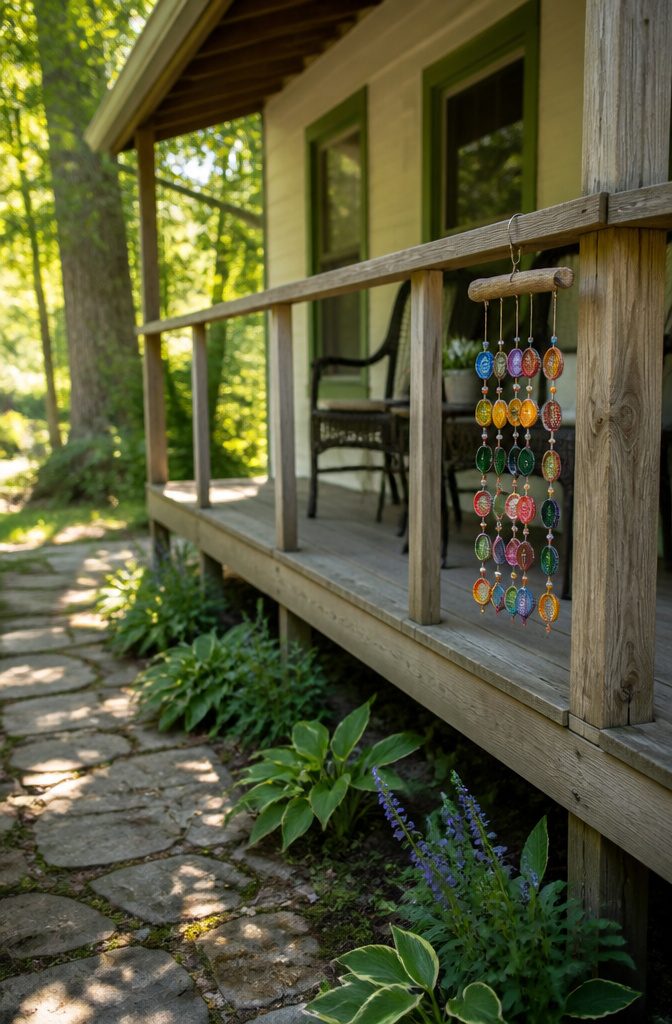
Bottle cap wind chimes sound like a clatter, not a chime.
Caps are thin, light steel, so they knock together with a tinny rattle instead of ringing, and I’d treat that as part of the charm. Hang them where a breeze is gentle and the sound stays pleasant.
To make one, punch a hole in the center of each cap with a hammer and nail, working over a scrap of wood. Paint or decorate the tops first, since a flat cap is easier to handle before it’s strung.
Thread the caps onto fishing line or sturdy string, knotting under each one so it stays put, then tie several strands to a stick or an embroidery hoop.
Space the caps so they can swing and touch, and the clatter will follow.
3. Bottle Cap Jewelry
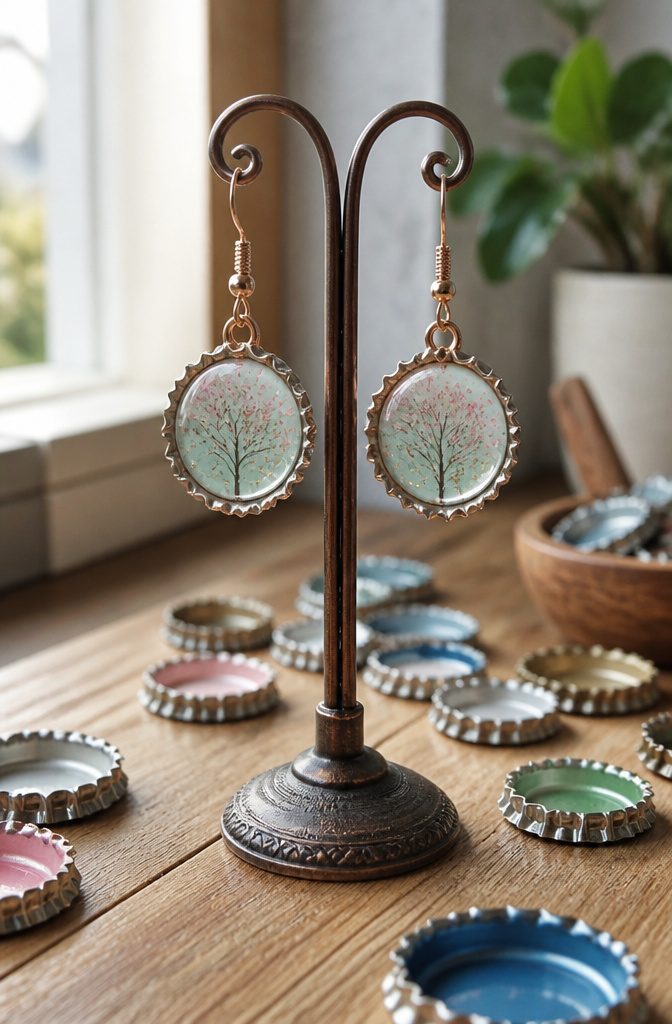
Earrings are the easiest of the three.
A cap is light enough to hang from a single ear wire, and you only make two. Necklaces and bracelets repeat the same cap many times, so the work and the weight both add up.
For earrings you need jewelry findings: ear wires, a small eye pin or jump ring, and glue. Glue the ring or pin to the inside of the cap, or to the cap’s edge, then hang it from the wire.
Necklaces need a chain and a bail or loop glued to the back. Bracelets need a chain or cord plus clasps.
Clean the caps first. If you don’t want the printed label showing, paint them with acrylic craft paint, or spray paint to reach every groove.
4. Bottle Cap Art
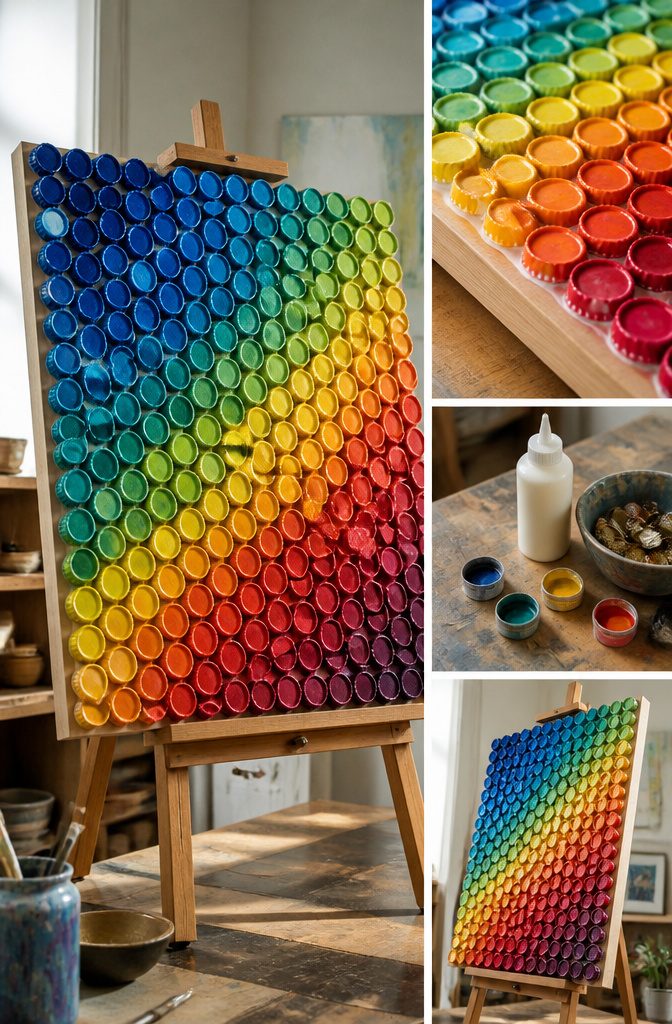
Lay the caps out dry on your base before any glue comes out. Sketch the design first, then shuffle the caps until the colors sit where you want them, because a cap pressed into adhesive is hard to move.
A canvas, a wooden board, or any sturdy flat surface works, as long as it’s clean.
For plastic caps, epoxy or super glue holds best.
Spread it on the back of each cap and press firmly so the bond takes. Work from your layout, one section at a time, and let it dry fully before you hang or lift the piece.
Paint is optional; I like it for outlining details on the caps or the background around them.
A clear sealer or resin gives a polished finish. Mosaic-style wall art, like a rainbow gradient, reads best at a larger scale.
5. Bottle Cap Coasters
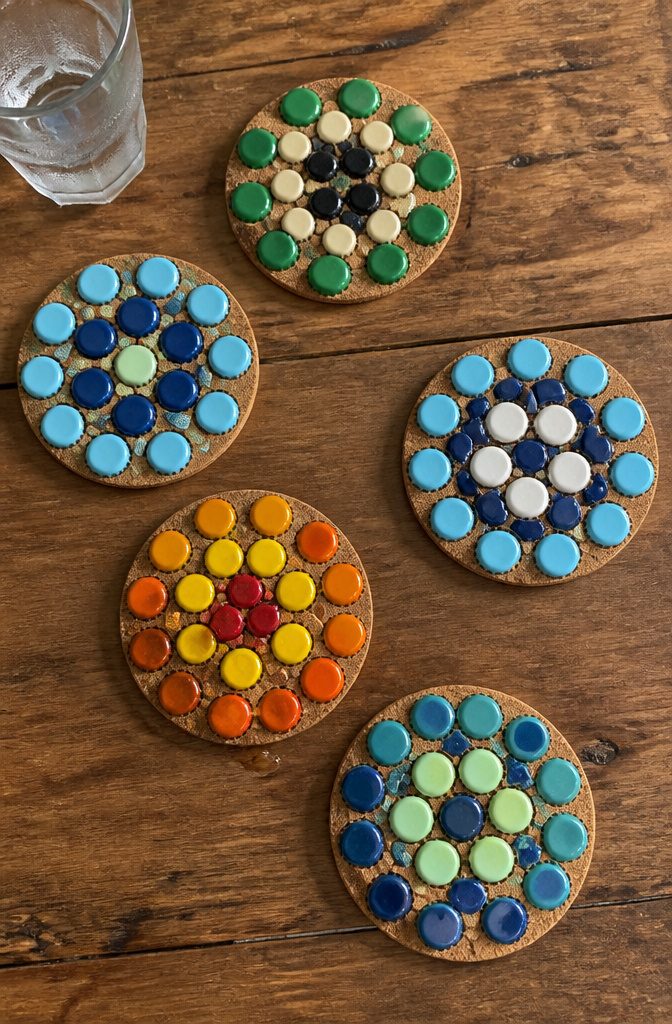
Cork is the base to use. A thin cork sheet cut to a square or circle gives you a sturdy, liquid-resistant surface that also protects the tabletop, and it’s easy to trim with scissors or a craft knife.
Plain cork mats work too if you’d rather skip the cutting.
Paint the caps first, since spray paint reaches the ridges better than a brush.
Arrange them in your pattern before gluing, then glue each one down. Tight rows in two or three colors match a decor scheme well.
On wet cups, the gaps between caps are the weak spot. Condensation pools there and soaks the cork, so these coasters suit dry or lightly sweating glasses better than iced drinks.
Sealing the surface would help, but it fills the cap hollows and dulls the look, so I’d wipe them clean after each use instead.
6. Bottle Cap Table

A bottle cap table is the biggest project in this list, and it asks for far more of everything than a magnet or a bookmark does.
You need a lot of caps, a lot of hours, and patience for covering every inch of the top one cap at a time. I’d skip it if you want something finished in an afternoon.
You can build the table from scratch or start with a pre-made one. Covering a table you already own is the easier route, since the work is all on the top and you skip the carpentry.
A tired old side table is a good candidate. Mixing every kind of cap you can find gives the funkiest look, and the finished surface makes people ask about it.
7. Bottle Cap Ornaments
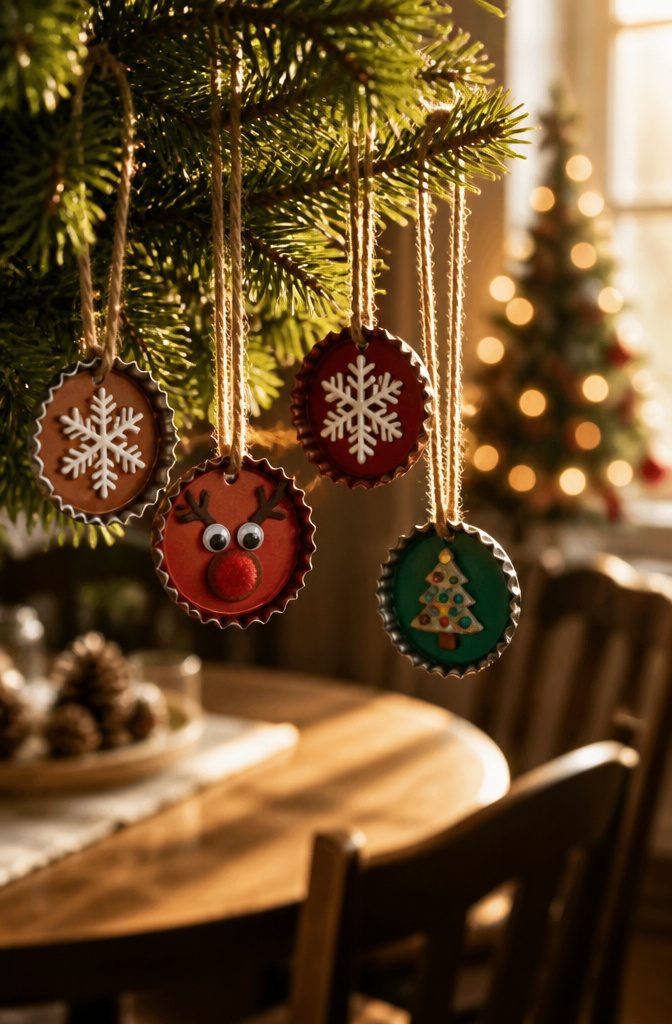
Bottle cap ornaments are the easiest way to put this craft on a Christmas tree, and the best ones lean on the cap’s round shape.
A Rudolph face works because the cap is already a head; a penguin body does the same job. Holly is another good pick, and it can hang on a tree, sit on a wreath or top a wrapped gift.
Snowflakes are the most delicate option. Caps hung on a branch or a door handle read as winter without any tree at all.
If you want a bigger statement, fill a small tabletop tree with sparkly cap ornaments and skip the store-bought baubles. I’d pick Rudolph for kids and snowflakes for adults, since the snowflakes take steadier hands.
8. Bottle Cap Wreaths
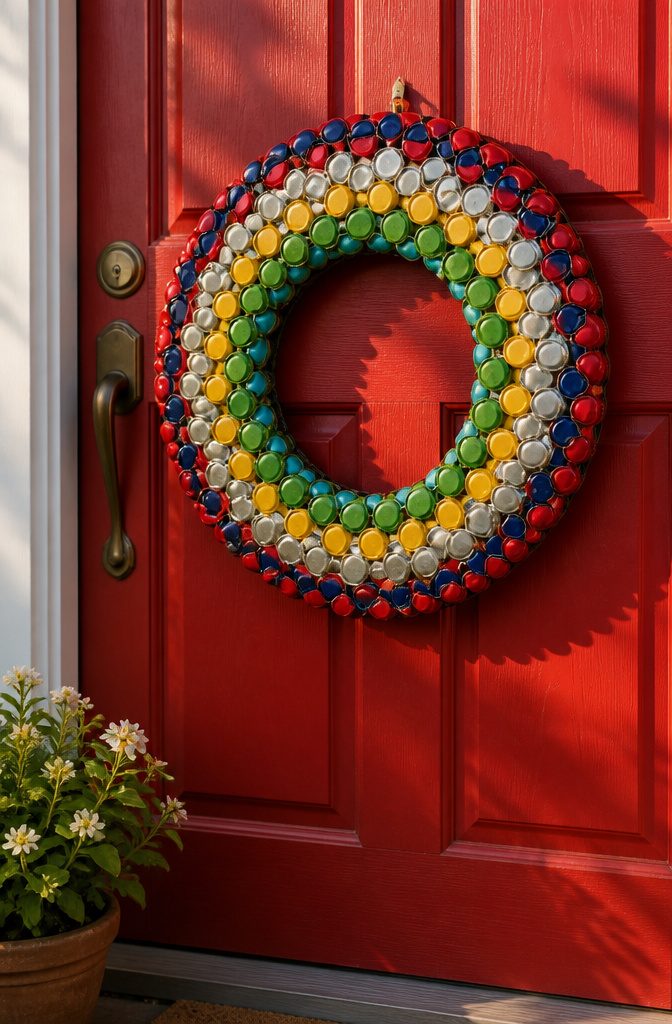
A rounded foam wreath ring from a local craft store is the easiest base for this project, and strong glue is what holds it together.
Craft glue that stays tacky will let caps slide off the curve, so pick something that grabs fast.
Start with the caps that will sit on the inner and outer edges of the ring.
Gluing those first keeps the foam from showing at the silhouette. Then fill the face in overlapping rows, tucking each cap into the gap between two neighbors so no foam peeks through.
For color, I like a team-style scheme for game day: two shades only, alternating by row, which reads cleanly from the sidewalk. A mixed pile of random caps looks busier but hides gaps better, so it suits a first attempt.
9. Bottle Cap Bookmarks
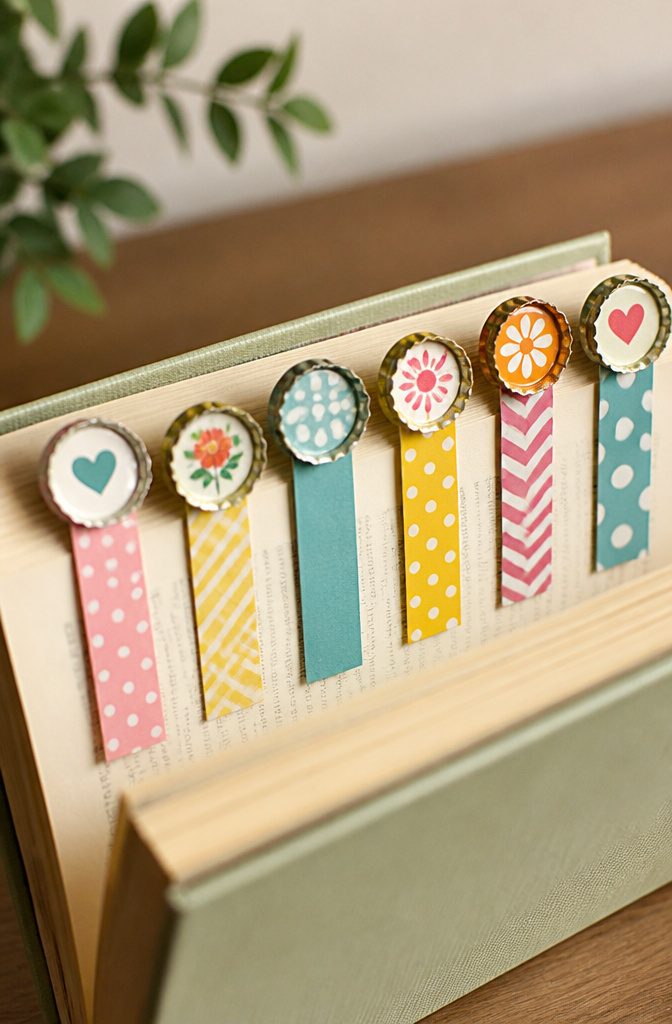
A bottle cap bookmark is one of the quickest projects on the list, and kids can make it start to finish with very little help.
Glue a cap to a strip of paper or card, then decorate the cap face however you like; size is up to you.
Because a cap sits at the top edge of the page, it works as a small flag that shows where you stopped reading.
Kids tend to enjoy this one because the result is useful the moment the glue sets.
A handmade bookmark makes an easy gift for a grandparent or any book lover. I’d skip anything fussy here: one cap, one strip, one coat of paint or a sticker is plenty for an afternoon.
10. Bottle Cap Toys
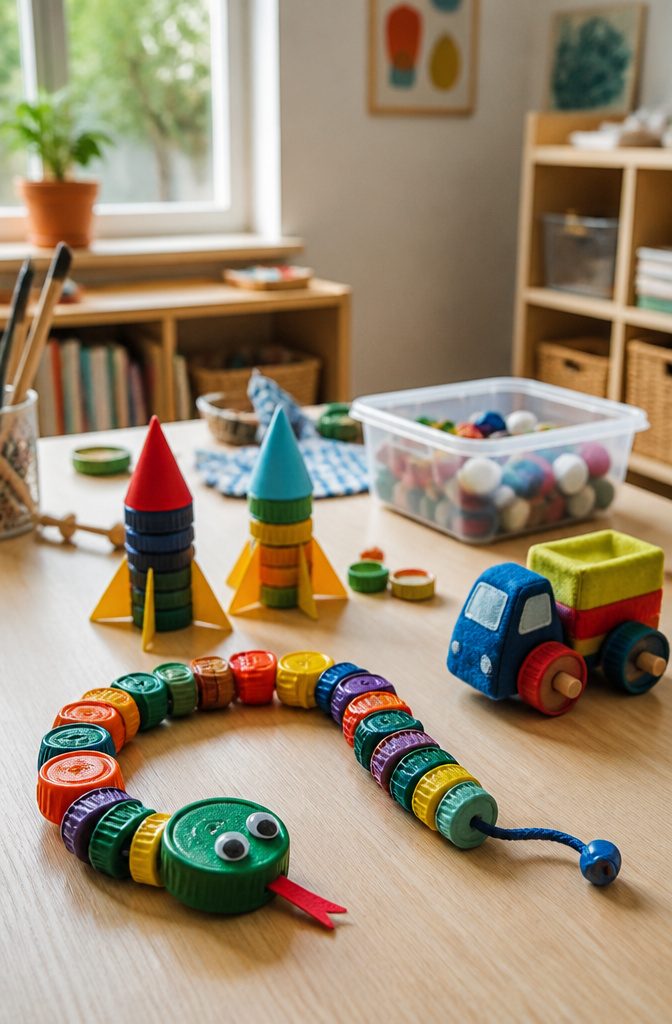
A rattlesnake toy that actually rattles is the build I’d start with, because it behaves like a toy once the gluing is done.
Metal caps do the same job in click clack crocodile castanets, and a toothpick through a cap makes a high-speed spinning top. Bottle cap boats go in a sink or tub for races.
For smaller kids, bird puppets and a dump truck softie with bottle cap wheels are the gentler picks. Mini bottles topped with caps make cute rockets, and they take the least fuss of any of these.
I’d skip the motorized tricycle (it needs a DC motor) unless an adult is running the glue gun. Miniature pies from polymer clay and caps are better for pretend play than for rough handling.
11. Bottle Cap Garland
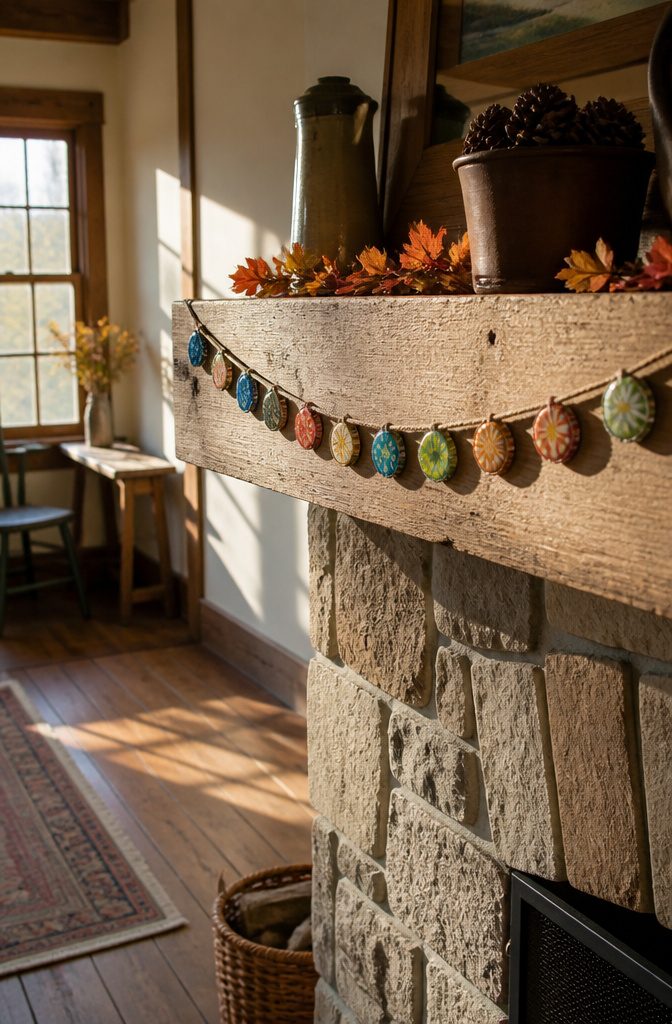
Twine plus chalkboard paint on the caps is the version I’d make first, because the garland doubles as labels for party food and drinks.
Paint each cap, let it dry, then write on it with chalk. If you’d rather skip labels, painted or decorated caps in bright colors work just as well for a party or everyday decor.
For stringing, punch or drill a small hole in each cap before you paint, so the paint doesn’t crack around the hole later. Thread them onto the twine and knot between caps so they don’t slide into a clump.
On spacing colors, repeat a short pattern, such as three colors in a fixed order, instead of scattering them at random.
It reads as planned from across the room, and you can see at a glance when you’ve swapped two caps by mistake.
12. Bottle Cap Floating Candles
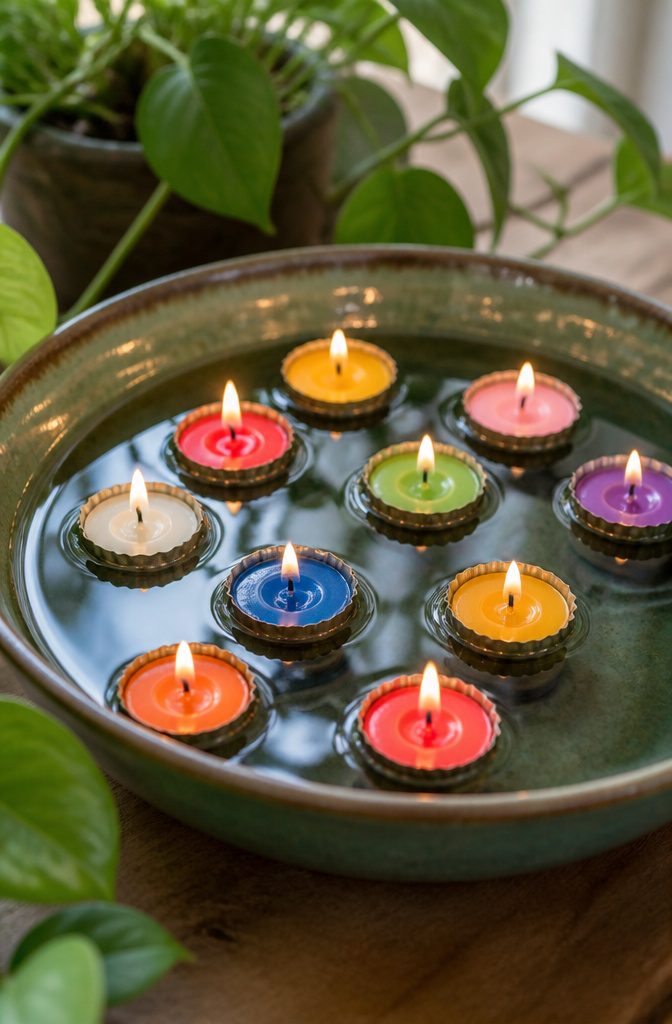
A bottle cap makes a good mold for a floating candle because it is already a shallow, sealed cup. Attach the wick first, so it sits in the cap before any wax goes in.
Then melt the wax and pour it into the caps. Scent and coloring go into the melted wax before you pour, and the candles need time to cool and set before they touch water.
The melting and pouring are a job for adults.
Hot wax burns badly, so kids can set out the caps, pick colors, and choose scents, then step back. A bowl of water makes a cheap display, and a batch of caps costs very little to fill.
13. Bottle Cap Planters
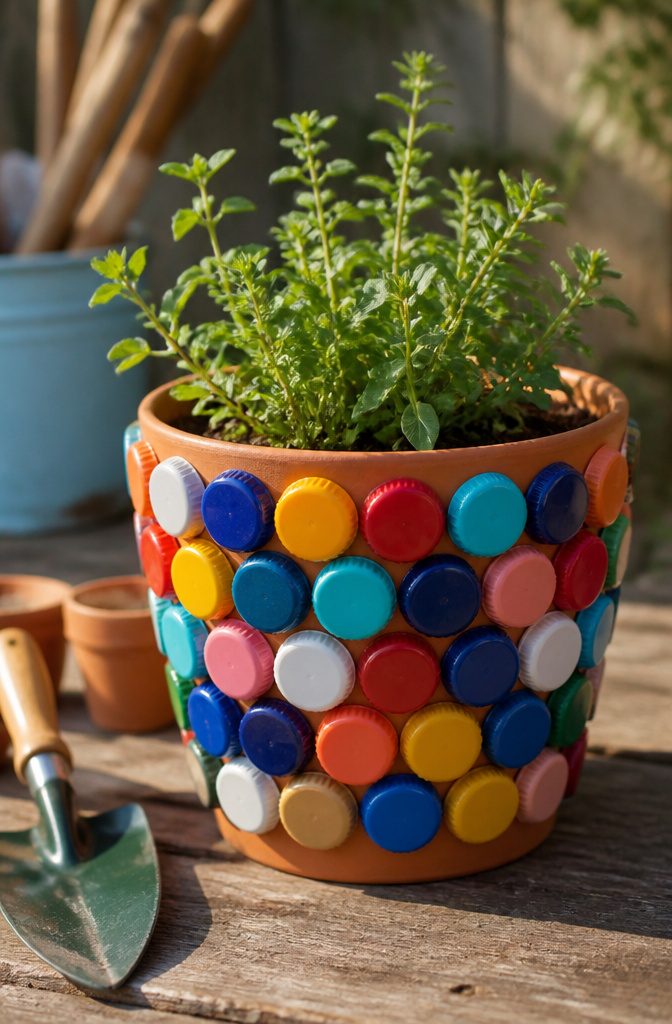
Plastic caps hold up outdoors because they resist moisture and wear, which is why garden planters are one of the smarter homes for discarded ones.
Caps can either decorate a pot or form it, and I’d pick the decorating route first. Glue them in rows onto a plain pot and the finish reads as a mosaic without any grout.
Building the pot from caps alone looks striking but takes far more caps and patience, and I’d save it for a small herb holder.
The clay-based garden idea is a good middle path: press caps into soft clay, then use cotton buds to add stems and leaf lines around them.
Use a strong outdoor glue and seal the finished pot, since rain loosens weak bonds fast.
14. Bottle Cap Serving Tray
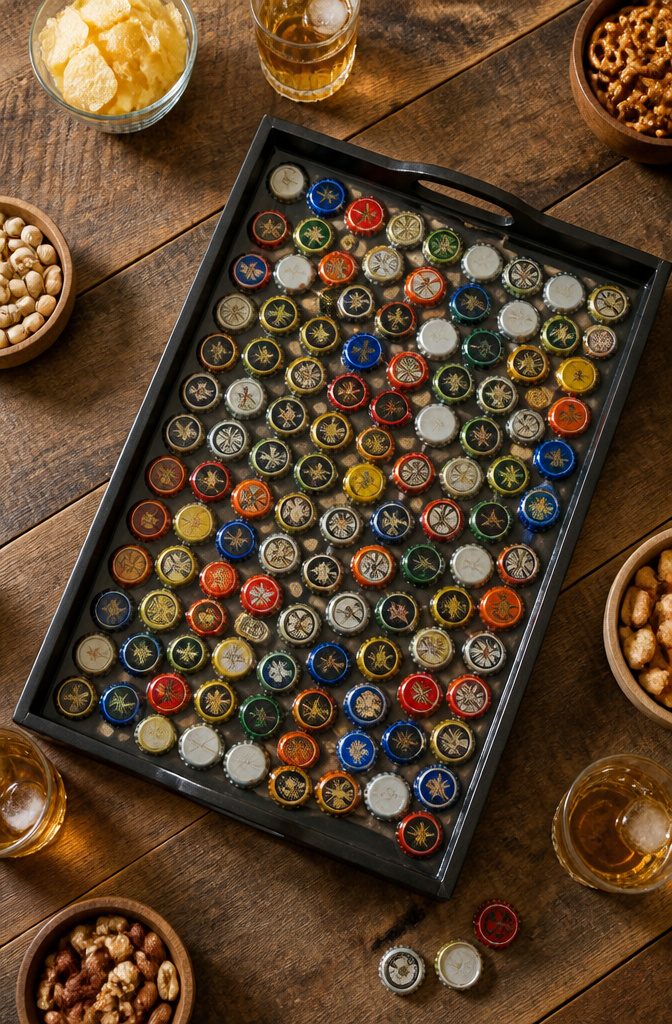
Arrange the caps on the tray bottom before any glue comes out, because the layout is the only part you can’t fix later.
Press them in tight rows, or leave gaps and fill them with smaller caps, until the whole surface is covered. Then glue each one down and let it set.
Sealing is what makes this a serving piece instead of a shelf piece. Epoxy resin poured over the caps fills the gaps between them and leaves a smooth, wipeable top, so crumbs and spills don’t catch in the ridges.
Layer the resin over the caps rather than just brushing a sealer on, since the pour is what levels the surface.
I’d pick resin over leaving the caps bare every time, though it adds a step and a cost. A tray with exposed caps looks great but collects grime.
15. Bottle Cap Clock
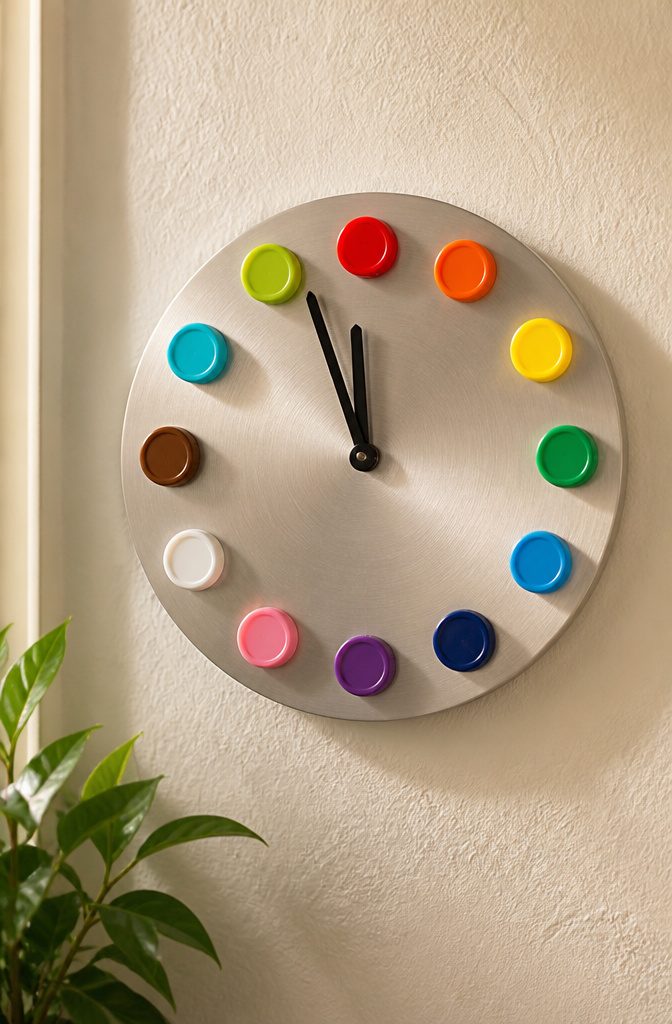
Plastic caps make the best clock markers because they already come in bright, solid colors, so nothing needs painting.
Metal caps usually carry logos, and covering those takes extra work. A set of plastic lids in 12 different colors reads as a pop art face, the kitschy 60s look that makes this project fun.
Start with a plain clock face and a working movement.
Space the caps around the edge where the hour numbers would go, and glue them down with the clock mechanism removed. Set the hands on after the glue dries, or they will snag on a cap and stop.
I’d use one size of cap for all the hour spots. Mixed sizes look charming on a wall of art, but on a clock face they make the hours hard to read at a glance.
Gluing and Painting Caps
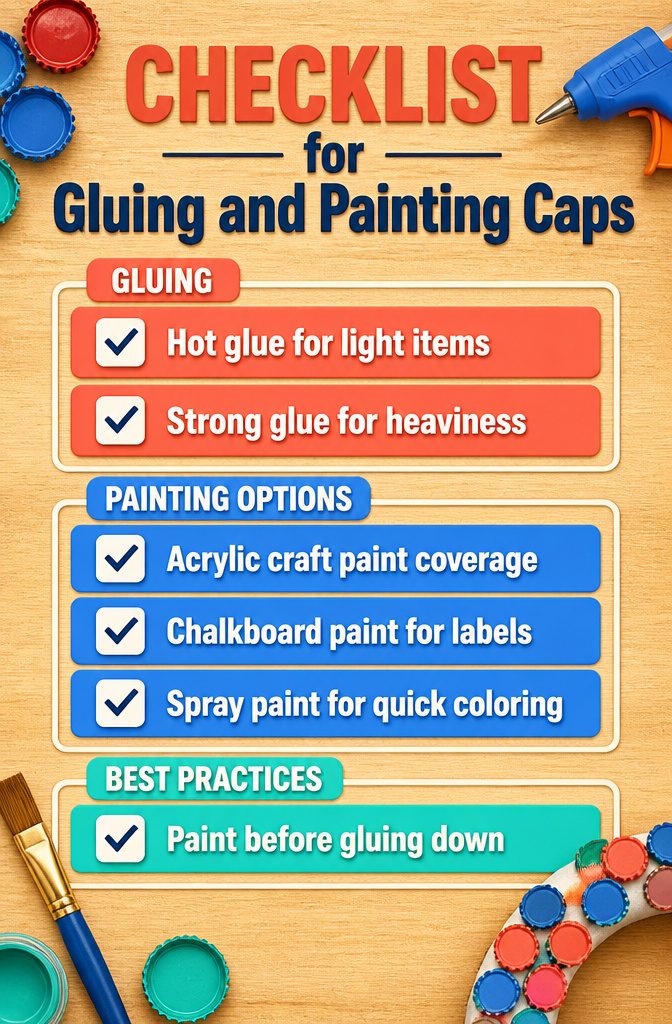
Yes, you can paint bottle caps, and acrylic craft paint is the easiest way to do it. Here is what the job needs:
- Hot glue is fine for anything light, like caps strung along ribbon or string.
- For a heavier build, such as covering a foam wreath ring, use strong glue. Hot glue alone can let go under the weight.
- Acrylic craft paint covers the cap tops well. Chalkboard paint turns them into labels for food, drinks or place settings.
- Spray paint works when you have a pile of caps and want one flat color fast.
- Paint the caps before you glue them down. It’s much neater than painting around a wreath or garland.
- Lay the caps out in your pattern first, then glue, so you don’t run out of a color midway.
Kid-Friendly Cap Projects
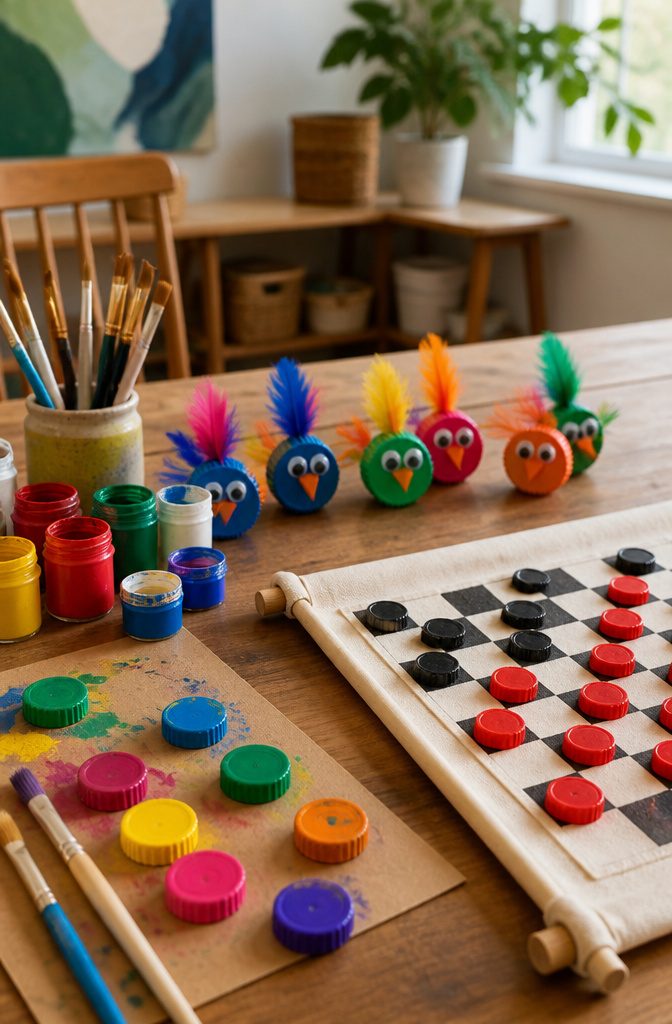
Metal caps and plastic caps suit different jobs, so pick by project. Metal caps make click-clack crocodile castanets, and plastic ones suit toddlers and preschoolers, who can make simple bird puppets with little help from you.
For games, a square of painted or stenciled canvas plus two sets of caps in coordinating colors makes a checkers set that rolls up for travel. Kids can paint the board themselves while you stay out of it.
Holiday projects run on the same minimal supervision. Rudolph ornaments and bottle top snowflakes are easy to set up for winter, and I’d pick them over fussier ornaments because the caps do most of the work.
Boats for a water race and spinners are quick wins too.
Upcycling Caps From the Landfill
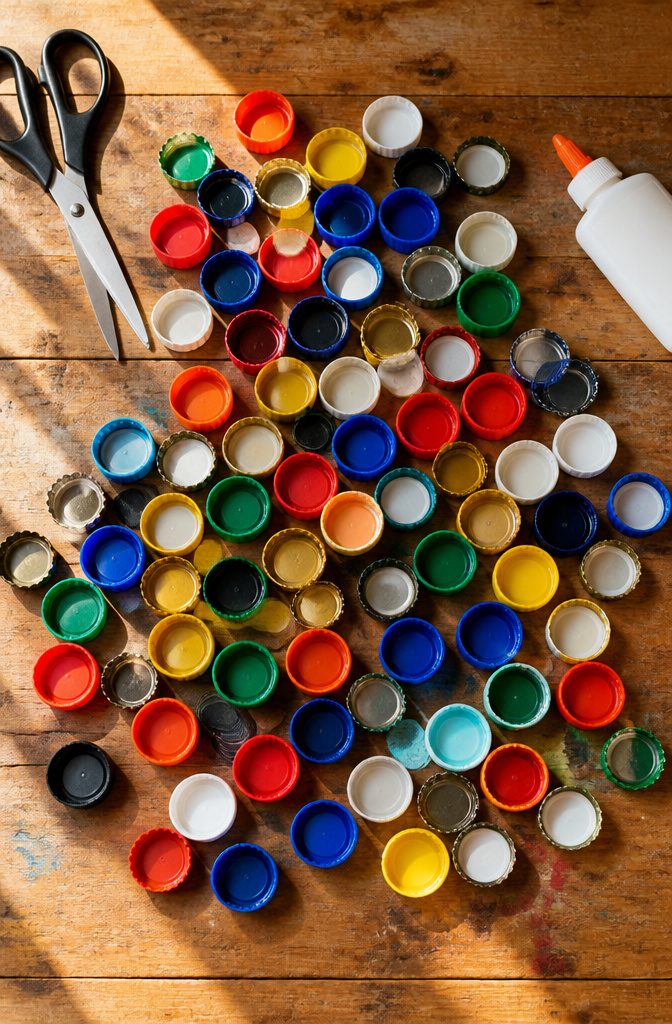
Billions of recyclable plastic bottle caps end up in landfills, and they are small enough that most of us never notice them leaving the house.
Caps from soda, wine, beer and water bottles all work for crafts, and metal and plastic both hold up well for projects that cost almost nothing.
I like caps for upcycling because the material is already finished: it’s sturdy, colorful and uniform in size.
Every cap you use is one that doesn’t reach a landfill, and a handful gathered over a few weeks is enough for a first project.
Vintage caps are the exception. Keep those for display rather than gluing or painting them.
Frequently Asked Questions
What can you make with bottle caps?
You can make magnets, coasters, jewelry, wall art, wind chimes, ornaments, wreaths, bookmarks, toys, garlands, floating candles, planters, serving trays, clocks and even a tabletop.
Magnets are the simplest place to start, since they take only caps, glue and magnets. Plastic and metal caps both work, so use whatever you have collected.
How do you make bottle cap art?
Sketch your design, then lay the caps out dry on a clean canvas, board or other flat surface before using any glue.
Once the colors sit where you want them, glue the caps down one section at a time and let everything dry fully. Painting details or adding a clear sealer or resin is optional.
Can you paint bottle caps?
Yes.
Acrylic craft paint covers the caps well, and spray paint reaches every groove faster when you have a pile to do. Paint them before gluing, which is much neater than painting around a finished wreath or garland.
What are some fun bottle cap crafts for kids?
Kids can make bookmarks, rattlesnake toys, click-clack crocodile castanets, bird puppets, boats for water races, checkers sets and Rudolph or snowflake ornaments.
Plastic caps suit toddlers and preschoolers best. Keep hot wax projects like floating candles for adults.
How do you make bottle cap magnets?
Put a little hot glue on the back of a magnet and press it into the cap so it sits inside the rim.
Decorate the top with paint, a photo, beads or resin. Choose a strong magnet, because a decorated cap weighs more than it looks.
What can I make out of plastic bottle tops?
Plastic caps work well for garden planters, since they hold up to moisture and wear outdoors.
They also suit clock markers, because they already come in bright solid colors that need no paint. Toddler-friendly projects like bird puppets use them too.





