
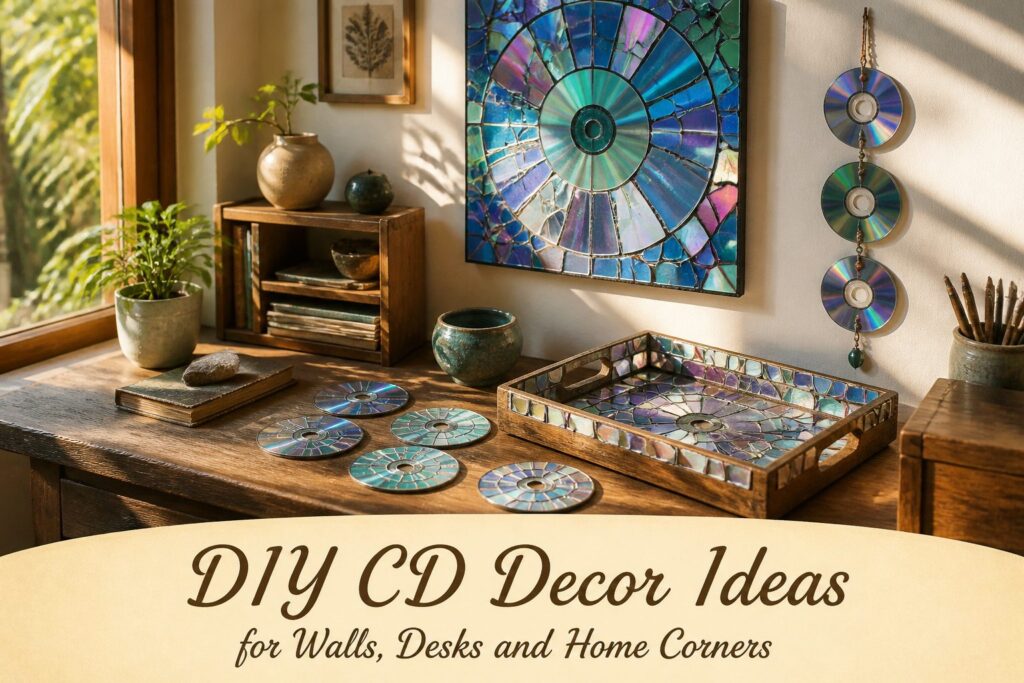
These projects run from a 30-minute pair of earrings to a tray that takes 9 discs plus a full day of resin curing.
What picks yours is the glue. Kids’ projects use a glue stick or tacky glue, while mirrors and mosaics need E6000 and an overnight cure, and anything that involves cutting a disc calls for eye protection.
1. Pom-Pom Pearl Diya
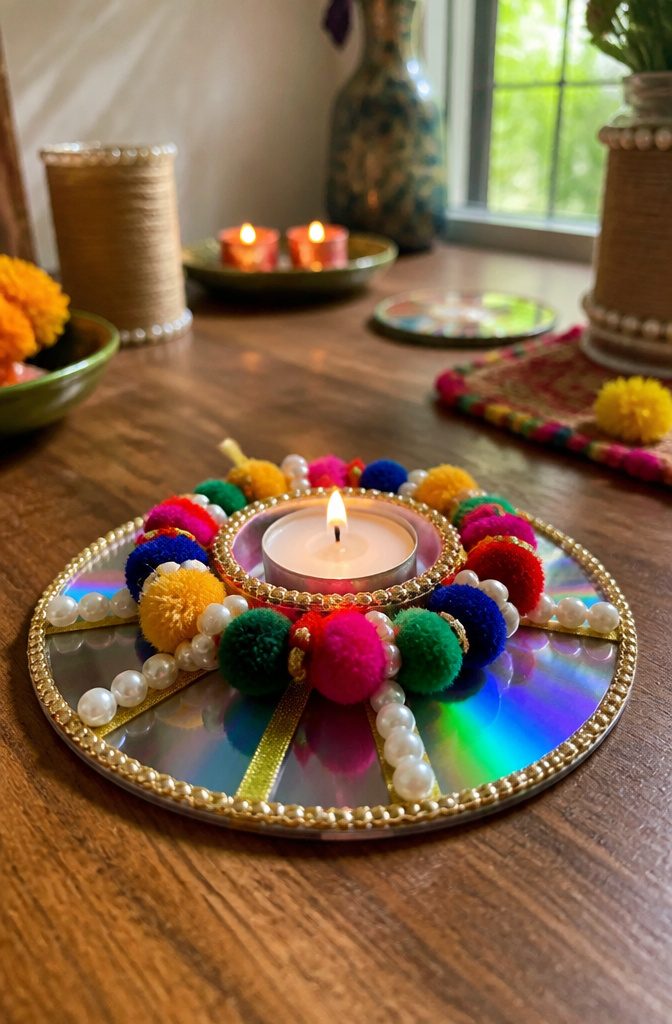
A single old CD, a white pillar or tealight, mini pom-poms, pearl chain, gold ribbon and hot glue make the whole diya.
The disc is the base, and its mirrored face does the work of a tiny thali under the flame.
Cut the ribbon into 2-inch strips and glue them radially around the center hole, like sun rays.
Wrap pearl chain around the candle base, then glue the pom-poms evenly along the outer edge of the disc. Center the candle last with strong hot glue, and let it set 10 minutes before lighting.
Pearls and the disc’s rainbow sheen throw small points of light around the table, while the pom-poms keep the look soft.
Glitter or beads would push it further, though I’d keep the ribbon gold so it stays festive and not busy.
2. Mandala Mirror Wall Art
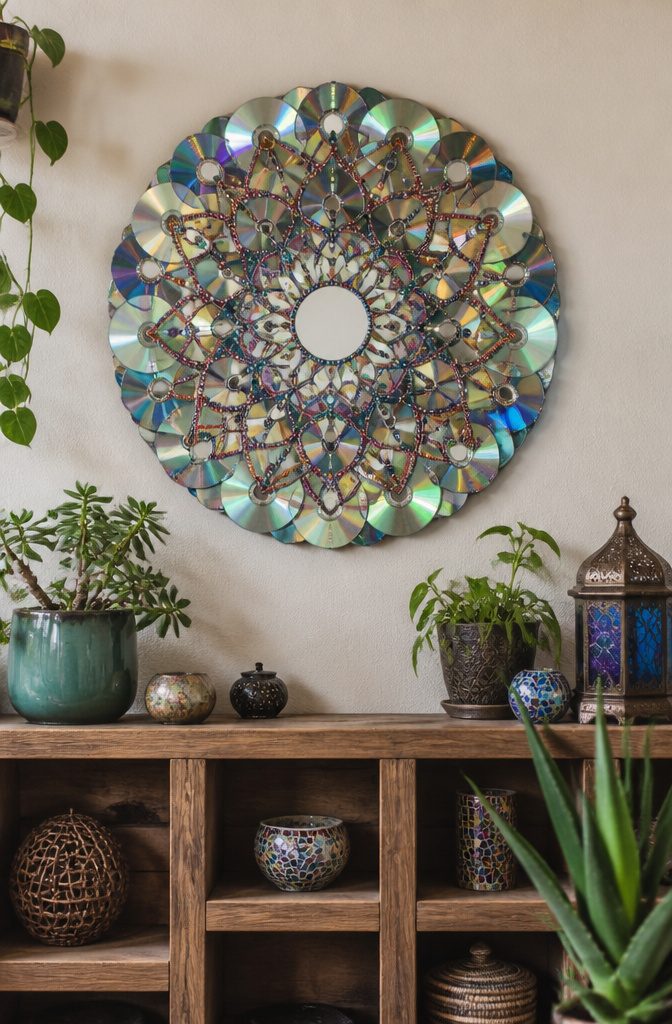
Six to 8 CDs make a mandala wall piece with real presence, and the mirrors are what separate it from a plain painted disc.
Small round mirrors glued at the focal points catch light from the room and throw it back, so the piece seems to shift as you walk past.
Sketch the design on cardstock first, trace it onto each CD, then build the pattern dot by dot with a skewer or dotting tool. Layered acrylic colors give the rhythm; the mirrors give the sparkle.
Mount everything on a foam board base with E6000, and let it dry overnight so the mirrors sit flat and stay put. I’d skip a hot glue shortcut here, since a mirror that slips off center ruins the symmetry.
3. Boho Hanging Sun Catcher

A CD sun catcher works because the disc’s mirrored surface does the heavy lifting.
Paint one side with white gesso, sketch a sunflower, color it in with acrylics, then glue a 1.5-inch round mirror in the center so the middle still flashes. Hot-glue faux roses to one side for the boho look.
For the movement, add gold chain drops cut to 6–8 inches, each finished with a crystal bead and attached with jump rings.
Hang the whole piece on fishing line. The line is nearly invisible, so the disc seems to float and turns slowly in a window or on a balcony, sending rainbows across the wall.
I’d pick chain and crystal over fabric scraps here. Chain swings with weight and the crystals catch light, while fabric mostly hangs limp.
4. Dot-Art CD Mandala
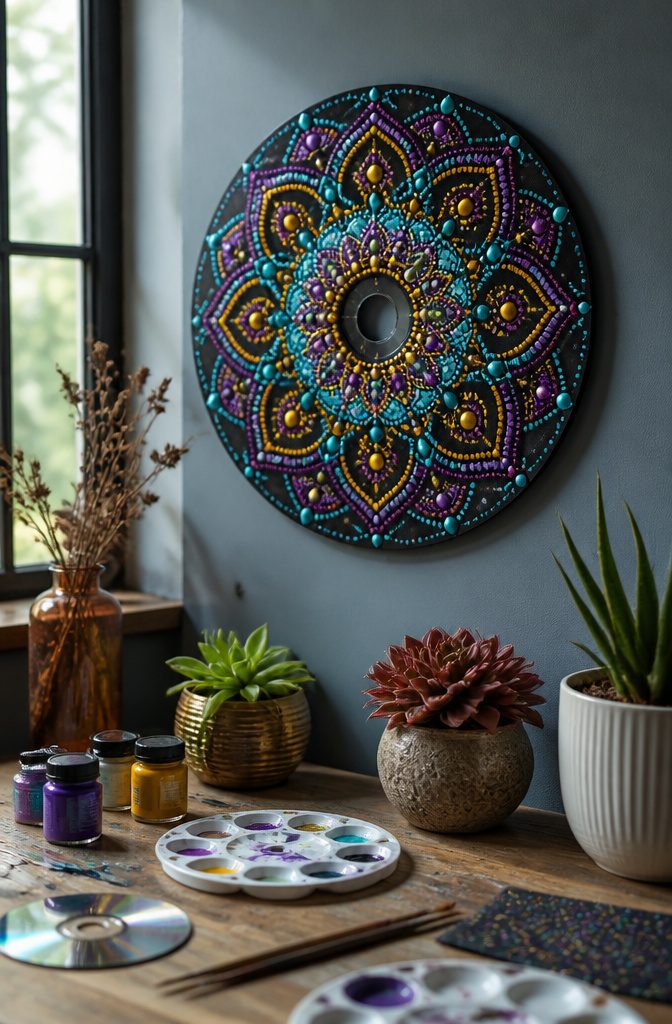
A matte black base is what makes this project work: acrylic dots in turquoise, purple, yellow and gold read as nearly glowing against it, and the contrast holds up on any wall color.
Paint the whole CD black first and let it dry fully.
Dot concentric circles outward from the center hole with a dotting tool, or use a cotton bud if that’s what’s in the drawer.
Keep the spacing even, and let each color set about 5 minutes before layering the next dot on top, or the paint smears into blobs. Gold works best as the final ring, where it catches light.
Finish with clear varnish. I’d skip it only if the CD will never be touched.
5. CD Fish Friends
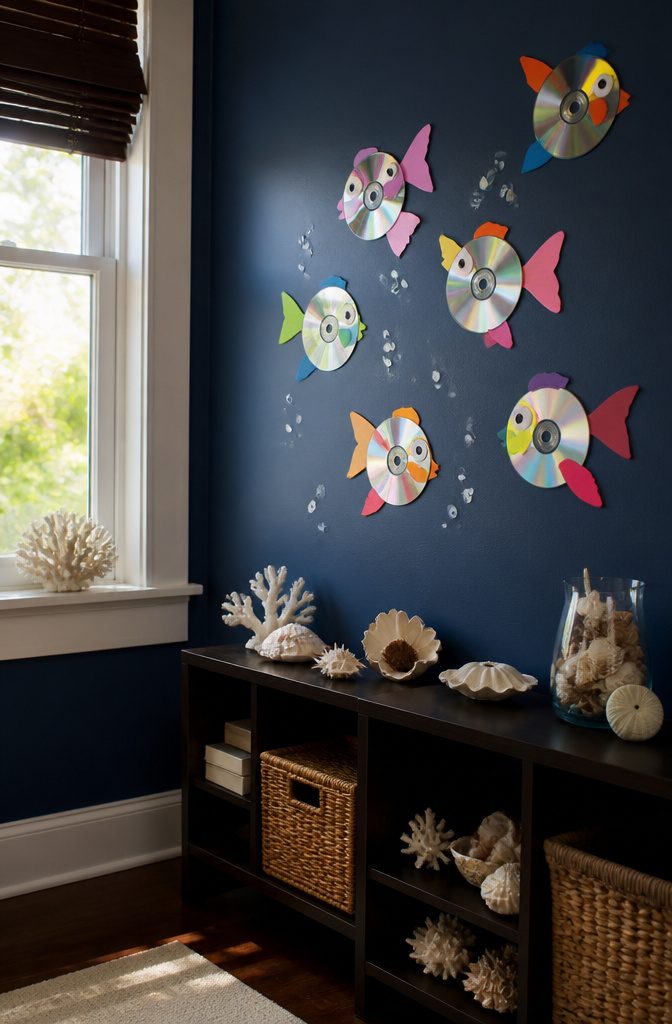
One CD makes one fish, and the shiny side does all the work as the scales, so keep it facing out. Glue every paper piece to the non-shiny side, letting the fins and tail peek out around the edge.
Colored cardstock holds a fold better than printer paper, which matters for the mouth: cut a 1×6-inch strip and fold it accordion-style so it pops forward off the disc.
A glue stick is enough for all of it, and that is the real reason this one suits young kids.
No drips, no drying wait, no cleanup beyond a wipe. Add googly eyes last, since they slide around if the glue underneath is still tacky.
I would skip a plain wall and pin the finished fish to blue chart paper. A school of five or six looks like an aquarium.
6. Button-Shell Turtle Art
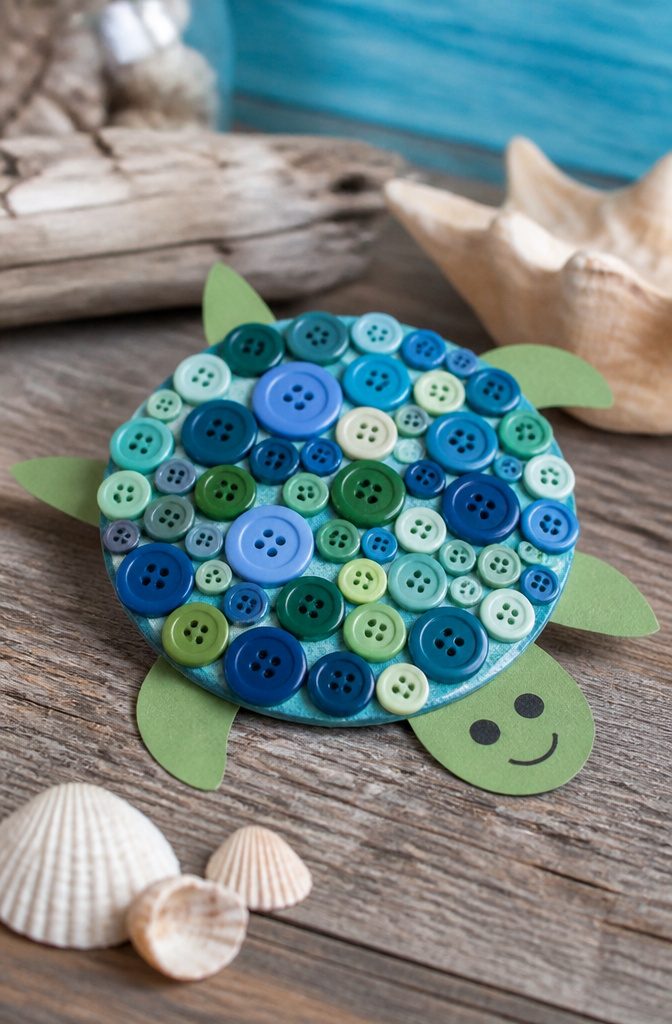
Start the shell from the center of the CD and work outward: glue assorted buttons onto the shiny side with tacky glue, packing them tight so no silver peeks through.
Mixed sizes fill gaps better than a matched set, and small buttons tuck in at the edge where the curve gets tight.
The head, four legs and tail come from green cardstock and glue to the back of the disc, so only a sliver shows around the rim.
Add googly eyes and draw the smile with a marker. Let it dry 30 minutes before you hang it, or the buttons slide.
Kids can handle nearly all of it. Sorting buttons by color is half the fun, and I’d hand the glue bottle to an adult for the youngest ones.
7. CD Animal Faces Playboard
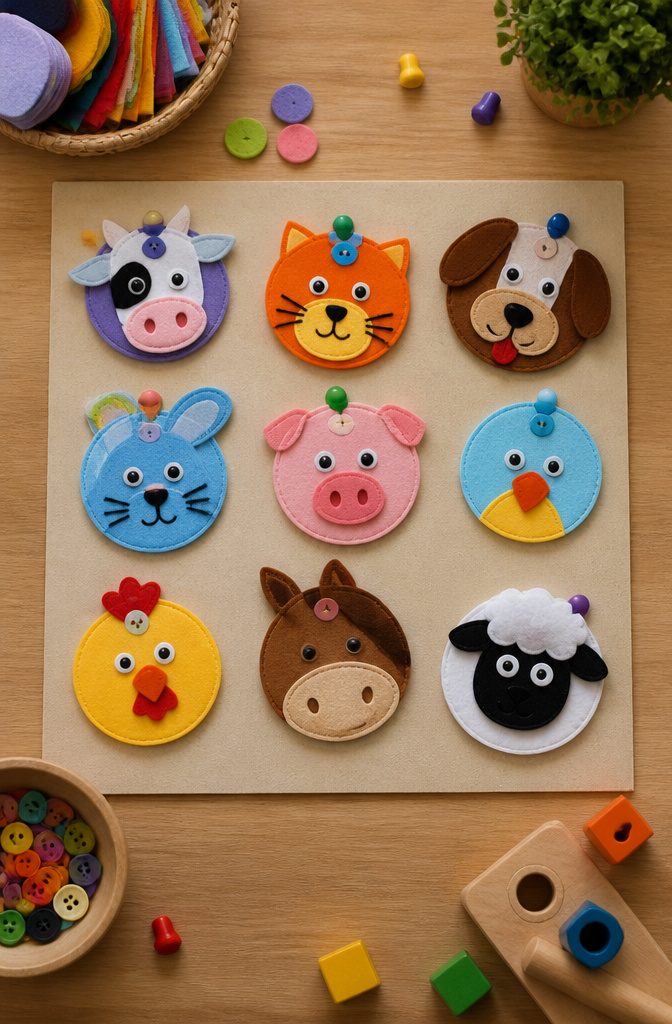
Felt or foam sheets are what turn a bare CD into a face.
Glue the sheet to the dull side, trace the disc first so the circle fits, then cut ears, noses and whiskers from scraps. Craft glue holds felt to the disc well, and foam dries in about 20 minutes.
Googly eyes and a fabric marker handle the details. Pom-pom noses add texture that flat cutouts lack, and I’d pick them over drawn noses every time.
For the playboard itself, mount each face with removable adhesive dots so kids can swap and rearrange the characters. Permanent glue on the wall would end the game.
8. Bear and Turkey Cuties
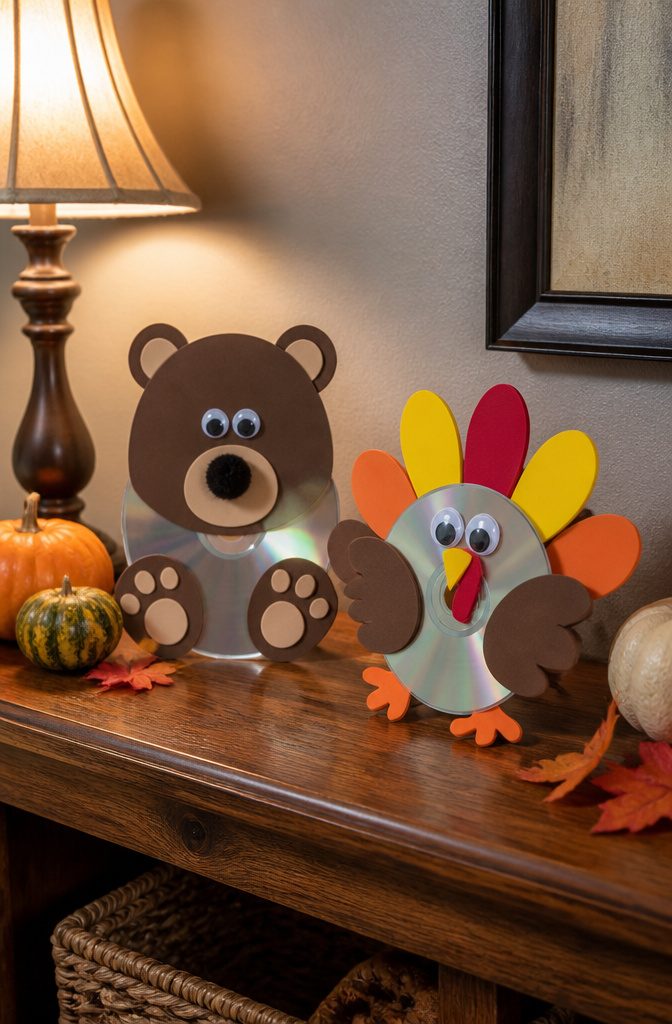
Foam sheets do the heavy lifting here. Trace the CD onto them for faces, then cut ears, beaks and feathers and glue everything to the dull, label side of the disc so the shimmer stays on show.
Bears need two round ears and a pom-pom nose; a turkey needs a beak and a fan of feathers behind the head, and I’d give the feathers a fuzzy texture with real feather bits or extra foam layers.
Marker details finish both faces, and the glue needs about 20 minutes to dry before you stand them up or hang them.
The turkey is the one I’d make first, since autumn colors in foam look warm against the silver.
The bear works any month, which makes it the better pick for a classroom shelf. The shine can crowd out small features, so keep the eyes bold.
9. Mosaic Elephant Desk Organizer
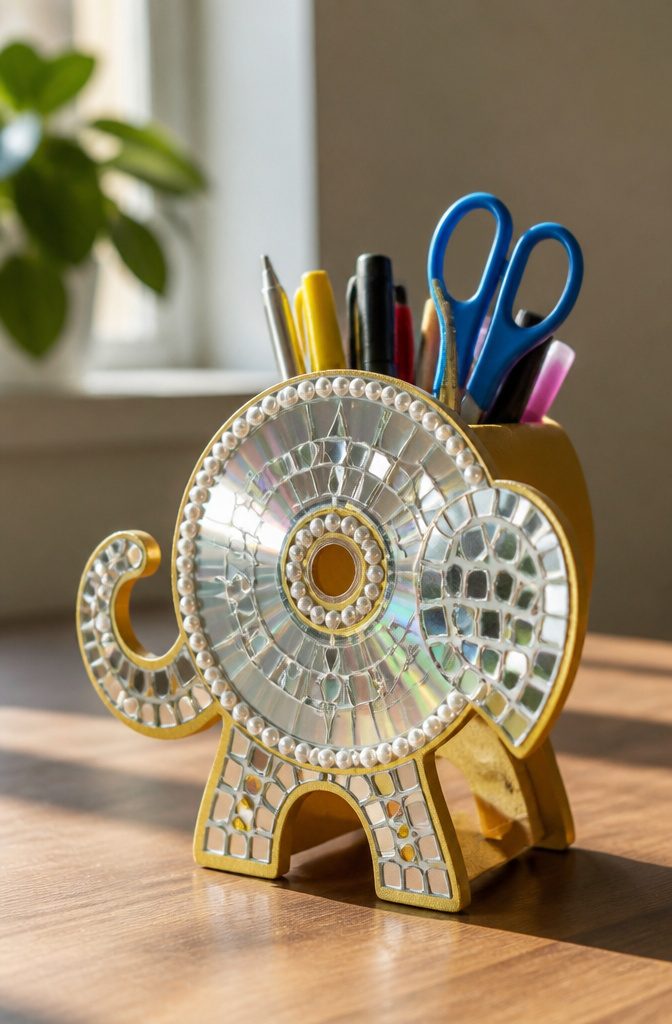
Cut the elephant from thick cardboard or MDF; MDF holds up better if the organizer will carry a full load of pens.
A whole CD sits at the center as the body, and mirror tiles and half-pearls fill in around it, all set with E6000. Paint the edges yellow first so no raw board shows between the shiny pieces.
For storage, slip a recycled tin behind the elephant. The tin does the real work, so the cutout can stay purely decorative.
If you’d rather break up whole discs into mosaic pieces, cut them with old scissors or tin snips and wear eye protection, because shards fly.
Leave small gaps between pieces, then fill them with black dimensional fabric paint to mimic grout.
Give it a full night to cure before it holds anything.
10. Quilling-Ring Tealight Halo
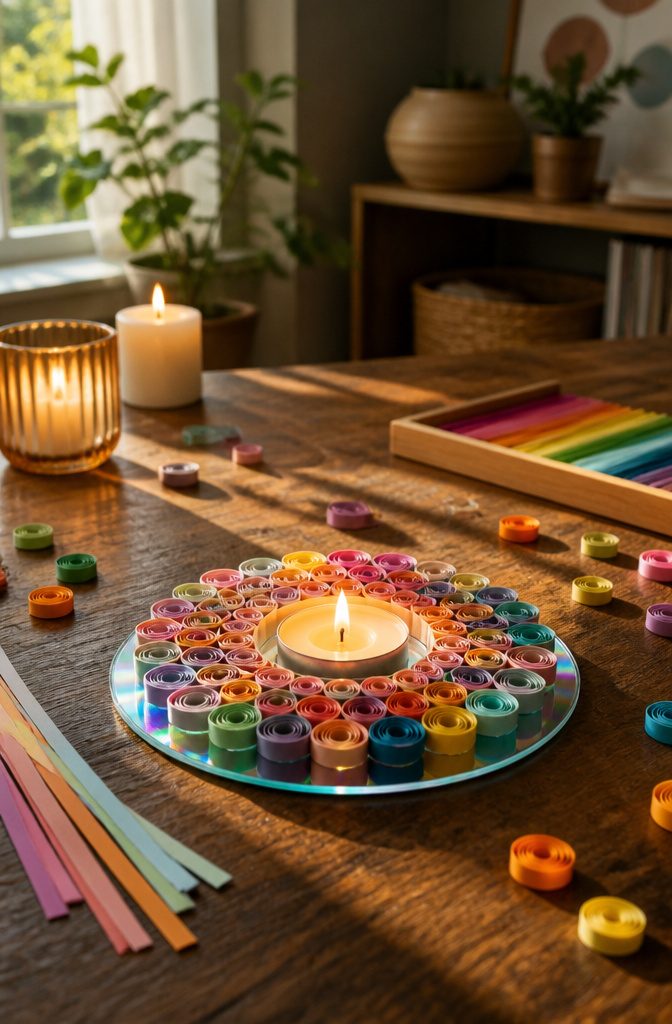
Quilled rings give a tealight halo its look: small paper coils, each about ¾ inch across, glued edge-on around the rim of the CD so the light spills through the gaps and bounces off the shiny disc underneath.
White glue holds the coils well, and I like tucking a metallic bead between every couple of rings for a little sparkle.
Center the tealight with hot glue, then let everything dry fully before the candle goes anywhere near it. For a piece that sits on a shelf or desk, I would skip real flame altogether and use a flame-free LED tealight.
Paper coils burn, and a halo built entirely from them has no business near a live wick. The glow looks nearly the same, and nobody has to watch it.
11. Modern Botanical Wall Art

Matte black is the base that makes this piece work: a CD painted in flat acrylic and left to dry fully before any detail goes on turns the shiny disc into a dark, quiet canvas.
Then the shine comes back on purpose. A textured gold ring around the center hole catches light, while a burnt orange half-sun and hand-painted white leaves stay soft and flat beside it.
Use a fine brush for the leaves. Simple pointed ovals read as modern, and a few are plenty; crowding the disc undoes the minimal look.
I’d finish with clear varnish, because it gives a soft sheen rather than a glossy coat and keeps the matte black from looking chalky. Earthy neutrals suit this best, so skip bright colors here.
12. Feathered Peacock Showpiece
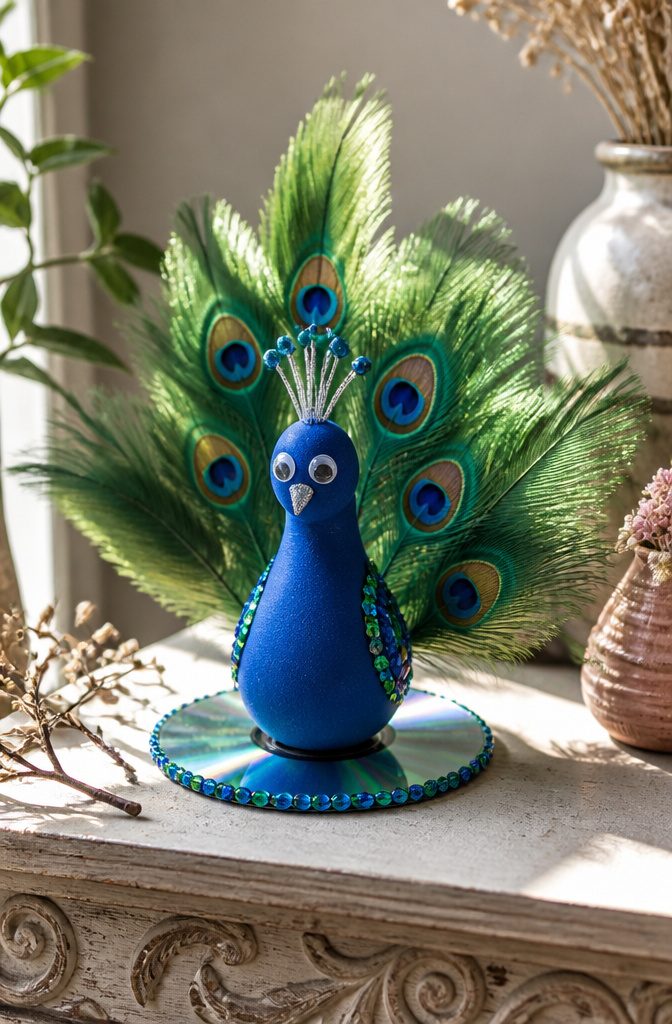
Green feathers go around the top half of the CD, and hot glue is the right adhesive here because it grabs the quills fast and fills the gap on the slick disc.
Cut the body from blue foam sheet, then add googly eyes and a small paper beak.
Dab sequins on the feather tips for sparkle. Mini clothespins make the legs, and they clip onto the foam so the bird stands up on a desk or shelf without a stand.
I like the CD base more than a plain cardboard circle, since the shiny surface flashes between the feathers whenever light shifts. Keep the feather layer even, or the glow gets lost.
13. Festive Hanging Trio
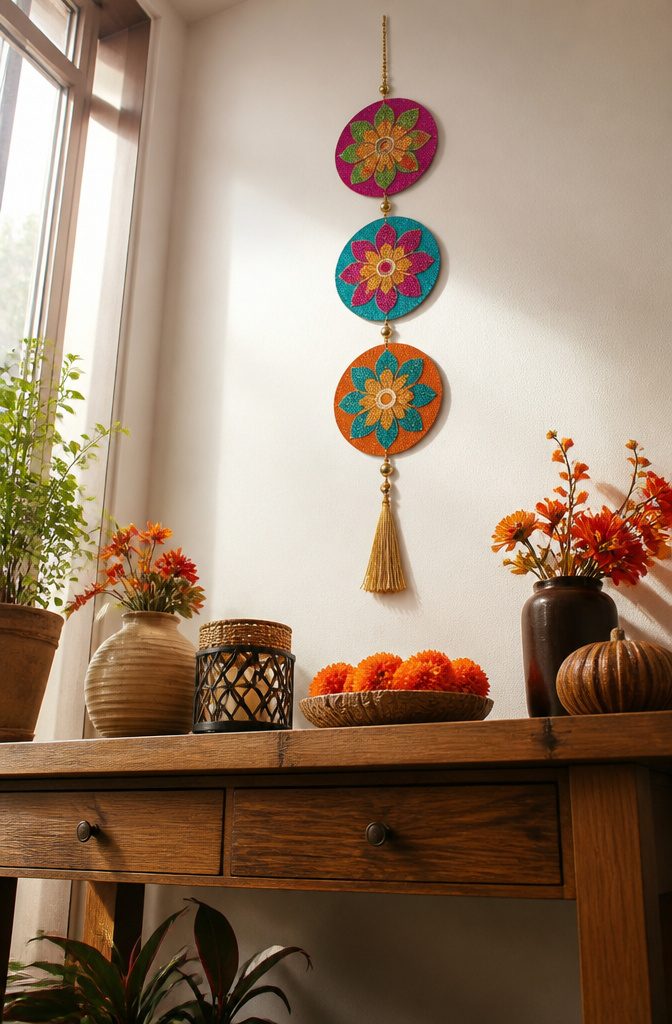
Three discs hung in a vertical line work best when the hanger is built in before any decoration goes on.
Thread ribbon through the center hole of each disc and glue it flat, then cover both faces with colored paper so the plastic disappears. Paint works too; red, white and pink make a good holiday set.
For the decorating, I like glitter foam petals glued in a radial pattern, with black bead chain around the edge and a stone or small flower at the center.
Cover both faces, since a hanging disc spins and shows its back.
Link the discs with ribbon or jump rings, and finish the bottom disc with a tassel.
Ribbon gives a softer drape; jump rings hold the spacing steady. Because discs stay rigid and don’t warp, the trio packs away flat each year.
14. Butterfly Mosaic CD Art
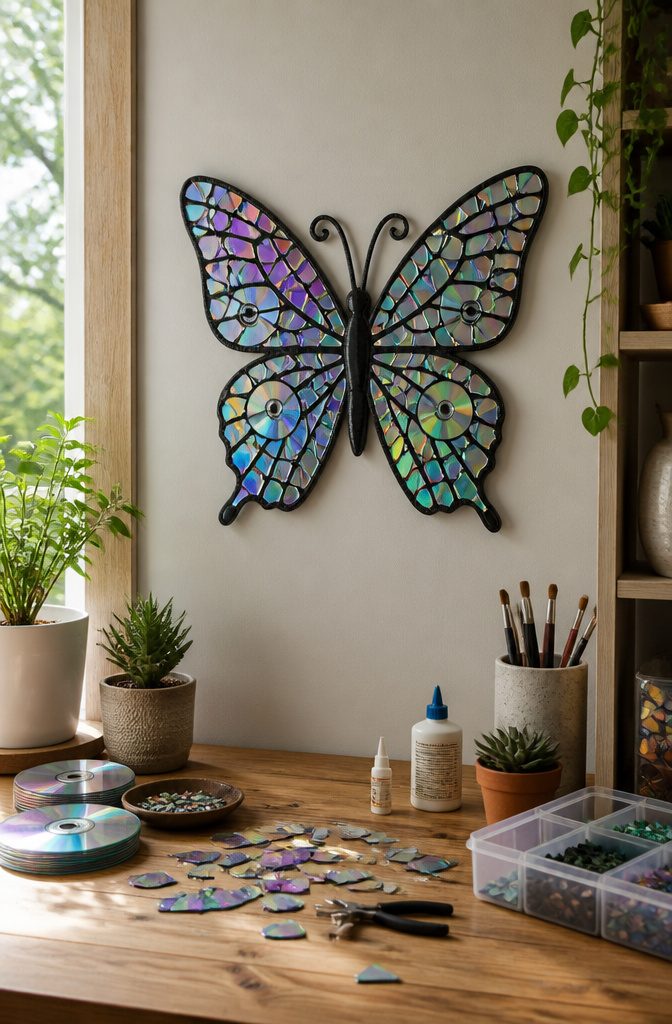
A butterfly mosaic starts with how you break the disc. Snip the CD with sturdy scissors held inside a plastic bag or a folded towel, because the reflective layer sheds sharp flecks that fly.
The pieces come out as irregular shards, and for wings I prefer them that way, since the odd angles catch light in different directions.
Draw the butterfly outline on cardboard or heavy paper first, then lay the shards out dry before any glue touches the surface.
Fill the upper wings with one color family and the lower wings with another. Leave a small gap of about the width of a pencil line between pieces so the backing shows through like grout.
Glue each shard down with craft glue, working from the body outward, and add a dark body and antennae last.
15. Moonlit Night CD Painting
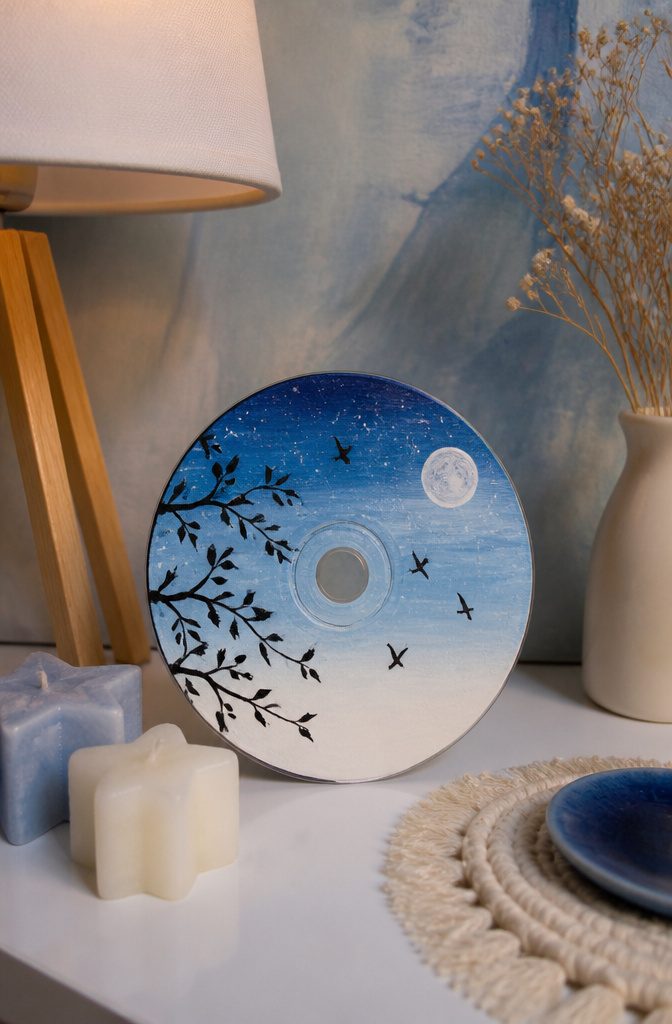
A sponge does the sky better than a brush. Dab white onto the disc first, then blend toward sky blue so the gradient fades without hard stripes.
The label side takes paint well, and a CD’s mirrored sheen gives the moon a faint glow if you leave a round patch thin.
Add the details once the sky is dry: black branches and a few flying birds with a thin brush, then tiny white dots for stars.
Silhouettes in black read best against the pale gradient, so keep the trees dark and simple.
Seal the finished disc once everything is dry.
I’d skip fussy detail in the branches, since a thin brush on a small round surface rewards a few confident strokes. It hangs or props up on a shelf equally well.
16. Koi Pond 3D CD Art
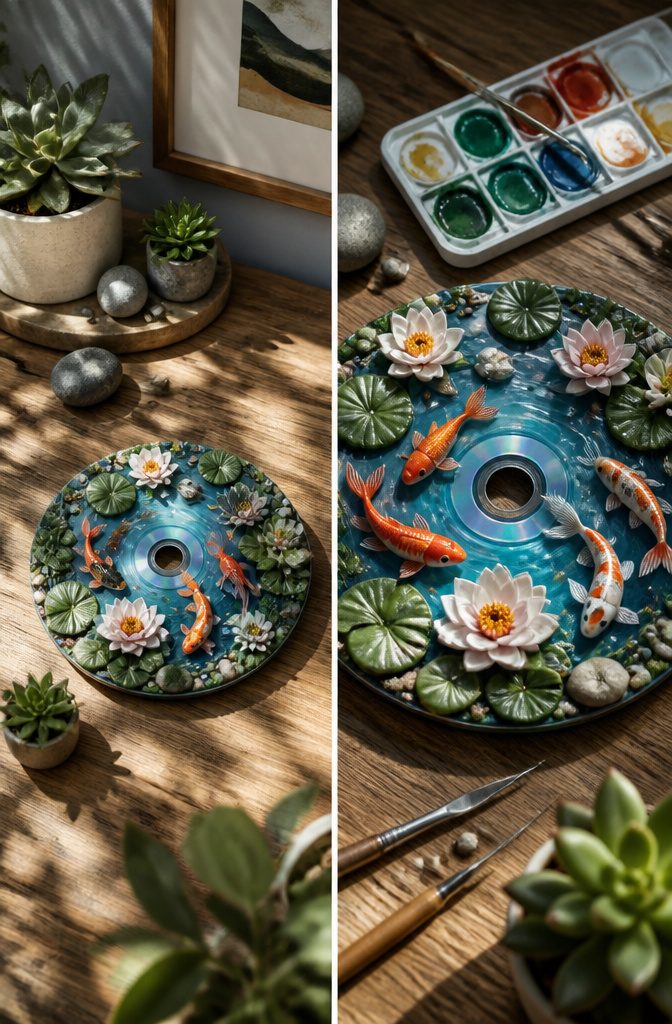
The CD itself is the pond: paint it blue, let it dry fully, and the flat disc already reads as still water. The depth comes from what you stack on top.
Sculpt the koi, lily pads, and flowers from air-dry clay, let them harden, then paint the details before anything touches the disc. Painting the pieces first is easier than working around raised clay with a small brush.
Glue the pieces down with hot glue, which grabs fast on clay and slick polycarbonate alike. Set the lily pads first and tuck the fish between them, so the koi look like they’re swimming under and around the leaves.
Finish with white paint strokes for ripples. They work best curved around the fish, like a wake.
17. Cartoon Friends CD Painting
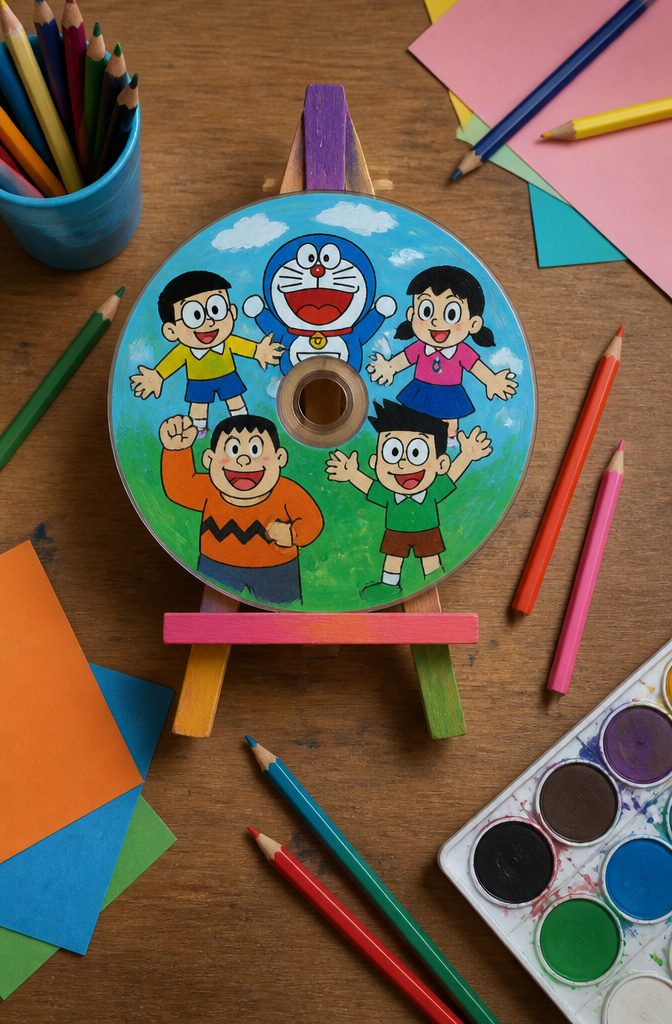
A thin base coat decides how this one turns out.
Two layers of yellow or a pastel acrylic, each brushed on lightly, cover the CD’s shiny surface better than one thick coat, and the paint has to dry completely before any pencil touches it.
Sketch the characters first, because pencil lines can be fixed and paint can’t.
Fine detail brushes handle the faces and small shapes. Once the colors are dry, trace the outlines with a black paint pen; that step is what gives the bold, cartoon look.
Kids can manage the painting, though I’d handle the outlining for younger ones, since a pen skips on tacky paint.
Finish with clear varnish or a spray sealer. It adds shine and keeps small hands from scratching the paint off a playroom piece or a gift.
18. Jewelry Box Using 6 CDs
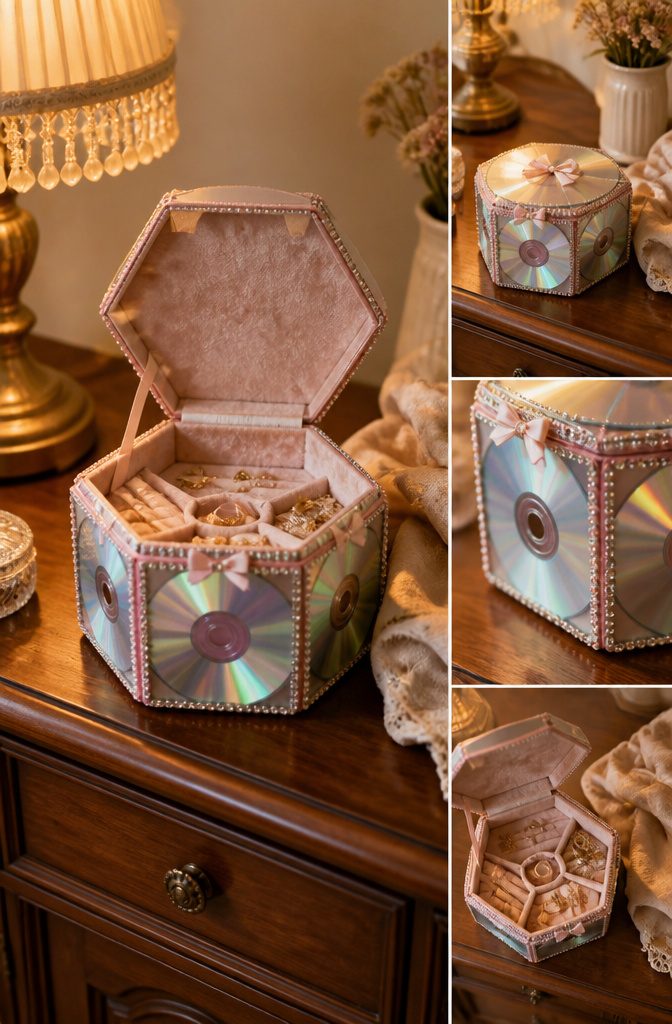
Six discs make a hexagonal-style box without any cutting: four stand upright as the sides, one forms the base, and one hinges on as the lid.
I hot glue the side discs edge to edge, then set that ring on the base disc. A lid taped or glued along a single edge with a strip of ribbon opens like a real jewelry box.
Hot glue holds the shiny sides far better than white craft glue, which slides on the coated surface. Cover the seams with ribbon or washi tape, since the gaps between round edges show and look rough.
For the finish, I like glued-on rhinestones or a layer of acrylic paint on the lid. The box is shallow, so it suits rings and earrings, not bracelets.
19. Moon and Star Hanging Decor
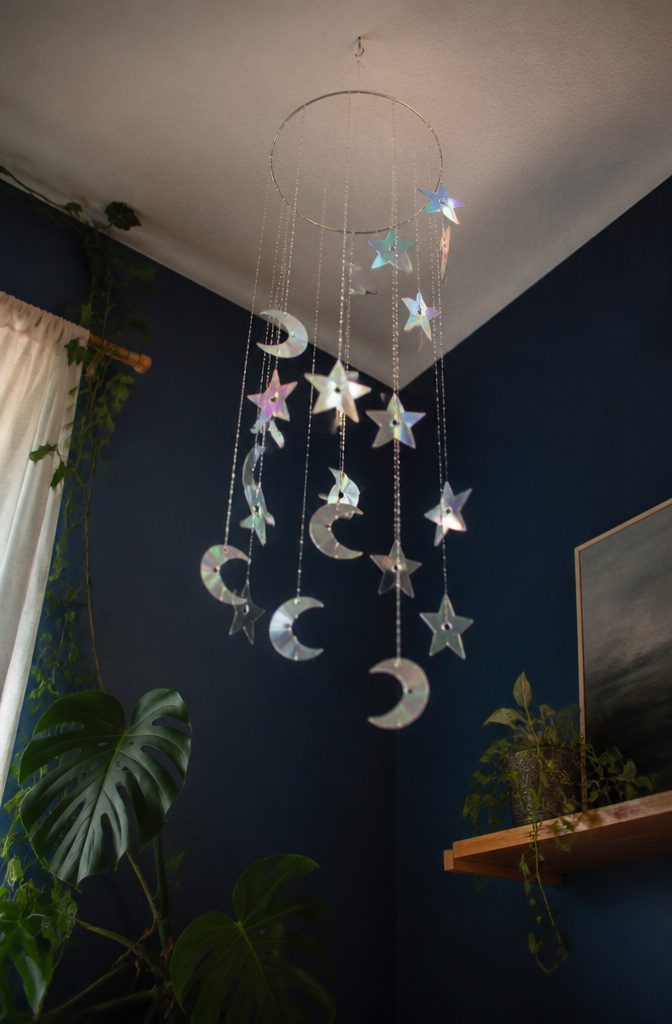
Ten old discs make a hanging mobile of stars and crescent moons, and heat is what keeps the cutting clean.
Trace two paper templates onto the discs, one star about an inch and a half square and one a shade larger. Warm the underside briefly with a lighter before you cut, because cold polycarbonate cracks.
You need 14 large stars, 10 small ones and 2 crescents, which I’d trace across a pair of overlapped discs. Glue each star back to back around a thread so both sides flash.
String silver beads an inch apart between pairs, then tie the strands to a large metal ring wrapped in silver lace. I’d keep the beads silver; anything louder competes with the discs.
20. Kaleidoscope Earrings
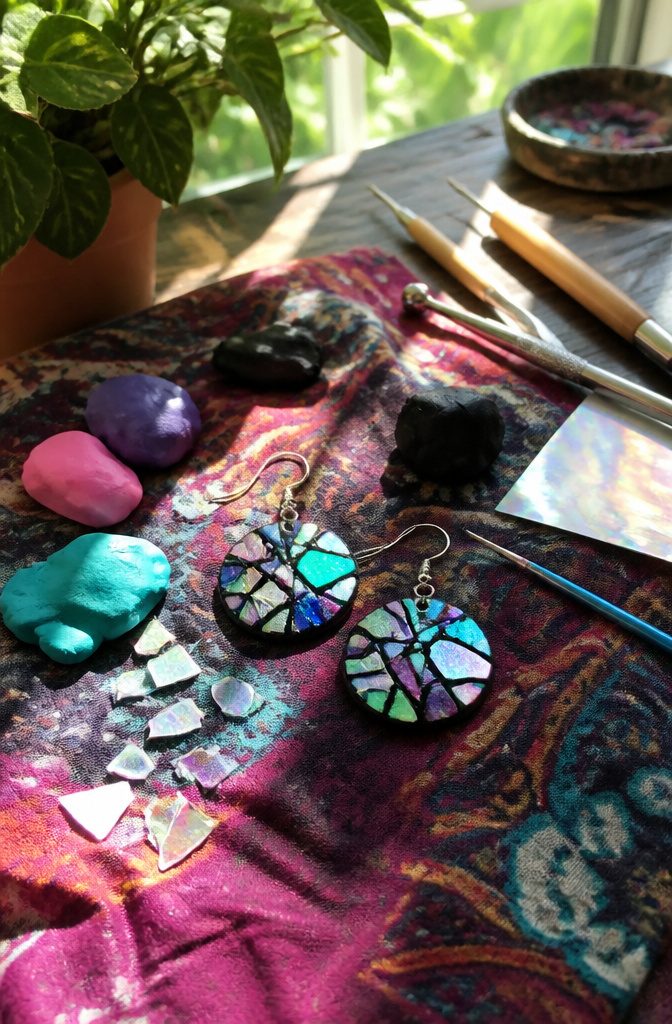
Cut the disc into big chunks first, then break those into small shards.
Snipping tiny pieces off a whole disc is slow and the plastic skitters; the two-step way takes about thirty minutes start to finish with a pair of flat earring bases.
Lay the shards on the base and arrange them before any glue goes down. Then hot glue them one at a time.
The heat melts a little of the silvery film at the edges, and I’d leave that alone, since the roughened rim plays nicely against the clear plastic. Trim anything truly sharp and wipe off the sticky residue at the end.
For a bolder build, press earring hooks into soft modeling clay discs, then set small CD triangles into the face with fabric glue. Let them dry fully before adding water based glass colors.
21. Curtain Pull Backs

A CD stops being a disc and becomes a ring here.
Trace a circle in the center with a can as your template, then cut it with a utility knife, going round several times instead of forcing through in one pass. Pop the middle out and toss it.
Wrap the ring in ribbon, overlapping each turn slightly and gluing the ends down.
Hot glue artificial flowers on top. A chopstick or a painted dowel pushed through the ring holds the gathered curtain against the wall.
I’d keep these for sheers and light fabrics only. A heavy curtain can bow or snap the plastic, and a cracked ring is hard to hide under ribbon.
22. Vintage Farmhouse Clock Faces
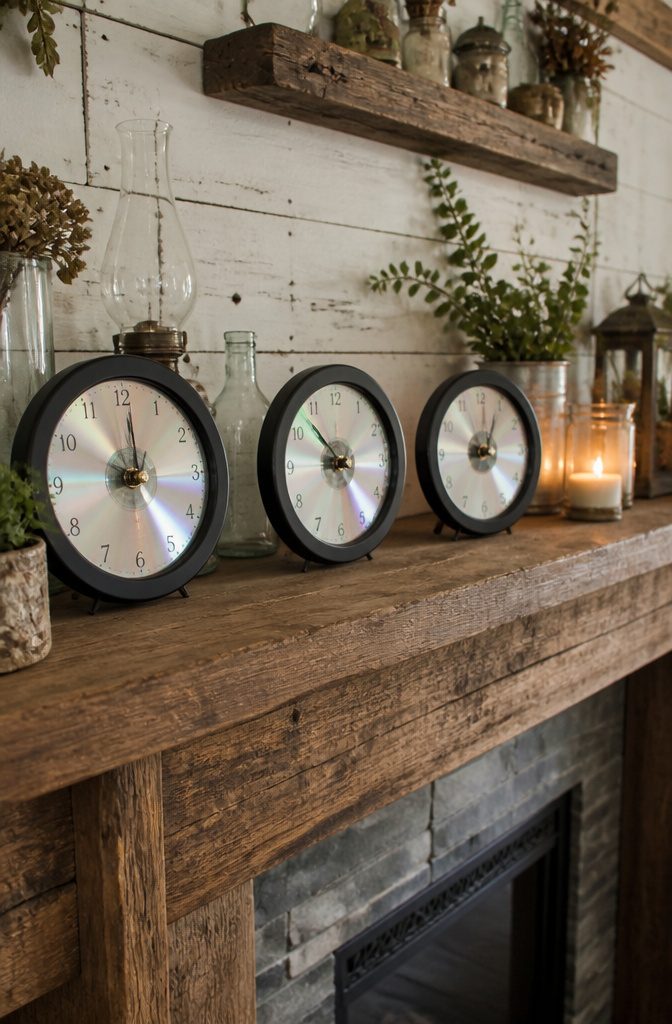
A painted black ring around the rim of each disc gives the clock face its dark border and hides the plastic edge completely, so the CD stops reading as a CD.
Print the faces on cardstock, cut them out carefully along the edge, and let the paint dry before anything gets glued down.
For the paper, I’d brush top coat over the disc and the back of the face, then lay it down from the center out to push the air bubbles clear. Seal the front with a second coat.
A short stemmed clock kit matters more than any paint choice, because a standard movement is built for a thicker surface than a compact disc. Painting the disc a flat dark color also works if you’d rather skip paper entirely.
23. Mosaic Resin Tray
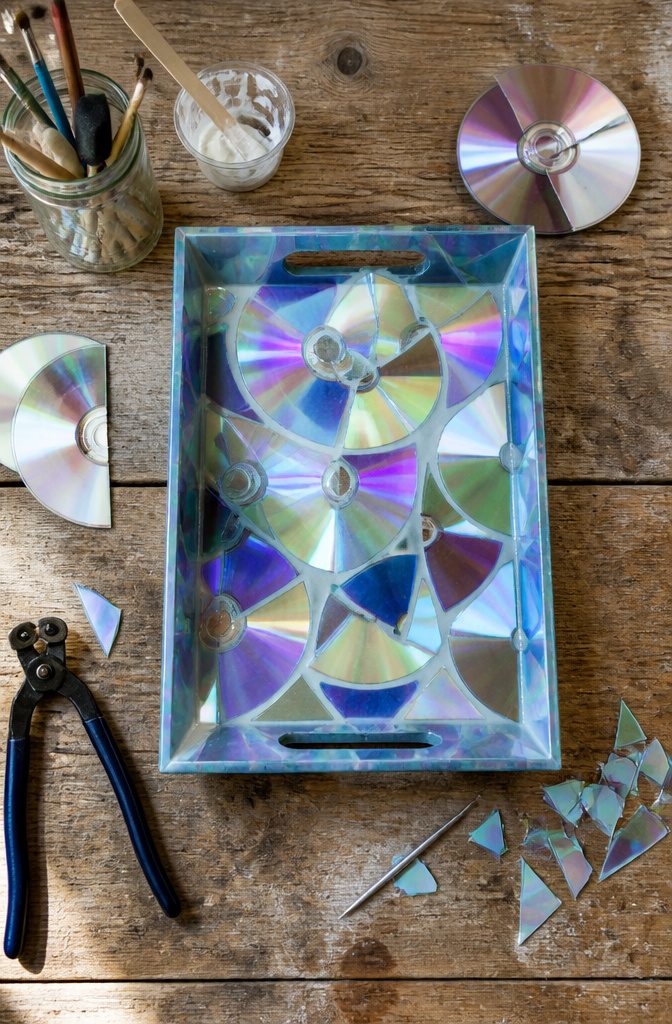
Nine discs covered an 18 by 8 inch tray, which is about three times what most people guess.
Cut each disc in half with strong scissors or clippers, then pry the two layers apart with your fingers. The metallic foil between them is the surface that throws real rainbow color.
Cut the halves into irregular tiles and keep them shiny side up. Fingerprints show, so handle the edges only.
Hot glue the tiles into the tray with even gaps, because the resin that fills those gaps reads as grout.
Mix 8 ounces of clear casting resin exactly to the packet directions, then pour. Pop the bubbles with a heat gun on low, and leave the tray alone for a full day.
24. CD Clock
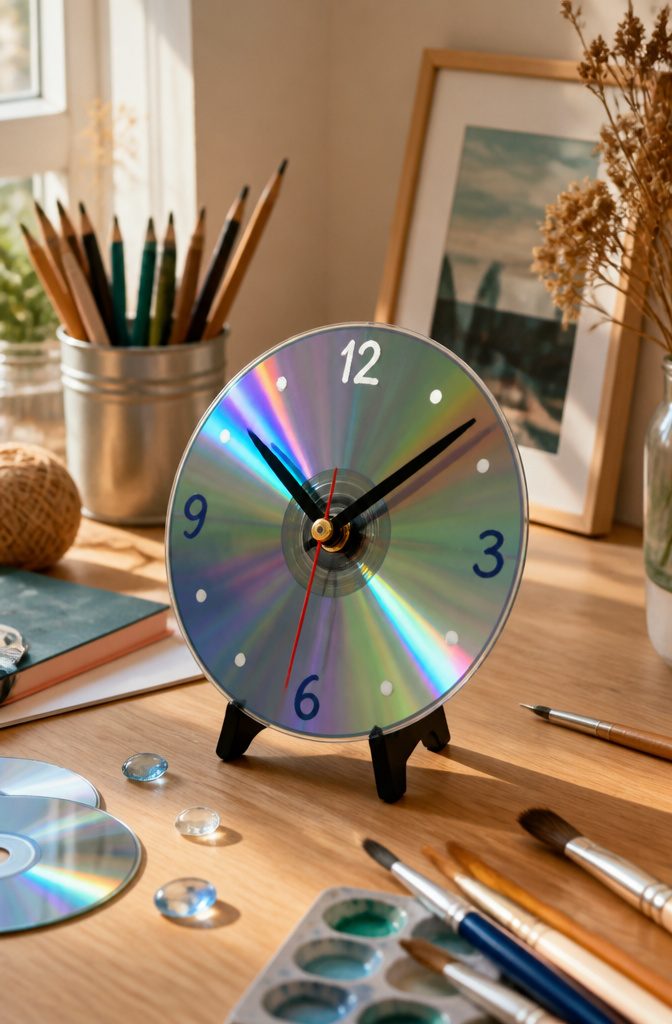
A CD already has a hole in the middle, but it is too wide for the shaft on most clock movements, so the clock kit’s own washer and nut will not hold it.
Cut a small disc of cardstock or craft foam, punch it to fit the shaft, and glue it to the back of the CD around the hole. That gives the nut something to grip.
Mount the movement from behind, then push the hands on from the front. Set the hour hand first, then the minute hand, and keep both clear of the disc surface so they do not scrape the numerals.
For numerals, I like adhesive stickers on the shiny side.
Paint pen also works, but it beads on the coating, so wipe the disc with rubbing alcohol first. Mark 12, 3, 6 and 9 before anything else; the rest fall into place.
25. Faux Mosaic Frames
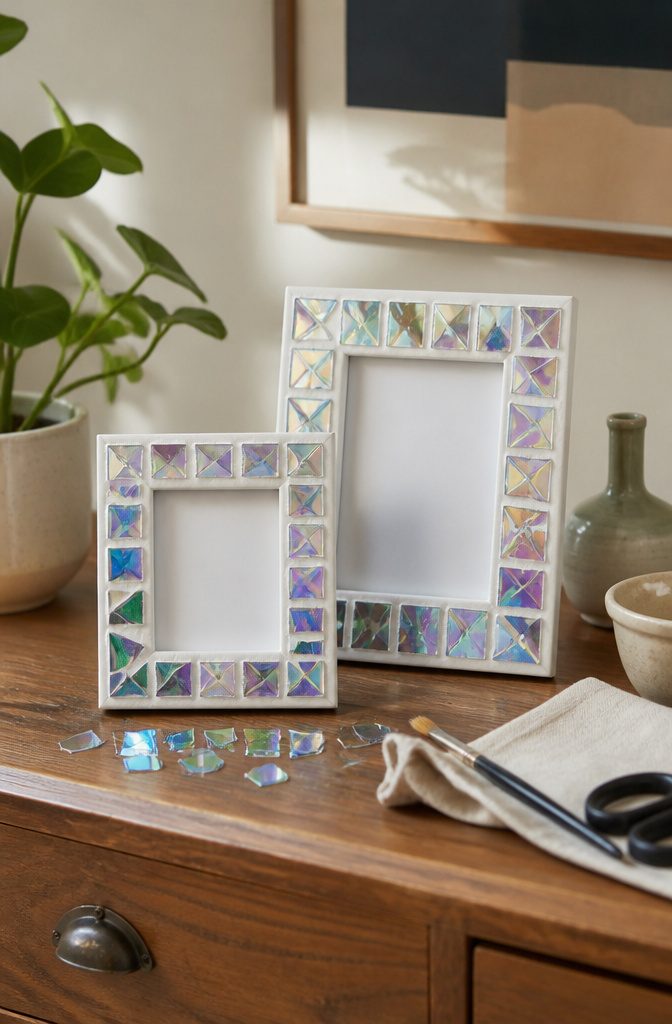
Two or three discs cover one small unfinished wood frame, so a pair of matching frames takes four or five.
Cut them into squares or triangles with old scissors, wear eye protection, and stop before the pieces get tiny: below a certain size the two layers of the disc start separating on their own, and the piece is ruined.
Paint the frame first and let it dry completely before any glue comes out, because the color underneath shows in every gap.
I would go with white. It pushes back against the faint purple cast the discs carry, which a dark base would only deepen.
Lay the pieces out dry on the frame to check you have enough, then glue them down one at a time.
Frequently Asked Questions
What can I make with old CDs?
Old CDs work for wall art, sun catchers, clocks, desk organizers, jewelry boxes, hanging mobiles, picture frames, curtain pull backs and even earrings.
The shiny surface throws rainbow light, so the best projects leave it showing or break it into mosaic pieces.
How do you cut CDs for crafts?
Warm the underside briefly with a lighter before cutting, because cold polycarbonate cracks. For mosaic pieces, snip with old scissors or tin snips held inside a plastic bag or folded towel, and wear eye protection since sharp flecks fly.
Cut the disc into big chunks first, then break those into smaller shards, and stop before the pieces get tiny, or the two layers start separating.
Are CD crafts kid-friendly?
Many are, especially the ones that use whole discs and no cutting.
The CD fish are made with a glue stick, which means no drips or drying wait, and the button turtle and felt animal faces are easy for kids too.
Keep cutting, hot glue, lit candles and outlining pens for adults or older kids.
What kind of paint sticks to CDs?
Apply two thin coats instead of one thick one, and let each dry completely.
Gesso gives a good base on the disc, and clear varnish or a spray sealer protects the finish from scratches. Paint pens can bead on the coating, so wipe the disc with rubbing alcohol first.





