The projects below range from a twenty-minute magnet set to a scrap-yarn blanket that spans weekends, and the deciding factor is drying time. Rushed plaster warps; damp cardboard molds. The half-inch plywood headboard that floats an inch off the wall for shadow depth costs under $15, but only if you already own a saw and the patience for three coats of poly.
1. Painted Pinecone Wreath

Pinecones collected from the yard flatten into tidy flower shapes with a pair of garden pruners. Chop the top and bottom off each cone, keeping the middle section with its open scales. A dull blade will make your hands sore fast, so sharpen or replace the pruner before starting. Arrange the flattened cones on a grapevine wreath form before breaking out the paint or the glue gun. This dry-fit step shows whether the foraged supply is enough to cover the surface or if another walk through the neighborhood is in order. Once the layout is settled, acrylic paint goes on quickly and hot glue fixes each piece in place. The finished wreath reads bright and cheerful against a door or above a mantel, and the whole project stays under the cost of a store-bought base.
2. Crocheted Pouf
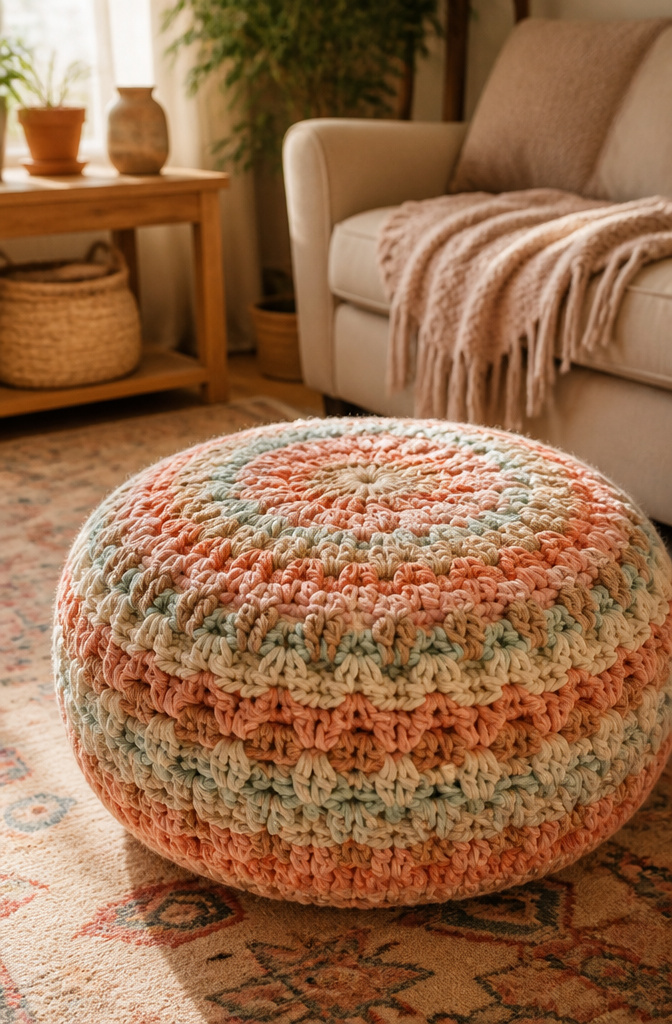
Soft chenille yarn turns up at thrift stores more often than you’d expect, and that single skein can carry a whole pouf for the price of a coffee. The construction is straightforward in theory: a magic circle, steady increases until the base is wide enough, a few plain rounds in the middle, then decreases that close the whole thing like a drawstring bag. Stuffing runs expensive, so old blankets and pillows from basement storage do the same work for nothing.
This one belongs on the list as inspiration rather than a single-day build. The rounds add up fast, and the hand fatigue from thick yarn is real. Start it on a weekend with a podcast running, and expect to come back to it across a few sessions.
3. DIY Magnets

A magnet kit plus your own art turns small scraps into fridge magnets in under an hour, which makes these an easy custom gift when you need something personal fast. The process is straightforward: stick the artwork to the magnet, then glue everything under the glass bead. The glue can blur or bubble the paper slightly, so the finished look is a little softer than the original piece. If that matters for the image you chose, skip the glass dome and attach the paper straight to the magnet instead. The flat version reads cleaner for detailed prints or text, while the domed one has the weight and depth that feels more like a store-bought keepsake. Either way, the kit handles the magnetic backing and adhesive, so the only real decision is which artwork to seal inside.
4. Crocheted Scrubbies

Cotton yarn scraps from finished projects pile up faster than most crocheters expect. Those partial skeins work into reusable dish scrubbies with almost no planning, and the finished pads replace the sponges that sit in landfills.
The construction mirrors a simple pouf: start with a magic circle, increase each round, then run a few rounds of plain single crochet before decreasing to close. For actual scrubbing power, the sources point to working in nylon netting fabric alongside the cotton. That netting gives the texture that cotton alone never quite achieves.
A basic mesh stitch also does the job if you prefer an open fabric that dries faster between uses. Either way, the project eats less than an afternoon and the scale means even a single partial skein yields two or three scrubbies. The nonstick-safe surface matters more than the pattern choice.
5. Crochet Scrap Blanket

A crochet scrap blanket turns the yarn you already own into something you actually want on the couch. Odd balls left from half-finished scarves and the single skeins you bought on sale collect in bins for years; held together with a strand of white, they become a patchwork where the random color blocking is the whole point. No two blankets look alike, and no new materials are required to start one.
The white yarn does the unifying work. One source held two strands together throughout, one colored and one white, then arranged the scraps in an ombre fade and finished with a white border. The result reads as intentional rather than leftover. Any stitch pattern works; the simpler ones let the color do the talking. My own attempt ran huge, big enough to fold in half for an armchair, but the scale is yours to control. Stop when it covers the lap or keep going until it drapes the bed. The only rule is using what you have.
6. Painted Candlesticks
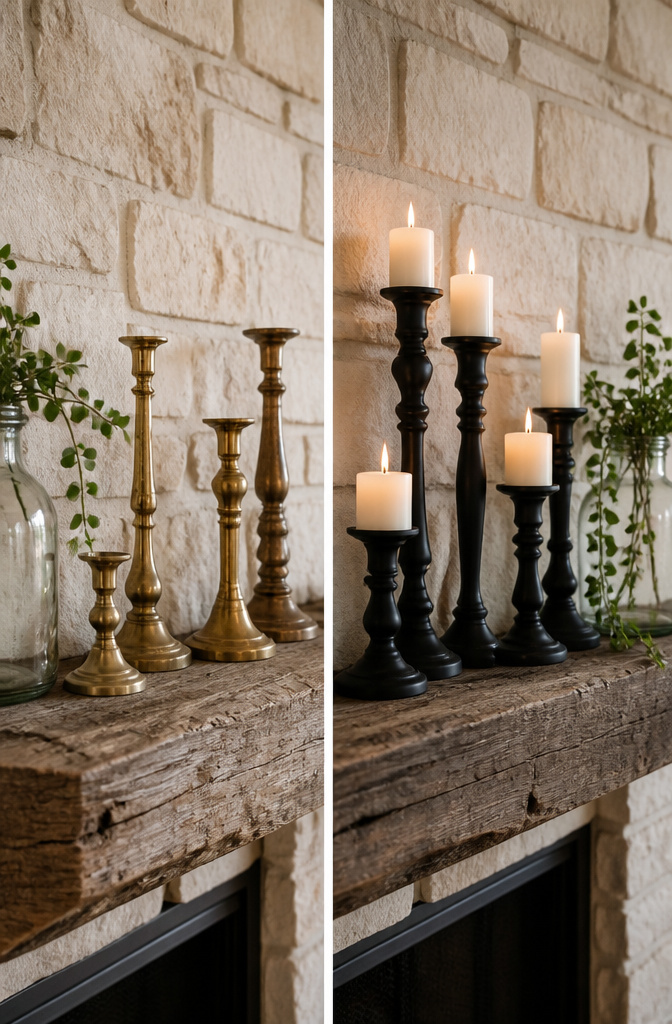
Painted candlesticks are the fastest way to turn thrift-store clutter into something that looks intentional. A mismatched brass pair and a single wooden column from three different estate sales become a coordinated set once they share the same color.
The work itself takes about half an hour; the rest is drying time. Sand any flaking finish first, then a thin coat of primer keeps metal from pushing oil through your paint. Spray paint works fastest, but a small brush and matte acrylic let you control where color stops if you want to leave the base metal showing at the foot.
A single color across different shapes reads as a collection, not an accident. I have seen people try to save time by skipping the primer on slick surfaces, and the paint chips off within weeks. The extra five minutes matters more than the color choice.
Black, deep green, and warm white are the shades that seem to survive changing trends. Pick one and commit; half a dozen candlesticks in the same tone look like you bought them together on purpose.
7. Macrame Flower Pot Hanger
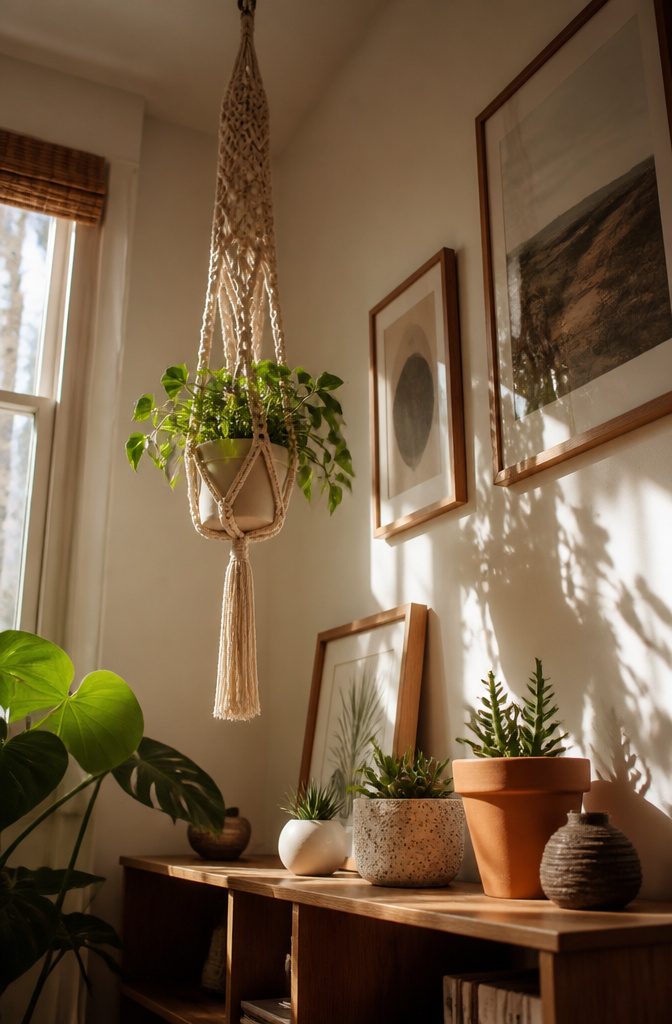
Macrame hangers were everywhere in the 1970s, and the look works again now in natural cotton or a dyed cord that matches your wall. The whole piece hangs from a single ring and uses just two knots: the square knot and the spiral knot.
The square knot is the backbone. Four cords hang down; you cross the outer left over the two center cords, then the outer right over that tail and under the centers, pulling tight. Reverse the direction for the second half so the knot lies flat rather than twisting. The spiral knot is the same first half repeated without reversing, so the twist stacks into a rope-like column down the cord.
I watched a few tutorials before the pattern clicked, and the mistake most people make is pulling the first square knot too loose. The gaps look sloppy and the pot sits uneven. Keep the tension firm and consistent from the first knot, checking that each new row sits level with the last. A six-strand hanger with four square-knot rows and two spiral accents takes about an afternoon. Cotton clothesline from the hardware store costs less than craft-store cord and holds the same weight.
8. Living Wreath

A living wreath starts with a wire form packed tight with sphagnum moss that stays damp enough to root in. Succulents work best for beginners because they forgive skipped waterings, though sheet moss fills gaps nicely if you want something greener faster. The first one I planned died in a week because I treated it like a dried arrangement: hung it in full afternoon sun and never touched it again. The moss had turned bone-dry and the roots never anchored.
Now I keep mine where it gets bright indirect light and mist it every few days, more often in winter when the heater runs. The plants slow-grow outward, so the silhouette softens over months. A neighbor’s three-year-old wreath looks nothing like the tight dome she started with; some stems trail, others bulk up where the light hits strongest. That change is the whole point. You will need to rotate it now and then so growth stays even, and every spring I pull out the stretched pieces and tuck in fresh cuttings from elsewhere in the house. The form itself lasts years if you do not let it dry to dust.
9. Cardboard Papier Mache

Shipping boxes flatten into something sculptural with little more than scissors and paste. I tear the cardboard against the grain so the corrugation shows, then cut strips that curve when dampened. Layer them over a crumpled-foil armature with flour-and-water paste, letting each coat dry until it sounds hollow when tapped, usually overnight. The second afternoon covers seams and adds surface detail; paint follows once the form is fully rigid. What starts as zero-cost packing waste ends up reading like studio ceramic from across the room. The catch is patience: rushing the second layer traps moisture and the piece warps or molds. Starting Friday after work and finishing Saturday evening fits the drying cycle naturally.
10. Cardboard Plaster Shelves

Cardboard looks flimsy until you glue enough layers together and let the stack dry under weight. Overnight compression turns a cereal box and shipping scraps into a block you can barely flex with both hands, which is what makes these small shelves possible. I cut the layered cardboard into simple bracket shapes, then sealed every exposed edge with white glue thinned slightly with water. That step matters more than the finish coat itself; raw cardboard edges drink in plaster or joint compound and stay rough no matter how many times you go back over them. A sealed edge, by contrast, takes two thin coats and sands smooth. I learned the timing the hard way: joint compound goes on in passes thin enough to let the layer underneath show through, and each pass needs to go fully gray before the next one. Thick coats crack as they shrink. Once the surface is smooth and the corners are crisp, any interior paint works over it, and the brackets screw into wall studs like anything sold in a store. The whole piece weighs less than a hardcover book, so a single stud and one drywall anchor hold it fine for small plants or a stack of mugs.
11. Painted Wooden Chairs
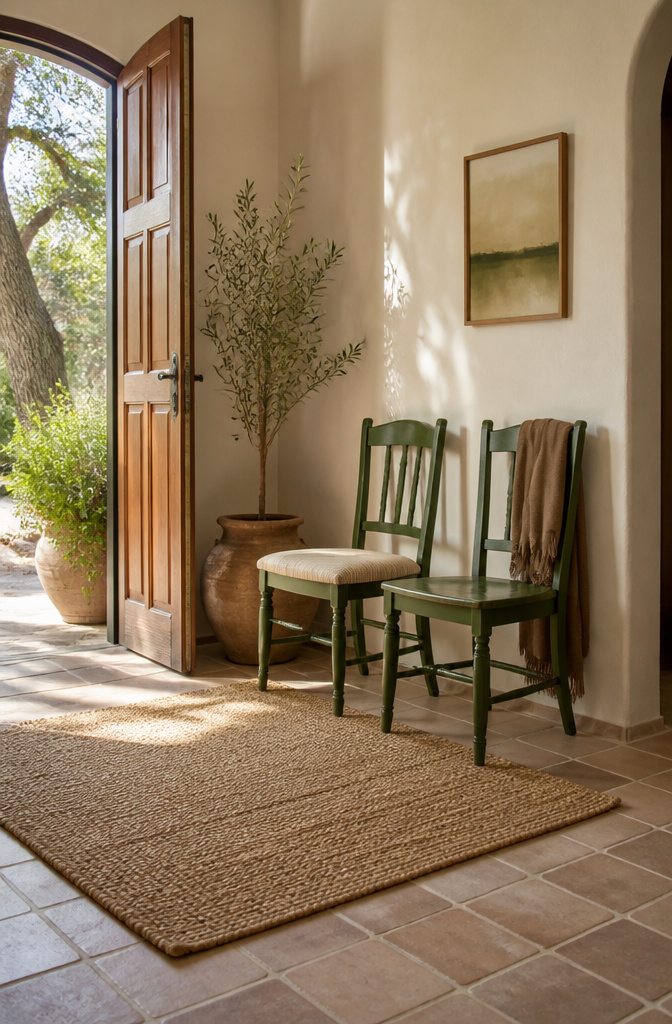
A wooden chair takes more Saturday afternoon than a candlestick, but the steps are the same. Sanding and priming are what keep the finish from chipping inside six months. One chair found at Goodwill came home painted already, and that saved hours. Stripping raw wood is the slower road, and only worth it if the shape is special. Either way, a base coat of spray paint goes on fast. Acrylic paint over that handles the decoration, flowers or otherwise, and a sealer at the end locks it in. The seat can stay as-is or get fresh fabric while the frame dries. Two chairs with new paint and recovered seats can shift a corner of a room for the cost of a takeout dinner.
12. DIY Rope Table Lamp
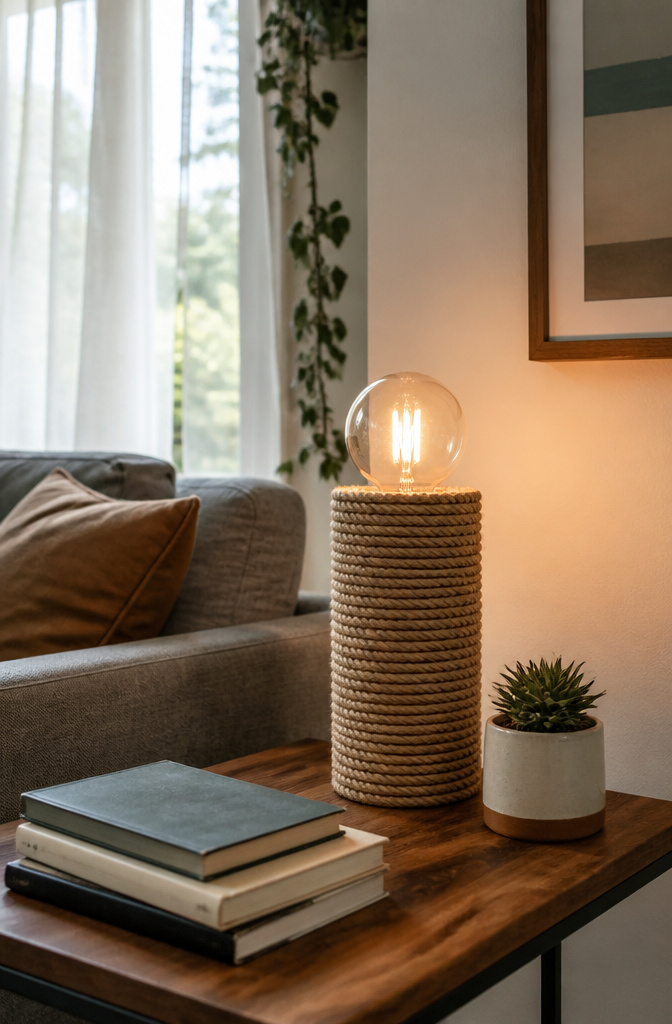
A cylinder lamp base wrapped in 3/4-inch-thick manila rope looks like something that came from a coastal shop rather than a Tuesday afternoon at the kitchen table. The rope gets glued in tight coils from bottom to top, each round pressed close to the last so no base shows through. Tuck both ends under neighboring strands so the finish stays clean and the raw cuts do not fray.
Hot glue works fast, but it also sets fast. A line too long ahead of you turns brittle before the rope lands on it, so work in six-inch sections and keep the coil snug as you go. The bottom end hides easiest under the first full wrap; the top end tucks under the final coil with a dab of glue on the rope underside, not the lamp itself, to avoid a visible blob.
Burlap tassels hung from the lamp’s neck add the little extra that makes guests ask where you bought it. The rope alone reads modern; the tassels push it toward farmhouse territory. Pick one mood or the other, because both together fight each other.
13. DIY Hanging Shelf
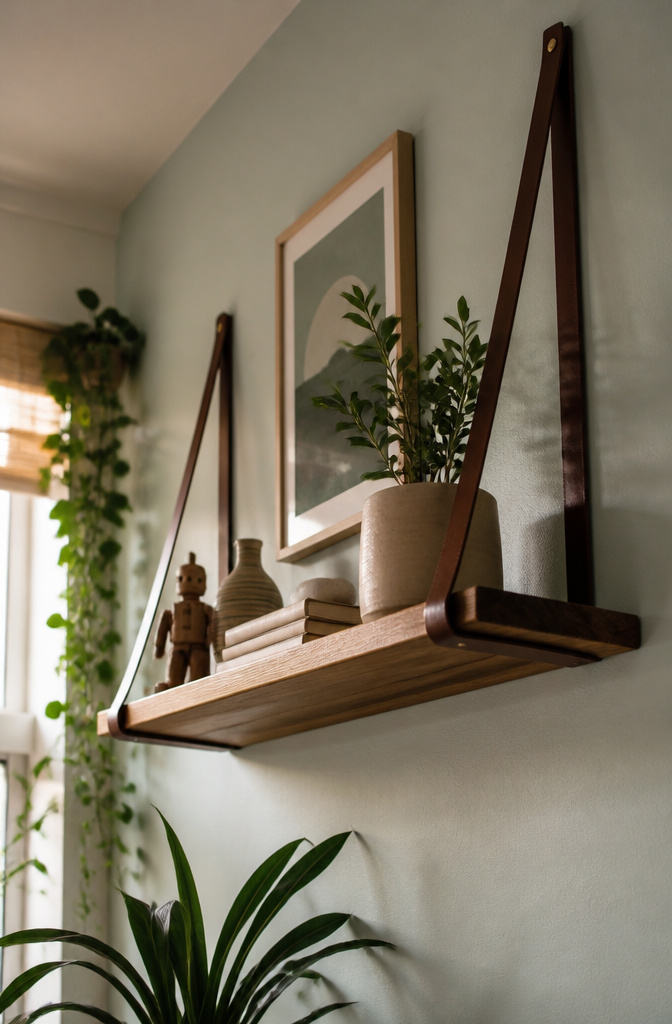
A bare wall only needs one thing to stop looking like a rental default. The hanging shelf that answers it is basic tools and two leather straps, nothing more.
The leather does real work here. It is the suspension and the finish both, so the strap choice is where the project lives or dies. Rope reads boathouse; leather reads deliberate. Width matters more than thickness, and the cut ends should angle to a point where they meet the wall hook, or the line goes sloppy.
I have seen versions where the shelf itself is a plain pine board, stained dark, and the contrast against tan leather is what makes the pairing worth doing. The board needs a hole at each corner, chamfered underneath so the strap knot sits flat. A simple overhand knot, cinched tight, holds more than anyone expects; the chamfer is what keeps the board from tilting when weight goes on it.
What stops most people is the wall attachment. Two hooks, level, into stud or solid anchor. The strap loops over each hook and hangs free. The shelf seats between the two hanging lengths, knotted to height. That is the whole mechanism, and it is why the tool list stays short: drill, level, knife for the strap ends if you burn-seal them.
The afternoon goes to measuring twice and cutting the leather once. The actual assembly is maybe twenty minutes after that.
14. DIY Fabric Covered Books

Fabric gives books a second life on a shelf. Old hardcovers with worn spines or mismatched colors become a single, quiet block of color once wrapped.
The method is gift-wrap logic. Lay the book open-faced on your fabric, cut a rectangle that folds around it like a present, and tuck the corners under the front cover without letting glue touch the book itself. That last part matters; the fabric sleeve slides off if you ever want the original cover back.
Thrift store books bought for this purpose tend to disappoint. The sizes vary just enough to break the clean line you’re after, and the paper quality shows through thin fabric. Books already on your shelf solve both problems: you know the dimensions, and the personal history justifies the effort.
Plain linen or cotton duck in one color reads as intentional; patterns fight each other across a row. I keep the spine side smooth and let the folded edge live at the back, where no one looks.
15. DIY Rustic End Table

A rustic end table from dimensional lumber sits heavy and warm in a room in a way store-bought veneer never manages. Two-by-fours and a couple of two-by-twos are enough to frame one up, and most hardware stores will cut the boards to length if you ask. Pocket hole joinery hides the screws cleanly, but butt joints with long screws driven straight through work fine too if you do not own a pocket hole jig. The drill does the real work either way.
The two-by-twos make good legs without looking bulky. Sand everything before assembly, especially the end grain, or the stain will turn blotchy in spots you will notice every time you walk past. I have built these with simple X-bracing between the legs and with a lower shelf added for baskets; both stay solid if the joints are square. A dark walnut stain and matte poly finish read as farmhouse without trying too hard. The whole build takes an afternoon once the wood is home, and the cost stays under what you would spend on a single night out.
16. DIY Headboard for Under $15

A single sheet of half-inch plywood, cut to width and hung like a picture frame, gives you a headboard for under $15 in raw material. Reclaimed fence boards work the same way if you have a source; the cost drops to hardware alone.
Paint or stain does the actual style work. A soft matte black against white walls reads modern. Weathered gray stain on rough-sawn boards reads farmhouse. The construction is identical either way: two heavy-duty D-ring hangers, wall anchors into studs, and the board floats an inch off the wall for shadow depth. That gap also hides an LED strip if you want reading light.
What I noticed comparing builds is that finish quality matters more than joinery. A $12 sheet with three coats of brush-on poly and sanded edges looks intentional. The same sheet with one rushed coat looks like exactly what it is. Spend the saved money on decent primer and a small foam roller. The roller leaves the smoother surface; brush marks catch bedroom light at odd angles.
For renters, this is the rare large piece that leaves no damage. Unhook it, spackle two holes, and the wall is bare again.
17. DIY Outdoor Bench
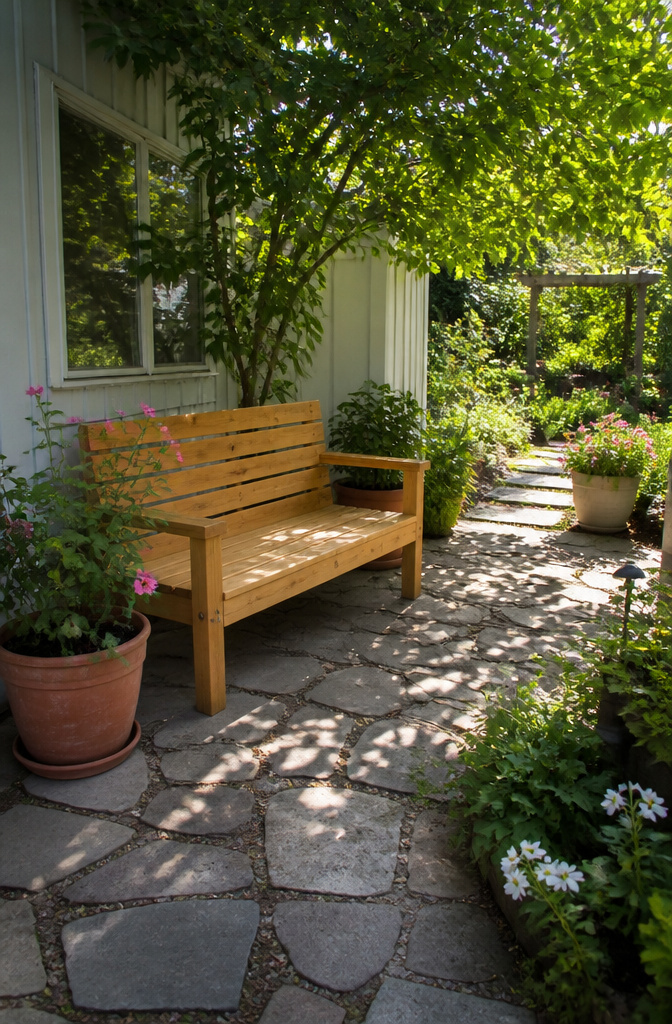
A bench built from 2x4s fills a patio corner faster than anything else on this list, though the lumber bill and the afternoon you spend on it will both be larger here than anywhere else. Standard construction lumber works fine. The cuts are straight, the joints are simple butt joints held with exterior-rated screws, and the whole thing goes together with a circular saw and a drill. Paint it or seal it with a penetrating oil finish; anything less and the grain will drink in water until the legs start to wobble. I have watched too many "temporary" outdoor pieces become permanent regrets because someone skipped that step. The finished bench sits two people comfortably, three if they like each other, and the weight means you build it where it lives rather than carry it through a doorway later.
18. DIY Wall Art in Clipboard Frames

Vintage clipboards make the fastest gallery wall I have tried. The board itself becomes the frame, and the metal clip holds prints or personal photography without glass, mats, or backing to fuss with. Swapping an image takes about three seconds, which means the display changes with the season or the mood.
For hanging, thread a piece of leather jewelry cord under the clip, knot it at the top, and push a pin through the knot into the wall. The whole display costs only the price of the clipboards and whatever prints you already have, since there are no frames to buy. The clipboards stay flat against the wall, so this works even in narrow hallways where protruding frames would catch shoulders. A clipboard with a worn finish reads as intentional vintage; a new one takes stain or paint if you want the set to match. Either way, the flexibility is the point: one wall, unlimited arrangements, zero re-framing.
19. DIY Cane Webbing Coasters

Cane webbing packs a lot of visual texture into something that costs almost nothing. A single yard of the material, sold by the foot at most hardware stores, yields about twelve coasters if you cut carefully around the weave pattern. That puts the raw material for each piece at well under a dollar, frame included.
The simplest build glues a square of cane to a cork base. Wood glue works, though the open weave soaks up more than you expect; press the sheet under a book for an hour so it dries flat. A sturdier version seats the cane inside a shallow wooden frame, the kind sold for embroidery hoops or custom-ordered from any lumber scrap wider than half an inch. The frame hides the ragged edges and gives the coaster enough weight that it does not stick to a damp glass.
A single yard makes a dozen coasters, so one purchase covers a full set with enough left over to replace the piece your cat shreds. The natural tone goes with almost anything, and the grid pattern catches light in a way that reads more expensive than it is.
20. DIY Tassel Throw Blanket
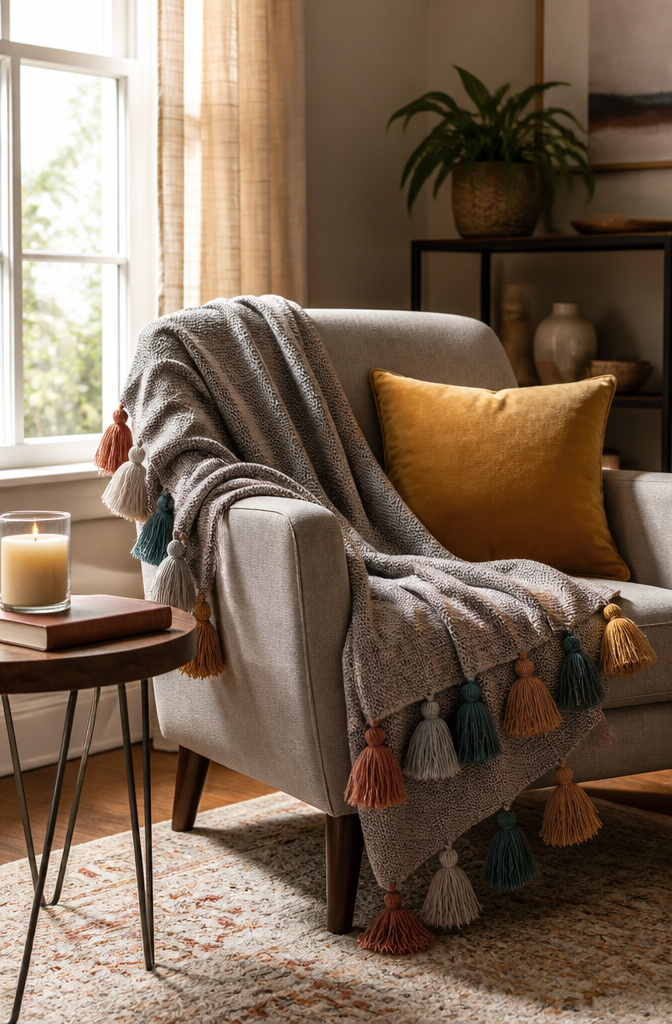
The fastest way to customize store-bought textiles is a line of yarn tassels stitched along the edges. I tried this on a plain gray throw last winter, and the whole project took under an hour. Matching the tassel yarn to colors already in the room ties the piece into existing decor without any repainting or reupholstering.
A standard tassel needs only cardboard cut to length, yarn wrapped around it, and a second tie to create the bulb. Sew them to the blanket edge at even spacing, about a hand-width apart, so they hang like fringe. Thicker yarn means fewer wraps for the same fullness; I used worsted weight and wrapped thirty times per tassel.
One of the easiest ways to make your home feel more personal is by adding handmade touches.
That applies here more literally than most projects: a blanket is already in your hands daily, and the tassels make it unmistakably yours. Skip the corners if you want a cleaner line, or double them up for weight. The yarn costs less than a coffee, and the blanket itself came ready-made.
Frequently Asked Questions
What are some easy DIY home decor ideas?
Painted pinecone wreaths, crocheted poufs, and DIY magnets all make simple weekend projects that cost less than store-bought alternatives. The article also covers painted candlesticks, macrame plant hangers, and fabric-covered books that refresh a room without new furniture. Most use materials you already have or can find at thrift stores.
How can I make my own home decor?
Start with recycled or foraged materials like cardboard shipping boxes, pinecones from the yard, or yarn scraps from old projects. The article shows how cardboard becomes sculptural papier mache or plaster shelves, while leftover cotton yarn turns into reusable scrubbies or a patchwork blanket. A single skein of thrifted chenille yarn can carry a whole pouf.
What materials do I need for DIY home decor?
Paint and primer handle most furniture refreshes, from candlesticks to wooden chairs. Fabric and leather work for book covers and hanging shelves. Wood, rope, and cane webbing build rustic tables, lamps, and coasters. Recycled cardboard and sphagnum moss support sculptural and living pieces. Basic tools like a drill, sandpaper, and a glue gun cover most of the list.