The projects below range from a single afternoon to a two-week wait, and the deciding factor is rarely skill. It is patience: whether you can let resin cure overnight or resist peeling washi tape too fast. A 16-inch paper lantern needs more cotton batting than you’d guess, while a 4×6 print grid costs a fifth what 5×7 does and often reads better in a small room.
1. Aesthetic Candle Molds

Silicone putty from the hardware drawer turns ordinary objects into candle molds faster than you’d expect. A pinecone, a vintage button, even a piece of coral: press the putty around it, wait for the cure, then peel. The original stays intact. Hot glue works in a pinch for simpler shapes, though you lose some surface detail and the mold won’t last past a few pours.
Paraffin or old candle stubs melt in a glass measuring cup set in simmering water. A chopstick rests across the rim to anchor the wick, which is just braided cotton string if you don’t have spooled wick on hand. The first pour usually has bubbles; tapping the mold sides helps, but a small flaw on the base is part of the look.
These candles read as found objects themselves. A cluster of three on a windowsill, each a different height and texture, gives the same warmth as boutique shelf decor at the cost of the wax and an afternoon. The mold material is the real investment, but one batch of putty outlasts dozens of projects.
2. Embroidery Kits
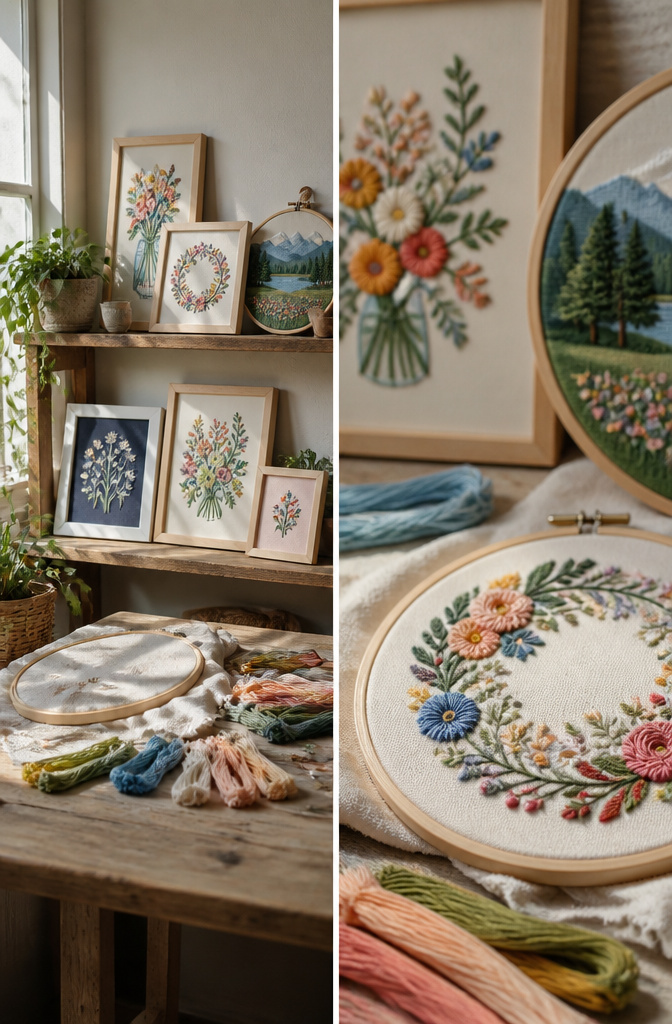
Pre-made embroidery kits bundle everything needed for a first piece of wall decor, which matters when the goal is finishing something today rather than hunting down supplies. A 6-inch hoop slides straight into standard 8×10 frames with a little matting, so the finished work looks intentional rather than temporary.
Thread count shows up differently than you’d expect on bedroom walls. Dense stitches read as solid color from across the room, while open-weave designs let the wall color through and feel lighter. The kit’s photo on the front rarely matches that distance view, so pick one where the stitched area itself looks interesting even when you squint.
A first piece runs longer than the box suggests. What the kit calls "two hours" usually stretches to an afternoon once you account for rethreading needles and squinting at the chart. The real mistake is pulling stitches too tight. Fabric warps into a drum shape inside the hoop, and that distortion stays after washing. Leave the weave relaxed enough to bounce slightly when you tap it, which means the hoop should feel barely snug when you tighten the screw. The finished piece stays flat, and the frame sits flush against the wall without that telltale gap.
3. Wall Collage Kits

Wall collage kits come in two sizes worth comparing. The 4×6 prints cost less at chain drugstores, usually running about twenty cents each, while 5×7 jumps closer to a dollar. For a bedroom grid covering six feet of wall, that gap adds up fast. I would pick 4×6 for tight budgets and smaller rooms, 5×7 only if the wall has nothing else competing for attention.
The backing choice matters more than the front. Blue tack leaves an oily film on painted drywall after about three months, especially in humid rooms, and scrubbing it off can lift the paint underneath. Masking-tape loops or removable poster strips hold longer and peel cleaner. If the paint is flat or older than a couple years, skip anything sticky and use a thin cork board or clip rail instead.
Grid layouts read as deliberate and calm; organic scatter reads as personal and busy. A grid needs a level and patience, but the payoff is a wall that looks finished in an afternoon. Scatter is faster to hang and easier to add to, though it tends toward chaos after the sixth or seventh print. My call: start with a loose grid, two inches between edges, and break it only for one or two accent pieces you want to spotlight.
4. Paint by Numbers

The standard 16×20 inch adult paint-by-numbers kit fills a wall spot above a desk or bed without looking like an afterthought. Most kits promise a single afternoon, but two afternoons is the honest timeline if you want the paint thick enough to bury the printed numbers. Light colors are the problem; the outlines ghost straight through a single thin coat, and by hour three your eyes are too tired to spot the bleed-through. A second pass after overnight drying fixes it, or you can roll on a uniform white base before you start and save yourself the headache.
Frames run about $15–$25 at big box stores for that size, which nearly doubles the project cost but also elevates it from dorm-room poster to something that reads as intentional art. Skip the glass; the canvas texture is half the point, and glare under a bedroom lamp ruins the flat color fields these kits are built around.
5. Printable Wall Decor

Printable wall art is the fastest way to fill a blank wall without waiting on shipping. I buy digital files, send them to my home printer or a drugstore kiosk, and have something on the wall within the hour. Most files come sized for 8.5×11 paper, which works fine for a small grid but looks skimpy alone. Scaling an 8.5×11 file up to 11×14 without buying the larger-size version usually leaves you with blurry edges and clipped borders. The seller almost always offers both; the extra dollar or two saves the whole print.
Home inkjets lay down color differently than store printers. My desk printer tends toward oversaturated reds and slightly muddy shadows, especially on basic copy paper. Glossy photo paper helps, but a $0.29 drugstore print on their machines usually looks more like what the designer intended. I stopped fighting it and now skip the home inkjet for anything that goes in a frame.
For sources, I have found good files at Creative Market, Design Bundles, Society6’s digital section, The Hungry JPEG, and even museum open-access collections like the Met and NGA. Each has a different feel: the museum files lean vintage and art-history, the marketplaces lean modern and scripted.
The mistake that still stings: I once taped a fresh print straight to the wall with regular Scotch tape. The adhesive grabbed the ink layer, not just the paper, and removing it peeled a ragged stripe right through the girl’s cheek. Now I use washi tape along the top edge or cheap poster putty in the corners. The print comes down clean, and I can swap it out when the season changes.
6. Resin Table Coasters

Two-part resin coasters with embedded objects look like something that took weeks, but the actual hands-on work fits in an afternoon. The catch is the 24-hour cure time; you pour one day and peel the next, so plan around that gap.
Silicone ice cube trays work better than you’d expect as molds. The flexible sides let you pop out a finished coaster without cracking an edge, and the geometric shapes read as intentional rather than improvised. I buy the ones with deep squares or hexagons, not the shallow bar-style cubes.
Bubbles ruin the look, and they come from mixing too fast. Stir the resin and hardener slowly, scraping the sides and bottom of your cup, then let it sit for five minutes before you pour. If you still see bubbles hovering near a pressed flower or a shell, a toothpick draws them to the surface.
Moving the tray before the resin turns hard is the mistake that costs you the piece. The liquid levels itself as it cures, so any tilt sets in permanently, and dust lands and sticks like it owns the place. I set my molds on a shelf I don’t need to touch and slide a cardboard box over them like a tent.
7. Punch Needle Rug Coasters

A punch needle coaster project fits the afternoon you have free. The fabric you stretch across the hoop matters more than most beginners expect. Monk’s cloth holds the loops evenly and does not sag after a few weeks of use, while burlap looks rustic but frays at the edges and the weave loosens where the mug sits. I would skip burlap for anything that actually gets used.
A four-inch square takes about ninety minutes once the rhythm clicks. The first one might run closer to two hours while you figure out how much yarn the needle grabs each time. The common mistake is pulling loops too high. They look plush and inviting, but loops taller than a quarter inch catch on the bottom of ceramic mugs and pull loose over time. Keep them short and dense for anything touching a drink.
The finished squares work on a desk or beside the bed, small enough to cluster in a set of four without cluttering the surface. Earth tones hide coffee drips; bright colors show the texture better. Both are valid calls depending on where you place them.
8. Floating LED Cloud Light

A 12-inch paper lantern makes a tighter cloud that looks more like a puff, while a 16-inch base spreads the batting thin enough to let light glow through the whole shape. Spray adhesive works fast, but the batting needs to be torn into pieces the size of your palm. Smaller shreds grip better; large sheets slide and dry in clumps that look like melted snow. Expect to go back over thin spots, especially near the bottom where the weight of the cotton pulls it loose.
The LED strip battery pack is the part that decides how you live with this thing. If the pack sits inside the lantern, the cloud hangs from the ceiling and the weight stays centered. If you want it on a shelf, the pack has to sit outside, which means cutting a small slit in the paper and feeding the strip through, then hiding the pack behind books or a plant. Incandescent bulbs will scorch the cotton and the paper; this is not a suggestion to use LEDs, it is the only way the project survives the night. The strips run cool, last hours on a few batteries, and the dimmer ones actually look more like real moonlight through cloud cover.
9. Spotify Album Plaque

Acrylic blocks or glass sheets make the cleanest desk plaques for Spotify codes. Perspex is the easiest to find in craft stores, and a white or black pen marker traces the printed template onto the surface.
The code itself comes from Spotify’s share menu. Open any song, hit the three dots, and the album cover art with the scannable waveform downloads ready to print. When someone points a phone camera at the finished plaque, the app reads the code and starts playing that exact track. No extra app needed.
Size splits the project in two. A 5×7 block sits neatly on a wooden stand without crowding a desk. An 8×10 reads easier from across the room but needs more shelf real estate. I would skip the wall-mount option unless the room already leans gallery-heavy; these look best where someone can actually scan them.
The glue mistake is real and visible. Regular adhesive under the print leaves bubbles that catch light and blur the code. Dry mounting or a very thin spray adhesive layer works cleaner. Black-markered edges hide any slight misalignment better than white does.
10. Clay Jewelry Tray

A clay jewelry tray looks polished on a dresser but the material choice matters more than the shape. Air-dry clay needs roughly 48 hours before you can paint it, and even then it stays fragile in humid bathrooms. Oven-bake options like Sculpey cure in about 30 minutes and harden into something that won’t soften again when the weather turns.
Rolling the clay freehand looks simple enough, yet the walls come out uneven every time. A couple of paint stirring sticks stacked as thickness guides keep the slab level so the base sits flat and the rim rises the same height all around.
The sealant step gets skipped too often. Acrylic paint alone stays porous, so a clear acrylic sealer brushed on after the paint dries keeps the surface from weeping in summer humidity and picking up dust. Two thin coats beat one thick one; the second goes on after the first is fully tack-free.
11. Aesthetic Mirrors

Cardboard sunburst frames are the upgrade that looks expensive but costs almost nothing. A cereal box cut into graduated strips, fanned around a thrift-store mirror and spray-painted, reads as vintage brass from five feet away. The paint that lands on the glass will not wipe off once it cures, so mask the surface with a sheet of newspaper and painter’s tape before you start. I learned that by ruining a ten-inch Goodwill find; the haze stayed through three kinds of cleaner.
Popsicle sticks arranged into a hexagon give the same geometric look for even less. Six sticks form the inner ring, twelve more fill the gaps, and white glue sets in twenty minutes. A flat frame this light hangs on two Command strips without drama. Anything over eight ounces, and the adhesive peels from the wall in a humid afternoon. The frame hits the floor, the mirror cracks, and the project ends in a broom. For heavier builds, a single nail or a screw anchor is the only safe bet.
12. Decorative CDs

Compact discs make surprisingly good tiny canvases for wall hangings. The plastic is slick, though, and acrylic paint will scrape right off if you forget to rough up the surface with fine sandpaper first. A quick pass with 220-grit gives the paint something to grip.
The label side is the one that actually holds paint. I learned the hard way that the shiny data side repels everything, water-based or not. Now I check twice before I start.
Nail polish builds interesting texture, raised and glassy, but chips off plastic within a week or two. For something that lasts, acrylic wins.
Fishing line disappears against a white wall and makes CDs look like they’re floating. Yarn is easier to knot and catches less light if you want the disc itself to stand out. I switch between them based on whether the wall is busy or bare.
13. Painted Plant Pots and Bottles

Leftover glass bottles and plain terra cotta pots sit on most shelves like they are waiting for something better. A coat of paint turns them into the something better, but the wrong paint choice has you redoing the work by summer.
Acrylic covers terra cotta fast and cleans up with water, yet it chips where you grip and flakes in humid corners. Spray paint bonds harder to glass and survives the bump of a watering can, so that is my pick for anything handled often. Terra cotta needs a sealer that keeps the walls breathable so roots do not suffocate; a full seal traps moisture and rots them from below. The real mistake is painting the inside at all. Water needs to evaporate through the clay, and a sealed interior turns the pot into a bucket with no drainage holes. I learned that after two painted pots sat soggy for a week while the uncoated one dried overnight.
Start after lunch. Spray the first coat outside, let it set while you sort brushes, then add a second coat and leave everything until evening. The sealer goes on the next morning. By afternoon you are planting or arranging, and the shelf looks finished.
14. Washi Tape Wall Art
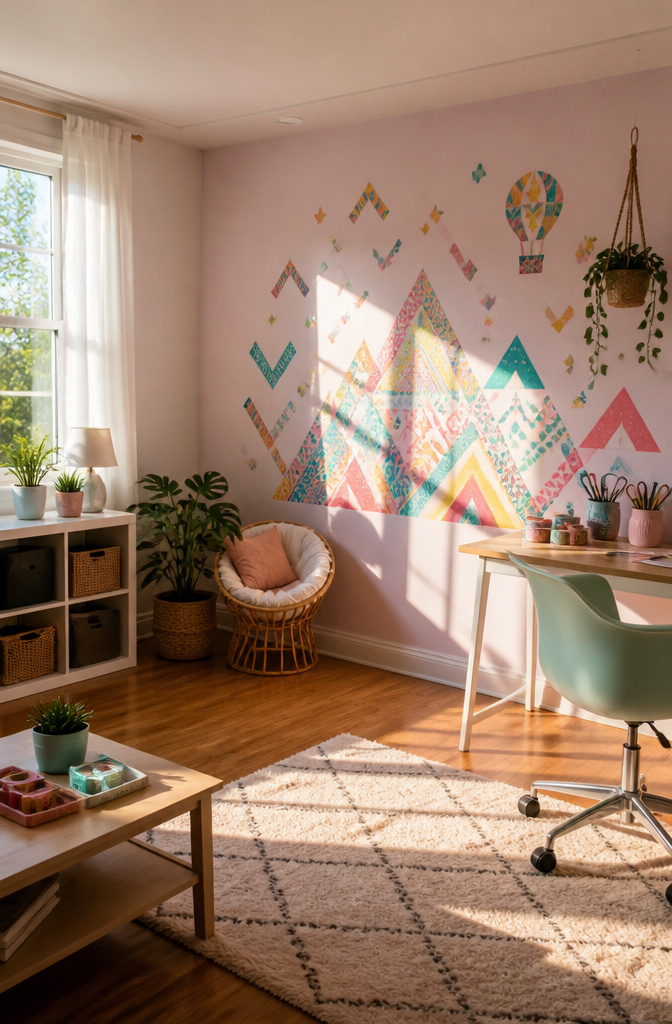
Washi tape sticks to walls without commitment, which makes it the first thing renters reach for. Three rolls at about three dollars each cover more wall than you’d guess; the strips layer cleanly for geometric patterns or build into simple illustrations like trees and mountains.
Six months in, the real question is residue. A small square of tape left on the paint behind a door, checked half a year later, told me what I needed: peel it back slowly at a low angle and the wall stays clean. Pull it fast like a bandage and you risk the finish.
My first attempt started at the ceiling. Gravity had its way by morning; every loop sagged into a droop. Work from the bottom up and each new strip supports the one below it. The tape is forgiving, but redoing a whole wall at 2 a.m. is not.
15. Macrame Wall Hanging

Three millimeter cord drapes like heavy ribbon and sits close to the wall; five millimeter throws bolder shadows but weighs more than a small nail will hold. For a first piece, 3mm cotton cord is the forgiving choice, and a simple pattern built from four basic knots, square, lark’s head, half hitch, and double half hitch, fills a Saturday afternoon rather than the twenty minutes some tutorials promise. The rhythm of tying, untying when the tension slips, and retying eats the clock in a way screen instructions rarely admit.
A straight dowel from the hardware bin costs next to nothing and gives a clean line. Driftwood looks more organic but the hunt for a piece with the right width and flat back can stretch across multiple beach trips. Either works; neither needs to be pretty on its own since the knots take center stage.
Cut your working cords at least three times the planned finished length, then add another half again for the fringe. The single most common beginner ruin is stopping the cut at double length, realizing too late that vertical knots consume cord faster than diagonal ones, and ending up with a stunted triangle that won’t reach the dowel a second time. Extra cord is cheap; restarting after midnight is not.
16. Painted Mason Jar Vases

Mason jars pick up paint differently depending on the route you take. Chalk paint grips the glass without primer, but the finish stays soft enough to scratch with a fingernail for days. Spray paint bonds harder from the start, yet it needs light sanding or the first chip lifts the whole coat like a sticker. For vases that actually hold water, oven curing at 350 degrees sets acrylic paint so it can handle a damp surface without turning tacky again. The timing matters: thirty minutes in a cool oven, then let the jars cool inside before you open the door, or thermal shock cracks the glass.
Rust on the rim taught me the inside cannot stay bare. Water splashes, condensation collects, and the metal lid threads corrode through the paint from underneath. A quick coat on the interior rim, even just the threads, stops it entirely. The whole project runs start to finish in one afternoon: wash and dry the jars, paint two thin coats with dry time between, cure while you clean brushes, and fill with grocery-store tulips by evening.
17. Floating Wooden Shelves

Wall storage only looks effortless when the hardware disappears. A 12-inch shelf depth holds actual books; 6 inches is display-only territory, and mixing those up leaves you with paperbacks in a pile on the floor.
The stud finder matters more than the wood choice. Drywall alone, even with toggle bolts, taps out around 20 pounds. That sounds like plenty until you stack three hardcovers and a small plant. Hidden bracket systems look cleaner but need that solid lumber behind the plaster.
My first attempt skipped the level entirely. Eyeballing it from the floor felt close enough, and for two days the shelf sat there looking fine. Then a pen rolled, then a chapstick, and I realized the whole thing sloped downhill like a gutter. Quarter-inch over four feet is enough to send everything sliding.
18. Canvas Painting

A single 8×10 or 11×14 canvas occupies the awkward gap above a desk or beside a mirror better than any store print sized to match everybody’s wall. The 8×10 fits tight spots and costs less to experiment on; the 11×14 gives brushstrokes room to breathe and reads as intentional from across the room. Either one sits in a standard frame if the raw canvas edge bothers you.
One tube each of blue, yellow, red, white, and black opens every mixed color you need. The white gets used fastest, so squeeze it with a stingier hand on the others. Gesso matters only if the factory canvas weave feels too slick; a thin coat with a wide brush adds tooth and hides the grid of threads. Skip the gesso and the paint slides, especially in watery first layers.
The real ruin is impatience between coats. Acrylic skin dries to the touch in minutes, but the layer underneath stays wet enough to lift. Paint over it too soon and the color below muddies the new one, or worse, rolls up in pale pills across your surface. I give each layer a full hour now, sometimes longer if the paint went on thick, because the twenty minutes I once trusted cost me a whole evening’s work.
19. Pressed Flower Frames

Pressed flowers keep their color best when they dry slowly between sheets of plain paper inside a heavy book, which takes about two weeks. The microwave method speeds that up to minutes, but the heat can set browning in more delicate petals if the power sits too high.
The real problem comes after the press. Glass pressed directly against a flower traps any lingering moisture, which steams the petal brown inside the frame within days. A double-mat fixes this by lifting the glass away from the surface. The top mat holds the flower in place with a window cut slightly smaller than the bloom, and a second mat underneath adds depth so the petals cast a soft shadow against the backing.
I pressed a whole bouquet once, stems and leaves included, and the thick bundle dried unevenly. The outer petals crisped while the centers stayed damp and rotted. Flat, single layers work better: one flower or two thin leaves per press, arranged with space between them so air moves through.
20. DIY Wall Art
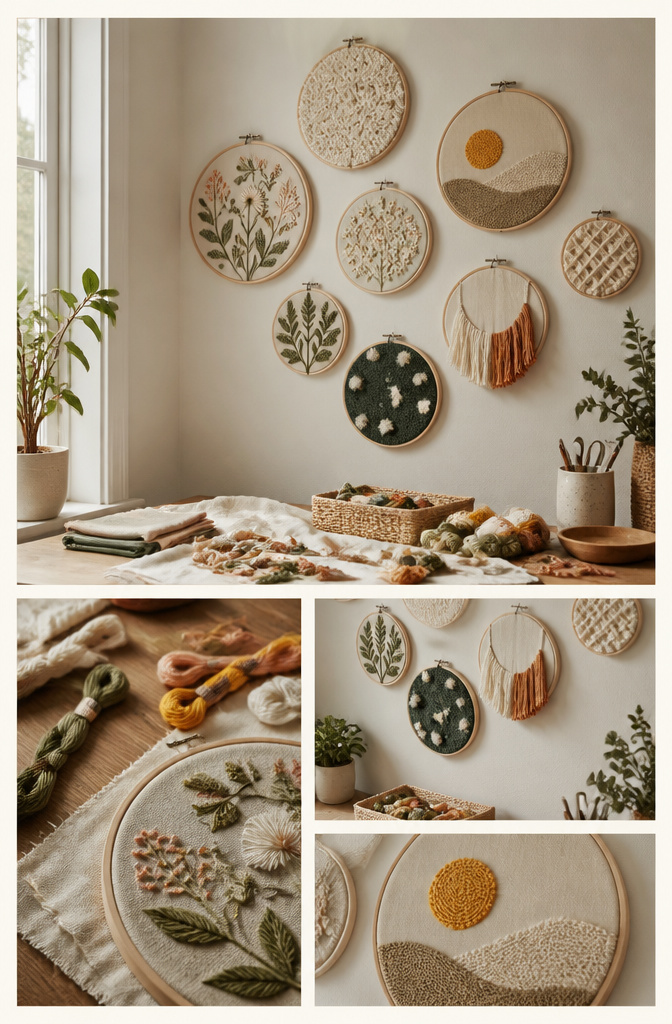
Embroidery hoops left in the craft drawer for too long make better wall anchors than you’d expect. Stretch a scrap of fabric or a thin scarf across the inner ring, tighten the outer hoop until the weave is drum-taut, and the result reads as intentional gallery geometry from across the room. Odd numbers and varied sizes cluster best, with one larger hoop anchoring the rest, and the whole grouping costs less than a coffee run. Rearrange seasonally and the wall stays fresh without new holes.
The texture question matters more than people admit. Lightweight cotton or lace flattens to near-nothing at three feet, which is fine for a quiet corner but disappears in a busy room. A heavier weave, linen with some slub, or layered gauze catches light and casts tiny shadows that read as depth. I learned the weight lesson the hard way on a stretched canvas alternative, though. The fabric was beautiful, a thick nubby throw I cut down, but I picked the hanger after the fact and the sawtooth bracket pulled through the canvas bar in under a week. Plan the hanger to the weight before you commit to the fabric, not after. A cleat or a French cleat rated for the load saves the redo.
Paper works too, if you keep it under glass or seal it flat. Quotes printed on cardstock, washi tape borders, small collages of found paper, all of it reads as personal without the fabric commitment. Double-sided tape beats glue directly on the wall; the glue ruins paint on removal, and the tape lifts clean when you swap pieces out.
Frequently Asked Questions
What are some cute DIY room decor ideas?
Press flowers into frames, make candles from silicone molds of found objects, build floating cloud lights from paper lanterns and cotton batting, or paint mason jars to use as vases. Each project uses cheap or leftover materials and finishes in an afternoon or two. Pick based on whether you want wall art, shelf accents, or ambient lighting.
How can I decorate my room with DIY items?
Start with washi tape geometric patterns on walls, printable art from digital files sent to a drugstore kiosk, or a wall collage of 4×6 prints hung with removable strips. For surfaces, try clay jewelry trays or punch needle coasters in embroidery hoops. The key is matching the project to the spot you need to fill rather than buying decor and finding a place for it later.
How can I make my small room look cute and not crowded?
Use 6-inch floating shelves for display only and keep floor space clear; 12-inch depths work only where you have studs and actual need. Light colors on painted mason jars or printable wall art keep the eye moving, while tight grids of small prints read as one calm surface instead of scattered clutter. Wall-mounted storage beats anything that sits on the floor.
Are there cheap cute room decor ideas that still look good?
Yes. Cereal box strips fanned around a thrift mirror and spray-painted read as vintage brass from five feet away. Printable art costs the price of a drugstore print plus a dollar or two for the file. Wall collage 4×6 prints run about twenty cents each. The real savings is in labor: an afternoon of cutting and gluing replaces boutique prices.
What are some cute room decor ideas for a teenage girl?
Fairy lights hung around a mirror or bed frame create warm pockets of light. Soft pillows and colorful bedsheets set the mood, while a Spotify album plaque on a 5×7 acrylic block turns a favorite song into desk decor. A pressed flower frame or embroidery hoop piece in standard 8×10 framing reads as finished art rather than craft project.
What are some cute room ideas for 11 year olds?
Paint by numbers kits in 16×20 size fill wall space above a bed without looking like an afterthought. Decorative CDs sanded and painted with acrylics hang like floating art on fishing line. Clay jewelry trays shaped and painted in bright colors organize small items on a dresser. Each gives a finished object to show off and the process fills a weekend.