
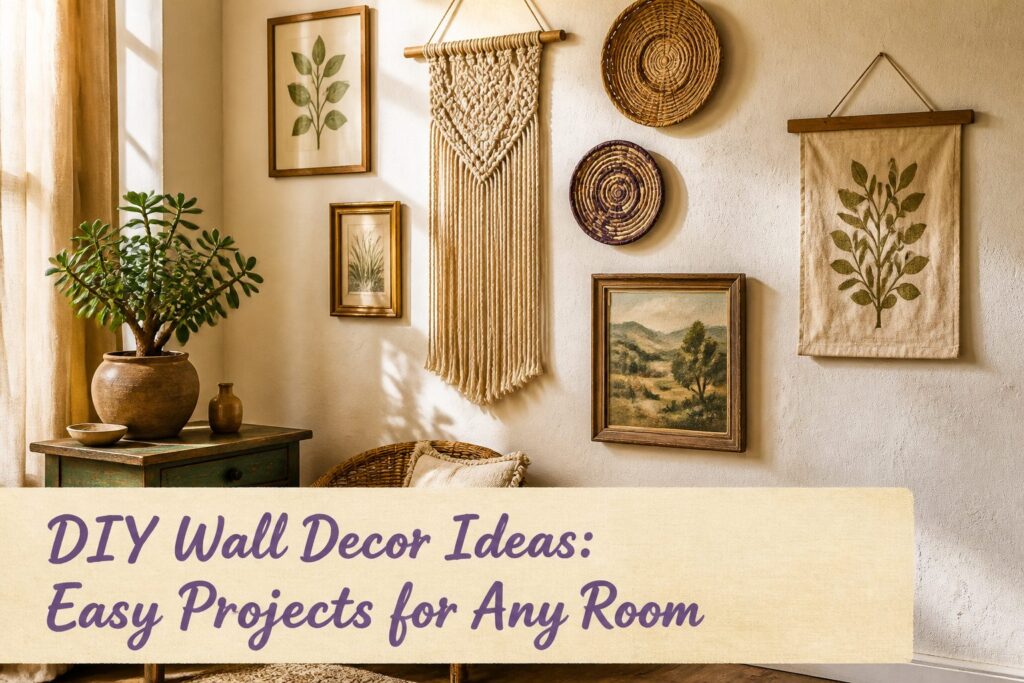
Projects here run from a few dollars of thrifted baskets to a messy, full-day epoxy resin pour, and your wall decides which one fits.
Renters should pick pieces that hang on small nails or hook-and-loop tape. Heavy ones, like a framed rug in a deep shadow box, need a stud or a rated anchor.
1. Tobacco Basket Wall Hanging
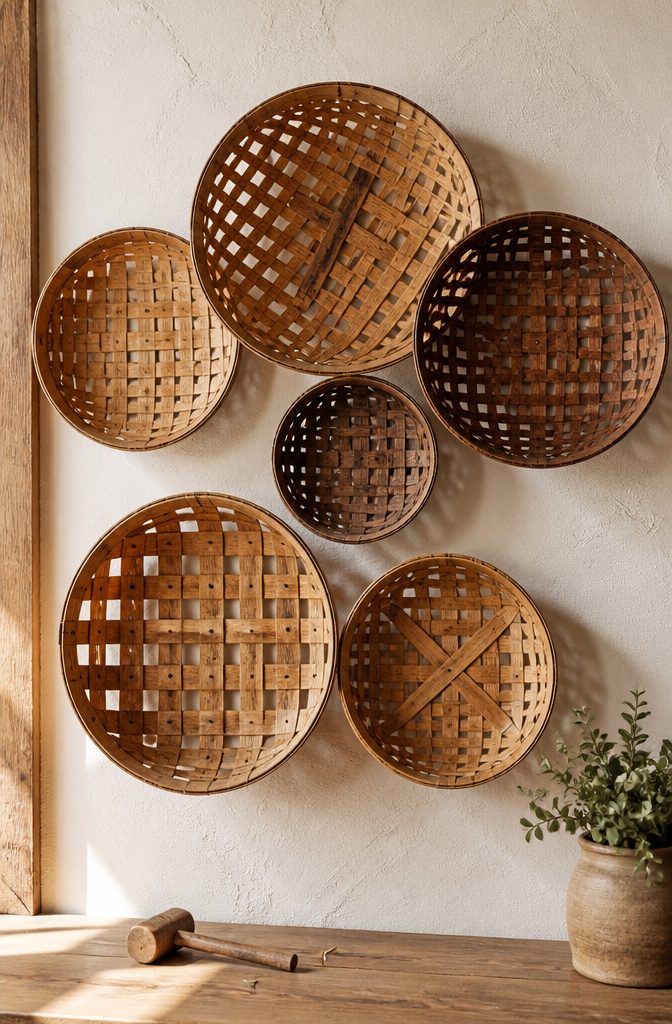
Baskets make a wall piece that costs very little and comes down without a trace.
Thrift stores sell them for a few dollars each, so you can pick them up in one trip or add one at a time. Tobacco baskets work well because the shallow, open weave sits flat against the wall.
Mounting is the easy part: a small nail and a hammer, one nail per basket, set where the weave will catch it. Plan on five to seven baskets for a small wall and about a dozen for a larger one.
Lay them on the floor first and shuffle until the sizes balance, then nail from the center out. I’d skip the glue; nails keep the whole thing removable.
2. Wall Art Weaving Hack
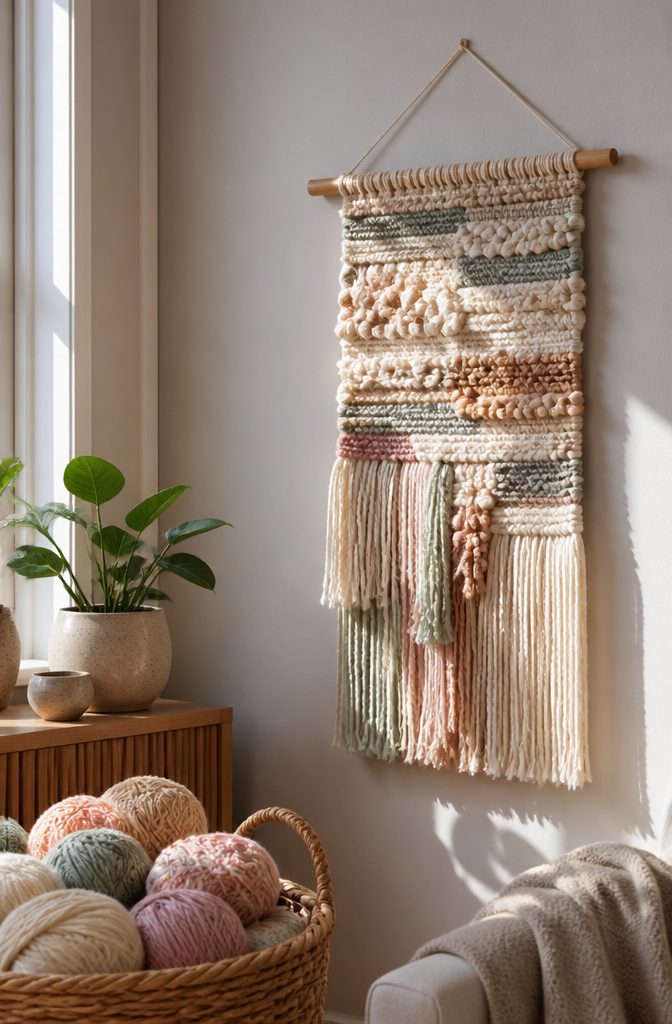
The finished piece looks woven, but nothing on it is. A simpler technique gives similar results in about half the time, so you skip the loom, the warp threads and the learning curve.
Weaving can feel intimidating, and this is the version I’d hand to anyone who has never tried it.
Texture is what you get out of it: the yarn, the knots and the uneven fringe give a flat wall something to look at.
A flat wall picks up depth from the layered strands, and the project works as a relaxing afternoon of making rather than a weekend commitment.
It takes roughly half the time of true weaving, which is the reason to pick it over a loom for a first wall hanging.
The materials list is short, and I can’t give exact yarn amounts because they depend on the size you choose. Plan the piece around a spot on your wall first, then buy to match.
3. Canvas Art Made With Wrapping Paper
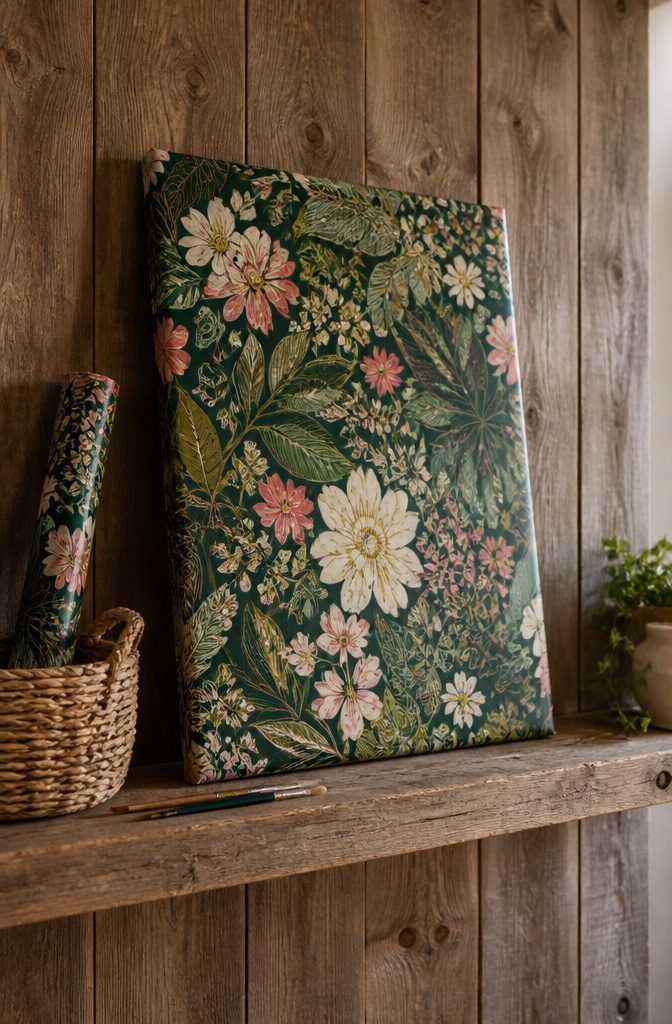
Wrapping paper turns a bare canvas into a one-of-a-kind piece of art for the price of a roll.
You pick the pattern, so a botanical print can echo the curtains and a geometric one can pick up the colors in a rug.
A canvas stretcher frame works well as the base, and it goes together in about 10 minutes. Oversized versions suit a living room, where a small piece would get lost.
Pull the paper taut across the frame and fold it over the back edges so the front stays smooth. Thin paper shows every wrinkle, so I’d choose a heavier sheet for a big surface.
Staple or tape it on the back, then hang it as is. Skip glue on the front, since it can ripple the paper.
4. Framed Rug Wall Art
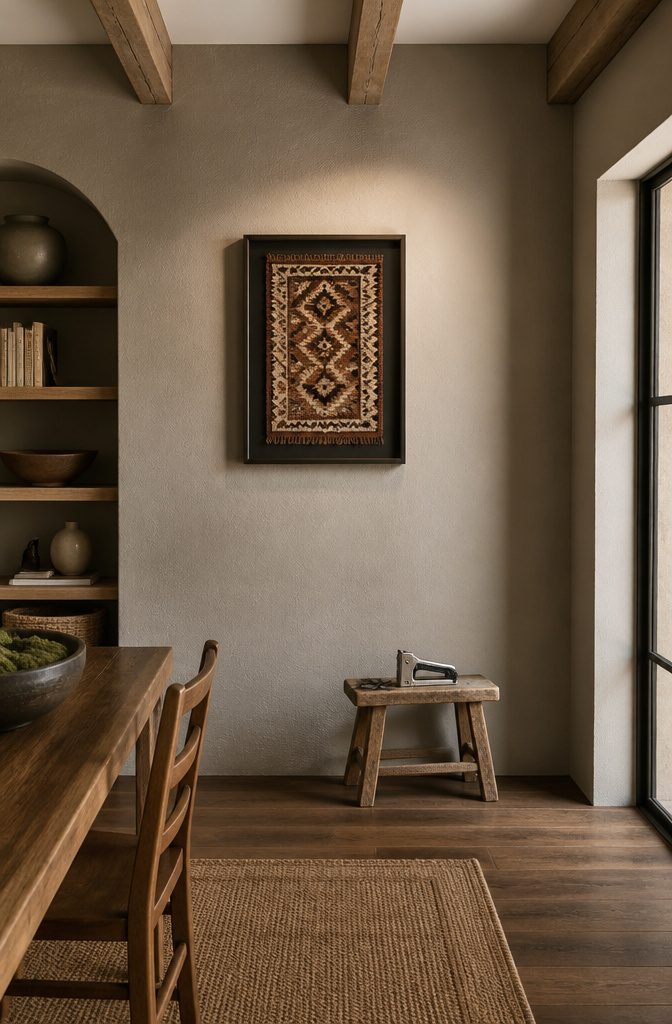
A small rug hung in a frame turns pattern and texture into wall art, and it costs far less than most original art.
A flat-woven rug, such as a kilim or a thin cotton dhurrie, works best because it sits close to the wall. Thick pile or shag pulls a frame forward and looks lumpy.
Weight is the real limit.
A rug in a deep wooden shadow box gets heavy fast, so hang it on a stud or a wall anchor rated well above the finished weight, not a lone nail. Skip glass; acrylic is lighter and won’t shatter.
For mounting, I’d staple the rug’s edge to a stretcher frame or sew hook-and-loop tape to the back. Stapling is faster, but it’s harder to undo, so renters should pick the tape.
5. Basket Wall Art
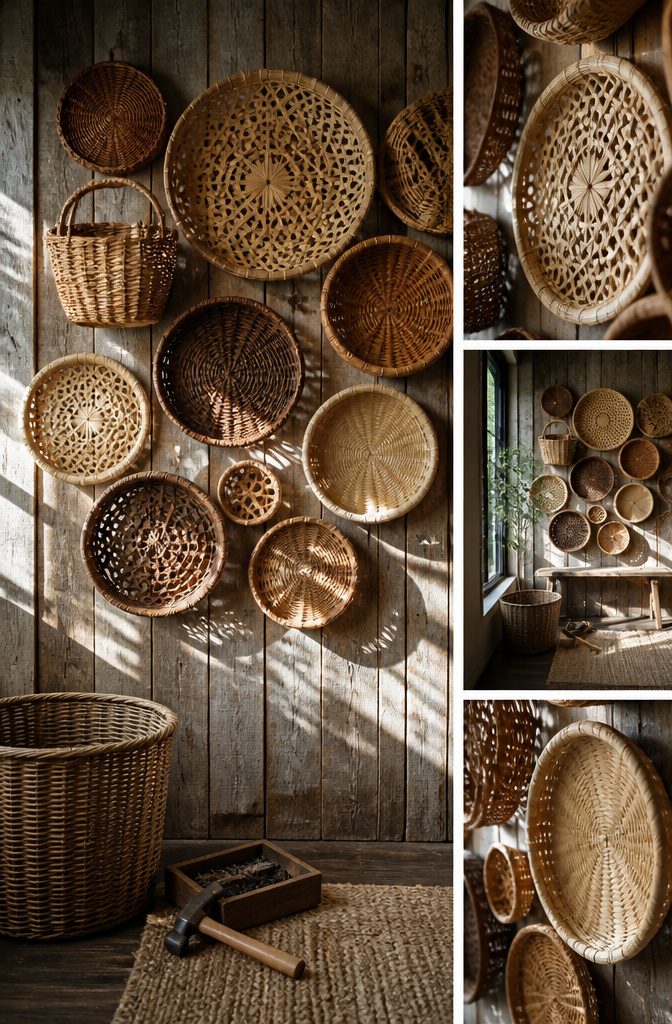
Thrift stores are the best place to buy baskets for a wall, since they sell for just a few dollars each and you can collect them in one trip or add to the pile over time.
Scale the count to the wall: 5 to 7 baskets for a small wall, about a dozen for a larger space.
Before any nail goes in, I’d lay the whole group on the floor and shuffle it until the sizes and shapes feel balanced, then hang from the biggest basket outward.
Small nails and a hammer are all the hardware you need. Baskets weigh little, and they come off the wall as easily as they go up, which makes this a friendly project for renters.
6. Minimalist Flower Hang
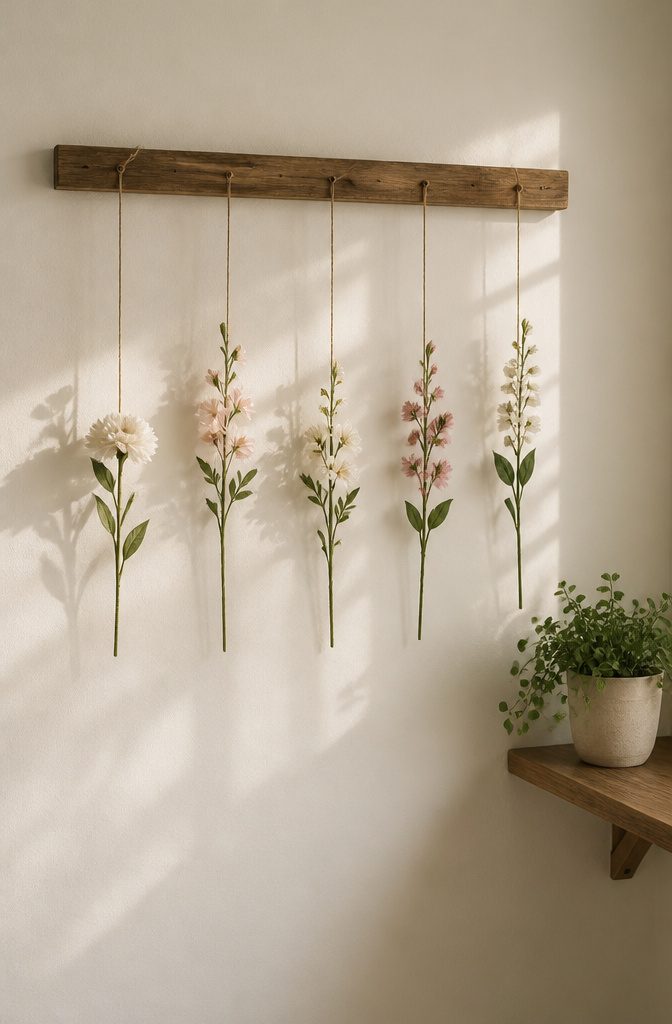
Faux flowers are the right material for this one.
They hold their color, they need no water, and you can match them to the room, which is how a teenager’s bedroom version ended up looking even cuter than the photo it was copied from.
I’d pick stems in one or two shades that already live in the room, so the display reads as an accent instead of a new focal point.
The minimalist part is restraint. A few blooms spaced out along a plain hanger leave the wall showing between them, and that gap is what gives you a pop of color without overwhelming the wall.
Crowd it with extra stems and you lose the look. Hang it over a bed or a plain section of wall, and keep it to one line of flowers.
7. Macramé Plant Hanger
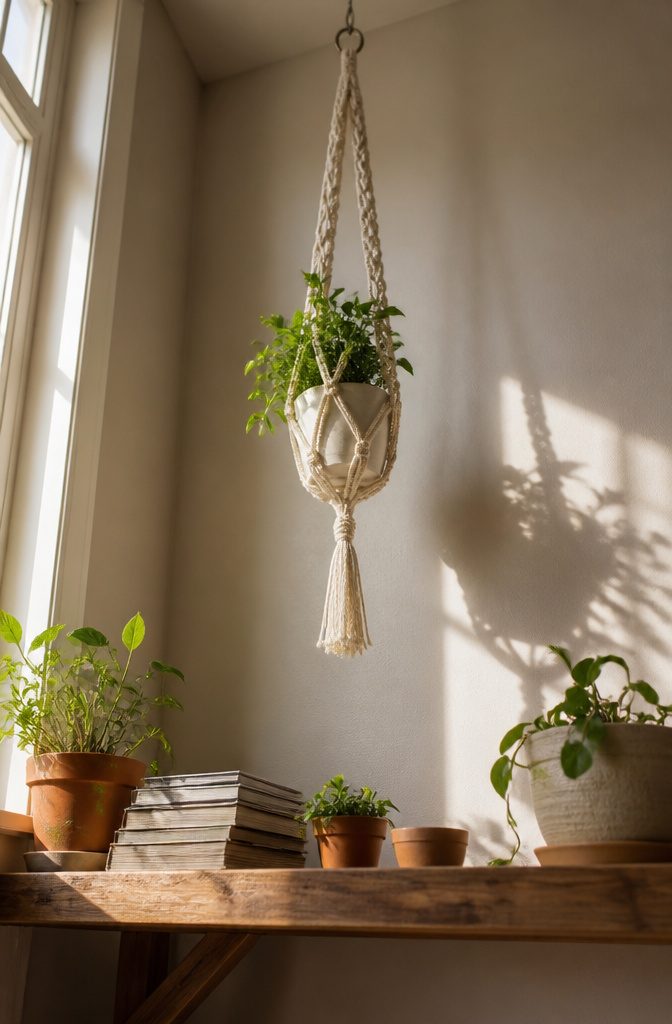
Cotton cord is the material to buy first, because it holds a knot’s shape and grips itself when you pull it tight.
Slick synthetic rope slips, and thin string disappears into the knots. Cut your lengths generously, since every knot eats up cord, and fold them in half over a ring so the loop sits at the top.
Two knots do nearly all the work: the square knot and the gathering wrap. Square knots build the open, diamond-shaped netting around the pot.
Keep the spacing between each row of knots even, because a crooked row shows once the weight of a pot pulls it straight. A wrap knot cinches everything together at the top.
I’d hang it near a window, from a ceiling hook or a wall bracket, where trailing leaves get light. It looks good against a plain wall.
8. Modern String Art
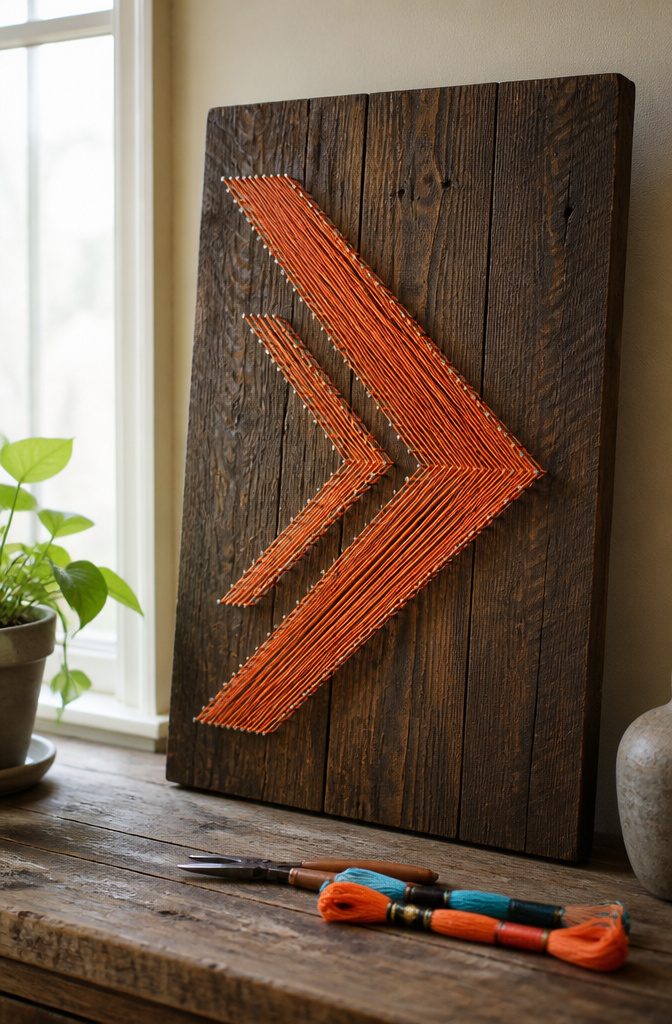
Tension decides whether string art looks crisp or sloppy, and it starts with the nails.
Drive them in straight and to the same depth, with about half their length standing proud of the board, because a leaning or uneven nail lets the thread slide and sag.
A pattern with a few clean shapes, like a geometric triangle or a simple arrow, reads as modern; dense designs with many overlapping lines need more patience than most afternoons allow.
Tie the thread to the first nail with a double knot, then pull each pass snug as you wrap, never loose. Wrap every nail the same direction and keep steady pull on the thread so lines stay straight.
Finish with a knot and a dab of glue. Embroidery floss in one bold color on dark stained wood is my pick.
9. 3D Minimal Wall Art
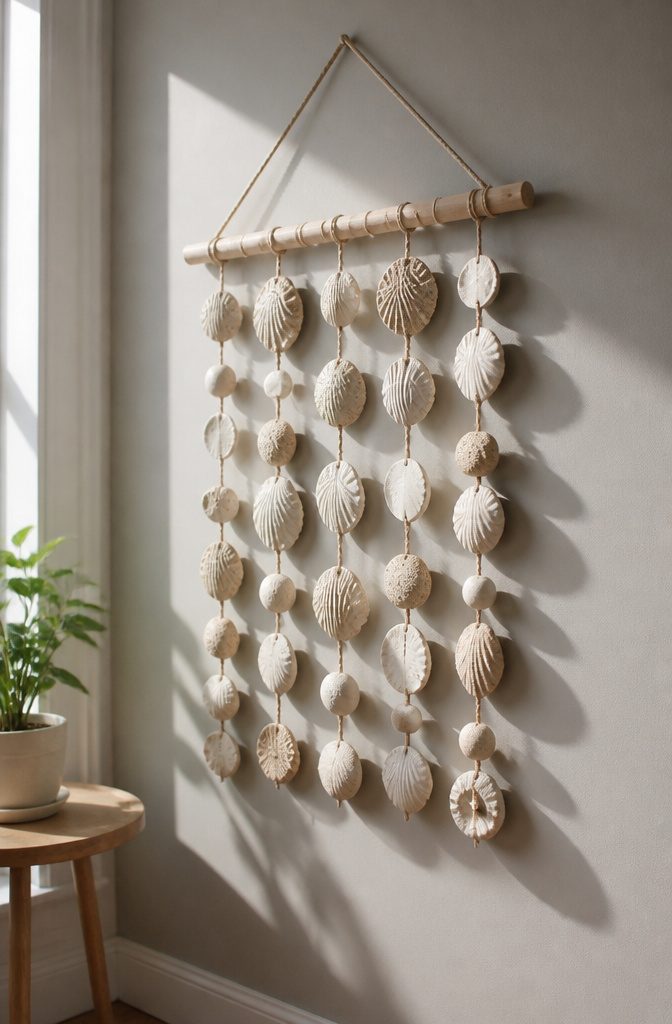
Texture does the work in 3D minimal art, and a single dimensional piece among flat frames gets more attention than a wall of prints.
The materials that make depth are plain: stoneware shells, hemp rope and a white oak bar were enough for one designer-picked hanging that balanced a TV and a modern room.
I’d copy that recipe in cheaper form, with air-dry clay shells, rope from the hardware aisle and a dowel for the bar.
Keep the palette to one or two tones, since shadow carries the design.
Let raised elements cast their own shadow by hanging the piece where side light hits the wall. Embroidery on canvas works the same way, and simple stitches are enough.
10. Painted Wooden Farmhouse Sign
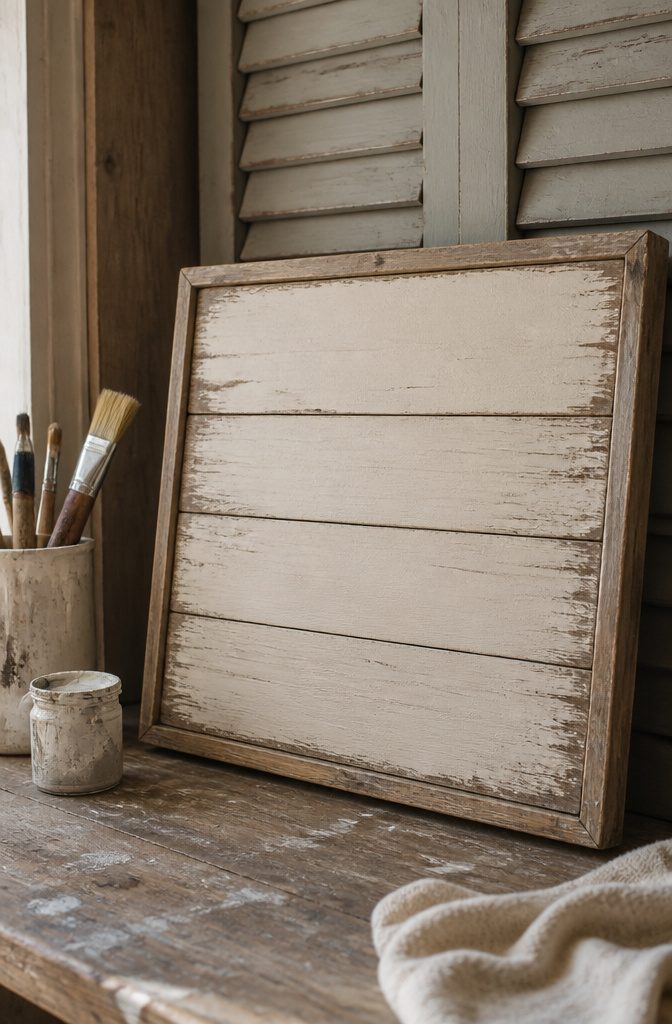
Reclaimed boards give a farmhouse sign the weathered look that new lumber needs stain and sandpaper to fake.
Old pallet slats, fence pickets and barn siding all work, but sand the face smooth enough that paint won’t snag, and check for nails before you start.
Paint the whole board in a light base coat and let it dry fully.
Then sand the edges and corners lightly so the wood shows through, which reads as age. Lettering is easier with a stencil or transfer paper than freehand; a pencil outline first keeps the words from drifting uphill.
Use a small flat brush and dab paint along the stencil edge instead of stroking it, since that stops bleed under the tape.
Seal it with a matte clear coat. Glossy finishes look too new for this style.
11. Embroidered Canvas Wall Art
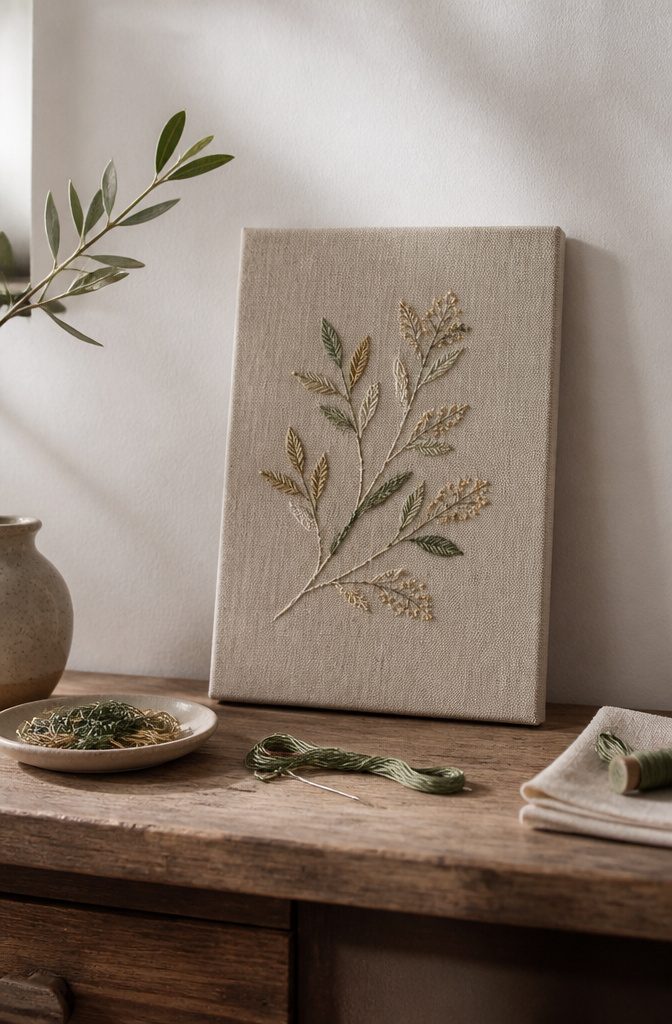
Stitching straight onto stretched canvas works, but the weave decides how much you’ll enjoy it.
A canvas with a loose, open weave lets the needle pass without a fight, while a tight, primed artist’s canvas makes you push every stitch through.
If you want to use a ready-made canvas from the craft aisle, poke a few test holes first, and go with a sharp needle that has a large eye.
Embroidery floss is my pick for thread.
It splits into strands, so you can use more for bold lines and fewer for fine detail. Cotton floss sits flat and matte; thicker perle cotton gives raised, rope-like texture that reads well from across a room.
Sketch your design in pencil on the canvas before the first stitch, since mistakes leave visible holes. Simple shapes like a sun, leaves or a single line of lettering look best.
12. Galaxy Epoxy Resin Paint Pour
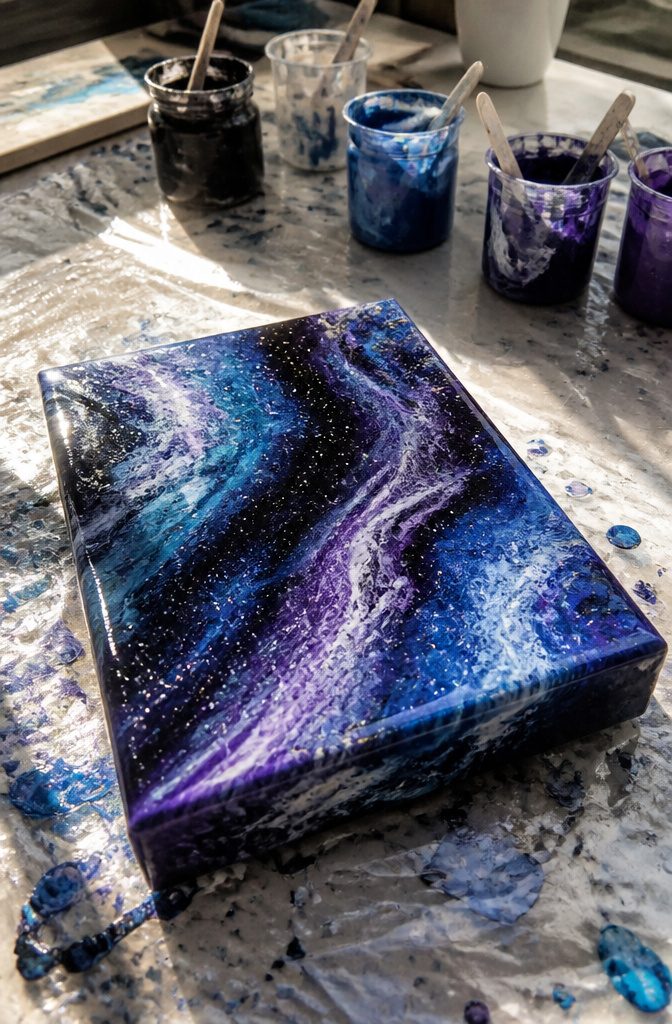
Galaxy resin art gets its depth from layering: dark blues, purples and black poured and swirled together, then dusted with white for stars.
A small canvas or wood panel works best for a first try, since a big surface eats resin fast and any mistake gets expensive.
You need two-part epoxy resin, mixing cups, stir sticks, nitrile gloves, and pigment or acrylic paint in dark tones plus white.
Cover the table and floor with plastic first. Resin runs off the edges, drips underneath, and doesn’t wipe up once it sets.
Plan on a full day of cure time before touching the piece, and keep it level and covered so dust doesn’t settle in.
Mixing takes patience too: stir slowly to avoid bubbles. The result is glossy and deep, but it’s the messiest project here, and I’d skip it with small kids around.
13. XOXO Wooden Sign
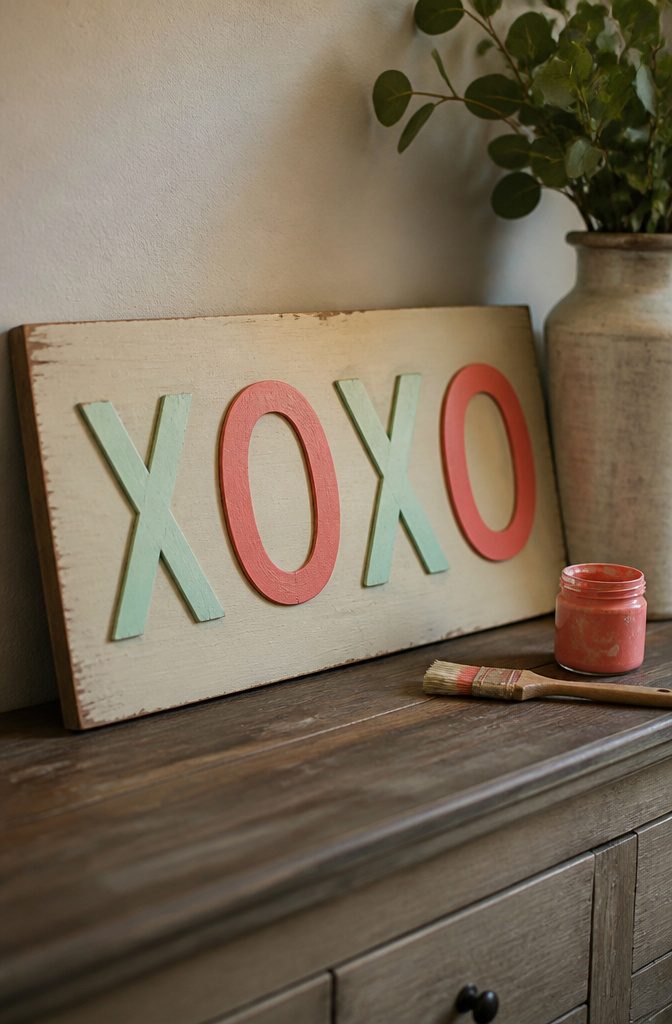
An XOXO sign works because the four letters are nothing but straight lines and two crossing strokes, so even shaky freehand lettering reads as intentional.
Paint the letters on a plain wood board, and pick your colors before you pick your board: a pale or whitewashed base lets almost any hue show up cleanly.
For personalizing, you have two routes. Paint is the easy one, since a custom phrase and color scheme are exactly what a painted wood sign does well.
Dye is the other: wood can take color, and a dyed X and O leave the grain visible, which paint hides. Dye wins if you like a natural look; paint wins if you want crisp, solid edges.
I’d alternate two colors, X in one and O in the other, and keep the base neutral.
14. Beach Stone Wall Art
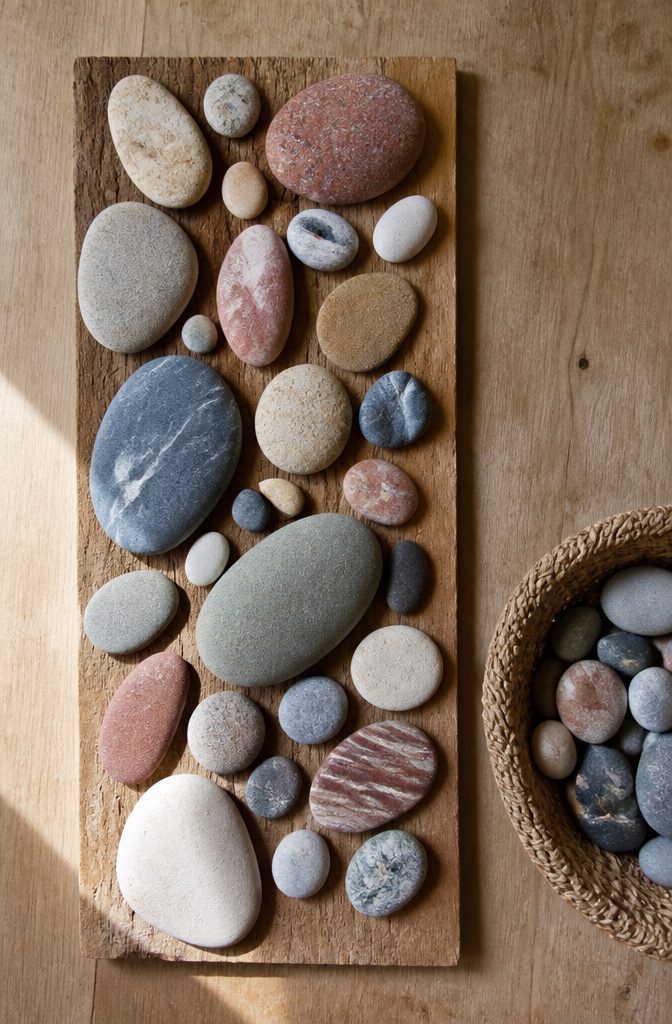
Beach stones and lake stones cost nothing if you collect them yourself, and that is the whole appeal of this project.
A walk along the water usually turns up enough, and craft or dollar stores sell similar rocks if you live far from a shoreline.
The look is rustic with a modern touch, so I’d lean on restraint: sort stones by size and tone, then lay the full arrangement on a table before anything touches the wall.
Keep gaps even and let a few larger stones anchor the design.
For attaching, I’d use a strong adhesive on a flat backing board and hang the board, rather than gluing stones straight to the wall.
Build it on a board so you can move it, rehang it, and take it with you if you rent.
15. Brushstroke Statement Art
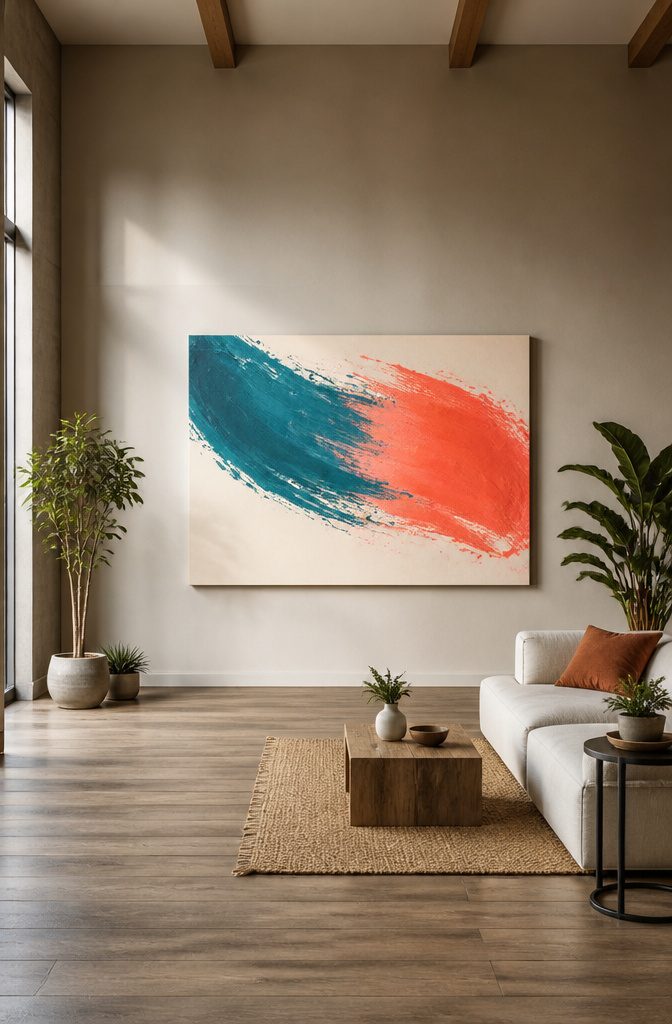
A bold brushstroke canvas works because it asks for almost no skill. One wide stroke of paint reads as intentional on a big surface, so the size does most of the work.
Go large, since a statement piece should act as a focal point that adds depth and energy to a room, especially one where windows and cabinets already fill the other walls.
Pick colors to match what is already in the room, so the canvas looks planned rather than dropped in. If the furniture is calm and neutral, let the art carry the burst of color and keep everything else quiet.
I would stick to two or three paint colors plus white, because a fourth usually muddies the strokes where they overlap.
16. Plaster Wall Art
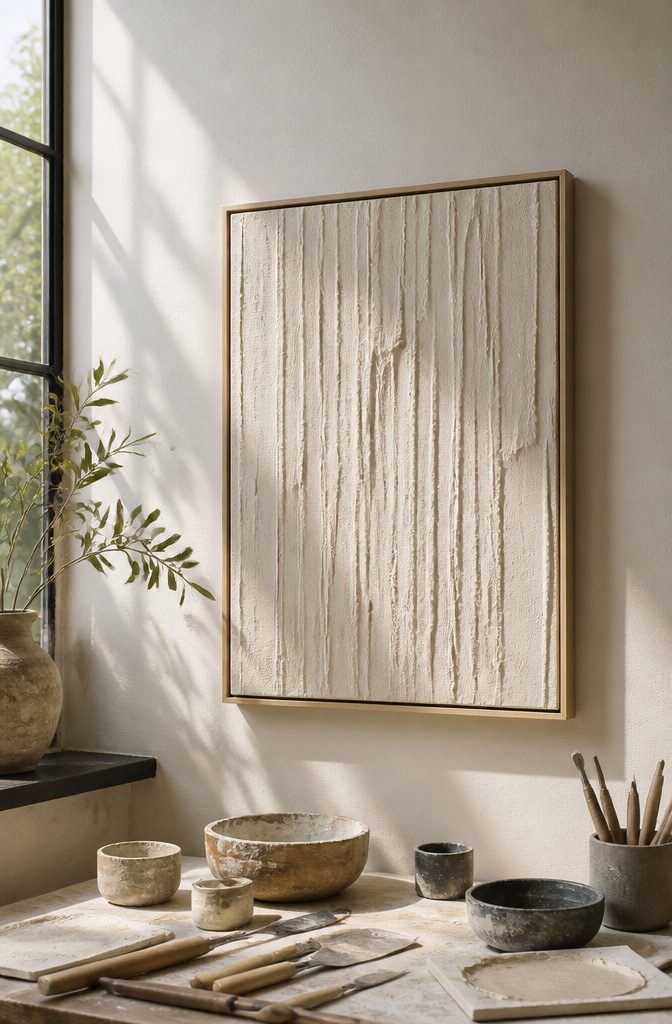
Joint compound is the cheap way into textured plaster art, and it works best in a room with a neutral palette, where the surface does the talking.
A framed slab of plaster makes a large piece of wall art on a small budget, and the sculpted look comes from the ridges you leave behind, not from paint.
Fluting the wall simultaneously created movement in the design and depth for the light to play off of.
That depth is why I’d pick plaster over a flat print: light changes it through the day.
Vertical lines also draw your eye up the wall, making the ceiling appear higher. Hand-fluting a whole wall is painstaking, so I’d start with one framed panel and run the ridges vertically.
17. Art for Large Blank Walls
Typographic wall art is the cheapest way I know to cover a lot of wall, and you can make a piece for under $25.
A big plaster panel in a frame works the same way: it’s simple, frugal, and it reads as one large statement.
Engineer prints are the budget route to a oversized gallery wall, since they let you print big and personal without paying for custom sizes.
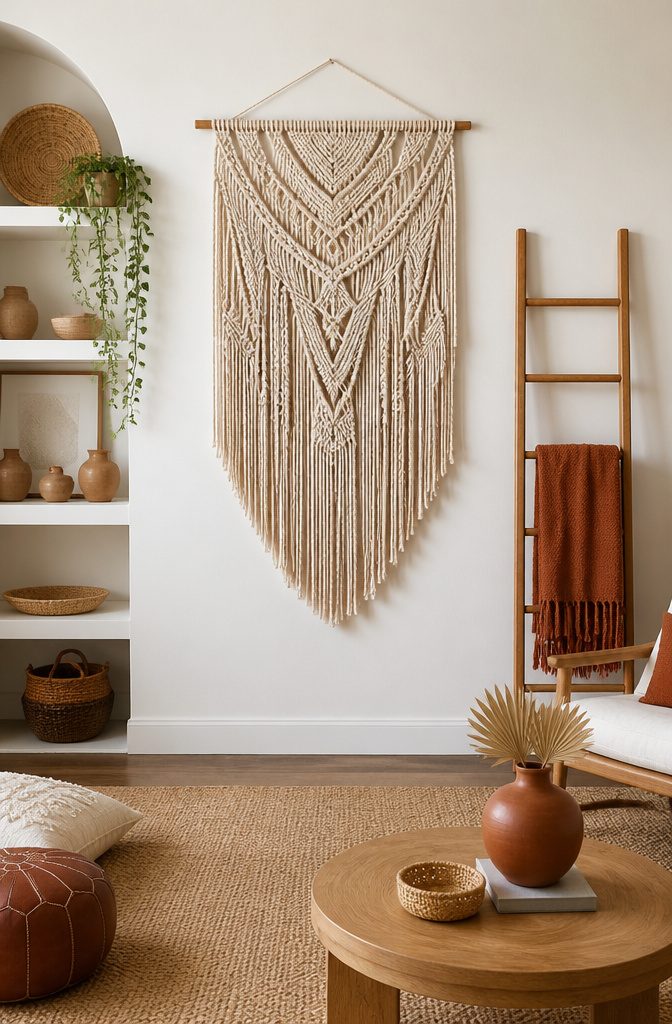
If you want texture, a large macramé hanging adds warmth, and a local craft store covers the materials. For paint, a blank canvas, painter’s tape and two cans of spray paint go a long way.
Go large rather than many small pieces, because small frames float on a big wall and look lost. I’d pick one oversized piece first and add to it later.
18. Stenciled Art
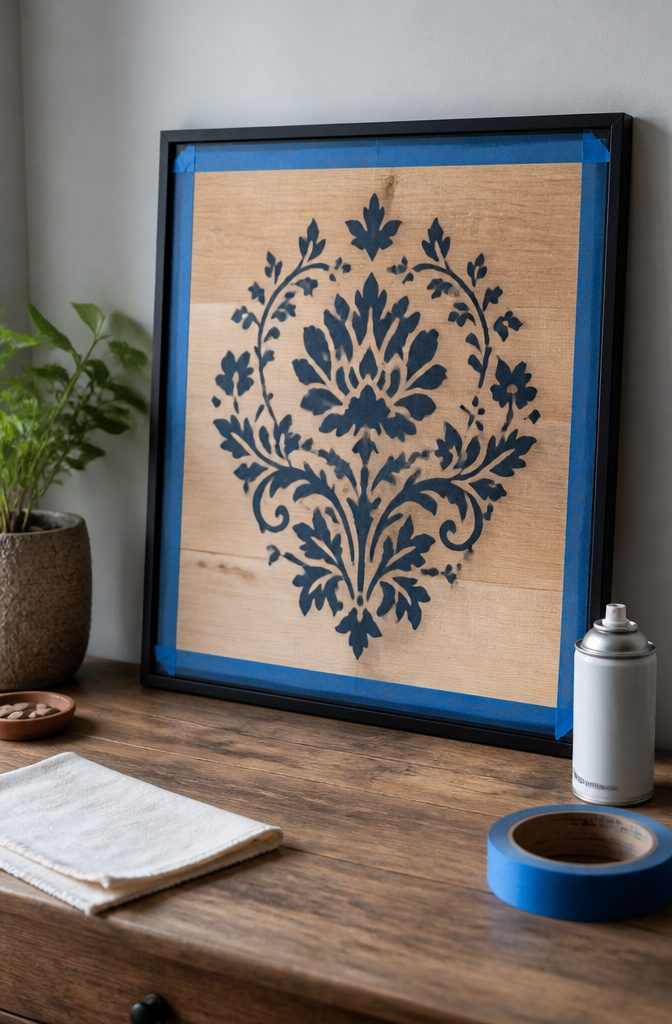
Crisp stenciled edges come down to how much paint is on the brush. Load it, then dab most of it off on a paper towel until the bristles leave almost nothing behind when you tap them.
A stencil brush or a dense foam pouncer, held straight up and down and tapped rather than swiped, keeps paint from creeping under the stencil.
Seal the stencil flat first.
Painter’s tape around the border works, and a light mist of repositionable spray adhesive on the back holds the fine details of a pattern down. Build the color in thin layers instead of one wet coat.
On raw wood, a quick coat of clear sealer or primer before stenciling keeps paint from wicking along the grain. Lift the stencil straight up, and wipe its back between repeats.
19. Sunburst Mirror
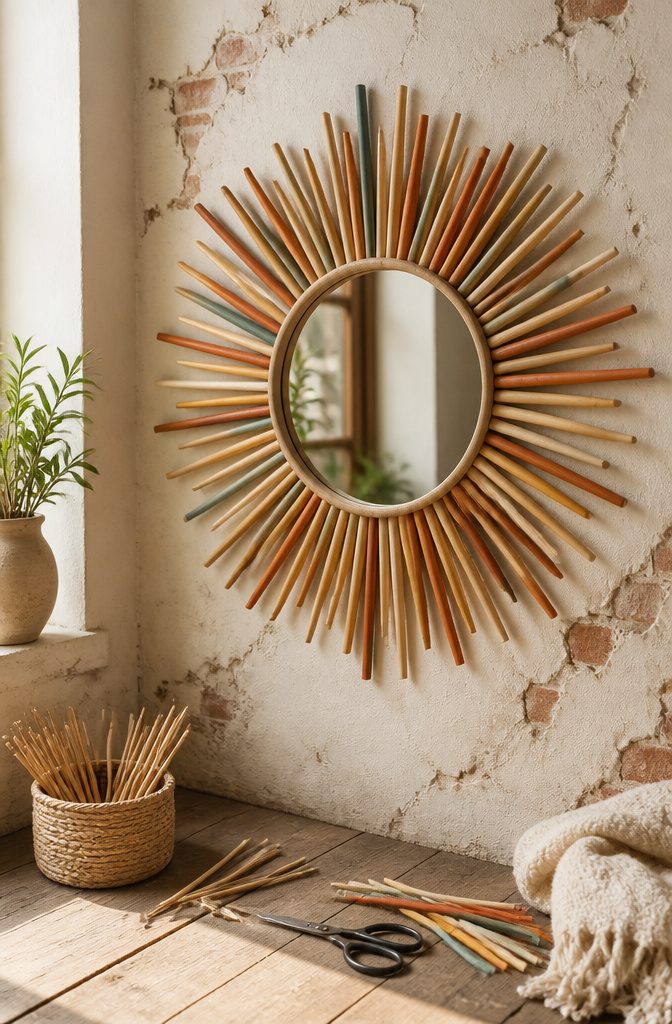
A sunburst mirror costs a fraction of what the store versions do, and the build is simple: a round mirror in the center, rays fanned out around it.
The rays are where your money and your style go, so pick a material you already have in the house, such as paint stirrers, wooden skewers, or rolled paper.
I’d go with wood for a first attempt because it holds its shape and takes paint or stain without fuss.
Lay the mirror flat on a backing board, then work from the four compass points inward, setting a ray at 12, 3, 6 and 9 o’clock before filling the gaps.
Gluing evenly spaced rays this way keeps the gaps from drifting, which is the flaw you see most in homemade versions. Finish with a coat of metallic paint, or try an iridescent finish for extra shine.
20. Christmas Print
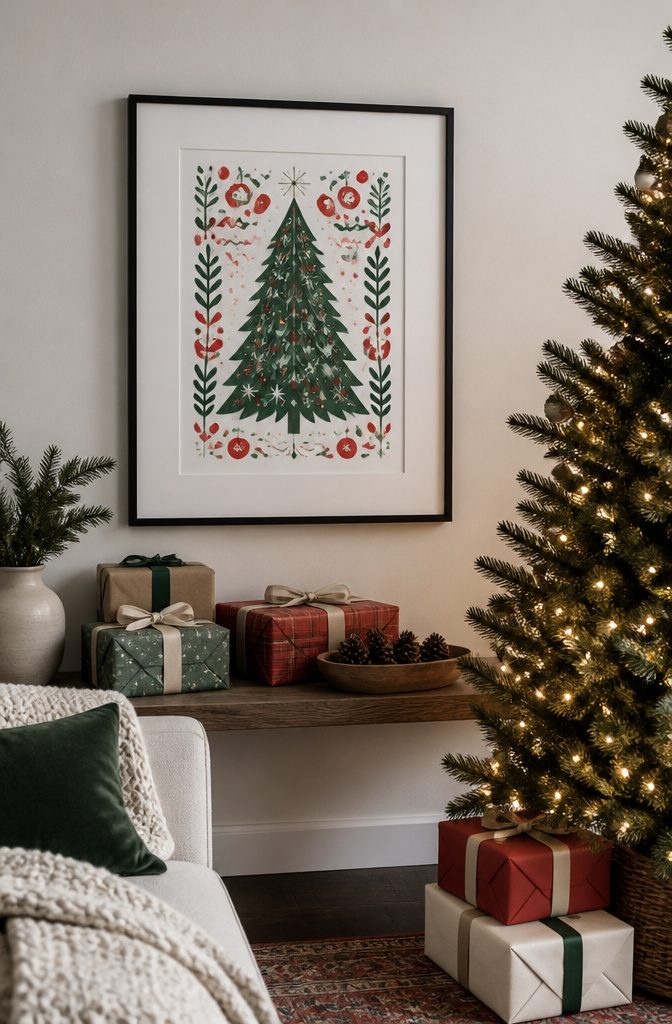
A Christmas print is the fastest seasonal piece in this list, because the "art" is mostly a printed page and a frame you may already own.
Pick a short phrase or a simple graphic, such as a tree, a star or a single word like "Noel," and set it in a bold font so it reads from across the room.
Print it on heavy white or kraft paper, since thin copy paper wrinkles behind glass.
I like a plain black frame with a wide white mat, which makes a cheap print look finished.
Keep the palette to two or three colors, usually red, green and black, so it sits well on a mantel or an entry wall. It takes down easily in January, and the frame goes back to work.
21. Flower Wall
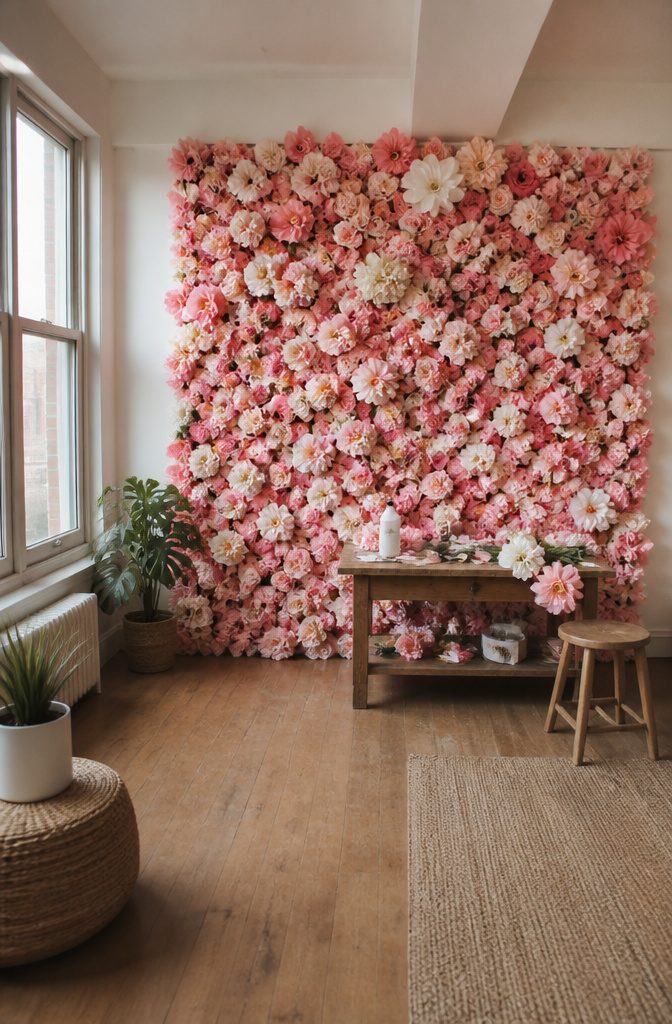
Faux flowers are the right call for a flower wall, because real ones wilt before the afternoon’s photos are done.
Pick stems that match your room’s colors, and a bedroom wall behind a bed is where this works best: a teen’s room, say, where the flowers become the headboard backdrop.
Cut the stems short and attach each head to the wall or to a backing panel, so the flowers cover the surface edge to edge with no gaps.
Gaps show the wall and break the lush look. Cluster the larger blooms first, then tuck smaller ones between them.
I’d mount the flowers on a board or foam sheet and hang that, since it keeps the wall clean and lets you take the whole thing down.
Choose a color scheme before buying, because mixing too many shades looks busy fast.
22. Gallery Wall of Kids Art
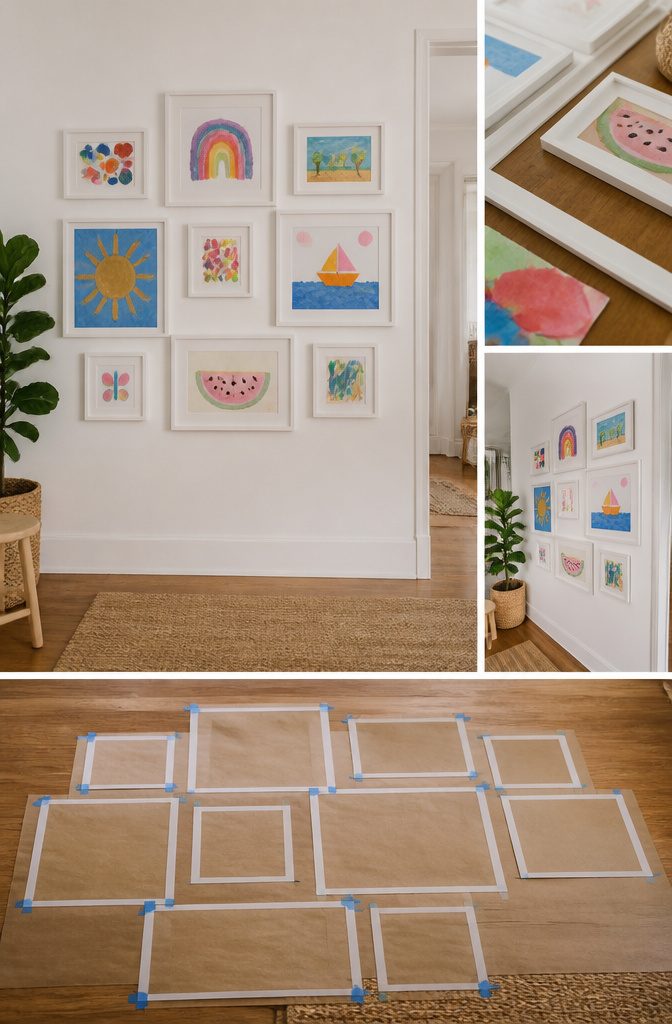
Kids’ art works best on a wall when the frames do the unifying.
Drawings, paintings and paper scraps vary wildly in color, so pick one frame finish, or let the art stay colorful and keep every frame white or black. A crowded, mismatched set of frames and mismatched art together just looks cluttered.
Before hanging anything, lay the pieces on the floor and shuffle them until the big ones anchor the middle and the small ones fill in around them.
Trace each frame on paper, tape the cutouts to the wall, and adjust the paper layout until it looks right before you drive a single nail. Mixing portrait and landscape orientations keeps the grid from feeling stiff.
I’d save a few slots for rotating pieces, so new art can replace old without new holes.
23. Pottery Barn Inspired Wall Art
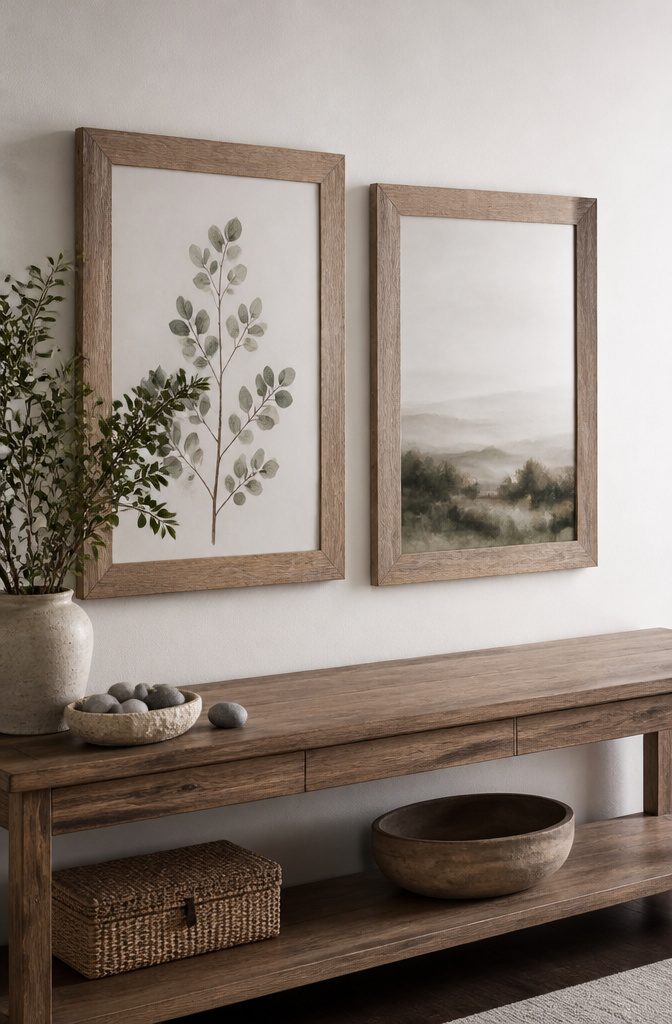
A Pottery Barn look comes down to a few repeatable traits: a sign or print with simple lettering, a muted palette, and a frame or backing that feels substantial.
Everything else is a swap you can make at home. The dupe sign that circulates for this style is built from your own materials, so the markup on the store version never enters the picture.
Start with color. Clay or paper pieces let you match whatever shades already live in your room, which beats hunting for a catalog print that almost works.
A coordinated set of three or four pieces reads as a collection, and it costs far less than buying them framed.
I would skip anything that needs special tools. If a project asks for more than basics you already own, the savings vanish.
24. Wood Burned Driftwood Wall Art
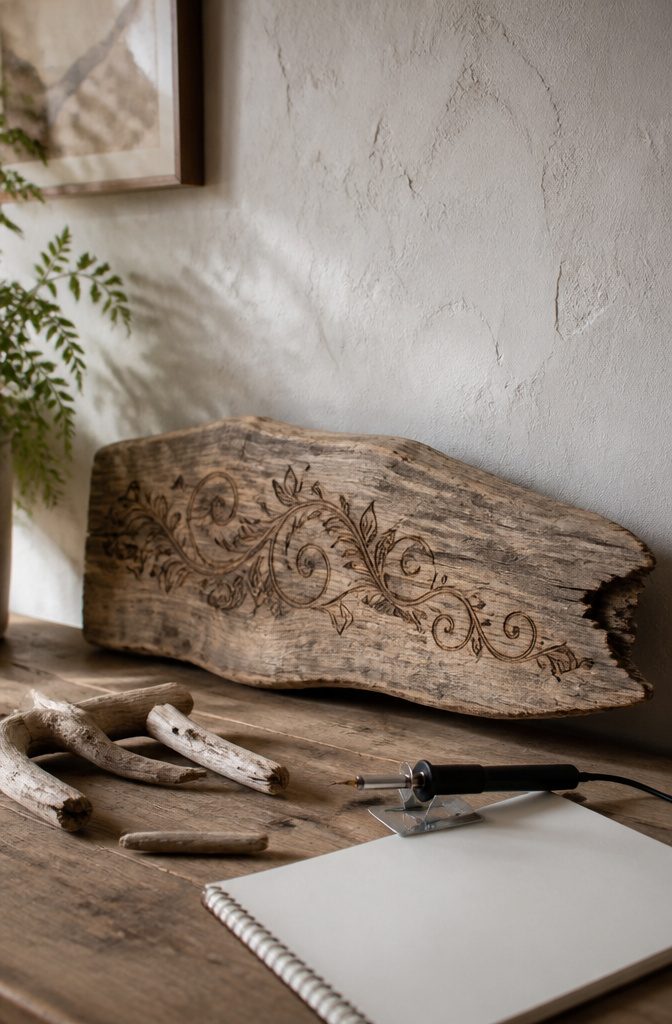
Driftwood already has the look most wall art spends money to fake: sun-bleached, grooved, and a little crooked. A wood burning pen turns a piece into a lettered sign, whether you copy a favorite phrase or pick your own wording.
Choose a board with a fairly flat face, since letters wander on deep grain.
Sketch the words in pencil first, then trace over them with the pen. Test on the back before you commit, because soft, weathered wood scorches faster than a new board and thin strokes can turn into blobs if you stall.
Reclaimed lumber works the same way, and I’d pick it when your driftwood is too rounded to burn cleanly. Pencil the whole phrase before you heat the pen, because a burn mark can’t be erased.
25. 10 Frame Ideas
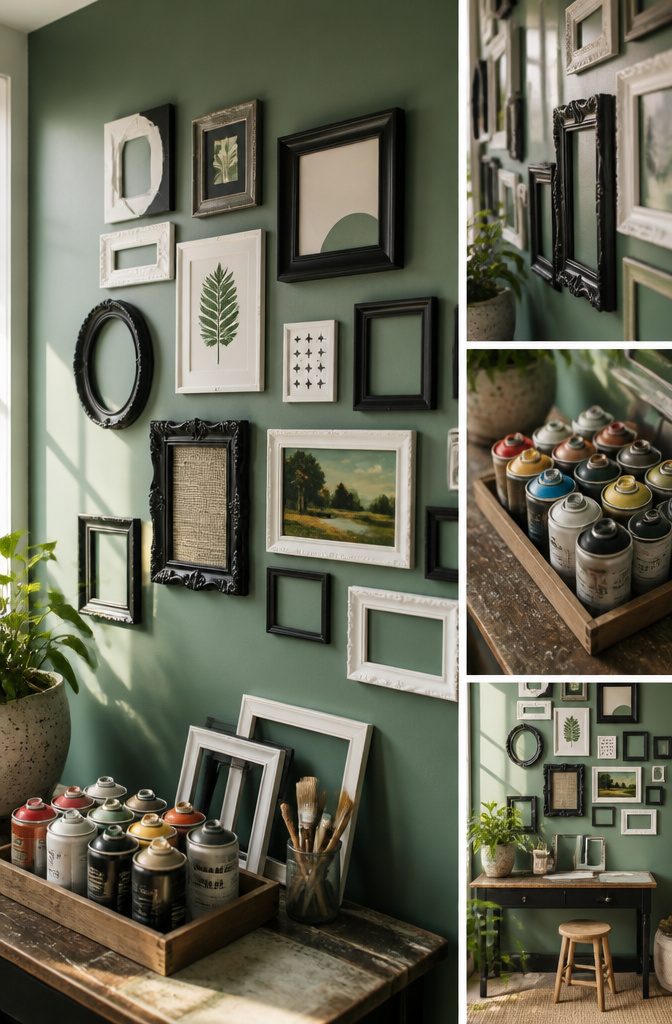
Frames are the cheapest way into DIY wall decor, because the frame can be the whole project.
A thrifted frame with dated finish takes spray paint well; sand it lightly first so the color grips. Painted matte black or white, mismatched frames start to look like a set.
Frames also stretch past picture holders. Glue rope, twine, or cut cardboard around a plain frame for texture, or wrap one in fabric scraps.
Hang an empty frame over a pretty piece of wrapping paper or a pressed leaf. I would skip glitter on anything larger than a small frame, since it sheds for months.
Pick one finish and repeat it across every frame in a group; the shapes can differ, but the color keeps the wall looking planned.
Frequently Asked Questions
What are some easy DIY wall decor ideas?
Baskets, framed rugs, wrapping paper canvases, string art, and stenciled prints are all easy starting points.
Baskets need only a hammer and one small nail each, and a wrapping paper canvas goes together in about 10 minutes on a stretcher frame. Frames alone can be the whole project if you paint thrifted ones in a single finish.
How can I make a gallery wall?
Lay your pieces on the floor and shuffle them until the big ones anchor the middle and the small ones fill in around them.
Then trace each frame on paper, tape the cutouts to the wall, and adjust the layout before driving any nail. Using one frame finish, such as all white or all black, keeps mixed art from looking cluttered.
Are there budget-friendly DIY wall decor options?
Yes, many projects cost very little.
Typographic wall art can come in under $25, thrifted baskets run a few dollars each, and beach or lake stones are free if you collect them yourself. A rug in a frame also costs far less than most original art.
What materials do I need for DIY wall decor?
Most projects use basics like wood, paint, fabric, cord, and frames.
Specific ones add their own supplies: cotton cord for macramé, embroidery floss for stitching on canvas, and two-part epoxy resin for a galaxy pour. Pick projects that use tools you already own, since special equipment cancels out the savings.
How can I personalize my wall decor?
Choose colors that already appear in your room, then pick a custom phrase, pattern, or personal items to build around.
Painted or wood-burned signs let you use your own wording, and a gallery wall of kids’ art is personal by default. Faux flowers and wrapping paper let you match the room’s shades exactly.
What can you hang on a wall?
Baskets, framed rugs, canvases, mirrors, signs, macramé hangings, and stone arrangements all work.
Heavier pieces like a rug in a deep shadow box need a stud or a wall anchor rated well above their weight. Lightweight options such as baskets suit renters because they come off with only a nail hole.
How can I make wall art?
Start with a simple base like a stretched canvas or a wood board.
Wrap it in heavy wrapping paper, paint a bold brushstroke, or stencil a pattern with thin layers of paint. Sketch your design in pencil first, and mount delicate arrangements on a board so you can move them later.





