

These projects run from 5 minutes of sealing marble to a full day of painting a room, and the deciding factor is the longest block of time you can clear.
Anything painted needs that block, since coats have to cure. Weatherstripping costs under $20 and a gallery wall takes about 30 minutes.
1. Dry Erase Board
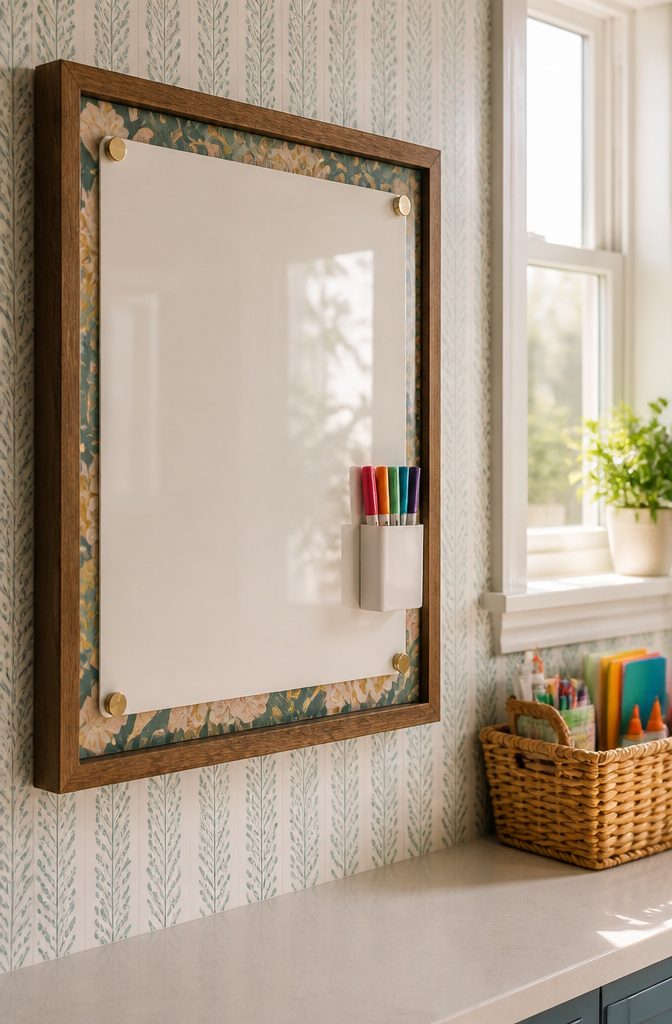
An acrylic sheet makes the best writing surface for a dry erase board.
It stays smooth and looks clean in a frame, and markers wipe off without the faint ghosting you get on cheap whiteboard material. The project takes about 2 hours, so it fits in one afternoon.
The build is simple: cut or buy the acrylic to fit a frame, set it over a colored or patterned backing such as paper or fabric, and secure it so nothing shifts.
The backing is where you get to personalize it.
I like this as a family command center for schedules and grocery lists. One honest warning: it looks so good that it’s easy to forget to use it, so hang it where you pass every day.
2. Organize Something
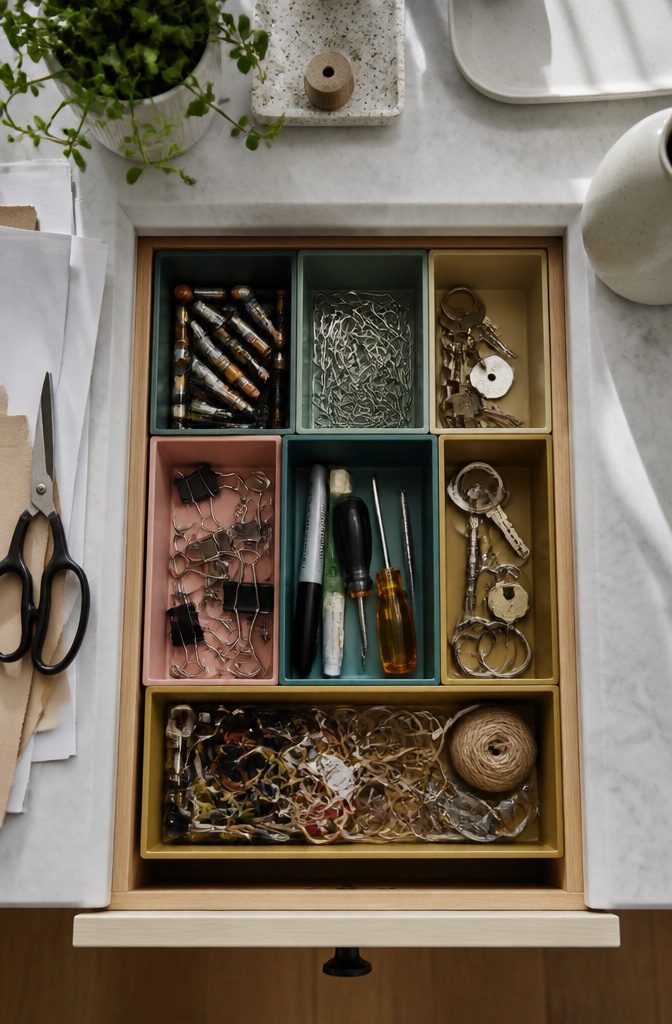
A junk drawer is the best place to start, because it takes about 10 minutes and the result shows every time you open it.
Dump everything onto the counter, toss what’s dead (dried pens, expired coupons, orphan keys), and put back only what earns the space. Corral cords with zip ties or Velcro so they stop knotting into one lump.
A bigger space stretches the job toward a full day.
An entire closet or an upstairs hallway means sorting into keep, trash and relocate piles before anything gets a home. For those, set a 30-minute timer and declutter without overthinking it.
Small trays or drawer dividers make the biggest difference, and you likely own a few boxes that work already. Pick one drawer or shelf, finish it, and stop before the project grows.
3. Install a Light Fixture or Ceiling Fan
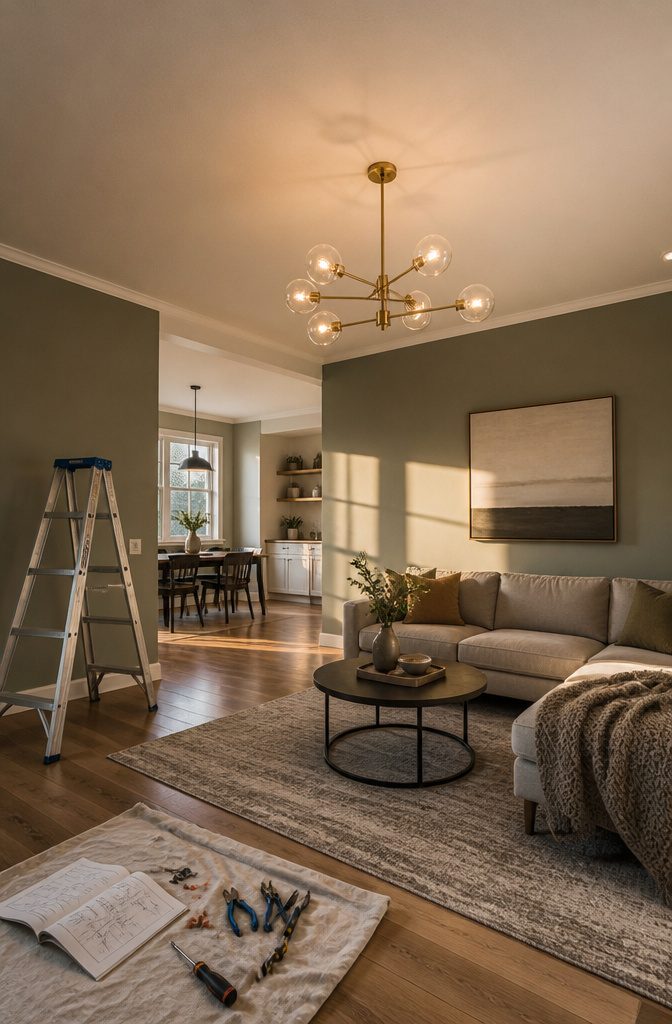
Swapping an existing fixture or ceiling fan for a new one takes about 2 hours, and an electrician isn’t required.
Shut off power at the breaker before you touch a single wire, then flip the wall switch to confirm the light stays dead. Skip that check and you’re trusting a panel label someone wrote years ago.
Replacing a fixture with a similar one is the easy version. A fan is heavier and fussier, so I’d start with a light fixture if you’ve never done this.
If the wiring looks frayed or anything feels hot, stop and call a pro. While the ladder is out, a dimmer switch is a cheap add-on.
4. Paint Your Front Door or a Room
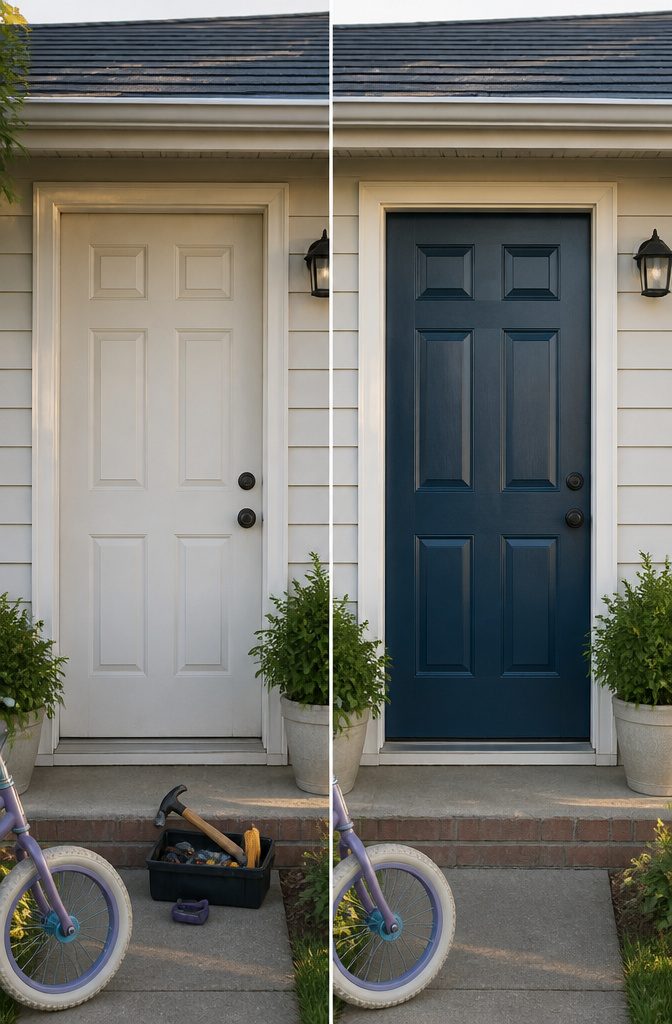
The front door wins for the time. About 2 hours buys a new look at the one spot every visitor sees, and a single can of paint can cover it.
A full room runs from 2 hours to a full day or a weekend, and it changes how the whole space feels, so I’d call it the bigger change overall, just not the bigger change per hour.
Prep decides how the paint holds up.
A front door takes weather and constant use, so clean it and touch up any fading or damage before the first coat. Going dark, like black over white, shows every flaw, so fix those first.
If a full room feels like too much, paint one accent wall. It costs less, takes less time, and lets you try a bold color you might regret on all four walls.
5. Hang Wallpaper
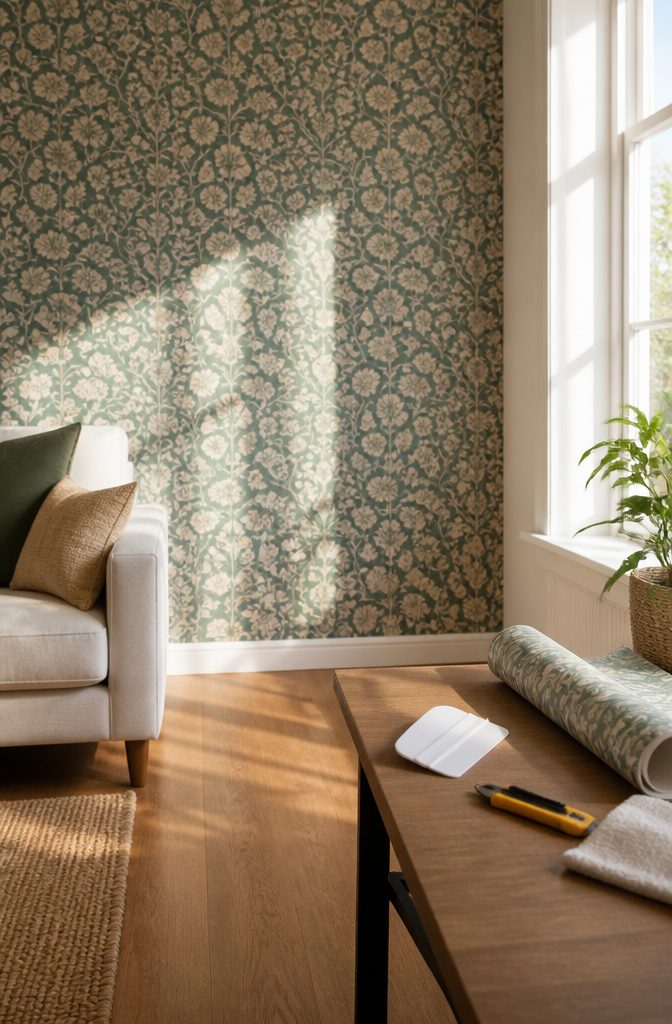
Peel-and-stick wallpaper is the version I’d hand to a first-timer, and it suits renters too, since it adds pattern to a living space without the paste and the commitment. Plan on half a day for a single wall.
Skip the ceiling for a first project. It’s a harder job, and a wall forgives mistakes that overhead work won’t.
Two trade-offs are worth knowing before you buy. Peel-and-stick tends to show the texture of the wall beneath it, so bumps and rough paint can telegraph through the paper.
Alignment is the other one: the pattern has to line up at every seam, and a panel that drifts crooked at the top will keep drifting down the wall.
Lift and reposition as you go instead of pressing it flat all at once.
6. Hang a Gallery Wall
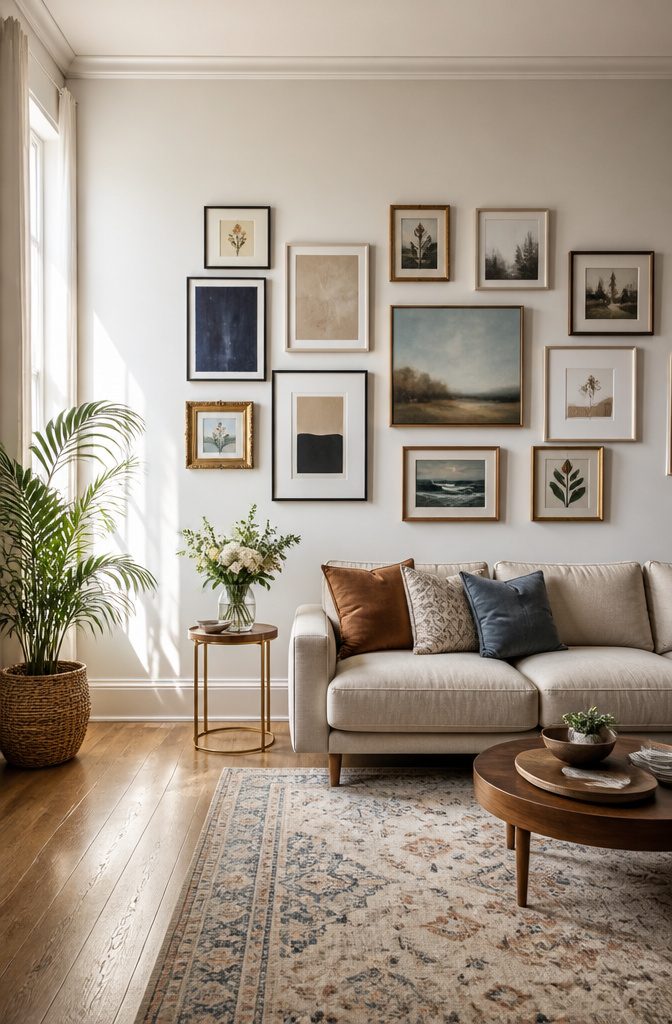
Plan on about 30 minutes, and spend the first part of it on the floor, not the wall.
Lay your frames, art and mementos out on the floor and shuffle them until the arrangement looks right, so you never put a nail hole in the wall for a guess.
Start with your biggest or most special piece and build outward from it. Fill the gaps with smaller frames and keepsakes, and keep the spacing between pieces fairly even so the group reads as one shape.
Once the floor version works, snap a photo of it and hang from that picture, one piece at a time.
I’d rather check a phone than trust my memory halfway up a stepstool. Hang the anchor piece first, then work out from it.
7. Bathtub Tray

A bathtub tray is one of the few wooden projects that really does fit in about an hour, and scrap boards are enough to build it.
Two boards run across the tub as rails, and a few slats on top hold the book, the candle and the glass.
Steam is the real enemy here, so skip flat interior paint and anything labeled water-based and meant for walls.
Oil-based paint gives a smooth, hard finish and suits trim, which is close to what a tray is: a small, exposed edge that gets handled.
Slow drying is the downside, so let the coats cure fully before the tray goes near a hot bath.
Gloss is the more durable sheen and sheds drips better than flat. Put the finish on every side, including the underside and the cut ends, since that is where moisture creeps in.
8. Abstract Art and Canvas

Abstract art is the easiest way into painting because nothing can be drawn wrong.
If you can let go of perfectionism, a canvas and a few jars of cheap acrylic are enough. A used canvas works too: one from a donation pile can become nursery art with a fresh coat of paint.
I’d pick budget craft paint over pricey tubes here.
You’re covering a large surface with big, loose strokes, and the cheap stuff does that fine. Start with two or three colors that sit well together, then layer, drag, and overlap them until the canvas looks finished.
Add a simple wood frame and the piece reads as high-end. Plan on a full day if you’re painting and building the frame, since the paint has to dry before the frame goes on.
9. Paint Your Vanity
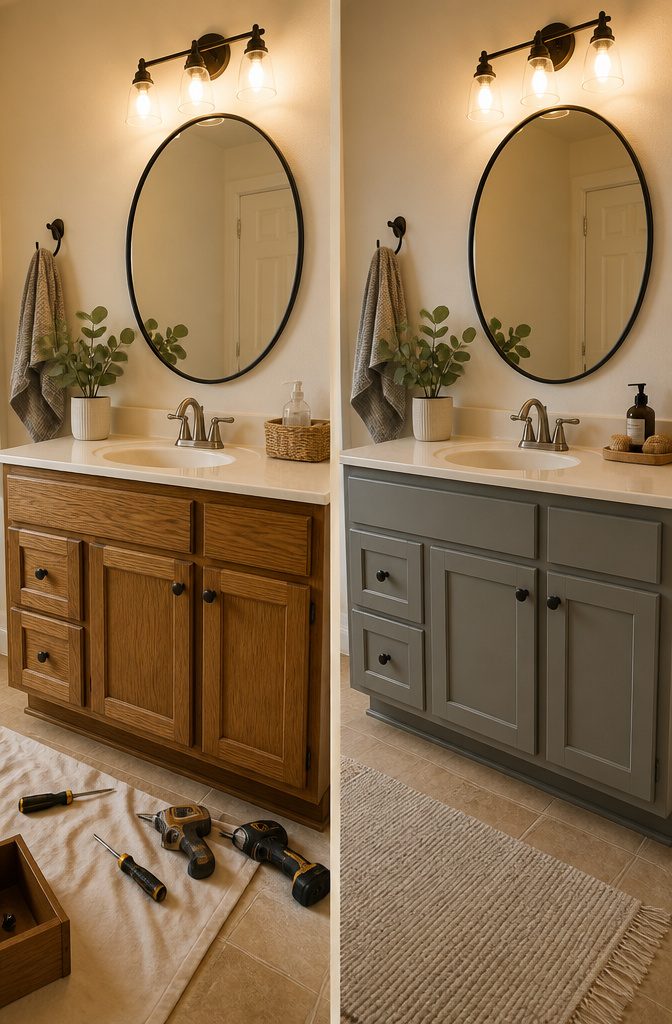
A cabinet paint kit is the fastest route to a repainted vanity, and it skips both sanding and priming.
One full day is a realistic window for the work. A tutorial that tried three different vanity methods landed on the kit because it took the least time and gave the best finish.
Prep still matters, even without sandpaper.
Take off the doors and hardware, and clean the surfaces before the first coat goes on. Bathrooms leave a film of soap and hair product that paint will not grip.
For paint, a water-based latex dries quickly and suits most rooms.
Oil-based gives a smooth finish but takes longer to dry, so I would skip it for a one-day job. Choose a gloss or semi-gloss finish, since shine is what makes a surface durable and easy to wipe.
Give the paint time to cure before the doors go back on and the sink gets used.
10. Seal Marble or Porcelain
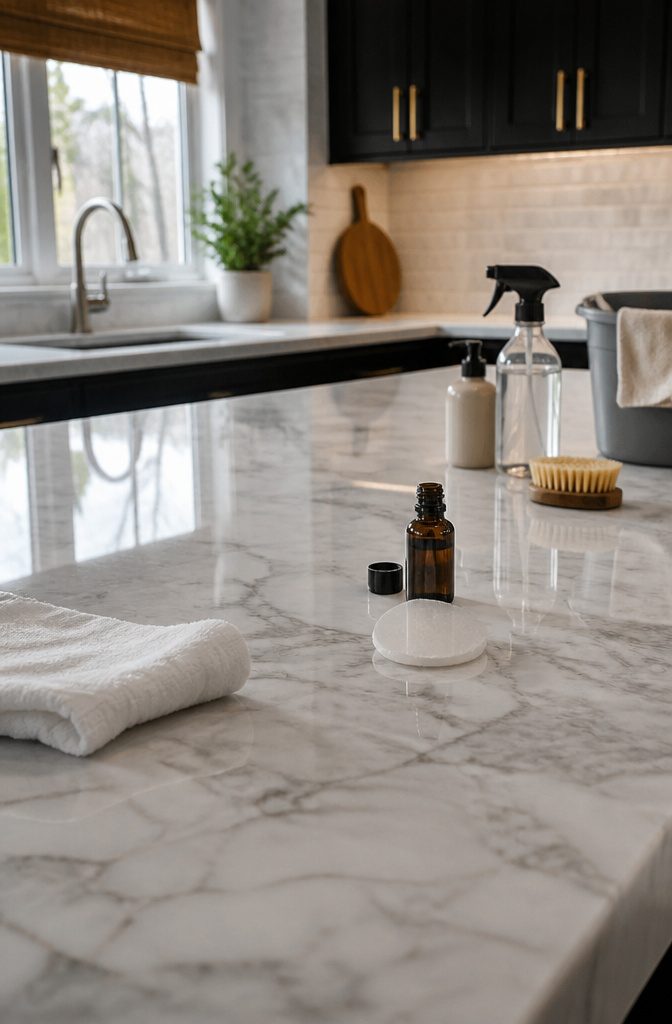
Sealing is the cheapest insurance a stone or tile surface gets, and it can take anywhere from 5 minutes to an hour.
Marble is porous, so a spilled glass of wine or a ring of coffee can soak in before you reach for a towel. A sealer fills that gap and buys you time to wipe up.
Porcelain tile asks for a slightly different routine.
Clean the tile and grout first, since sealing over grime locks the grime in. The grout is the thirstier part of the floor or wall, so I would never skip it.
This is a weekday-night job. Buy the sealer ahead, clear the surface, and the weekend stays free for something bigger.
11. Add Wood to Your Walls
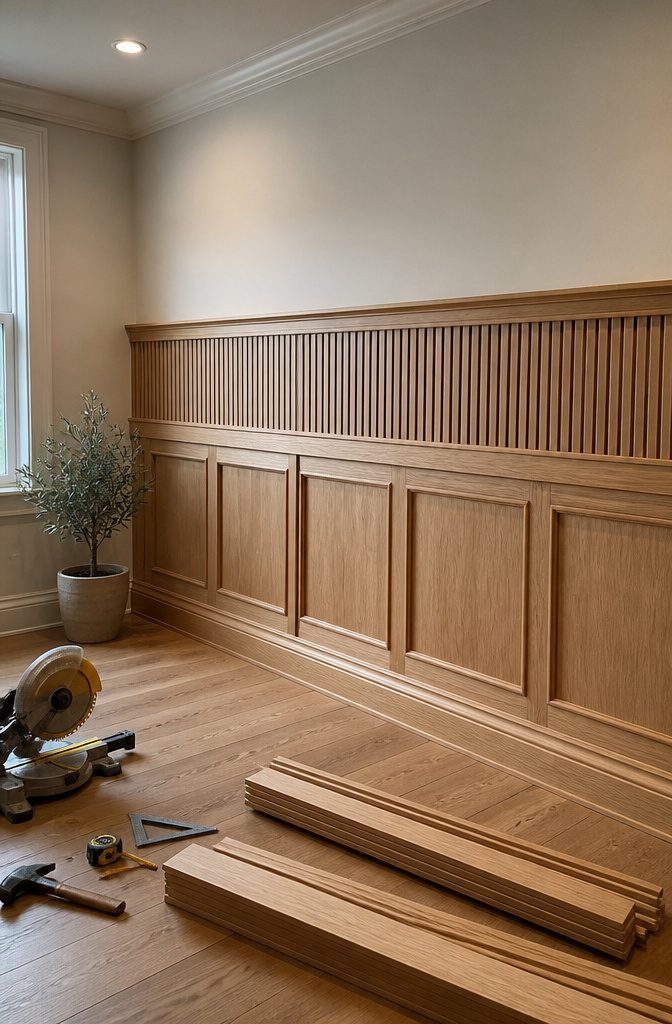
A wood wall treatment is the fastest way I know to make a blank wall look more high-end, and a small space fits in one day.
A bathroom with molding added is a good example: one day of work, and it can become the favorite feature of the room.
Chair rail, picture frame molding and full planks all work on the same logic. Pick one wall and finish it.
Plan the work so the prep happens during the week.
Read through the steps, buy the supplies at the hardware store when it’s quiet, and clear the space. Saturday morning then starts with the first cut instead of a shopping trip.
12. Hang Window Treatments
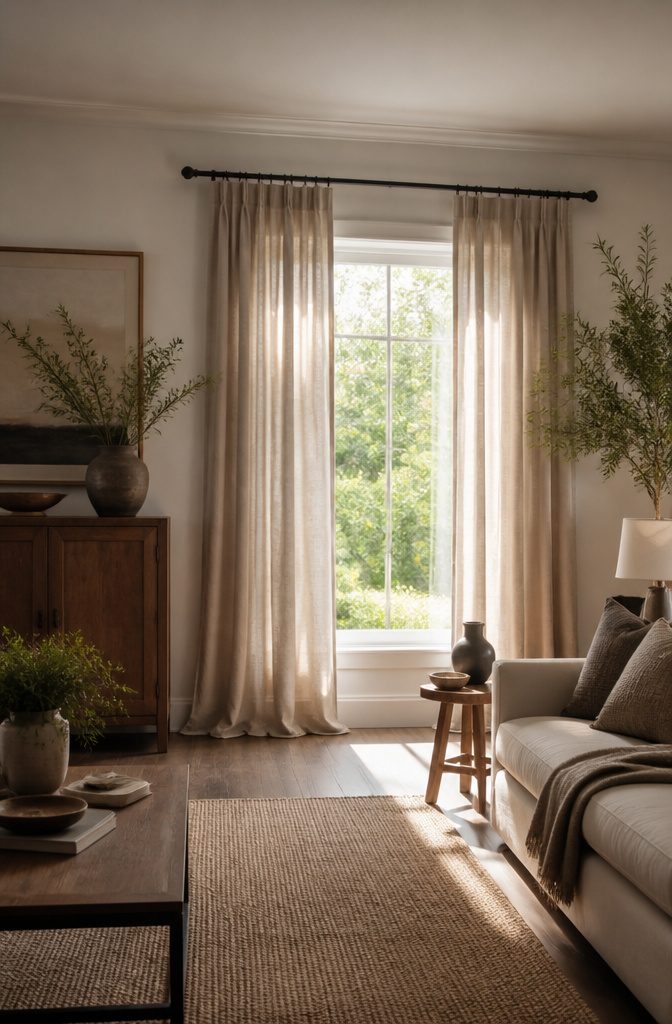
Mount the rod higher than the window frame, closer to the ceiling than feels natural, and the whole wall looks taller.
Hanging it a few inches above the trim and letting the panels fall to just off the floor does more for a room than any fabric choice.
Extend the rod wider than the window on each side so the panels can stack against the wall and leave the glass uncovered.
Brackets should land into a stud or a proper wall anchor, because a closed curtain pulls outward on them every day.
Mark the bracket spots with a pencil and a level, drill pilot holes, and screw them in. Use a level on every bracket so the rod doesn’t slope.
A drill and a tape measure are all you need, and the job fits in an afternoon.
13. Hang Something From the Ceiling
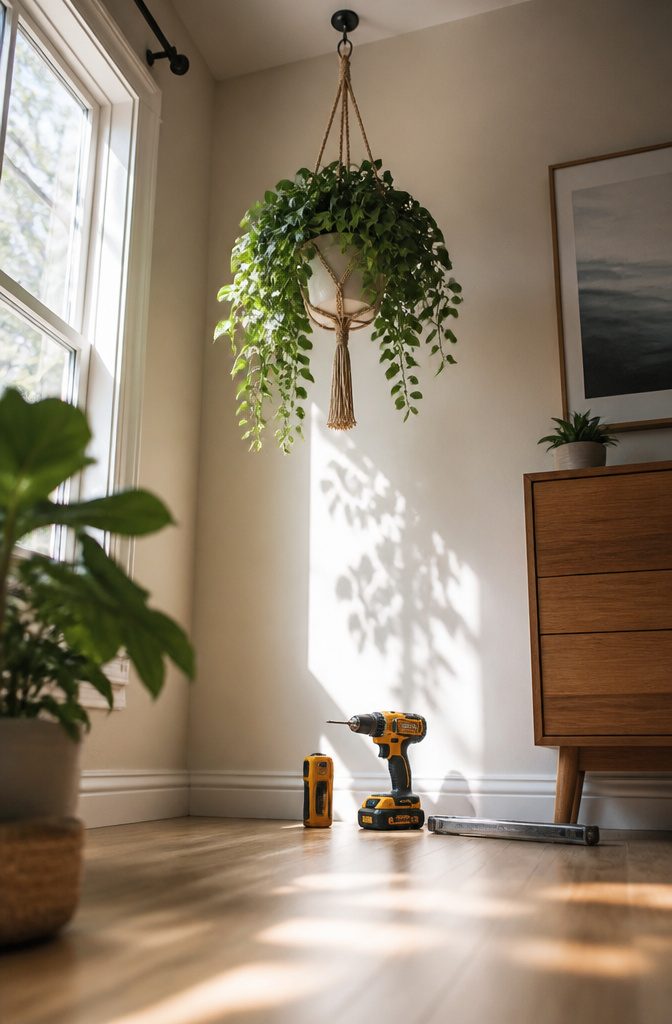
Drywall alone will not hold a hanging plant for long, so the first job is finding what sits behind it. A stud finder works, or you can knock along the ceiling and listen for the dull thud that means wood.
Joists usually run in one direction, so once you find one, the next sits at a regular interval along the same line. A small nail or drill bit pushed through confirms it.
When no joist lines up with where you want the plant, use a toggle bolt or a heavy-duty drywall anchor rated well above the pot’s weight.
Screw a hook into a joist whenever you can, since a watered pot weighs far more than a dry one. Light paper lanterns or a string of lights need only a small hook.
14. Paint Outdated Tile
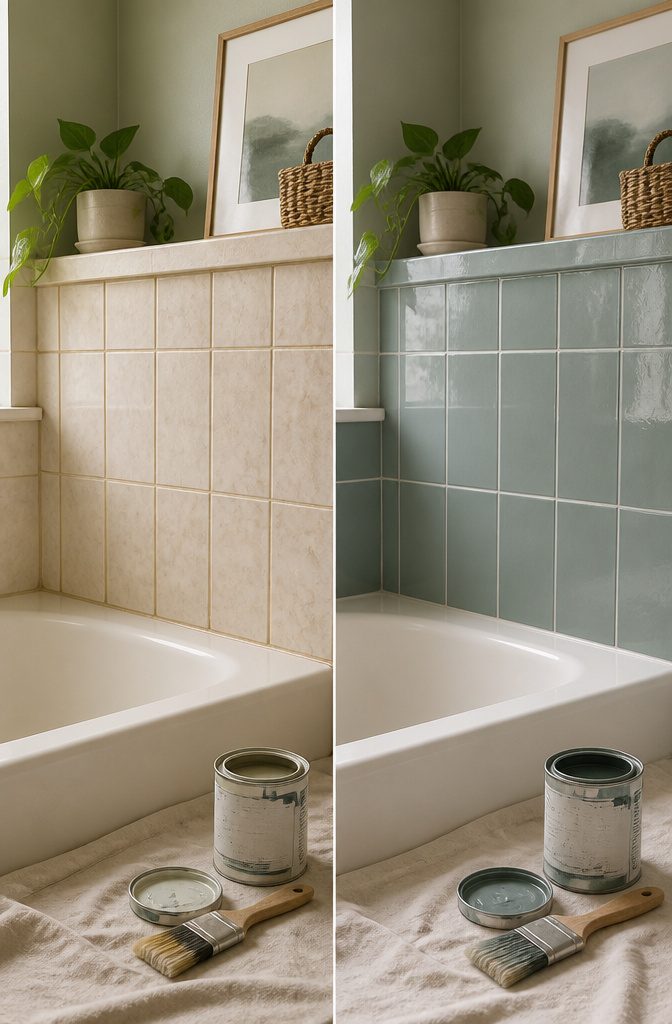
Painted tile is one of the cheapest ways to change a bathroom floor, and it costs a fraction of new flooring.
A single solid color can be done in one day, while a stenciled design needs a second day of work and more dry time, so plan it as a weekend job.
Countertops are the bolder move. Rustoleum Appliance Epoxy is the product to use, and it has been applied even over brown granite with results that hold up well and need very little touch-up.
I would choose it over replacing a countertop you only dislike for its color.
Painted tile will never match the hardness of fired glaze, so expect the occasional chip, and keep the stencil work off the spots that take the most traffic.
15. Use Rub ‘N Buff
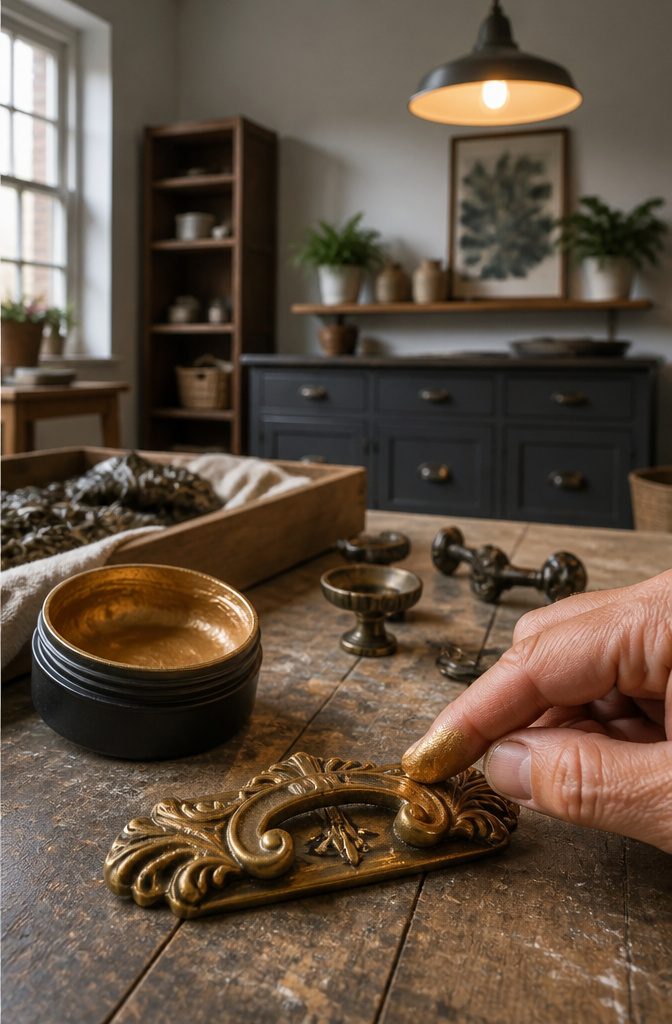
Rub ‘N Buff is a wax-based metallic finish that goes on with a fingertip or a soft cloth, which makes it a tidier option than spray paint for anything small.
Black curtain rods turn gold with it, and the finish holds up under daily use.
Knobs, drawer pulls and picture frames are the same kind of job: small, handled often, and quick to finish. Plan on about 30 minutes for a set of rods.
Rub it in, then buff the color. I’d pick it over buying new hardware when the shape of the old pieces is fine and only the finish is tired.
If the pulls are loose, grimy or the wrong size, replace them instead. New pulls need the same center-to-center measurement as the old ones, or the holes won’t line up.
16. DIY Coffee Station
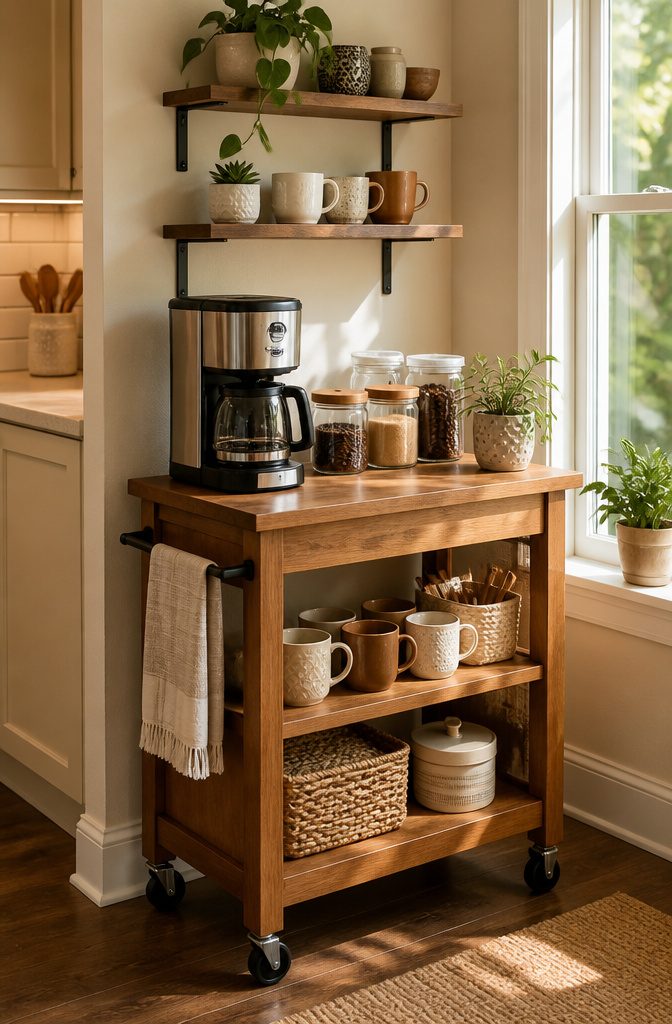
A small cart wins over a shelf if you rent or move often, since the whole station rolls to a new wall.
A butcher block or a cart gives you extra counter space, and that matters because the coffee maker and grinder need a dedicated section of surface.
Put the heavy gear on the flat top and keep beans, sugar and other supplies in labeled canisters or jars, so you can tell them apart at a glance and the cart looks tidy instead of cluttered.
Floating shelves above it can hold mugs, jars of beans and a few decorative pieces. I’d match the wood to your kitchen so it reads as one setup.
Hooks screwed under a shelf are the cheapest upgrade: mugs and small tools hang within reach, and the cart’s surface stays clear.
17. Custom Shelving
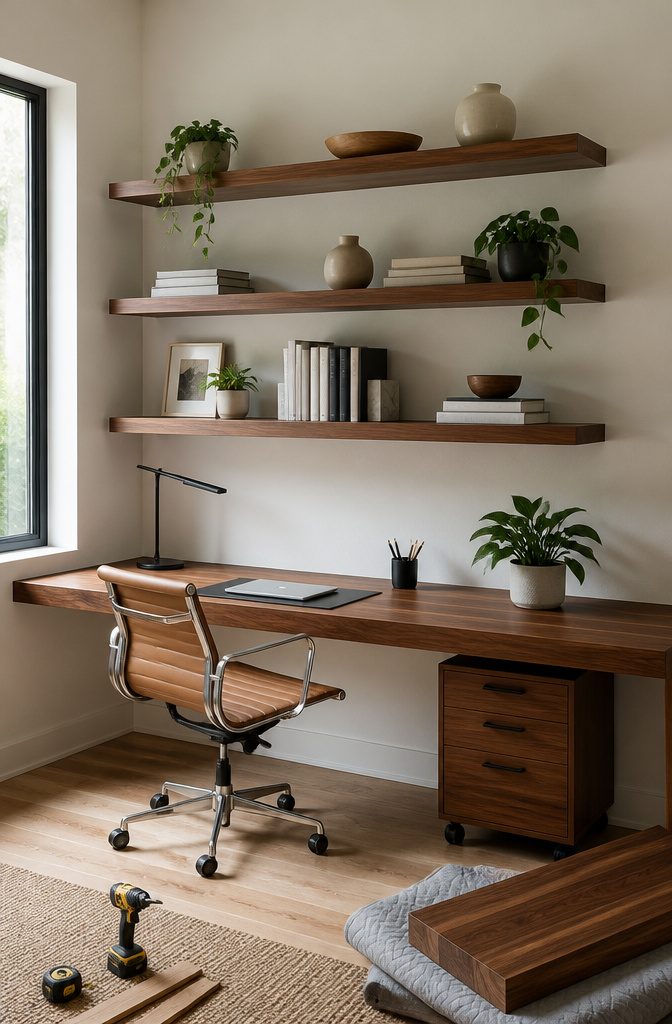
Bracket strength decides how much a shelf can hold, so pick brackets for the heaviest thing you plan to set on the board, not the lightest.
Books and pantry cans weigh more than decor, and a bracket that looks sturdy in the store can sag under a full row of hardcovers.
Plywood, pine and oak all work for the board. Pine is the easy budget pick, oak costs more but looks richer, and plywood suits a painted shelf.
Size the board to your wall first: measure the width of the nook, then the depth of what will sit on it, and cut to that.
Use wood screws matched to the board thickness and the wall type. Match the screws to your wall, not just your shelf, since drywall and studs call for different fasteners.
18. Kitchen Backsplash
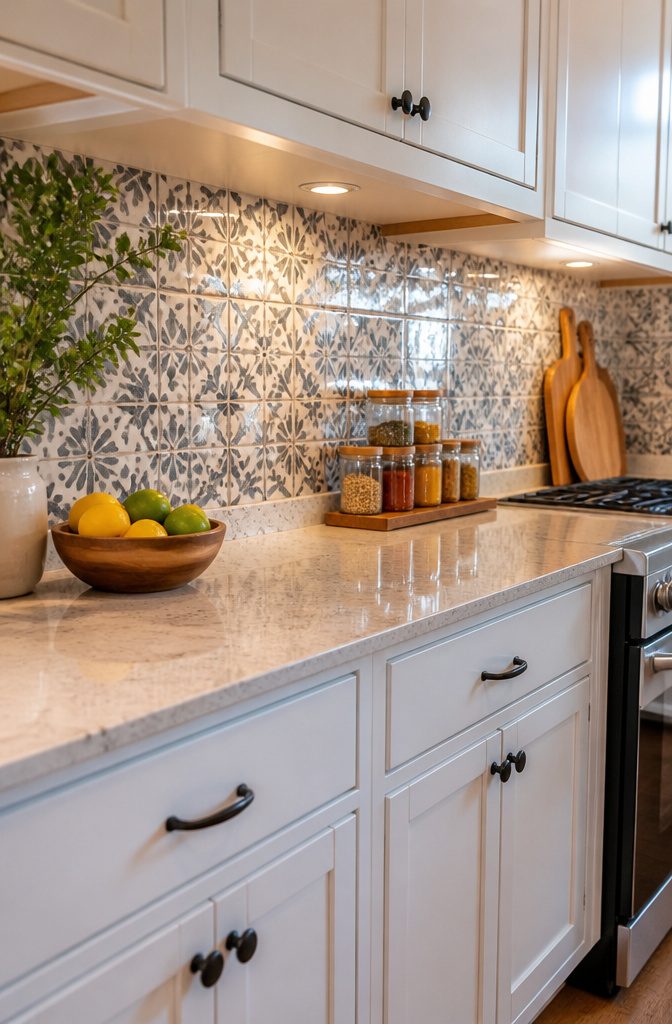
Peel-and-stick tile is the easiest backsplash a beginner can put up, because it skips the adhesive tub and the grout entirely.
Today’s vinyl comes in patterns that mimic stone, wood, or even metal, and it goes down fast. Clean the wall, press each tile in place, and trim around outlets as you go.
Real tile wins on looks and feel. Ceramic, like a classic subway or a mosaic, needs adhesive (pre-mixed or powder you mix with water) plus grout in a color that suits the tile.
That means more steps and more patience, though a beginner can still manage it. For a first backsplash or a quick afternoon project, I’d pick peel-and-stick; I’d save ceramic for when you want it to look permanent.
19. Weatherproof Your Home
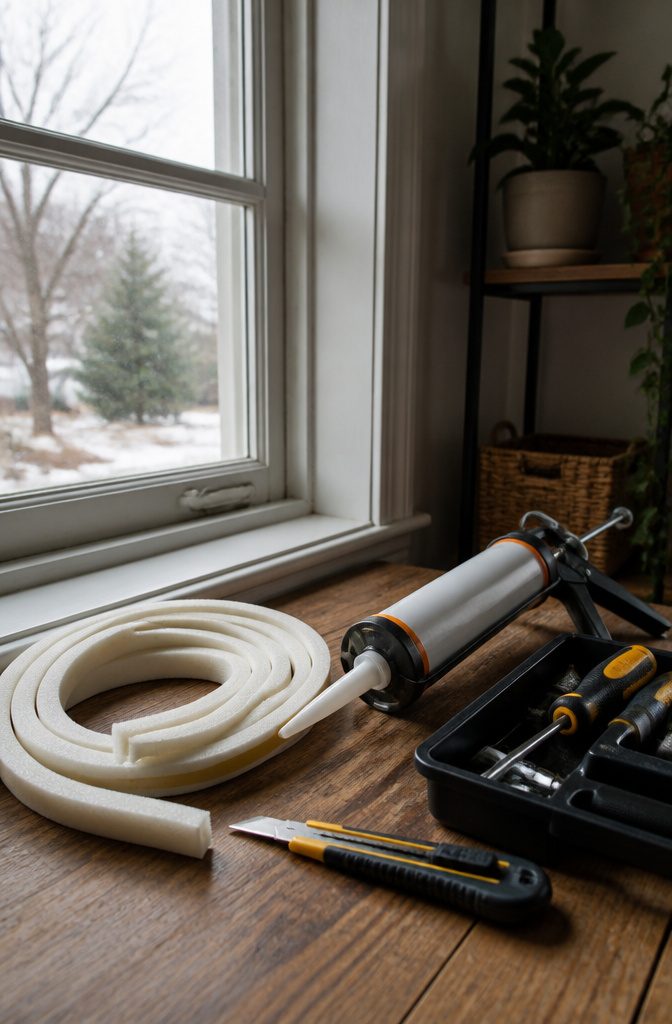
Gaps around windows and doors let cold air in and make the furnace work harder, and two cheap fixes close most of them.
Caulk handles cracks around window and door frames, and a tube usually runs under $10. Weatherstripping handles the moving edges, using foam tape or rubber strips, and it takes a few minutes and costs less than $20.
For doors and windows you open all season, I’d choose permanent weatherstripping, either adhesive or nail-on.
For windows that stay shut until spring, temporary seals or peel-off sealants make more sense, since you can pull them off when the weather turns.
Start with the drafty spots you can already feel with your hand on a cold day. The whole job fits in an afternoon, and the house feels more comfortable right away.
20. Garden Bed
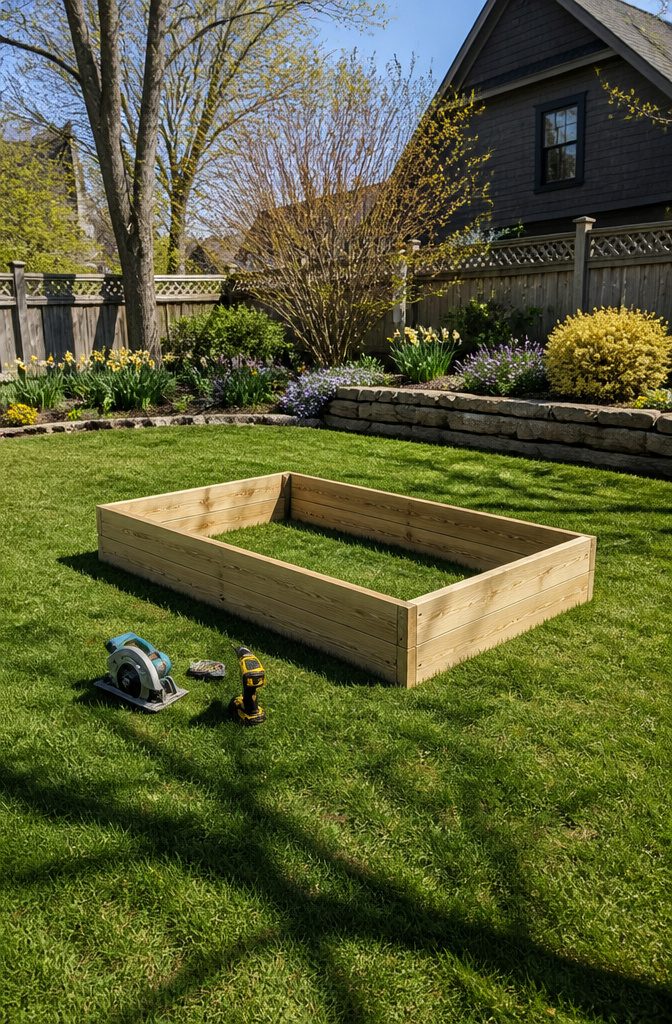
An 8-foot-square raised bed goes together in under an hour, and the shopping list is short: eight 8-foot sections of pressure-treated lumber, screws, and construction adhesive.
A saw cuts the pieces to size, and a drill drives the screws. Glue each joint before you screw it and the corners stay tight once the soil is in.
Line the base with water-permeable landscape fabric so weeds can’t push up from below. If digging critters are a problem in your yard, add hardware cloth under the bed as well.
I’d do it even if you’ve never seen a gopher, since it’s cheap insurance against a bed you can’t easily move once it’s full.
Set the bed where you’ll actually walk past it, and build it before planting season so the soil has time to settle.
How Long These Projects Take
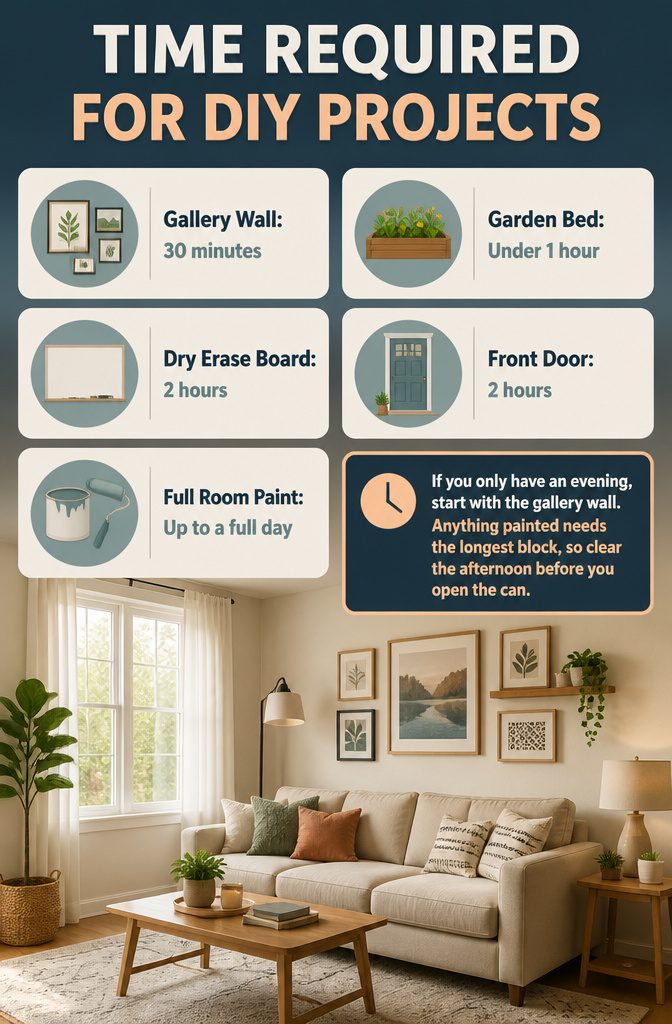
Most of these projects land between 30 minutes and a full day, and the paint jobs are the ones that stretch.
A gallery wall can go up in about 30 minutes, a garden bed takes under an hour, and a dry erase board or a front door each run around 2 hours.
Painting a whole room is the long end, up to a full day.
| Project | Time | Best for |
|---|---|---|
| Gallery wall | 30 minutes | A quick weeknight win |
| Garden bed (8-foot square) | Under 1 hour | Saturday morning |
| Dry erase board | 2 hours | An afternoon |
| Front door | 2 hours | An afternoon |
| Full room paint | Up to a full day | A whole weekend day |
If you only have an evening, start with the gallery wall. Anything painted needs the longest block, so clear the afternoon before you open the can.
Keeping Costs Under $100
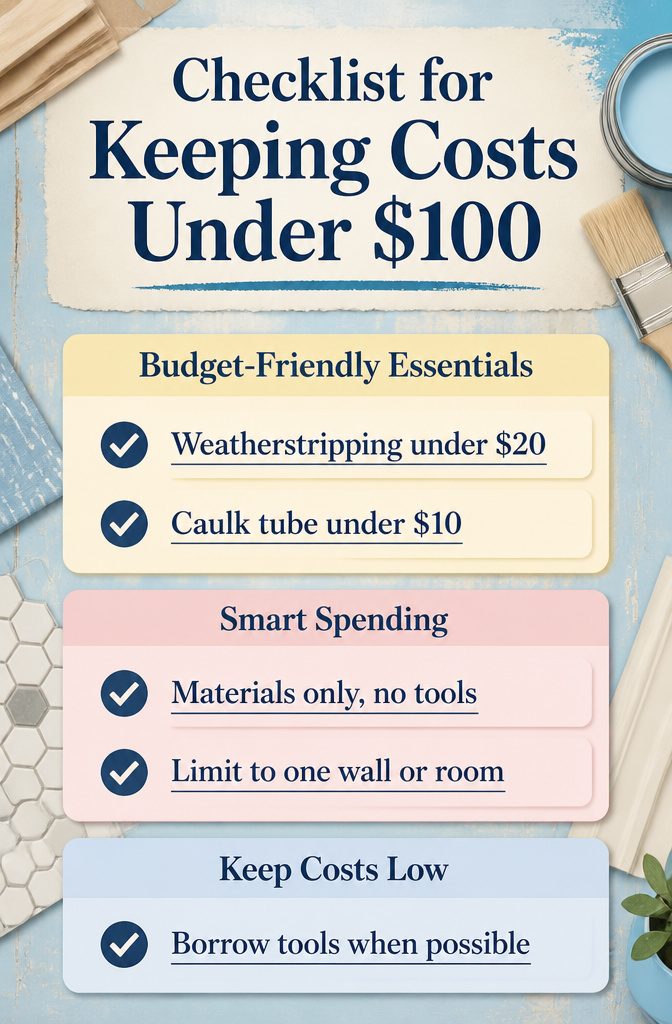
Weatherstripping runs less than $20 and a tube of caulk is usually under $10, so the cheapest wins in this list cost about the price of lunch.
Paint, tile, trim and shelving climb from there, and that is where most of the $100 goes: materials you can see and touch, not tools.
Most of these projects fit under the cap if you do the labor yourself and keep it to one room or one wall.
Spreading the work across weekends helps, since you can buy supplies for one project at a time instead of one big cart.
I’d skip any project that needs a tool you’d only use once; borrowing or already owning the tools is what keeps a project under $100. If a plan needs three or four new tools, it usually isn’t a $100 project anymore.
Skill Level and Tools
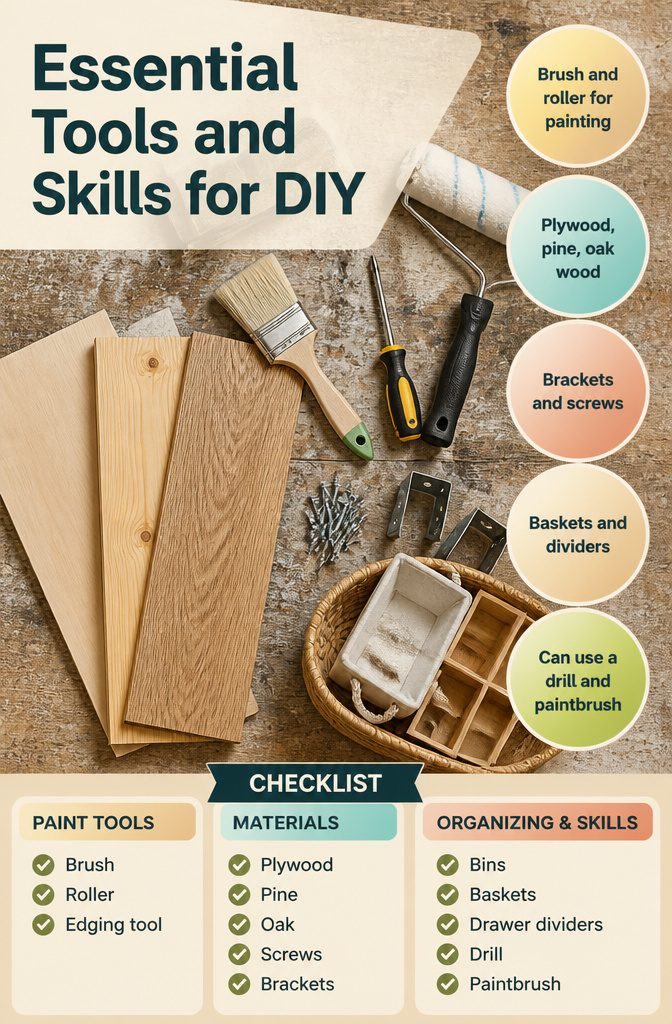
Most of these projects need nothing beyond a brush, a screwdriver and a free afternoon. Here is what I’d gather first:
- Paint tools: a brush for cutting in and detail work, a roller for large areas, and an edging tool for clean lines. Good tools matter more than fancy paint.
- Wood: plywood, pine and oak are the popular picks. Pine is the easy choice for a first build.
- Brackets and screws: match the brackets to the weight you plan to load on them. Choose wood screws sized for your board’s thickness and your wall type.
- Organizing supplies: bins, baskets and drawer dividers cover the "catch all" spots that bug you most.
- Skill level: if you can hold a drill and a paintbrush, you’re set.
Frequently Asked Questions
What are some easy DIY projects for your home?
Good starting points are organizing a junk drawer, hanging a gallery wall, painting a front door, sealing marble or tile, and weatherstripping drafty windows.
Each one needs only basic tools, and most fit into an afternoon or less. If you can hold a drill and a paintbrush, you can handle the list.
How long do easy DIY projects take?
Most land between 30 minutes and a full day. A gallery wall takes about 30 minutes, a garden bed under an hour, and a dry erase board or front door about 2 hours.
Painting a whole room is the long end at up to a full day, and anything painted needs the biggest block of time.
What materials and tools do I need for easy DIY projects?
A brush, a screwdriver, and a free afternoon cover most of them.
Paint jobs call for a brush, a roller, and an edging tool; wood projects usually use plywood, pine, or oak. For shelves, pick brackets rated for the heaviest load and screws that suit your wall type.
What is the best DIY project for a beginner?
A junk drawer cleanout or a gallery wall is the easiest win, since each takes about 10–30 minutes and shows results right away.
Peel-and-stick wallpaper or backsplash tile is a good next step because it skips paste and grout. Start with one small project and finish it before adding another.
Can I do these DIY projects for under $100?
Yes, most fit under $100 if you do the labor yourself and limit the work to one room or one wall.
Caulk is usually under $10 and weatherstripping under $20. Owning or borrowing the tools is what keeps a project under the cap.





