
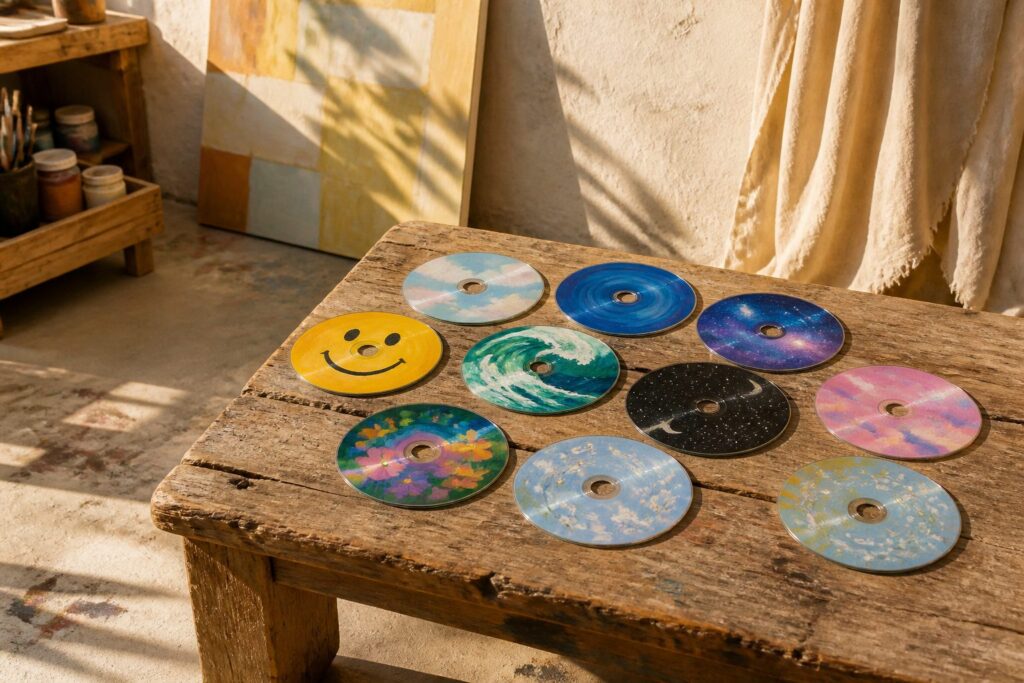
These designs run from a 2-minute smiley face to layered scenes like the ocean waves and galaxy sky, and the one you pick depends on how much drying time you’ll tolerate.
Slick plastic punishes impatience: wet layers smear, so nearly every design needs a fully dry base, and sheer colors like yellow need 2 thin coats.
1. Monarch Butterfly Design
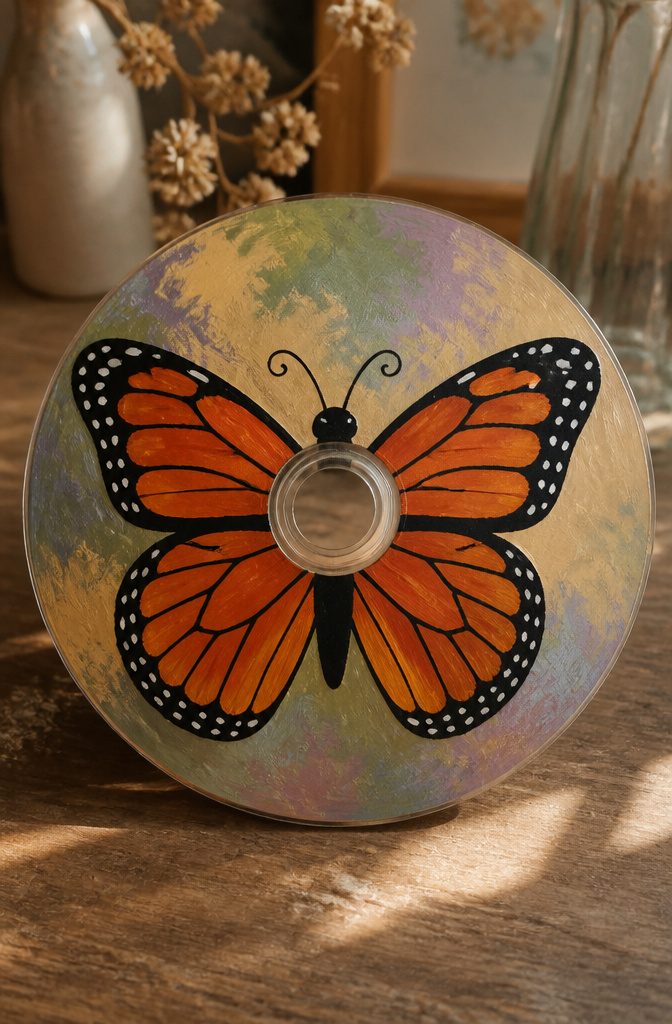
Paint the wings so the center hole sits where a monarch’s body would, with one wing pair on each side of it.
The hole becomes the dark body line, so you only need to add a small black head above it and two thin antennae curling off the top edge.
Start with orange acrylic as the base for all four wings, then outline each wing in black and add a row of tiny white dots along the black edges.
A thin brush or a paint pen handles the veins better than a full brush.
Burnt orange looks more like a real monarch than bright orange, and a touch of yellow in the wing centers adds depth. Let the orange dry fully before you outline, or the black will streak into it.
2. Bubbles on Black Background
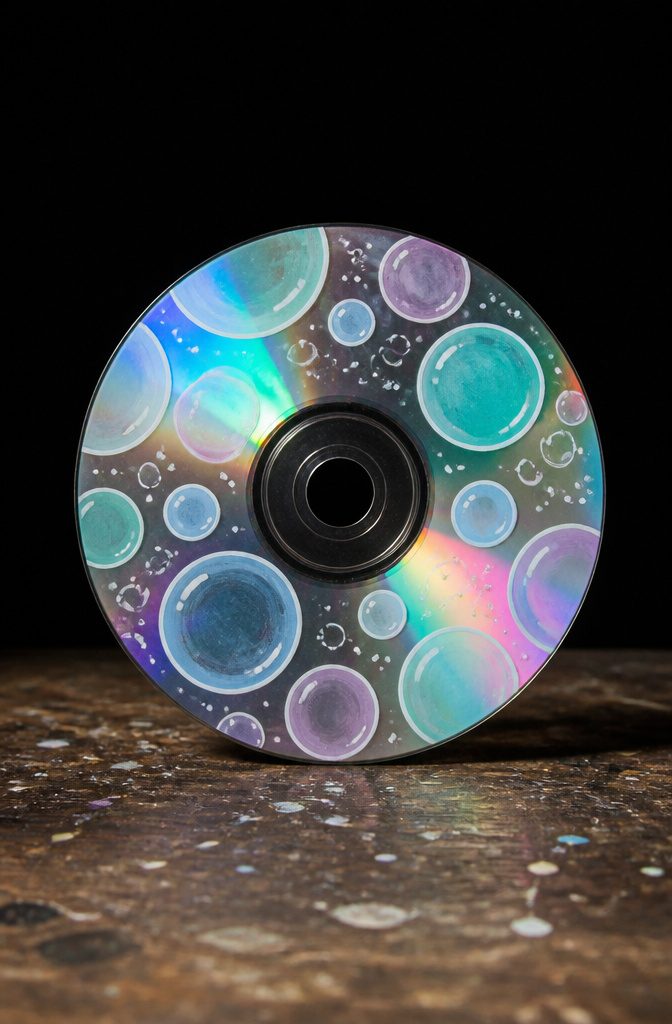
A CD’s shimmer does half the work here, so the base coat should be solid black and nothing else.
Two thin coats of black acrylic cover the reflective side better than one thick one, and the base needs to dry completely before any bubbles go on. Tacky paint drags, and the circles will smear into the black.
Pick light, translucent colors for the bubbles: pale blue, mint, lilac, soft pink. Thin the paint with a little water so the black shows through and the CD’s rainbow glint comes up around each circle.
Dip the back of a pencil eraser or a round sponge dauber for clean circles, and vary the sizes.
I like a few large bubbles with clusters of tiny ones tucked between them; evenly spaced dots look like polka dots, not bubbles.
3. Matisse Abstract Flowers
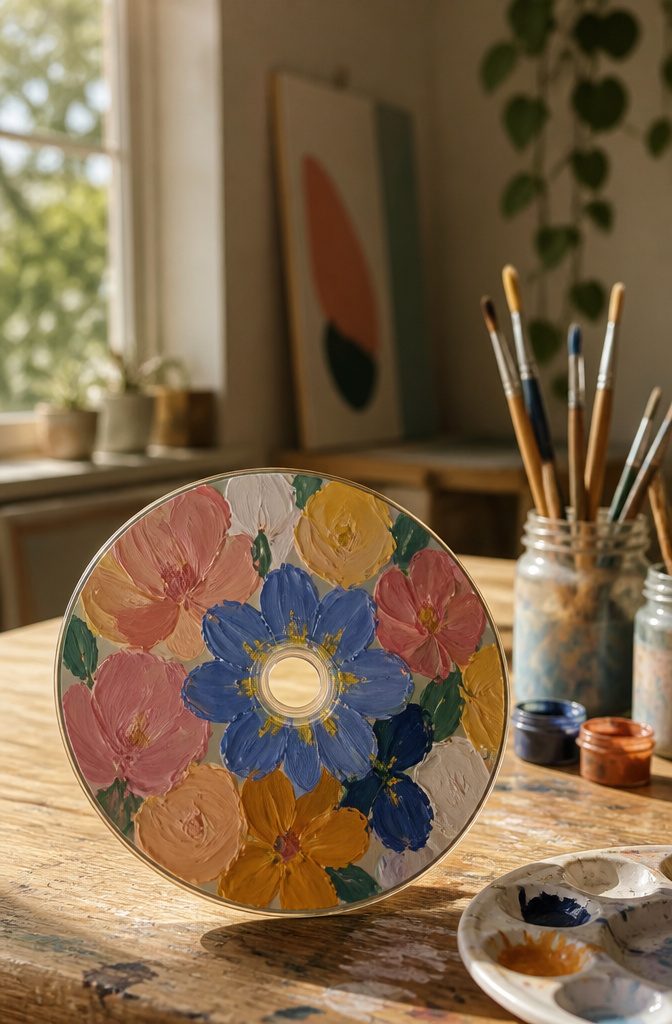
Start with a clear CD, then paint the first flower in blue: a small circle in the middle and loose, uneven petals around it. The paint will look thin and see-through at this stage, and that is fine.
Pick up pink and set a second flower right beside the blue one, then keep going in whatever colors you like until the whole disc is covered.
Let the paint dry, then brush a second coat over the first. Two coats turn the color opaque and get rid of streaks.
A third coat gives punchier color if you want it, though I’d stop at two. Loose, imperfect petals are what make this look like a Matisse cutout rather than a stiff stamp pattern.
4. Milky Way Galaxy Night Sky
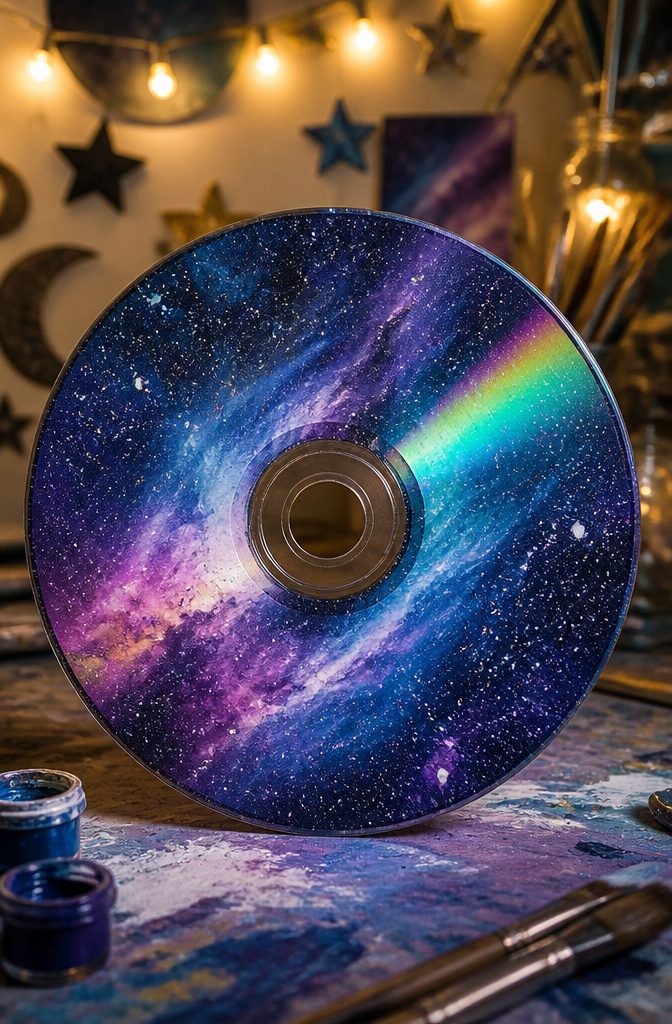
A CD’s rainbow sheen is the best part of a galaxy design, so paint thin enough to let it through.
Use acrylic with a little water, and the disc’s color shift glows behind the blue and purple like a faint nebula.
Blend while the paint is still wet, because a slick surface gives you no tooth to grab.
Dab dark blue on one half and purple on the other, then pat the seam with a damp sponge until the two melt together. Brushing back and forth drags the paint into streaks, so pat instead.
Let the base dry fully. For stars, load an old toothbrush with watered-down white paint and flick the bristles with your thumb.
A few larger dots from a toothpick make the closest stars. I’d skip glitter here; it competes with the sheen.
5. Easy Pink Donut Design
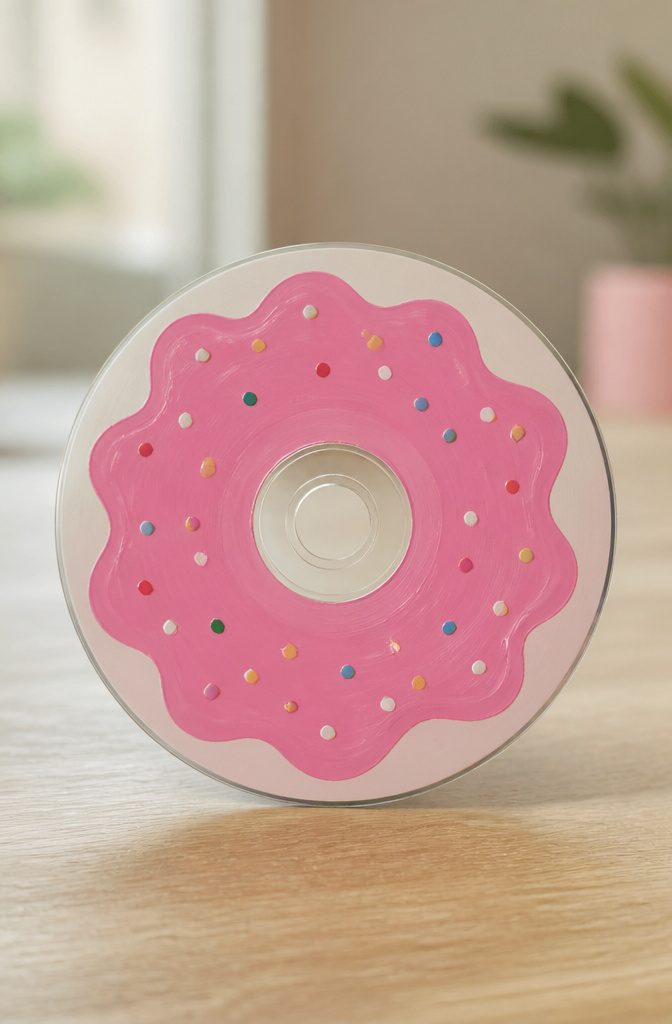
A donut is a forgiving first CD project because the hole is already there.
Paint a wavy pink band around the center hole, leaving a thin ring of bare disc at the edge so the shape reads as icing on a pastry.
Let the outline wobble. Uneven drips look better than a perfect circle.
For the sprinkles, dip the tip of a small brush or a toothpick in a few colors and press down short dashes, each one in a different direction.
Keep them small and spaced apart, or the icing turns into confetti mush. Wait until the pink is fully dry first, since wet paint drags the dashes into streaks.
I’d pick opaque acrylic paint or paint pens here. Thin craft paint can look patchy on the shiny side, so plan on two coats of pink.
6. Q-tip Lavender Flowers
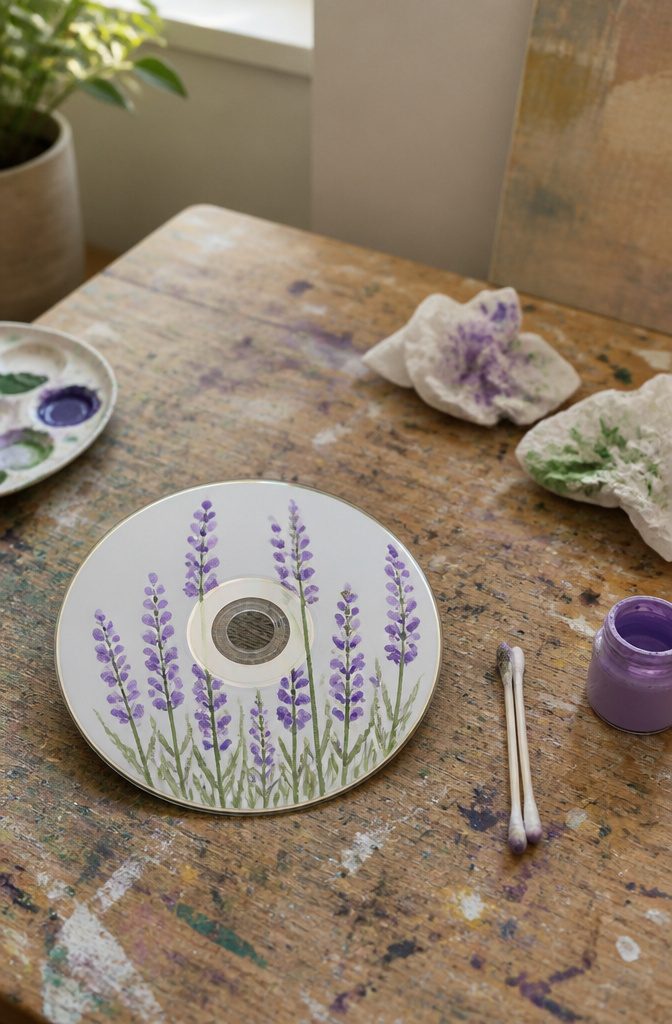
Lavender is one of the easiest flowers to fake on a CD, because the whole bloom is a stack of small purple dabs.
A Q-tip works as the stamp: press the cotton tip straight down, lift without dragging, and you get a soft oval petal.
Space a column of them up a stem line, with the biggest dabs at the bottom and smaller ones toward the tip.
Paint the green stems with a thin brush, either before or after the petals.
I’d do the stems after, since a quick brushed line tidies up any dabs that landed crooked. Use a fresh Q-tip if you switch to a lighter purple, so the colors stay clean.
Q-tips are already in most bathroom drawers, so this idea costs nothing beyond the paint.
7. Blue Ocean Wave Design
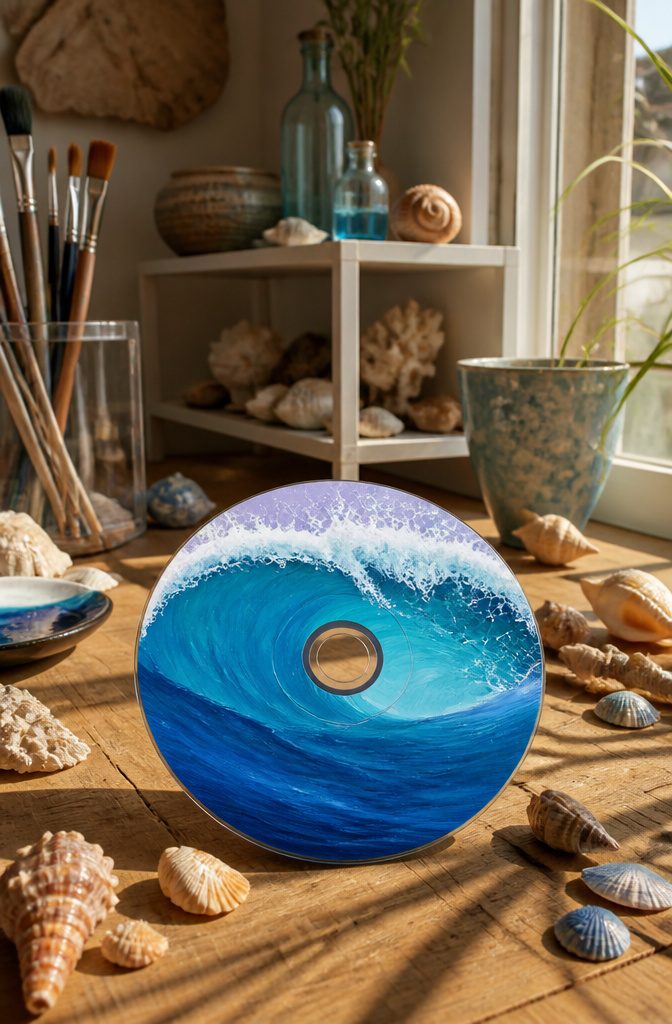
Start with the darkest blue, a navy or deep ultramarine, and cover the whole disc in uneven bands so the lower half reads as deep water. Acrylic works best because it dries fast and layers without lifting.
Mid-blue goes on next, brushed up into the dark while it’s still tacky so the edges blur. Then add a light blue or turquoise toward the top.
White comes last, and working dark to light is what keeps the foam bright. Load a small brush, drag it along the crest of each wave, and flick the tip back into a curl.
Dab a little white with a sponge or fingertip for spray. If you paint white first, the blues will turn it gray.
Let each layer dry before the next one covers it, or the curls turn muddy.
8. Kawaii Cute Characters
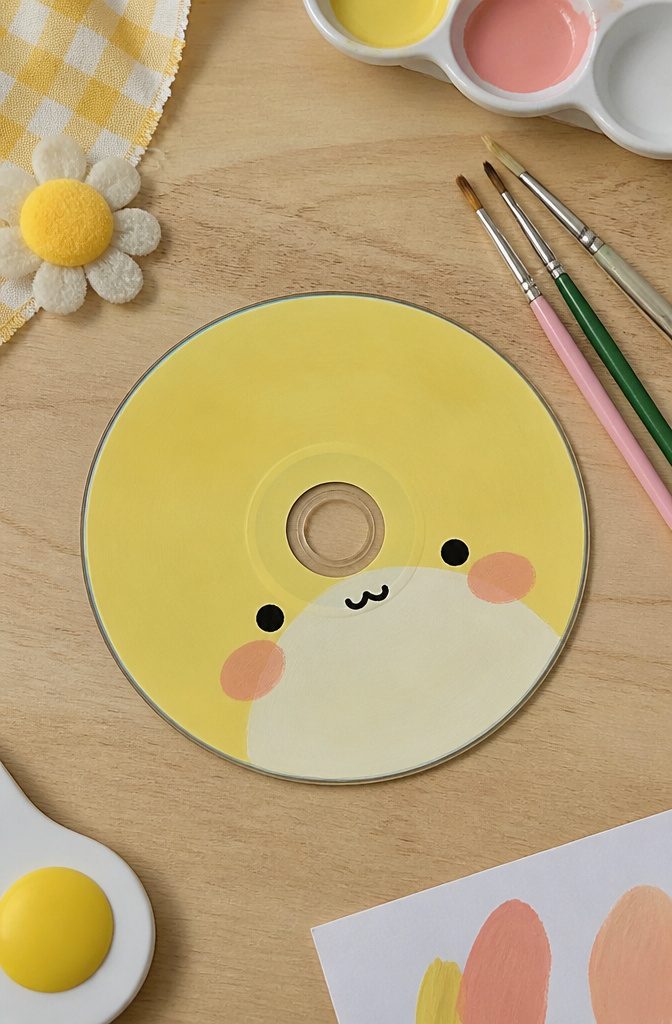
A kawaii face works on a CD because it needs almost nothing: one round shape, two dot eyes, a tiny mouth, and two blush ovals.
Keep every feature small and bold, since a 4.7-inch disc gives you very little room and fussy detail turns to mush from arm’s length. I’d skip eyelashes, noses and outlines entirely.
Paint on the shiny side with an opaque paint pen.
The dots go on with a pen tip or the end of a toothpick, and a wide-set pair of eyes sitting low on the face reads as cuter than eyes placed high.
Set the mouth between them, smaller than you think it should be.
Pastel blush looks best over a solid background like white or pale pink. Let the base dry fully before adding the face, or the dots will smear and drag.
9. Yin Yang
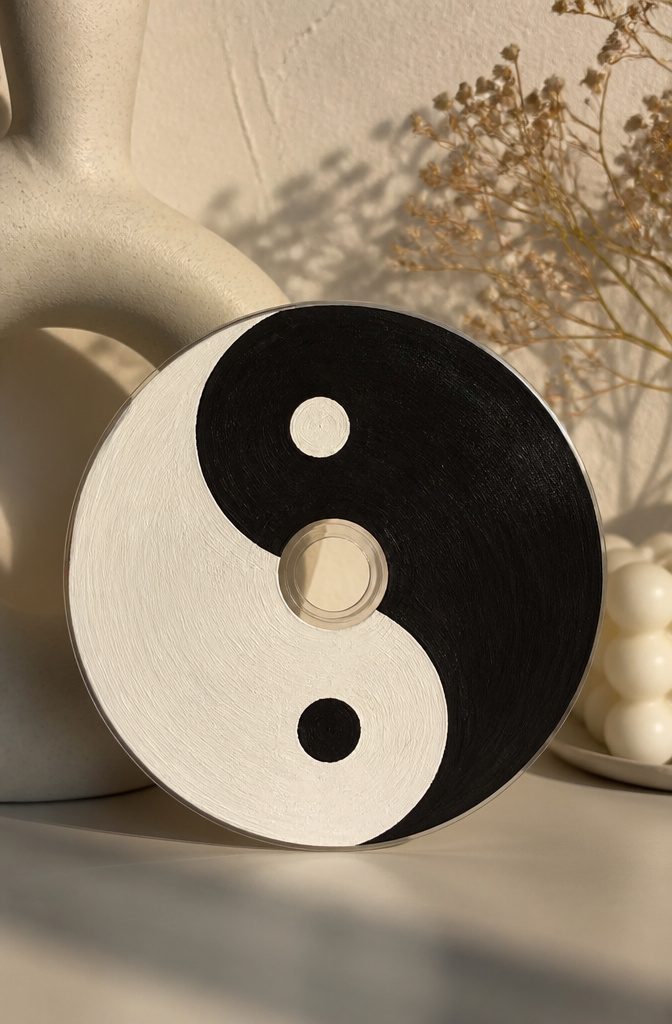
The center hole is the best part of a yin yang CD, because it can stand in for one of the two small dots.
Paint the disc half black and half white in a curved S shape, then use the hole as the "dot" in whichever half it lands.
A hole sitting in the white side reads as a black dot, so run a thin black ring around its edge.
Acrylic paint pens give cleaner curves than a brush on this slick surface. Do the white first, let it dry fully, then add the black so the line between them stays crisp.
White usually needs two coats to cover the silver, and I would paint the shiny label side. The other side shows rainbow glare through thin paint.
Add the second dot by hand, about halfway along the opposite half. Make it the same size as the hole so the two match.
10. Palm Trees
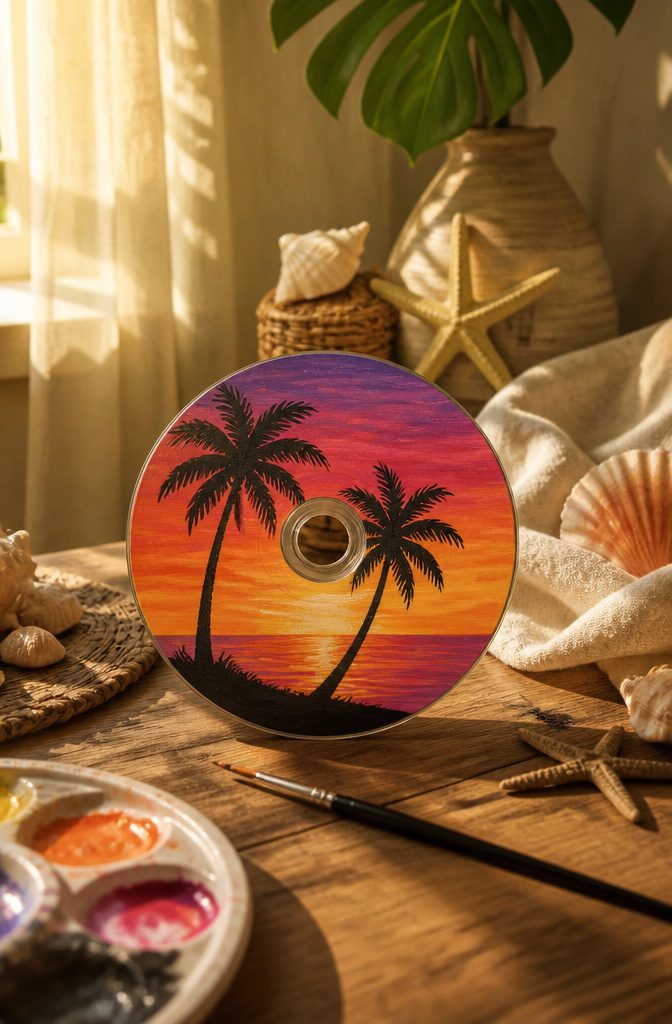
Start with the sky, because it is the part that goes wrong. Brush orange, pink and purple in horizontal bands while the paint is still wet, then blend the seams with a dry brush or a sponge.
Let the gradient dry completely before you paint a single palm, or the black will bleed into the sky and turn muddy.
For the silhouette, use black acrylic and a thin liner brush.
Paint a slightly curved trunk first, then flick short, tapered strokes outward from the top for fronds. Let the fronds droop at the tips, since stiff, straight ones look more like feathers than palms.
I’d keep it to two trees of different heights.
A single palm feels lonely on a small disc, and three crowd the hole in the center. Placing the trunk beside the hole lets the sun sit right where the hole is.
11. Music Notes

Black on a light base is the whole recipe here.
A white or pale cream disc gives the notes the contrast they need, and a CD’s mirrored side takes paint better once it’s primed with a thin coat of white acrylic. Let that coat dry fully before you draw anything.
Start with the staff: five thin horizontal lines, drawn with a fine-tip paint pen and a ruler held steady. They can curve with the disc, which looks more natural than straight ones.
Then add a treble clef at the left and a few notes scattered along the lines. Keep it to five or six notes, because a crowded staff reads as noise rather than music.
Dot the note heads first, then add the stems. Seal it with clear spray.
12. Abstract Art
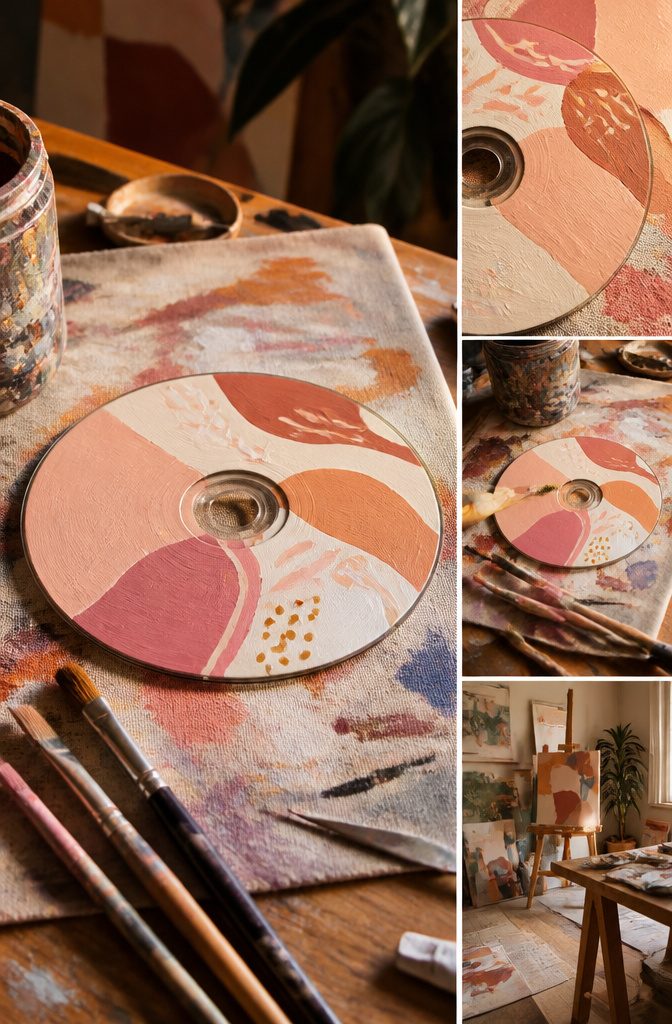
Abstract work is the easiest place to start on a CD because nothing can go wrong.
Squeeze a few colors straight onto the shiny side, drag a brush or a old gift card across them, and let the drips run toward the center hole.
Leftover craft paint from other projects works well here, even the half-dried dabs at the bottom of the bottle.
Color blocks look best when you keep the palette to three or four shades that sit near each other, like peach, dusty pink and cream.
Let each layer dry before adding the next, or the colors turn muddy and the paint can lift off the slick surface. A thin coat of acrylic sealer afterward keeps fingernails from scratching it.
13. Waves
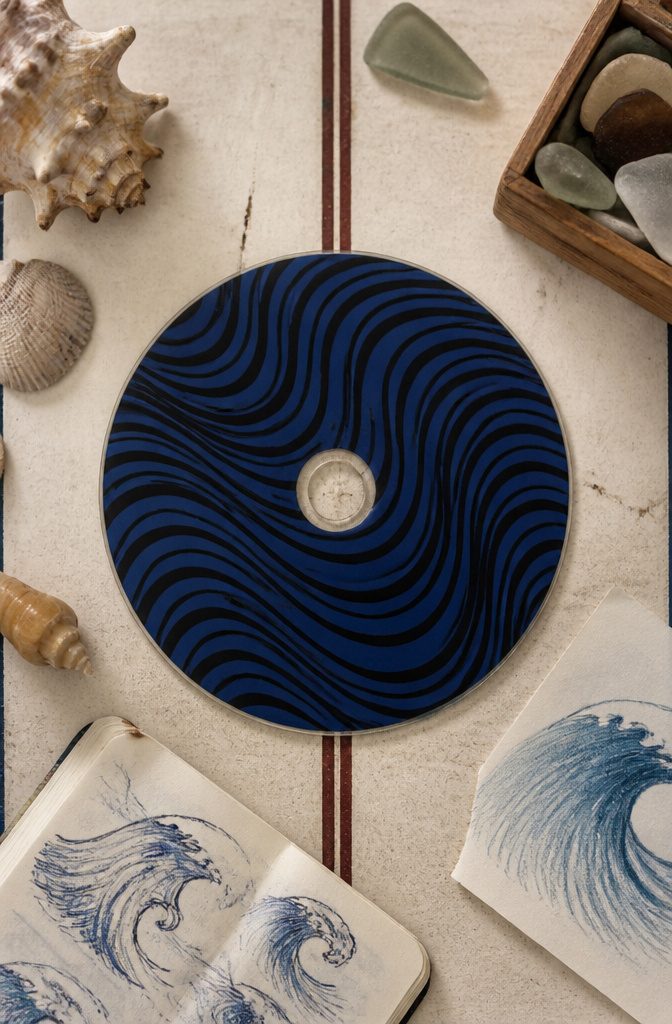
Flat, repeating curved stripes read as graphic because nothing blends. Paint the whole disc one solid color first, black or deep navy for contrast, and let it dry fully.
Then use a fine brush or a paint pen to draw a single wavy line from the center hole out to the rim, and repeat it in parallel, keeping the gaps even.
Spacing decides whether it looks designed or wobbly. Match each new line to the one before it rather than eyeballing the whole disc, and stop when you reach the edge instead of squeezing in a last cramped stripe.
I’d stick to two colors, maybe three, because more starts to look like the layered ocean scene.
Paint pens win here; brushes drag on the slick surface and wobble. A coat of clear sealer keeps the lines from scratching off.
14. Clouds
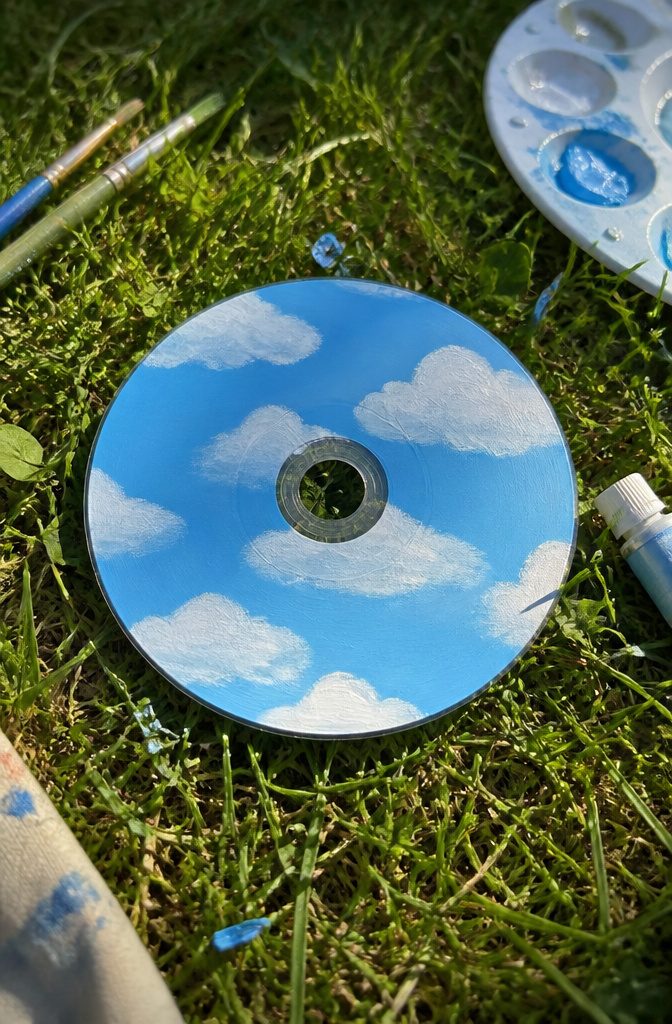
Blue acrylic is the whole base for this one, and the timing matters more than the brush.
Paint the disc in a sky blue, then wait until the surface loses its wet shine but still feels slightly tacky under a fingertip.
A CD is slick plastic, so paint sits on top instead of soaking in, and that tacky window is what lets white grab without blending into the blue.
Load a small sponge or a folded paper towel with white, blot most of it off on a scrap, and dab in clusters of two or three overlapping puffs. Keep the bottoms flatter and the tops rounded.
Dab, never swipe, because dragging turns clouds into streaks. A cotton ball works too, though it leaves more fuzz than a sponge.
I’d skip a fully wet base. The white sinks in and you get a pale blue smudge instead of a puff.
15. Cactus
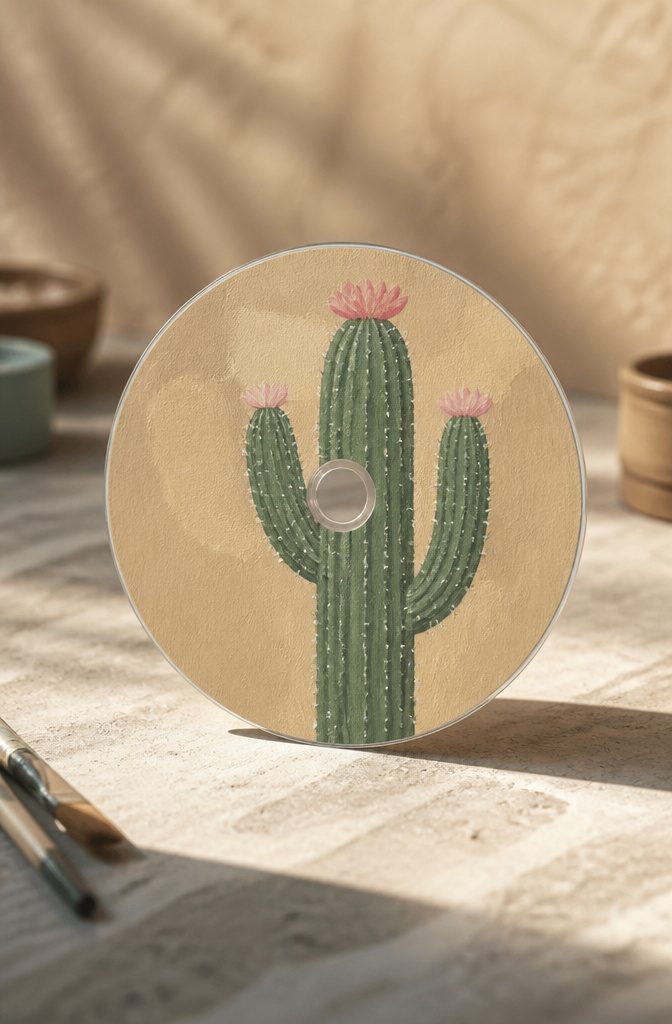
A cactus suits a CD because the shape is simple and the shiny surface does half the work. Start with a sandy peach or soft tan wash across the whole disc, which gives you a desert sky without any blending.
Paint the cactus in a muted sage green rather than a bright one; the dusty tone reads as aesthetic, while a bold green looks like clip art.
Keep the pot tiny, in terracotta or blush, and sit it low on the disc so the sky has room.
Add the pink flowers last, as small dots of pink on the top edge of each arm, then a pinprick of lighter pink in the center.
A fine brush or toothpick handles the spines, and dried paint won’t smear if you use acrylic.
16. Nature Scenes
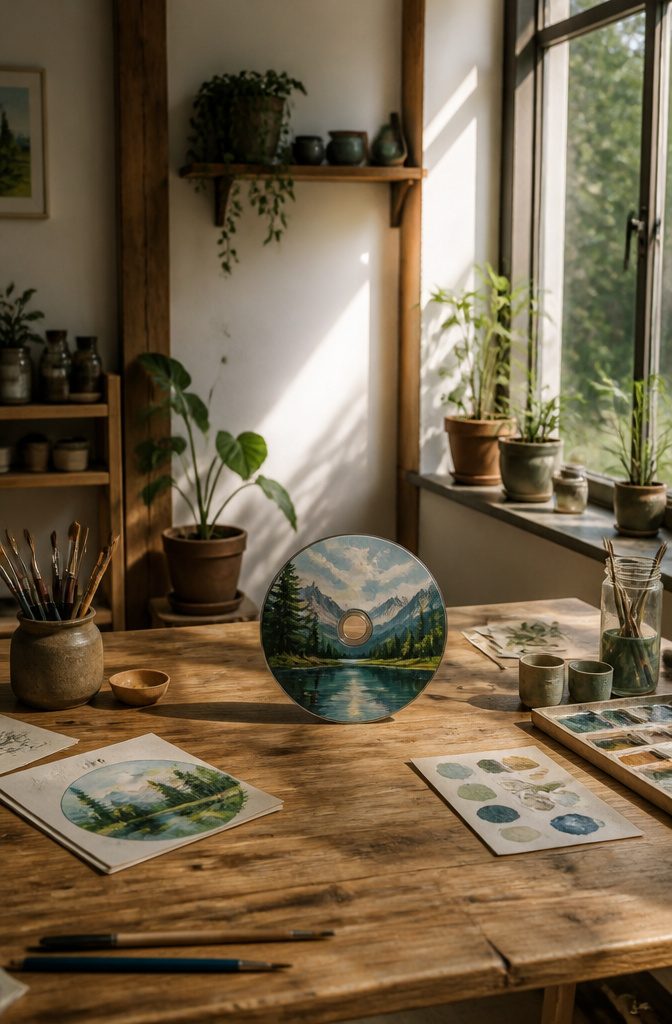
A CD is already a circle, so treat it as a porthole and paint the scene to the edge instead of fighting the shape.
Mountains suit it best: two or three overlapping peaks, a low sun, and the hole in the middle becomes the moon or sits in the sky where you’d never miss it.
Greens for the trees, deep blues for water, warm hues for a sunset.
That palette is all a forest or lake scene needs. Put the sunset glow in the top third, then run the blue water below it so the colors meet at a horizon.
Work from the back of the scene to the front, sky first, then distant hills, then trees. Let each layer dry before the next, or the colors muddy.
17. Polka Dots
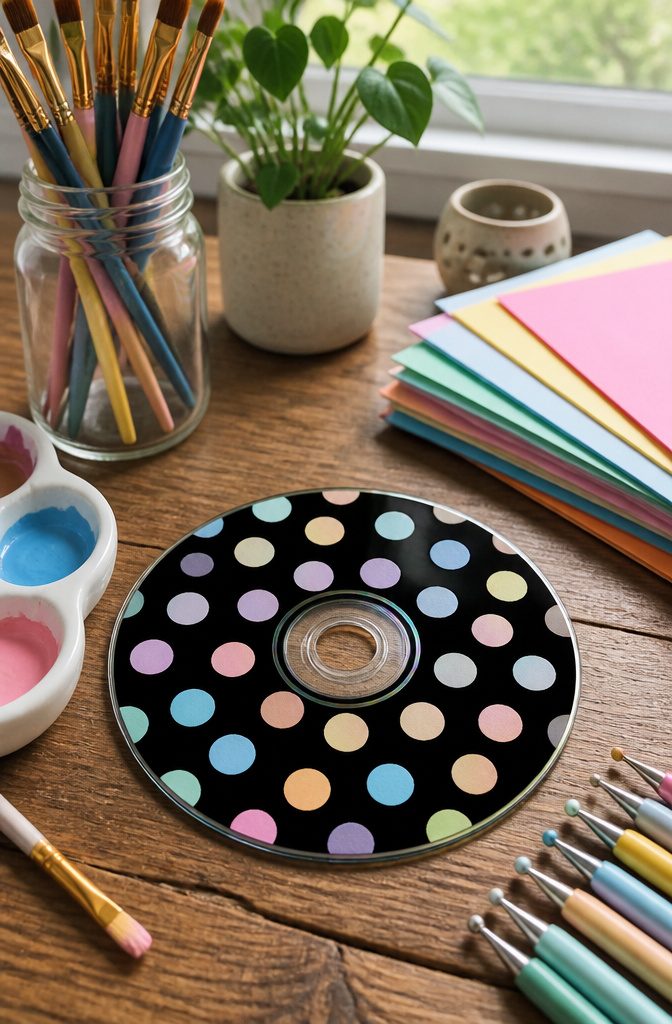
Polka dots are the easiest design on a CD, and they look best when you stop trying to make them perfect.
Paint the disc a solid color first and let it dry fully, then press the dots on with the rounded end of a brush handle or a Q-tip.
The handle gives a bigger, cleaner circle; the Q-tip gives a softer, smaller one.
Dip, press straight down, and lift without twisting. Reload the tip every dot or two, because the third dot in a row comes out thin and streaky.
Space them in rows, offsetting each row by half a dot so the pattern reads as polka dots rather than a grid.
White on black is my pick, though pastel dots on a dark base also look good. Skip the hole at the center, or ring it with dots.
18. Cow Print
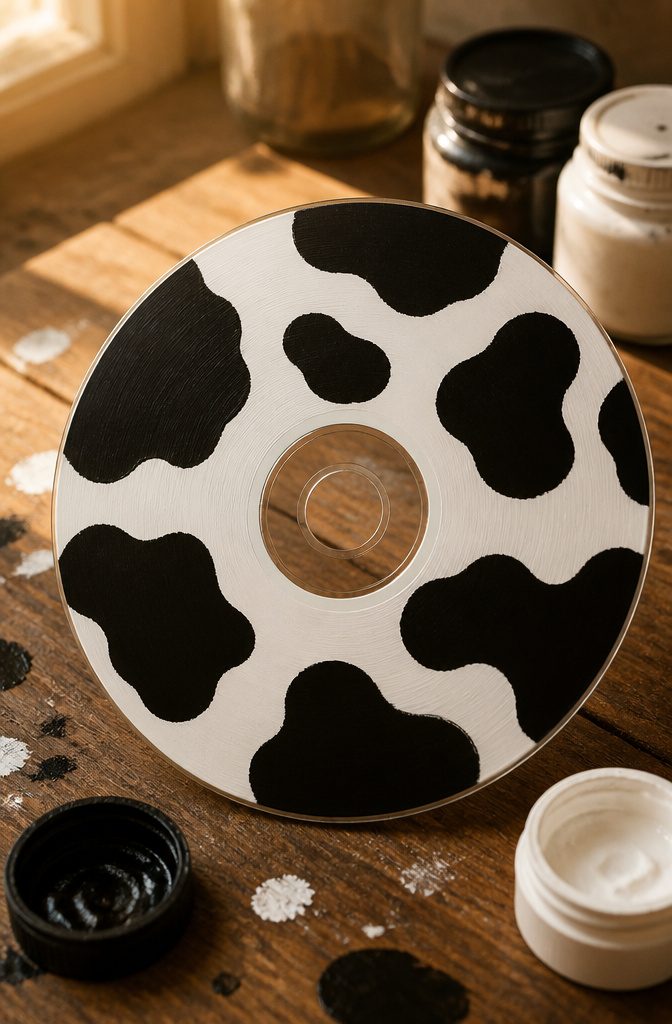
White acrylic goes on first, and the base decides everything else, so let it dry fully before you touch it with black. A glossy CD shows brushstrokes, so I’d use two thin coats rather than one thick one.
For the spots, skip the pencil outline and paint the patches freehand: rounded, lopsided blobs with a few notched edges, some small and some big enough to run off the rim.
Keep the patches uneven and leave plenty of white between them, because evenly spaced ovals read as polka dots.
For the pastel version, swap the black for soft pink, lavender or mint and keep the white base. Pastel acrylics are often sheer, so expect to add a second coat on the spots.
Mint on white looks the most polished to me. Seal either version with a clear spray so the paint doesn’t scratch off.
19. Butterflies
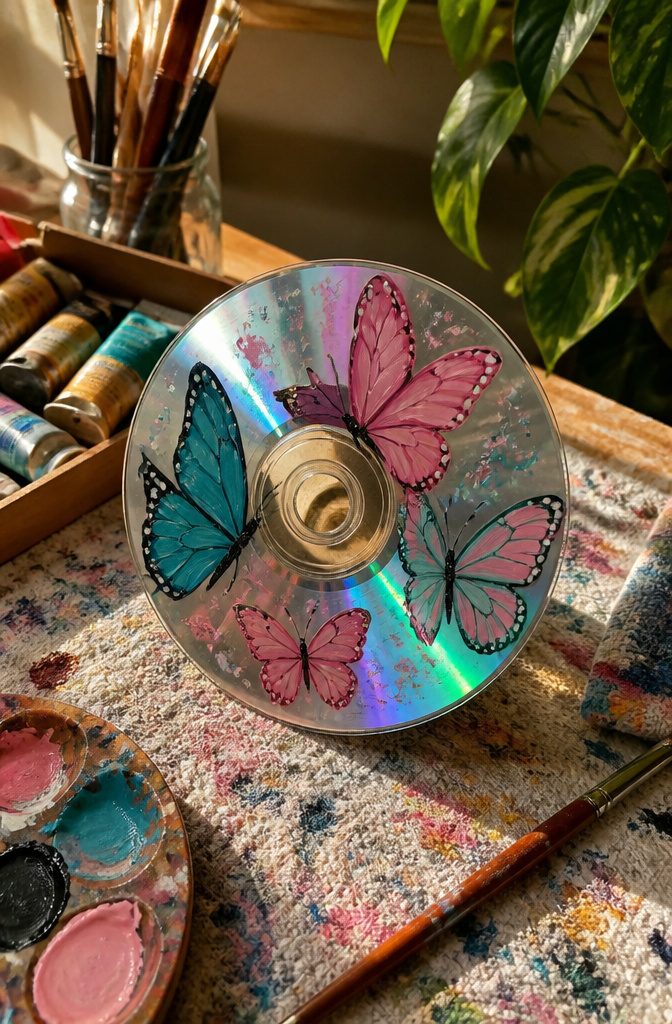
A CD makes a good butterfly canvas because the round shape lets you paint two wings as a pair of overlapping ovals, with the center hole standing in for the body.
Skip the monarch’s orange and black rules. Pick any two or three colors, such as pink with teal or purple with yellow, and let each wing be different from the other.
Paint the wings with a paint pen or acrylic on the shiny side, and let the first coat dry before adding dots or swirls on top.
Wet-on-wet blending gets muddy on slick plastic, so I’d keep colors in separate zones. Finish with two thin curled lines for antennae and a clear sealer spray so the dots don’t scratch off.
20. Donuts
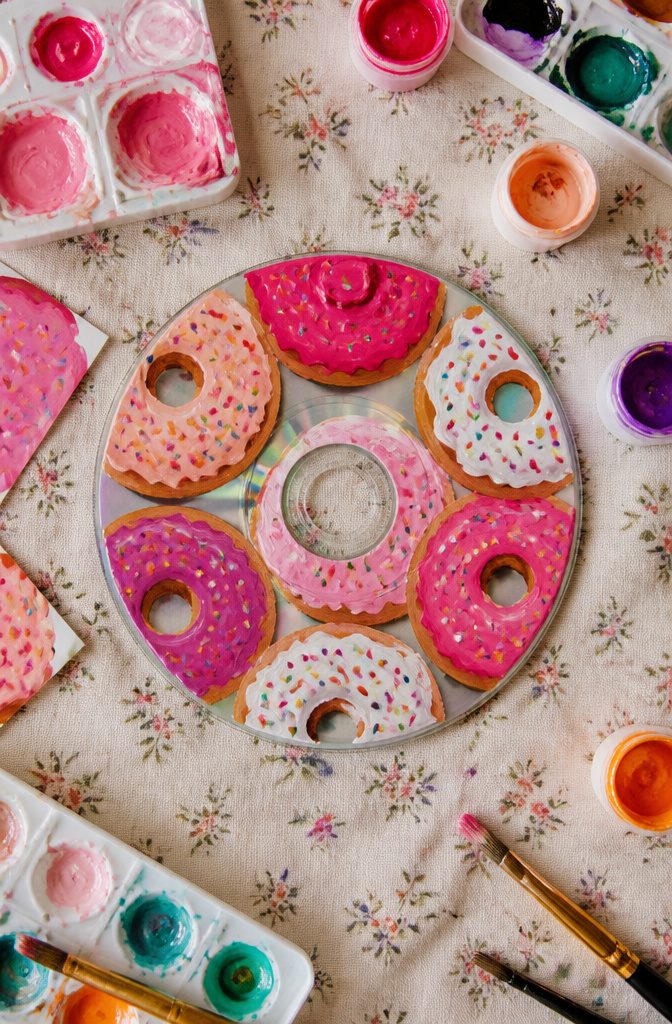
A pink donut is the obvious starting point, but a set of three or four flavors looks far better on a shelf or wall.
Chocolate is the easiest swap: paint the frosting dark brown and keep the dough ring tan, so only one color changes.
Mint works because it sits close to pink in tone, and a pale green frosting with white sprinkles reads as cool and calm next to the warm ones.
For a glazed donut, thin white paint with a drop of water, brush it on glossy, and leave the sprinkles off.
Use the same tan base and the same hole size on every disc so the set looks like one batch.
The CD’s center hole is already the donut hole, which saves you a step. Let each frosting layer dry fully before adding sprinkles, or the dots will smear into the color beneath.
21. Rainbows
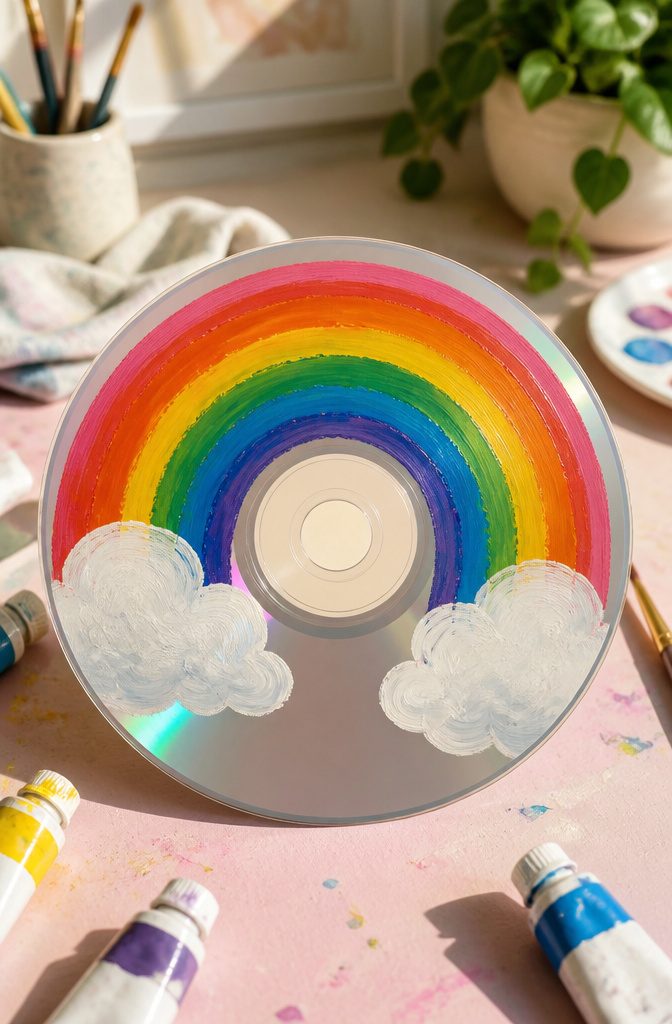
A rainbow suits a CD because the disc’s round rim already gives you the curve.
Paint each color band along the edge of the arc, so the stripes bow the same way the disc does, and let the bands sit side by side with no gaps.
Fluffy white clouds at both ends finish the shape and hide the spots where the bands stop.
I’d paint the clouds last. Let the color bands dry fully before adding the white, or the stripes bleed into the clouds and turn them muddy.
Dab the white on with a loose, bouncy motion rather than smooth strokes; that gives the clouds their puff. It’s a cheerful, forgiving design, and it works well for kids filling their own space with homemade art.
22. Unicorns
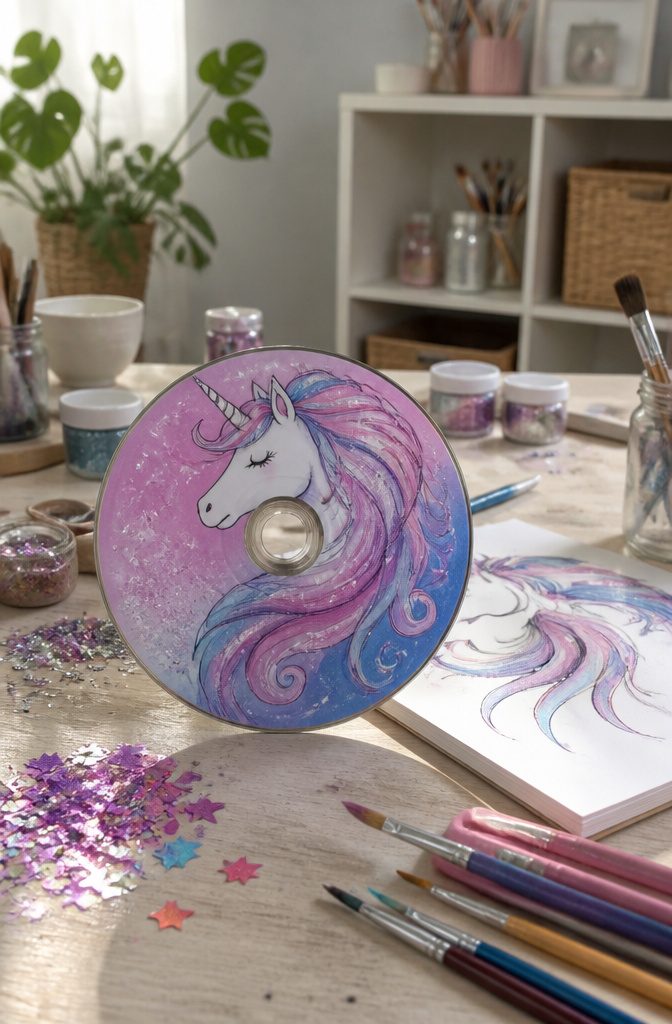
The center hole of a CD already works as a unicorn’s muzzle, a nostril on a profile face, or the spot where a horn sprouts.
Plan the face around it before the first brush touch. I like the hole as the gap between the ears, with the horn rising from the rim above it.
Stick to pink, purple and blue. Pastels read best over a white base coat, since the bare shiny side pushes any thin color toward gray.
Paint the mane first in loose, flowing curves that run off one edge, then fill the horn in a lighter shade so it stands out.
Paint the mane in swoops that wrap around the hole, so the empty center looks intended rather than like a gap you worked around. Kids handle this one well because the curves don’t need to match.
23. Smiley Face

A yellow base coat and three black marks are the whole design, which makes this the fastest disc on the list.
Paint the shiny side with acrylic, and give it two thin coats rather than one thick one, since yellow is a sheer color and the silver underneath shows through the first pass.
Let the yellow dry completely before you add the face. Two dots for eyes and one curved line for the mouth are enough, and a paint pen or a Q-tip dipped in black paint gives cleaner marks than a brush.
Keep the face slightly off center, closer to the hub, because the center hole is part of the design and can read as a nose if you plan around it.
I’d skip outlining the face in a glossy sealer until the paint has fully cured, or the black will smear.
24. Minions
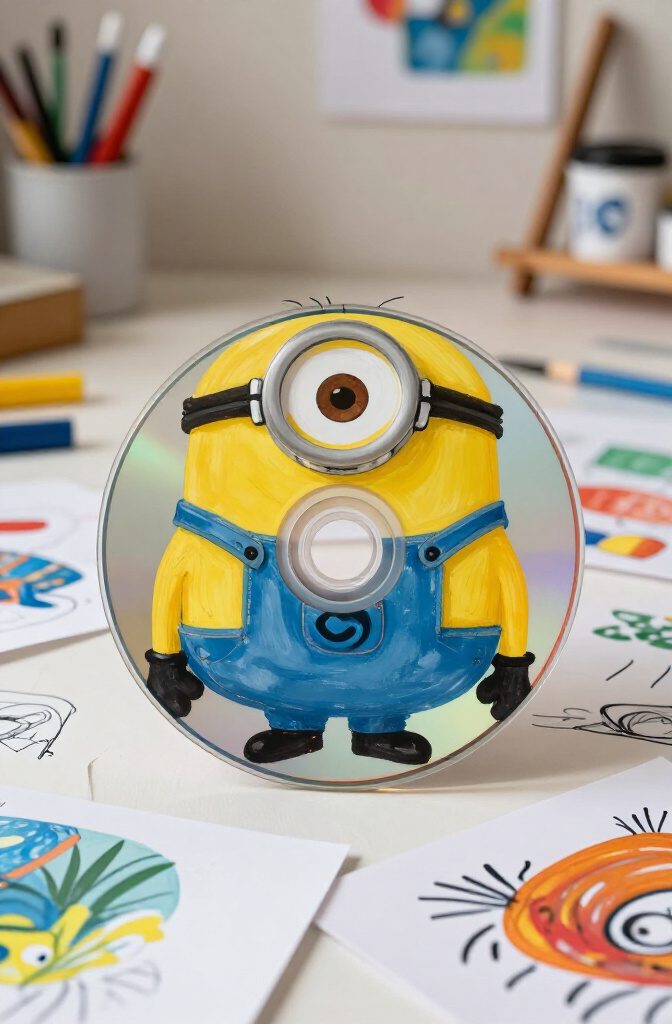
The hole in the middle of a CD is already a Minion’s eye, which makes this one of the easiest character designs on the list.
Paint the whole disc yellow, then add a blue band of denim across the lower half for the overalls. Acrylic paint covers best if you scuff the shiny side first, or the yellow can bead up and streak.
For the goggle, ring the center hole with a thick gray or black band and let the hole sit inside it as the pupil area.
Add a white circle around the hole, a dot of black or brown for the iris if you like, and a strap across the disc on each side.
A fine-tip paint pen handles the mouth and strap lines better than a brush. Seal it with a clear spray so the yellow doesn’t scratch off.
25. Halloween
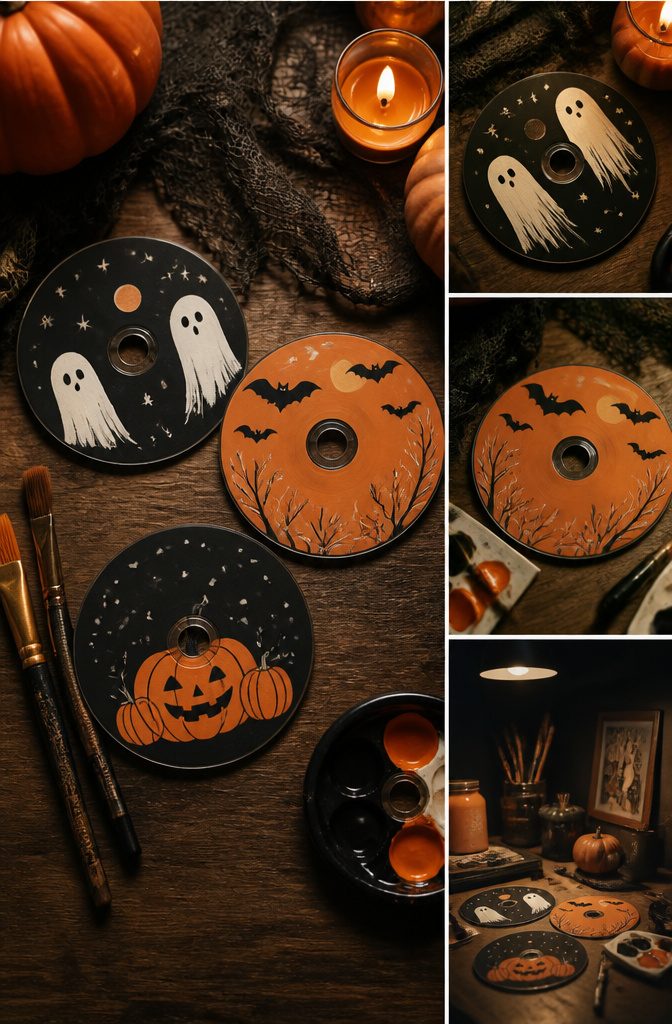
Ghosts, pumpkins and bats make a tidy three-CD set, and the palette does half the work: orange, black and white, nothing else.
Start with a black acrylic or paint-pen base on the shiny side for the bats and ghosts, and an orange base for the pumpkins.
A ghost needs only a white blob with a wavy bottom edge and two black dots for eyes. Bats are simple silhouettes, so they work best against an orange CD, where the black reads sharply.
For pumpkins, I’d skip fine detail and paint three curved lines for ribs and a short brown or black stem.
Let each base coat dry fully before adding white or black details, or the layers lift and smear on the slick surface. Hang the trio on a window or string them as a garland.
Frequently Asked Questions
What kind of paint works best on CDs?
Acrylic paint is the most popular choice.
It sticks to the smooth surface, dries fast, and comes in strong colors. Paint pens work well for fine lines and curves, and spray paint, glass paint, oil-based paint pens and permanent markers are other options.
How do you paint a CD?
Gather an old CD, acrylic paint and a few brushes, then paint the shiny side in thin coats.
Let each layer dry fully before adding the next, because wet paint drags and smears on the slick plastic. Finish with a clear sealer spray so the design doesn’t scratch off.
What is the best CD painting design?
For a first project, polka dots, abstract color blocks or a simple donut are the most forgiving, since nothing has to be perfect.
The center hole can become a donut hole, a moon, a butterfly’s body or a Minion’s eye. Pick a design that works with the hole instead of around it.
What are some cool things you can make with old CDs?
Painted CDs make room decor, especially when you hang several together as a gallery or a set, such as 3 or 4 donut flavors or a Halloween trio of ghost, pumpkin and bat.
They also work as handmade birthday gifts. Hang them in a window or string them into a garland.





