
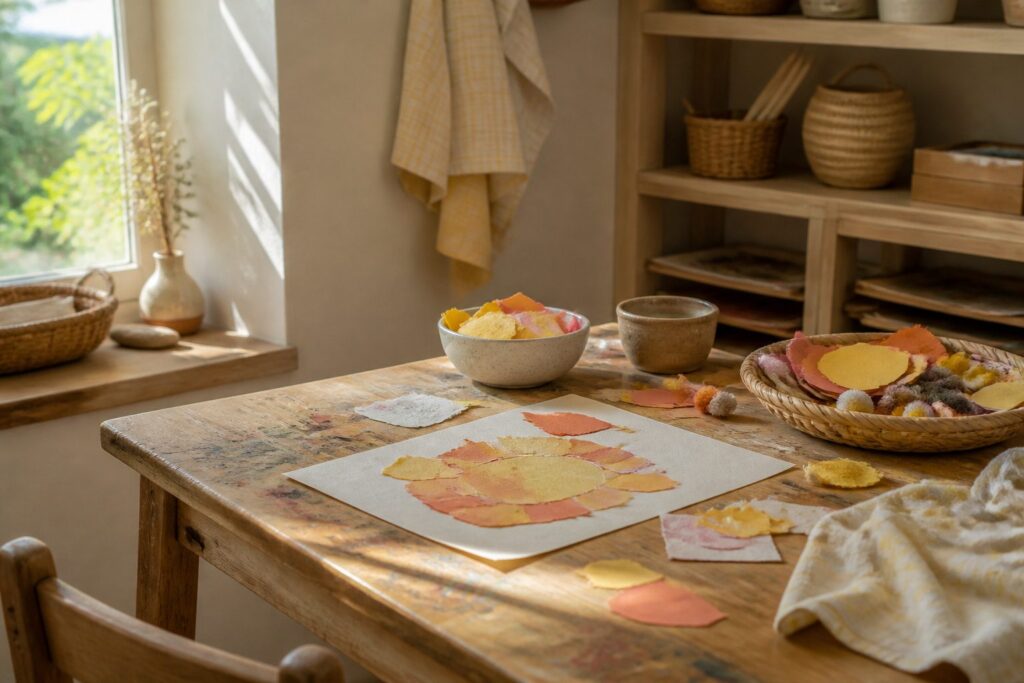
These crafts run from a 5-minute torn-paper collage to a glue-bottle panel that needs two drying stages, and your child’s age and mouthing habits decide which ones you pick.
Skip the button apple and the beaded zipper pull if your child still tastes everything. Pom-poms or paper circles work instead, and lacing a paper plate apple needs no small parts.
1. Yarn-Wrapped Cardboard Pencil
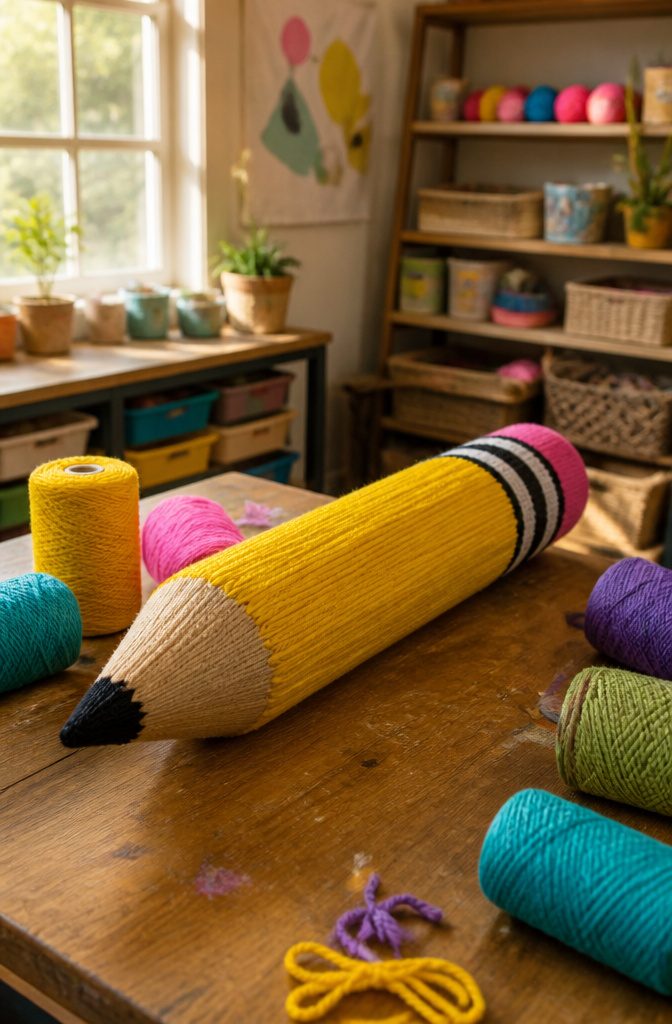
Cut the cardboard into a long strip with a pointed tip, and make it any size that fits your child’s hands.
A bigger pencil is easier to wrap, so I’d go large for 3-year-olds. Paint the tip black, then add pink and black stripes at the other end for the eraser, and let the paint dry before any yarn goes on.
Tape one end of the yarn at the eraser end of the pencil. Your child winds it around and around to cover the yellow section, then tucks the tail under to finish.
Wrapping yarn tight, edge to edge, is real fine motor work: it builds finger dexterity, grip strength and hand-eye coordination, the same skills behind writing and buttoning a coat.
Glue is optional with tape holding the start, but a dab of glue on the tail keeps it from unraveling.
2. Paper Plate Apple Lacing
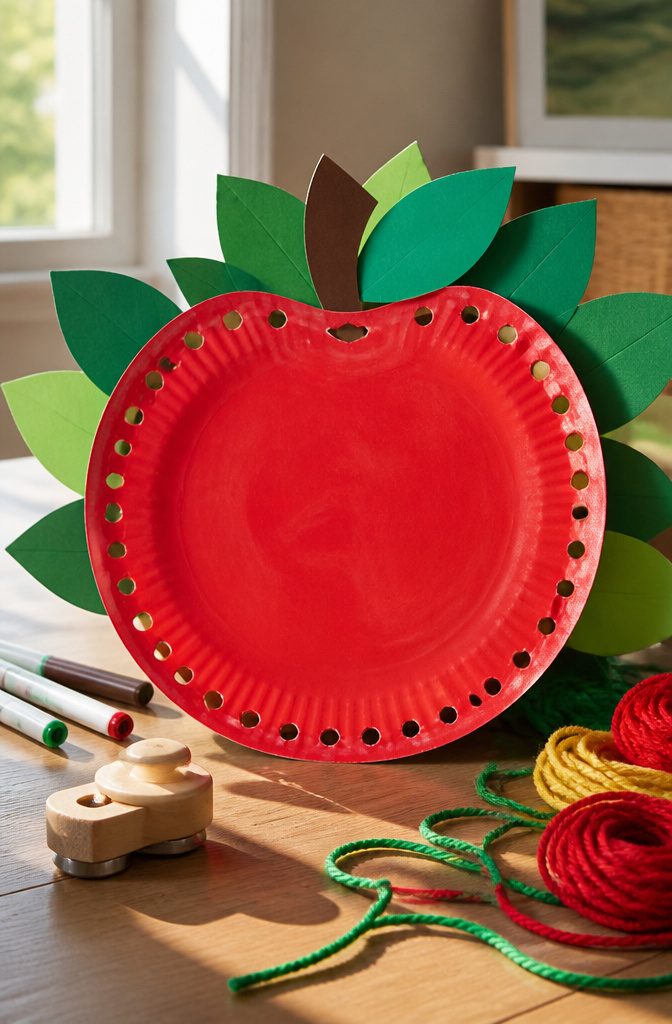
Hole spacing decides whether a preschooler finishes this apple or quits halfway.
Punch the holes evenly spaced around the plate’s edge with a hole punch, and keep them far enough apart that small fingers can find the next one without hunting.
Cut the plate into an apple shape, then add a brown paper stem and a green paper leaf at the top with glue.
Red paint or markers work for the body, though I’d leave the plate white if you’re short on time.
Tie one end of the yarn to a hole yourself, then show your child the in-and-out motion.
Threading builds hand-eye coordination and the pinching grip a pencil will need later. Wrap a bit of tape around the free yarn end if it frays, since a stiff tip is easier to push through.
3. Fruit Pouch Bag
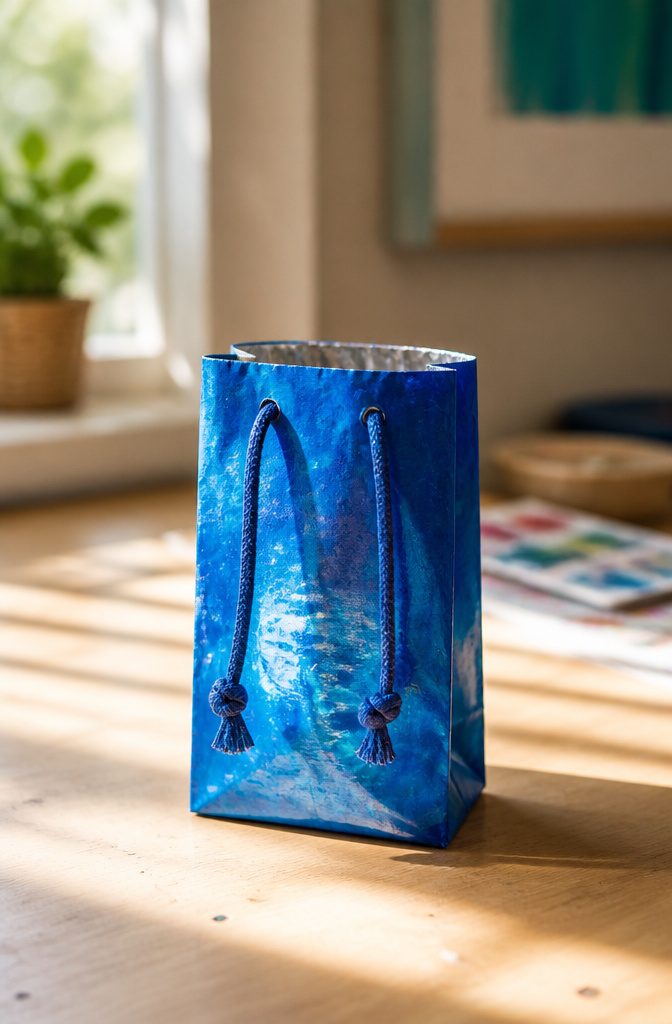
A squeezable fruit pouch makes a sturdy little bag once you cut the top off and wash it out. Rinse it well, because leftover puree turns sticky and smelly fast.
The foil-style plastic already has a printed front, so I like painting it a solid color first. That covers the logo and gives small hands a fresh surface.
Once the paint is dry, a preschooler can go wild with markers, more paint, or whatever scraps are in the craft bin. Stickers and torn paper would also stick well, though I haven’t seen those tried on this one.
For the handle, punch two holes at the top and tie one end of a shoelace through each. A shoelace makes a better strap than string because it’s flat, tough, and easy for little fingers to knot.
4. I Will Grow Keepsake
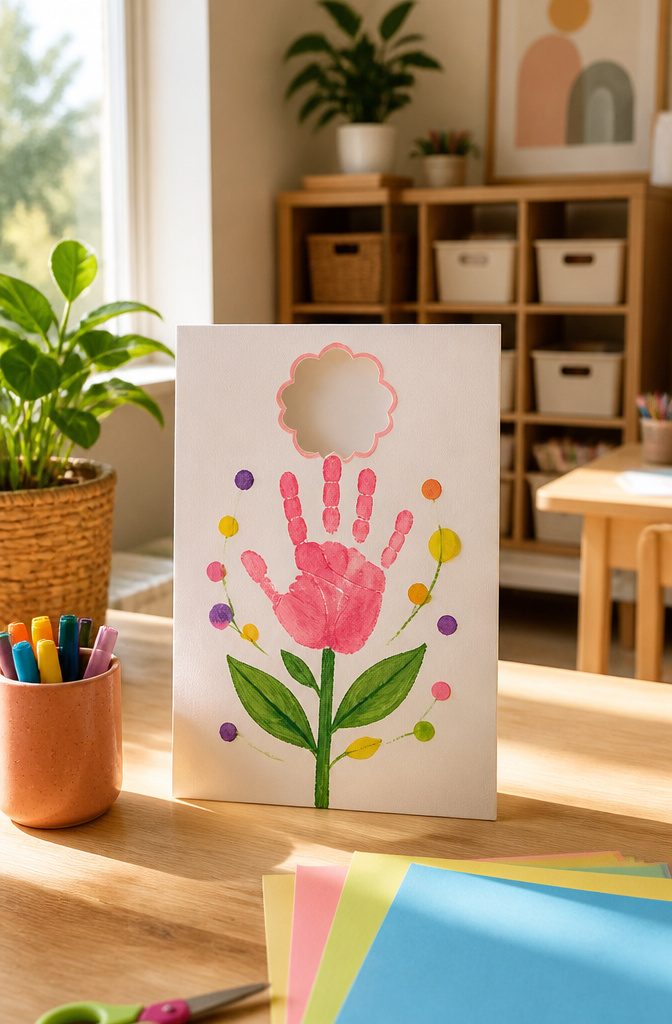
The handprint flower is the version I’d pick for a keepsake. Trace your child’s hand, cut it out, and have them glue it to the middle of a page.
The handprint becomes the flower’s center, so markers go to the stem and leaves. Then glue a photo of your child where the hand sits and add the line "This year I will grow!"
Date the back of the page with the child’s age, because the handprint is what changes fastest. A preschool hand outgrows its outline in a year, and that gap is what makes the page worth keeping.
Grandparents will treasure it most, and it tucks flat into a folder or a frame.
5. Button Apple Craft
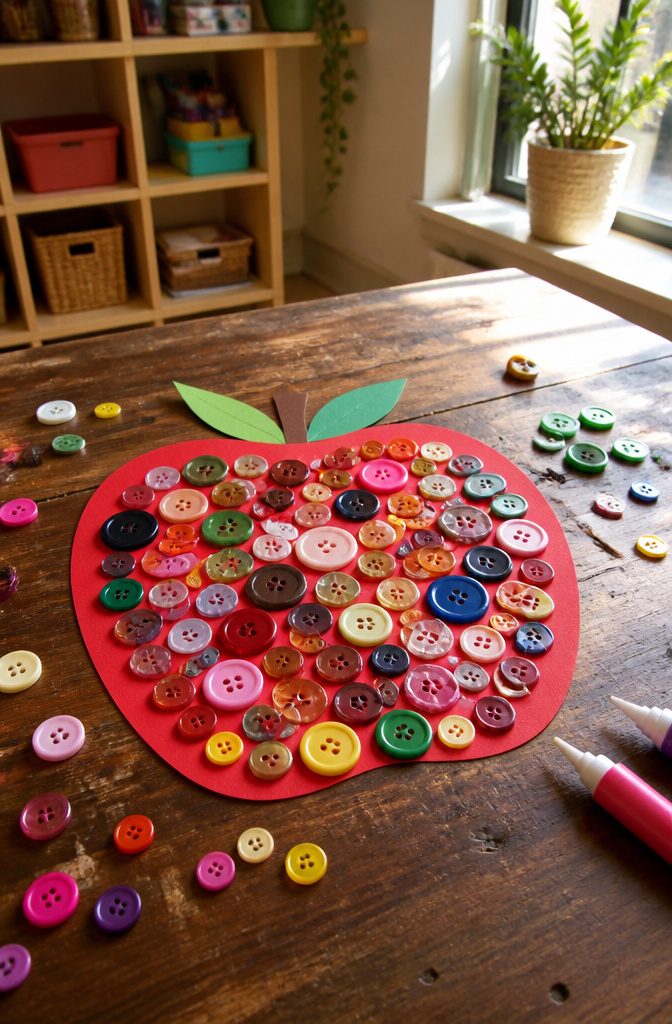
Buttons turn a flat apple outline into a sorting job and a gluing job at once.
Trace a large apple on card stock, add a stem and leaves, then let your child fill the shape with buttons, covering as much of the space as possible.
Sorting happens before any glue comes out. Ask your child to pile the reds together and set the greens aside for the leaves, and the craft becomes a quick color-matching game.
Gluing each button down one at a time builds the pinch and finger control that later help with buttoning a coat.
Buttons are small parts, so stay at the table the whole time with children who still mouth things. If your child is still tasting everything, pom-poms or paper circles make a safer apple.
6. Paper Bag Colored Pencil Craft
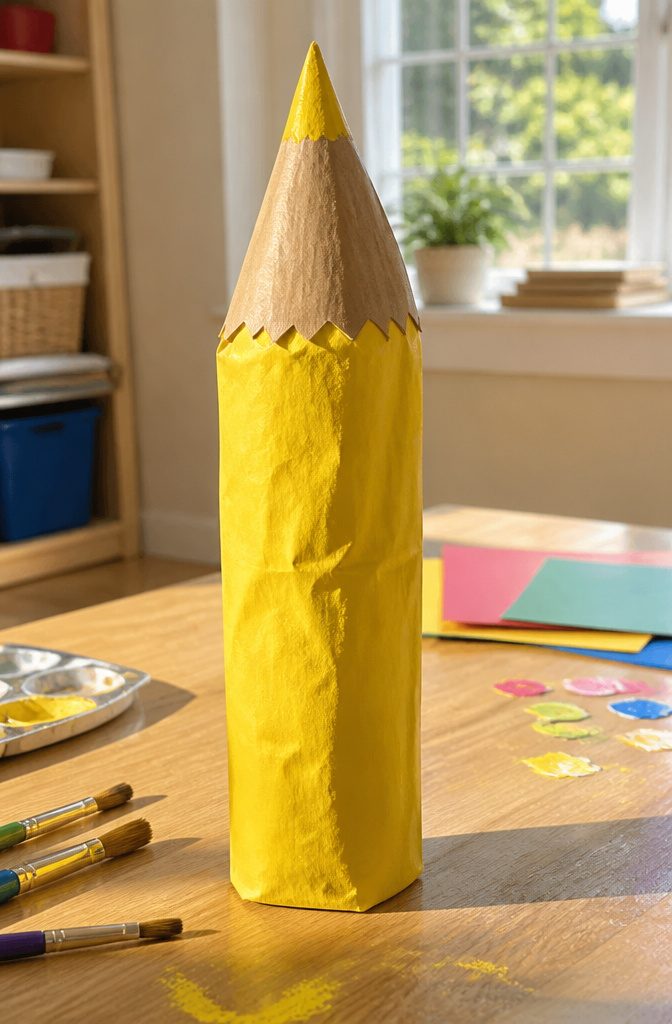
A brown paper lunch bag makes a good pencil body because it already holds a shape.
Cut a rectangle from the flat side, roll it into a long tube, and glue the seam closed. For a pointed top, snip the open end into a cone and fold the tip inward.
Paint or color the tube yellow, or use colored paper wrapped around it. Cut the point from a tan scrap and glue it on, then color the tip.
Preschoolers can handle the gluing with a stick or a dab of white glue.
Adults should do the cutting, since a curved cone is hard for small hands to cut cleanly. Let the glue dry before the child decorates, or the seam will pop open.
7. Personalized Sticker Pencil Box
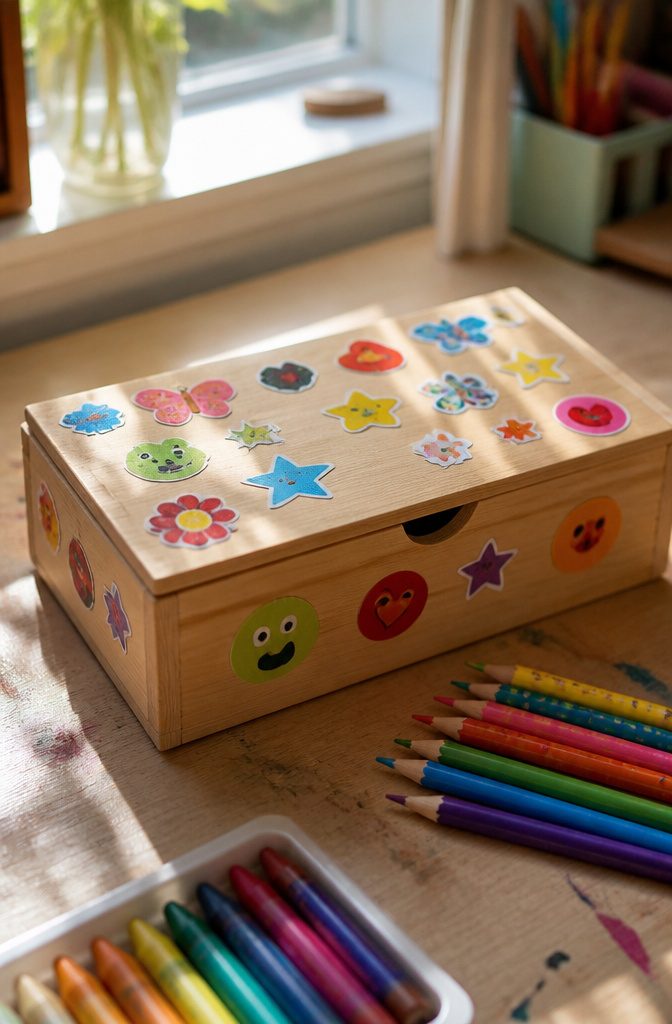
Start with the name. Have your child pick the letters out of a set of adhesive letters, then press them onto the lid.
Hunting for the right ones is a quiet spelling lesson, and a name that is theirs holds a preschooler’s attention better than any pattern I could suggest.
Peeling and placing is the real work here. Small fingers have to lift a sticker’s edge, pull it free of the backing, and set it down where they want it.
Let them decorate the rest of the lid with the other stickers however they like, even if the result looks crowded. Resist straightening anything; a lopsided "M" is part of the charm.
Once the box is covered, it holds their favorite pencils, markers, and other supplies.
8. Butterfly Pencil Holder
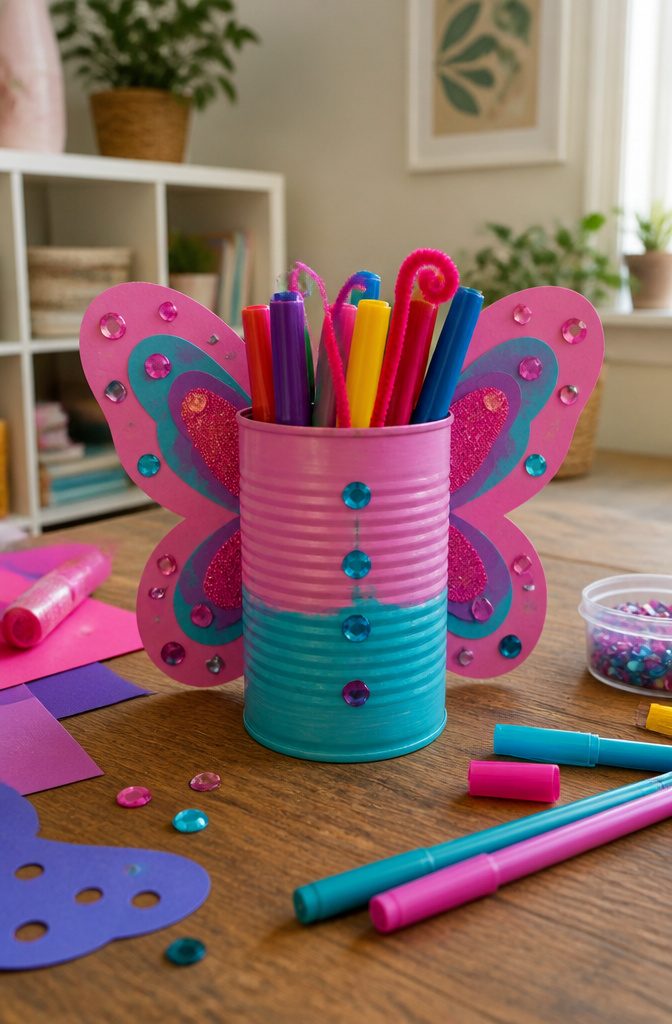
A clean, empty can is the whole base, and the color it gets painted matters less than you’d think, because the wings hide the back half.
Let your child paint the outside any color they like, and let it dry fully before anything gets glued on.
The wings come from construction paper.
Cut two, then hand them over for paint or markers, since decorating is where a preschooler’s butterfly gets its personality. Symmetry is optional; a lopsided pair looks charming.
Glue the wings to the back of the can, not the front.
That keeps the paper tucked behind the pencils and out of sight, so the can reads as the butterfly’s body and the wings seem to spread from behind it.
For a thicker coat of paint or heavy marker, give the wings a few minutes to dry before gluing so they stay flat.
9. Handprint Box of Crayons
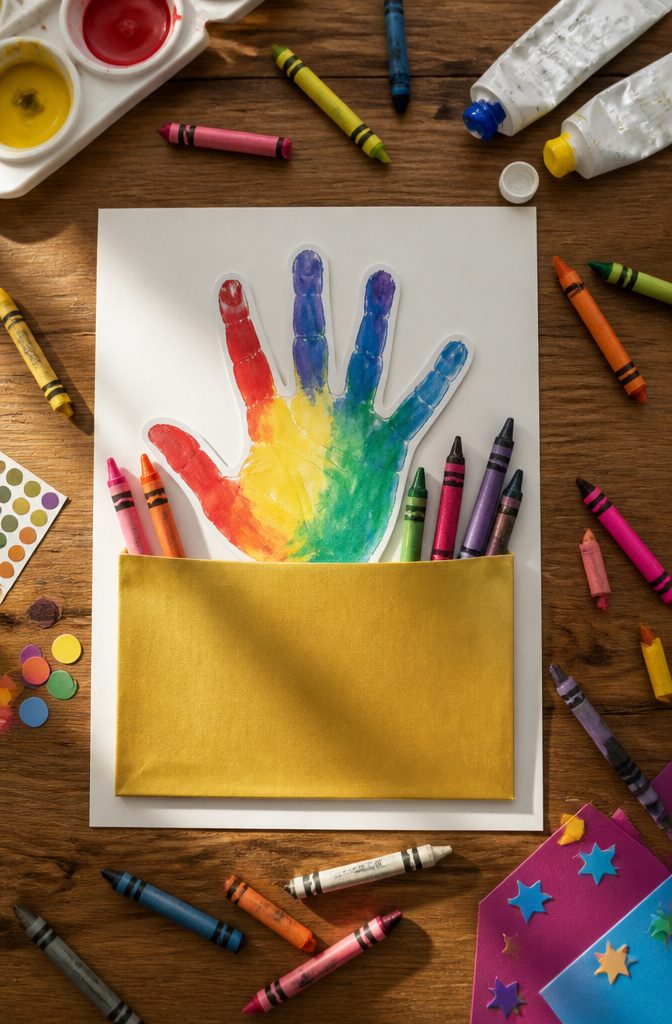
Paint is the choice that matters here, and I’d pick washable tempera over markers for the fingers.
Markers work, and they are the tidier route: trace the hand on white card stock, cut it out, and let your child color each finger a different shade.
But a painted print leaves the real outline of a small hand, and that is what makes it a keepsake.
Paint the palm and fingers in stripes of different colors, press the hand down once, and lift straight up so nothing smears.
Once it dries, glue a rectangle of gold card stock over the bottom of the print so the fingers read as crayons sticking out of the box.
Label the front "Crayons" and add your child’s name. Write the date on the back, because a preschool-size hand will not fit the same print a year later.
10. Popsicle Stick Glue Bottle
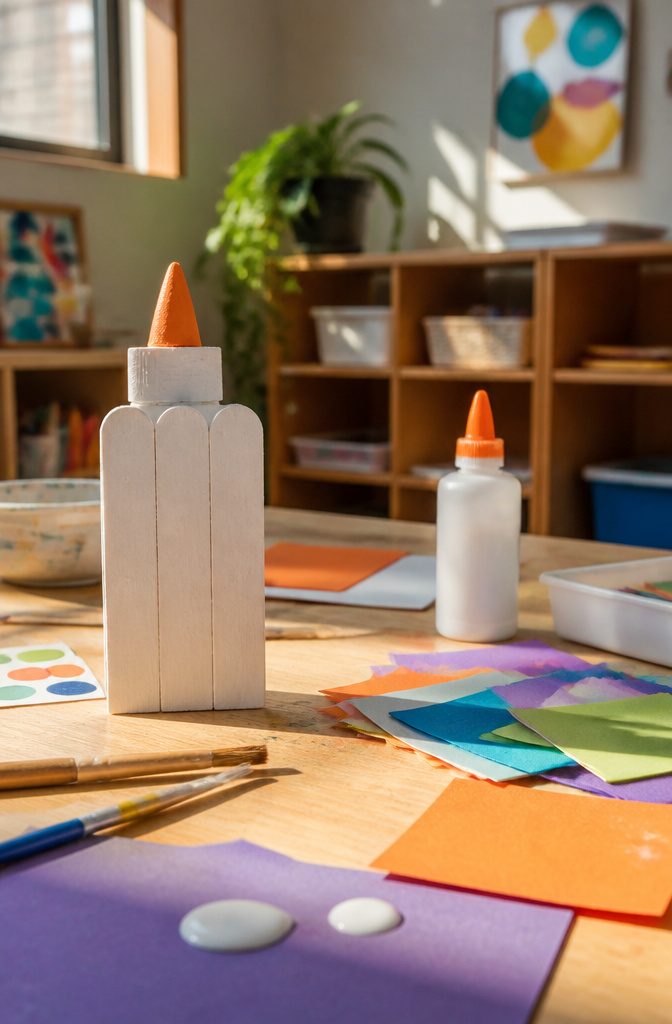
Four craft sticks laid side by side make the body of the bottle, and a fifth glued across the top, running sideways, locks them into one flat panel.
Let that dry completely before anyone paints, because a damp joint slides apart under a brush. Paint the whole panel white and let it dry again, which is a good job for small hands.
The nozzle is orange card stock cut to a small cone shape, with a thin blue strip glued just beneath it.
Add a wider blue stripe lower down for the label. I’d cut these shapes ahead of time for preschoolers, since scissors on card stock frustrates most beginners.
Write "Glue" across the label with a marker, then paint a smiley face above it. Glue sticks work fine for the paper pieces.
11. First Day of School Crown
![A decorated paper crown with the text '[Name]'s First Day of School.'](https://pics.theblueberrymoon.com/crafts-for-kids-preschool/first-day-school-crown.jpg "25 Preschool Crafts for Kids: Easy Back to School Ideas 11")
Cut the crown from plain paper in any shape you like, and hold off on the stapler until the decorating is finished.
A flat strip is far easier for small hands to color than a finished ring, and a stapled crown fights every marker stroke.
Write "[Name]’s First Day of School" across the front before your child starts, so the lettering sits clear of the decorations.
Then hand over the crayons, stickers and markers and let them cover the rest however they please. I’d keep my own hands out of it; a crown that looks a little chaotic photographs better than a tidy one.
For sizing, wrap the strip around your child’s head and staple it only after it fits. Mark the overlap, then staple.
12. Craft Stick Picture Puzzle
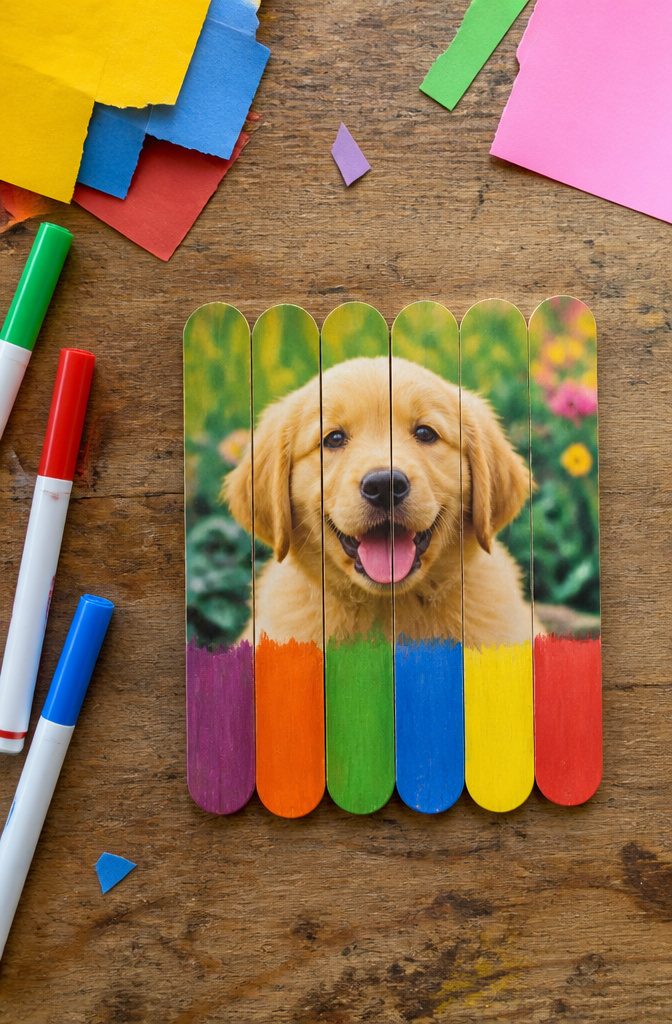
Lay the craft sticks side by side with their edges touching, then glue a picture across the whole row, leaving room along the bottom.
A child’s photo works well, and one letter of the name per stick across that bottom strip gives a preschooler a second clue for putting it back together.
Painting or drawing straight onto the sticks works too, and it’s the version I’d hand a younger child, since a photo needs an adult with a knife to slice between the sticks.
Let any glue or paint dry fully before you separate them.
Mixing up the pieces is where the learning happens.
Your child matches colors, follows lines across neighboring sticks, and sorts out letter order by trial and error. Teachers can have each student make one and trade with a classmate, so everyone practices names too.
13. Back to School Coloring Book
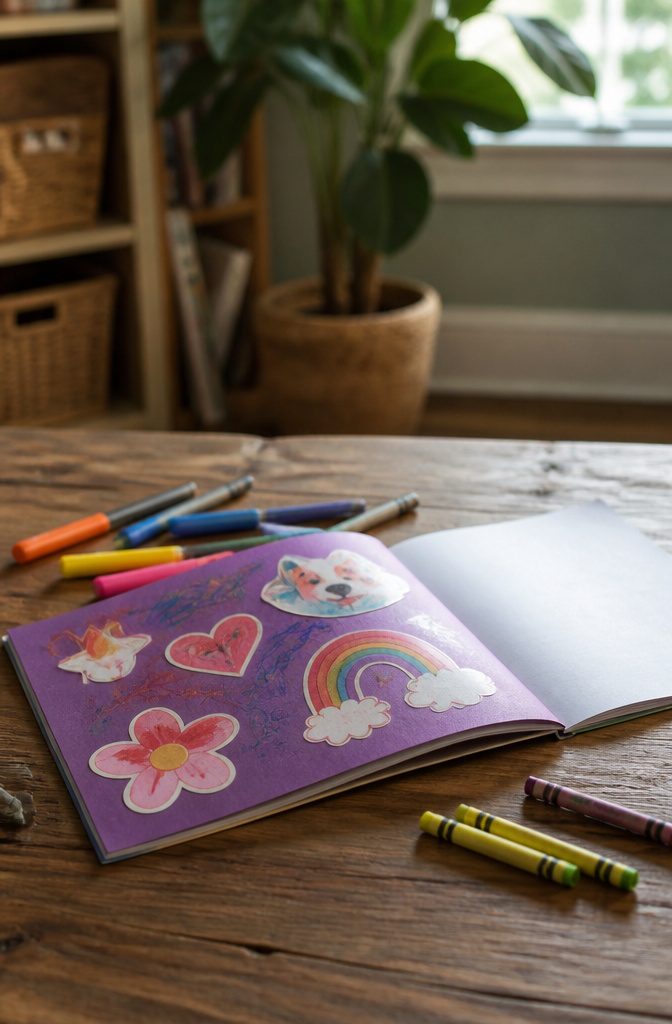
A construction paper cover on the front and back is what turns a stack of printed coloring pages into a booklet a preschooler can carry.
Stack the pages, sandwich them between the two covers, and staple along the left edge so the book opens like any picture book. Staples are the right binding here: fast, flat, and sturdy enough for small hands.
Write "[Name]’s Back to School Coloring Book" across the front, and add the year if you like. Then hand over stickers or crayons and let your child decorate both covers before touching the pages inside.
I would make a fresh copy every August. Setting last year’s book beside this year’s shows how the coloring has changed, and that comparison tells you more about their skills than any worksheet.
14. Silly Student Plant Hair
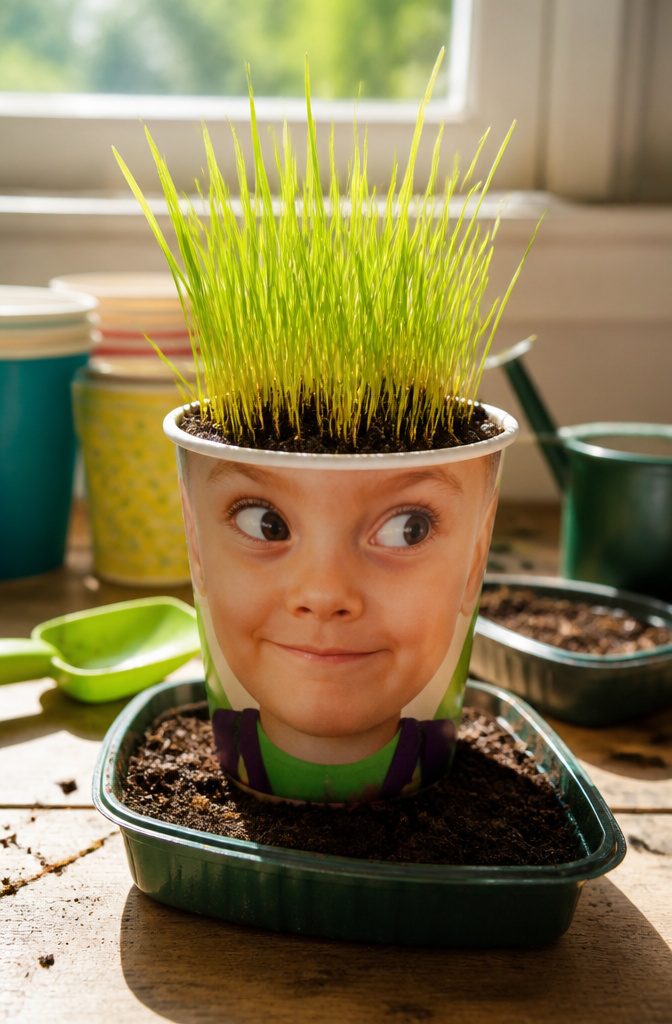
Glue a photo of each child to the outside of a paper cup, placed so the hair line sits right below the rim.
The soil goes in the cup, grass seed gets sprinkled on top, and the "hair" grows from there.
Set the cup in a sunny spot and water it lightly each day.
Heavy pours wash the seed around and flood a paper cup fast, so a gentle sprinkle wins. Preschoolers can handle that job themselves, and a daily watering gives them a reason to check the windowsill every morning.
The haircut is the best part.
Once the grass is shaggy, kids can trim it with kid-safe scissors, which is a good fine-motor workout. For a classroom, line the cups up across a windowsill and let the whole class compare hairstyles.
15. A is for Apple
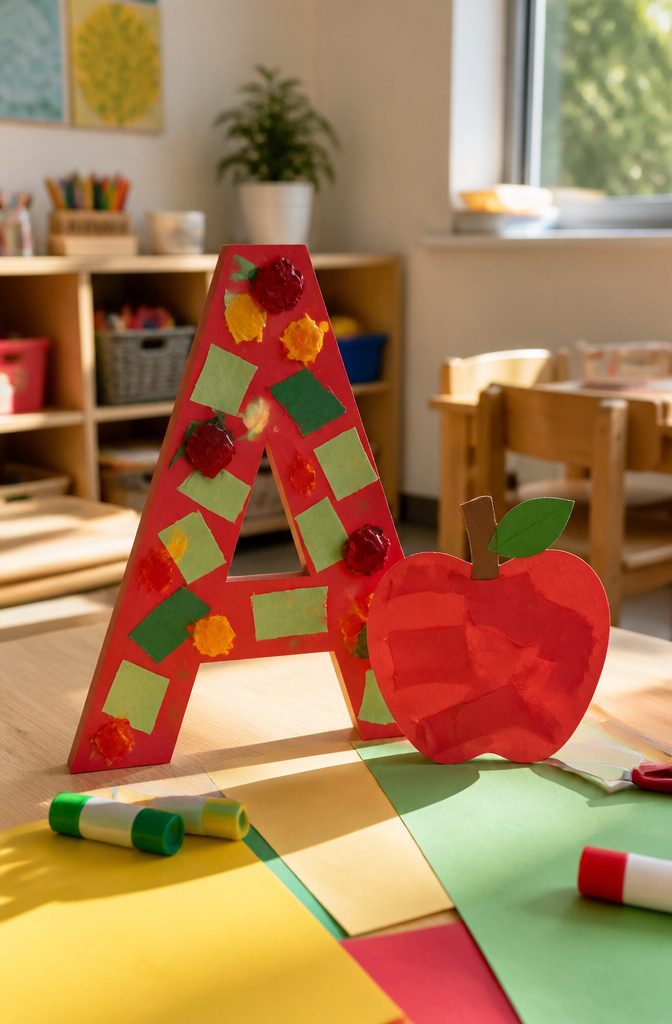
A letter A craft works best when the apple does the teaching.
Trace a big capital A on red or green card stock, then let your child fill it with torn paper, paint dabs, or the button method from the apple outlines: whatever covers the shape.
The two slanted legs and the short crossbar are what make an A recognizable, and a child gluing along each stroke is tracing it with their hands.
Say the sound out loud as you go: "A, apple, ah." Pair the capital with a lowercase a on a second sheet, since preschoolers meet both forms in books.
Cut a stem and leaves from construction paper and glue them on top so the A reads as an apple first and a letter second. I’d skip glitter; it hides the edges of the strokes.
16. B is for Brown (Lunch) Bag
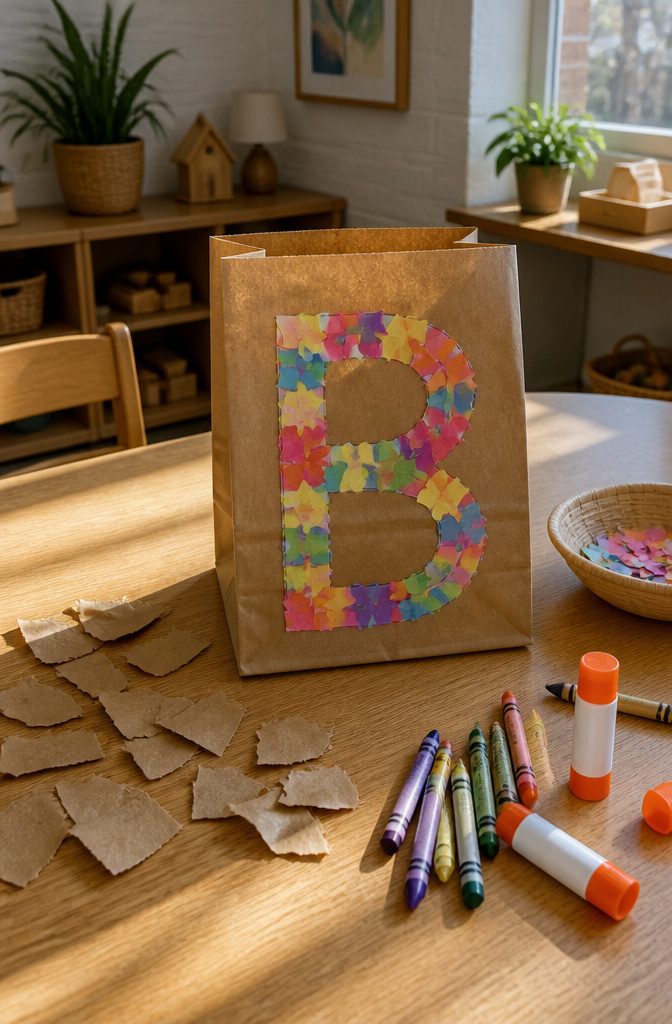
A plain brown lunch bag is the right material for a letter B because the color already matches the letter’s name.
Cut or tear the bag into small pieces; for preschoolers, tearing is the better choice, since it works little finger muscles and nobody needs scissors skills to start.
Print or draw a big outline of the letter B, then let your child fill it in with the scraps and glue them down. A thick outline gives small hands a clear edge to stay inside.
Once the glue is set, hand over crayons and ask what might have been packed in that lunch.
Drawing an apple or a sandwich around the B ties the letter to its sound, and a gently used bag keeps the whole project free.
17. Crayon Bookmarks
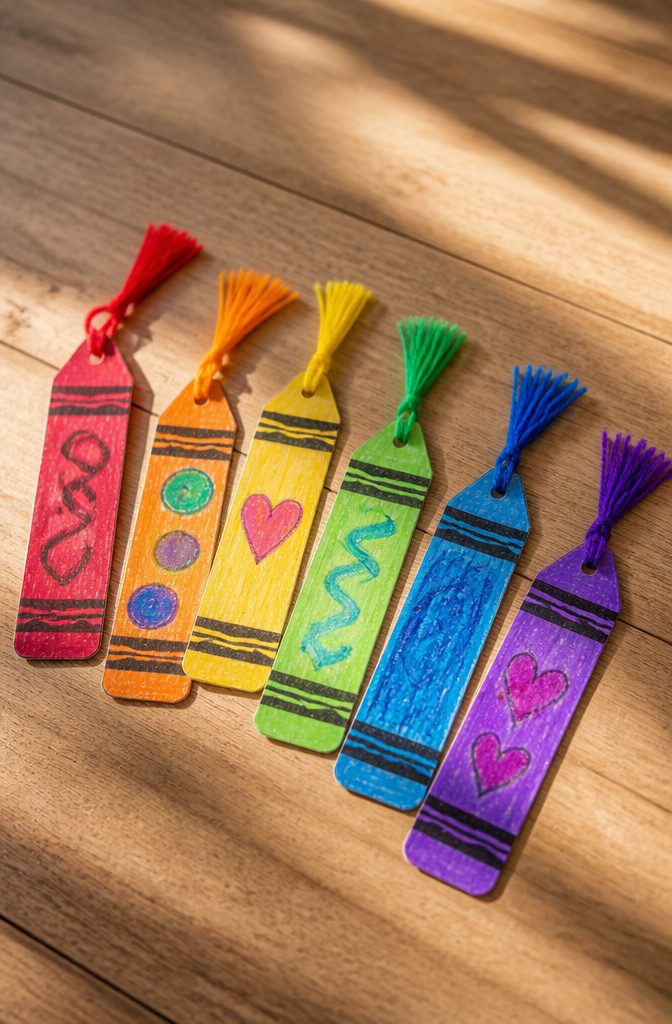
A crayon bookmark starts as a crayon-shaped piece of card stock, traced and cut so the tip points down and the body runs long enough to peek out of a book.
Card stock holds up to small hands better than plain paper, which curls and tears at the corners.
Color is where the crayon look comes from. Cut a rectangle label from card stock slightly lighter than the crayon body and paste it across the middle, so it reads like the paper wrapper on a real crayon.
Your child’s name goes on the label in black marker, and a few doodles around it finish the wrapper.
For a tassel, I’d add one.
Tie a longer piece of yarn around the middle of 3–4 short pieces, punch a hole in the top of the crayon, and loop the long end through. Fluff it, and the bookmark becomes something a preschooler wants to carry around.
18. Yarn-Wrapped Can Pencil Holder
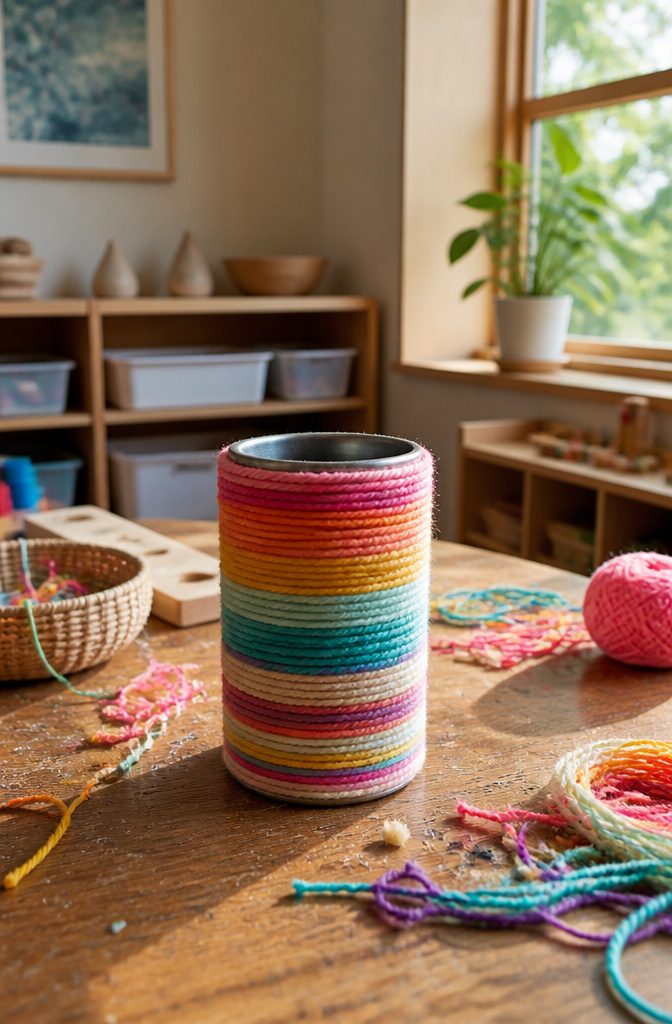
Sharp edges decide whether this craft is safe for a preschooler, so deal with the can before any yarn comes out.
Run a strip of duct tape or masking tape around the open rim and fold it over to the inside.
Better yet, pick a can with a smooth rolled edge, or tape the rim and let an adult check it before little hands touch it.
Wash the can, peel off the label, and let it dry. Brush white glue over a small band, press the end of the yarn down, and let your child wind it around while you hold the can steady.
Glue a little at a time, since wet glue on the whole can gets messy fast. Chunky yarn covers faster and holds small fingers’ attention better than thin yarn.
19. F is for Family
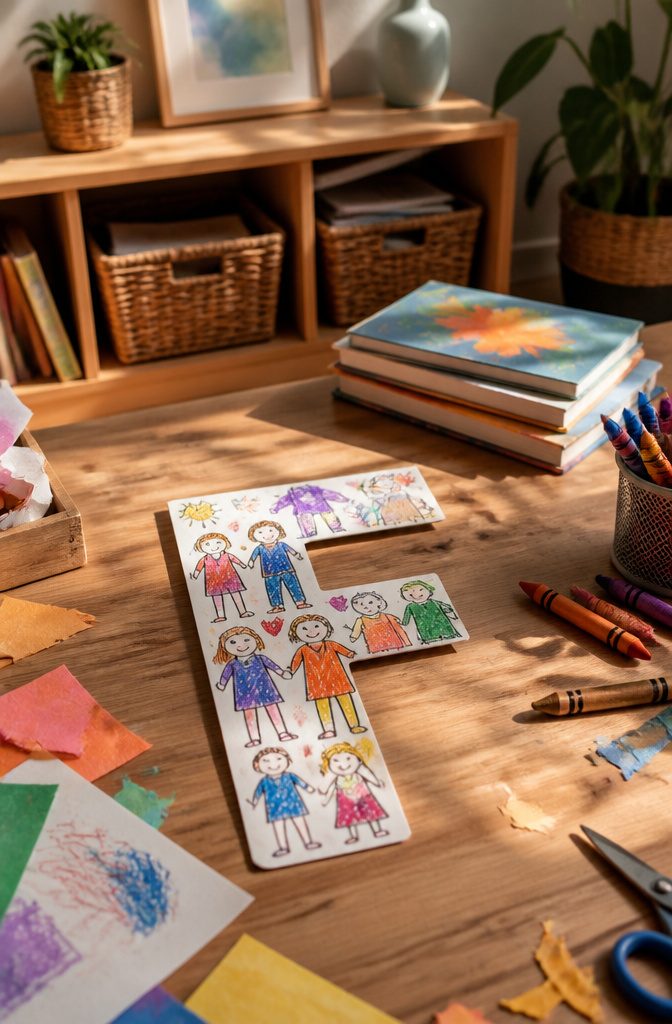
A big letter F gives a preschooler a lot of room to fill with people, which is why I like it for this craft.
Cut or draw a large F on construction paper, then let your child fill it with a picture of their family using whatever art tool they reach for first: crayons, markers, or paint.
Each person gets their own small figure, and the child decides who counts as family. Pets, grandparents, and the neighbor down the street are all fair game.
Skip a template for the figures. Children this age add family members one at a time, so ask them to name each person as they draw, then write the name beside the figure.
Let the drawings stay wobbly, because a stick-figure mom with enormous hands is the whole charm.
In a classroom, the finished F pages work well for sharing on the first day, and hung up together they show kids whose families look like theirs and whose don’t.
20. Craft Stick Pencil Bookmark
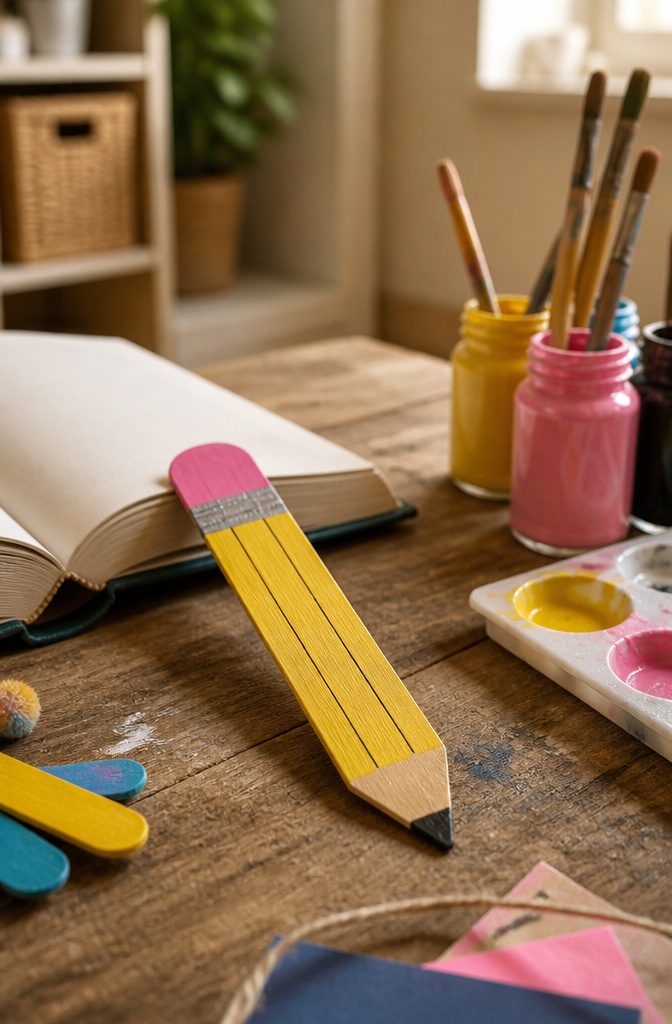
Cut one end of the craft stick into a point, then sand the cut edges smooth, because a raw cut leaves splinters that little fingers find fast.
A pencil bookmark only looks like a pencil if the colors land in the right places, so mark them first with a light pencil line. I’d do the sketching myself, since preschoolers paint better inside a boundary than freehand.
Hand your child the brush and let them fill each section. Paint one color at a time and let it dry before the next one touches it, or the colors bleed together at the lines.
Once everything is dry, write their name or a school subject along the stick. A pencil bookmark for each subject makes a nice set, and the labeling is the part I’d save for an adult hand.
21. H is for Handprint
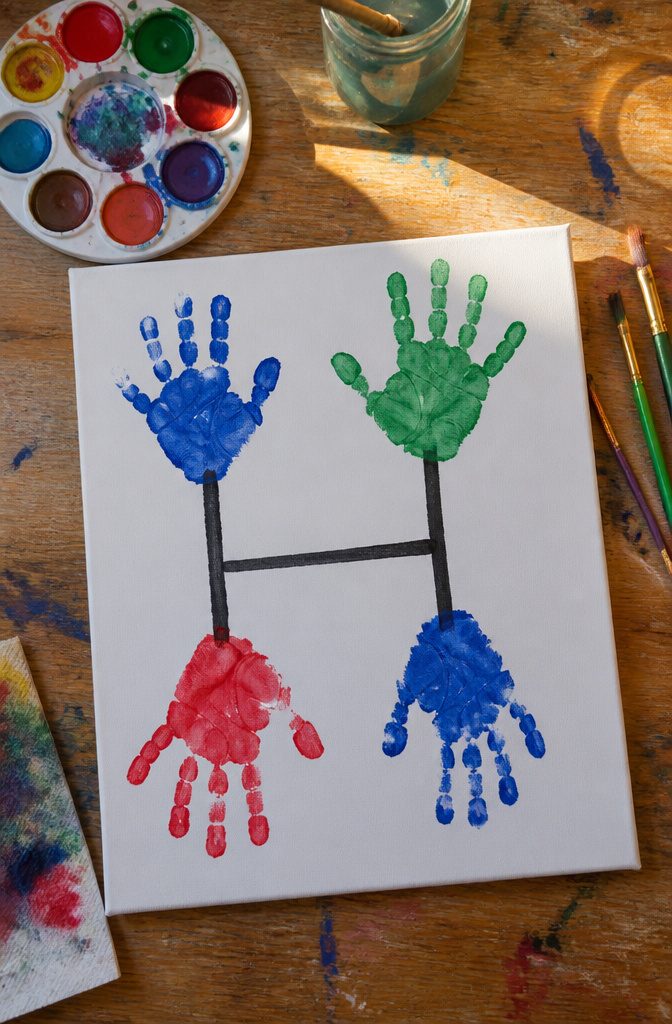
A handprint makes a better letter H than you’d expect, because the two hands become the two upright strokes.
Paint one palm and press it down, then paint the other and press it a few inches to the right with the fingers pointing up.
Draw the crossbar between them with a brush or a marker once the paint dries, and the H is done.
Use washable paint. Little hands will wipe themselves on sleeves and chair backs, and washable formulas come out of most fabric and off skin with plain soap and water.
This one is also a keepsake. Write your child’s name and the date along the bottom edge, since handprints this size won’t fit the same child next year.
I’d put it on a small canvas or a sheet of sturdy paper you can frame, and skip flimsy printer paper that curls as the paint dries.
22. Back to School Collage
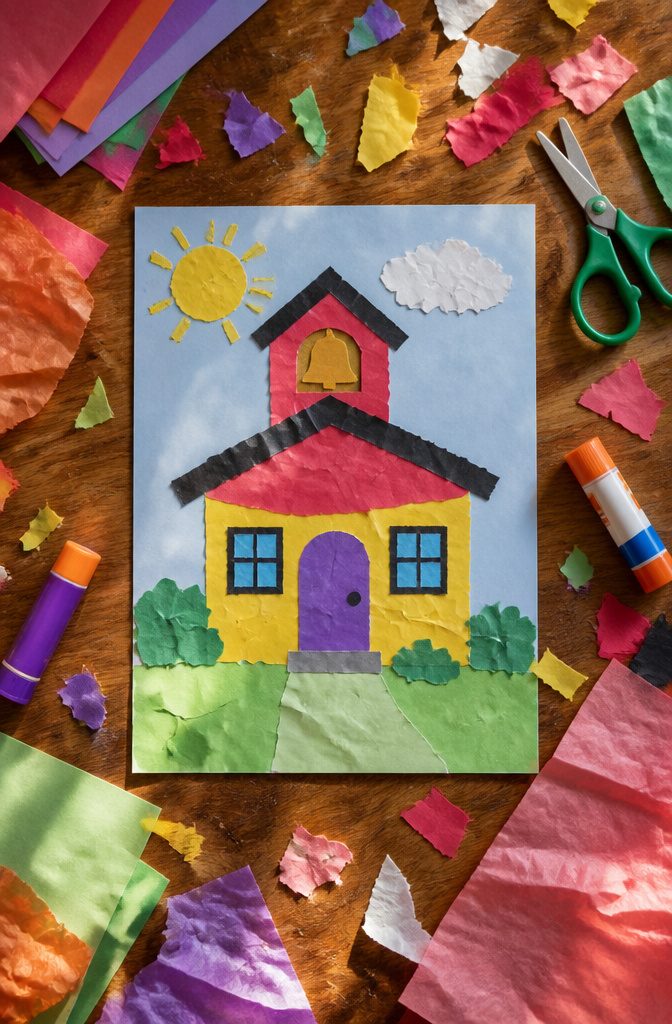
Tearing comes first because it is the easiest cut for small hands, and it quietly trains the same pinch-and-pull grip that scissors need later.
Give each child a pile of construction paper and tissue scraps and let them rip strips and chunks for a few minutes before any glue comes out.
Cutting is the second pass.
Draw a fat line on a few scraps and let them snip along it, while the rest stay torn. A mix of ragged and straight edges looks better on the page anyway.
For gluing, I’d pick glue sticks over bottles. Bottle glue pools under tissue and wrinkles it.
Start with a simple school shape, like a pencil, a backpack or a schoolhouse, outlined on a sheet of paper. Then ask the child to spread glue on the page, not the scrap, and press each piece down flat.
23. P is for Pencil
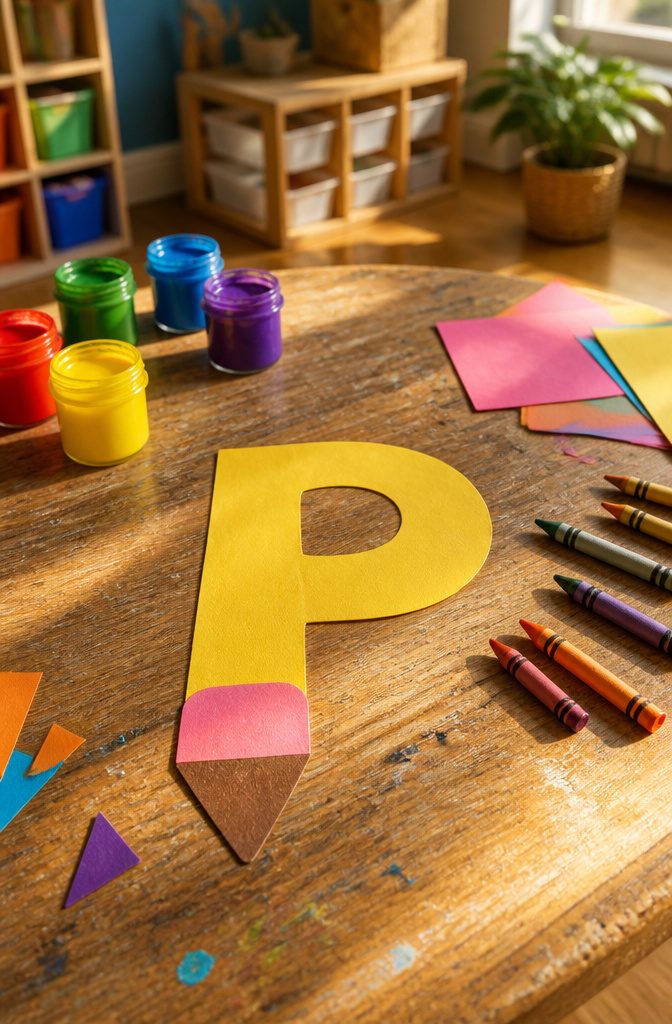
The stem of the P is a yellow rectangle, and that one choice is what makes the letter read as a pencil.
Cut an uppercase or lowercase P from yellow construction paper, then have your child draw straight lines down the stem from top to bottom. Smudging them lightly with a fingertip gives the stem a painted-wood look.
The tip is where preschoolers get the most out of it.
Glue a pink square to the bottom of the stem for the eraser, then add a larger brown triangle and a smaller black triangle at the other end for the wood and the point.
Have your child say "P" as each piece goes on, so the sound ties to the shape they’re building. I’d pick uppercase first, since the straight stem is easier to line.
24. Q is for Quiet
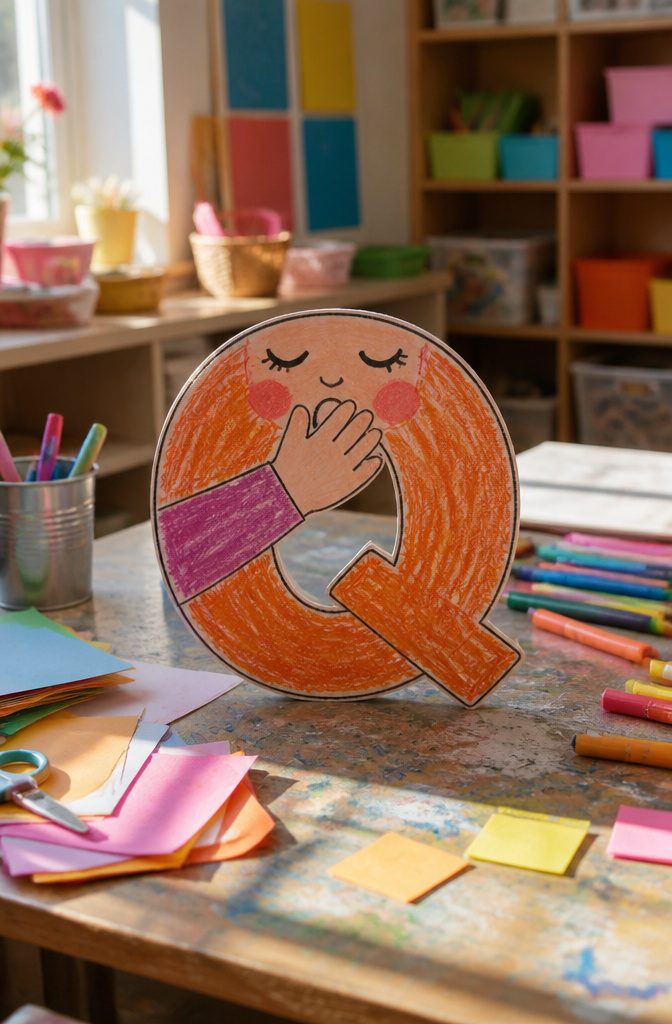
Q is for quiet, and the easiest way to show a preschooler what that looks like is a face with a hand over its mouth.
Have your child draw a circle on a sheet of paper and add eyes, eyebrows and a nose. Then trace their hand on construction paper and cut it out.
Fold down every finger except the pointer, and glue the hand where the mouth would go. The face is now saying "shhhh!"
To make it a Q, I’d draw the circle large and add a small tail at the bottom right.
The pointer finger covers the mouth, so the tail stays clear of it. Tracing and cutting are the slow parts, so cut the hand yourself if scissors still frustrate your child.
25. Beaded Name Zipper Pull
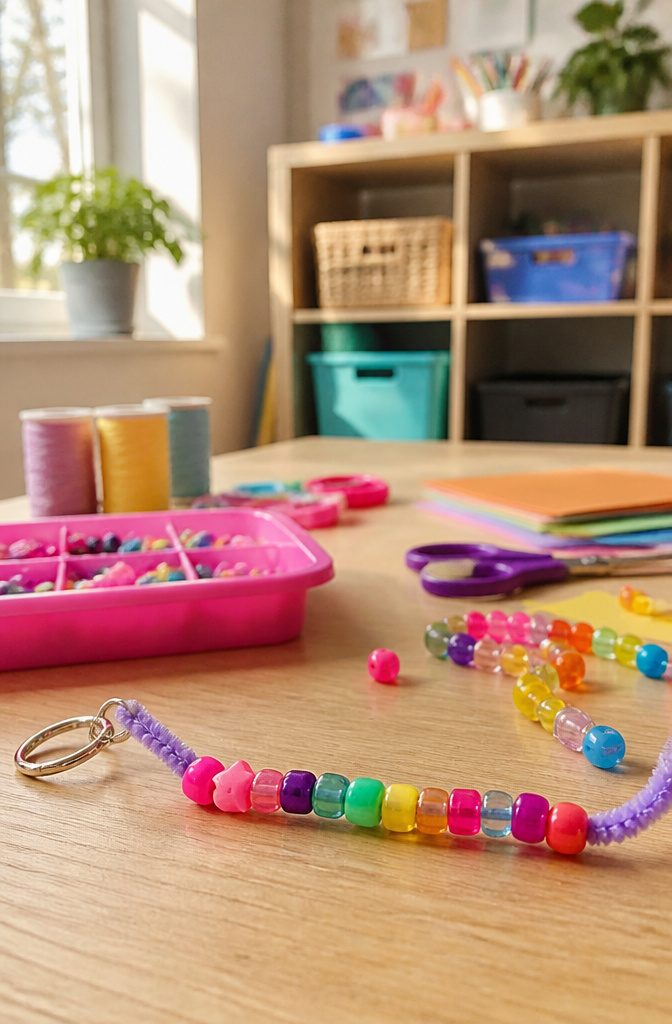
A pipe cleaner beats string for this project because its stiff end works like a built-in needle, so a preschooler can thread letter beads without fumbling for a hole.
Have your child hunt through the alphabet beads for each letter of their name and slide them on one at a time. That search-and-thread routine builds hand-eye coordination and finger dexterity, the same skills behind buttoning a coat later on.
Add a few plain decorative beads on either side, then feed the top through the backpack zipper pull and twist it tight. Loop the bottom end around your finger once and twist it closed so the beads can’t slide off.
Small beads are a choking risk, so stay beside any child who still mouths things, and skip this one for toddlers.
Frequently Asked Questions
What are some good crafts for preschoolers?
Simple projects with big, forgiving steps work best, such as the yarn-wrapped pencil, paper plate apple lacing, handprint keepsakes, and letter crafts like A is for Apple.
Each one uses everyday materials and gives small hands a job like wrapping, threading, tearing, or gluing. Pick one that matches your child’s age and let the result stay a little messy.
How can crafts support child development?
Crafts build fine motor skills, hand-eye coordination, and creativity.
Wrapping yarn, threading, and pinching buttons train the same finger control kids later use for writing and buttoning a coat. Letter and name crafts add early literacy practice, and sorting colors adds early thinking skills.
What materials are best for preschool crafts?
Non-toxic washable paint, washable markers, construction paper, and glue sticks cover most projects.
Recyclable items like paper bags, cans, and fruit pouches also work well and cost almost nothing. Choose washable paint for handprints, and check cans for sharp edges before a child touches them.
What crafts can a 3-year-old do?
Three-year-olds do well with tearing paper, painting, sticker placing, and wrapping yarn around a large cardboard shape.
Sponge painting and simple stamping are also good fits, since they need little setup and only simple motions. Adults should handle the cutting, and kids who still mouth things need close supervision around small parts like buttons and beads.
What are some easy crafts for kids?
The personalized sticker pencil box, the first day of school crown, and the back to school collage are all quick to set up.
They use paper, stickers, glue sticks, and markers, with no special supplies. Tearing paper instead of cutting it keeps the collage easy for beginners.
How long should a preschool craft last?
Plan on 15 to 20 minutes.
That matches how long most young children stay interested, so they finish while they are still engaged. For crafts that need drying time, such as painted pencils, split the project into two short sessions.
Do preschool crafts need to look perfect?
No.
The value is in the process: exploring materials, practicing hand skills, and making choices. A lopsided letter or a stick-figure family with huge hands is part of the charm, so hold back from straightening anything.





