
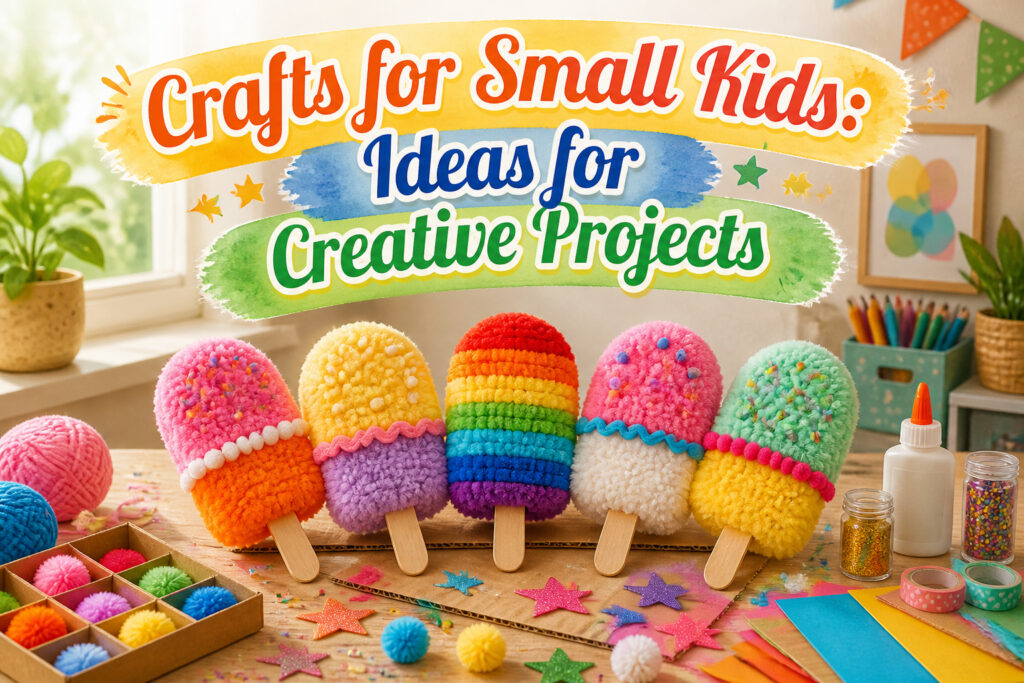
Crafts for small kids work best when the finished object survives rough handling and invites play afterward.
The pompom ice pops in this list become currency in pretend games, not shelf decorations, because they have no melting parts to break the spell.
Most of these twenty projects use flour, cardboard, or yarn, materials already in the house, and each includes the one adjustment that keeps it from failing mid-afternoon.
1. Pompom Ice Pops
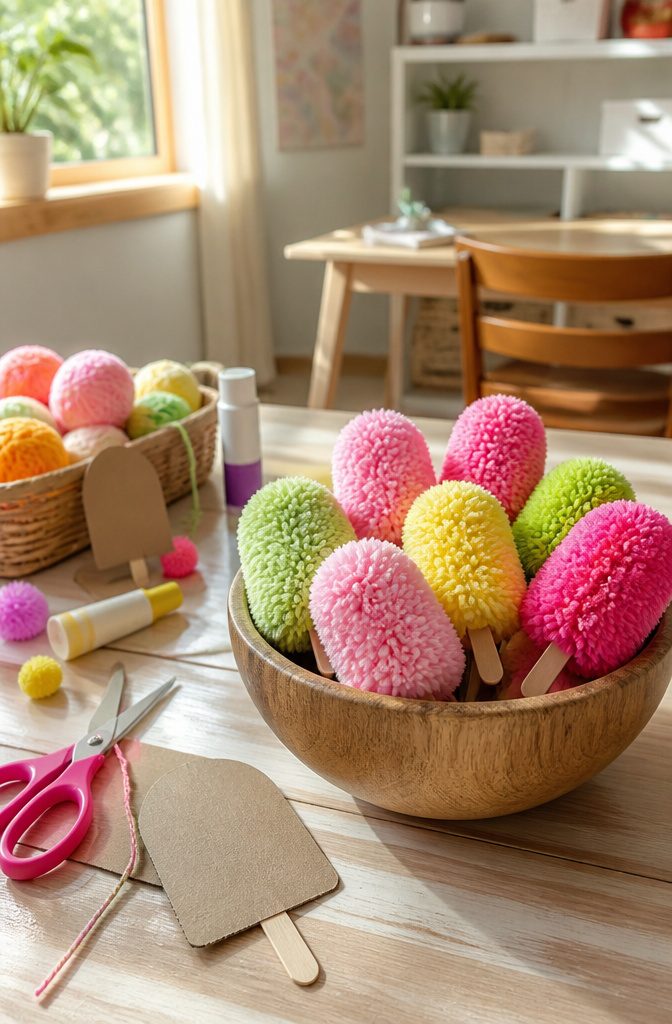
Yarn pompoms and craft sticks turn into pretend frozen treats that survive a toddler’s grip, which matters more than it should.
The build is two moves. A toddler can hold one end of the yarn while you wind the rest around a cardboard rectangle cut to ice-pop width.
Their job is keeping tension and deciding when to stop, usually far later than necessary. You tie off the bundle, snip the loops, and trim the pompom into a rough oval while they watch fuzz fly everywhere.
A dab of glue sets the craft stick handle; let them pick the color and call it a flavor.
What sells this craft is what happens after the glue dries. Mine became currency in a game I did not write.
The pink one was strawberry, the green one was definitely not lime, and both got traded back and forth in a game of pretend ice-cream stand that lasted until dinner. No melting, no sticky hands, no reason to stop.
Fine motor practice hides in the wrapping and the gluing, but the real payoff is the open play that follows.

Toddler Crafts Set - All-in-One Creative Fun: This comprehensive set includes 20 animal-themed pom pom pictures (each 7.8x7.8 inches), over 500 colorful 1.5cm pom poms, 160 self-adhesive rhinestone stickers, 500 glue dots, and 1 easy-grip tweezers-everything your little artist needs to start creating right away

POM POM ART KIT FOR KIDS: Creative children will use the pom pom popper tool to develop fine motor skills and creativity as they pick and stick on pom poms to dress up the animals in 3D designs

😀 Design-A-Kids Work of Art: An extremely fun DIY kit that allows small children to stick colorful pom poms onto a sticker card surface. The perfect arts and crafts for kids ages 3-5 years old.
2. Homemade Clay
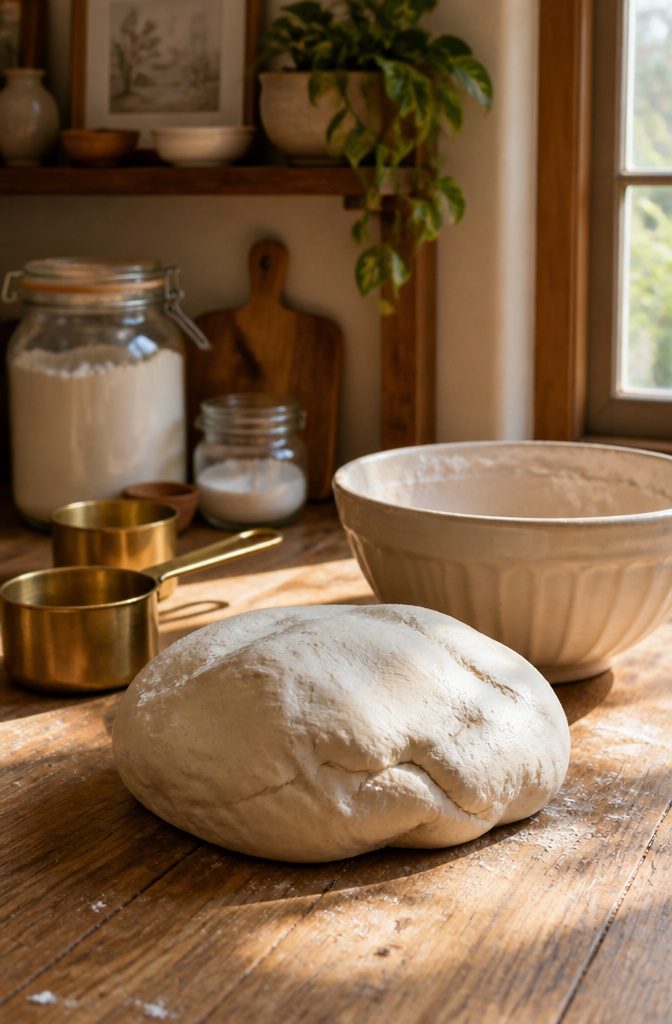
Flour, salt, and water make the cheapest clay you will ever use, and the mistakes teach themselves. I started with a one-to-one ratio and wound up with a sticky mess that glued itself to the table.
The dough needs enough salt to keep it from puffing in the oven, enough flour to hold a ridge when you drag a finger through it.
Mixing takes about ten minutes by hand if you are thorough, five in a stand mixer with a dough hook.
Bake at the lowest setting your oven allows, usually around 200 degrees, for two to three hours. Thicker pieces need more time, and rushing it with higher heat cracks the surface from the inside out.
The shapes that survive best have no thin arms or dangling bits; a flat handprint or a solid ball holds together, while a giraffe neck snaps the first time someone drops it.
Air-dry clay skips the oven entirely, but it shrinks more as it dries and can warp if you do not flip the pieces every few hours.
Both versions keep for months in a sealed bag, which means you can mix a batch on Sunday and sculpt again on Wednesday.

VIBRANT CLAY KIT - Our air dry clay kit includes 32 different colors,3 sculpting tools,and extra sealing bags.You can also mix and match any way you like to create your desired colors
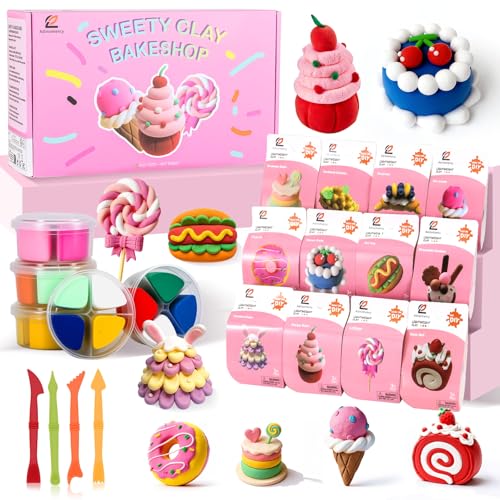
Ultimate Air Dry Clay Kit for Creative Kids! Dive into a world of creative fun with our complete air dry clay kit! This all-in-one set lets kids create 12 adorable food-themed pastries like cupcakes and donuts. Each of the 12 individual cups comes pre-filled with 4 vibrant modeling clay colors, making it the perfect arts and crafts activity for boys & girls aged 3-12 and beyond.

Animal Theme Clay Kit: Unleash creativity with our complete air-dry clay set! Includes 12 individual boxes of premium clay (each with 4 vibrant colors), 4 sculpting tools, and step-by-step tutorials. Easily craft 12 lifelike animal models using illustrated guide cards. The innovative compartment box keeps colors separated, and leftover clay stores neatly in the sealable container—mess-free fun anywhere!
3. Dinosaur Feet
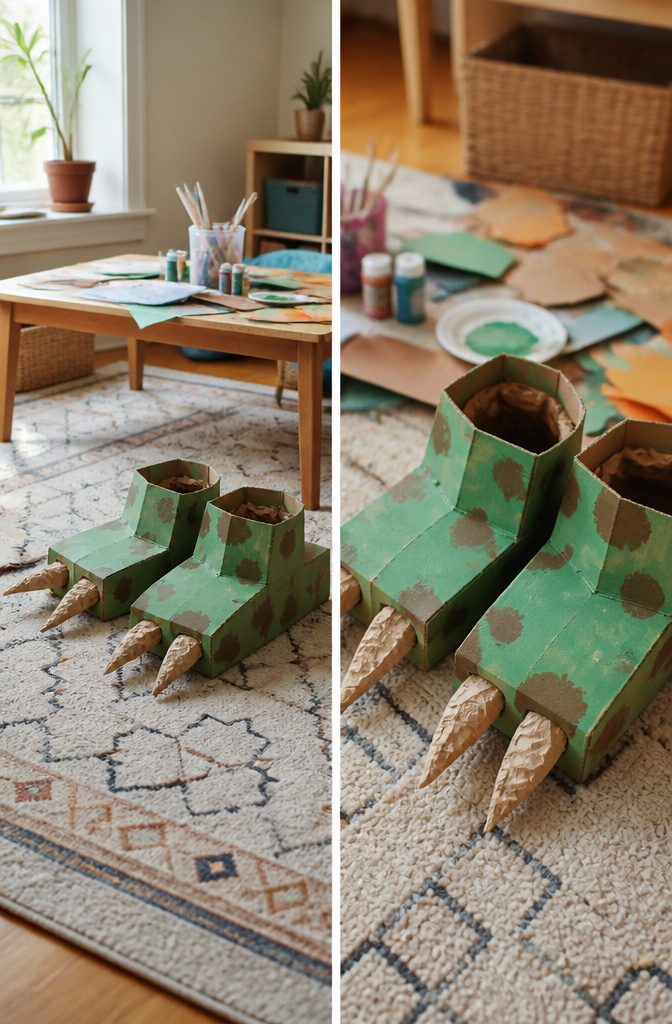
Empty tissue boxes or shoeboxes make the raw material here.
The child paints the box green or brown, then glues on paper claws at the open end. Two holes punched on the sides let you thread elastic through, knotted inside to hold the box on a small foot.
The elastic slips and the box flops unless you anchor it to something the foot actually pushes against.
What worked was cutting a second strip of cardboard to fit across the inside of the box like a shallow bridge, just behind where the toes sit.
The elastic loops under that bridge, so every step presses the strap against the sole instead of tugging on the thin box walls. Without that bridge, the box skids off in three stomps.
The claw end goes forward, obviously, but small kids often want to walk backward to see the claws themselves.
Let them. The stomping noise matters more than direction.

CRAYOLA AIR DRY CLAY: Includes 5 pounds of Crayola Sculpting Clay in a re-sealable bucket.


Multicolor & More Fun: The air dry clay set contains 66 colors,with 1 instruction booklet, 4 sculpting tools and extra ziplock bags.Kids can mix and match, creating their unique hues while developing fine motor skills. This modeling clay kit is synonymous with infinite enjoyment for kids
4. Flower Pens
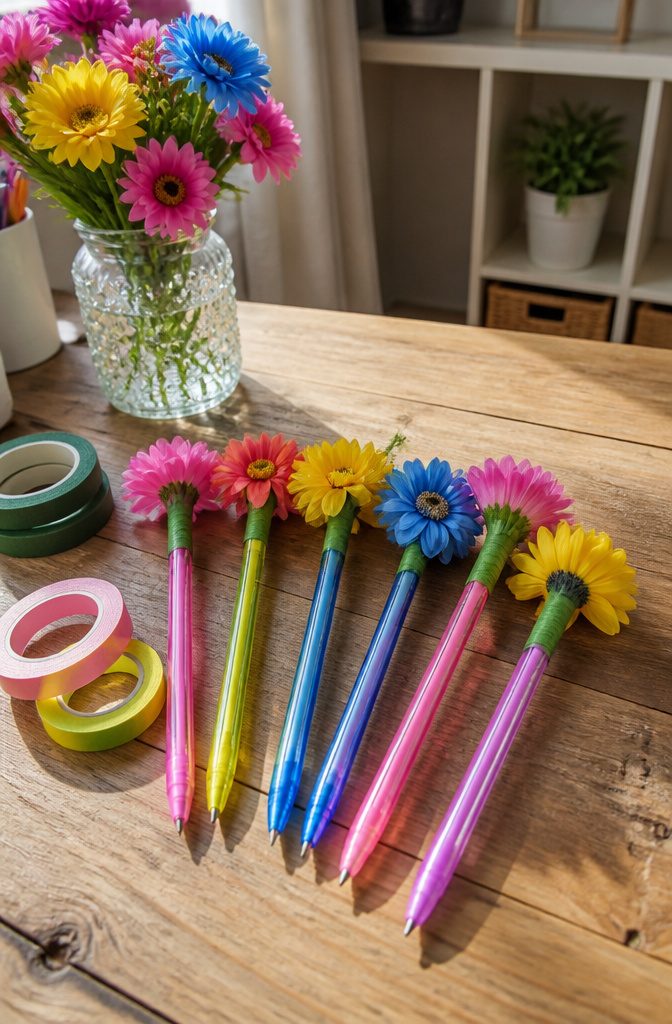
A child can turn a ballpoint pen into something worth giving away with nothing more than a plastic flower and the right kind of tape.
The sources point to floral tape as the material that actually holds, wrapped tight around both the pen and the flower stem so nothing wiggles loose.
Glue, by contrast, tends to get everywhere with small hands involved, and the mess usually outlasts the craft session itself.
Plastic flowers from the dollar store work fine; the stems snap short with scissors and the tape covers the cut end.
A four-year-old can manage the wrapping motion after one demonstration, and the finished pen still writes like ordinary, which matters more to a kid than you’d think.
The motor practice is real, and the gift-giving part gives them a reason to finish.

Quantity: 10 Yards Size: 16mm (5/8 Inch) Fold Over Elastic Single Face Printed Great for hair bows, hairbow clips, scrapbooking and many other projects.
5. Ooey Gluey Suncatchers
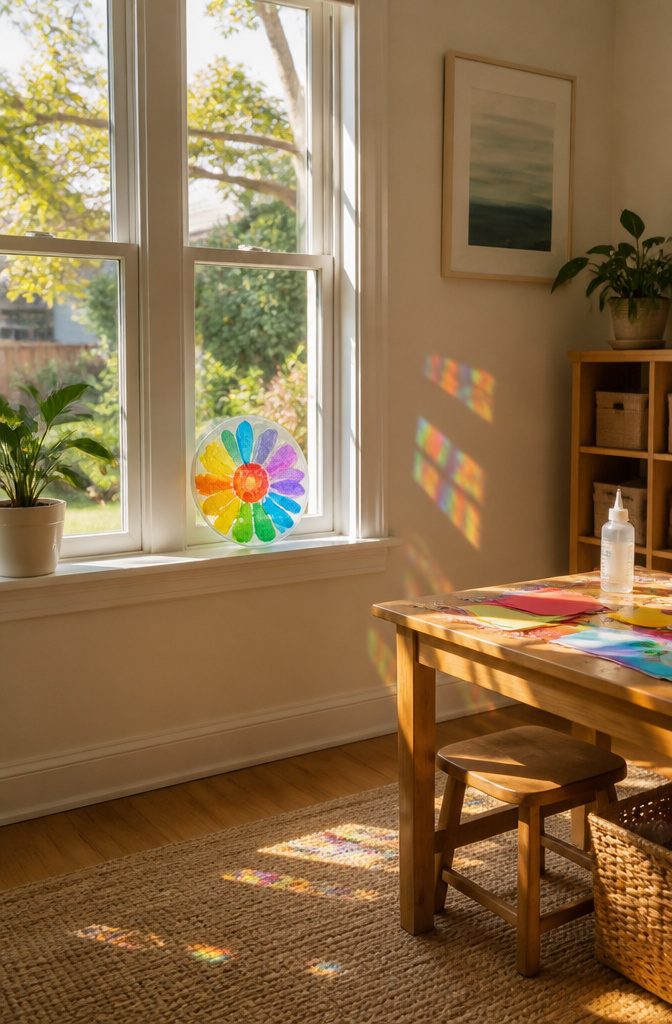
Glue and food coloring on clear plastic or wax paper dries into a suncatcher that catches light like stained glass, except it costs nothing and a three-year-old can make it.
The catch is the curl. Thin glue shrinks as it dries, and by hour four the edges lift off the plastic like a potato chip.
Lay the plastic directly on the windowsill, not on a plate you move later; any transfer after the first ten minutes invites a bend that sets permanently.
Food coloring gives the glassy look in drops.
Tissue paper torn small works too, though the colors muddy where pieces overlap. Either way, the drying takes a full afternoon sitting in sun.
My own patience failed at the two-hour mark once, and the half-dry sheet curled into a tube I never fully flattened. Wax paper is more forgiving than clear plastic for beginners; the slight texture hides small wrinkles.
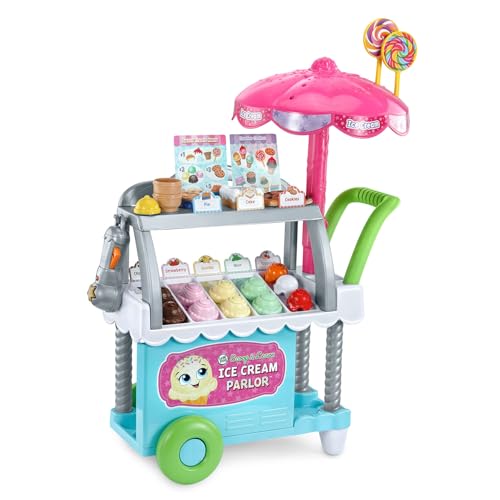
The Magic Scooper recognizes colors and flavors, and introduces shapes

Ice Cream Stickers for Kids - Package Contents: 48 sheets Ice Cream stickers for kids with 12 unique designs, a set enough to satisfy kids various activities or party games needs

Complete Ice Cream Shop: Kids love scooping & stacking bright wooden scoops & toppings, with a kid friendly ice cream toy scooper, & serving on a countertop with special ports to hold all their treats
6. Mail a Hug
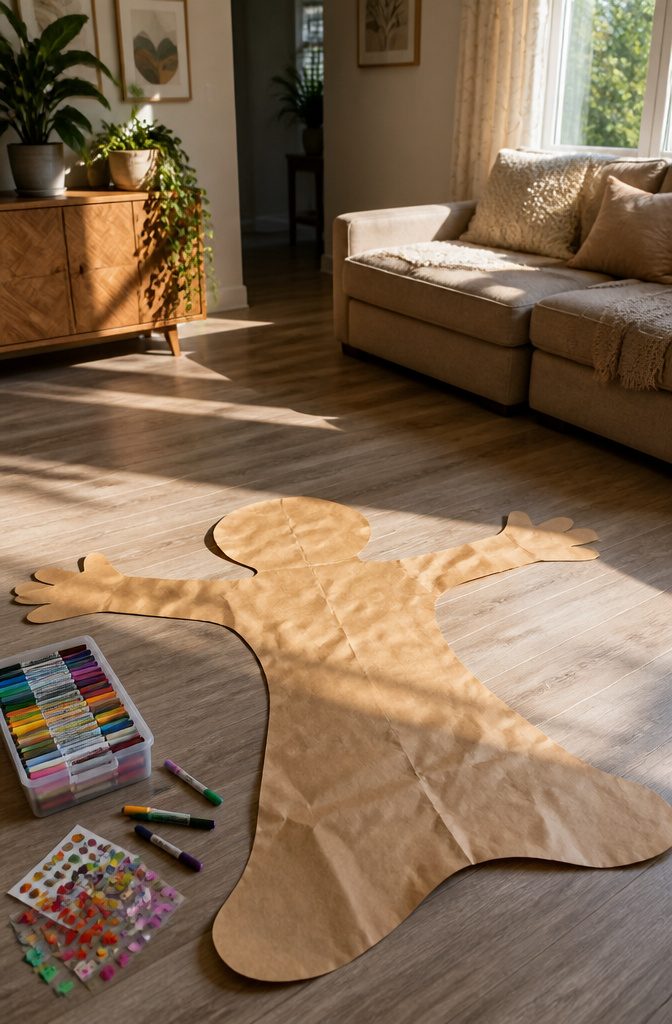
A sheet of butcher paper at least 36 inches wide gives you room to trace a toddler’s full wingspan without running short at the wrists.
Roll it out on the kitchen floor, have them stretch both arms straight, and trace from fingertip to fingertip. The cutout makes a surprisingly emotional artifact, thin and floppy as it is.
Folding that shape into something mail-able is the puzzle.
A 9-by-12 envelope won’t close around it. What worked was a simple accordion fold at the elbows, then once more at the shoulders, until the hug compressed into a standard letter envelope.
The post office handled it as regular first-class mail, no extra postage, though the clerk did eye the lumpy rectangle and ask if there was "something alive in there."
Markers and a glue stick are enough to finish it.
The child can draw a face on the chest scribble, add buttons, write their name in the corner. The lesson in where mail goes and who receives it lands without any lecture.

Create Fun Pom Pom Art: Craft 3 animal-themed art pieces with this toddler-friendly kit, perfect for hanging up and showing off.

Pom-Pom Pets are as much fun to make as their canine cousins (and every bit as cute), and with 20+ animals and 150+ cute punch-out features to choose from, there's bound to be a puffy little pocket-sized pet that's a perfect match for every young pom-pommer.

Turn plain yarn into perfectly precious pups.
7. Goofy Robots
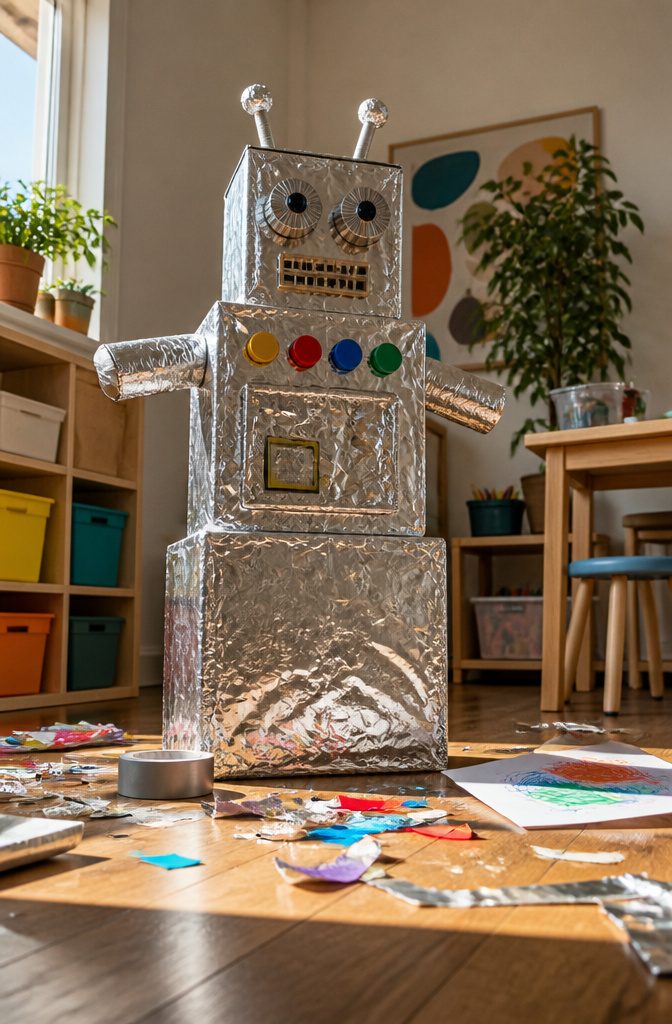
A shoebox with the lid taped shut makes the steadier torso than a cereal box, which wants to tip sideways the moment a 4-year-old sets a second box on top.
Stack two boxes of different sizes, largest on the bottom, and the robot stands without wobbling.
Toilet paper rolls work best as arms or legs when slit partway up so they grip the edge of a box instead of dangling free.
Aluminum foil covers the rough cardboard edges and gives that metallic look a kid recognizes, though it wrinkles fast in small hands and tears if pulled too tight.
The face, drawn with marker on a glued-on foil square, usually happens fast.
The real work, the sticking and wrapping, holds a preschooler’s attention for maybe ten minutes before the tape dispenser becomes a fight or the foil ball won’t stay where it was patted.
That is about when you step in, not to finish the robot, but to hold the next box steady while they press.
A finished robot with six foil buttons and one lopsided eye is still a finished robot; the goal is the making, not the museum piece.
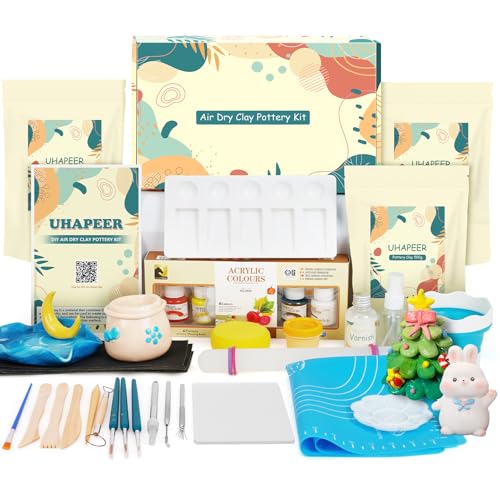
Comprehensive Pottery Kit: This all-inclusive air dry clay starter kit includes all the necessary materials to start your pottery journey - 3 x 1lb/500g air dry clay with storage bags, 1 x gloss varnish, 6 x acrylic paints, 8 x sculpting tools, 1 x sponge, 1 x palette, 1 x foldable bucket, 2 x brushes for detailing, 1 x work mat, 1 x spray bottle,1 x rolling pin, 1 x guide manual with a video tutorial. Transform your leisure time into a fulfilling pottery experience with the our airdry clay kit!

Complete Animal-Themed Creative Experience:Release your child's imagination with our premium air dry clay kit! This comprehensive set includes 12 individually packaged boxes, each containing 4 vibrant colors, 4 professional sculpting tools, and illustrated step-by-step tutorials. Perfect for creating 12 different adorable animal models while developing essential motor skills through hands-on crafting fun.

All-in-One Monster Clay Kit for Kids Ages 4+: Includes 12 individually packed monster clay kits with colorful air dry clay, 12 keychains, 4 wind-up mechanisms, and 1 sculpting tool set. Each box features step-by-step instructions, making it easy for boys and girls ages 4+ to create adorable monsters and enjoy hands-on crafting right away.
8. Homemade Finger Paint
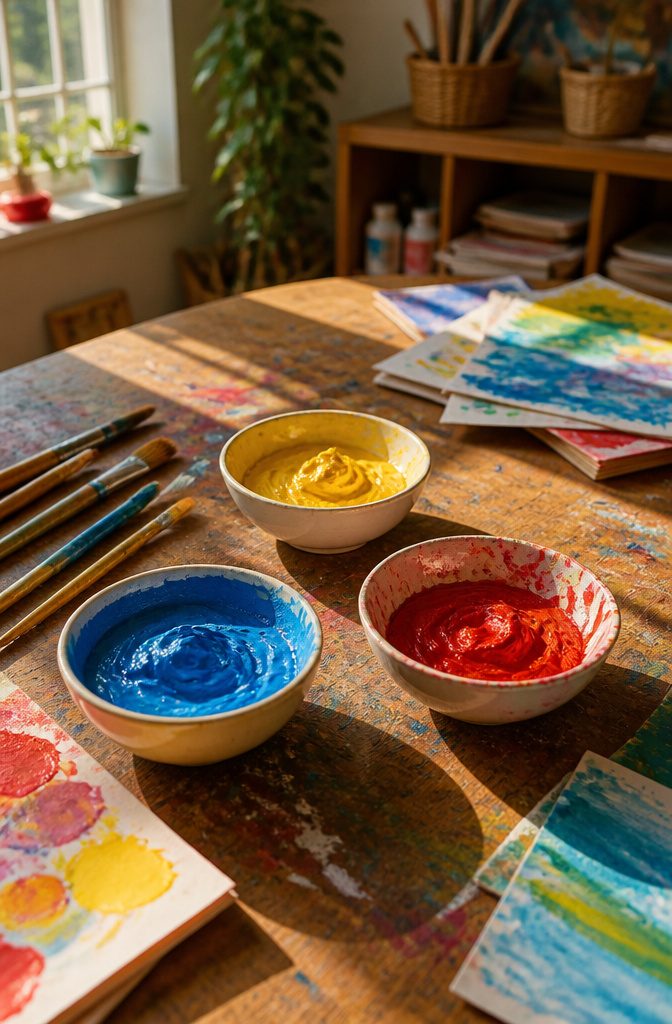
A batch of homemade finger paint starts with flour and water, cooked slowly until the mixture thickens into something that coats a spoon without dripping right off.
Salt goes in to keep it from spoiling fast, and food coloring turns the whole pot into whatever shade your kid names that afternoon.
The uncooked version skips the stove entirely. Cold water and flour get whisked until smooth, which saves maybe ten minutes but leaves a thinner paint that runs down paper and pools at the edges.
The cooked batch holds brush marks and finger swirls the way the raw one never manages.
Both formulas wash out of a cotton shirt if you catch them wet. The cooked paint, though, dried into the fibers of an old white t-shirt I tested and needed a second soak before the pink lifted completely.
The uncooked paste rinsed clean in one go. For a rainy afternoon with a two-year-old who treats their shirt as the canvas, that difference matters more than the time at the stove.

All-in-One Animal Modeling Kit for Creative Play: 12 reusable tins with 4 vibrant clay colors plus sculpting tools in each box. Step-by-step tutorials for 12 animals including chicken, dog, owl, bear, and deer with extra clay for original creations. Starter kit for clay crafts and 3D art projects

INCLUDES A STEP-BY-STEP TUTORIAL: The air-dry clay set contains 4 modeling tools and project tutorials. The set is divided into 12 boxes, with each box corresponding to a different project. Each box has 4 compartments containing different colors of clay, with enough clay to create each themed model. This allows children ages 8 to 12—or those new to this activity—to get started quickly

Create 12 Mini Desserts Kids Love to Display Includes birthday cakes, ice cream, macarons, tiramisu and more. Every project comes with pre-measured clay and simple step-by-step guidance, making it easy for beginners to complete adorable mini desserts with confidence.
9. Water Microscope
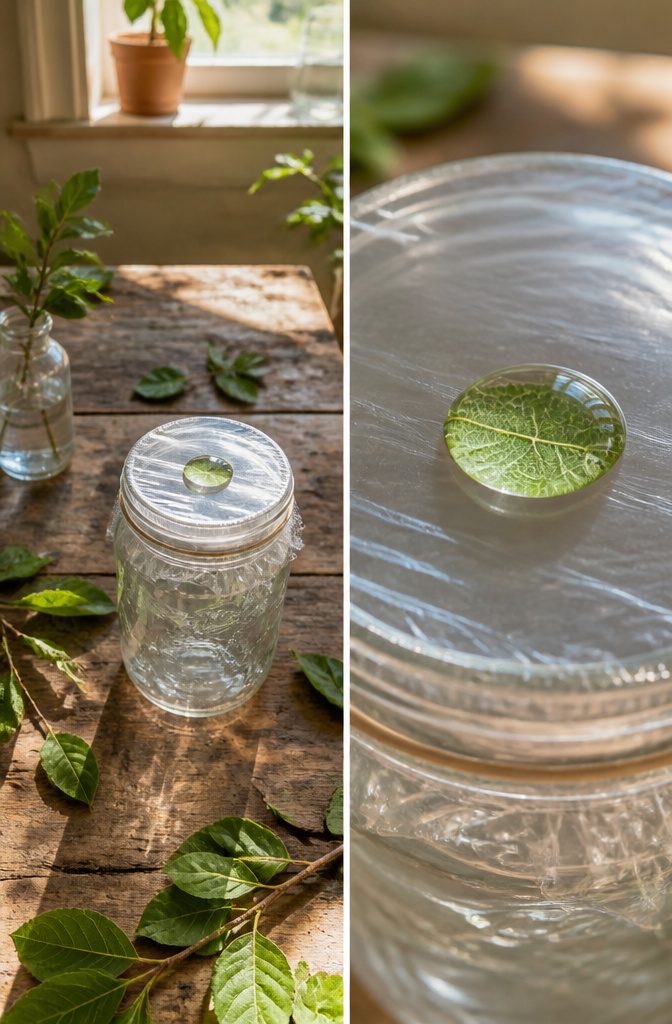
Stretch a square of clear plastic wrap over a wide-mouthed jar and pull it drum-tight with a rubber band.
A single drop of water sits on top like a tiny dome. That dome is what does the work: surface tension pulls the water into a convex lens that bends light and magnifies whatever you slide underneath.
The sources say a child will see leaves or flowers in new detail.
What actually happens is more modest. The water drop gives maybe 2x to 4x magnification, enough to make a leaf’s veins visible or show that a flower petal isn’t solid pink but streaked with white.
A small kid sees that something ordinary looks different, which is the real payoff.
The trick is keeping the dome small. Too much water and the drop sags, the lens flattens, and the whole thing turns into a wobbly magnifying glass that mostly magnifies your frustration.
I would skip the paper cup version some guides suggest and stick with a jar rim: the wider opening gives the wrap more surface to grip, and a mason jar’s screw band even holds the plastic in place while a rubber band goes over it.
What lives under that drop matters too. A leaf works because it lays flat and has texture to catch the light.
A flower petal is better pressed than loose, or it pushes up and breaks the water’s curve. The activity peaks at about ten minutes of actual looking, which fits the age group fine.
10. Create a Castle
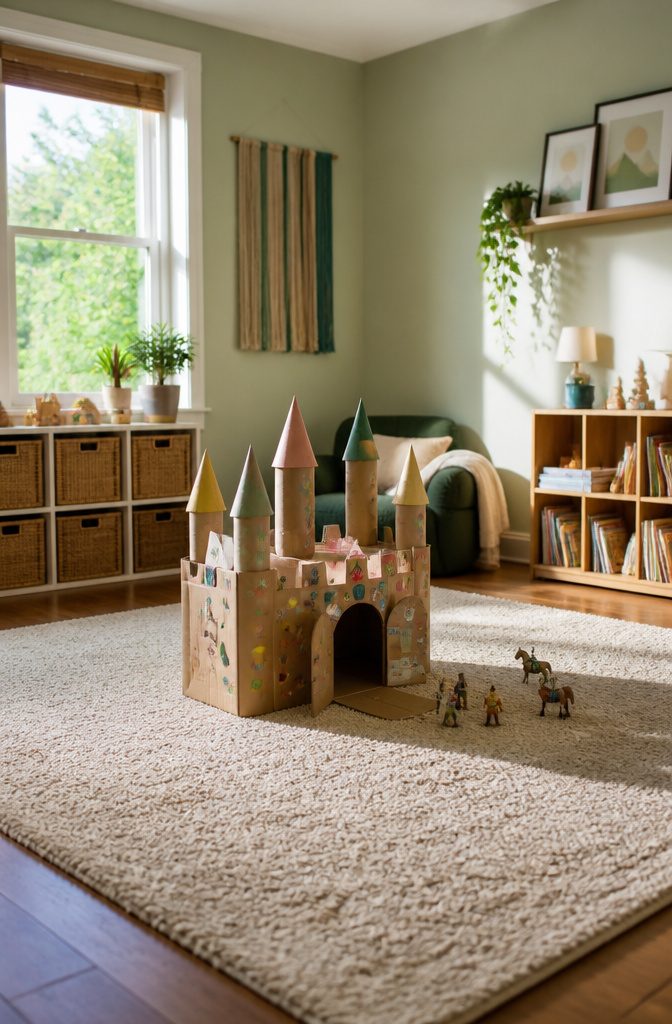
A castle built from cardboard boxes and paper towel rolls starts with the question of who gets to live inside.
A box 18 inches square fits a three-year-old sitting cross-legged, but push past two feet on a side and the walls bow outward under their weight. Tape helps only until it doesn’t.
I learned the hard way that a structure tall enough for a child to enter needs a roof cut from a separate flat piece and taped across the top like a lid, not balanced on upright walls like a tent.
Paper towel rolls make excellent turrets when slit halfway down and slid onto the corners.
The first castle my household attempted stood nearly three feet high and looked magnificent for roughly thirty-six hours before the tape peeled from the humidity of small hands and the whole thing folded flat during breakfast.
A smaller version, closer to ottoman height, survived a full week of knights and dragons because the walls were short enough that the roof sat squarely on top without levering the seams apart.
Paint is optional; markers and stickers let a child decorate without the drying time that derails momentum.

Ice Cream Toys Set: 1 x Ice Display Stand, 6 x Ice Cream, 6 x Popsicle, 2 x Yogurt, 2 x Scoops, 1 x Ice Cream Scoop, Menu and a set of Toy Notes and Coins.


Keeps Toddlers Engaged: Includes 15 ice cream, 2 scoops, 1 base, and stickers. Ideal for children aged 3-5, sparking creativity through pretend play, making it a fantastic pretend toy food for kids ages 4-8.
11. Cardboard Tube Telescope
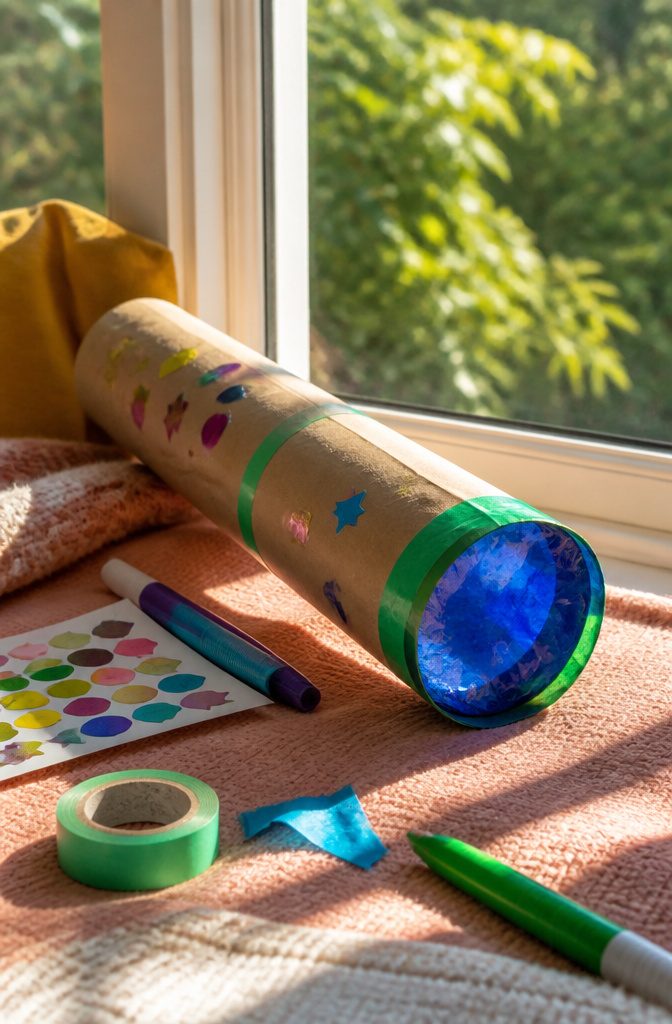
A paper towel or wrapping paper tube, some paint, and a square of colored cellophane are enough to build a telescope a two-year-old will actually use.
The cellophane gets taped across one end: blue, yellow, red, whatever is in the drawer.
That colored film is the whole point. A toddler looking through it sees the living room carpet or the backyard fence washed in blue or gold, and the effect holds their attention longer than you’d expect.
The cellophane lens turns an ordinary room into a place worth investigating.
Without it, the tube becomes a baton.
They carry it, drop it, carry it again. Still good; still a craft finished in twenty minutes.
But the cellophane is what makes them pause and look. Paint and stickers let a preschooler claim ownership, and the length of a wrapping paper tube fits a four-year-old grip better than a stubby paper towel roll.
Either works. Younger kids wave it toward birds through the window; older ones aim it at the dusk sky and call out planets they know are not there.
The craft does not correct them. It gives them a reason to look.
12. Recycled Guitar
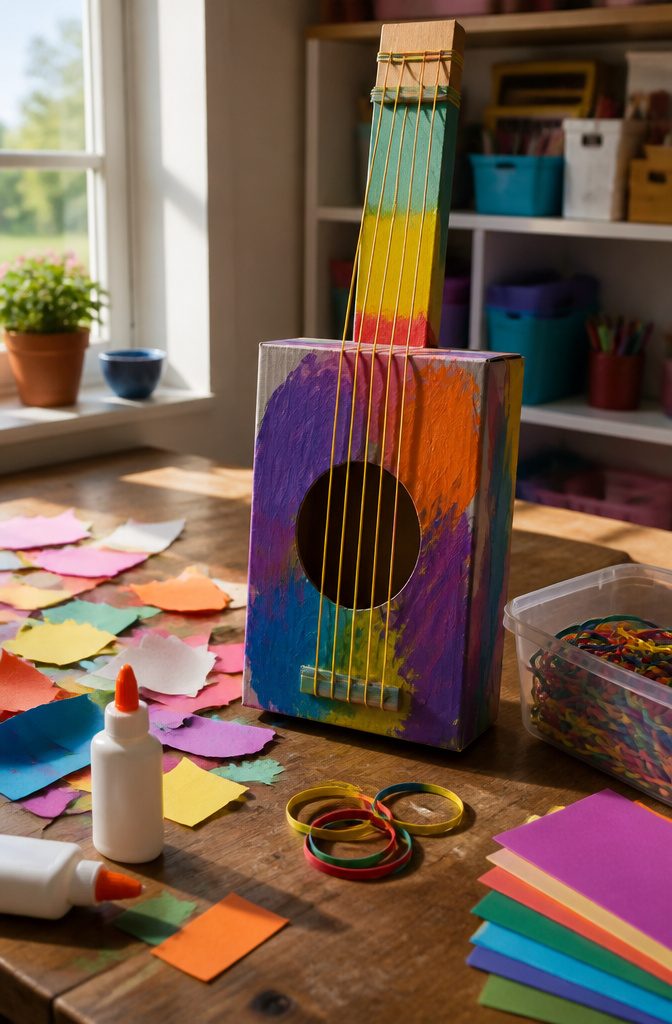
A tissue box and a handful of rubber bands make a guitar that actually plays notes, which is more than most crafts for small kids can promise.
The box body is already hollow, so the sound has somewhere to go. Stretch the bands across the opening where tissues used to pull through, and the different widths do the real work.
The #19 bands, the skinny ones, snap under a three-year-old’s eager fingers about half the time. Wider #33 or #64 bands hold up better and give lower, fuller notes that don’t turn into a thin twang.
The #64s need a decent stretch to stay tight over a standard Kleenex box, but that tension is what keeps them reachable for small hands.
Length changes pitch too.
A rubber band doubled back on itself, looped around the box twice, vibrates shorter and higher. Most kids figure this out by accident while wrapping, then start hunting for the sound they want.
The box itself can get decorated with whatever’s already in the craft drawer, though paint takes overnight to dry and delays the actual playing.
13. Paint with Bubbles
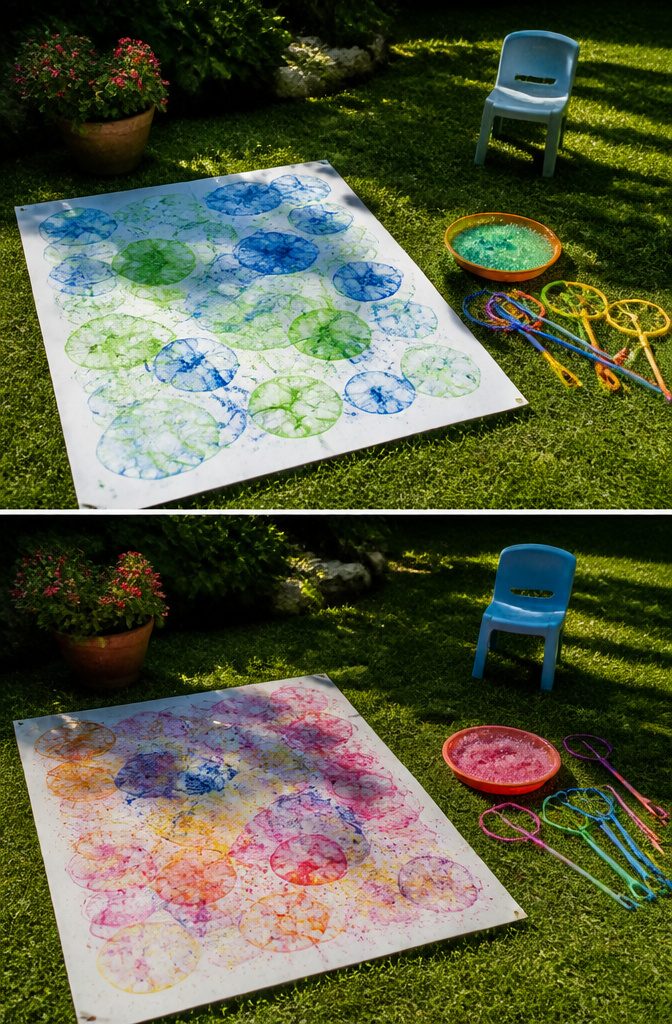
Bubble paint lands somewhere between science experiment and controlled chaos, which makes it a natural draw for small kids.
The mixture is simple: dish soap, water, and non-toxic paint blown through wands onto paper. The results are abstract and genuinely pretty, with overlapping circles and soft edges you can’t get from a brush.
The mess factor is real.
This belongs outside, or at least on a surface you don’t mind speckling. Sources recommend outdoor setup, and after trying this indoors in February, the reason is obvious.
The floor, the table, and somehow the dog all picked up paint within ten minutes. A warm day on the lawn solves most of this.
Heavy paper is the one supply choice that matters.
Regular printer paper wilts and tears under the wet bubbles; cardstock or watercolor paper holds the shape and dries flat. The wands themselves can be anything with a loop, plastic lids with the center cut out work fine.
The paint ratio takes some adjusting.
Too thin and the colors wash out; too thick and the bubbles won’t form. Start with a tablespoon of paint to half a cup of bubble solution and tweak from there.
The bubble science itself, surface tension holding the paint film until it pops against paper, is part of what keeps kids engaged past the first few minutes.
14. Paper Plate Spin Art
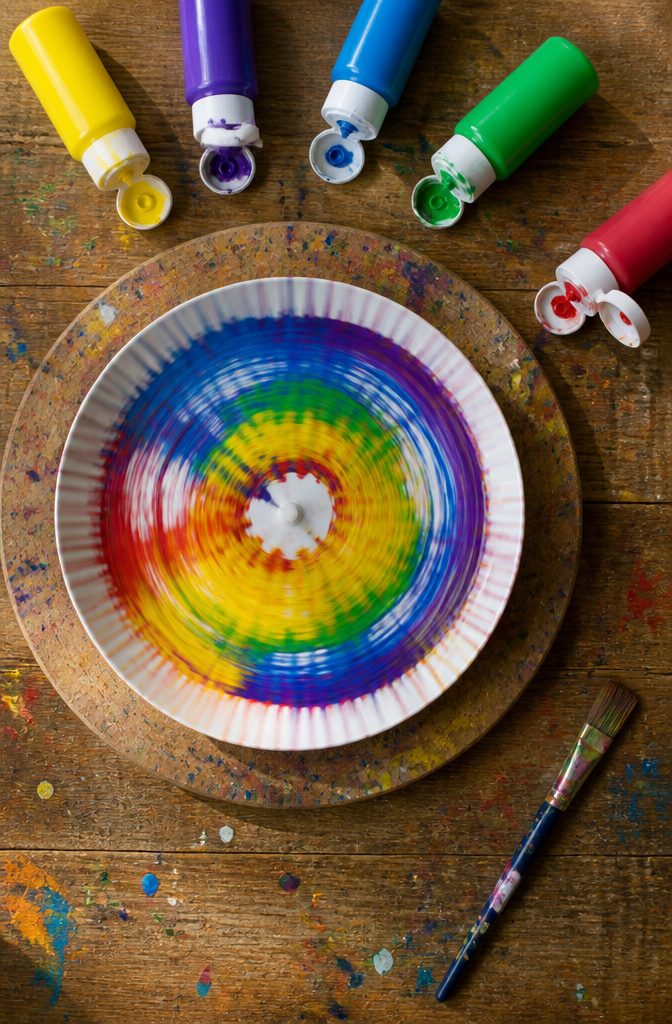
A paper plate takes paint like a canvas that moves. The plate spins by hand or on a lazy Susan while drops of washable paint fall from above.
Centrifugal force pulls the color outward in rings and streaks, and no two spins match. The physics is simple enough to talk through with a four-year-old: the faster the spin, the farther the paint travels.
Too much paint flies right off the edge. A few drops at a time, maybe a quarter-sized pool in the center, is the ceiling before the plate throws more color onto the table than onto itself.
A lazy Susan gives steadier speed than small hands managing the plate alone, though both work.
Younger kids notice how the pattern changes from blob to spiral; older ones can draw a maze first and watch the spin turn it strange. The finished plate dries into something they will insist on giving as a gift.
15. Easy Sidewalk Paint
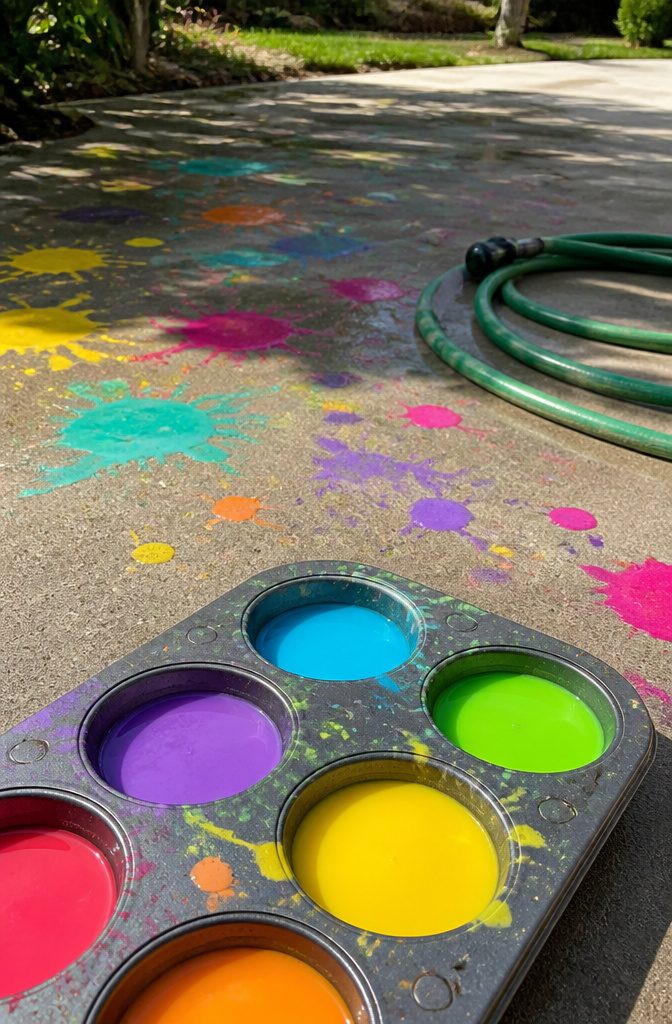
Cornstarch sidewalk paint is the rare craft that costs pennies and feels like magic. A one-to-one mix of cornstarch and water, thinned just enough to pour, turns into opaque color once it dries on concrete.
The liquid spreads faster than chalk, so kids cover more ground, and the wash-off is easier than actual chalk because there is no dusty residue to grind into the surface.
Food coloring gives bright color in the bucket but dries lighter, so go heavier on the drops than looks right.
A muffin tin makes a perfect paint tray, one color per cup, and the whole batch rinses down the driveway with a hose.
The only real limit is that it needs a dry day; rain turns the paint back to milky water before it sets.
16. Decorate a Time Capsule
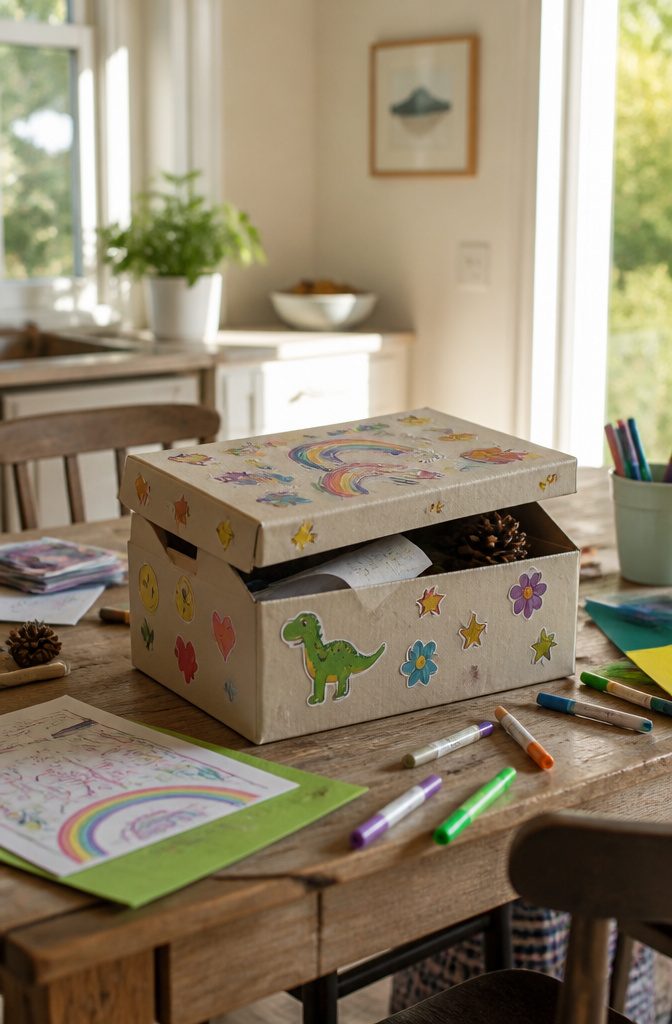
A shoebox works better than a jar for a three-year-old’s time capsule. The lid lifts off without a fight, and the cardboard takes paint and glued-on paper without sliding out of small hands.
My daughter spent twenty minutes layering stickers on hers, then announced the box was "done" and moved on to what mattered: choosing what went inside.
A three-year-old’s selections rarely match an adult’s.
She dropped in a pinecone from the driveway, a drawing of our cat with purple legs, and a plastic spoon. I would have picked the school photo and her height mark on the doorframe.
Both approaches belong in the box. The capsule is richer when the child curates it, even if the result looks like junk to grown eyes.
Seal it with tape, write the open date on top, and store it somewhere you’ll actually remember.
Five years is long enough to feel like magic to a small child without becoming so distant that the box gets lost in a move.
Ten years risks the "where did we put that" conversation that ends the tradition. Pick a birthday, mark it on the family calendar, and let the child help carry the box to its hiding spot.
17. String Puppet Plane
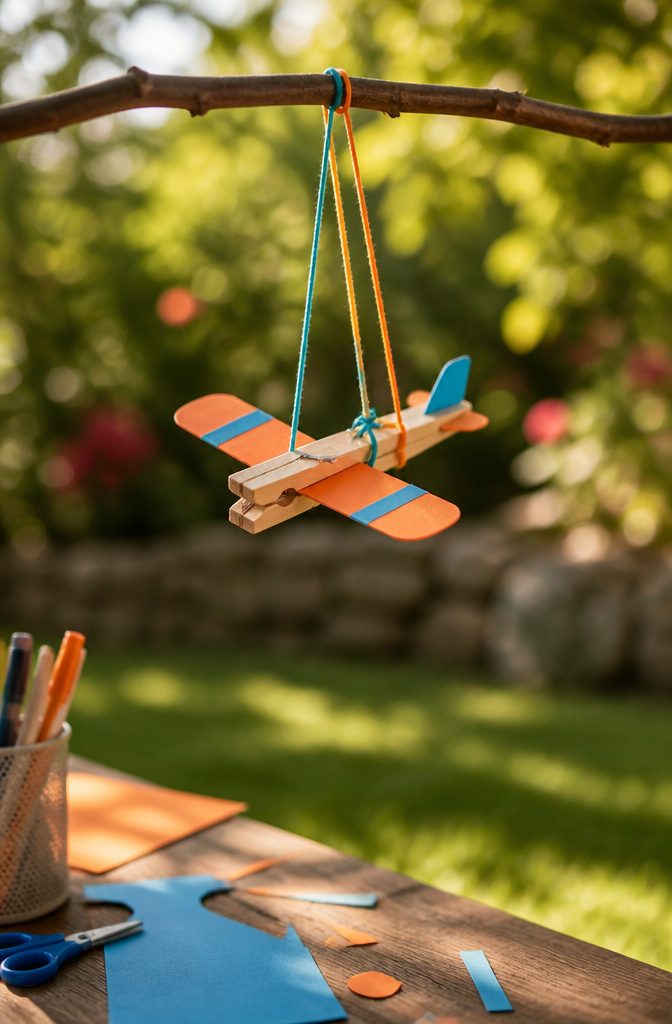
A springy puppet plane needs three strings, not four, to tilt and dive the way a real plane does.
The trick is where they knot: one at the nose, one at each wingtip, all meeting at a single balance point slightly forward of center. Two strings make the thing hang flat like a sign.
Four lock it stiff. Three give the kid control, so a tug left dips the left wing and the whole body banks.
The body itself is nothing fancy. A clothespin carries the weight, or a scrap block whittled square.
Cardstock wings slot through a slit and get a dab of glue. String length depends on the child’s reach; shorter lines react faster, longer ones glide smoother.
I have watched a four-year-old figure out in about thirty seconds that pulling the nose string makes the plane climb. The discovery is the whole point.
18. Make Your Own Block Prints
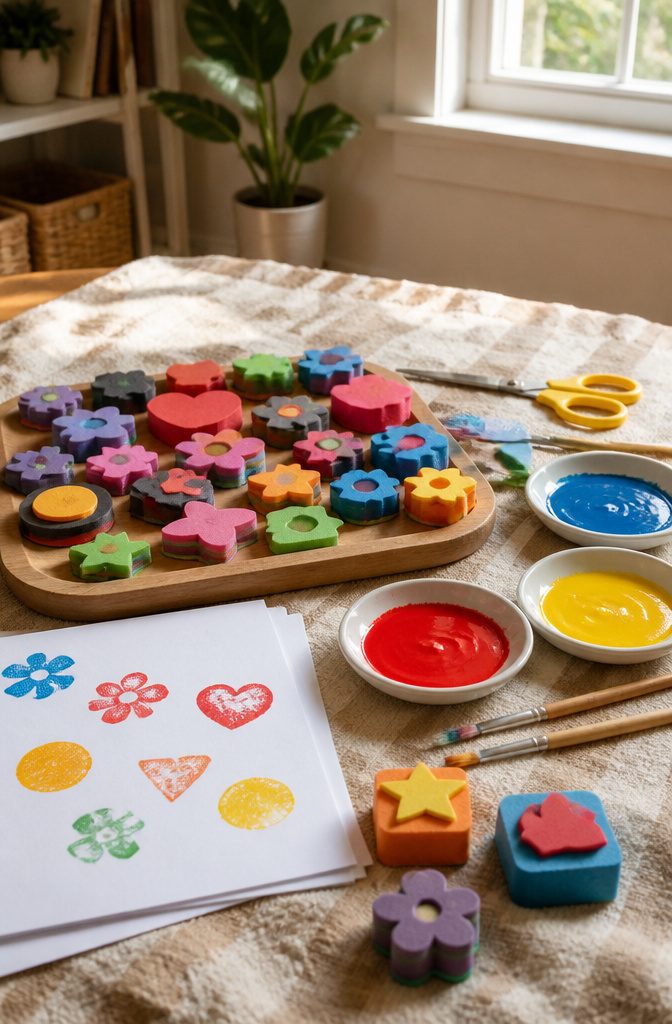
Potatoes, sponges, and foam sheets all work for block printing with small kids, but the difference in what a three-year-old hand can manage is real.
A potato half is satisfying to grip and heavy enough that its own weight helps press the carved face flat.
Foam blocks or thick sponges are even better: they compress slightly, forgiving uneven pressure that would leave a potato print patchy in the center.
The shapes that succeed are the ones you can cut with kitchen scissors.
A circle, a triangle, a simple heart. Thin lines and small interior cutouts disappear under paint, bleeding together before the paper even meets the surface.
The foam sheet suggestion is the right move here; it takes a craft knife or sturdy scissors, but the shapes hold and the material is light enough that a child can re-ink and stamp repeatedly without tiring.
Repetition is where the project earns its afternoon.
A single shape stamped in rows or rotated builds pattern without requiring new skills. The paint layer wants to be thin, not puddled, or the print slips and smears on contact.
19. Colorful Butterflies
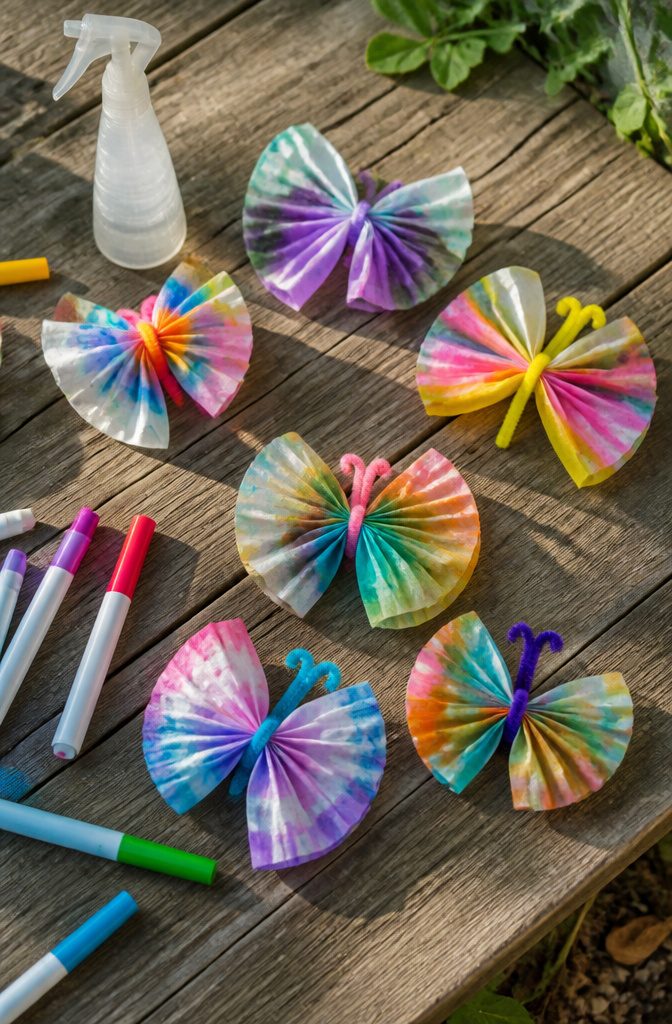
Coffee filters spread flat on a tray work better than paper towels for this, since the ridges hold puddles of color where you want them.
Lay a few out, hand the kids washable markers, and let them scribble patches or draw lines across the surface.
A light mist from a spray bottle turns the whole thing into a watercolor bleed, the pigment running together in soft, unpredictable patterns.
The trick is stopping before the paper gets soggy enough to tear, something I learned watching my niece soak one straight through.
Once the wings are dry, pinch the center together and clip it with a wooden clothespin for the body.
The spring in the clip holds the paper tight enough that it won’t slip, and the flat side makes a face you can draw on.
Pipe cleaners twisted around the top of the pin make antennae that actually hold their curl if you wrap the ends around a pencil first.
The finished butterflies hang fine from a string taped to the back of the clip, or the kids can clip them to curtains and call it a migration.
20. Toy Camera
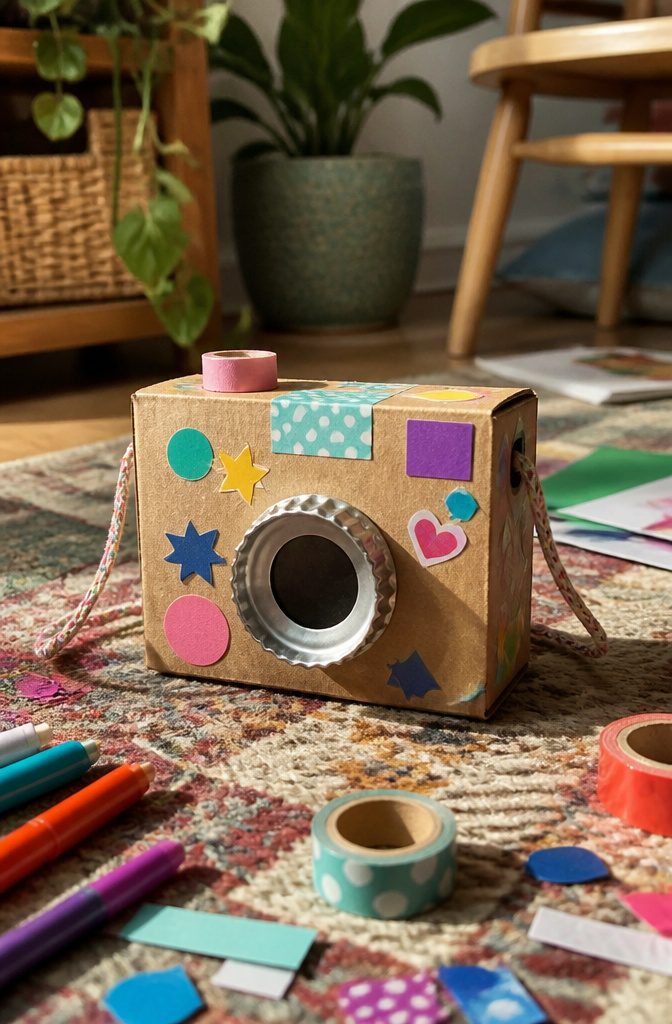
A small box or cardboard tube becomes a camera with almost no prep.
Two rubber bands hold a clear plastic lid over one end for a lens, and a rectangle cut in the back gives a viewing window they will actually peer through.
A two-year-old mostly carries it around, clicking the button and announcing "cheese" at the dog. By five, the same kid is framing shots of stuffed animals and directing whole photo shoots with a sibling.
Markers and stickers do the heavy lifting for decoration. A bottle cap glued on top flashes, and washi tape around the edges hides rough cardboard cuts.
The pretend play stretches for days: a two-year-old wants the adult to take their picture with it, while a five-year-old turns photographer, assigning poses and reviewing imaginary shots on the back.
Either way, the camera ends up in the car or the grocery cart, because the project lives in the play that follows it.
Frequently Asked Questions
What crafts can I do with my toddler?
The article covers twenty options, including pompom ice pops, homemade clay, dinosaur feet from tissue boxes, flower pens, ooey gluey suncatchers, mail-a-hug butcher paper cutouts, goofy robots, homemade finger paint, a water microscope, cardboard castles, tube telescopes, rubber band guitars, bubble painting, paper plate spin art, cornstarch sidewalk paint, decorated time capsules, string puppet planes, block prints, coffee filter butterflies, and toy cameras.
Each project uses household materials and builds in open-ended play that holds a small child’s attention after the making ends.
What materials do I need for kids’ crafts?
Most projects in the article rely on cardboard boxes, paper towel or toilet paper rolls, craft sticks, yarn, flour, salt, food coloring, glue, tape, and washable paint.
A few call for specific extras like floral tape for flower pens, butcher paper for mail-a-hug, or clear cellophane for tube telescopes. The general rule is to save packaging and kitchen basics rather than buy a kit.
How can I make crafts more educational?
Several projects in the article fold in science and math without turning into lessons. The water microscope teaches surface tension and lens behavior through a drop on plastic wrap.
Paper plate spin art lets a four-year-old feel centrifugal force in action. Bubble paint mixes ratios of paint to soap solution.
The block print section builds pattern recognition through repeated stamping. The educational part lands because the child notices the effect themselves, not because an adult explains it first.





