
The best art ideas for kids split cleanly between five-minute bursts and full-afternoon commitments, and the deciding factor is how much cleanup you can face that day.
A painted paper pinwheel takes a square of paper and a stick from the yard; indigo shibori needs a plastic sheet, gloves, and a garden hose. Most parents figure out which camp they are in before the glue ever opens.
1. Painted Paper Pinwheels
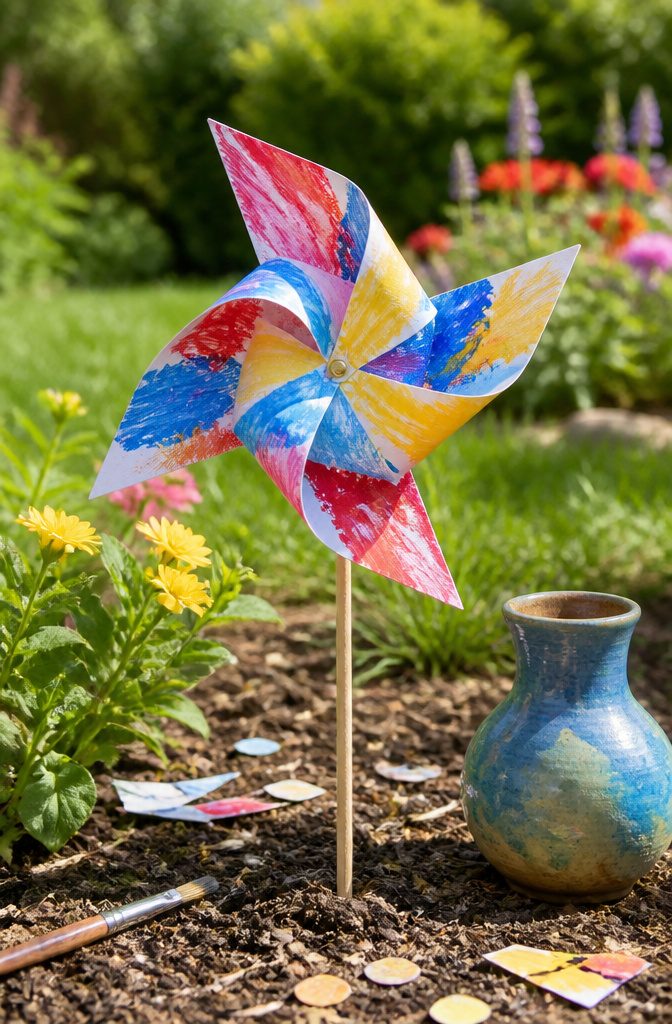
Painted paper pinwheels give younger kids a project they can actually finish without help falling apart in their hands.
A square of paper, some tempera or watercolor, a stick from the yard, and a brass fastener are the whole list. The painting comes first, which means even a three-year-old’s random brushstrokes become the design.
Once the paint dries, you cut from each corner toward the center, fold every other point to the middle, and pin the whole thing to the stick.
The folding and pinning is where fine motor practice happens. A preschooler can manage the brass fastener with a dot of help; by five or six, most can push it through the paper and open the prongs themselves.
The pinwheel spins best when the hole is dead center, so mark that point before the paint goes on if you want a working toy and not just a sculpture.
The finished piece is light enough to blow around in a breeze on the porch, or it sits in a vase as a flower that never wilts. Either way, the kid made something that moves.

100 DIY Blank Pinwheels Included: This bulk arts and crafts for kids set includes 100 blank carnival pinwheels, ready for kids to customize with their own creative designs. These handheld crafts spin in the wind and are easy to assemble—perfect for fun, engaging DIY activities.

𝐂𝐑𝐄𝐀𝐓𝐈𝐕𝐄 𝐃𝐈𝐘 𝐏𝐈𝐍𝐖𝐇𝐄𝐄𝐋𝐒 𝐊𝐈𝐓: Spark joy with 4E's Novelty 24-pack DIY pinwheels craft for kids! Kids design vibrant pinwheels for kids bulk using markers or paint. Durable cardstock do it yourself pinwheel crafts for kids are ideal for classroom crafts, July 4 Pinwheels for kids & adults, or summer camps. Easy assembly with instructions for fun pinwheel kit projects.

Creative Paper Pinwheel Crafts- 16 blank DIY pinwheels let people design their own colorful windmill spinners for school art projects and group activities
2. First Weaving with Cardboard Looms
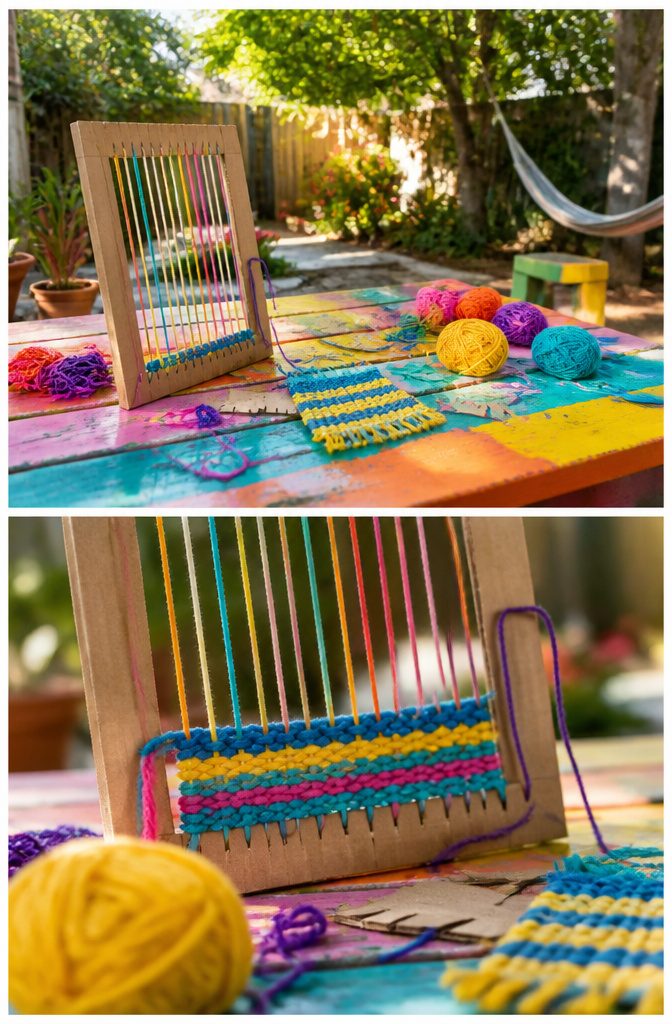
Cardboard looms turn a cereal box or shipping box into a proper weaving frame with about five minutes of cutting.
Slits along the top and bottom edges hold the warp threads in place, no nails or notches needed. A child can manage the whole setup once the cardboard is cut, which means the project starts with their hands already busy.
The real payoff sits in the weaving itself.
Over, under, over, under. The rhythm builds patience fast, because rushing tangles the weft and shows immediately in the row.
Kids start noticing patterns without anyone naming them: two blue, one yellow, two blue, one yellow. A cardboard loom keeps the tension forgiving, so a mistake unravels in seconds rather than ruining an hour.
I have watched children who usually sprint between activities stop at this one.
The motion is repetitive enough to settle them and just tricky enough to hold attention. A finished piece might be a bookmark, a small mat, or simply a strip they cut off and tape to the wall.
The loom itself lasts through several projects before the slits fray, and then you cut a new one from whatever box came in the mail last week.

What You Will Get: you will receive 48 pieces weaving boards, enough quantity to meet your daily use and replacement needs, you can also give them to your friends and enjoy the fun of knitting together

Package & Size: Rectangle Cardboard Weaving Looms: 250x150x2mm/9.84x5.91x0.08 inch, 8pcs. Sewing Needles 1: 71x4x2mm/2.8x0.16x0.08 inch, 8pcs. Sewing Needles 2: 92x6x3mm/3.62x0.24x0.12 inch, 8pcs. Appropriate size for your DIY work and daily storage. An ideal artistic outlet for adults.

210 SOFT CRAFT LOOPS: The soft, flexible loops included in this set are made from high-quality polyester and come in 7 different colors.
3. Melted Crayon Butterflies
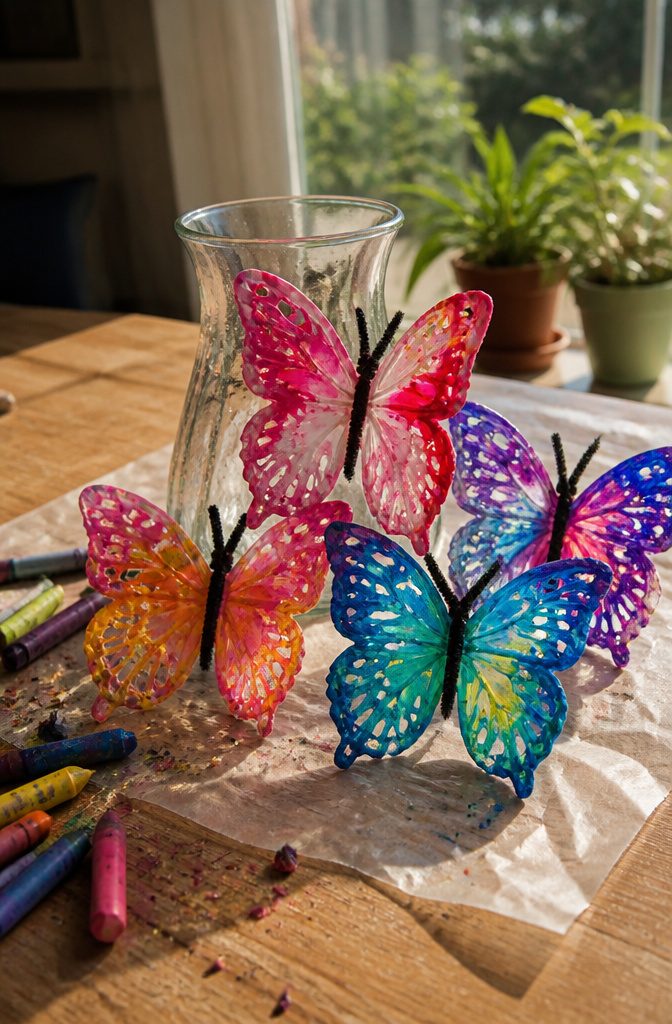
Wax paper and crayon shavings make a stained-glass effect that catches light in a way construction paper never will.
The kids grate the crayons themselves, which buys you a solid twenty minutes of busy quiet, then they sprinkle the shavings into butterfly shapes on one sheet and you press another sheet on top.
The ironing step needs a grown-up hand on the iron and the kids at a safe distance; the wax paper can curl or bubble if the heat sits too long in one spot, so keep it moving.
The finished wings go floppy and translucent, and when you hang them in a window the light coming through gets an actual gasp from most age groups.
I have seen kids who normally rush through crafts ask to make three more because the melt moment feels like a magic trick they helped perform.

Great stocking stuffer Packaged in a clear top box Perfect for Easter baskets
4. Dreamcatchers
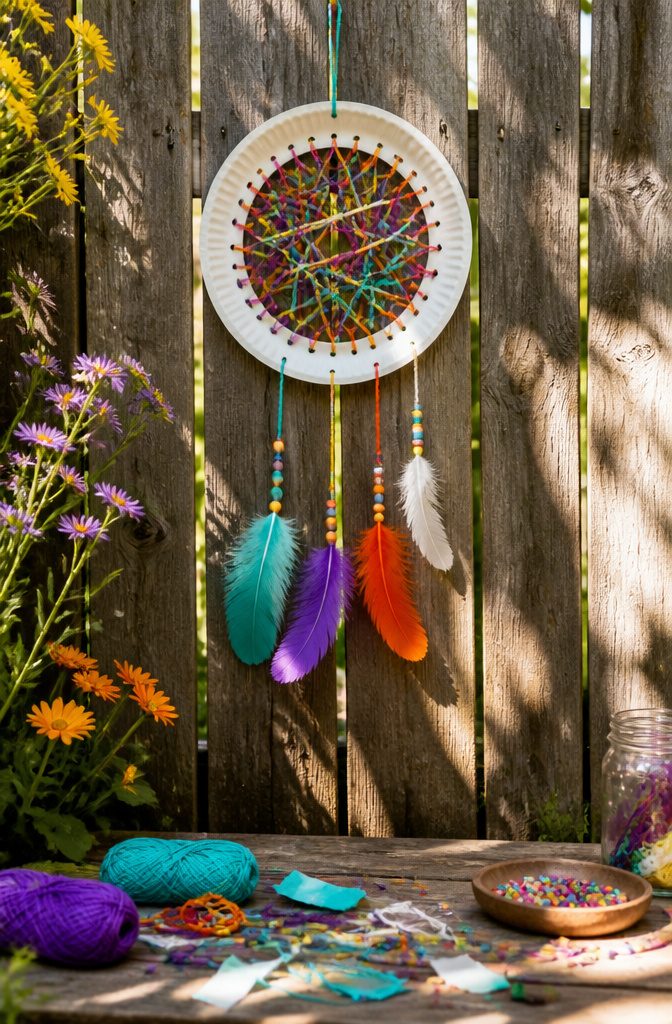
Paper plates make a solid frame for a kid-sized dreamcatcher, and yarn is all the web needs.
The holes punch cleanly around the rim with a regular hole punch, and kids can thread the center in a simple over-under pattern that tightens into the classic web shape without real knot-tying.
Feathers, beads, and whatever else turns up in the junk drawer finish it.
The project borrows from Ojibwe tradition, so I mention that the web catches bad dreams and the hole in the middle lets good ones through.
That is the story, not the whole history; a sentence is enough for context before the hands get busy again.
Threading the yarn builds the same fine-motor control as lacing cards, but the pattern repeats enough that kids start predicting where the yarn goes next.
By the third pass, most have the rhythm. Knotting comes at the end, when the dangling feather strings need securing, and that is a skill that transfers straight to shoe-tying.
Skip slick beads on the hanging strands unless you knot above each one, or you will find beads under the couch for weeks.

8" Mosaic Glass Cuttitl llrs x1, 8" glass running plier x1, 6" Glass Breaker Pliers x1, replacement rubber tip x4, replacement wheel x2, screw x2, hex wrench x2, Handmade zipper bag x2,150 W soldering iron x1,desoldering pump x1,5 soldering tips, solder wire 2mm*3pcs(100g),soldering iron stand x1, tweezers x1, Screwdriver x2,plastic bone knife x2,sponge cleaning pad x 4,pistol type oil fed glass cutter x1,with 3 interchangeable heads (2-6,6-12, 12-20mm)oil drip tubes x2,Tungsten Carbide Tip Scriber x1,copper foil tape(6.5mm*20M)*2pcs,cut-proof gloves*2pcs,Diamond Hand File for Glass Polishing x 1,Flux Paste x 1,Brush * 1,Soldering iron tip cleaner * 1,Professional-grade masks * 10

【What You Get】:8" Mosaic Glass Cuttitl llrs x1, 8" glass running plier x1, 6" Glass Breaker Pliers x1,150W soldering iron x1,desoldering pump x1,5 multiple soldering tips, solder wire 2mm*3pcs(100g),soldering iron stand x1,tweezers x1,wire stripper cutter x1,Screwdriver x2,sponge cleaning pad x 4,Handmade zipper bag x 2,bone knife x2,pistol type oil fed glass cutter x1,with 3 interchangeable heads (2-6,6-12, 12-20mm)oil drip tubes x1,Tungsten Carbide Tip Scriber x1,copper foil tape(7mm*20M)*2pcs,cut-proof gloves*2pcs,110V Glass Grinder x1,5/8" + 1" Diamond Grinder Bit x2,Finger Cots x 10,Goggles x1,English description says x1,Diamond Hand File for Glass Polishing x 1,Flux Paste x 1.

Complete 31PCS Stained Glass Tool Kit: This stained glass starter kit with glass scoring & cutting set, grinding & edge finishing set, soldering tools, protective & auxiliary tools for DIY crafts — stained glass kits
5. Washi Tape Plates
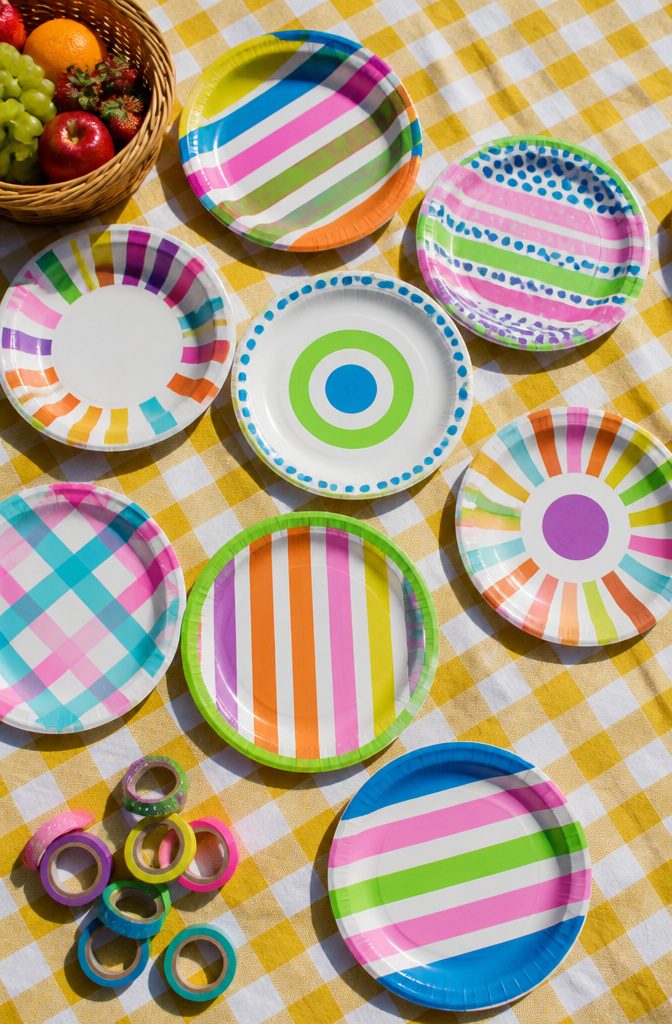
Washi tape turns a stack of plain paper or plastic plates into something a three-year-old can actually finish without help.
The tape tears by hand, so scissors stay in the drawer. Patterns form by laying stripes across the middle, around the rim, or in angled blocks that overlap.
A toddler pressing tape flat gets the same pride as brushwork, but there is no puddle on the table and no twenty-minute wait while paint dries.
Plastic plates hold up to repositioning when the first strip lands crooked.
Paper plates cost less and take markers well if gaps show. My own preference runs to the plastic ones for younger kids, since a plate that survives the project becomes the daily snack dish.
The finished pieces work for pretend picnics, wall collages, or sorting games where each color calls for a different washi pattern.
The only real limit is the tape supply.
Solid colors, thin stripes, and the ones with tiny triangles all read differently against white plate. A single roll covers half a dozen plates, so the buy-in stays small even if you want variety.

Mr. Pen washable watercolors offer rich, vibrant color selections and come in a 2-pack, with each set containing 8 colors and a matching brush.
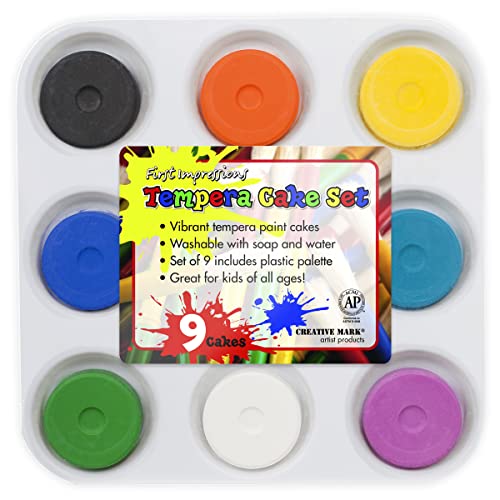
Features: Vibrant tempera Paint cakes, rated AP non-toxic, washable with soap & water, easy clean up, great way to learn Colors, creativity, and basic art knowledge for beginners or kids
BULK WATERCOLOR PAINT SET: This set includes 12 individual washable watercolor paint sets for kids, each featuring a unique palette of 8 vibrant colors. Packaging, contents, and colors may vary.
6. Glitter Star Mobiles
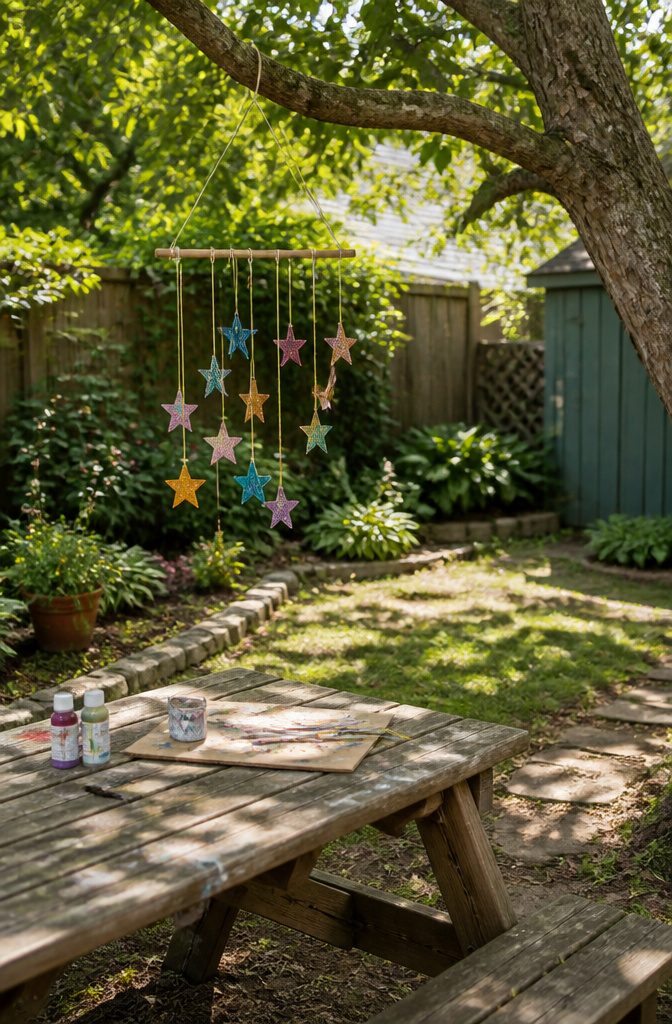
Glitter star mobiles start with cardboard cut into star shapes, traced from whatever you have on hand. A cereal box works fine.
The first session is paint and glitter: acrylics on one side, sprinkled while wet, then flipped and repeated. The glitter needs a full overnight dry before you flip them again, which is why this project spans two afternoons.
String comes through a hole punched near each point, different lengths so the stars hang at staggered heights.
A bent wire hanger or a stick from the yard becomes the top bar. Tied off with simple knots, the whole thing weighs almost nothing, so a thumbtack in the ceiling holds it.
The finished mobile reads as room decor rather than fridge art, which matters to kids past the age of seven. My niece hung hers beside her bed and the glitter catches the morning light coming through her blinds.
The cardboard warps slightly if the paint goes on too thick, so thin coats save you from stars that curl and spin backwards.

Complete Craft Set: Includes 60 blank white paper pinwheels and 60 colorful sticks in vibrant colors (red, orange, yellow, green, blue, purple). Perfect for adult group crafting, DIY workshops, creative events, and party activities.

You will get: 24 pieces pinwheels, and come with 24 pieces plastic sticks, enough quantity for you to use with your friends and family, please pay attention that the windmill was not pre-assembled
7. Coffee Filter Poppies
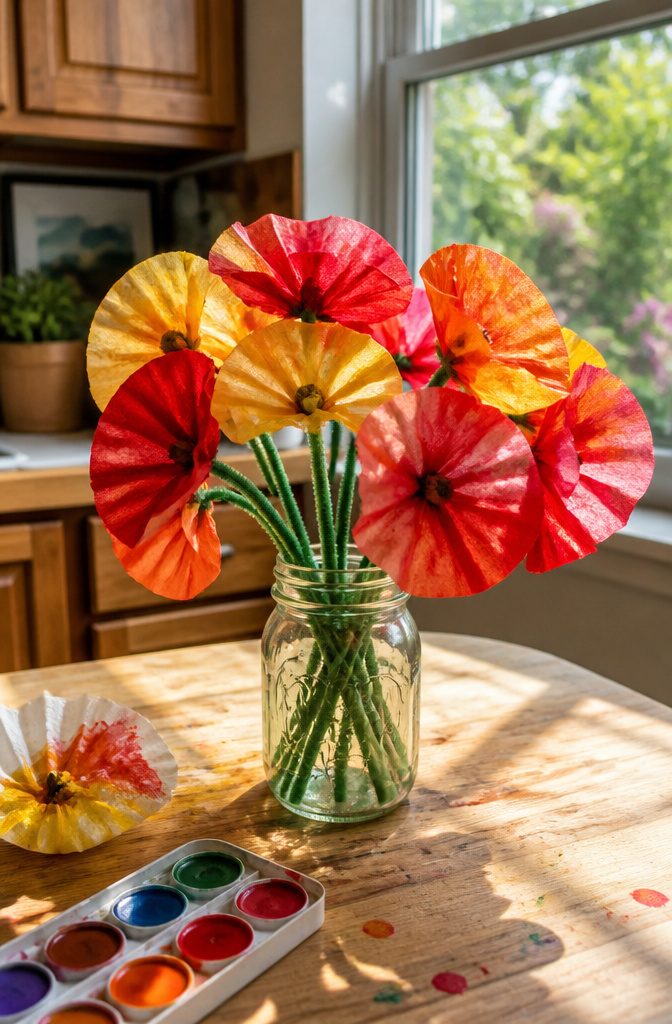
Coffee filters give you a flower shape before you even pick up a brush. The ruffled edge looks like petals, and watercolor or marker soaks into the paper in soft, ragged circles.
The real lesson here is color blending. A drop of red at the center spreads outward into orange or pink where it meets water or another color, and kids watch the pigment travel rather than getting a flat wash.
Markers work too if you lay down color and then drip water on top. The filter needs to be wet enough to bleed but not so soaked that the colors turn muddy brown.
I have seen this go wrong when a child floods the center with black to make the poppy’s dark eye.
The color pools and spiders outward, swallowing the whole flower. Better to let the red dry and add the center with a dry brush or a second, smaller filter circle glued on top.
A pipe cleaner stem twists through the middle once the paper dries. The finished flowers hold up well enough for a windowsill bouquet, though they soften again in humid air and need a day to re-stiffen.

WHAT YOU GET: 12 wooden looms measuring 6 inches L x 9 inches W x 1/8 inches Thick. Includes activity/instruction guide that gives a brief history on the art of weaving & how to use the looms as well as activity ideas. Weaving materials sold separately.

Interesting Weaving Work: cardboard looms for weaving are designed with gears at both ends for better placement of weaving threads; Weaving not only allows you to give full play to your creativity, but also improves attention and hand eye coordination, allowing you to pass the boring time

Interesting Weaving Work: cardboard looms for weaving are designed with gears at both ends for better placement of weaving threads; Weaving not only allows you to give full play to your creativity, but also improves attention and hand eye coordination, allowing you to pass the boring time
8. Shibori Indigo Dye Technique
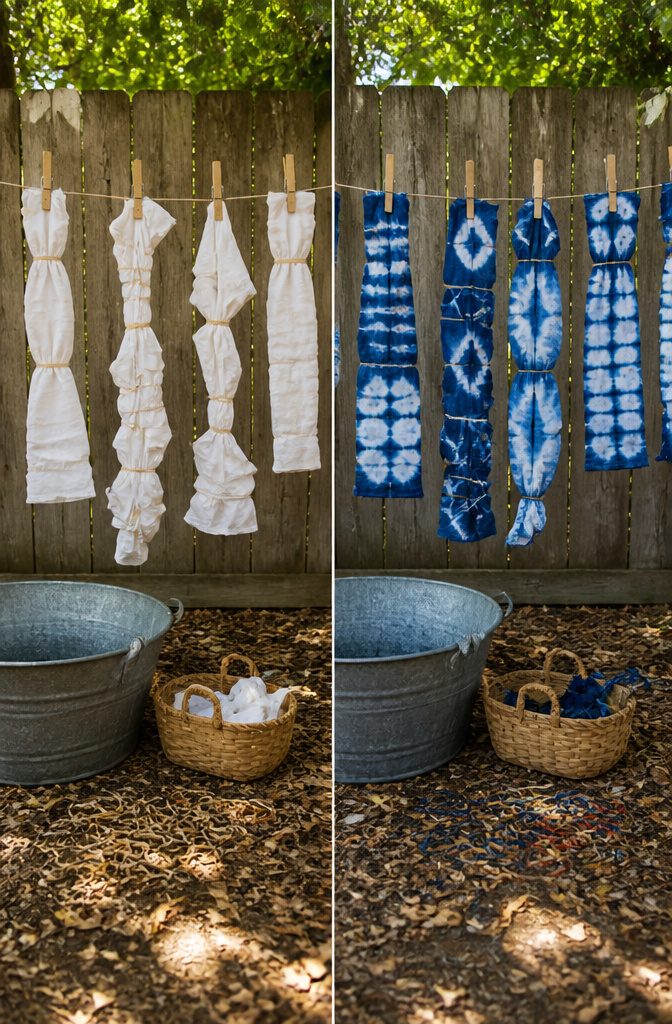
Shibori indigo dyeing with kids trades an afternoon of setup and cleanup for results that look like something from a boutique textile shop.
The traditional Japanese technique normally demands precise stitching and specialized vats, but rubber bands and a bucket of pre-reduced indigo dye turn it into a project older children can manage with supervision.
The method is simple: bunch, twist, or accordion-fold fabric scraps, then bind them tightly with rubber bands before dipping.
Where the bands compress the cotton, the dye cannot reach, leaving soft-edged circles and streaks that read as deliberate pattern rather than happy accident.
Pre-washed white cotton bandanas or old t-shirts work better than synthetic blends, which resist the dye and wash out to a disappointing gray.
The cleanup is real. Indigo splatters on grout and countertops with a persistence that makes it worth laying down a full plastic sheet, not just newspaper.
Gloves are non-negotiable unless you want blue palms for a week. Yet the moment a kid unwraps their first bundle and sees the symmetry they created, the extra thirty minutes of hose-down feels worthwhile.
My own preference is treating this as a warm-weather outdoor project exclusively; the porch becomes the studio, and the garden hose handles the rinse.
9. Printmaking with Styrofoam
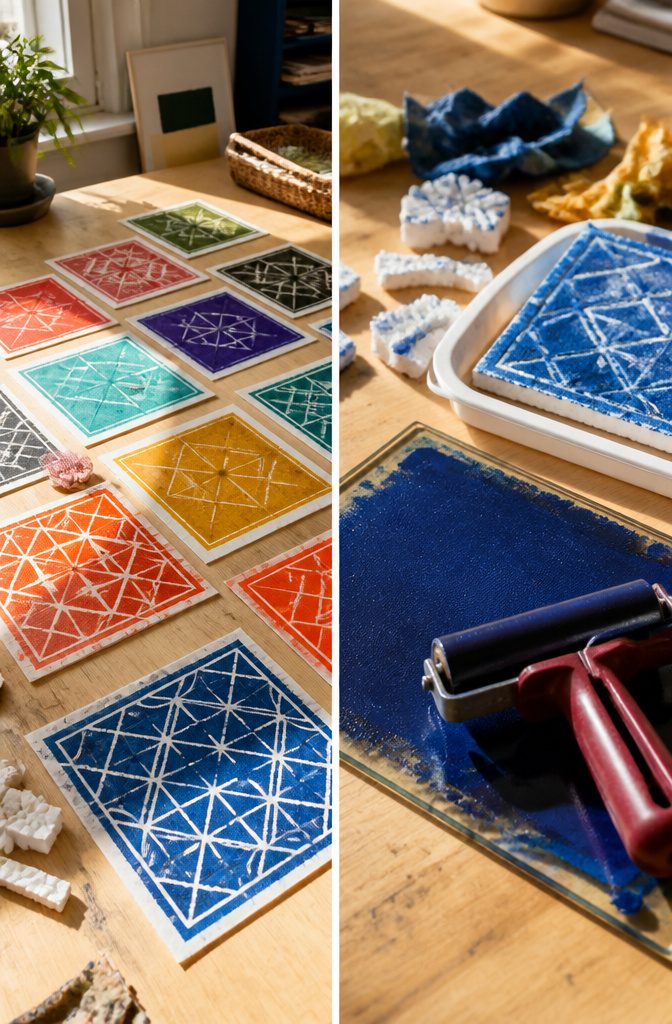
Styrofoam trays from the grocery store make surprisingly good printing blocks once the meat’s gone and they’ve had a good wash.
The foam is soft enough that a pencil pressed firmly leaves a clean groove, which is exactly what you want for relief printing. The raised areas hold ink; the grooves stay clean and print as white lines.
I roll block printing ink onto a glass or acrylic sheet with a brayer until the sound turns velvety, almost silent.
That thin, even layer is what transfers to the foam. Too much ink and the fine lines fill in; too little and the print looks patchy.
Paper gets laid on top, smoothed with a clean brayer or the back of a spoon, then lifted from one corner to reveal the image.
The first print is usually the worst; the second or third pulls cleaner as the ink settles into its proper thickness.
Kids tend to press the pencil too lightly at first, so the lines disappear under ink.
A quick demo on scrap foam fixes that. Water-based ink washes off hands and tables, which matters more than the print quality some afternoons.


No glass cutting required! Great for children or for quick projects

Content: Translucent paper strips (semi-transparent glassine paper, kite paper)
10. Paper Picado Garland
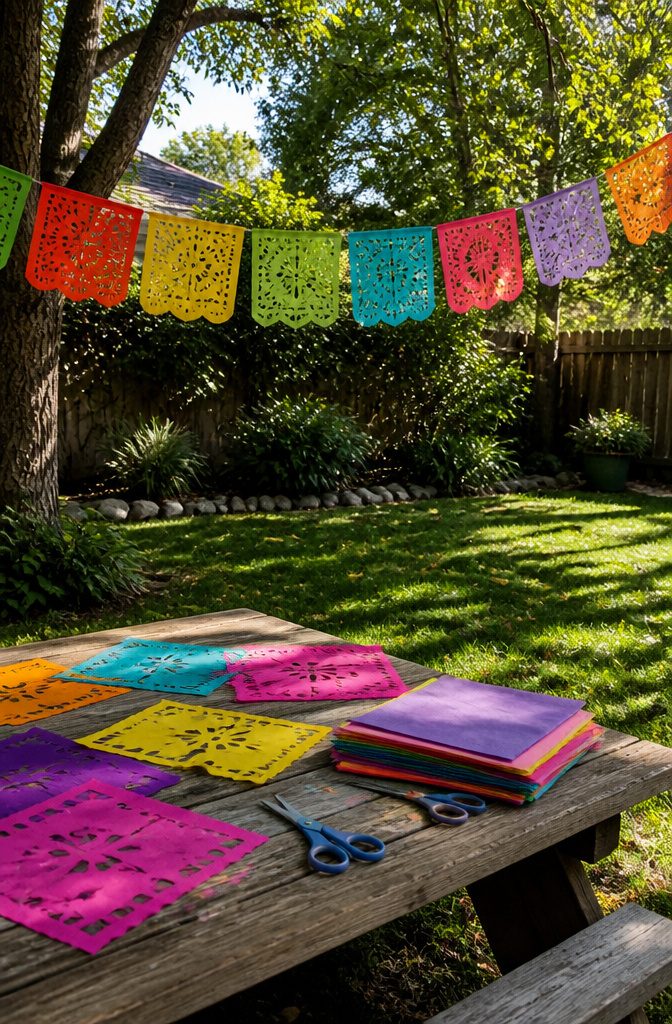
Tissue paper folds down to nothing, which makes it the right material for teaching kids to cut shapes that open into something bigger.
The Mexican tradition of papel picado works on the same principle as a paper snowflake, except the thinness of the paper means scissors glide through ten layers at once without the bulk that frustrates small hands.
A stack of bright tissue squares, folded in half and half again, turns into a garland of linked diamonds or zigzags once the cuts are made and the paper unfolds.
I have watched kids who normally abandon cutting after two minutes stay with this for twenty, because the payoff is immediate and the resistance is low.
String the finished panels between two chairs with ordinary thread, and the gaps you cut become the pattern, moving in any breeze.
The only real limit is that tissue tears if you pull instead of cut, so the lesson built into the material is patience with the blade.

48 Vivid Colors Best Watercolor Paints Set -- The watercolour paint set including 42 unique vibrant colors, fine pigment powder make them soluble in water easily. The color is saturated and beautiful, the effect of halo dyeing is good, the texture is light and thin, with high transparency, and create a natural blooming in your painting paper. You can play your imagination and talent more freely, easy to blend to create an endless range of colors

CRAYOLA WATERCOLORS: This kids paint set includes 8 Crayola watercolors In classic colors, as well as a paintbrush to dive right in!

VIVID COLORS: Pure pigments with no wax fillers provide smooth laydown and bright colors
11. The Drawing Tree
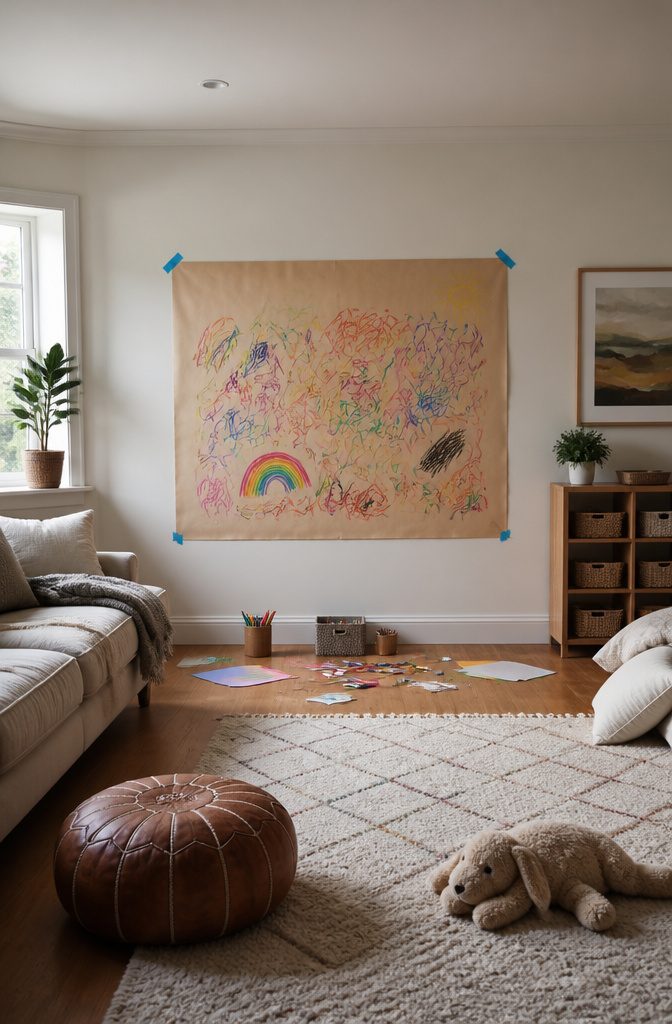
The drawing tree started as an experiment in my own living room after watching how my niece treated paper. She’d draw for eight minutes, wander off, and return an hour later wanting to add to the same page.
That rhythm is exactly what a drawing tree accommodates. A large sheet of butcher paper gets taped to a wall at kid height, and anyone in the house can add to it whenever they pass by.
Markers, crayons, and scraps from a creativity box sit in a bin underneath.
Some days the tree grows branches; other days someone fills a corner with patterns. The collective piece changes daily without anyone announcing "art time."
A designated corner helps, but the wall itself does the real work. Kids stop on their way to breakfast.
They add a line while waiting for shoes. What looks like a scheduled activity in most houses becomes background noise here, and that frequency matters more than duration.
My own tree stayed up for three months before the paper finally filled. By then the habit had stuck, and a fresh sheet went up the same afternoon.
12. God’s Eyes
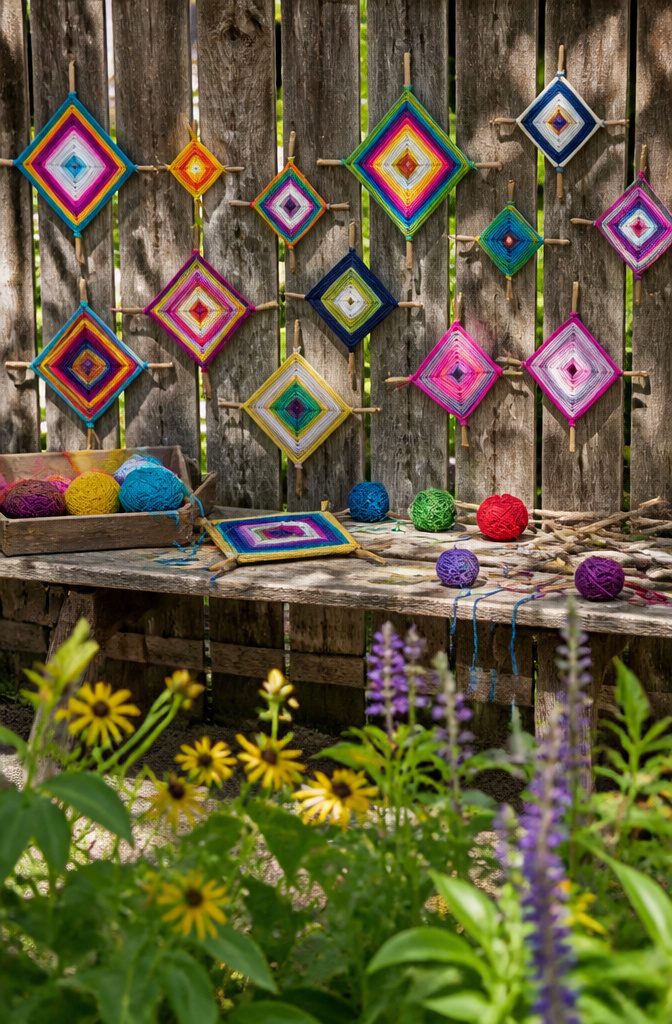
Two sticks crossed into an X and a ball of yarn are all it takes to start a God’s eye, or ojo de dios.
The Huichol people of Mexico wove these as spiritual offerings, each color representing an element of nature or a prayer for protection. That history gives the craft weight without weighing down the afternoon.
The wrapping pattern is simple once the rhythm locks in. Working clockwise, the yarn passes over one stick arm and under the next, over and under, each full circuit building a new layer outward.
Kids who need structured repetition find the count soothing: one, two, three, four, turn. Mistakes show immediately when the weave bulges or gaps, so the child feels the problem and fixes it without instruction.
I’ve watched left-handed kids struggle when the pattern is demonstrated only right-handed.
Flip the sticks counter-clockwise instead and the motion stays natural. The finished piece needs a tail looped around the center first or the whole thing unwinds in the backpack.
Cotton yarn grips the sticks better than acrylic, which slides. A four-inch arm length keeps the project finishable in under an hour, though some kids will add tassels and fringe until suppertime.
13. Seashell Collage on Wood
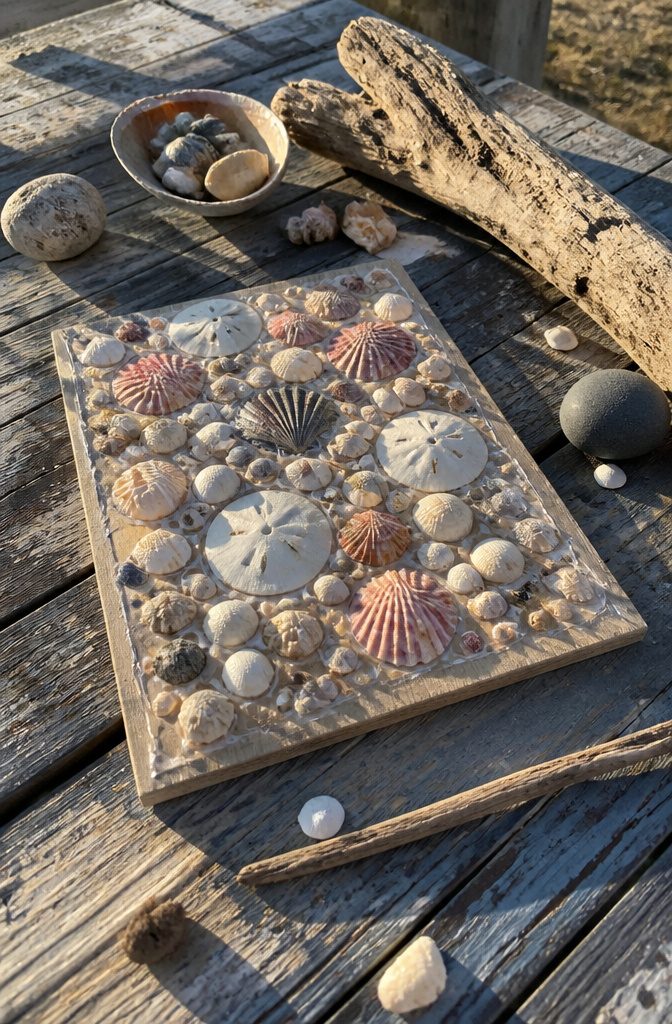
Sand dollars and scallop shells from a summer trip turn into something solid on a scrap of driftwood or a flat panel.
The project is simple: arrange, glue, let dry. A strong glue matters more here than in most kid crafts, since shells are heavier than paper and a weak bond leaves them on the floor by morning.
Tacky glue or school glue will not hold; you need something rated for wood and for the slick surface of shell.
Wood from the beach works especially well for this, already carrying the memory of where you found it.
A panel from the garage works too. Let the kids sort shells by shape or color before any glue touches the surface; once the adhesive is out, the clock starts.
Press each shell firmly and leave the piece flat until the next day. Rushing the dry time is the usual mistake, and it costs you the whole arrangement.
14. Branch Weavings
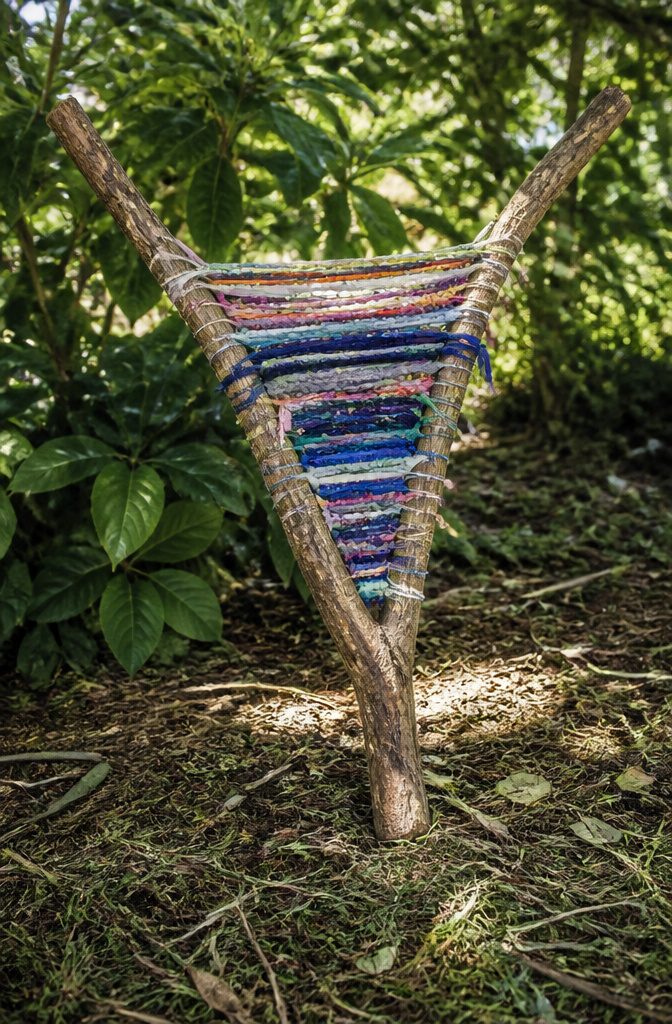
A Y-shaped branch makes a natural loom that turns an afternoon walk into the first half of a project. The forked arms hold the warp threads taut, and the bark keeps the yarn from slipping better than any notched cardboard.
Each branch’s irregular shape, the curve of the split, the slight twist in the grain, means no two weavings come out the same.
You wrap the yarn in a figure eight between the two arms to set the warp, then weave under and over with whatever you collected: strips of old T-shirt, raffia, embroidery floss, or grass from the same walk.
The gaps and knots in the branch become part of the design, not flaws to hide.
Kids tend to pack the center tight and leave the edges loose, which actually looks intentional with a branch’s uneven frame. A blunt yarn needle helps small hands, though fingers work fine for thicker materials.
The weaving holds together without glue or finishing; slip the warp loops off when the shape looks done, tie a knot at the top, and it hangs like a small net of found color.
15. TP Roll Marionettes
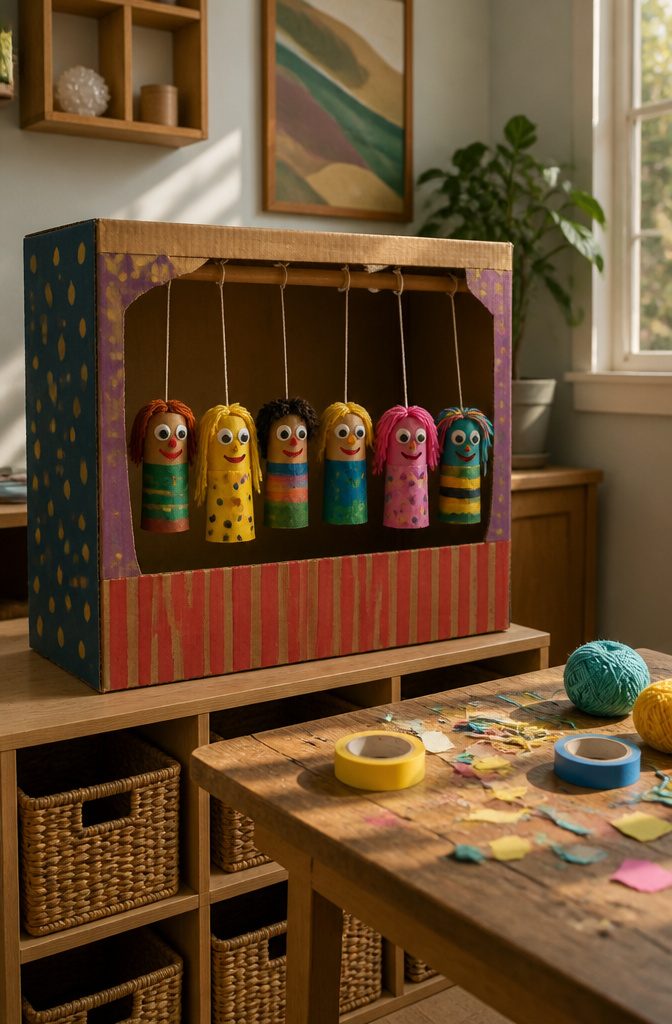
TP roll marionettes start with the cardboard tube your bathroom already produced. Flatten the bottom end and staple it shut for a head, or cut two slits up the side and fold flaps out for arms.
String runs from the top of the head to a horizontal stick, with extra threads knotted at the elbows and knees so a gentle tilt makes the puppet nod or wave.
Yarn hair and crayon faces take five minutes; the real payoff comes after, when kids figure out how to make the figure walk by rocking the control bar.
The string length matters more than the decoration. Too short, and the puppet kicks its own feet; too long, and the lines tangle before the show starts.
A foot and a half from stick to head hits the workable middle for most six-year-olds. Tape the knots with a bit of masking tape so they do not slide when pulled.
The project does not end at the craft table. Two kids with two puppets and a blanket draped over a chair makes a theater.
The same materials that felt like a quiet drawing activity become a reason to move around, speak in voices, and argue about whether the show needs tickets.
16. Shoebox Mansion
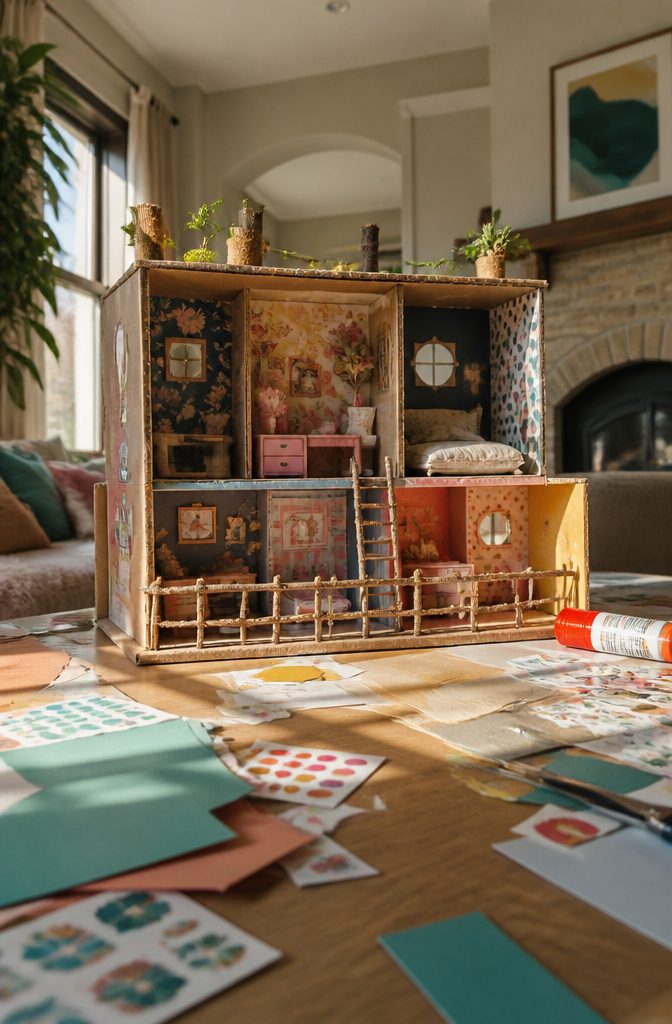
A shoebox flipped on its side becomes four walls and a floor faster than most kids expect. Construction paper, magazine cutouts, and tissue paper layer onto cardboard to make wallpaper, rugs, and tiny framed pictures.
Yarn turns into a rug with fringe. Twigs from the yard become porch railings or bedposts, and a bottle cap pressed into foil makes a decent skillet for a miniature kitchen.
What starts as one afternoon often stretches across a week. Kids rarely declare a shoebox mansion finished.
They return to add a leaf-pressed garden outside, or a cardboard staircase they forgot, or a second room taped to the first. The collage materials from the first day stay out on the table, and the house keeps growing.
17. Paper Maché Ice Cream Sundaes
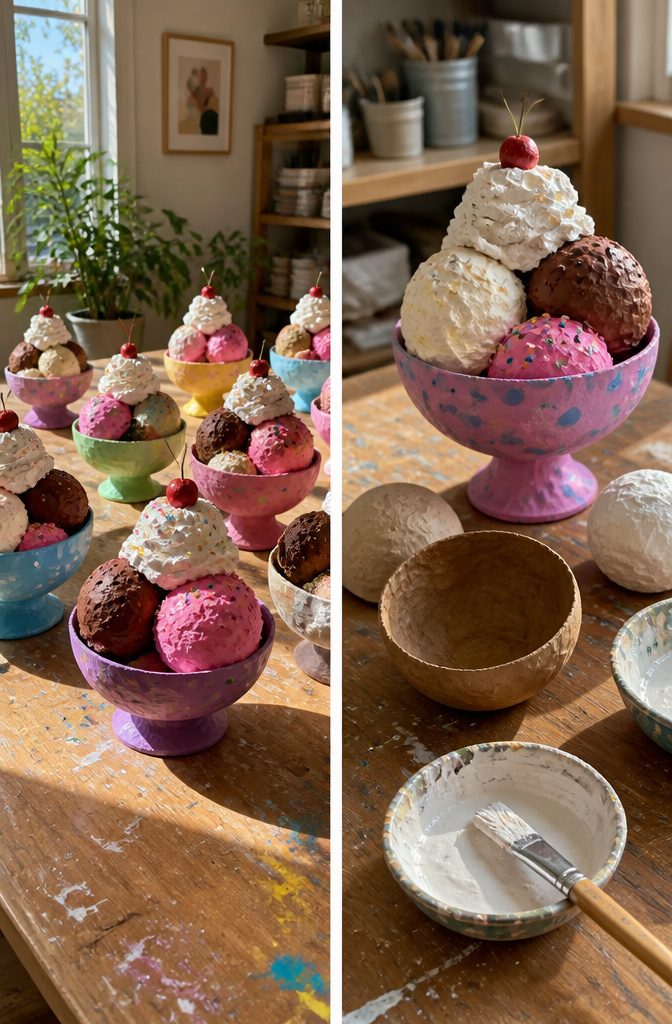
Paper maché ice cream sundaes start with a balloon for the bowl and crumpled newspaper balls for the scoops.
A basic paste of flour and water binds strips of newspaper in two or three thin layers, and the whole thing needs two sessions to dry because the underside stays damp longer than you expect.
The first round hardens overnight, then you flip it, patch any soft spots, and wait again.
A coat of white primer evens out the newsprint, and craft acrylics do the rest.
Vanilla gets a warm off-white with a shadow of raw umber underneath; chocolate mixes burnt sienna with a touch of black; strawberry needs more red than seems right while wet because it cools as it dries.
A dot of thick white paint on top reads as whipped cream once it sets.
The finished pieces are light enough for small hands and sturdy enough to survive actual play, which matters more than gallery looks for a project like this.
My own preference runs to slightly overscaled scoops, maybe two inches across, because the proportions read better from across a room and the curves are easier to smooth.
A full sundae with three flavors and a bowl sits at about five inches tall, a good size for a windowsill or a shelf where it might get picked up and carried off to a toy kitchen.
18. Circus Tents
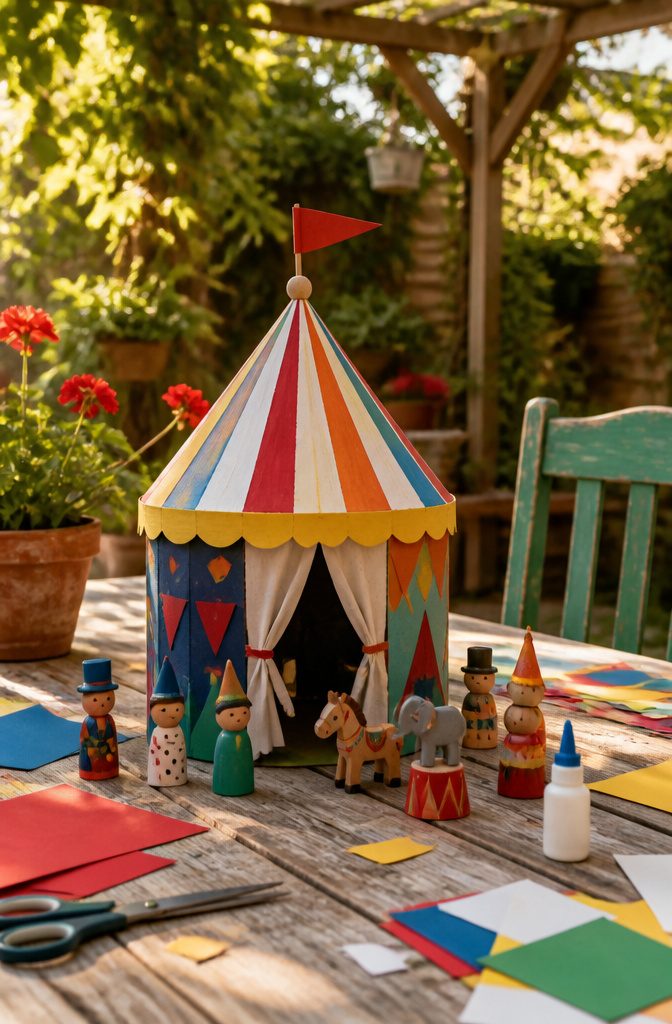
A paper cone and a decorated base are all you need for a miniature circus tent that kids actually play with after they make it.
The cone forms the roof, and a strip of paper around the base hides the seam where it meets the cardboard circle underneath.
Paint the base in stripes, add pom-pom trim along the edge, or let the kid cover it in stickers. The real payoff comes when you hand them a few peg dolls or small animal figures to stage shows underneath.
My daughter spent more time directing acrobatic cats than she did building the tent itself, which is exactly the kind of hand-off that makes a twenty-minute craft worth the cleanup.
A dab of glue inside the cone keeps the roof from sliding, but don’t seal it too tight; you want it liftable for peeking in. Wider bases are more stable and give more floor space for the cast.
19. Paper Robots
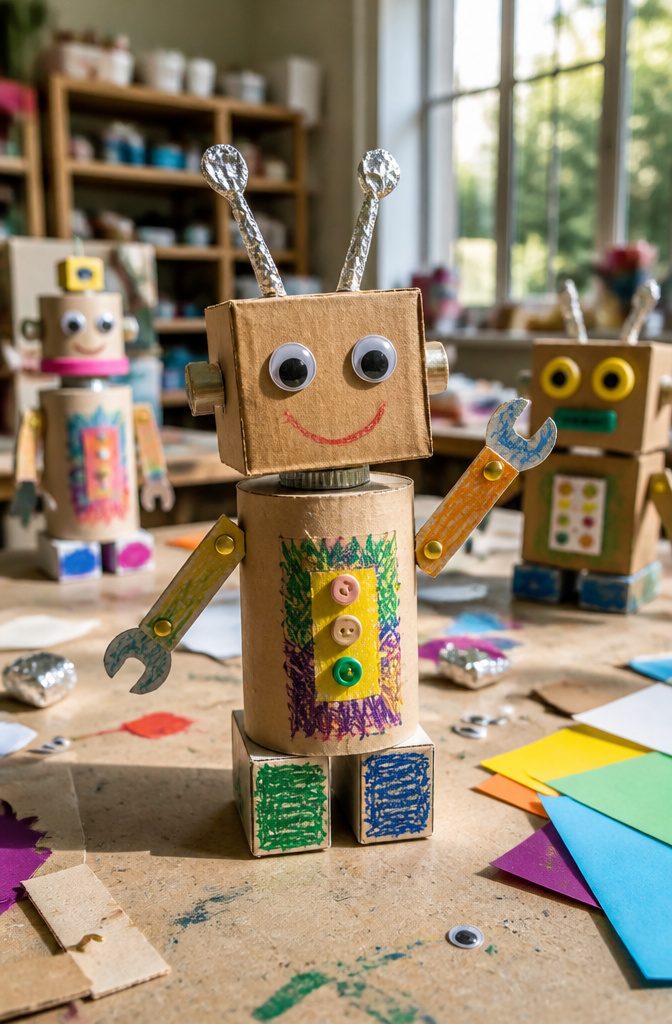
Cardboard tubes and small boxes make the best robot bodies because the material is already shaped like parts.
A toilet paper roll becomes a torso. A small box taped on top turns into a head with a flap that opens.
The real payoff comes when you punch holes through the shoulders and thread brads through cardboard arms. The brads work as simple mechanical joints, so the arms swing up and down instead of hanging stiff.
Kids usually spend the first twenty minutes building and the next hour naming the robot and deciding what it does.
I’ve watched a six-year-old attach a candy-wrapper antenna, name the thing Zork, and spend twenty minutes explaining Zork’s job guarding the refrigerator.
The brad joints are what make that possible. Without moving parts, the story stops at "I made a robot."
With them, it becomes "Zork waves before he patrols." Foil, buttons, and stray googly eyes finish the look in about an hour or two, depending on how elaborate the backstory gets.
20. Cardboard Animals
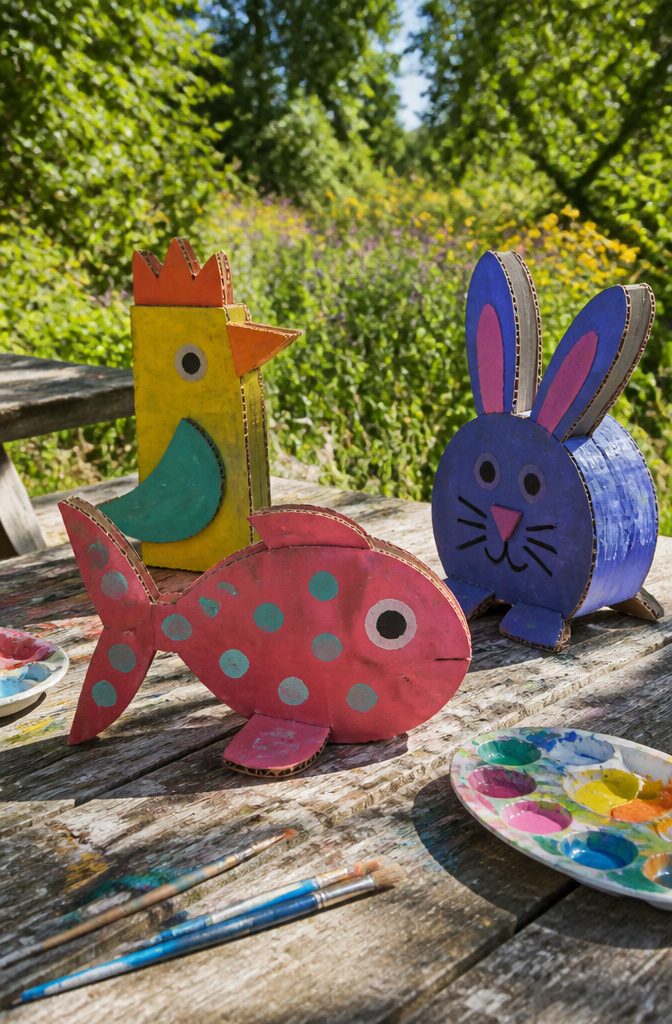
A cereal box gets a second life when you cut it into animal shapes.
Scissors handle the thin cardboard easily, so younger kids can manage simple silhouettes, a rabbit or a fish with one flat side that stands on its own when you fold a strip at the bottom into a small tab.
Older kids can stack several cut shapes together with a strip of cardboard glued between each layer to build out a 3D body that actually looks round from the side.
The trick is keeping the grain of the corrugation vertical on any piece that needs to stand.
Horizontal corrugation folds over on itself and the animal tips. Paint covers the printed side fine if you give it a quick sanding first with any sandpaper you have, though markers skip less and dry faster.
My own preference is leaving the printed logos partly visible under thin paint; it reads as pattern rather than mistake.
For hanging animals, punch a hole through the top layer before you glue the stack, thread string through, and knot it between layers so the knot hides inside.
A single hole punch works, or a nail and a block of wood underneath. The weight adds up fast on a mobile, so keep the individual pieces small or the whole thing tilts.
Frequently Asked Questions
What are good art projects for kids?
Good art projects for kids are ones they can finish without help falling apart in their hands, like painted paper pinwheels, cardboard loom weaving, or melted crayon butterflies.
The 20 projects in this guide all use everyday materials, recyclables, or items from outside, and each builds a real skill, fine motor control, patience, or color theory, while leaving room for the child to make choices.
The best results come from projects where the process matters more than a perfect end product.
What is the easiest art for kids?
The easiest art for kids requires minimal setup and lets them work independently, like washi tape plates, where the tape tears by hand and scissors stay in the drawer.
Three-year-olds can manage this start to finish, pressing stripes flat and repositioning on plastic plates when the first strip lands crooked.
Other simple starts include coffee filter poppies, where the ruffled edge already looks like petals, and the drawing tree, where kids add to a large wall-mounted sheet whenever they pass by.
How can I make art more engaging for my child?
Let your child take the lead and choose when to work, which is why the drawing tree works so well: a large sheet taped at kid height with markers in a bin underneath, so they add a line on the way to breakfast or while waiting for shoes.
Give them moving parts, like brad-jointed paper robot arms that swing, and the play continues long after the building stops. Celebrate the backstory and the naming, not just the finished look.





