
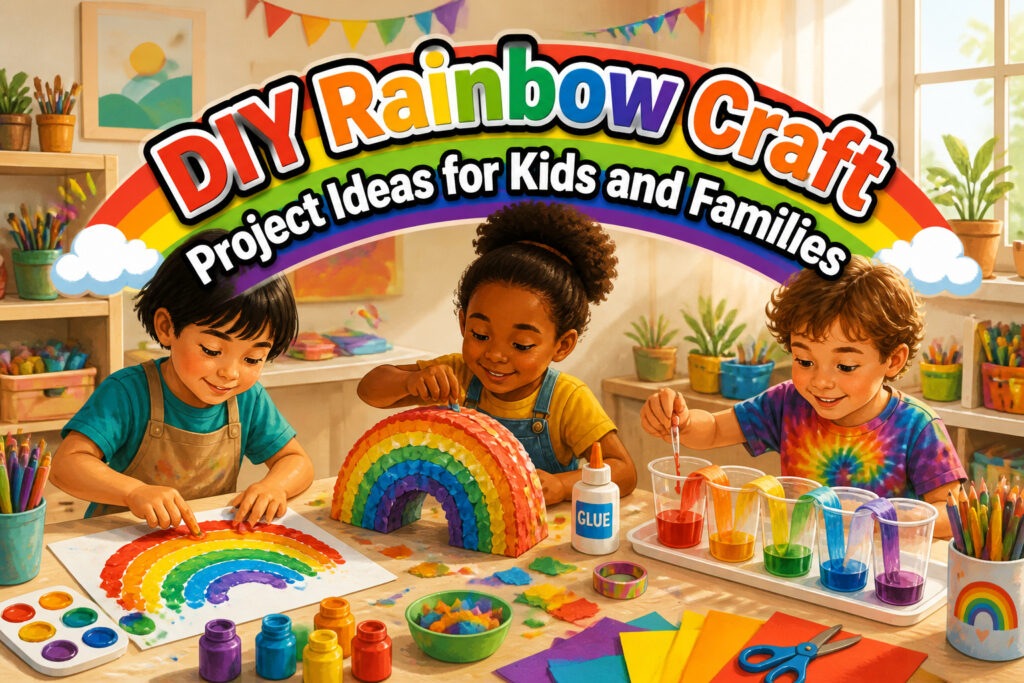
A DIY rainbow craft project is any hands-on activity that arranges color into the classic arc, from simple handprint paintings for toddlers to fiber-reactive tie-dye that needs adult supervision.
The catch is that the same pigment mixing that makes the rainbow work will turn it muddy brown if you rush the sequence or overlap the wrong colors.
Even the walking-water experiment, the most reliable starter for young kids, can pool into a gray mess if you use paper towels too thin to hold the load.
1. Handprint Rainbow Painting
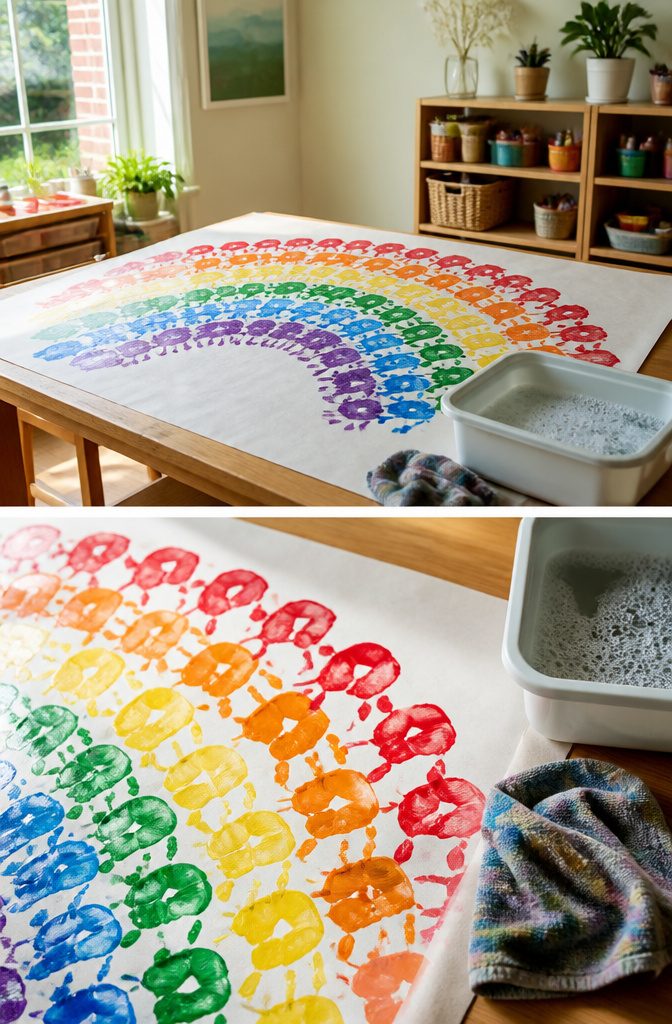
Washable paint, paper, and a wet rag within arm’s reach: those three things separate a calm afternoon from one that ends with a stained couch.
Handprint rainbow painting is the most common rainbow craft for a reason — it works for toddlers and preschoolers who have not yet developed the grip for a brush but can still press a palm flat and lift it clean.
The learning is real, not just cute. A two-year-old figures out that red sits next to orange because you guide the placement.
The cool squish of paint between fingers is sensory exploration in its rawest form, and the whole act of spreading fingers, pressing down, and pulling back builds fine motor control without feeling like work.
The mess is half the point and most of the problem. I laid down a vinyl tablecloth first, kept a shallow bin of soapy water beside us, and still found purple smears on the chair rail an hour later.
What saved the session was doing the arch in stages: one color, immediate wash, dry with a towel, then the next. Rushing the sequence turns a rainbow into brown swirls and a cranky kid.

MIX & MOLD A CUSTOM HANDPRINT STONE: Plaster mix, a keepsake stone mold, protective gloves, a mask, paints & a brush — this kit includes the arts & crafts supplies you need to create a special décor piece you’ll cherish forever. Have a new baby brother or sister? This also works as a baby handprint footprint keepsake kit!

Perfect Family Handprint Frame Kit for All Sizes — This VidwanHome Family Handprint Kit offers a creative and meaningful way to capture family memories. With 4 pages or 5 pages of transparent acrylic boards in white and black, this DIY craft kit allows you to create beautiful handprint art, photos, or even pressed flowers and leaves. It’s perfect for families of 3, 4, 5, 6, or 7, or Valentine’s Day,and makes a unique handprint keepsake to decorate your home.

READY-TO-PAINT 7-INCH GARDEN STONE: No plaster, no messy molding! Jump right into a world of creative fun as you paint a rainbow garden stone to life!
2. Paper Plate Rainbow
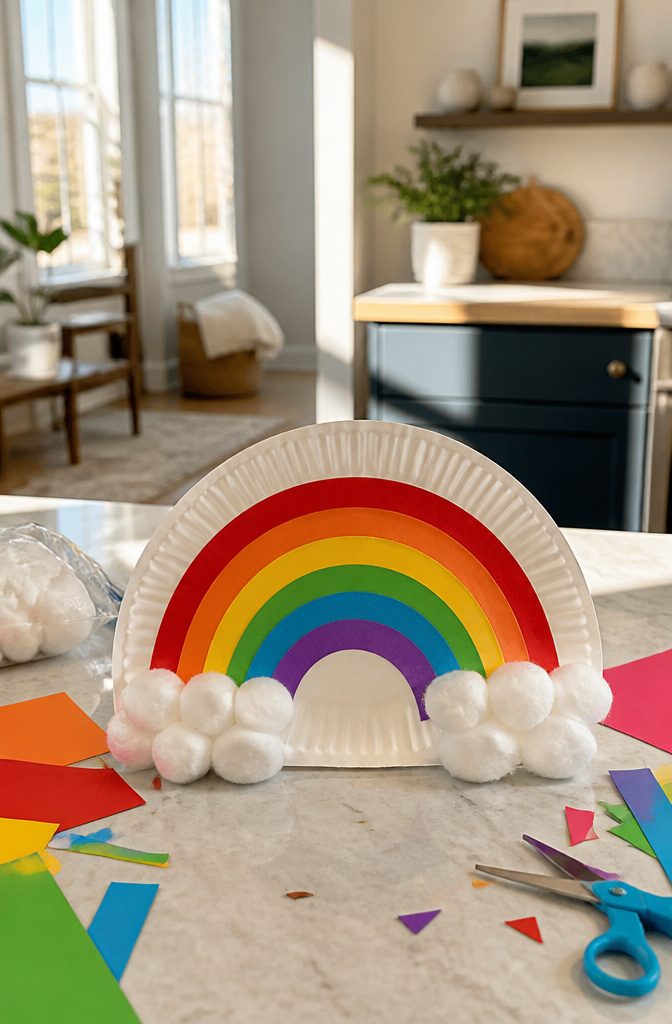
A paper plate rainbow lands in that sweet spot where toddlers get structure and older kids still want to make it.
The plate itself does the heavy lifting: one clean cut across the middle gives you the arc, and the rim becomes the outer edge no one has to draw freehand.
I went with colored paper strips on my first run, thinking paint would mean waiting around for dry time.
The strips need to be narrower than an inch, or the curve fights you and the ends stick out past the plate edge.
Live and learn. Glue amount matters too; a thin swipe holds fine, but glob it on and the paper buckles while the cotton-ball clouds slide right off.
Materials stack up cheap: paper plate, cotton balls, glue, scissors, and either markers or colored paper with a stapler optional.
Some versions add tissue paper for texture, which works well for kindergarten and up. Toddlers handle the cotton-ball gluing fine; the paper-strip placement usually needs a hand until age four or so.
The finished piece hangs light on any wall, and the combo of a hard structure plus soft clouds keeps kids engaged through the whole build.
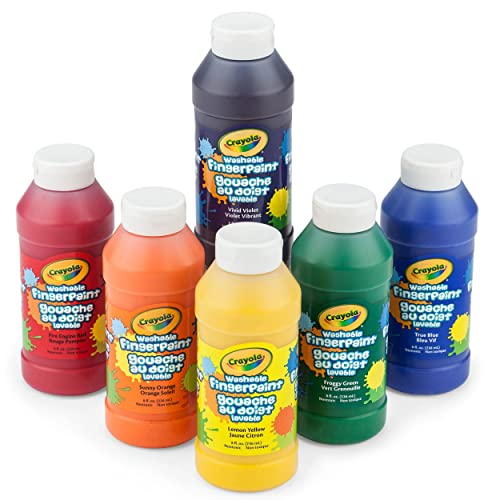
CRAYOLA FINGER PAINTS: This set of washable finger paints for kids includes 8oz bottles in six lively shades: Blue, Yellow, Orange, Green, Violet, and Red.

*ULTIMATE STARTER SET: This Rainbow Pack is the ultimate starter paint set for classrooms and home art projects! This vibrant set includes Red, Orange, Yellow, Green, Blue, Purple, Black and White, 16oz each. Everything you need to unleash creativity.

Kids Bulk Paint Set – Cra-Z-Art features Classic Paint in 8 beautiful, vibrant colors
3. Rainbow Salt Painting
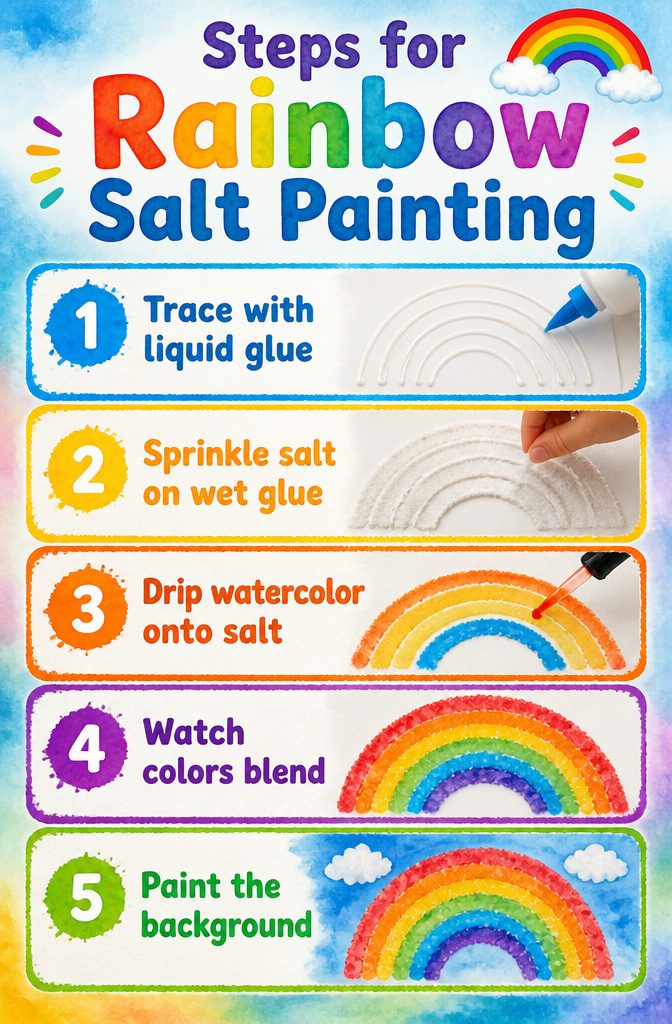
Salt painting pulls kids in because the color does not stay where it lands. Liquid glue traces the arc of a rainbow across heavy paper, and a generous coat of salt over the wet lines leaves a raised, crystalline ridge.
Once that sets, red, yellow, and blue watercolor dripped from a dropper travels along the salt channels like a wick, bleeding into secondary colors where they meet. The crystal absorbs the pigment fast, so the spread looks almost magnetic.
I have watched this go wrong two ways.
Too much water floods the salt and collapses the ridge into a pale puddle. The color runs past the glue boundary and the texture flattens to nothing.
Too little salt leaves bald patches where the watercolor beads on bare paper and refuses to move. A thick, even layer of salt and a barely-wet brush or dropper fixes both.
Watercolor painting on the background, a wash of blue for sky, works while the salt dries or after.
The rainbow itself is the main event, but the extra step gives the finished piece somewhere to sit. Basic materials, one afternoon, and the chemistry does the teaching.

Package includes: you will receive 72 rainbow paper plates, these eye-catching and bright paper plates will make your party look elegant and lively; these rainbow plates can be arranged in various ways, whether placed on a table or as the centerpiece of a dining table, they will always look beautiful and add a special splash of color to your table

WHAT'S INCLUDED: 50 round dinner plates

Package Included: Dive into a world of vibrant dining with Ckhoid's colored paper plates. Each package includes 300 disposable plates, featuring a stunning array of colors like orange, light green, dark blue, white, pink, purple, red, dark green, light blue, rose, yellow, and black. These colorful plates are perfect for any occasion, ensuring you have enough 7" colored plates to cater to all your guests.
4. Rainbow Paper Weaving
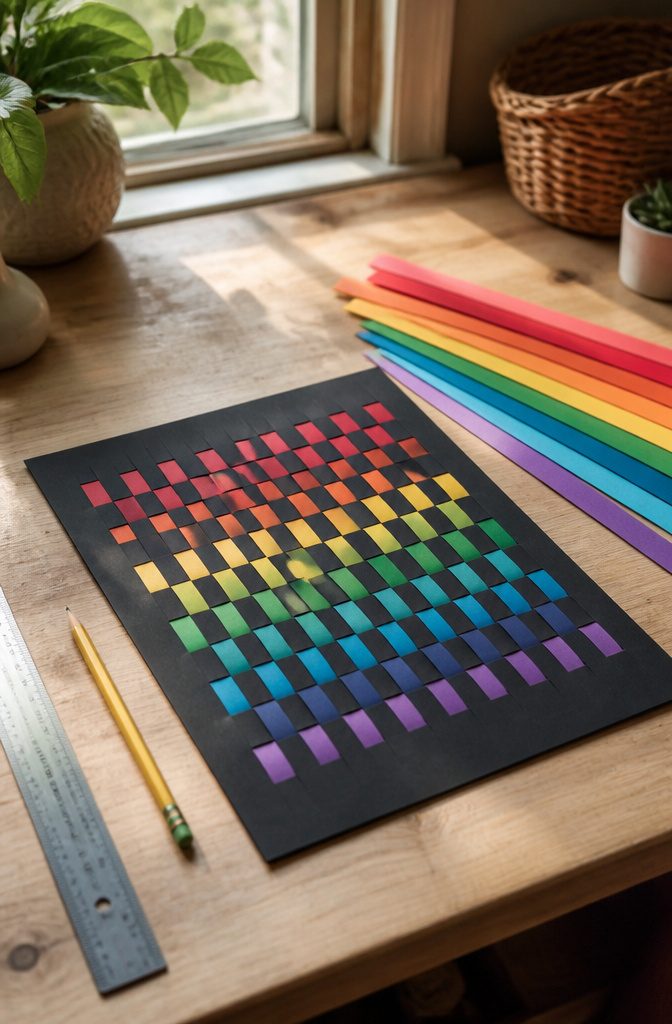
Rainbow paper weaving starts with one solid sheet as the backbone, usually black or white, with slits cut straight across from edge to edge but stopping short of the borders so the frame stays intact.
Colored strips get woven through those slits in an over-under pattern, each row offset from the last so the colors line up into bands.
The prep matters more than it looks.
Strips need to be roughly half an inch wide to slide through without tearing the base. Go narrower and preschoolers lose their grip; go wider and the weave gets bulky and gaps show.
I have tried cutting the base slits freehand, but a ruler and pencil line keep the spacing even so the finished face stays flat instead of buckling.
Tension is the other place this craft lives or dies.
Pull the strips snug as you work, but not so tight that the base sheet curls into a tube. A gentle press under a book for ten minutes after the last strip fixes most waviness.
The over-under motion itself builds fine motor skills in a way coloring does not, because the fingers have to pinch, thread, and alternate direction with each row.
Kids four and up usually manage the weaving once the slits are pre-cut; younger ones can sort strips by color or help press the finished piece under that book.
The whole thing takes under fifteen minutes once the cutting is done, and the flat result works as a mat, a basket side, or a wall piece with a little glue on the ends.

Soft material: Our pastel pom poms for crafts are approximately 1 inch in diameter, providing a soft and fluffy texture that is perfect for a wide range of DIY projects, from garlands to ornaments

Great for puppet making - use for hair, eyebrows, or beards

Funny commissioner warrior bragging piece. Great statement design to respect the commish on draft day, to say I'm just here to draft a kicker, or for your favorite season of the year. Let the games begin
5. Rainbow Rice Sensory Activity
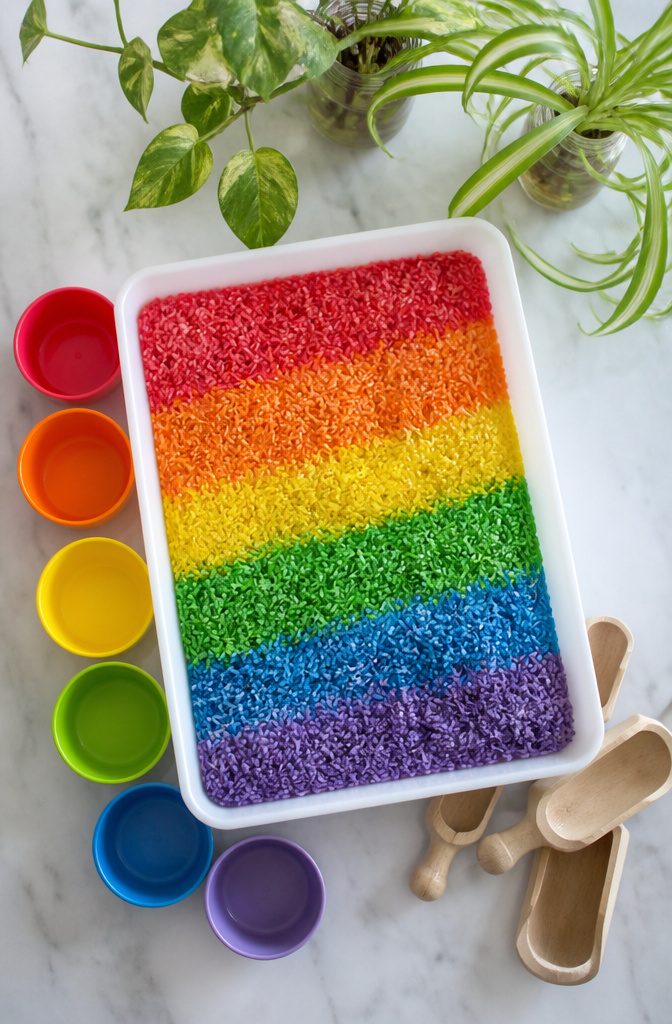
Rice takes color better than you’d expect. I stir a few drops of food coloring into a tablespoon of white vinegar, pour it over dry rice in a zip-top bag, and shake until each grain is coated.
A baking sheet spreads the rice out for drying, usually an hour or two depending on humidity, before the kids can dig in.
The setup shapes how long the activity lasts. A shallow bin with scoops and cups keeps a toddler busy with pouring practice, while a clear bottle layered with rainbow rice becomes a calm-down jar they can turn and watch.
Glued art on cardboard is possible, though I skip glue on the tubes themselves; the rice stays put fine without it, and the cleanup is simpler.
The sensory draw is real. Running fingers through cool, colored rice gives tactile feedback that holds attention longer than flat crafts, and the pouring builds the kind of life skills that show up in other contexts.
The color bleeds if the rice goes in wet, so I wait the full dry time even when the kids are hovering. Stored in a zip-top bag, the batch lasts for months of repeated play.

【STUNNING COLORS】:This soap colouring set includes 36 colours: red, grape purple, grass green, orange red, blue green, incense purple, lemon yellow, brown, yellow green, pink, teal, etc. Each soap dye is 6ml/0.25 fl.oz.


6. Rainbow Cereal Necklace
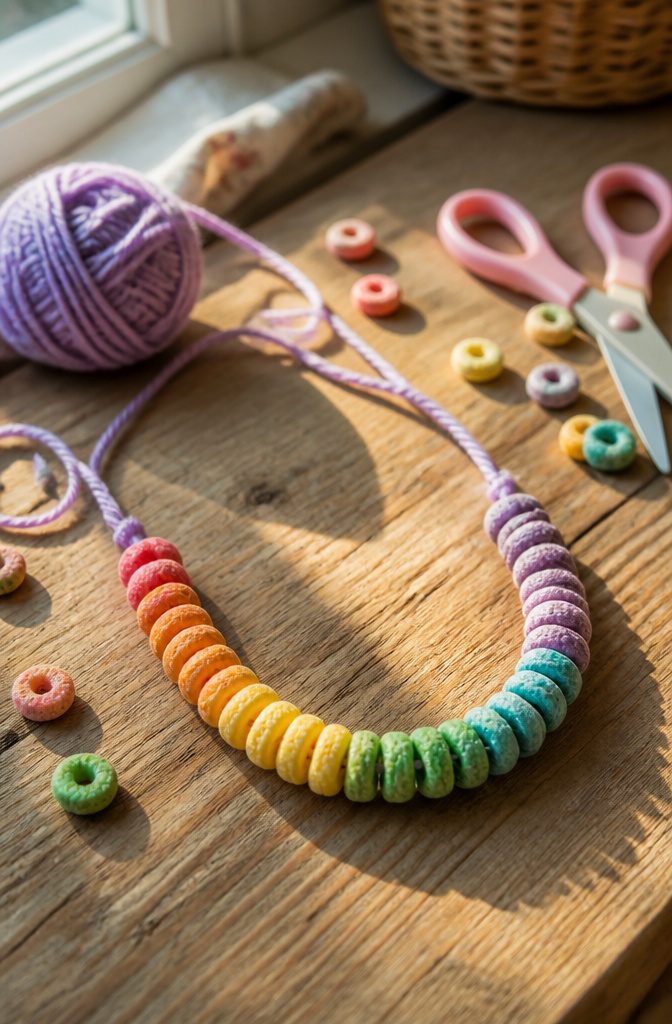
A bowl of Fruit Loops and a length of yarn will keep a preschooler busy for a solid twenty minutes, which in parenting hours is basically a vacation.
Threading cereal onto yarn builds the same fine motor skills as lacing cards, only the payoff is edible.
Toddlers can manage this with an adult nearby, since the loops are a genuine choking hazard for kids who still mouth everything. By three or four, most kids handle the task solo.
I have learned the hard way that yarn matters more than you’d think. The soft acrylic skein I grabbed first frayed into a fuzzy mess after three loops and kept knotting against itself.
A smoother cotton yarn or a pipe cleaner bends more cooperatively and threads faster, though pipe cleaners leave a scratchy necklace.
If you stick with yarn, wrap the end in a bit of tape to stiffen it into a needle. The kids get so excited to participate once they realize the craft doubles as snack time, stale cereal and all.

Create a meaningful family handprint artwork with this DIY craft keepsake kit. Designed for handprints, footprints, and paw prints, it helps preserve special memories in a clean, elegant display that fits beautifully in living rooms, bedrooms, nurseries, entryways, or family photo walls.

FAMILY HANDPRINT KIT WITH LIGHT - This DIY kit lets you gather handprints from every family member—including your furry friends, then transforms into a cozy night light that bathes rooms in soft warmth. Whether it’s in the bedroom, living room, or nursery, the soft glow creates a peaceful and warm atmosphere. Perfect for adding a touch of heart to your home.

Quality Family Keepsake Frame: Finish this hand casting kit with your family and enjoy every second of it. This is a thoughtful baby keepsake handprit kit that can be used to document a child's growth. This is a great way to save beautiful memory for a family. This family hand print frame kit also suitable for printing your pet's paw prints.
7. Rainbow Pom-Pom Craft
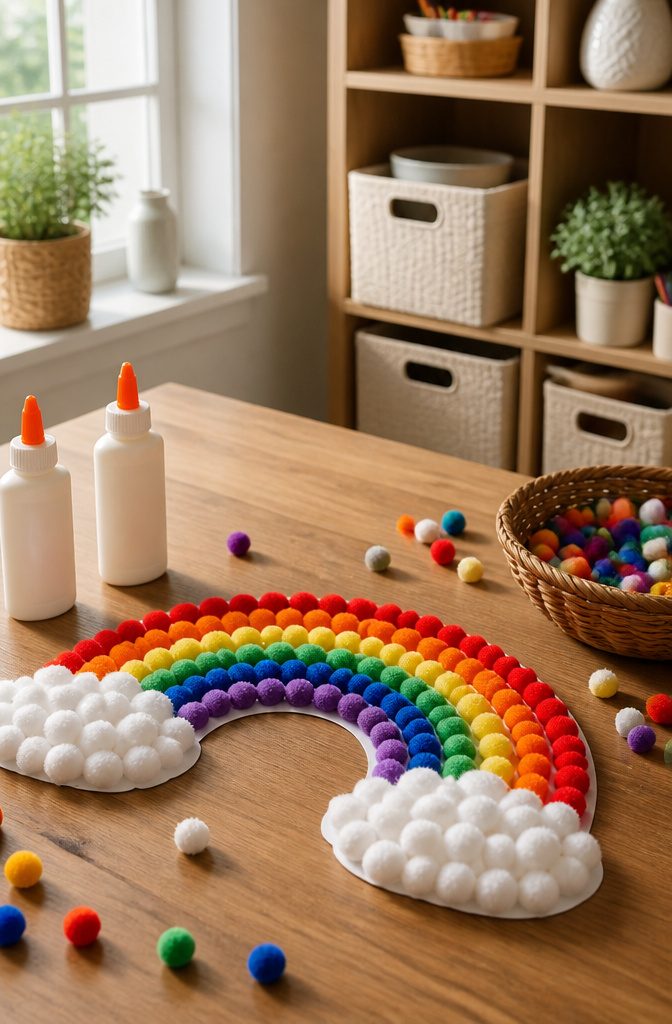
Pom-pom rainbows hit that sweet spot where a toddler can finish something recognizable before snack time.
The basic version needs colored craft pom-poms, craft glue, a printable rainbow template, and cotton balls for clouds. Dot glue on each pom-pom, press it onto the template in rainbow order, and the clouds anchor the ends.
One nice shortcut: draw a thin glue line straight across each arc and let kids place pom-poms along it, which speeds things up for impatient little hands.
Size matters more than I expected. Small pom-poms dry faster and stay stuck; larger ones take noticeably longer and tend to slide until the tack sets.
Plan on at least twenty minutes of drying time before the piece can travel home, longer if the cotton-ball clouds get a generous glue coat.
For a different spin, color sorting turns the same materials into a matching game. Spread pom-poms in mixed piles and have kids sort by hue into rainbow order before any glue touches paper.
Sensory bottles work too: drop pom-poms through a narrow-necked bottle in color layers, though this skews toward older preschoolers with steadier fingers.
The sweet spot for glued rainbows is ages two to five.
Sorting extends that range slightly, and the color-matching built into either version gives toddlers practice they do not register as practice. Fine motor control, hue recognition, and the satisfaction of a finished piece all land in the same twenty-minute window.

Baby Safe & Non Toxic: Made with non toxic paint for toddlers, our finger paints are hypoallergenic, gentle on sensitive skin, and certified by ASTM D-4236. Safe for little hands, they’re perfect for creative play at home, daycare, or preschool.

Multicolor inkpad for a rainbow of stamping fun

Mess-Free, Truly Washable Formula – Designed for worry-free creativity, this paint for toddlers and kids rinses off skin, clothes, tables, and walls with just soap and water, so parents and teachers enjoy stress-free painting time with zero stain anxiety and faster cleanup.
8. Rainbow Paper Chain
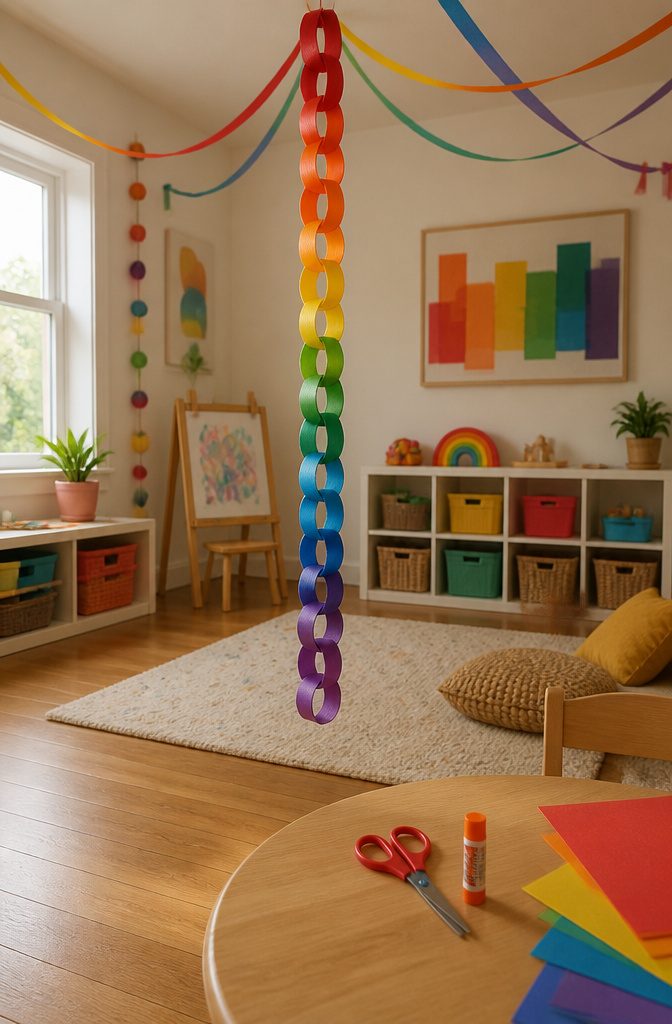
A rainbow paper chain starts with nothing but paper, scissors, and glue or a stapler.
Cut strips about an inch wide and six inches long, one color per strip. Loop the first strip into a ring and seal it.
Thread the next strip through that ring, loop it, seal it, and keep going in rainbow order: red, orange, yellow, green, blue, purple. Glue gives a cleaner look; staples are faster and hold better if the chain gets yanked.
For a chain long enough to drape across a doorway or window, plan on roughly thirty to forty strips.
That lands around five to six feet once looped, depending on overlap. Toddlers and kindergartners can handle the looping with help, but the cutting needs an adult or a practiced older kid.
The Great Wolf Lodge crafts page notes the whole project wraps up in under fifteen minutes once the strips are ready.
I messed up the first chain by making the strips too narrow, maybe half an inch, and the loops looked skimpy against the wall.
Worse, I lost track and stuck yellow after orange, skipping green entirely. The fix is laying the strips out in a line before you start, like a color checklist you can see.
These chains work as room decoration, party garlands, or countdown chains where you tear one off each day.
Crayola’s template for a massive rainbow wall hanging takes the same idea bigger, but the basic loop method scales to whatever time you have.

You will receive 60 colorful paper plates measuring 7 inches/17.8 cm in diameter to hold many foods such as sandwiches, wings, hot dogs, etc. for easy access by your guests. The product consists of six different colors, red, orange, yellow, green, blue and purple, 10 of each color. Plenty of quantity to meet your party needs.
Funny DIY Crafts for Kids - The paper plate crafts kits can stimulate children's imagination, cultivate their hand-eye coordination, and promote their psychological growth. As a simple papercraft, children can easily remove each part and paste it on the paper plate without using scissors and other tools, which provides a safety guarantee for young kids' handmade creations.

【Package Contents】You will get 48 packs of colorful paper plates, including 24 pieces (7 inch/18 cm) dessert plates and 24 pieces( 9inch/23cm)dinner plates.The colorful party favors are enough to decorate your party.
9. Rainbow Stained Glass
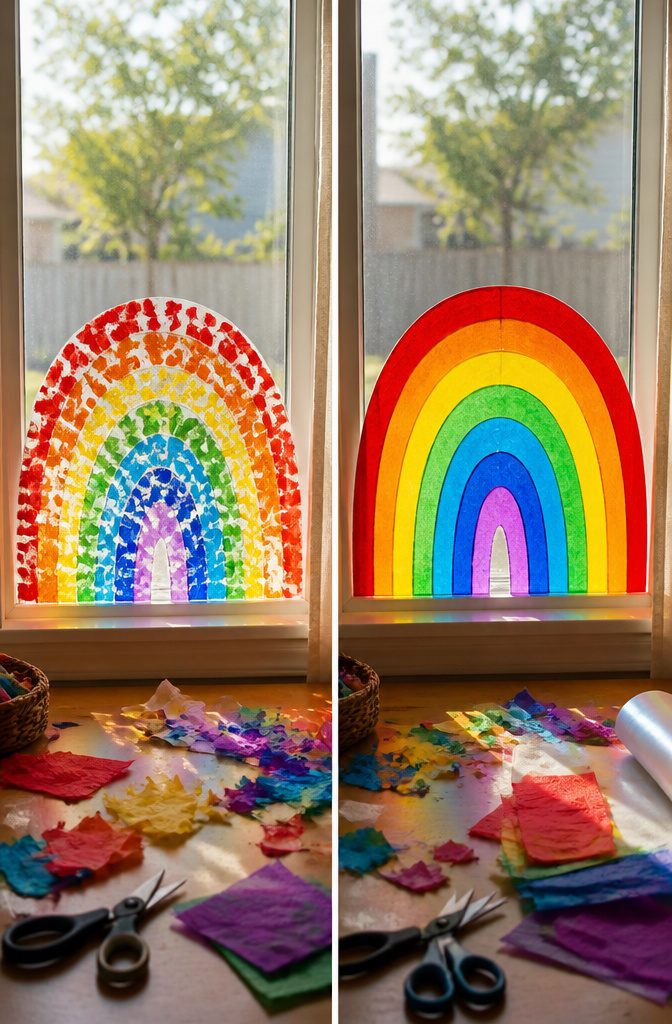
Tissue paper pressed between two sheets of contact paper or waxed paper makes a convincing stained glass effect that catches afternoon light.
The key is the overlap zone where colors bleed together; that bleeding wrecked my first attempt at a clean rainbow arc, so now I leave a finger-width gap between each color band and let the light do the blending instead.
A black paper frame gives the piece its leaded-glass look. Cut the frame shape first, whether that is a simple arch or something more elaborate, then tape it to one sticky half of contact paper.
Kids can place one-inch to two-inch tissue squares in rainbow order, working from red at the top through violet at the bottom.
Seal with the second sheet, trim the edges, and hang it in a window where the sun hits directly.
This works for ages three up with some adaptation. Preschoolers tear tissue and stick, which is enough; early elementary kids can manage the frame cutting and the color sequencing themselves.
The whole project finishes in under an hour, though the frame cutting eats more time than you expect if you choose a detailed shape.

🧶 Yarn Overview Material : 8% Wool,57% Acrylic,35% Cotton Weight : ca. 200g(7oz) Length ca. 458m(500yds) Needle : 4.0-5.0 mm (US 6-8), Crochet Hook: 3.5-4.5 mm (US F4-7)

Pet Nest Comfort: These warm pom pom balls add a soft, colorful layer to a hamster nest or small pet bedding, helping create a cozy space for winter use while giving pets a gentle touch surface

🧶 Yarn Overview Material : 8% Wool,57% Acrylic,35% Cotton Weight : ca. 200g(7oz) Length ca. 458m(500yds) Needle : 4.0-5.0 mm (US 6-8), Crochet Hook: 3.5-4.5 mm (US F4-7)
10. Rainbow Flower Pots
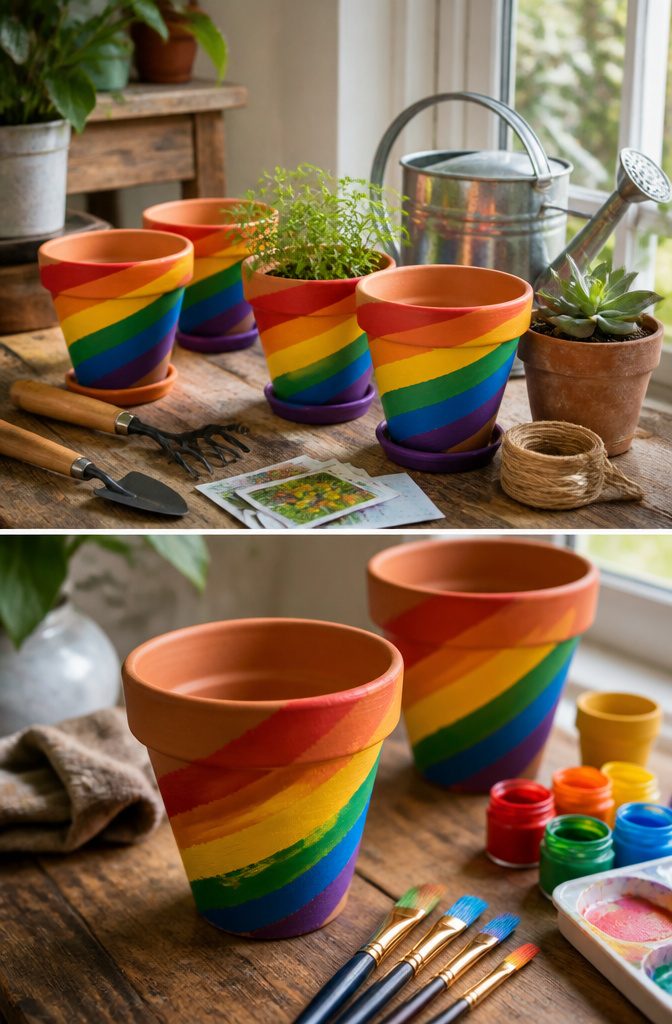
Terra cotta pots take acrylic paint better than plastic ones, but both work if you scuff the surface first with fine sandpaper.
I learned that the hard way after a set I painted for the patio flaked off by July; the sealant I grabbed was labeled indoor use only, and rain found the gap within weeks.
For anything that sits outside, a marine-grade acrylic sealant costs more but holds through freeze-thaw cycles without clouding the colors.
The painting itself suits older kids who can wait out drying time between stripes. I tape off sections with painter’s tape and let each color dry to the touch before peeling and rotating, which keeps the edges cleaner than freehanding.
Six or seven bands of color fit a standard six-inch pot without crowding; the rim gets its own coat last so you can grip the base while working.
Succulents and trailing pothos show well against a rainbow pot, though herbs like thyme give the same visual pop with the bonus of scent when someone brushes past.
A full cure of 48 hours before planting keeps the soil moisture from lifting fresh paint, a step I still rush sometimes and always regret.
11. Rainbow Tie-Dye T-Shirts
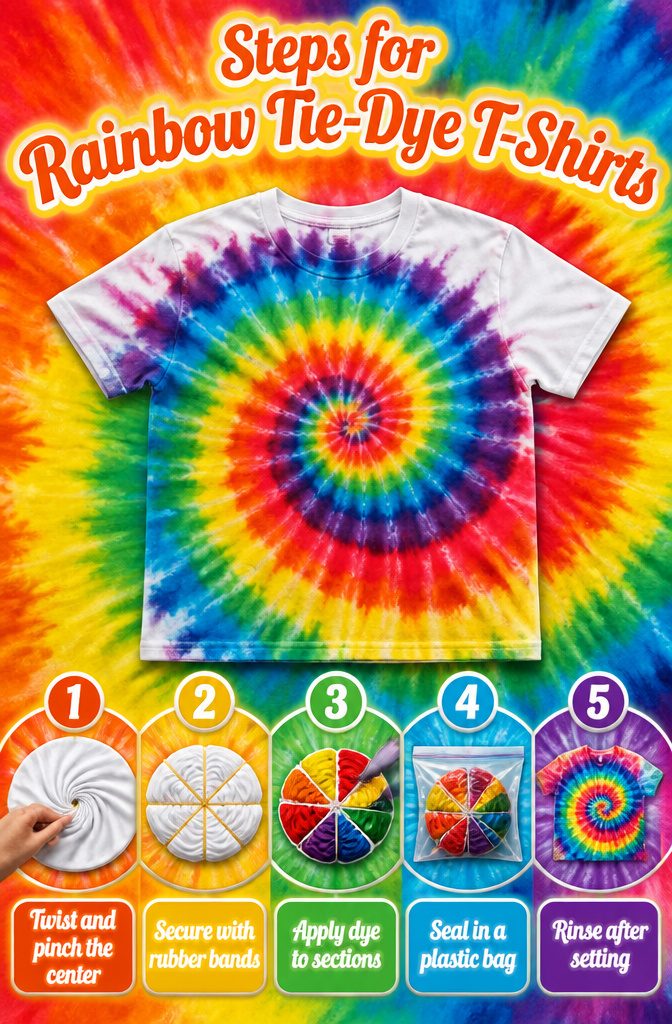
Fiber-reactive dye needs adult hands involved, so this one lands in the older-kid zone with supervision, not a solo toddler project.
White cotton shirts work best because the fibers grab the color; poly blends leave you with washed-out pastels that look like a mistake even when you did everything right.
The spiral starts from a pinch at the center, twisting the fabric clockwise while the rest of the shirt pleats around itself.
Rubber bands hold the pie wedges in place, three or four crossing the center like spokes. Stripes run faster: fold the shirt accordion-style from one side, then band every two inches down the length.
The dye gets applied in sections, one color per wedge or band gap, and the damp shirt goes into a plastic bag to set for several hours so the reaction finishes before you rinse.
My first spiral came out brown in the center because I overlapped the red and green too generously where the wedges met.
The color wheel still matters with dye, not just paint. My second try bled worse; I’d skipped the soda-ash soak that opens the fibers to bond permanently, and half the rainbow washed down the drain in the first rinse.
The kit instructions had mentioned it. I had not read them carefully enough.
12. Rainbow Science Experiment
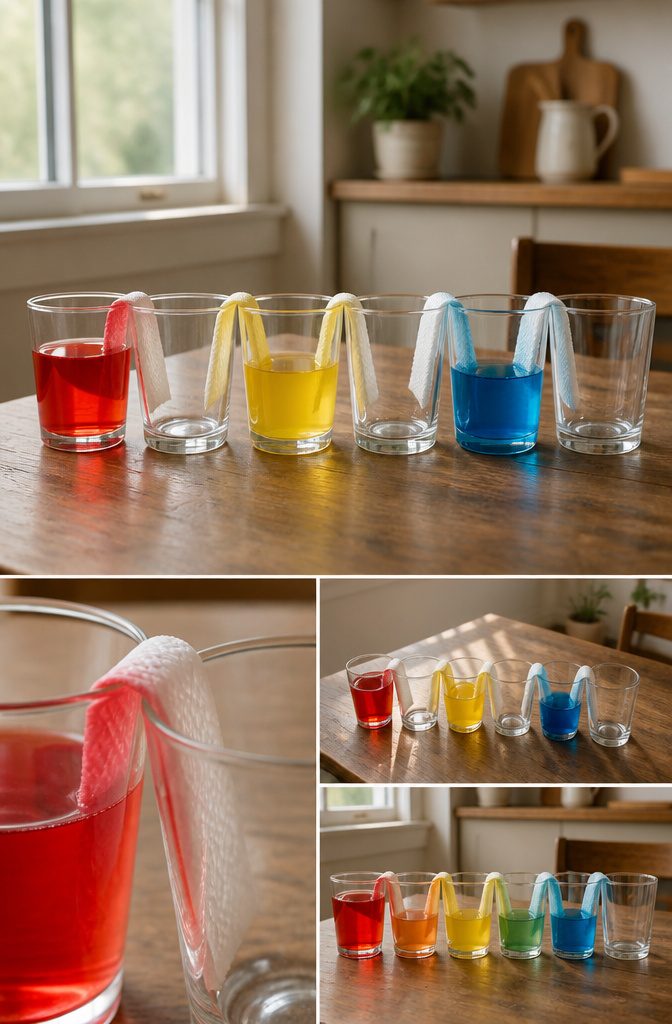
Water wants to move, and that stubborn fact makes the walking-water experiment the most reliable starter for a diy rainbow craft project with kids under eight.
I set out six clear cups in a line, filled the odd-numbered ones with water plus red, yellow, and blue food coloring, folded paper towels into bridges between each pair, and waited.
The colored water climbs the towel through capillary action, meets in the empty cups, and mixes into orange, green, and purple.
The whole arc forms in about two hours, though sources note it can stretch to overnight depending on the paper towel thickness.
I tried rushing it once with thinner towels.
They tore under the weight of the water and the colors pooled underneath instead of walking. Thicker towels hold the load but slow the climb; the tradeoff is patience for structure.
What surprised me was how fast the color separation reverses once the cups level out. The rainbow blurs back toward brown if you leave it too long, which became its own lesson on saturation and equilibrium.
For older kids, the density rainbow builds a stable jarred arc using sugar water layers, heaviest concentration on the bottom. Both projects need only food coloring, water, and household cups or jars.
The prism option splits actual sunlight into spectral colors with a glass of water and white paper behind it, no waiting required, though it demands bright sun and steady hands.
13. Rainbow Streamers
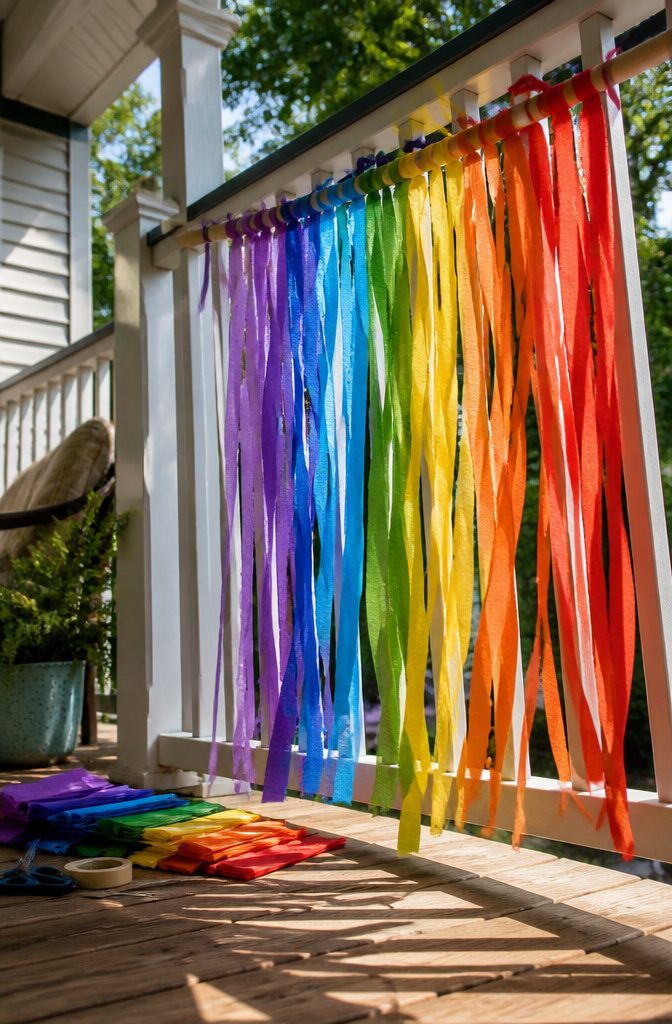
Rainbow streamers turn a breezy afternoon into something kids actually run outside for. Crepe paper, ribbon, or plastic tablecloth strips are the usual starting points, and each behaves differently once the wind hits it.
My own attempts taught me that three-foot lengths hit the sweet spot for toddlers, who tangle anything longer around their wrists before they finish a single spin. Older kids can manage six feet without tripping themselves.
Crepe paper frays and tears the fastest, especially on concrete, but it moves like nothing else.
Plastic tablecloth strips outlast everything and cost next to nothing, though they crackle more than flutter. Ribbon lands in the middle for durability and drape.
Attachment matters more than the material itself. A simple loop around a wooden dowel, secured with a staple or a tight wrap of masking tape, holds up through serious spinning.
For hanging streamers from a porch or tree branch, punch a hole near the strip’s end and thread twine through. The streamers twist around each other, which kids under three find fascinating even before they chase them.
Wind resistance is where outdoor use gets real.
Anything lighter than plastic tablecloth strips tangles into knots within ten minutes of gusts over 15 mph. I learned that the hard way after a birthday party spent untangling red and violet into one hopeless braid.
14. Rainbow Collage
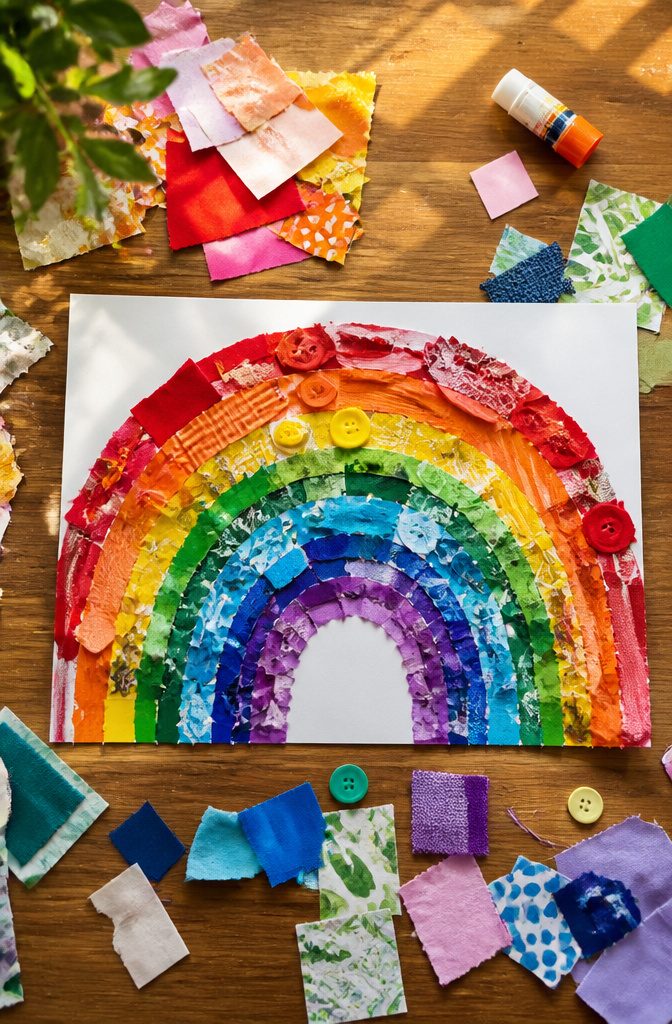
A rainbow collage lets you turn whatever is already in the house into color order.
Magazine clippings, fabric scraps, buttons, stickers, or found objects from a walk outside all work. The open-ended approach means a three-year-old can tear paper and glue it down while an older child plans a full spectrum arc with layered textures.
Sorting comes first. Reds with reds, oranges with oranges, and so on.
Once the piles are ready, the backing material becomes the real decision. Cardboard or heavy watercolor paper handles weight without warping; standard printer paper will buckle under buttons or layered fabric.
Glue coverage matters more than you expect. A thin swipe holds paper flat, but buttons and heavy fabric need a solid, even layer pressed for a full minute or the piece dries lumpy and the items peel off.
I learned that pressing overnight under a book saves the whole thing.
15. Rainbow Butterfly
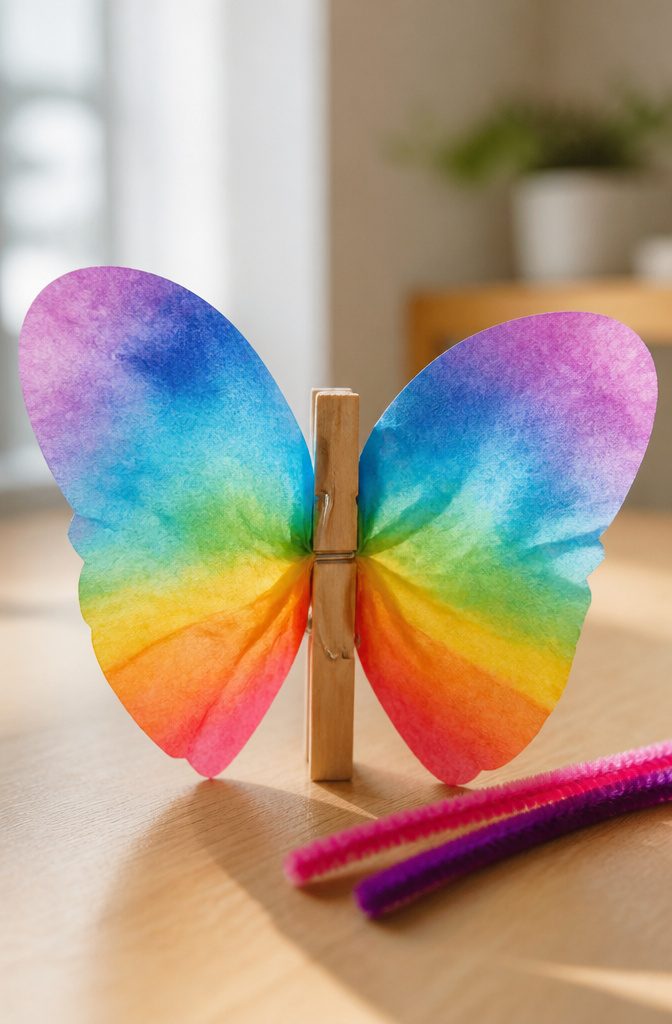
A clothespin body with coffee filter wings makes the most reliable rainbow butterfly for kids under eight.
The coffee filters absorb liquid watercolor or marker bleed into smooth gradients, and the wood grip holds up through the kind of active play where paper tube bodies squash flat by day two.
The symmetry practice lands naturally here.
Kids draw on one half of the folded filter, press the wet halves together, and open to matching wings. That reveal still works at age five; at nine they start predicting the mirror effect and the magic thins out.
For antennae, pipe cleaners twisted through the clothespin spring stay put better than glued pom-poms or paper strips.
I have watched wing attachments fail on every method except the clothespin pinch: slide the gathered filter center into the gripping end, add a dab of white glue, and clamp until dry. Paper clips rust.
Tape peels. The clothespin itself is the fastener, which is why this version survives the backpack test when others shed parts by lunchtime.
16. Rainbow Light Play
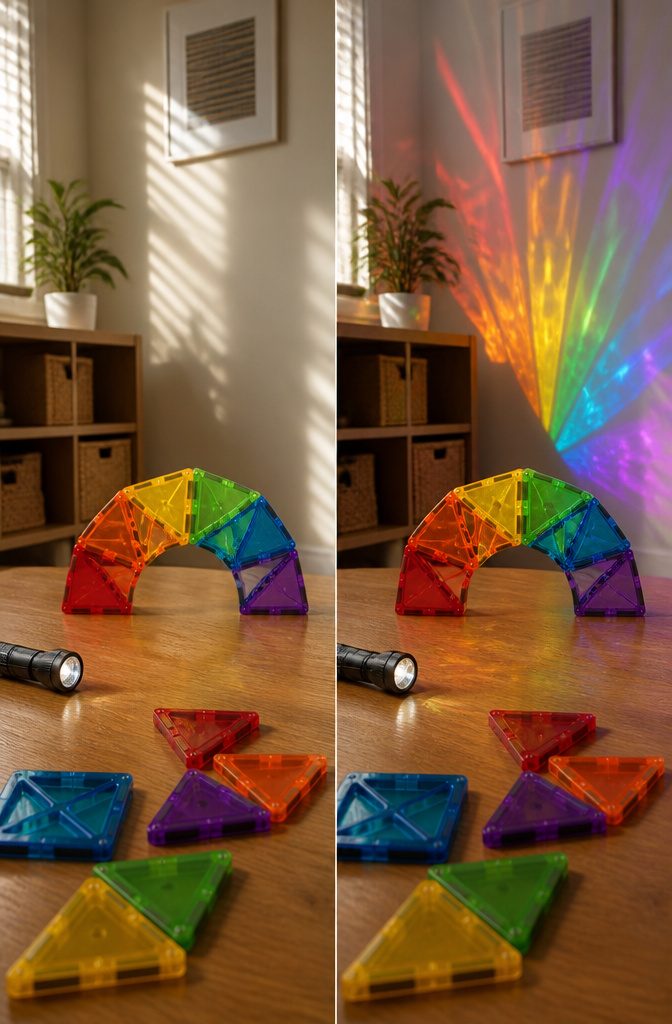
A flashlight and a set of triangle Magna-Tiles clicked into a rainbow arch will throw a full color spectrum onto the wall in a dark enough room.
The darker the space, the sharper the projection, and a phone flashlight is too weak for more than a faint smear.
I learned that the hard way after ten minutes of tilting a dim beam until I swapped in a hardware-store work light.
CDs work the same way for a zero-cost option. Tilt one under a lamp and the grooves split white light into bands you can catch on a sheet of paper held behind it.
A glass of water in sunlight does the same with a paper screen, though the colors spread wider and softer than with a prism.
Colored cellophane on a window is the daylight version. Layer red, orange, and yellow strips and the overlap zones turn muddy brown, which is its own lesson in how light mixes.
No finished product here, just the materials and the beam, and seeing what happens when you move either one.
17. Rainbow Watercolor Drip
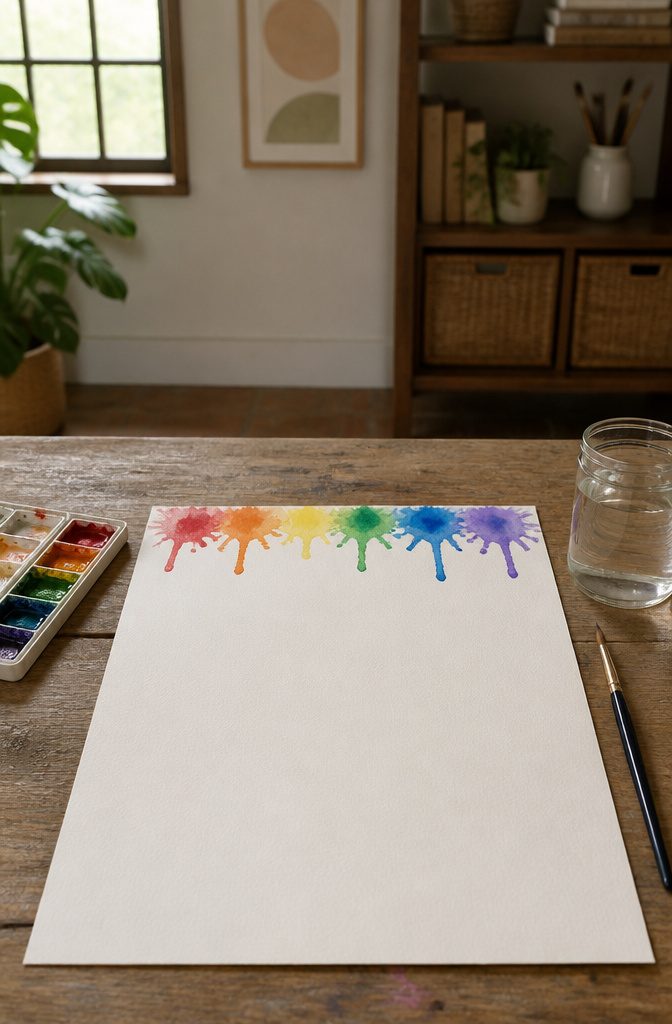
Watercolor paper or a sturdy mixed-media sheet is the only substrate that can handle the soak without buckling into a wave you can’t paint on.
I lay the paper flat, then run clean water across the whole surface with a wide brush until it has a uniform sheen, no puddles.
Too much standing water and the pigment washes out into gray mud before it ever travels. The color goes in as thick, barely diluted paint at the top edge, just a half-inch band in each rainbow stripe.
Gravity does the rest. The paint creeps downward, bleeding softly into the next hue as it goes.
School-age kids manage this well; they understand the waiting.
My first attempt, I flooded the paper and loaded the brush with thin color, so the whole thing ran to the bottom in two minutes and dried as a single brown stripe.
The fix is less water on the paper and more pigment in the brush.
A slight tilt helps control the speed. If the drip races, lift the back edge a hair.
If it stalls, add one careful pass of water at the top, not the middle. The bottom inch will always darken; I leave it blank now and trim later, or plan the composition so the cloud or pot sits there.
18. Rainbow Lava Lamp
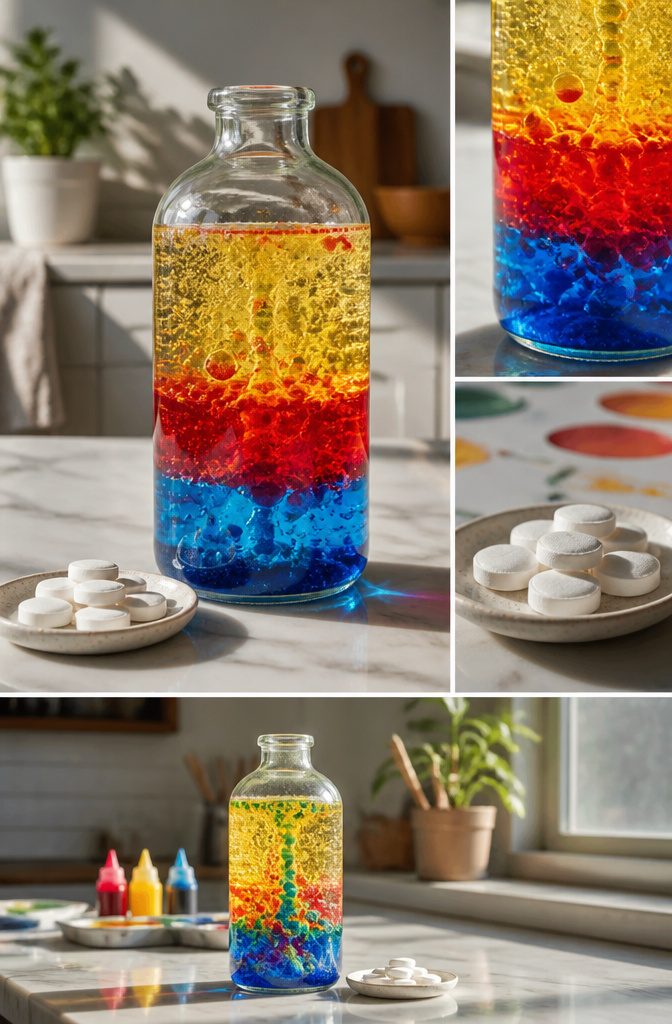
A clear bottle, water, vegetable oil, food coloring, and Alka-Seltzer tablets are all you need for this one. The oil and water refuse to mix, which is what creates the lava lamp effect.
Food coloring sinks through the oil in little droplets, and when an Alka-Seltzer tablet hits the water layer, it releases carbon dioxide gas that drags those colored blobs back up.
The layering matters. Water goes in first, filling roughly a quarter of the bottle.
Oil gets poured slowly on top until the bottle is nearly full. If the oil is added too fast, the layers mix and the effect turns muddy.
I have found that a 16-ounce bottle works better than a smaller one; the taller column gives the bubbles more room to travel, and the visual payoff lasts longer before the motion dies down.
The cheapest store-brand vegetable oil performs the same as name-brand, so there is no reason to spend more.
The chemical reaction is straightforward.
Alka-Seltzer contains citric acid and sodium bicarbonate. In water, they react to produce carbon dioxide.
That gas attaches to the food coloring droplets, making them less dense than the surrounding oil, so they rise. At the surface, the gas escapes, the droplets sink, and the cycle repeats.
Each tablet buys a few minutes of motion. Adding another tablet will restart the show, but the reaction eventually stops because the water becomes saturated with the reaction byproducts and the tablet surface can no longer dissolve efficiently.
Adult supervision matters for the tablet handling. The pieces can be sharp when broken, and the fizzing reaction happens fast enough to startle younger kids if they are not expecting it.
19. Rainbow Paper Flowers
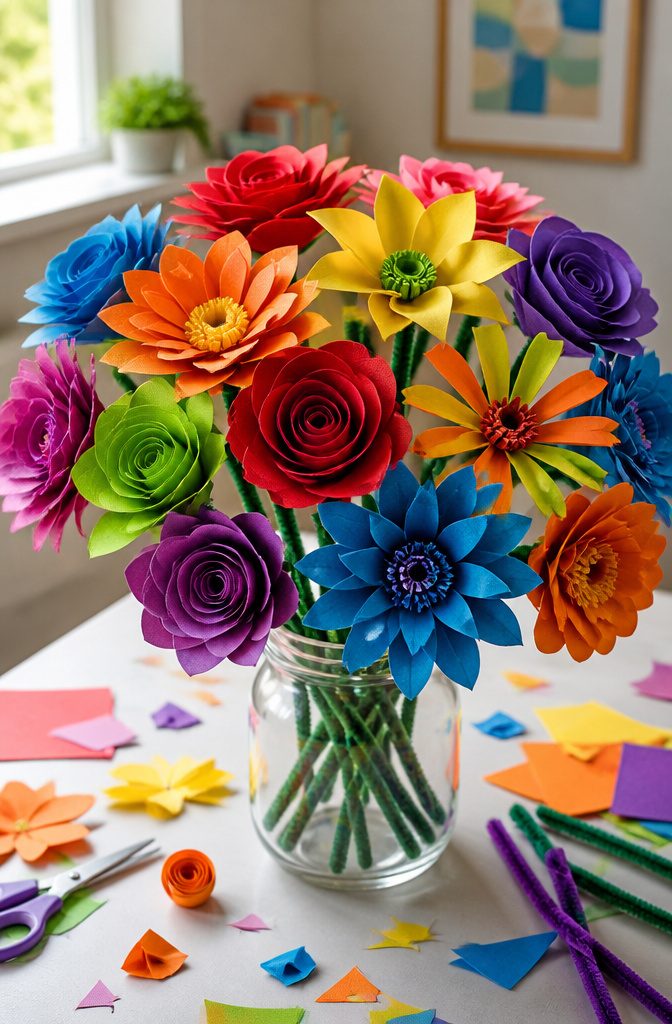
Colored paper flowers in a rainbow pattern take more patience than the strip-and-glue crafts, and that is exactly why they work for older kids who have already built some fine motor control.
I have watched a ten-year-old and a six-year-old tackle the same rolled-rose tutorial; the older child finished in twenty minutes while the younger one handed me the paper after three tries and asked for scissors help.
Ten petals per flower is the workable minimum if you want the spiral to look full rather than skimpy.
The build has three workable shapes.
Rolled roses need a long teardrop strip wound tight from the outside in; layered petals stack six or seven same-size cutouts with the top ones slightly smaller; pinwheel centers fold a square into triangles and let the points flare.
Each reads as a different flower species once the stem goes on. I curl my petal edges around a pencil or a thin dowel before gluing, which gives the paper a slight lift instead of lying flat like a pancake.
Pipe cleaners make the most forgiving stems because you can bend them into a leaf or a hook for hanging.
Sticks from the yard work too, though you will need tacky glue or a hot glue gun to seat the flower head firmly.
Assembly order matters: curl first, arrange second, attach last. The paper weave from the same craft family can become a basket or mat, but these flowers stay three-dimensional and stand in a jar without extra support.
20. Rainbow Cloud Craft
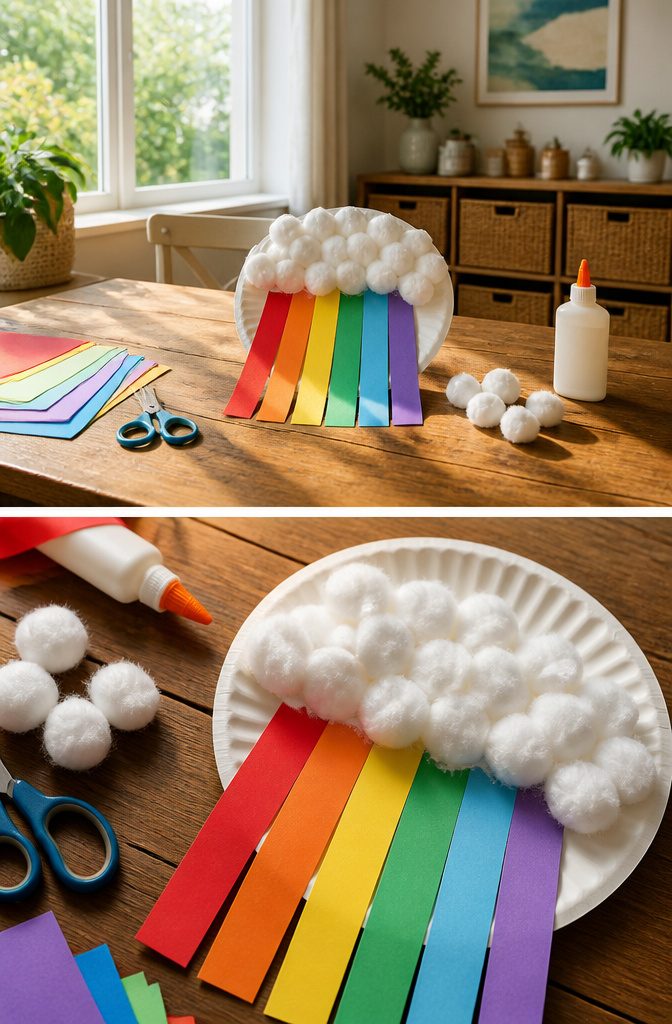
Cotton balls and a paper plate are the backbone of this craft, and the two main ways to build it both start there.
One approach glues the cotton balls into a fluffy cloud at the top edge of a half paper plate, with the rainbow arched below in marker or paper strips.
The other suspends rainbow strips from the cloud so they hang like falling rain, turning the whole thing into a mobile toddlers can watch from below.
Too much glue will warp the paper, something I learned the hard way when the plate curled and would not lie flat against the wall.
A thin layer on the cotton ball itself, pressed lightly, holds better than soaking the plate. Fluffing the cotton helps, but pulling too hard turns a ball into string, so gentle teasing works best.
This lands in the toddler through grade 1 range, though younger children need an adult handling the scissors and stapler.
The materials stay simple: paper plate, cotton balls, glue, scissors, and markers or rainbow paper. A stapler is optional for the hanging version.
Frequently Asked Questions
What are some easy rainbow crafts for kids?
Handprint rainbow painting, paper plate rainbows, and rainbow rice sensory activities are all easy starting points. Handprint painting works for toddlers who cannot yet hold a brush, since pressing a flat palm is enough.
Paper plate rainbows give built-in structure with the plate’s arc, and rainbow rice keeps kids busy with pouring and scooping once the colored grains are dry.
What materials do I need for rainbow crafts?
Basic supplies include paper plates, cotton balls, colored paper, glue, and scissors for most projects.
Specific crafts add items like washable paint and a vinyl tablecloth for handprint rainbows, or liquid glue, salt, and watercolors for salt painting. Rainbow rice needs white rice, food coloring, white vinegar, and zip-top bags.
Are rainbow crafts suitable for toddlers?
Yes, many are designed specifically for toddlers and preschoolers. Handprint rainbow painting works for two-year-olds who have not developed a brush grip yet.
Pom-pom rainbows and paper plate crafts with cotton-ball clouds also land in the two-to-five range. The key is choosing projects where pressing, tearing, or gluing large pieces replaces fine cutting or sequencing.





