
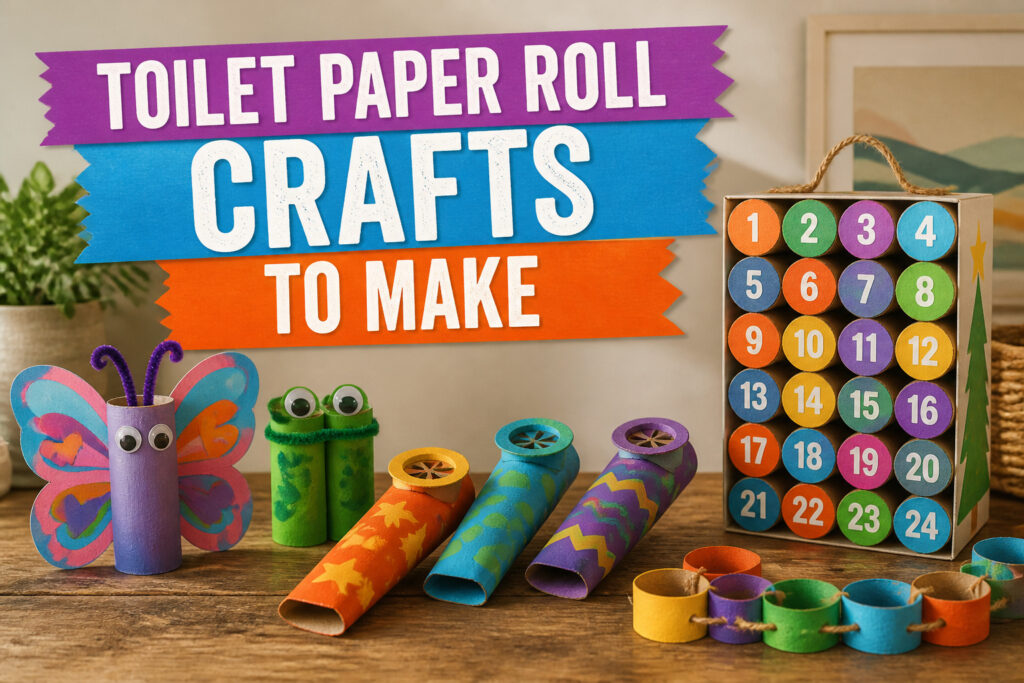
The projects below range from a five-minute kazoo to a two-hour advent calendar, and the one that fits your afternoon depends on whether you have paint drying time or a kid whose attention span outpaces white glue.
Wet rolls from the bathroom trash go straight to recycling; damp cardboard molds before you reach the scissors, and only the clean, dry tubes with their faint spiral seam earn a spot in the hall closet bag.
1. Toilet Paper Roll Snowman
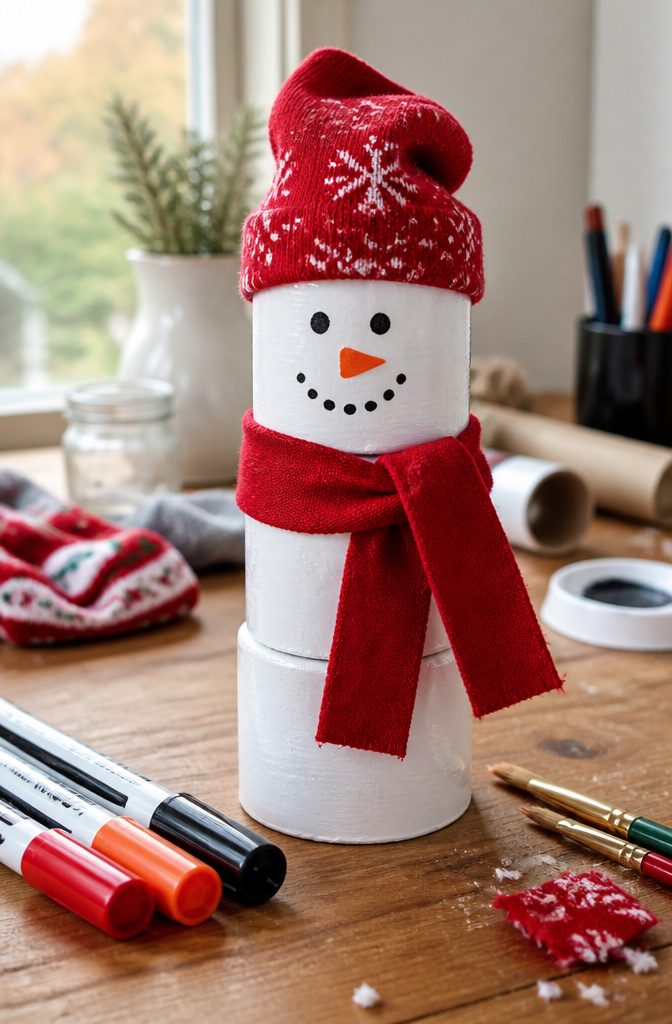
A toilet paper roll snowman starts with three coats of white paint, and the paint needs real drying time between layers or the rolls turn gummy when you stack them.
Two rolls make a short snowman, three give you the classic proportions. White craft paint works fine; acrylic covers faster but can crack if it goes on too thick.
The face comes after the stack sets.
Markers do the job, though paint pens stay brighter through a season of handling. Buttons down the front are optional; the bare white stack reads as snowman enough on its own.
The hat and scarf are where this craft gets clever. Odd socks, the ones missing their mates, get a second life here.
A cuff snipped from a kid’s old sock makes a rolled brim hat; a strip from the tube ties as a scarf with the raw edge fringed by snipping into it.
The stretch of the knit hugs the cardboard without glue, though a dab at the back keeps the scarf from sliding.
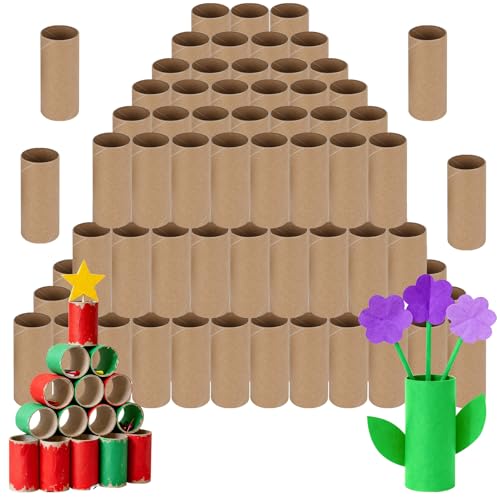
100 pcs cardboard tubes with box: You will got 100 pcs cardboard tubes for crafts with box , convenient for long-term storage, suitable for schools, families, and handicraft enthusiasts to use in bulk

100 pcs cardboard tubes with box: You will got 100 pcs cardboard tubes for crafts with box , convenient for long-term storage, suitable for schools, families, and handicraft enthusiasts to use in bulk
2. Toilet Roll Angels
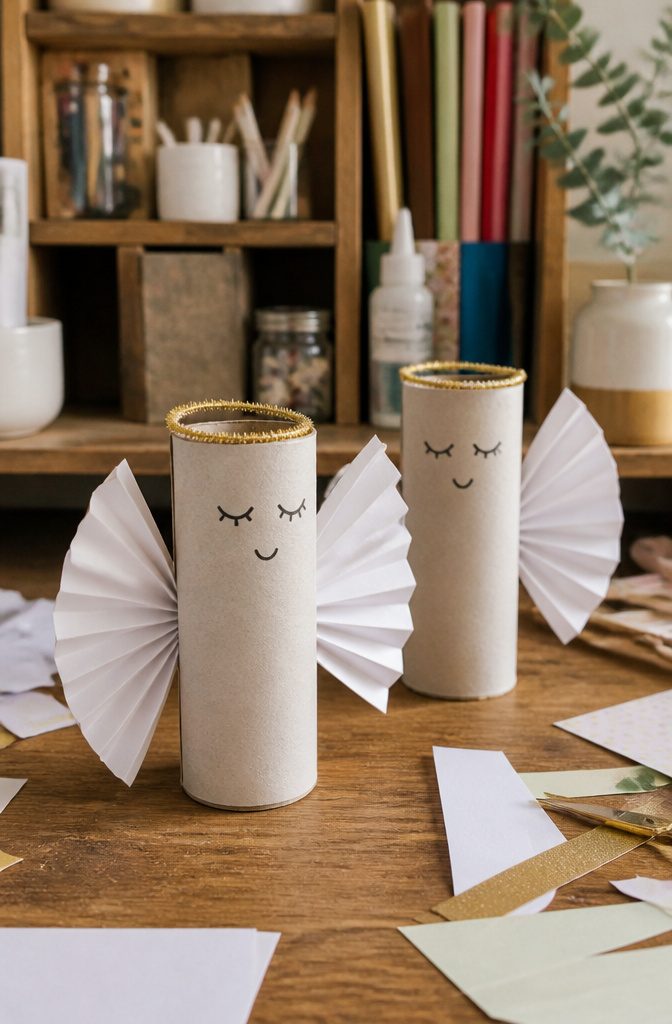
A pair of scissors and a single roll are all it takes to make a small robe shape.
Cut the roll straight across the bottom third, then angle those two cuts inward so the center strip forms a narrow body with flared sides. The leftover ring from the top becomes the head.
Paper wings attach to the back with regular glue. White printer paper works, though scrap cardstock holds the fold better if you press a sharp crease down the middle first.
The face needs nothing fancier than a pencil: two dots and a curved line, and younger kids manage this part without help.
Yarn or curled paper strips do the hair.
A few loops taped inside the top opening stay put well enough for a tree ornament. One source mentions making these in batches, which tells you how fast they go once the first one is figured out.
The snowman variant uses the same starting cut, so kids who try both end up confident with the scissors by the third roll.

Every roll of Angel Soft Toilet Paper delivers a heavenly combination of softness and strength you can count on every time.

✔ GREAT VALUE: Contains 50 sturdy craft rolls, long lasting value bundle, sufficient quantity, high quality, perfect for handmade and sharing needs.
3. Toilet Paper Roll Bird Feeder
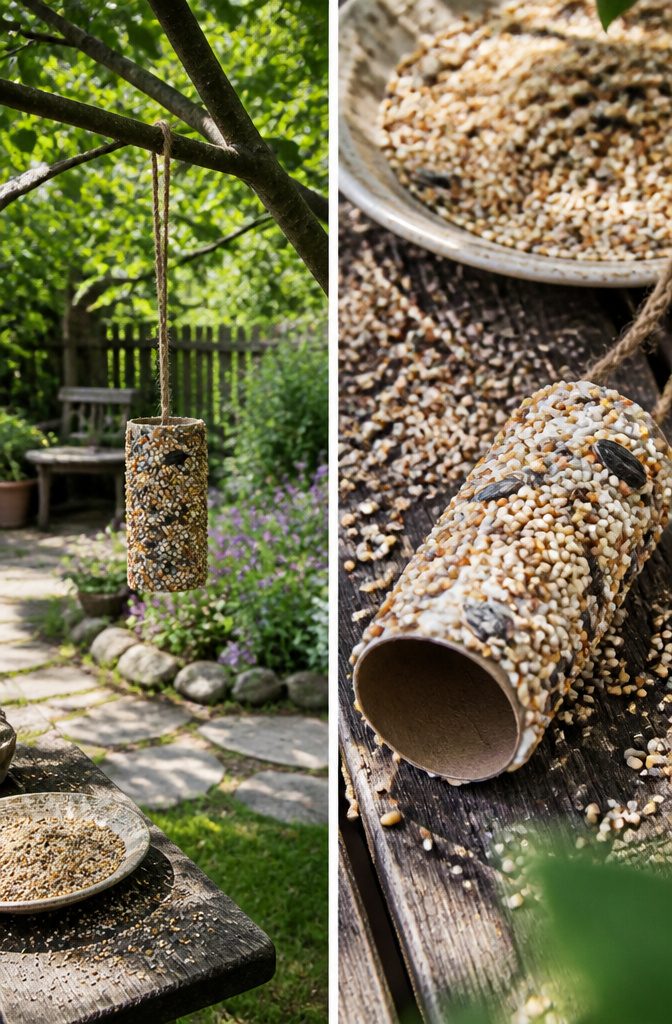
A toilet paper roll makes a surprisingly sturdy base for a bird feeder, and the whole project takes about ten minutes once the shortening softens enough to spread.
- Spread shortening across the outside of the roll, covering every surface the birds can reach. The coating needs to be thick enough that seeds will embed and stay put through wind and pecking.
- Roll the tube in birdseed until fully coated. Press gently so the seeds stick into the shortening layer rather than just sitting on top.
- Thread string through the roll for hanging. The string goes through the open center and knots at both ends so it cannot slide out.
- Hang the feeder porch-side or stick it on a branch. Either spot works; porch-side keeps it visible from a window, while a branch places it deeper in the birds’ natural territory.

Product 1: Attracts many beautiful perching and ground feeding Western songbirds Product 1: Contains seeds that Western songbirds desire including sunflower and safflower...
4. Toilet Paper Roll Christmas Tree
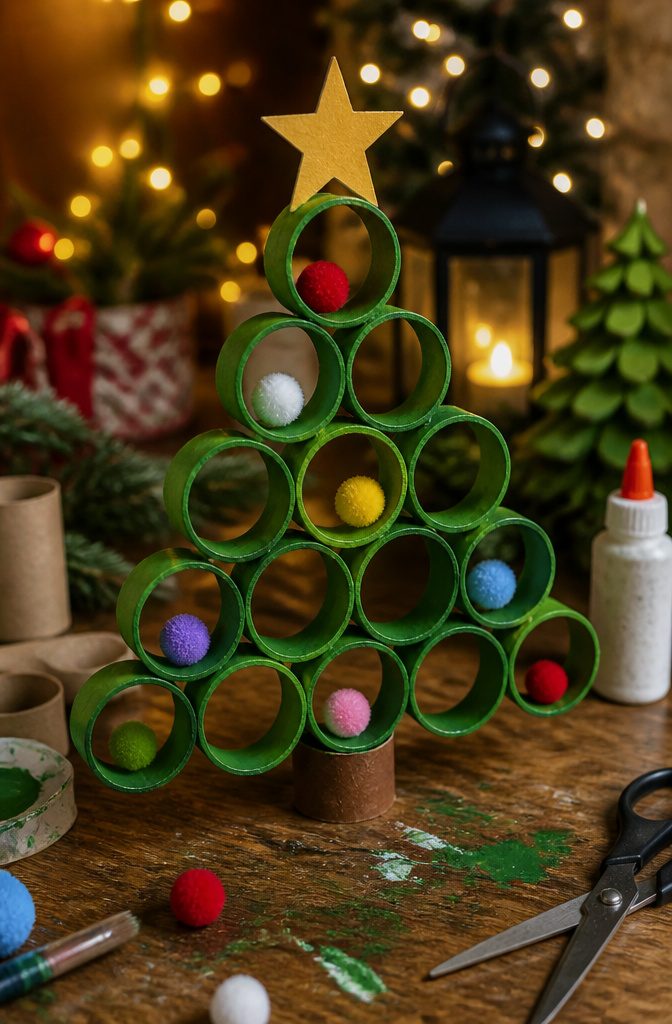
The Christmas tree build starts with three or four empty rolls and a pair of scissors.
Cut each roll into rings about half an inch wide, paint them green with acrylics so the color doesn’t run if the finished piece gets damp, and let them dry.
Stack the rings into a triangle, widest row at the bottom, narrowing to a single ring at the top. Glue the layers as you go, or thread them onto a central skewer if the tree needs to travel.
A second version keeps one roll whole and fringes it with short cuts from one end.
The strips fan out into branches, and the roll stands on its own. Acrylic paint beats poster paint here, especially if the tree doubles as a napkin ring and might meet a wet glass.
Small pom-poms pressed into the fringe make ornaments. A paper star on top finishes either style.
The ring version sits flat on a shelf; the fringed one fits a windowsill. Both take under an afternoon, and both look better with slightly uneven cuts, so hand-trimming is actually a feature, not a flaw.

Large Pack in 3 Sizes: Comes with 90 PCS high-quality cardboard tubes for craft in three sizes 4 x 1.5 inch, 4 x 1.6 inch, and 4 x 1.7 inch. The ample quantity is ideal for group use and repeated projects, making crafting more efficient and convenient

Products include: 24 white craft rolls, long lasting value bundle, suitable quantity, perfect quality, small quantity packaging, ideal for handwork.

Package: 30 Sturdy Craft Rolls (3 Sizes) – 10 Packs of 1.38x3.98", 10 Packs of 1.57x3.98", 10 Packs of 1.69x3.98". Long-Lasting Value Bundle with THICK, Heavy Pressure-Resistant Cardboard Tubes – A Durable Upgrade From Flimsy Standard Toilet Paper Roll Tubes.
5. Toilet Paper Roll Nutcracker
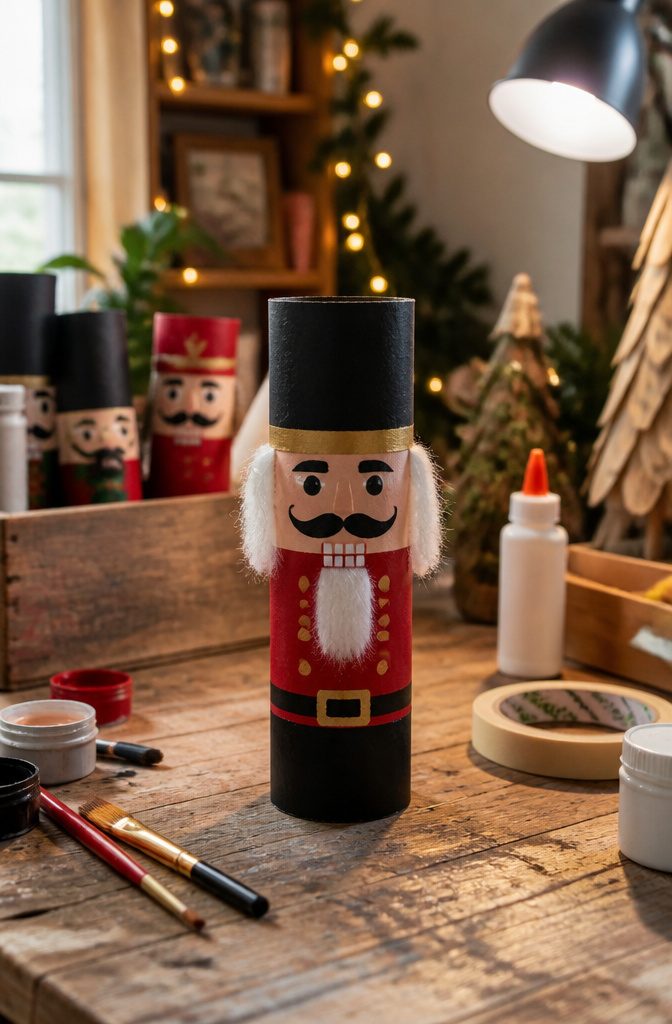
A nutcracker is where the toilet paper roll stops looking like trash and starts looking like a thing.
The trick is symmetry from the first coat of paint, because lopsided shoulders or a crooked belt line will read as sloppy in a way a snowman forgives.
I paint the roll in two bright blocks, usually red on bottom and black on top, with a thin gold band where they meet.
Two even coats cover the cardboard, and the second coat goes on only after the first is fully dry or the brush drags and leaves streaks.
The face goes on last: a thin mustache, a neat beard, and eyes that I place by measuring with the brush handle so they sit level.
Hair is the fiddly part. I have tried yarn, which looks richer but needs glue dots every quarter inch to lie flat, and folded paper, which is faster and keeps its shape.
Either way, the hairline has to frame the face evenly or the whole figure tilts visually.
A paper hat, rolled into a cylinder and topped with a painted pom, finishes him. The brim should overhang just enough to cast a shadow on the forehead; too wide and he looks like a lampshade.

35% Wool/65% Rayon - Made in USA
VALUE PACK: Our package includes 40 pieces of 4"x4", 10 pieces of 4"x6" and 10 pieces of 8"x12" felt sheets .The colored felt is a creative material for DIY enthusiasts and craftsmen. Each felt sheet in our set is made of 1mm thick nonwoven material, which is durable and long-lasting.

35% Wool/65% Rayon - Made in USA
6. Toilet Paper Roll Unicorn
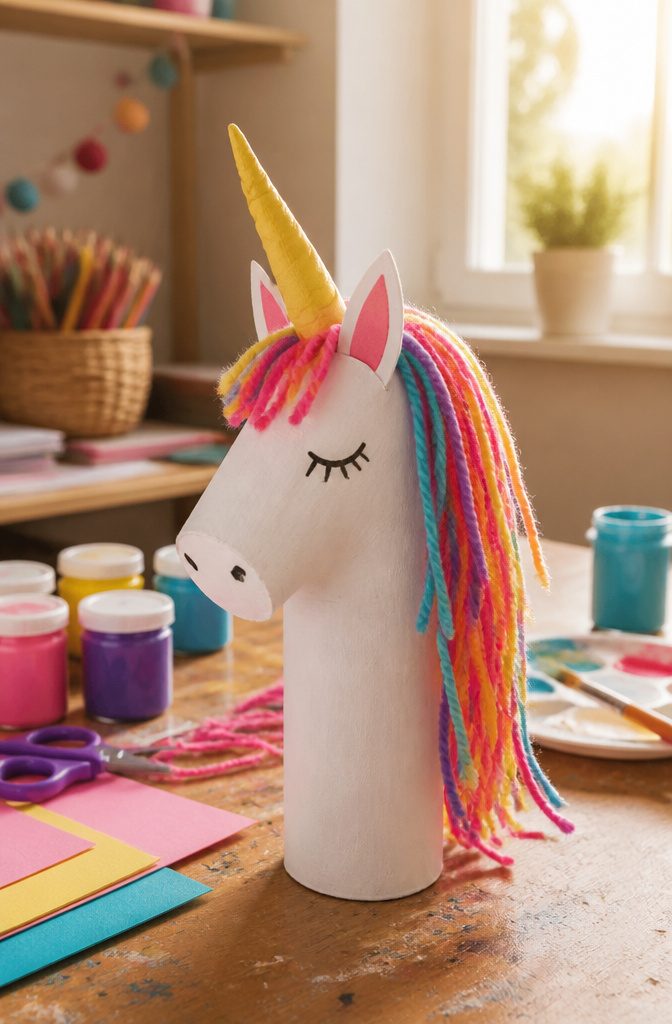
White paint covers the roll first, and the drying time is what stretches this project past the others in the list.
A paper horn gets twisted tight from a triangle of colored stock, the point curling into that spiral you see in every kid’s drawing of the animal.
Ears are just smaller triangles, glued flat to the top rim. The mane is where the yarn comes in: snip six-inch lengths in two or three pastels, loop them along the back with glue so they hang like fringe.
The horn unravels if the paper is too lightweight, so cardstock beats construction paper here.
This one asks for more shopping than most of these crafts.
Paint, colored paper, yarn, plus glue and scissors, and none of it is optional. The payoff is a finished piece that actually looks like what it claims to be, which is rarer in toilet-paper-roll work than the Pinterest photos suggest.

100 Pack Value Set for Craft Projects:Includes 100 sturdy cardboard tubes, ideal for DIY crafts, classroom activities, kids art projects, holiday decorations and group crafting needs

100 Pack Value Set for Craft Projects:Includes 100 sturdy cardboard tubes, ideal for DIY crafts, classroom activities, kids art projects, holiday decorations and group crafting needs

Rich Amount to Use: the package will bring you 50 pieces of craft tubes, ample in quantity, very useful for your crafting; The quantity is sufficient for you to use, and can easily meet your share and other requirements
7. Toilet Paper Roll Monsters
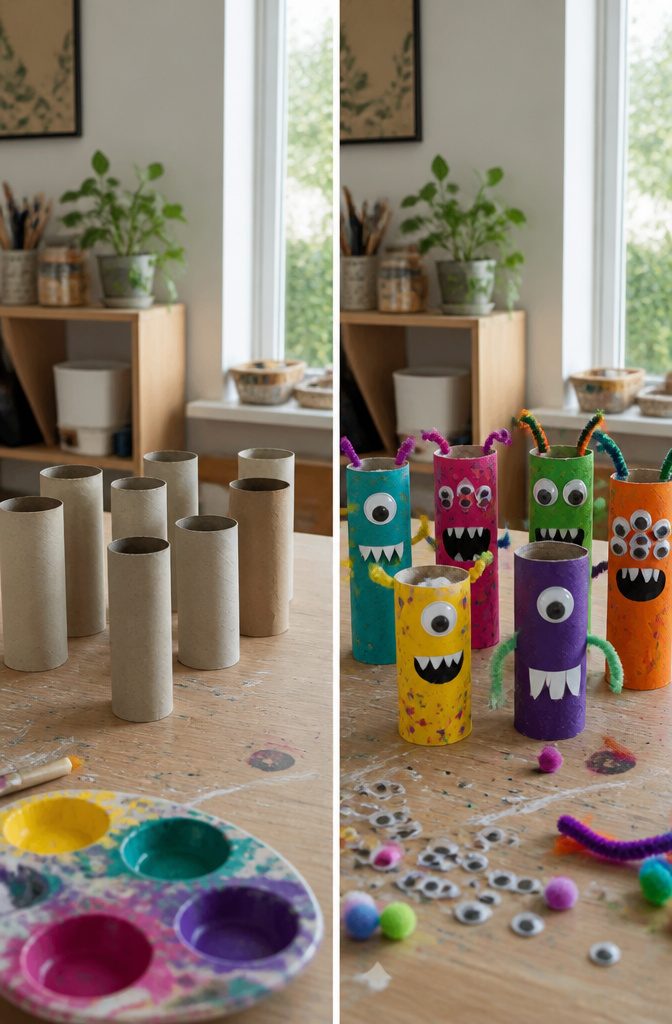
A toilet paper roll monster starts with the same cylinder every time and ends up looking like whatever a kid decides scary means that afternoon. Paint works.
Covering the roll in scraps of paper works too. Lauren Nielsen’s spray-painted versions turned out detailed enough to post, but hand-painting gets the same result without the mess of tarps and backyard setup.
Googly eyes are the fastest way to make a creature readable, though drawn eyes keep the project moving when the craft drawer is empty.
Pipe cleaners or folded paper strips become arms, legs, or antennae. Teeth, horns, extra eyes, and lopsided mouths all fit somewhere on the tube, and the open ends of the roll can turn into a mouth or stay plain.
The project survives on variety, not precision. One kid might build a single-eyed blob with three paper legs; another stacks two rolls for height and adds foil teeth.
Let the kid direct the design and the monster actually looks like something they would draw in a notebook, which is the whole point.

The softness and strength you already love with the heavenly scent of fresh linen on the tube!

The softness and strength you already love with the heavenly scent of fresh lavender on the tube!

Great Value Set: You will receive 70 pack craft paper tubes, with a plentiful quantity to easily meet your various crafting needs. Additionally, we guarantee a 30-day free exchange/return policy. Feel free to contact us if you have any questions.
8. Toilet Paper Roll Race Car
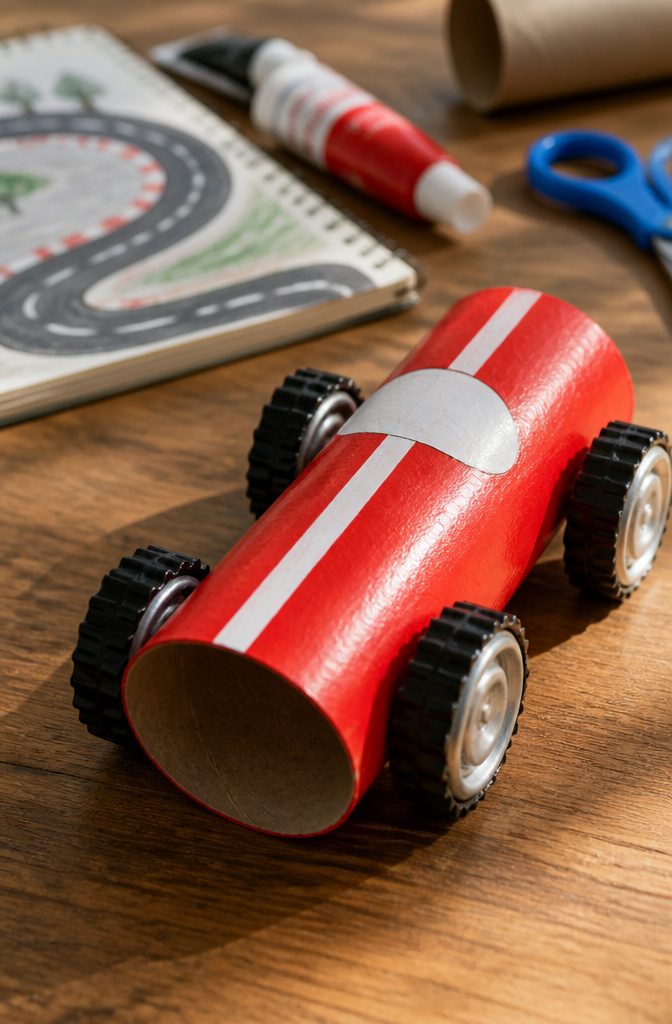
Paint the roll whatever color reads as fast to you.
I went with red, which felt obvious until my daughter picked neon orange and hers looked faster standing still. Cut the cockpit opening before you paint, or the wet edges smudge against your fingers while you work.
A slit across the top third and a little oval carved out with scissors does it; nothing fancy, the driver is imaginary anyway.
For wheels, the sources mention pouch caps or lids, and that range is about right.
I had bottle caps on hand, four of the same size, which matters more than you’d think. Two straws run through the roll for axles, or skewers if you want something stiffer.
The straws bowed slightly under the weight of metal caps, so mine listed to the left and needed a second straw doubled inside the first to track straight.
Paper wheels would have rolled truer, lighter, but the caps gave it the satisfying clatter a six-year-old expects from a car. Pick your tradeoff: speed down a ramp, or dignity on carpet.
9. Toilet Paper Roll Kazoo
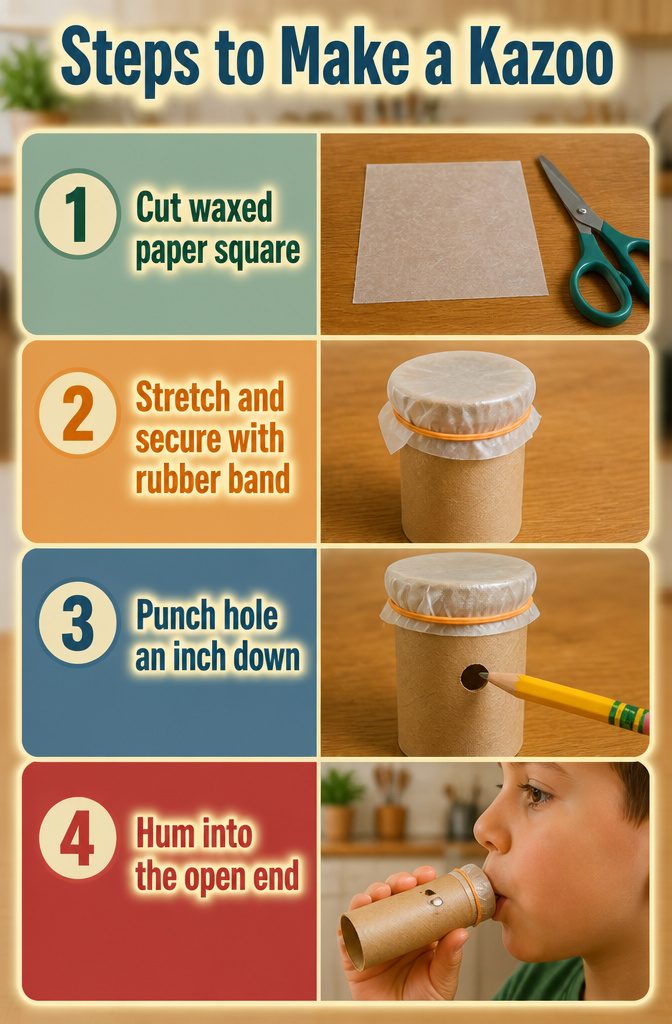
Cut a small square of waxed paper, stretch it tight across one end of a toilet paper roll, and hold it with a rubber band.
The tighter the paper, the better the buzz. Punch a hole in the side with a pencil or the tip of a scissors, about an inch down from the open end.
Hum into the open end, do not blow. I tried blowing first, and the paper just flutters and goes dead.
A steady hum makes the waxed paper vibrate, which turns the roll into a working kazoo. The sound is surprisingly loud once you find the right pitch, somewhere in your lower register.
If the buzz is weak, the paper is probably too loose or the hole is too large. A second rubber band can help, or a fresh piece of waxed paper if the first one tore.
This one takes under five minutes to assemble and another five to figure out the hum, after which my kitchen sounded like a one-person marching band for the better part of an afternoon.

The original and industry leading instant papier mache mix; just add water, no paper strip cutting or adding messy paste; beginner friendly with exceptionally professional results, sustainably sourced and made from 100% recycled paper

Bulk Pack with 3 Sizes: Includes 135 PCS high-quality cardboard tubes for craft in three sizes 4 x 1.5 inch, 4 x 1.6 inch, and 4 x 1.7 inch. The ample quantity is ideal for group use and repeated projects, making crafting more efficient and flexible
Products include: 32 white craft rolls, long lasting value bundle, suitable quantity, perfect quality, small quantity packaging, ideal for handwork.
10. Toilet Paper Roll Cactus
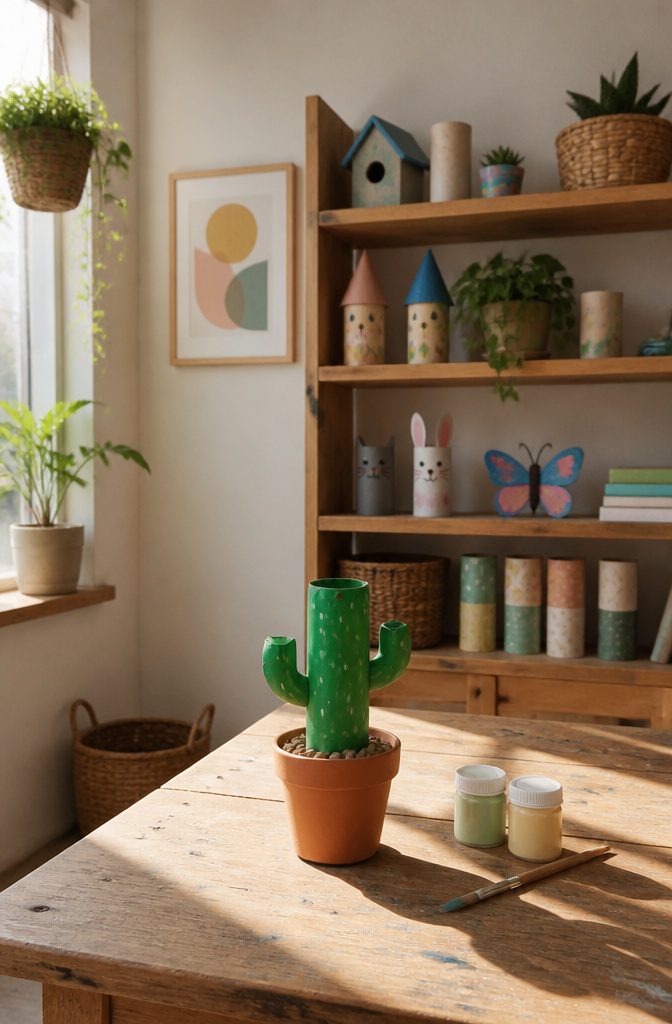
The toilet paper roll cactus lands somewhere between folk art and shelf filler, which is exactly why it works.
Paint the whole cylinder green, then cut vertical slits down from one end, stopping about halfway. Those strips fold outward into arms, and the shorter you cut them, the stubbier your plant looks.
A terra-cotta pot weighted with pebbles or a lump of clay keeps it from tipping, and a few more stones pressed around the base hide the mechanics.
I like this one as a year-round piece rather than something seasonal.
It does not pretend to be realistic, which saves you from overworking the details. A quick pass with a second, lighter green on the ridges, or nothing at all, both read as intentional.
The finished cactus stays where you put it, collects no dust on leaves it does not have, and survives the windowsill in January when actual succulents sulk.
Keep the slit depth consistent or the arms splay at odd angles and the whole thing looks like it is trying to escape the pot.

40PCS 8X12INCHES FELT FABRIC SHEETS. HTVRONT felt sheets for crafts come with 40 felt sheets in 38 assorted colors. They are A4 - 8 x 12inches(20 x 30cm) in size, thick 0.04inches (1.0mm). Our craft felt sheets are good for many craft projects and sewing handmade items
【Multiple Size】Available in a variety of sizes and hardness options (Stiff/Soft). Ideal for crafts, home decor, and DIY projects, these versatile sheets adapt seamlessly to your creative and practical needs.

Package Included: This Halloween sailor costume accessories include 1 sailor hat, 1 black eye mask, 1 blue scarf, 1 pair of gloves and 1 pair of socks. Wear this Halloween sailor costume at a party and you will stand out from the crowd. Pair it with a red top and black shorts to show your style.
11. Toilet Paper Roll Gift Boxes
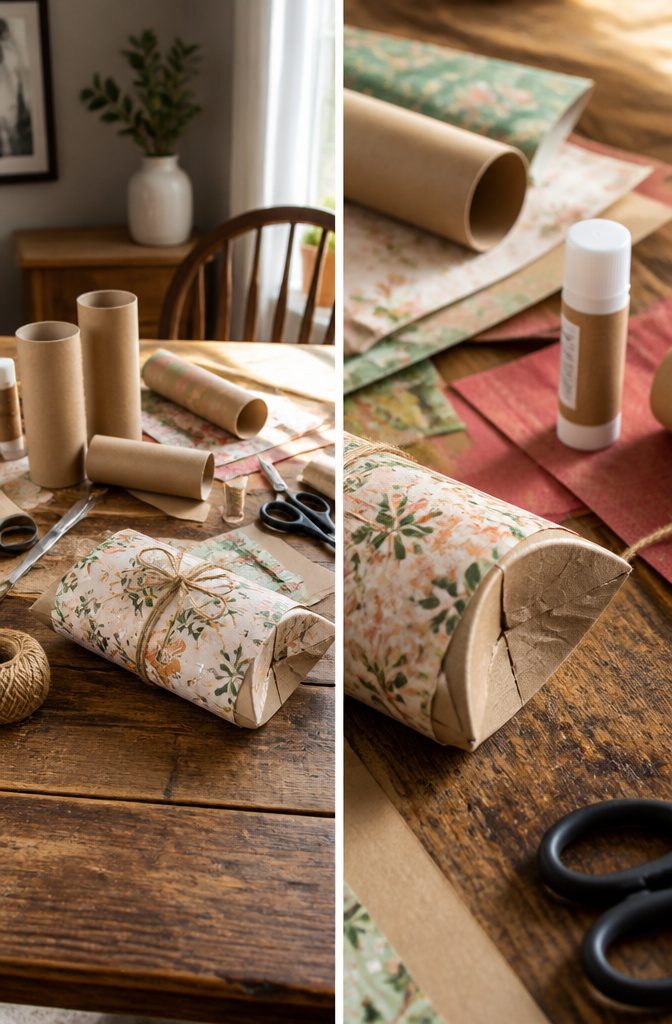
Flatten a toilet paper roll with your palm so it becomes a narrow oval, then pinch both ends inward to make four small flaps.
Fold those flaps like you are closing a cardboard box, and the roll turns into a little cylinder with tucked ends.
Decorative paper glued around the outside hides the cardboard completely, and a piece of twine or ribbon wrapped twice around the middle finishes it.
A 4-inch roll holds about three foil-wrapped chocolates, a pair of stud earrings, or a gift card slipped in diagonally.
Anything bulkier than that and the ends refuse to stay folded. I have made these for desk-drawer surprises, and the size limit is real: once I tried a chunky beaded bracelet and the flaps kept popping back open.
The cardboard needs to stay slightly curved for the folded ends to hold tension.
Crease it too sharply when you flatten it, and you will need a dab of glue to keep the box closed. That is not a disaster, but it slows the project down.
12. Toilet Paper Roll Advent Calendar
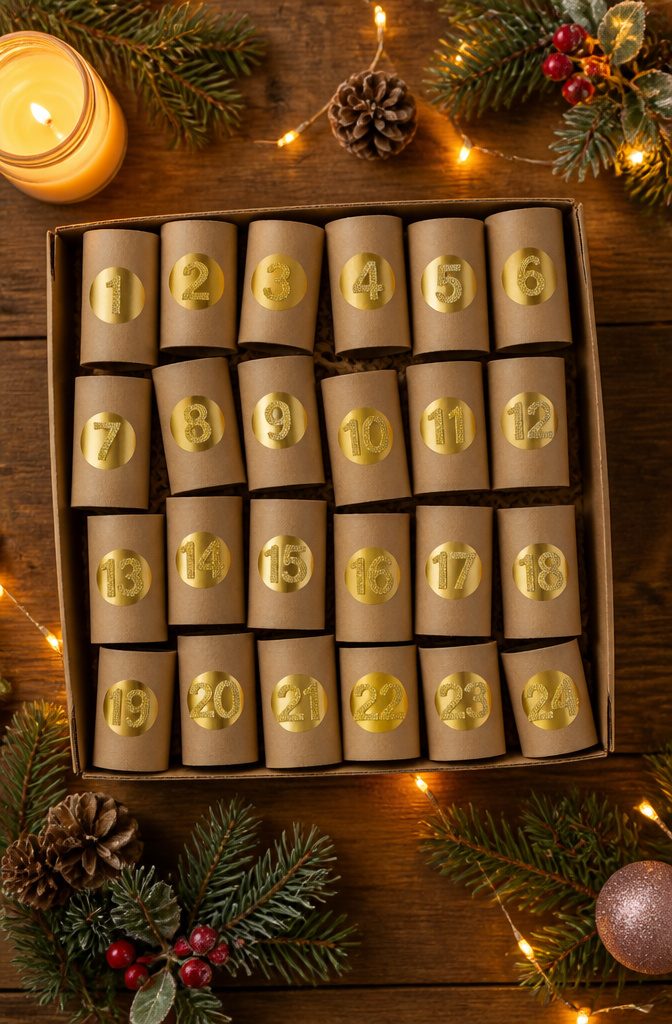
Twenty-four toilet paper rolls, flattened and creased into little pockets, turn into an advent calendar that looks more considered than it has any right to be.
I number mine with a gold paint pen, fill each with a chocolate or a folded note, and stack them in a shallow cardboard box until hanging day so the treats don’t scatter across my desk.
The whole set takes maybe two hours to assemble, not counting paint dry time, and strung in a grid it reads as intentional rather than recycled.
A single roll hung as a garland works too, but the grid is what makes it feel finished.
Never toss a toilet paper roll in the trash again. These creative crafts are a fun and easy way to make the most out of this household item.
That line is the whole premise: the rolls are already in your house, the project costs nearly nothing, and the result still looks like you planned it.
13. Toilet Paper Roll Confetti Poppers
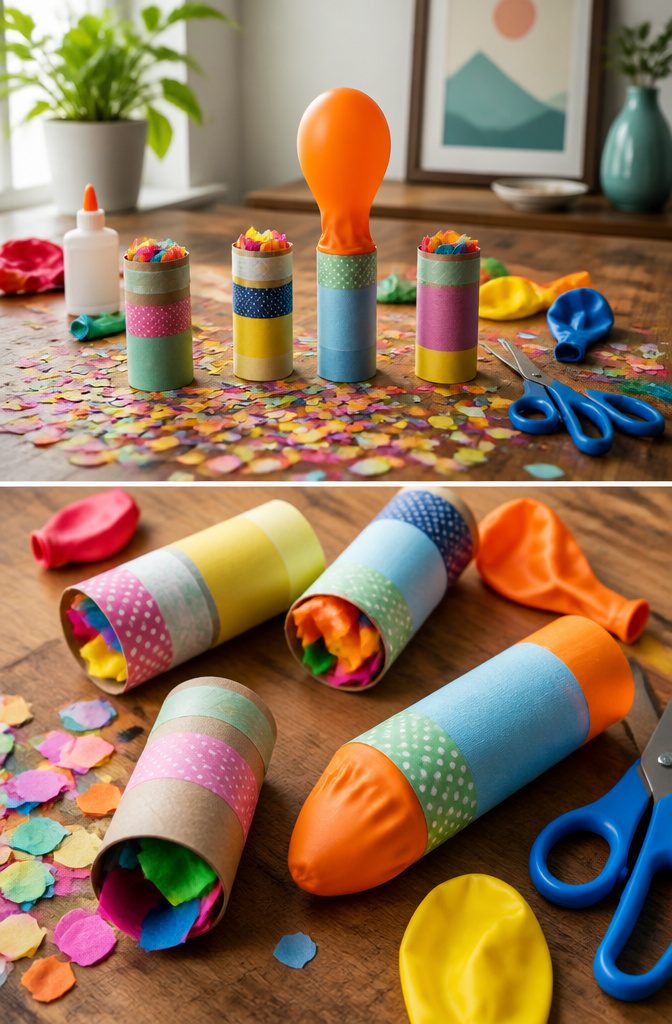
- Stretch a balloon over one end of a toilet paper roll and tape it tight. The balloon neck becomes your trigger.
- Pour confetti into the open end, then pull back on the balloon knot and release. The pop sends paper flying.
- Loose confetti is vacuum-bait. The scraps scatter, roll under furniture, and cling to socks. Tissue paper cut into quarter-inch squares works better, or punch small circles from lightweight paper so the pieces flutter instead of drifting everywhere.
- For less mess, a single sheet of crepe paper twisted into a tail launches cleanly and lands in one piece. The balloon still snaps satisfyingly, and cleanup means picking up one string instead of a hundred flecks.
14. Toilet Paper Roll Animals
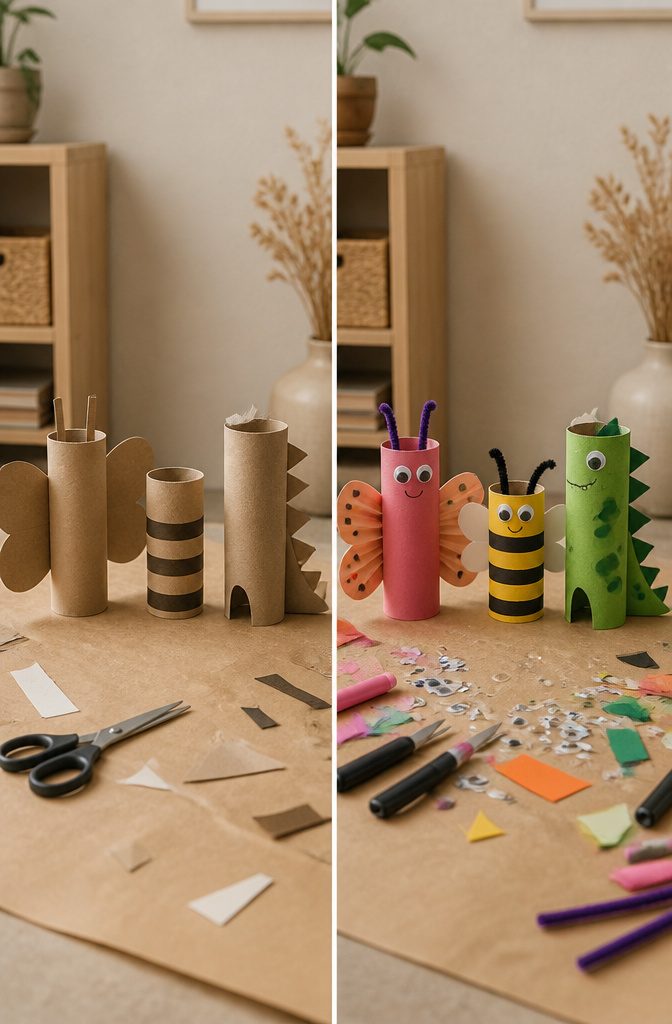
Toilet paper roll animals are the first thing most people picture when they think of things to make with toilet paper rolls, and the form has more range than the preschool staple it gets labeled.
A bee gets its stripes from glued paper rings and tissue wings that flutter when you blow on them. Butterflies need accordion-folded wings that spring open, which means scoring the fold lines first or the paper cracks.
Dinosaurs carry a row of spines cut straight into the roll itself, and the trick is keeping those triangles even so the creature stands upright instead of rocking on a lopsided back.
The bee gave me the most trouble. The wings sit high and the roll is light, so the center of gravity shifts with every glue joint.
I ended up weighting the base with a penny hidden inside, which is not in most tutorials but keeps the thing from tipping if someone breathes near it.
The butterfly folds faster than it looks once the creases are set. The dinosaur spine demands scissors sharp enough to snip cardboard clean, or the ridges tear and the silhouette collapses into fuzz.
A whole menagerie spreads from there: elephant trunks curled from the same cardboard, hedgehogs with snipped fringe, lions with yarn manes dense enough to hide the tube entirely. Pair the building with an animal movie and the afternoon fills itself.
What I Keep On Hand
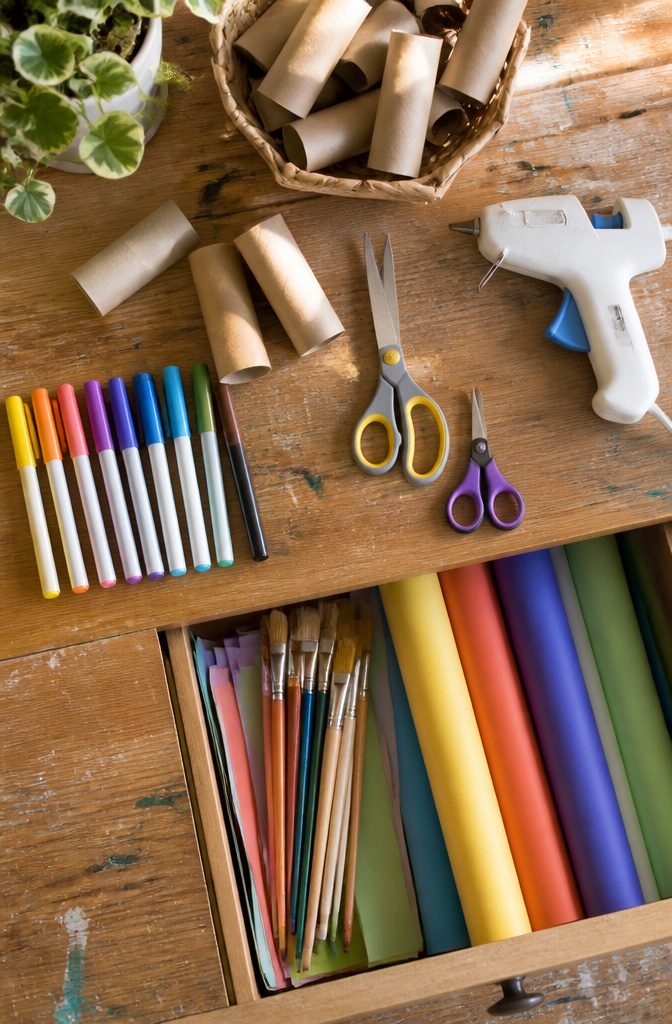
Toilet paper rolls are only half the battle.
After a dozen of these projects, the glue gun lives on the top shelf of my craft drawer, not buried under yarn, because nothing else bonds yarn manes or googly eyes fast enough to outpace a six-year-old’s attention span.
White glue still handles paper and paint layers where speed does not matter.
I keep two pairs of scissors, one for paper and one that I have resigned to cutting cardboard, plus brushes cheap enough that acrylic paint stiffening the bristles is not a tragedy.
Colored paper, markers, and yarn cover most of the decoration that paint does not.
String substitutes for yarn when the yarn runs out, though it frays more and needs a bigger glue dab to stay put. Googly eyes are a luxury I forget to restock; drawn marker eyes work fine and sometimes look funnier.
Glitter foam sits untouched on the same principle, too messy for the payoff. A project runs thirty minutes to an hour if the materials are already out, so the real prep is keeping them within arm’s reach.
Working With Kids
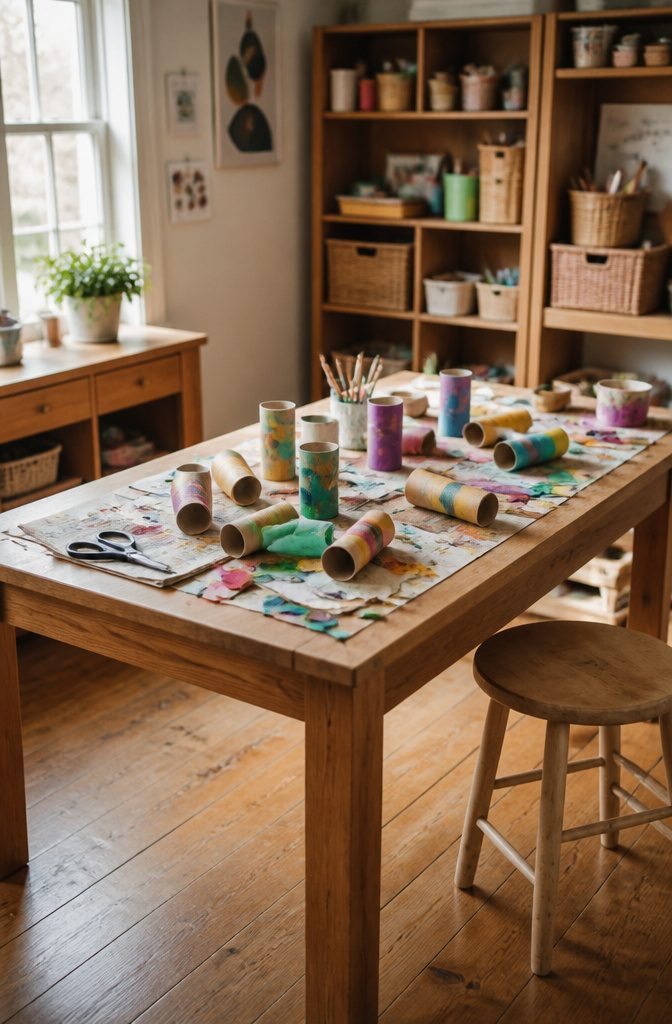
Projects with kids under ten shift fast between hands-on help and standing back.
The cutting and gluing need an adult nearby, especially when scissors first enter the picture, but the decorating is where a six-year-old will take the tube and run.
That focus window runs about twenty to thirty minutes before the roll becomes a telescope or a drum, and that pivot point is the craft itself finishing; the owl becomes something else, and that is fine.
Fine motor work shows up in the stacking builds, threading pieces onto a stick form, or slotting tubes together like blocks. Imaginative play takes over once the structure stands and the child decides it is a rocket ship instead.
The recyclables angle lands naturally here; a cardboard tube was already trash in their eyes, so remaking it carries its own small lesson without a lecture.
Supervision sits in the room, not hovering over every motion. Paint on the table, glue on sleeves, bits of paper on the floor: that mess is the cost of the twenty minutes of absorbed work that came before it.
A damp cloth and a dustpan close it out. The goal is the child at the table, not the table staying clean.
Why I Save the Rolls
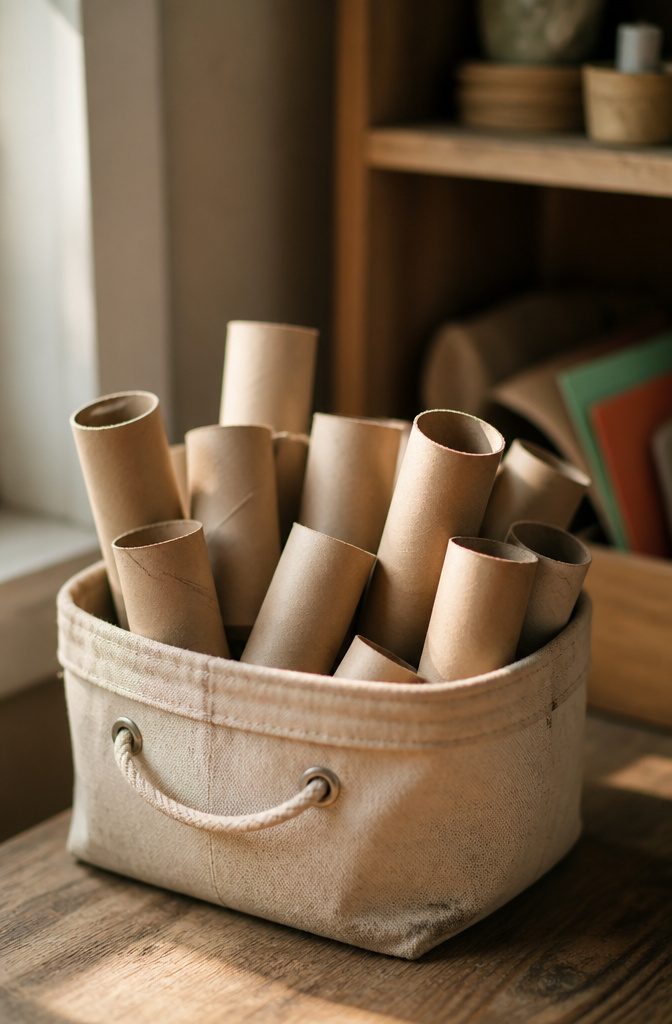
A household of three goes through roughly one roll a day, which means a hundred empty tubes pile up in a year.
Those hundred rolls weigh almost nothing, but stacked they take up about the same space as a medium moving box. I keep a small bin under the bathroom sink and toss new empties in as the week goes on.
Wet rolls from the bathroom trash or any tube with thick adhesive labels go straight to recycling instead.
The damp ones mold before I get to a project, and glued paper shreds under scissors. Everything else, the clean cardboard with its faint spiral seam, gets saved.
Whether this measurably shrinks my footprint depends on how you count. One saved roll is roughly half an ounce of cardboard, so a year’s collection might offset a single shipped package’s worth of filler.
The real payoff is having free material ready when a Saturday afternoon opens up. No store run, no spending, just tubes already sitting there waiting to become something else.
Seasonal Timing
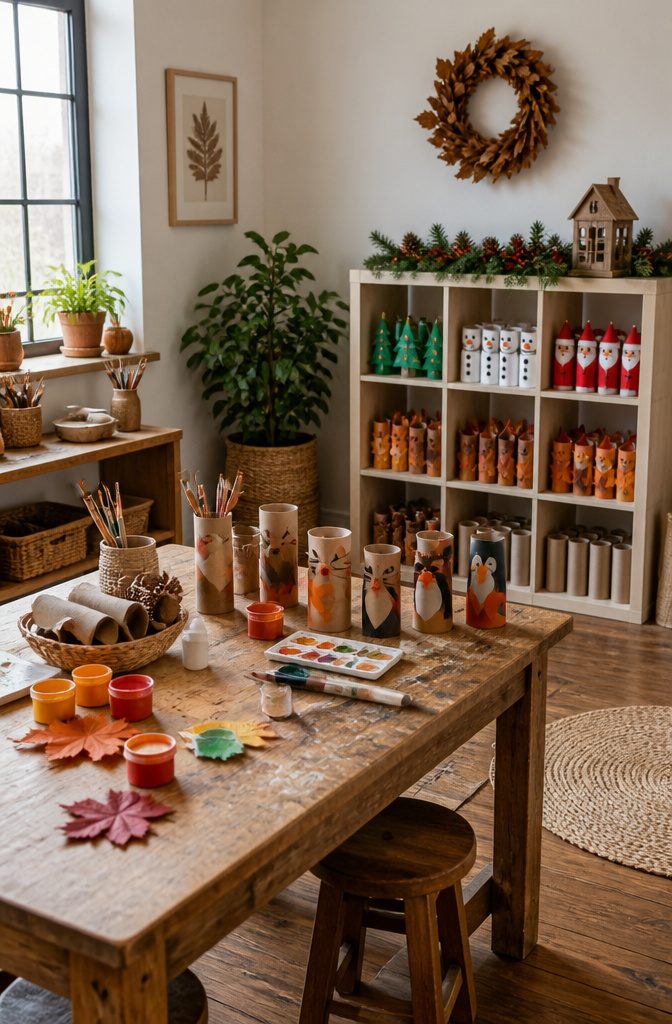
December projects lean into the ones that need a warm, dry house to finish properly. Paint on cardboard curls if the humidity spikes, so the Advent calendar gets started the first week of November at the latest.
That leaves time for glue to set between tiers and for paint touch-ups when the white turns out more cream than snow.
Summer builds are simpler: the race car, the kazoo, anything that can be assembled fast and carried outside before the mess spreads across the kitchen table.
Halloween and Easter possibilities sit in a liminal space. The monster faces and egg holders are cute in theory, but they compete with actual candy and actual egg dye for attention.
I make them only when a niece or nephew is coming over that weekend; otherwise the raw rolls get tucked into a paper grocery bag on the top shelf of the hall closet, out of the dust and away from the dog.
That bag is the key. Flat storage warps the cardboard, so they stand on end, loose enough to breathe, tight enough that they do not unspool across the shelf every time I reach for the light bulbs behind them.
Frequently Asked Questions
What can I make with toilet paper rolls?
You can make snowmen, angels, bird feeders, Christmas trees, nutcrackers, unicorns, monsters, race cars, kazoos, cactuses, gift boxes, advent calendars, confetti poppers, and animals like bees, butterflies, and dinosaurs.
The rolls also work for seasonal decorations and simple toys that kids can assemble in under an hour.
Are toilet paper roll crafts suitable for kids?
Yes, most of these projects are built for kids to handle with minimal help.
Younger children manage the decorating and simple cutting, while adults step in for sharper scissors or hot glue. The attention window runs about twenty to thirty minutes, which matches how long most of these builds take before they become toys.
How do you make a bird feeder out of a toilet paper roll?
Spread shortening across the outside of the roll, roll it in birdseed until fully coated, then thread string through the open center and knot both ends.
Hang it porch-side for window viewing or stick it on a branch deeper in the birds’ territory. The shortening needs to be thick enough that seeds embed and stay put through wind and pecking.
What materials do I need for toilet paper roll crafts?
The basics are toilet paper rolls, scissors, glue, and paint. A glue gun speeds up anything with yarn or googly eyes, while white glue works fine for paper layers where drying time does not matter.
Most projects also draw on colored paper, markers, yarn, string, and whatever decorative scraps are already in the drawer.





