
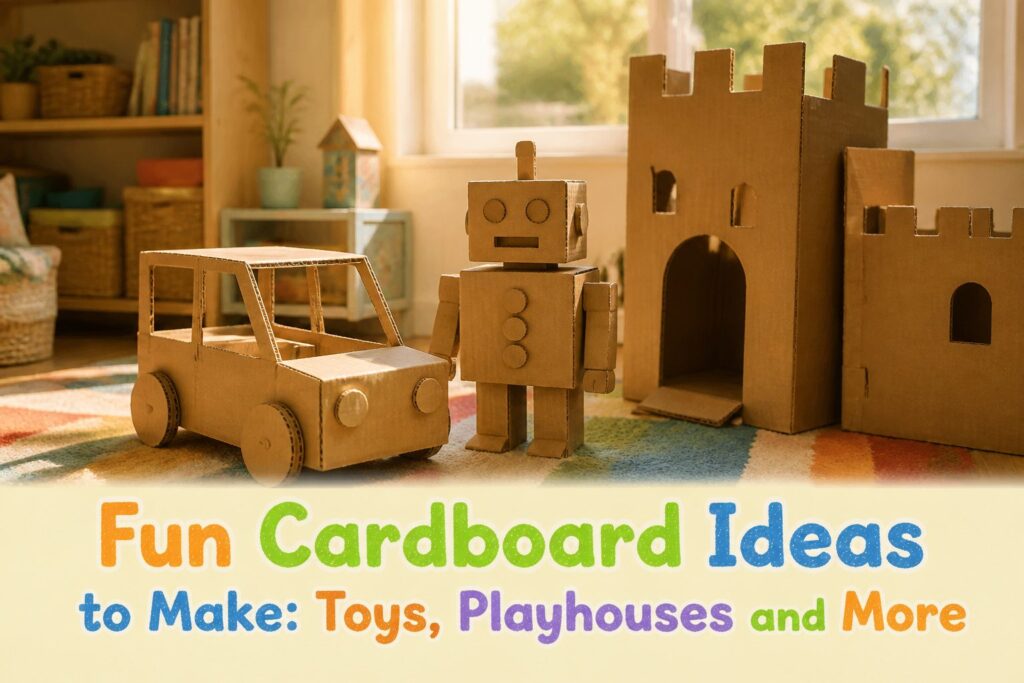
Projects here run from a 5-minute cash register to a castle with slotted walls, and the deciding factor is the box you already have.
A shoebox suits small builds like the schoolhouse, while a large shipping box suits anything a kid climbs into. Thin cereal-box cardboard cracks at folds, so corrugated needs a deeper score.
1. Noah’s Ark
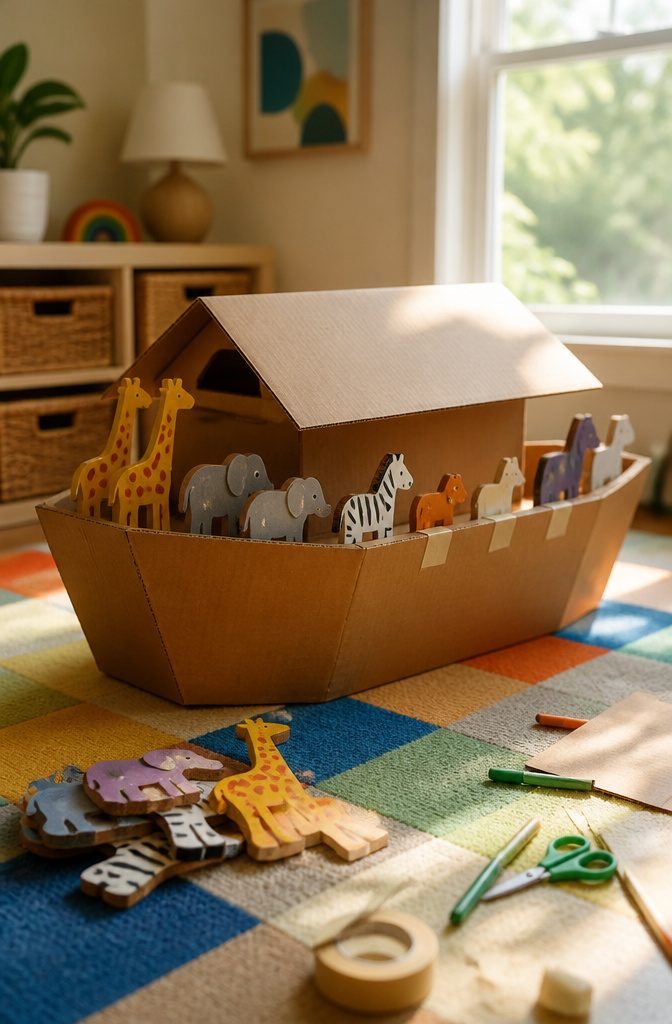
A shipping box makes the best hull because its flat sides and square corners already look like a boat to a kid.
Cut one long side down so the walls slope, or trim the top flaps into a pointed bow, then stand the box on its base. Leave the deck open so small hands can load animals in pairs.
For the roof, fold a piece of cardboard in half and set it over the middle as a ridge, like a tiny barn. Keep one end of the roof loose so the animals can still get inside.
Scraps handle the passengers.
Cut each animal as a flat shape with a folded foot tab, then make two of everything. Paint pairs to match, and tape tabs to the deck if the ark will be bumped around.
2. Shoebox Schoolhouse
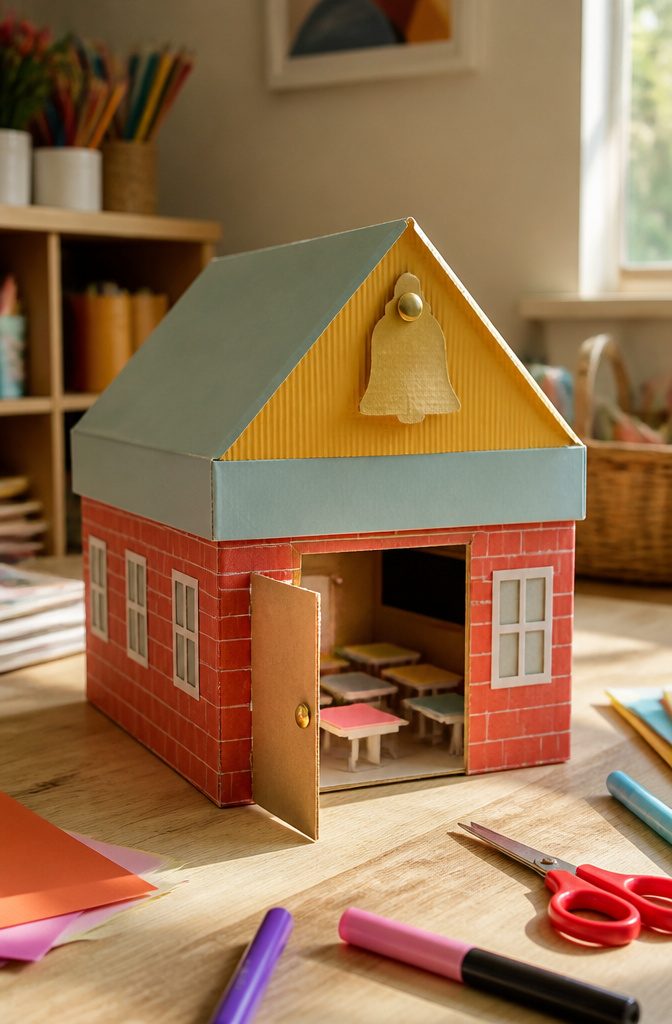
A shoebox already has the right bones for a schoolhouse: a long, low body with a lid that becomes the roof.
Stand the box on its long side and cut a peaked gable from a flattened cereal box, then tape it to the front so the roof pitches the way a real one does.
A small door cut on three sides swings open on a tape hinge, and kids will open it all afternoon.
For the bell, poke a paper fastener or a short loop of string through the peak and hang a bottle cap or a small jingle bead from it.
Glue the bell tower to the front edge, not the lid, so the lid still lifts off and the inside stays reachable for tiny desks and figures.
3. Cardboard Box TV
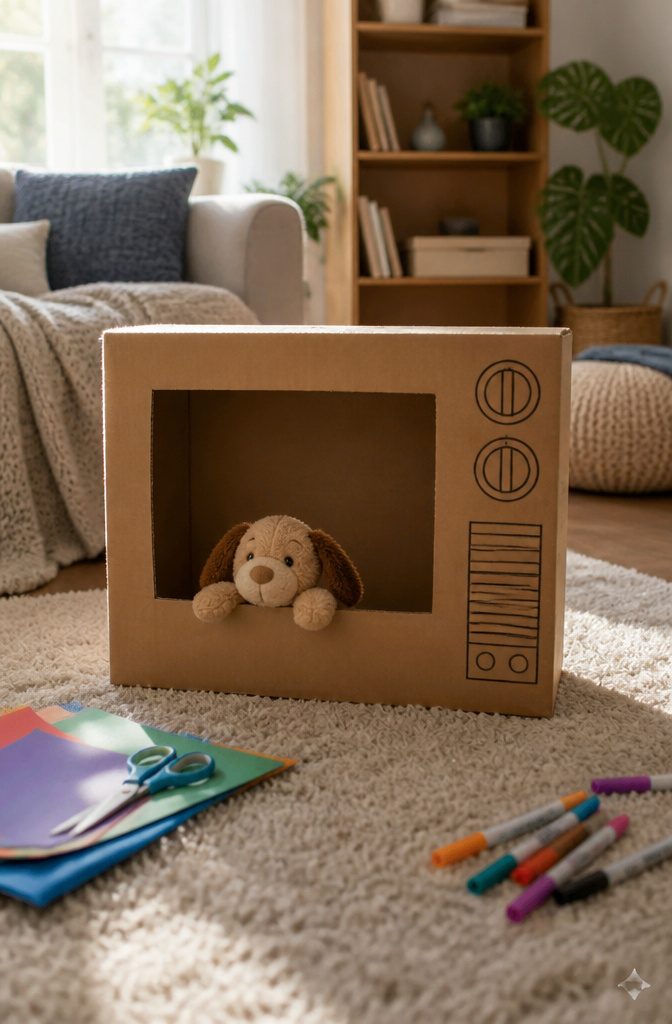
A large cardboard box makes the best TV frame because the box already has a back, so the "set" stands on its own.
Cut a rectangular screen out of one face, leaving a border of about a hand’s width, and the leftover frame looks like a real television.
Tape the cut edges if they feel flimsy, then draw knobs and a brand name with markers.
The show is the fun part. A child kneels behind the box, pokes their head or hands through the opening, and becomes the news anchor, cooking host or weather reporter.
Cut the screen low enough that a seated child can lean into it, since a tall opening forces them to stand and the act gets tiring fast.
Stuffed animals work as guest stars, and a sibling can hold a "remote" to change channels.
4. Monster Jaws
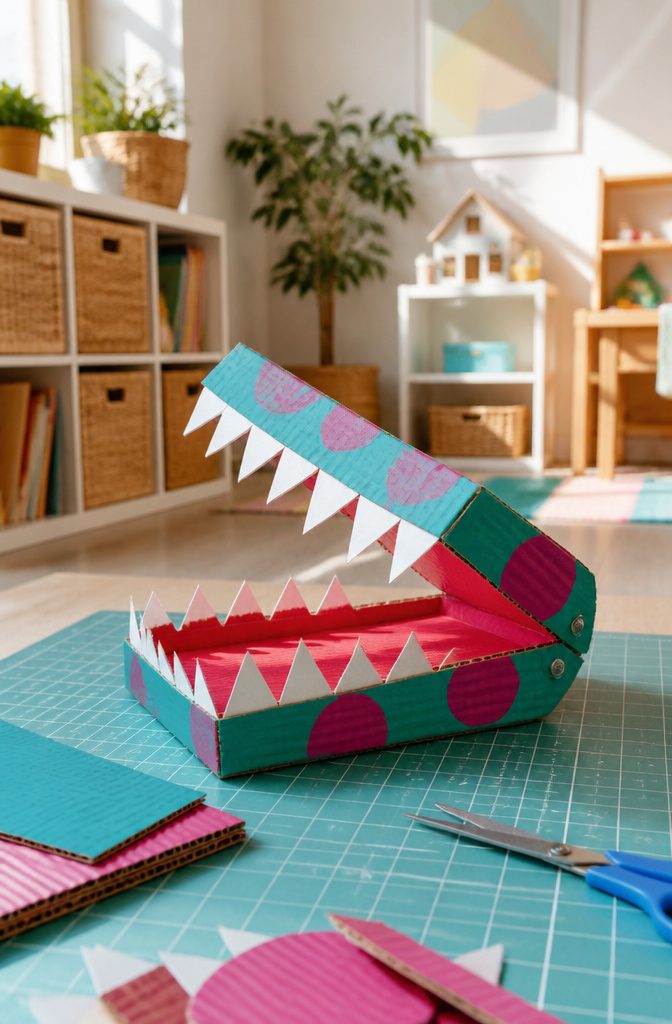
A snapping mouth works because of one fold.
Cut a strip of cardboard, score it down the middle with a butter knife or the back of a scissor blade, and bend it into a V. That V is the hinge, and it acts like a spring, so the jaws pop open when you let go.
Glue the upper and lower jaws to the two sides of the fold, and make sure the fold sits at the back of the mouth. Cereal-box cardboard folds cleanly; corrugated needs a deeper score or it cracks.
For teeth, cut triangles from white paper or thin cardboard and glue them along each jaw edge.
Stagger the top and bottom teeth so they slot between each other when the mouth shuts. I’d skip tape here, because it peels after a few dozen snaps.
5. Rocket
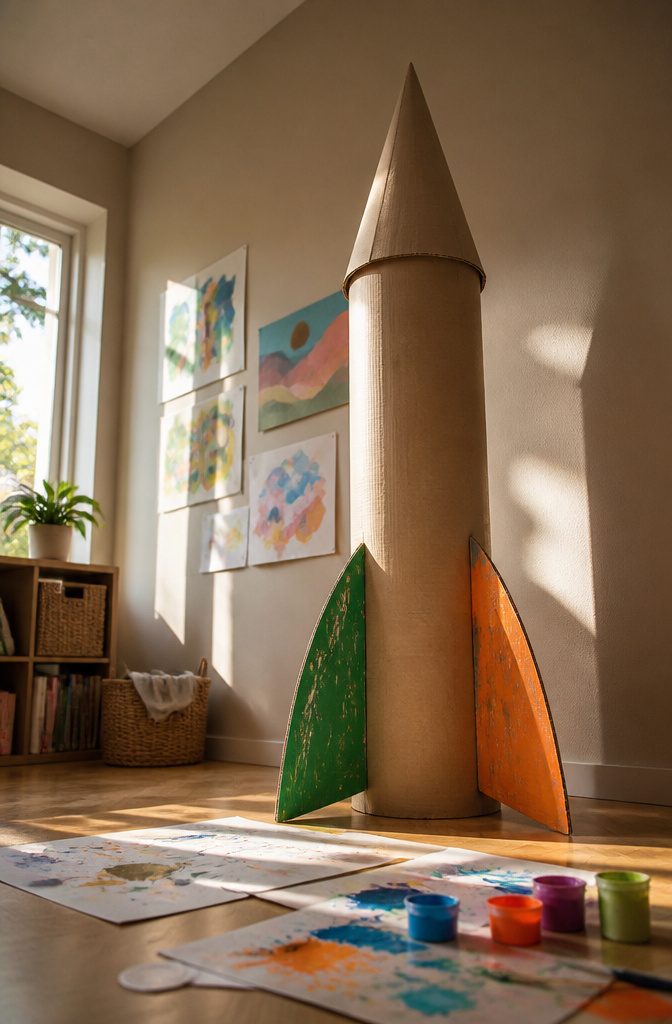
A big shipping box or a long mailing tube makes the body, and the choice sets the size.
A tube gives a slim rocket a child can hold and swoosh around the room. A large appliance-style box, stood on end with a doorway cut in the side, gives one the kid can climb inside.
For the nose cone, cut a half circle from cardboard or thin poster board, roll it into a cone, and tape it until it holds its shape.
Test the cone against the top of the body before you tape it down, then trim the base so it sits flush.
Cutting the fins is easier than it sounds: draw one triangle-ish fin on a scrap, trace it three times, and fold a tab along the straight edge of each. Glue or tape those tabs to the body.
I would skip fancy paint. Foil, silver paint or red construction paper windows do the job, and a kid can still decorate it themselves.
6. Mini Foosball Table
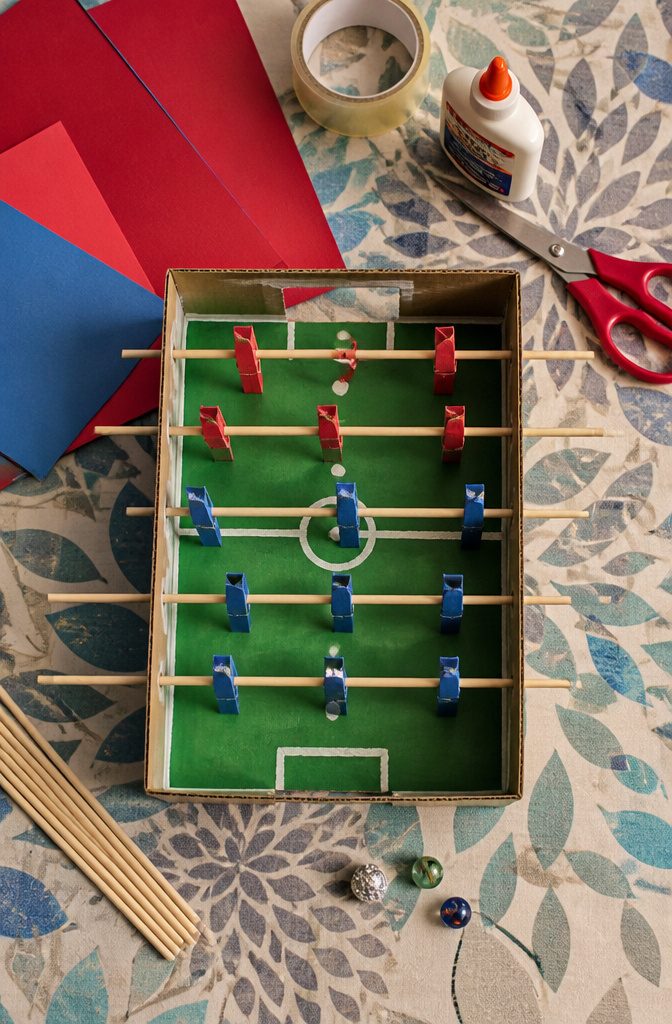
A shoebox-sized cardboard box makes a solid playing field, and a box with sides at least a few inches tall keeps the ball from flying off the table.
Line the floor with green paper or paint it, then draw a center line and a small circle. Cut a goal opening in each short end, low enough that a marble or a crumpled foil ball rolls straight through.
Rods are the part that decides whether it plays well.
Wooden skewers or dowels slide through holes poked in the long sides, and the holes on both walls must sit at the same height or the rods bind. Tape a cardboard strip to each rod as a handle.
Players are folded cardboard figures glued onto the rods. Cut them a bit narrower than the gap between rods so they never snag.
7. Doll Bed
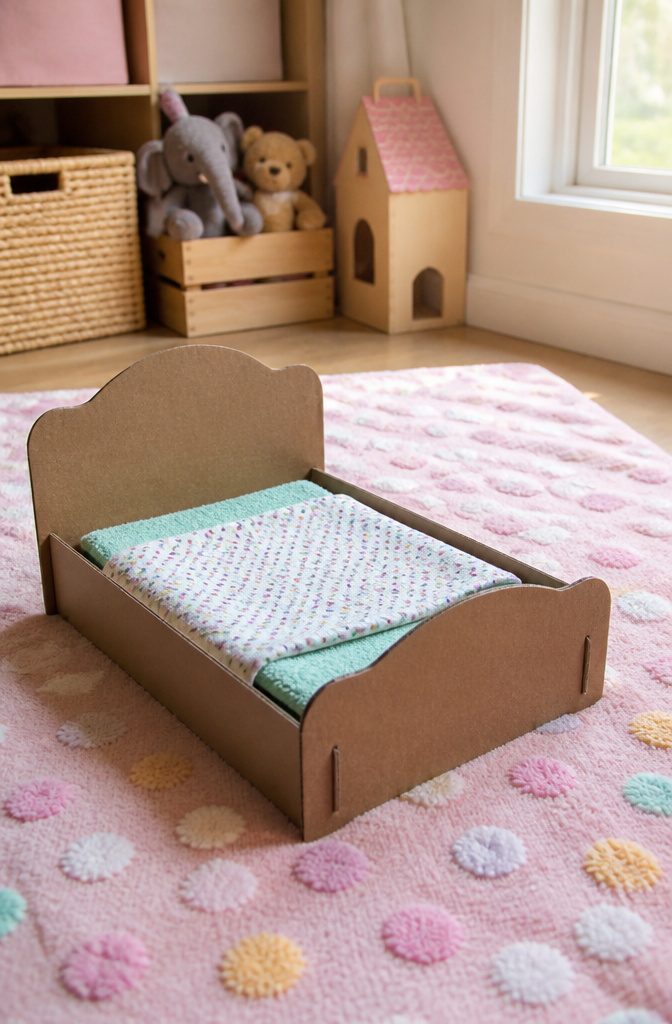
Measure the doll before you cut anything: lay her flat on a sheet of cardboard and trace around her, then add a couple of inches on every side.
A bed sized to the doll looks right and holds her; one sized to the box you happened to have usually doesn’t.
Cut the base from that tracing and glue strips along the long edges for the sides.
Make the headboard taller than the footboard, since a tall end is what makes it read as a bed. Cutting a shallow curve into the top of each end takes seconds and softens the look.
For bedding, a folded washcloth works as a mattress, and a scrap of fabric or a napkin makes a blanket. Tuck the mattress in snugly against the sides so it stays put when a child plays.
8. Toy Oven
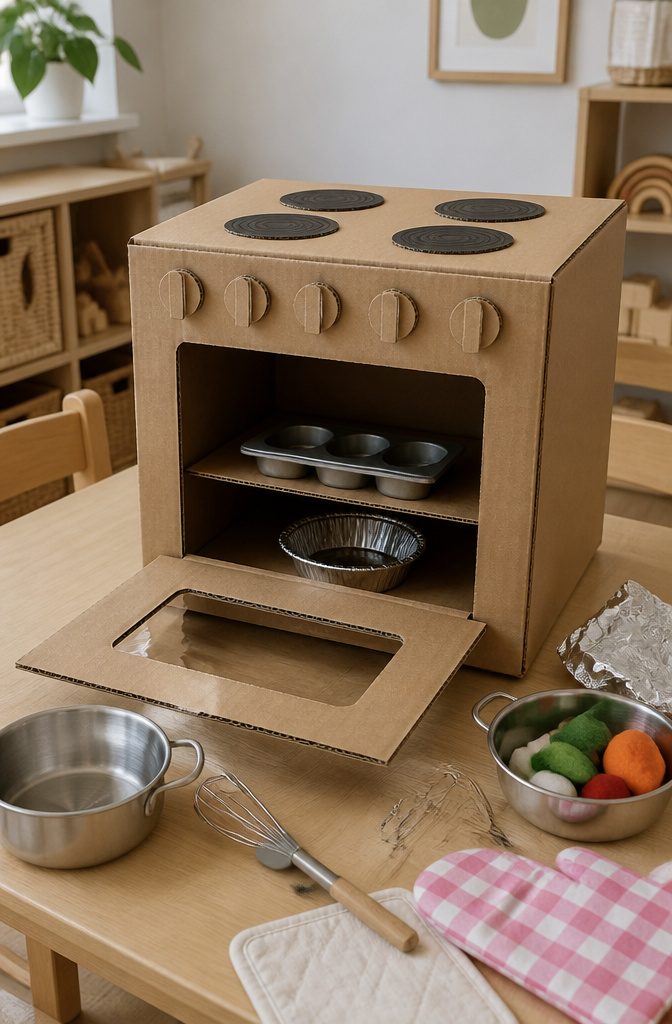
A medium box turned on its side makes the best oven body, because the open face becomes the door opening and the flat top gives you room for burners.
Cut the door on three sides and leave the fourth as a hinge, then score that fold line with a ruler and a dull pencil so it bends cleanly instead of tearing.
For knobs, I’d skip anything glued flat and use bottle caps or paper fasteners, which actually turn.
Burners can be black circles of paper or cardstock, and a small window cut into the door and backed with clear plastic from packaging lets kids watch the pretend cookies bake.
Reinforce the door edge with a second layer of cardboard, since that is the part small hands pull on hardest. Add a paper-towel-tube handle, a foil baking sheet, and muffin tins, and the oven is ready for the pretend kitchen.
9. Box Vehicles
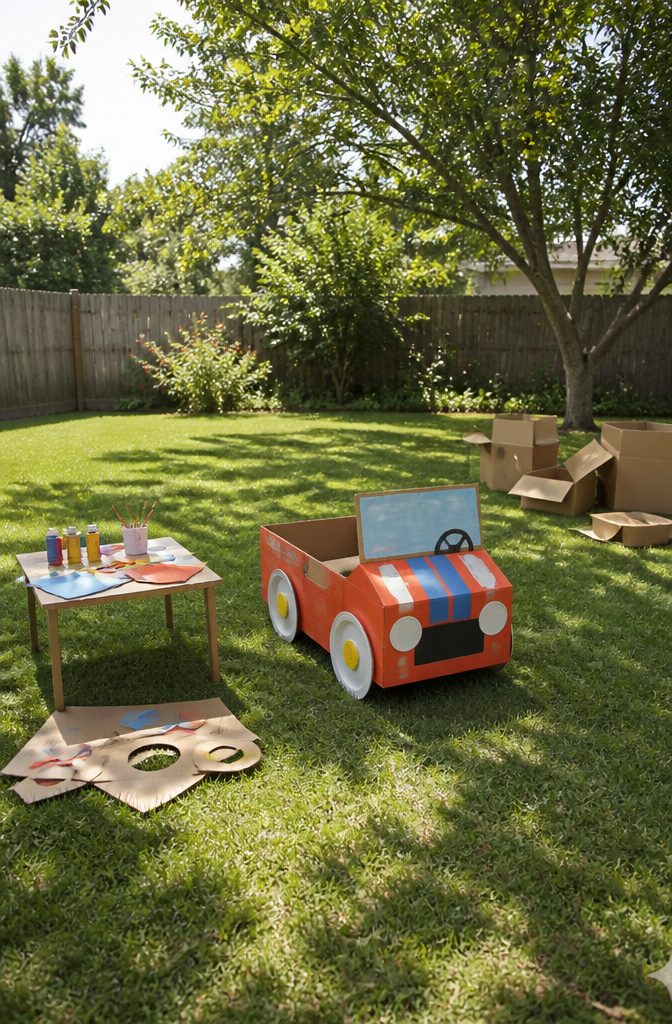
A large box already has the shape of a car, which is why cars, trucks and even an airplane are some of the easiest builds on the list.
Kids make cardboard cars over and over, so the first one rarely stays the only one.
Cut or fold the box so it reads as a body, then add the parts that sell it: paper plates or cut circles for wheels, a rectangle of cardboard for a windshield, a strip of foil for a bumper.
Ambulance, tractor and fire truck versions all start from the same box and change only through color and details.
For decorating, paint the whole box before you attach any parts. Big cardboard panels also work as an outdoor canvas in summer, so the driver can help paint in the yard.
A row of boxes lined up on the floor becomes a train, no cutting needed.
10. Interlocking Castle
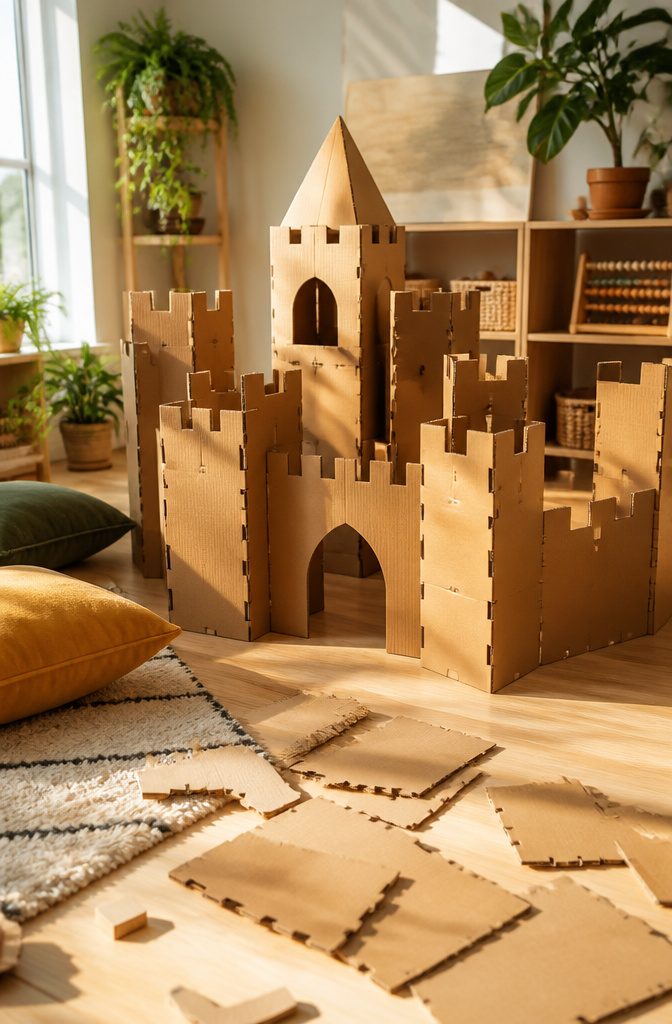
Slots are what make this castle work. Each wall piece gets a notch cut halfway up from the bottom, and its neighbor gets a matching notch halfway down from the top.
Slide them together and they lock at right angles, no glue or tape needed. Towers can be made the same way, as four narrow panels that slot into a square.
Cut the slots only as wide as the cardboard is thick, because a loose slot makes a wobbly wall.
If the fit is too snug, a few passes with scissors widen it. Corrugated board from shipping boxes holds an edge better than cereal-box cardboard, so I’d save the thin stuff for flags and banners.
The real advantage is that the whole castle flat-packs, so a kid can take it apart, stack the pieces, and rebuild it a different way tomorrow.
11. Horse Stable
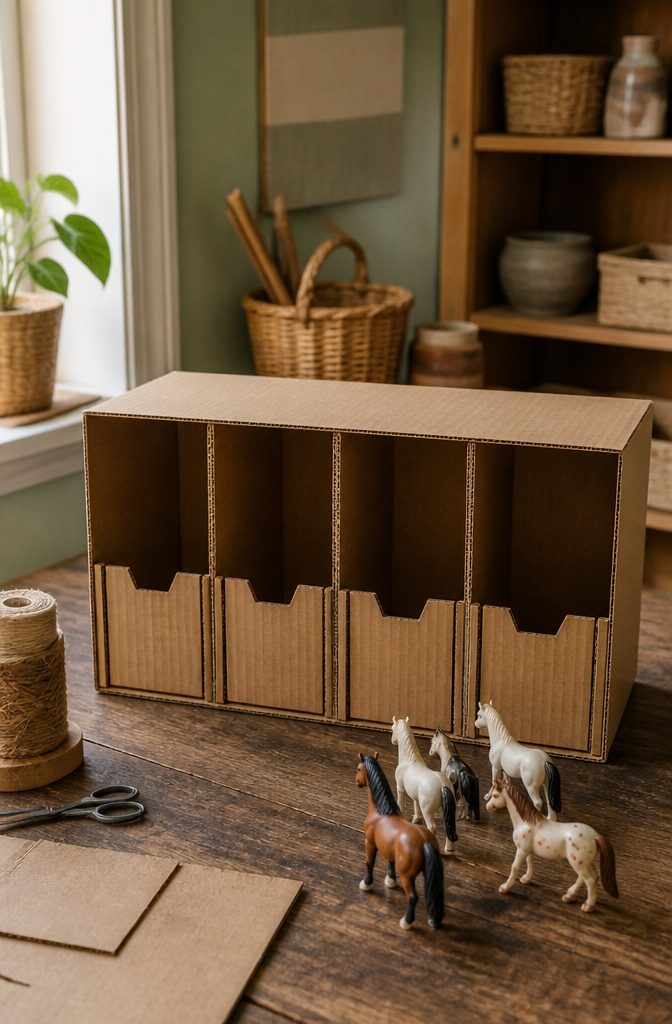
A shoebox-sized stable works best with a long box turned on its side, since the open face becomes a row of stalls with no cutting at all.
Slice dividers from flat cardboard and glue them in with tabs folded at the bottom edge, so each wall stands without tape showing. Space the stalls a little wider than your horse, because toy legs catch on tight walls.
For doors, cut three sides of a flap and leave the fourth as a hinge; score the hinge line lightly so the door swings without tearing. A brad or a scrap of tape makes a latch.
Fold one sheet of cardboard along the middle for a peaked roof, and glue it to the top edges so it overhangs the front. Corrugated ridges running left to right look like roof tiles once painted.
12. Trainville
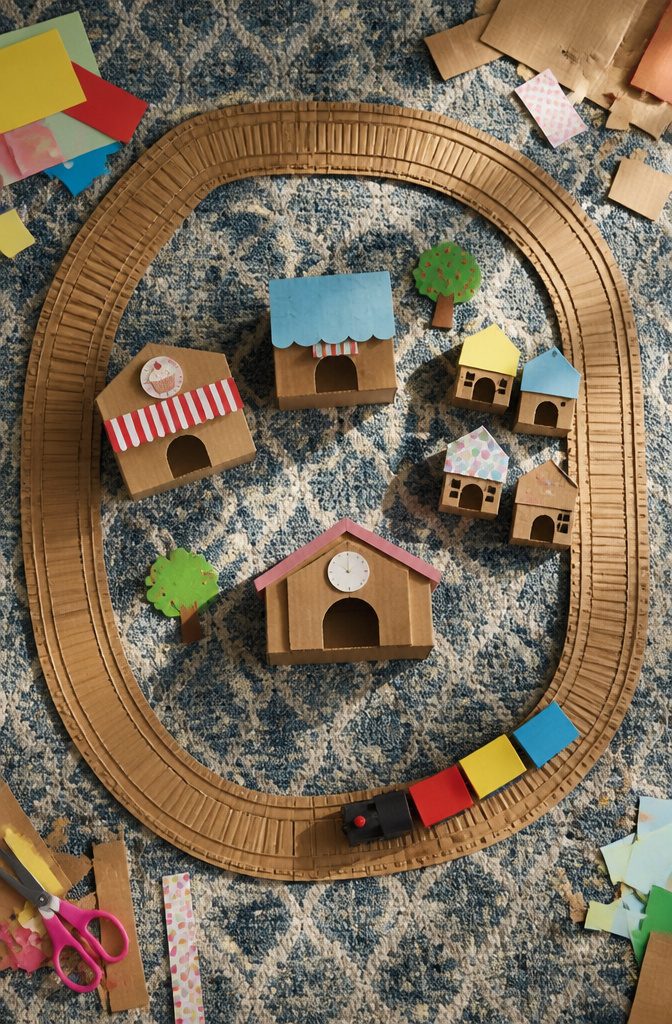
Trainville works best as a long, loose loop rather than a straight line.
Flatten shipping-box panels and cut strips about 2–3 inches wide for track, then fold the strips into shallow channels so a toy train or wooden car stays on the rails. Corrugated ridges give the wheels grip, which paper tracks can’t.
Buildings come from small boxes turned on their sides: a station, a bakery, a row of houses with cut-out doors and paper roofs. Keep every building a hand’s width back from the track so a train never snags a corner.
I’d add a tunnel from a toilet paper roll cut in half, and a bridge from a bent strip.
Kids tend to rearrange the town after the first run, and that’s where the play value lives: new streets, new routes, new stories. Glue only the track; leave the buildings loose.
13. Cardboard Camera
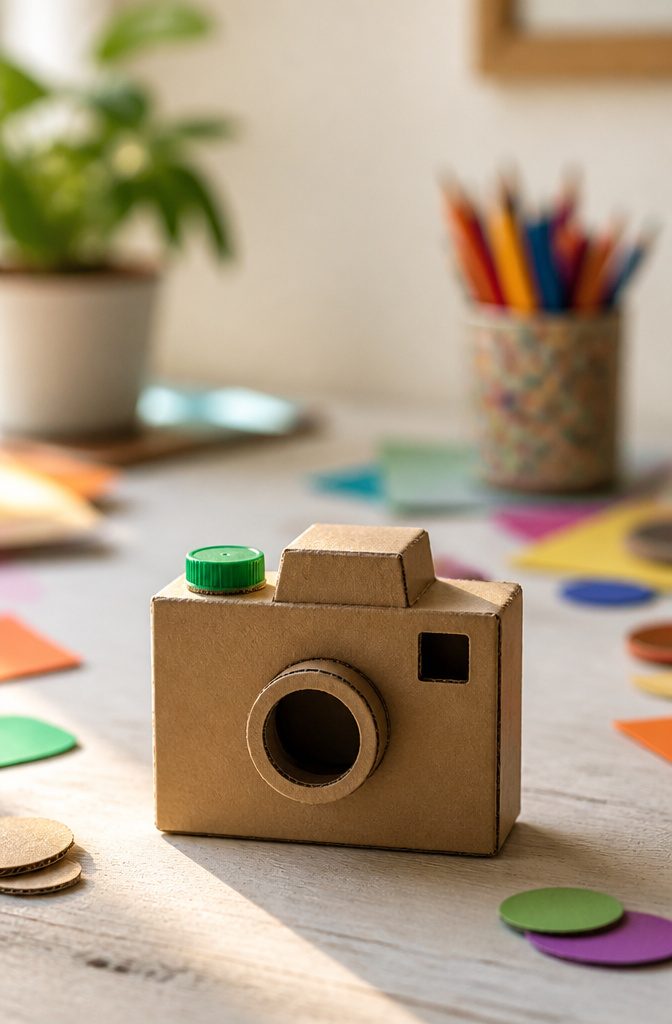
A small box makes the best camera body, because the proportions already look right: wide, shallow and easy for a kid to hold up to one eye.
Cut a round hole in the front for the lens, then glue a cardboard tube or a ring of stacked cardboard circles around it so the lens sticks out. A toilet paper roll works well here.
Cut a small square window in the back for the viewfinder. Make it small enough that a child has to squint a little, since that is what sells the pretend.
For the button, glue a bottle cap or a rolled scrap of cardboard on top. A dab of paint in a contrasting color makes it stand out.
14. Cash Register
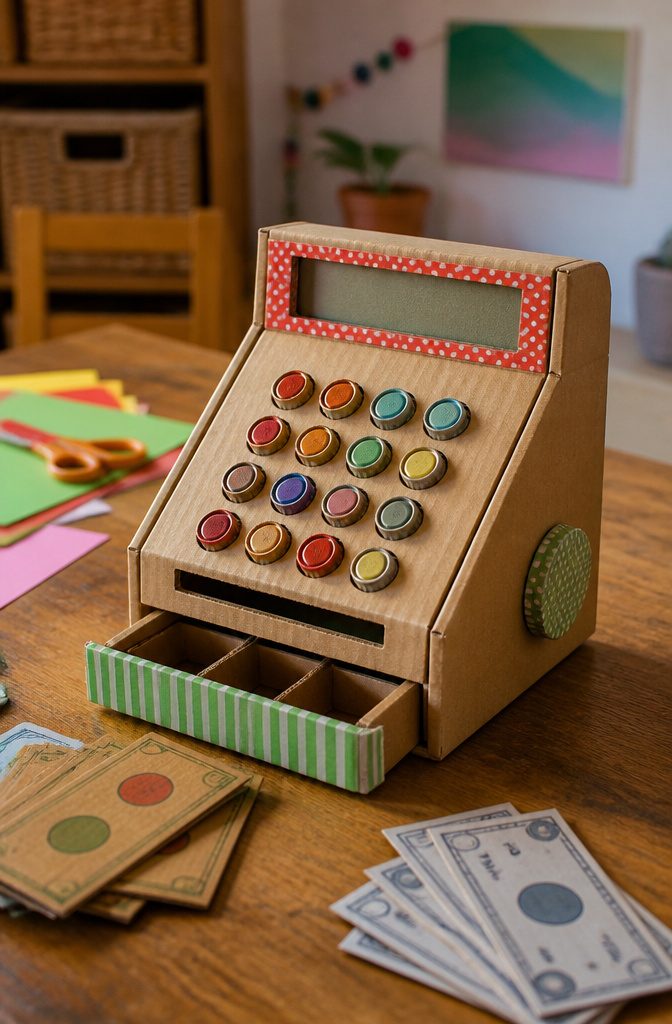
A cash register is mostly a box with a drawer, so start with a small shoebox or a cereal box turned on its side.
Cut a slot along the lower front and slide a smaller box or a folded cardboard tray into it as the drawer.
Glue a flap of cardboard to the drawer front so it has something to pull, and add a tab of folded cardboard on the drawer’s underside that stops it sliding out the back.
For keys, glue on bottle caps or small cardboard squares and mark them with numbers and a plus sign. Bottle caps feel better to press than flat paper.
Play money costs nothing: trace a coin on cardboard scraps and color the bills on plain paper. Sorting them into drawer compartments keeps store games running longer.
15. Collapsible Playhouse
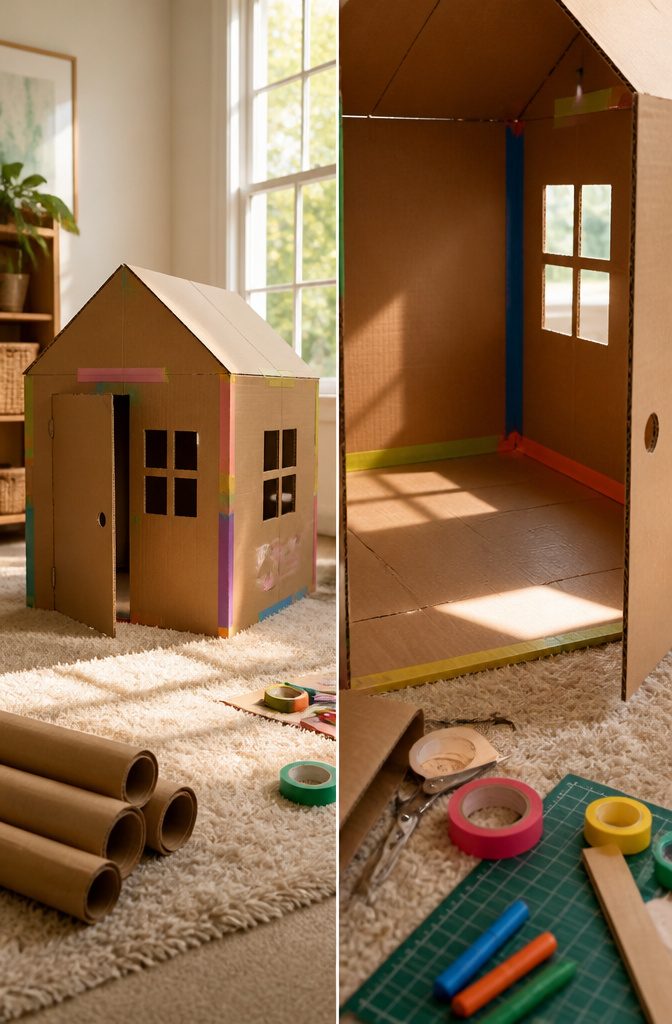
A collapsible playhouse works because of its hinges: four wall panels joined edge to edge so the whole thing opens like an accordion and closes into a flat stack.
Cut each panel from the same flat piece of cardboard, then join neighbors with a strip of duct tape run along both faces of the seam.
Tape on one side only wears through fast, and kids pull on these walls constantly.
Cut a door and a window into the panels before you tape them together, since a flat panel is far easier to cut than a standing wall. Fold the door flap back as a shutter so it stays attached.
To set up, stand the panels in a square and let the corners hold the shape. Leave the roof as a separate flat piece that rests on top, so the walls still fold completely flat.
16. Pizza Oven
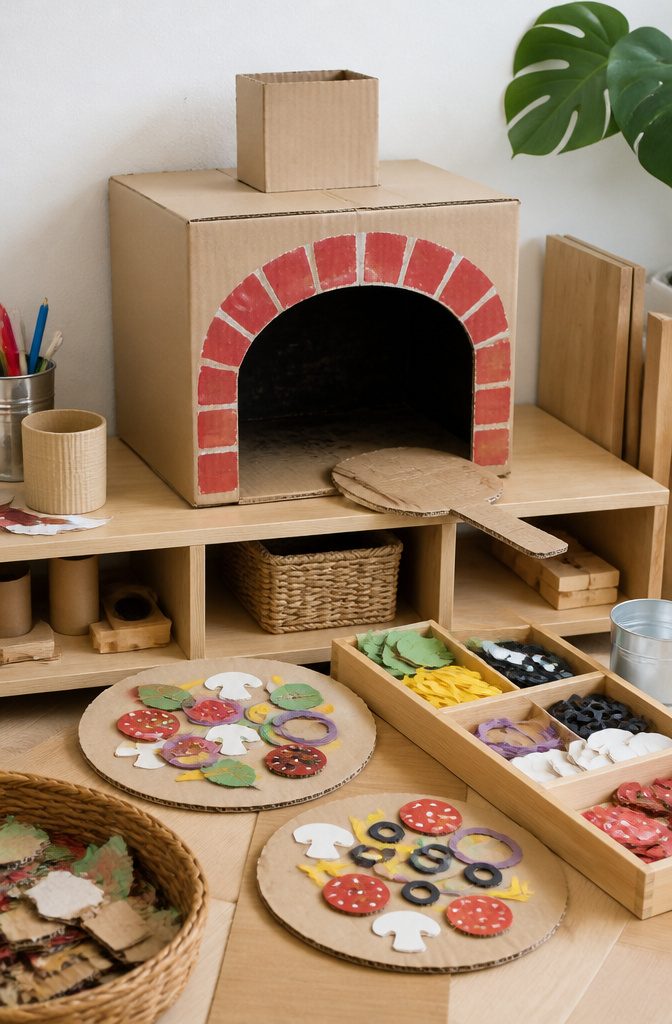
A pizza oven is a good box project because the shape does most of the work: a medium cardboard box turned on its side already looks like a brick oven with a deep mouth.
Cut the opening as an arch on one face, leaving the sides intact so the box stays rigid. Paint the inside dark to look like a firebox.
The pizzas are where scraps earn their keep. Cut a round from flat cardboard for the crust, then make toppings from whatever is in the recycling: red paper circles for pepperoni, green strips for peppers, crumpled tan paper for cheese.
Glue the toppings down only if you want one fixed pizza; leave them loose and kids build a new order every round.
17. Parking Garage
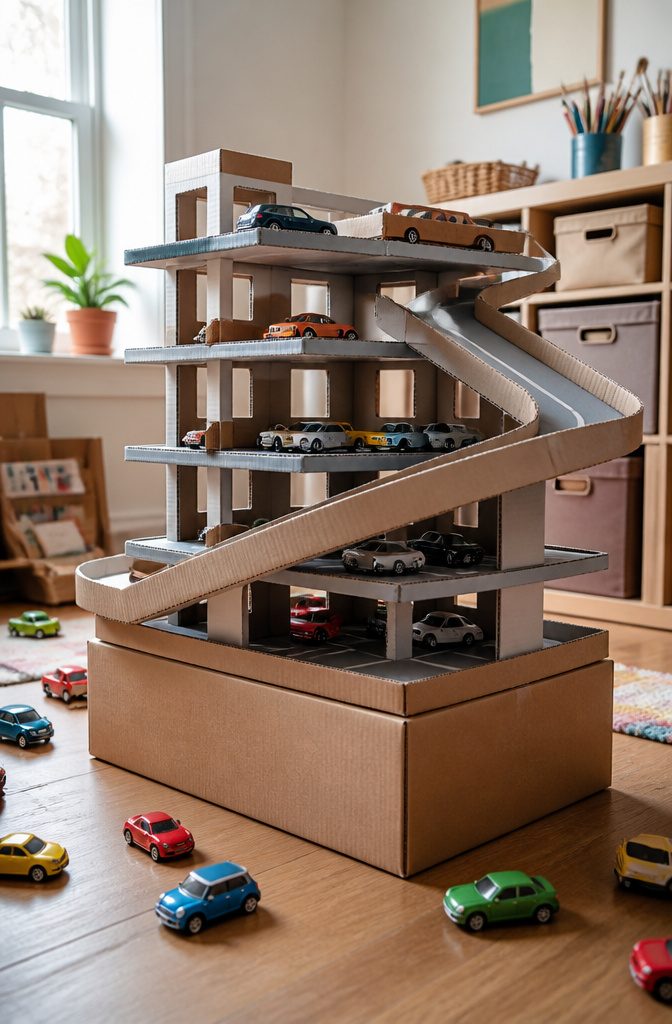
Each floor of a cardboard parking garage is just a flat panel resting on walls, and the ramp is what ties the levels together.
Cut the floors from flattened shipping box sides, since they stay rigid under a pile of toy cars. Cereal box cardboard flexes too much for a floor but works well for the walls and railings.
Make the ramp as long as you can manage. A short, steep ramp sends cars tumbling, while a long gentle one lets a small car roll down by itself.
Cut the ramp slot slightly wider than the ramp, then glue the ramp in place with a hot glue line along each edge.
Fold a 1-inch strip up along both sides of the ramp so cars can’t roll off the edge.
Paint the floors gray and add white parking lines with a marker. Stack no more than three levels, or the walls start to bow.
18. Recycled Dollhouse
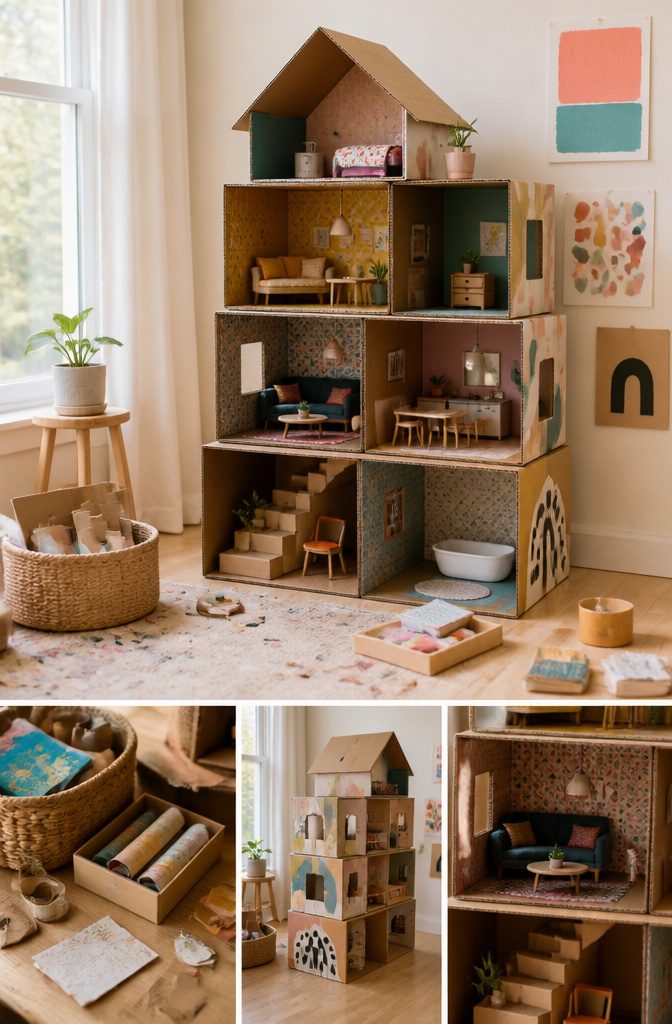
Shipping boxes and cereal boxes make better dollhouse rooms than any kit, because each box is already a room with four walls and a floor.
Stack three or four on their sides, open faces forward, and tape them together with the seams on the inside so the front stays clean.
Glue works better than tape on the outside joints, and it needs about an hour to set.
Furniture comes from the scrap pile. A toilet paper roll cut in half makes a stool, a tissue box becomes a bed frame, and a folded strip of corrugated makes a staircase.
Cut every piece before you glue any of it, so you can test sizes against the room instead of guessing.
I’d paint the walls before the furniture goes in. Scrap paper and fabric squares work well for rugs and wallpaper, and they cost nothing.
19. Cardboard Castle
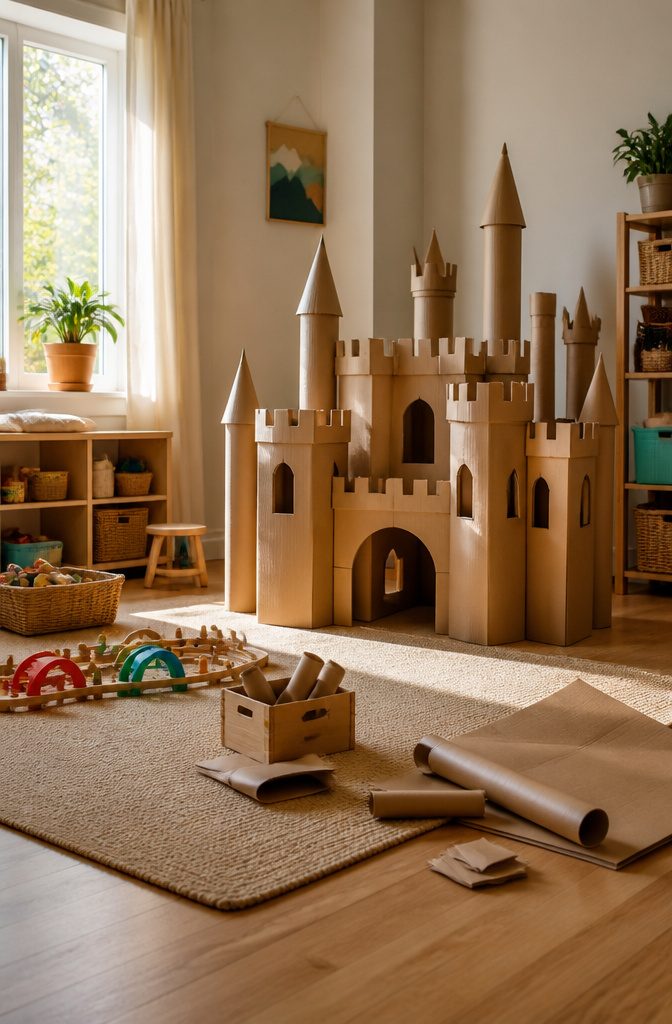
Towers are what make a cardboard castle read as a castle, so I’d build those first and size the walls to match.
Paper towel tubes work for small turrets, and mailing tubes handle the tall corner ones. Cut a cone from poster board or a cereal box panel for each roof and tape it on.
For battlements, cut a row of square notches along the top edge of each wall panel, alternating tall and short.
Keep the notches evenly spaced and about the width of a child’s hand so small figures can peek through. Fold a flap at each wall end and tape it to the neighboring tower, and the whole thing stands without glue.
Skip the paint until the walls are standing, since wet cardboard warps. A drawbridge cut from one flap and hinged with tape finishes it nicely.
20. TV Puppet Theater
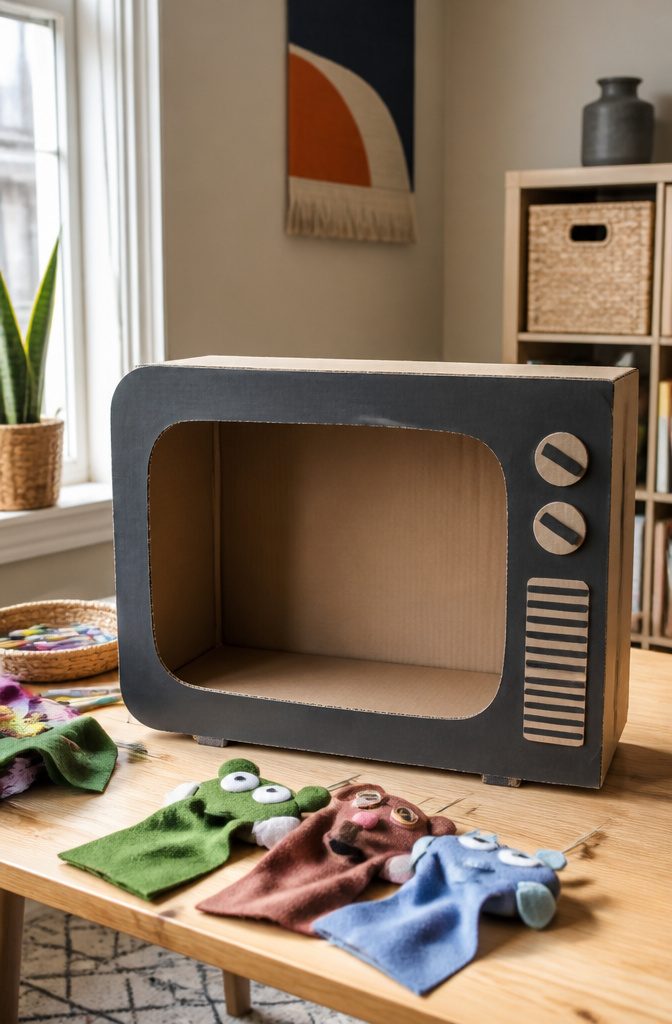
A TV puppet theater starts with a box that already looks like a television: a squarish carton with some depth to it, so a child can kneel behind it and keep their arms free.
Cut the screen opening in the front, low enough that a seated kid’s hands reach it without straining, and leave a border of an inch or two so the frame still reads as a TV.
A box cutter does this cleanly, so that part is a grown-up job.
Paint or marker the frame black or gray, then add dials and an antenna made from scrap cardboard or two bent pipe cleaners.
Puppets are the easy part. Paper bags, craft sticks and cardboard cutouts taped to sticks all work, and sticks win for small hands because the puppet rises from below the screen and stays steady.
21. Marble Maze
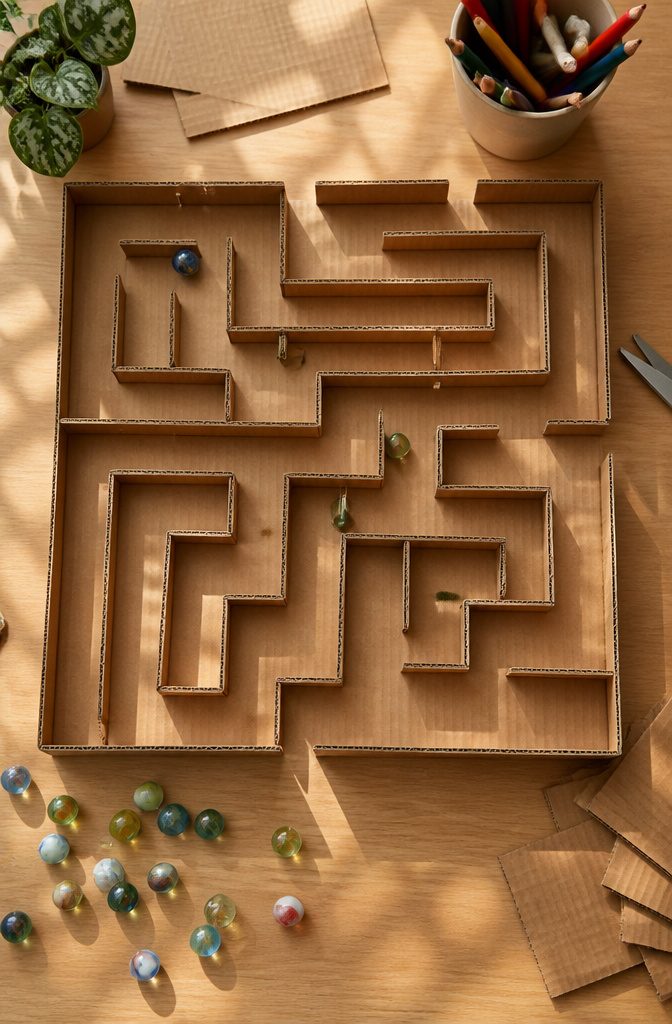
Wall height decides whether a cardboard marble maze works.
Strips cut about as tall as the marble is wide will guide it but let it hop out on a hard tilt, so cut them a little taller and glue them upright along a flat cardboard base.
A hot glue gun holds fastest; white glue works if you can wait for it to dry.
Leave a gap between each wall and the edge so the marble can pass through. Make every gap wider than the marble, with room to spare, or it will jam in the first turn.
Tilting is where the physics shows up.
The marble speeds up on a steep slope and crawls on a shallow one, and kids feel gravity and momentum in their wrists. I’d add a few holes as traps.
22. DIY Catapult
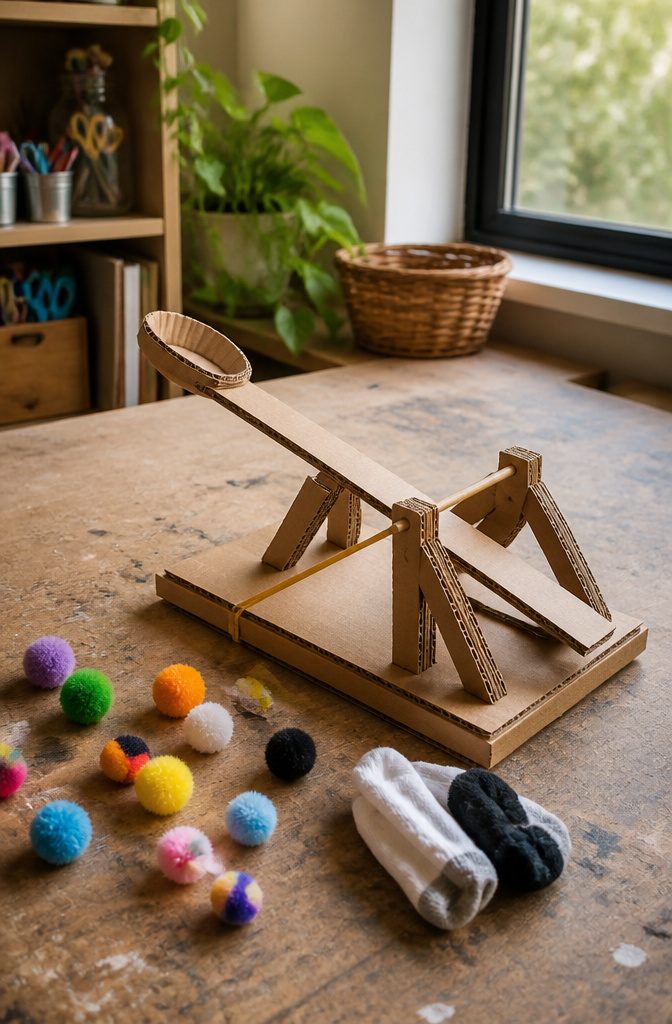
A cardboard catapult works because of one lever: a flat arm that pivots on a fixed point and snaps forward when you press the free end down and let go.
Put the pivot closer to the cup end than the handle end, and a small push turns into a longer, faster swing at the business end.
I’d build the arm from a doubled strip of corrugated board so it doesn’t flop, with the flutes running along its length for stiffness.
Mount the arm on a sturdy box base and add a stop bar across the front so the arm halts mid-swing and throws the load instead of dragging it.
A rubber band or a bent cardboard spring behind the arm adds snap. Launch only soft objects, such as pom-poms, balled-up socks or marshmallows, and keep the aim away from faces and the family cat.
23. Cardboard Dollhouse
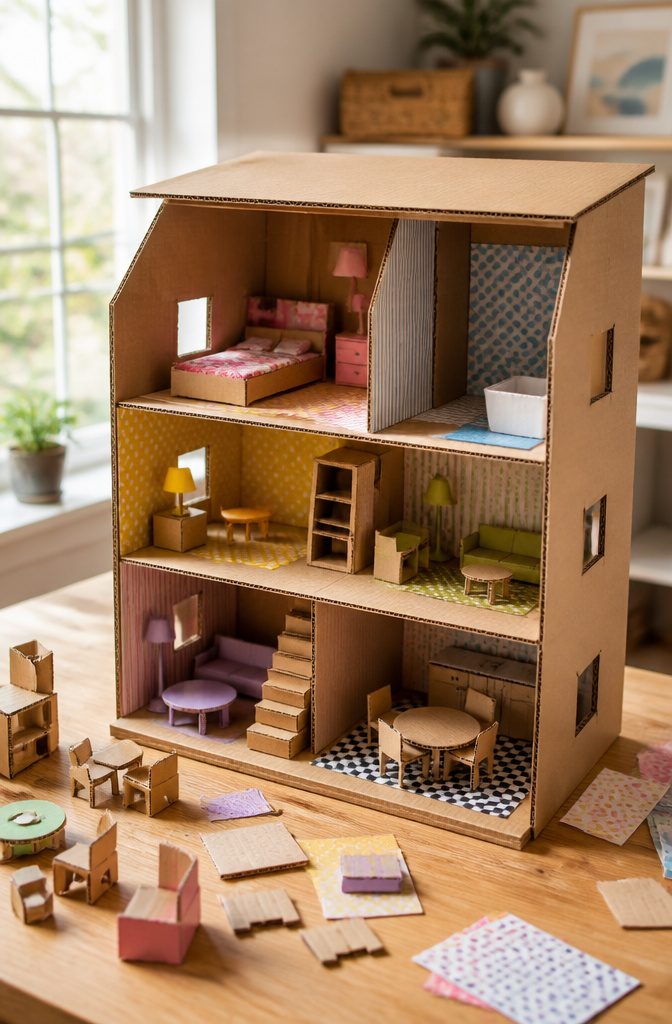
A cardboard dollhouse works best as a plain box turned on its side, with the open face as the front and a few interior walls glued in to make rooms.
Cut the roof as a separate piece, either flat or folded into a peak, and glue it on last so you can still reach inside while you build.
This is the tidy cousin of the recycled version.
Paint or cover the whole exterior in one color or one paper and the seams, printing and shipping labels disappear. Craft paper or wrapping paper works, and I’d pick paper over paint if the box has heavy logos.
Windows and doors are cleaner as cutouts than as drawn-on shapes.
Use a ruler, score the lines first, and cut slowly. A flap door that opens is worth the extra five minutes.
24. Cardboard Robot
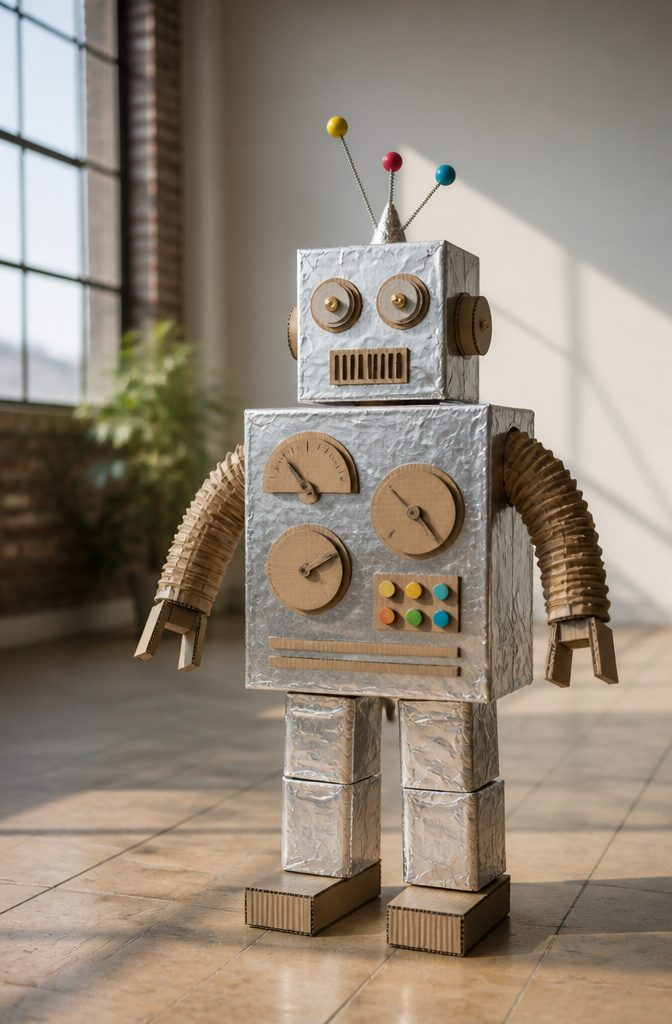
A robot costume starts with two boxes: a larger one for the torso and a smaller one for the head. For a wearable body, pick a box that sits from shoulders to hips with room for the arms.
Cut a hole in the top for the neck and a hole in each side for the arms, then trim the edges so they don’t rub.
Dials are the part kids care about most. Cut circles from scrap cardboard, stack two or three for depth, and glue them to the chest.
A brass paper fastener through the center lets each one actually turn. Use a paper fastener rather than glue for the dials, since a spinning knob is what makes the robot feel real.
Paint the whole thing silver, or skip paint and wrap it in foil. Foil is cheaper and shinier, though it tears at the corners.
25. Cardboard Guitar
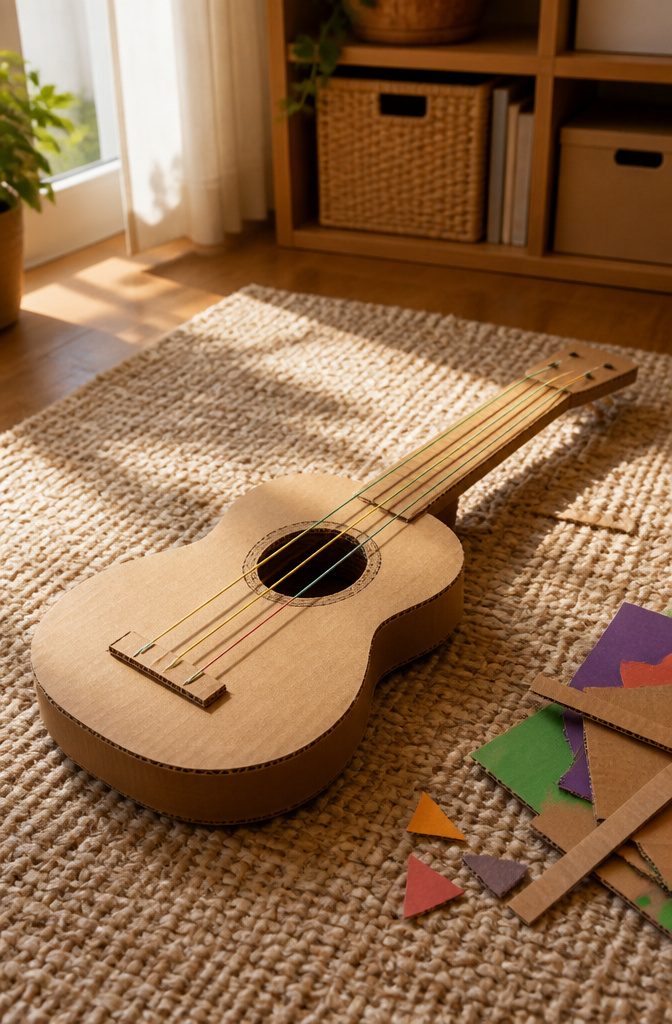
A flat cardboard guitar works better than a boxy one, because a single sheet cut in a figure-eight shape reads as a guitar right away.
Cut the body from corrugated cardboard, add a round hole in the middle, and glue a long strip of doubled cardboard on as the neck so it stays stiff when little hands grip it.
For strings, stretch 4–6 rubber bands lengthwise across the sound hole and over the neck.
Thick bands give a low twang, and thin ones sound higher. Plain string works too, but it needs tape at both ends and won’t make a sound unless pulled tight.
A small cardboard strip glued under the strings near the hole lifts them so they can vibrate. I’d paint it last; poster paint covers cardboard well in one coat.
Frequently Asked Questions
What can I make out of cardboard?
Toys and pretend-play pieces are the easiest place to start: a rocket, a robot, a cash register, a toy oven, a castle, or a dollhouse.
Most start with a shipping box, a shoebox, or a cardboard tube from the recycling bin. Scraps handle the small parts like knobs, wheels, and toppings.
How do you make a cardboard playhouse?
Cut the door and window into flat panels first, then join the panels edge to edge with duct tape on both faces of each seam.
Taping only one side wears through fast, because kids pull on the walls constantly. Stand the panels in a square and set a separate flat roof on top, so the whole house still folds flat for storage.
What types of cardboard can be used for crafts?
Corrugated board from shipping boxes, thin paperboard from cereal and shoeboxes, and kraft cardboard all work well.
Corrugated is strongest and holds an edge for walls, floors, and slots, while paperboard suits flags, banners, and small details. Make sure whatever you use is clean and free of food residue.
What age is appropriate for cardboard crafts?
Cardboard projects can be scaled from toddlers to older children.
Younger kids do well with decorating, painting, and playing with a finished piece, while older kids can handle scoring, hinges, and slots. Any step with a box cutter should be done by an adult.





