
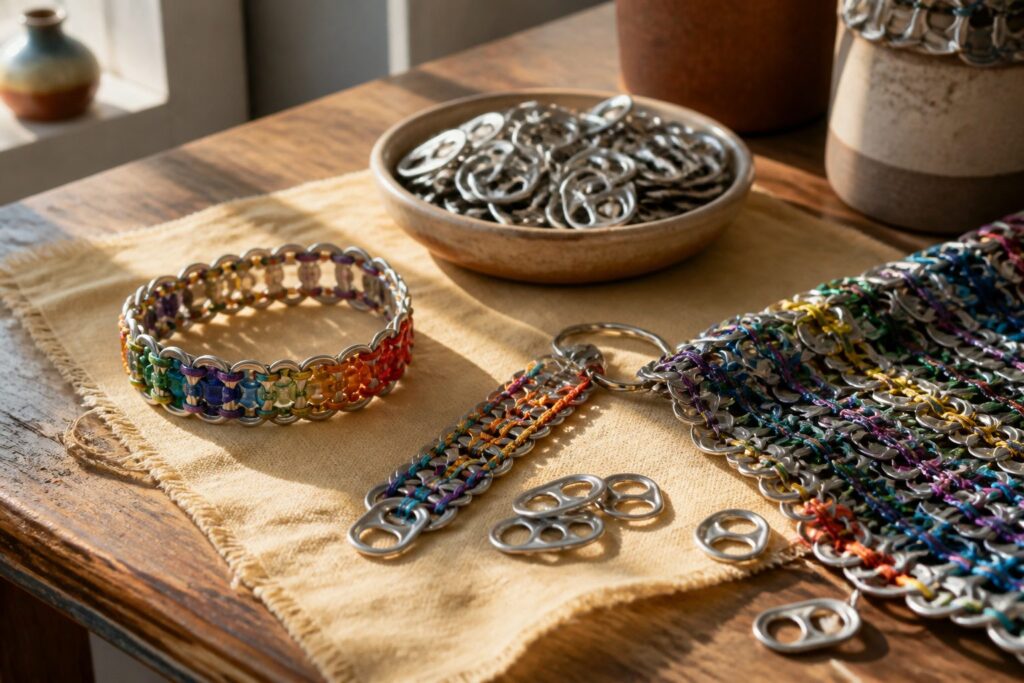
Pop tab crafts are projects made from the aluminum tabs pulled off soda cans, linked, glued, threaded or crocheted into things like bracelets, coasters and keychains.
The cost is volume: a bracelet takes 12 tabs, but a lampshade or armor costume takes a huge pile, so start saving cans months ahead and rinse every tab.
Upcycled Bracelets
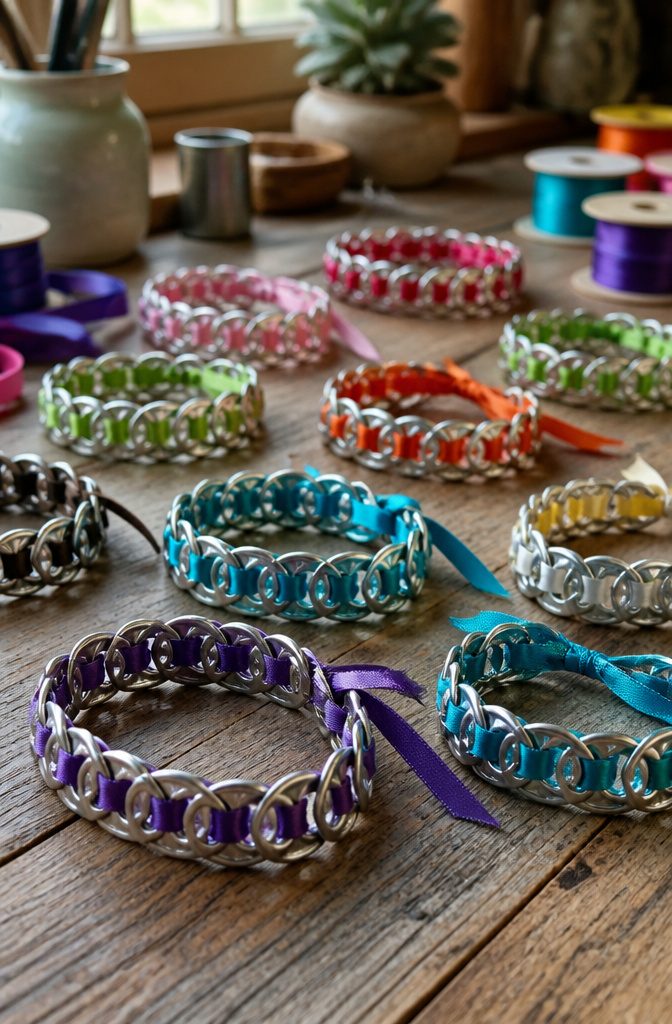
Pop tab bracelets are the one project every tutorial I read agrees on, and the count is small: 12 tabs makes an average woman’s bracelet.
The jump-ring version calls for 27 rings, which is more fiddling but gives you a metal chain with no fabric showing.
For the ribbon version, I’d pick ribbon over stretchy string if you want the bracelet to hold its shape, since a bow or knot lets you size it right at the wrist.
Start with one tab smooth side up, ribbon through the top hole and bottom hole. Flip the next tab and overlap it by half, like a Venn diagram.
Alternate face-up and flipped tabs down the chain. Where you thread through the front, the ribbon crosses in an X; through the back, it runs straight.
Lampshades
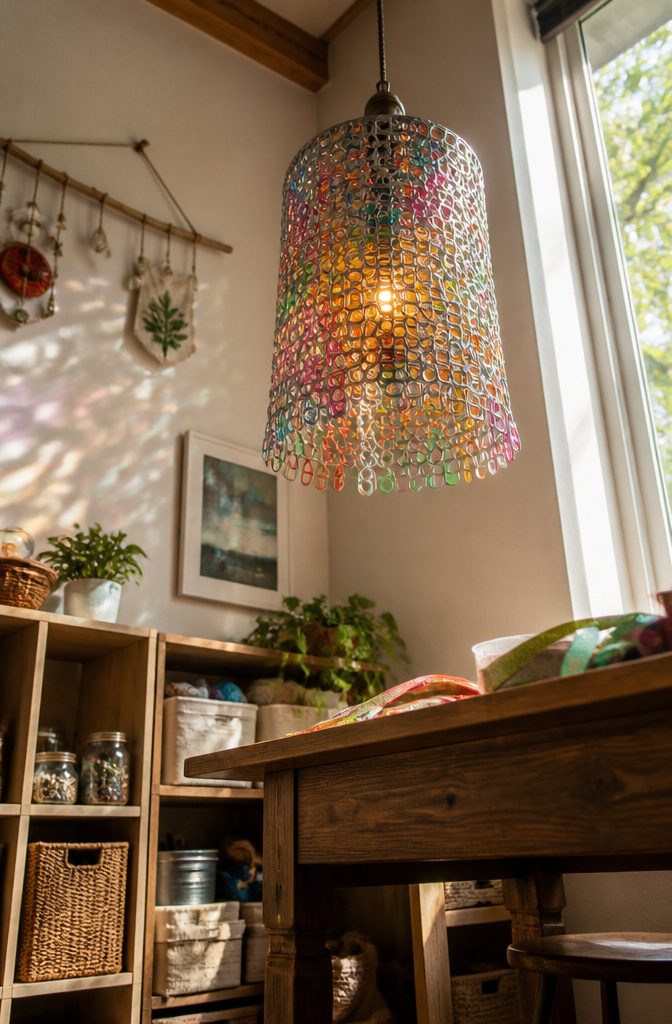
Color is the reason to build a pop tab lampshade. Tabs from different soda cans give you a whole rainbow of shades, and you can paint any that don’t match what you have in mind.
A lampshade made from pop tabs works without a frame at all. Recycled wire rings plus tabs are enough to make a cover for a side table lamp, with the tabs linked or glued together into the shape.
If you’d rather cover an existing frame, hot glue is the quicker route, and I’d choose it for a first try.
The real cost is collecting.
A shade eats a huge number of tabs, and the only way to get them is to save them can by can. Start saving well before you plan to build.
Wall Art
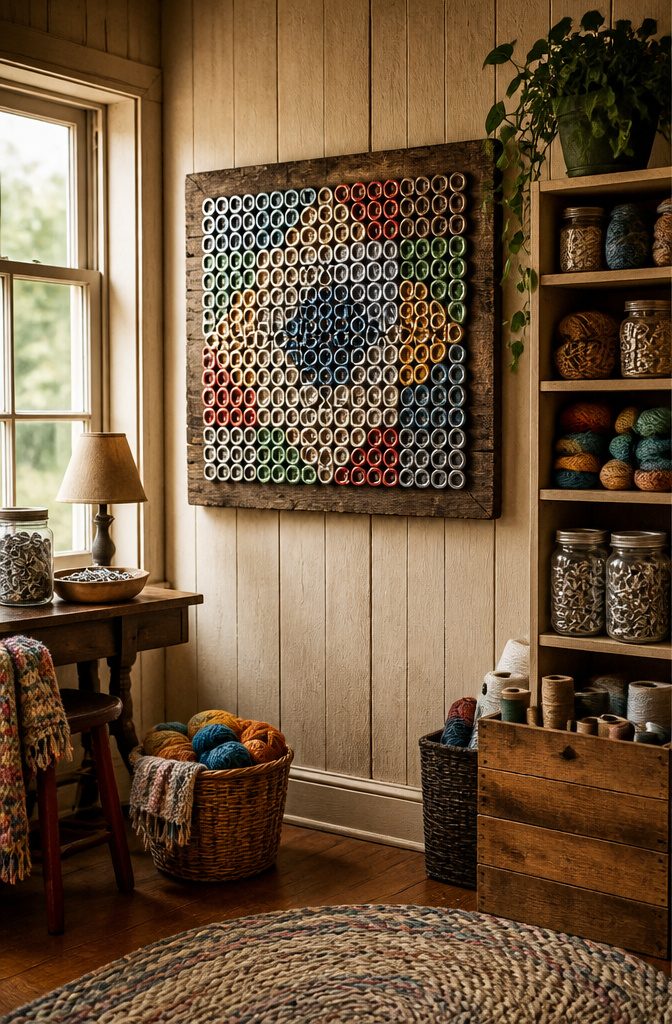
Wall art is where pop tabs earn their keep as a statement piece, because a single tab is tiny and a few hundred together read as texture.
The same chains and crocheted links used for smaller projects scale up to a wreath or a year-round hanging, and the tabs give the surface real dimension that flat paper can’t match.
For a panel, lay the tabs out on a table first and join them with ribbon the way a bracelet is built: overlap two tabs so their holes intersect, then thread the ribbon through in an X so it pulls everything tight.
Dry-fit the whole pattern before you glue or thread anything, since rearranging a finished row is a pain.
Whatever color the can had stays on the tab, so mixing brands gives you a pattern without any paint.
Handbags
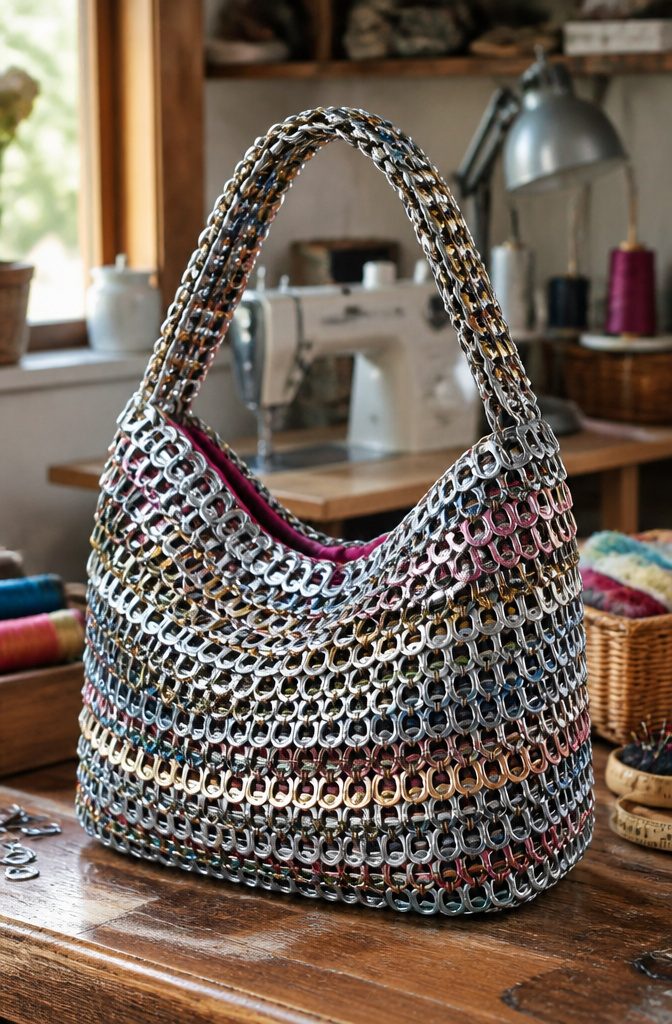
Handbags are the biggest commitment in pop tab crafts, because a full bag means linking hundreds of tabs into a fabric-like panel before you can shape anything.
The linking method is simple: lay a tab face up, set the next one flipped and half overlapping so the holes cross like a Venn diagram, and pull ribbon or cord through the intersections in an X. Repeat that across and down, and the tabs lock into a flexible sheet.
For an afternoon project, I would skip the all-tab bag.
Embellishing an old fabric purse with tab flaps gives you the same look in a fraction of the time. A macramé-style pattern in mixed colors works well for a market bag, and leftover cord does the rest.
Necklaces
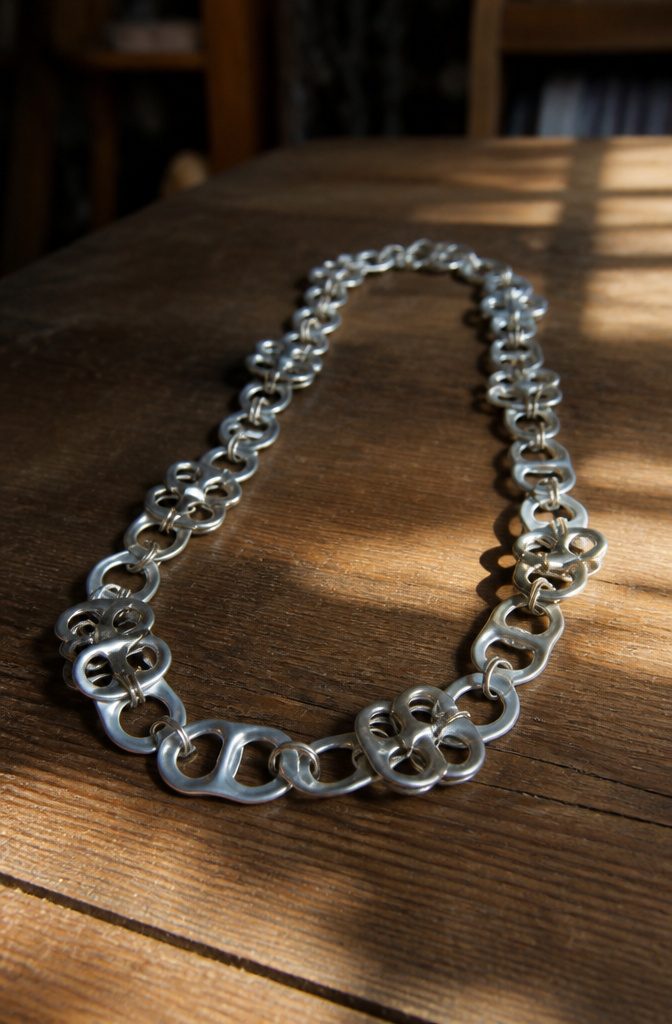
A necklace is a bracelet that never closes at the wrist. The jump ring method carries over directly: wash and dry the tabs, then join them with 5mm jump rings, the same size used for a bracelet chain.
Skip the dozen-tab count, though. A necklace needs a lot more tabs, and I’d lay the chain around your neck before adding a clasp, since a necklace has to slip over your head or be fastened.
The ribbon method works the same way. Flip every other tab, cross the ribbon in an "X" through the front intersections, and run it straight across the back.
Ribbon wins for comfort, because metal rings can pinch skin, while ribbon sits softer. Rings win for a chunky chain that looks like it was never recycled.
Clutches
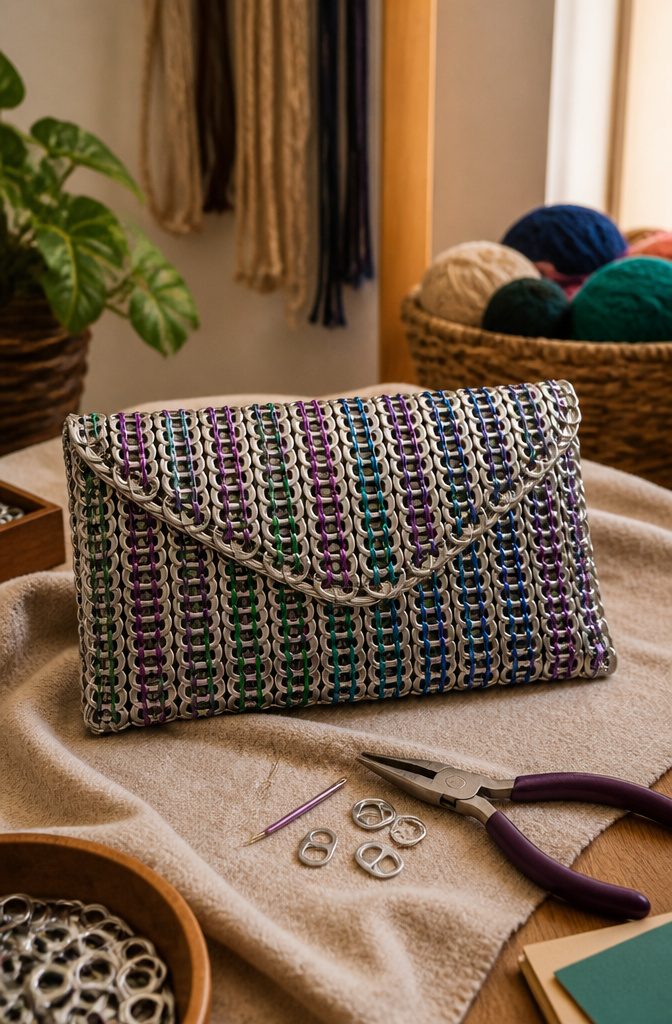
A clutch is the easiest place to see what pop tabs do well.
The tabs are linked or woven into a flat fabric, and a clutch only needs a small rectangle of that fabric folded over, so it asks for far fewer tabs than a full handbag.
There are no handles to carry the load, which matters because the weight of a loaded tote is where tab joins tend to fail.
I’d pick a woven or tightly linked construction with no gaps between rows. Loose links let a phone or lipstick slip through, or catch on the edges.
A fabric lining sewn or glued behind the tabs fixes that and keeps the metal off your things. A clutch stays stiff and a bit noisy, so it suits an evening bag better than a daily carry.
Picture Frames
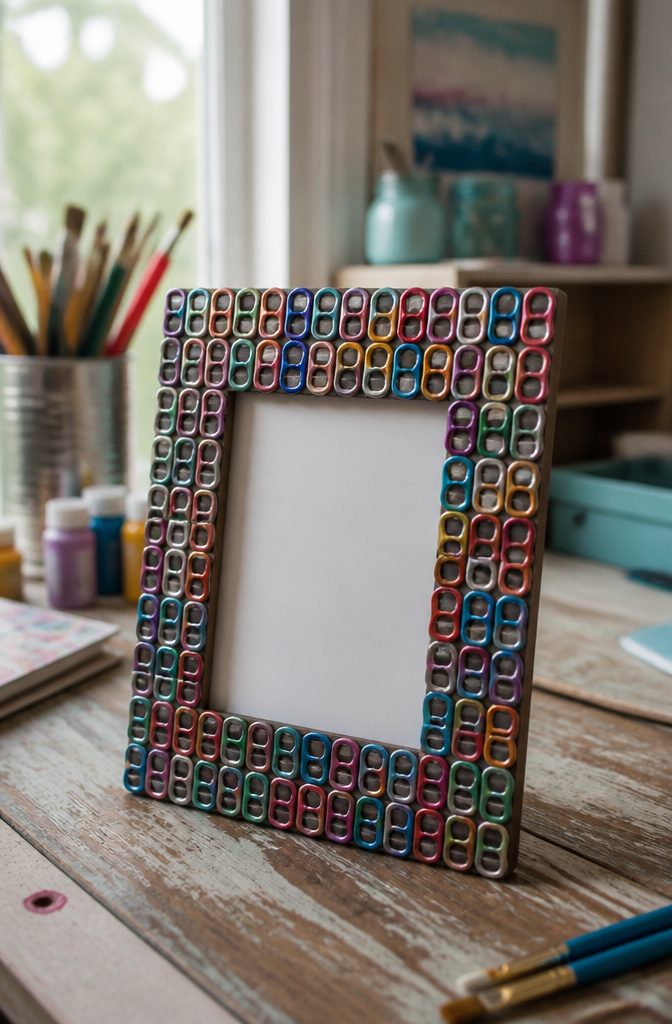
A plain, slightly dull frame is the best candidate for pop tabs, since it would otherwise end up in a donation bin. Hot glue or crazy glue is all the adhesive you need, plus a stash of saved tabs.
Press the tabs down in a repeating pattern around the border so they build texture. Spacing them evenly matters more than covering every inch, because a regular rhythm reads as deliberate while random clumps look messy.
I would paint the tabs before gluing if you want drama.
Silver tabs on a black frame are fine, but tabs in different colors turn the border into the focal point. Paint them first, since reaching into the gaps once they are glued down is fiddly.
Pen Holders
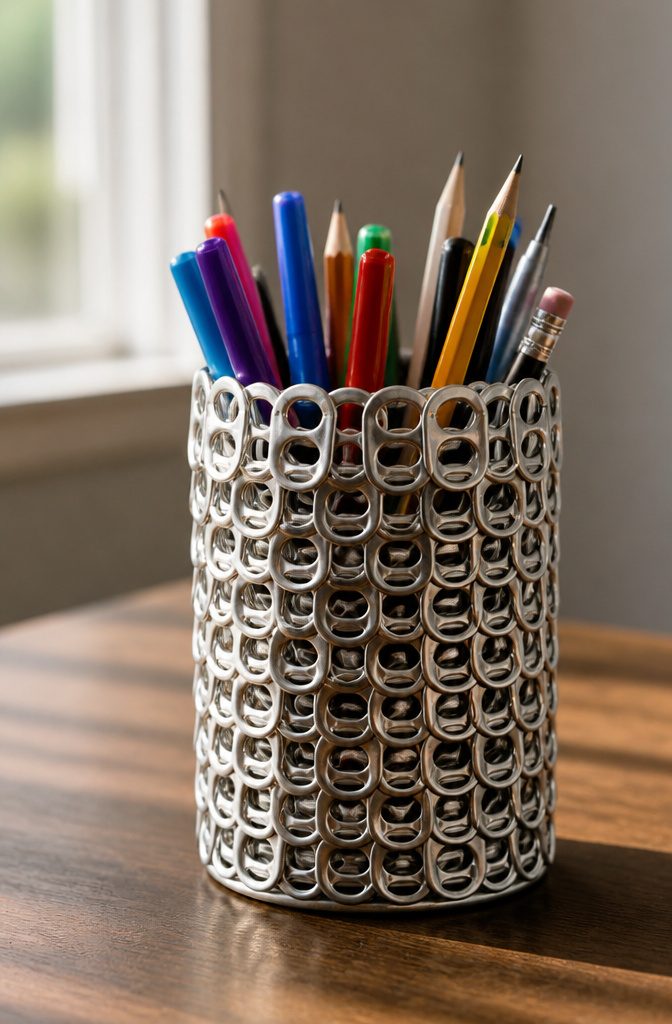
A clean soup can or a sturdy paper cup makes the base for a pop tab pen holder, and the whole project comes down to gluing tabs on in tight, overlapping rows.
Start at the bottom and work up, offsetting each row so the tabs sit like fish scales. Gaps show the can underneath, so I’d paint it silver or black first to make small misses disappear.
Hot glue grips metal fast, but it can ooze past the edges and leave strings.
A thick craft glue or E6000 stays neater, though you’ll hold each row a minute or two while it sets. Wash and dry the tabs first, because leftover soda residue keeps glue from bonding.
Finish with a ribbon around the rim to hide the top row’s raw edge.
Crocheted Coasters
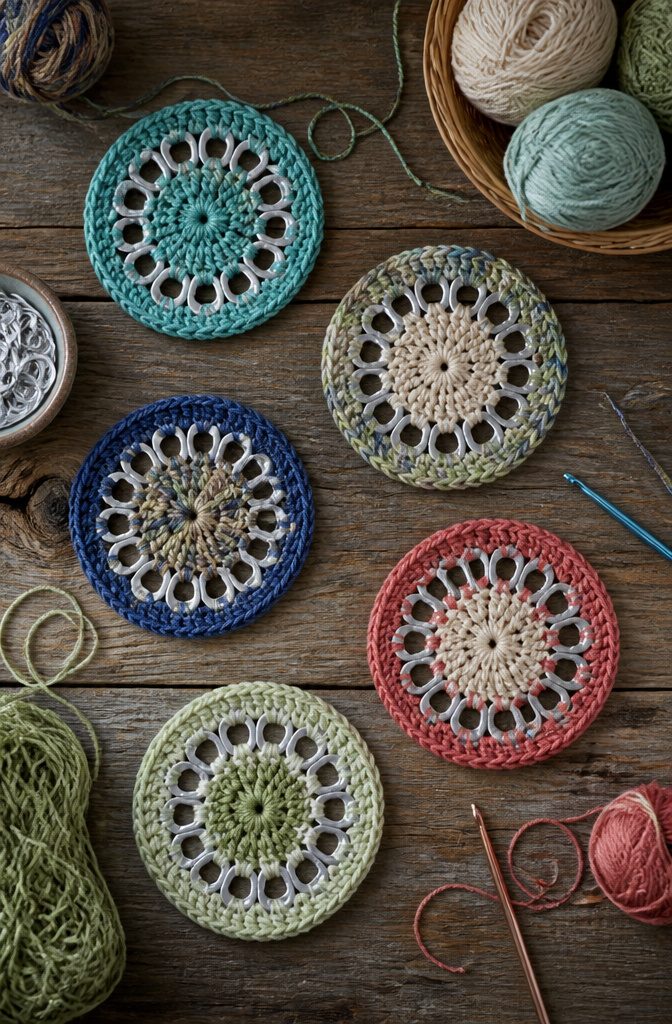
Crocheting through a pop tab means the tab itself becomes the foundation. You work yarn around and through the tab, so the metal gives you a fixed shape to build on.
Linking is a different move: tabs hook or tie to each other and the piece is made of metal. Here the yarn does the covering, and the tab only sets the size.
That fixed guide is why crocheted coasters are an easy way to start crocheting.
You never have to guess where the first stitches go. Yarn color is where the design freedom lives, and a set of coasters in mixed shades looks good with very little planning.
I’d pick a soft cotton-style yarn, since a coaster gets handled, though that’s my preference and not a rule.
Keychains
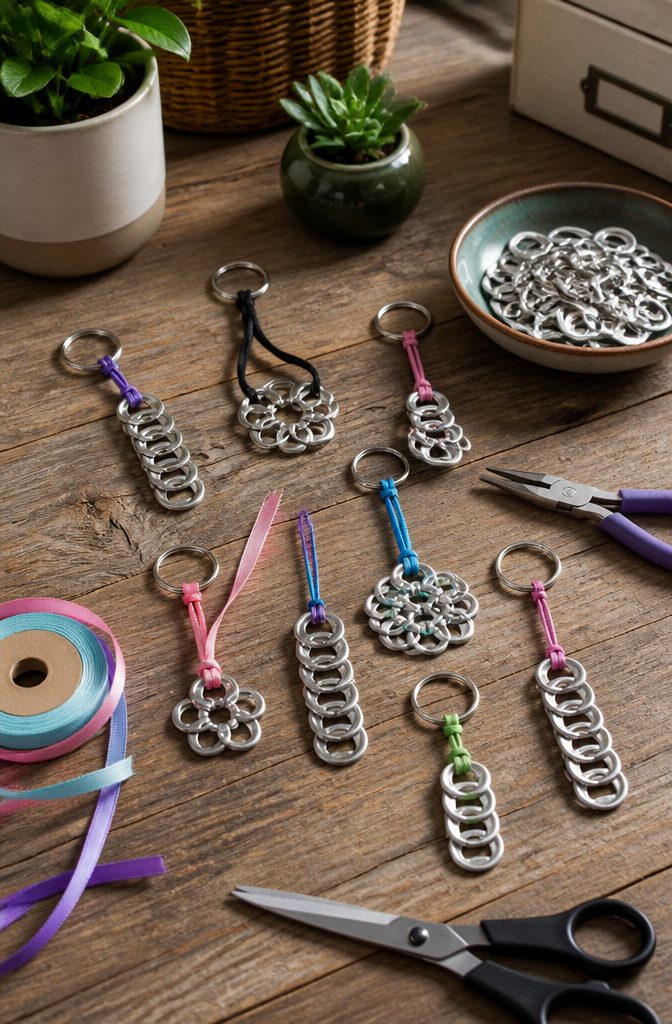
A keychain is the easiest way into pop tab crafts, because the tab already has the hole you need.
Slide a round key ring through that hole and the project is done, which makes it a fine 10-minute starter for kids or for anyone testing whether the hobby suits them.
If you want something more than a single tab, link several into a short chain and let the bare metal be the focal point.
Finish the chain with a round ring or a carabiner, and I’d pick the carabiner if the keys get clipped to a bag, since it comes off faster than a split ring.
Switching the direction of the tabs as you go breaks up the pattern. Crocheting the tabs together is the other route, though plain metal looks cleaner to me.
Zipper Pulls
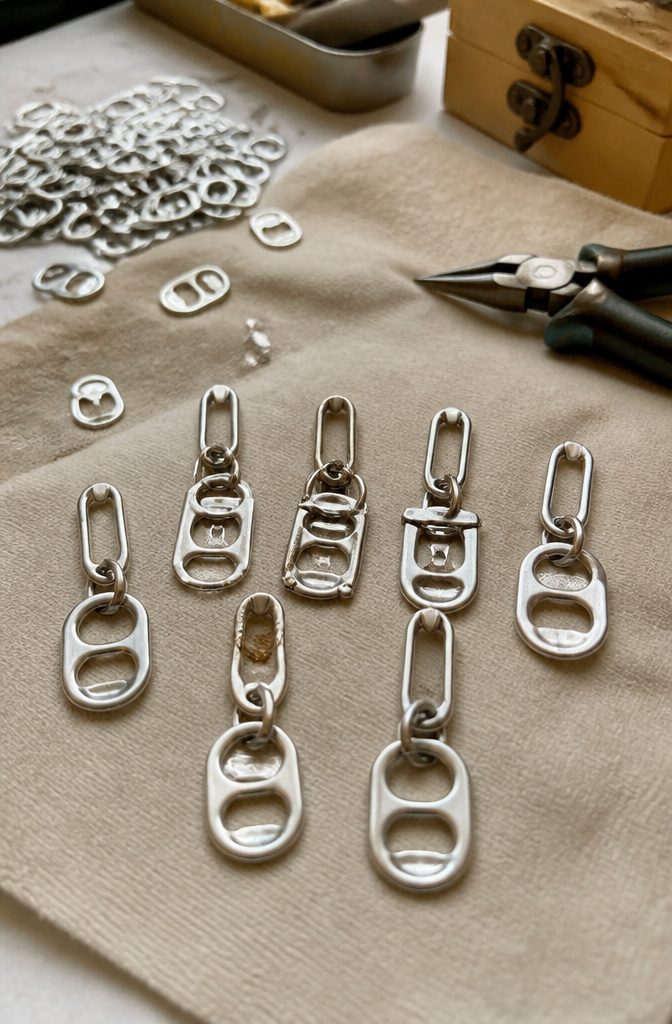
A pop tab turns into a zipper pull with one cut. Snip a narrow incision into one side of the tab’s ring, so the metal opens just enough to slide onto the loop of a zipper slider.
The fit works because it is nearly the same mechanism as the pull it replaces, only a little bigger.
Make the cut in the ring rather than through the middle, and keep the slit barely wider than the slider’s loop.
A gap that is too wide lets the tab slip off the first time a bag gets jostled. Once it is on, the tab hangs like any factory pull and gives your fingers something easy to grab.
I like this best as a quick repair for a broken pull on a jacket or backpack, since it takes about a minute and one pair of snips. It suits clothing and bags equally well.
Baskets
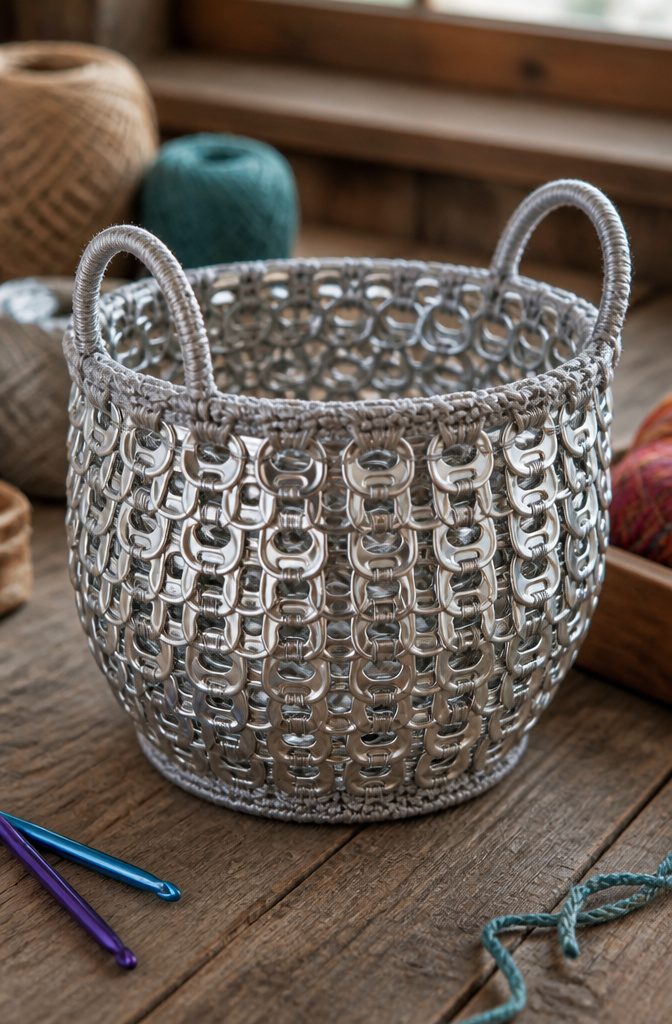
Crocheting around the tabs is what holds a pop tab basket together.
The design I’d point you to comes from Creative Erika on YouTube, and it uses the tabs as a guide for the crochet pattern, so the yarn does the joining and the tabs set the shape.
Build the base first, then work the walls up from its edge. Each tab becomes a unit in the pattern, which means the wall height depends on how many rows of tabs you stack.
It’s more complex than a bracelet, and I’d skip it as a first project.
Baskets take patience, but the finished piece looks far more expensive than it is. Swap yarn colors by season, or make one as a gift.
Fishing Hooks
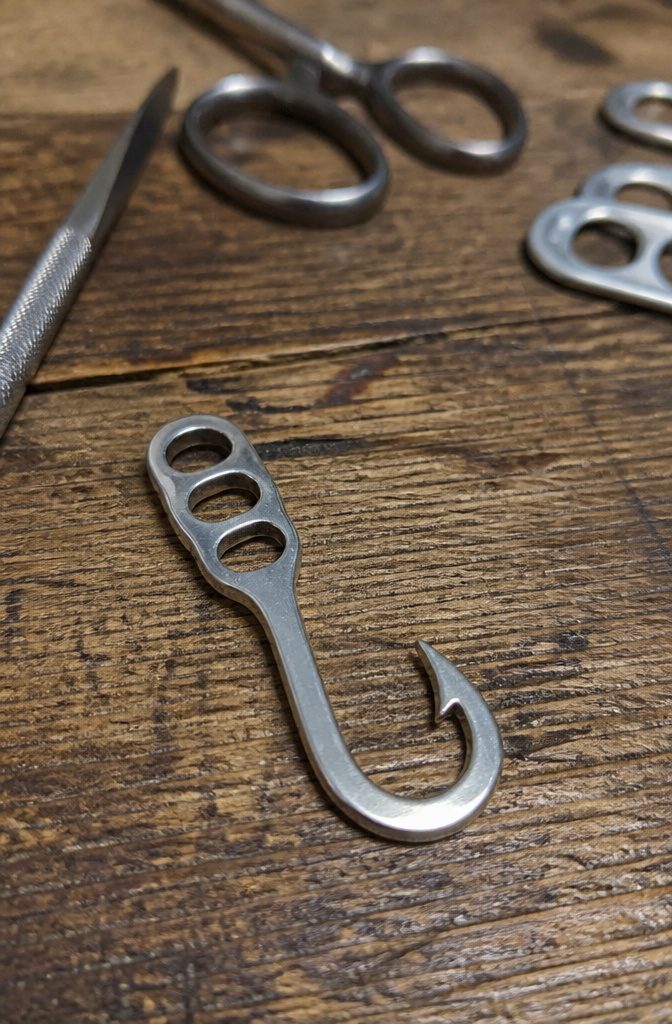
A soda can tab can be turned into a fishing hook, and I’d file it firmly under novelty.
The method is to cut a notch into the tab and, if you want a true hook, file one end down to a point.
Aluminum is soft, so a tab hook is only worth trying for the fun of it, and I wouldn’t count on it to hold a fish.
The work is also the riskiest of any pop tab craft. A freshly cut tab has sharp edges, so wear gloves while you cut and sharpen, and keep your fingers clear of the point.
Of everything you can make from tabs, this is the one I’d keep as a curiosity for an afternoon. Pack real hooks for the actual trip.
Wire Organizers
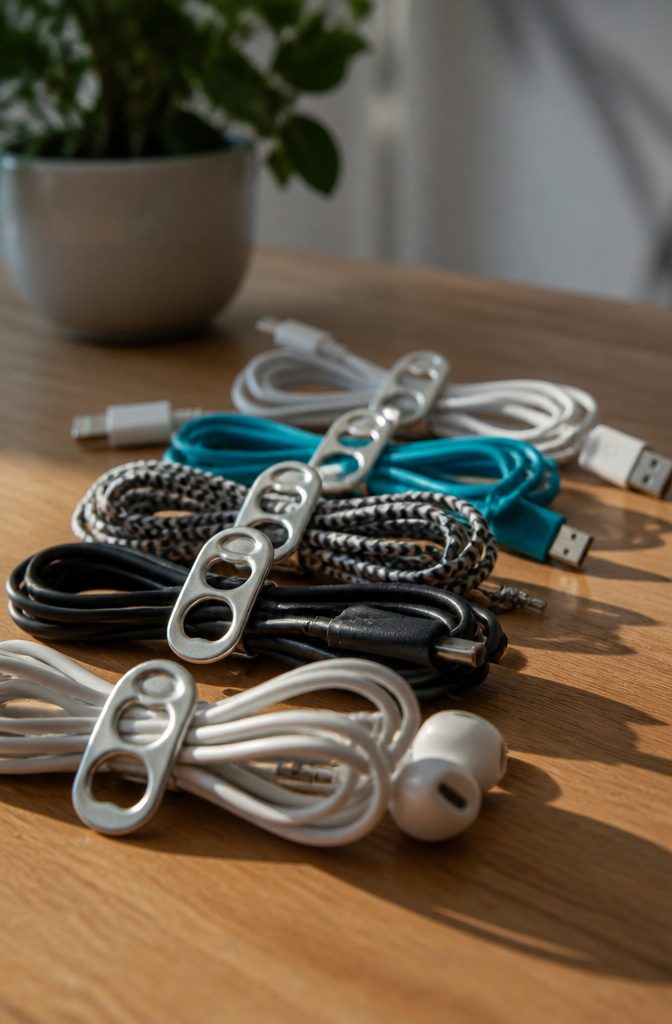
A soda can tab works as a tiny cord keeper because it has two loops, and a bundle of wire can slide through them and stay put.
For headphones, fold the wire back over itself in loose loops, bunch them together, and slip the tab over the whole bundle.
The tab acts like a small clamp around the loops, so the cord stays tangle free in a pocket or bag.
I’d use it on chargers first, since those cords tangle just as badly. It also works on holiday lights and garlands, where one tab per bundle keeps strands from knotting in storage.
A tab only grips a bundle that fits through its opening, so thick cables will need a bigger loop or a different fix.
Armor Costumes
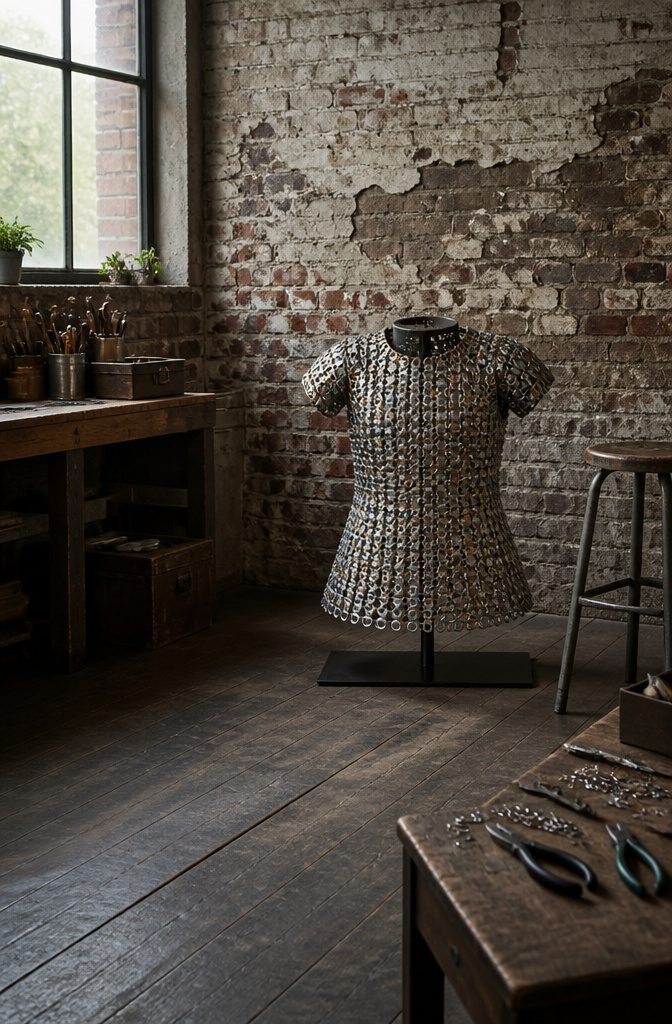
Pop tab armor is the one project here where the sheer count of tabs becomes the real cost.
The tabs themselves are free, but a full suit means a very large collection, so I’d start saving months before Halloween or a themed event, not the week of.
The supplies are short: tabs and jump rings, and a soft pliers wire works for linking if you’d rather skip rings. Pliers do the work of opening and closing each connection.
The look is scaled metal, a bit like a fish-scale mail shirt that catches light and clinks when the wearer moves.
A child’s armored dress is the easiest place to begin, since it needs far fewer tabs than an adult suit.
Treat it as a costume, not protection. It is made for practicing craft skills, not for battle.
Chainmail Vambraces
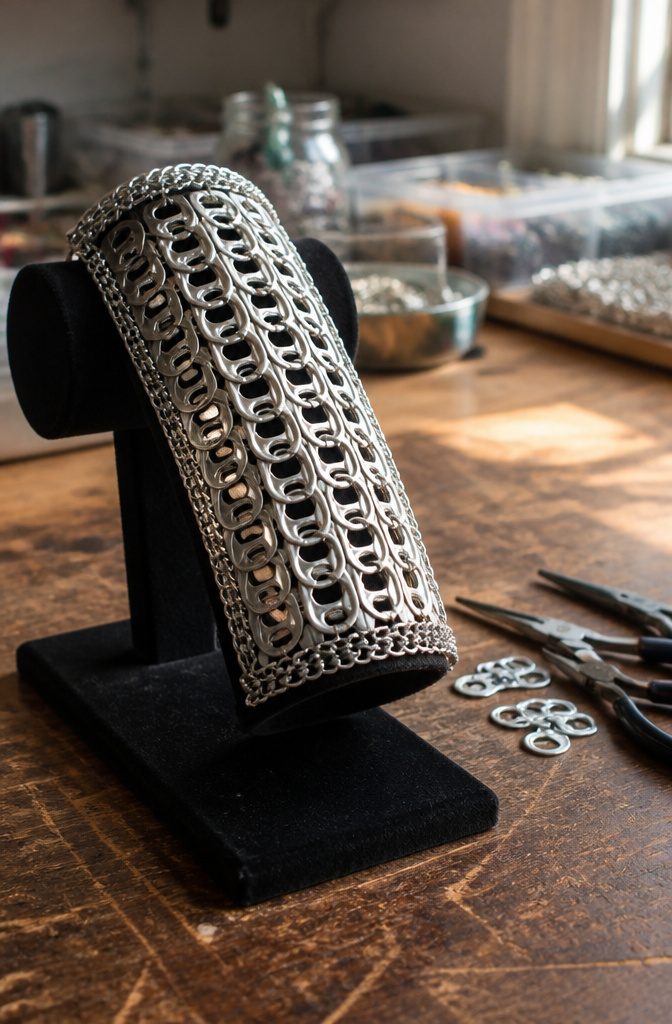
Gluing tabs flat to a backing is fast, but the bond is the weak point: a glued vambrace flexes at the elbow and the tabs start to peel.
Chainmail skips the adhesive. Each tab is linked through its neighbors, so the weave holds itself together and bends with your arm.
Build it as a flat strip first, then wrap it. Add rows until the strip reaches from wrist toward elbow, and size the width around your forearm before you close it.
A woven vambrace stays sturdy because every tab is locked in by the ones around it, so one loose link won’t unravel the whole piece.
Chainmail vambraces take a lot of time. Weaving takes a lot more tabs and patience than gluing, and the sharp edges of raw tabs can catch skin or sleeves.
I’d squeeze the joins snug and line the inside with felt. For a costume that gets worn and tugged, I’d weave every time.
Decorative Pillows
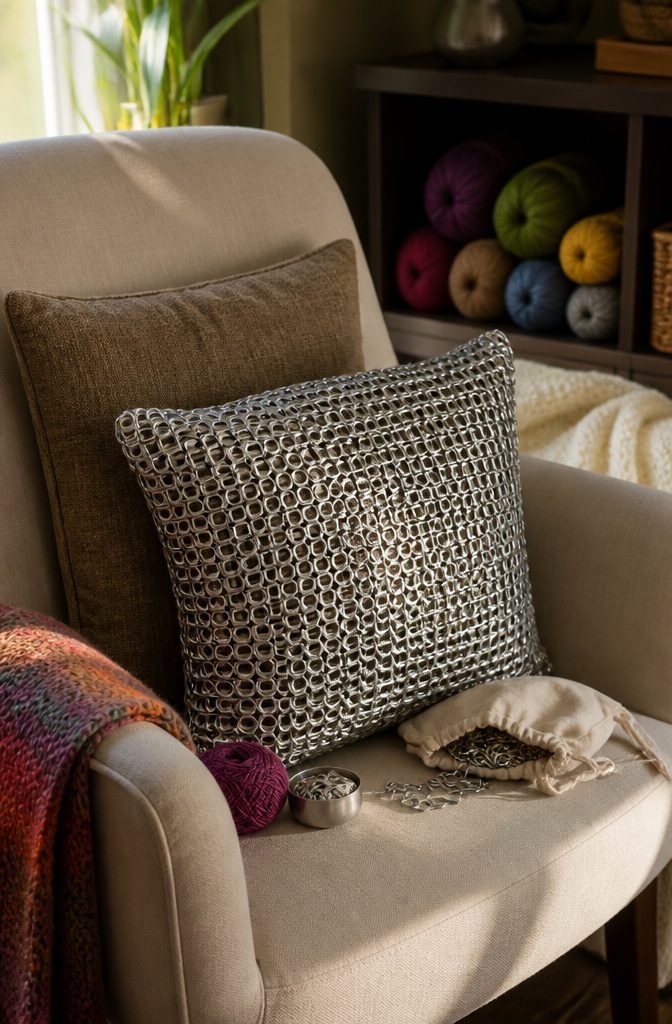
A pop tab pillow is a decorative piece, not something to lean on, so treat the tabs as a surface and the pillow as the backing.
Joined in overlapping layers, the tabs build up into a cushion shape, much like scales on a fish.
Ribbon is the easiest way to hold them together.
Thread it through the holes where two tabs overlap, then cross it in an X through the next pair and pull tight; that crossing is what locks the tabs into one piece.
Alternate tabs face-up and upside down so the holes line up.
For a stiffer pillow, I’d skip cotton stuffing and use a copper sheet as the form. It holds the shape that soft filling can’t, and the tabs lie flatter against it.
Chandeliers
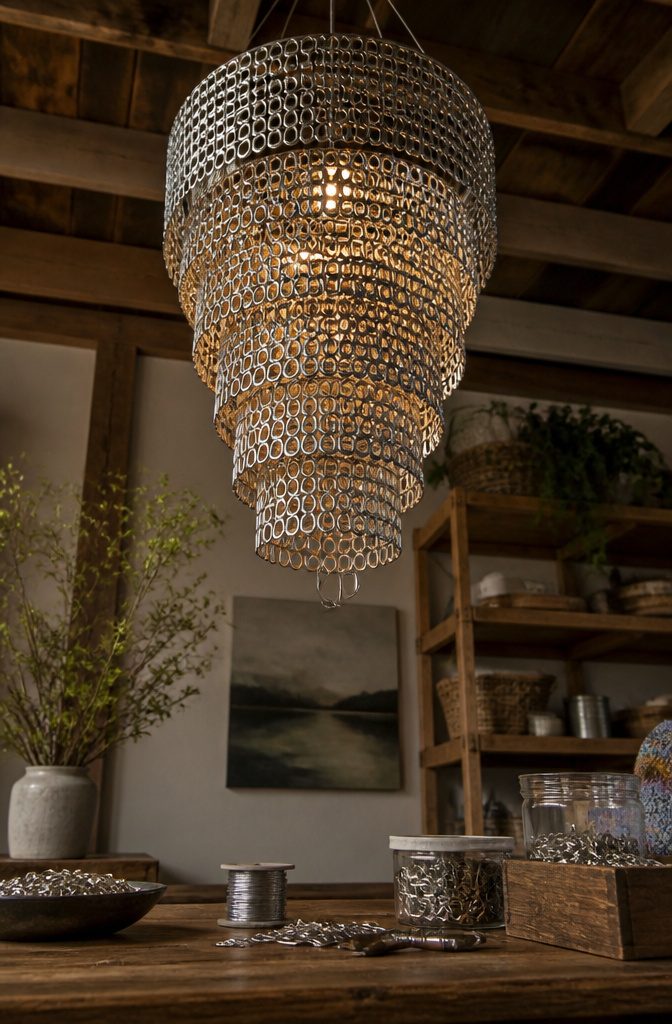
A pop tab chandelier is a lampshade built without the lamp: linked tabs hang in tiers from a wire ring, and the ring sits around the center light in a room.
The ring sets the width, and each tier of linked tabs drops from it in strands. Free-style dangling gives the loosest look, and I’d choose it over rigid, even rows because uneven strands catch light from more angles.
Each tab has a hole, so light passes through the chain instead of stopping at it.
Link the strands before you attach anything to the ring, then tie them on one at a time so you can adjust the spacing as you go.
A store-bought chandelier costs real money, and this one runs on soda tabs you were going to toss.
Fish Models and Cyber Butterflies
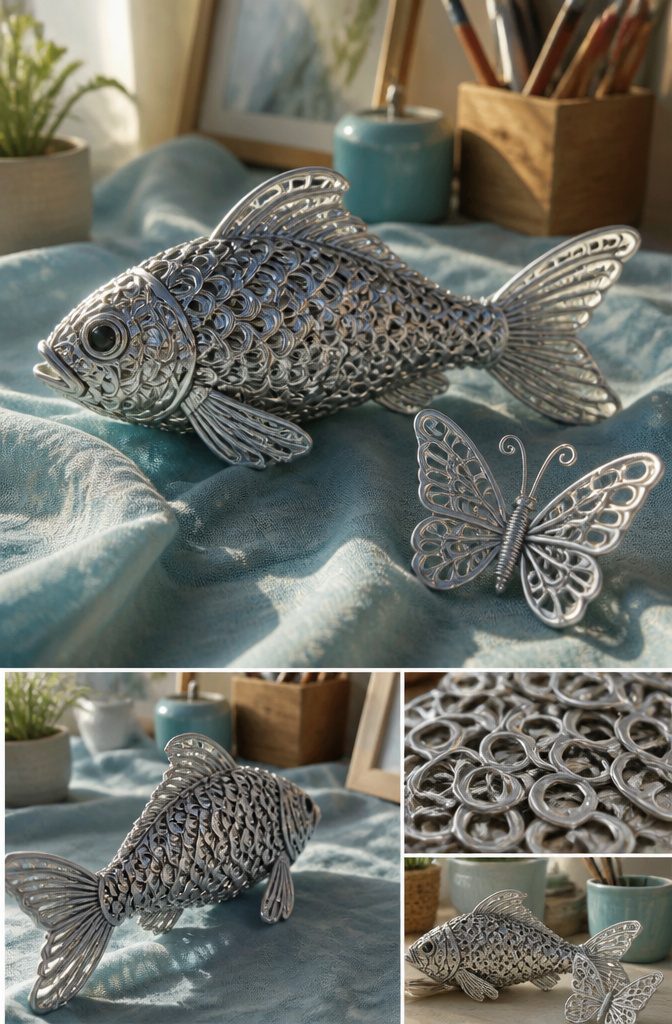
A pop tab fish works because the tabs overlap like real scales, so lay each row slightly over the one before it and work from tail to head.
The tabs alone won’t hold a pose. Run a rod or a wire cage through the body first, and the fish keeps its shape on a shelf instead of slumping.
Flapping fins and a tail made of extra tabs give it more movement, which is what turns it from a craft into an exhibition piece.
The cyber butterfly uses the same layering, only flatter. Build the wings from tabs and add thin wire with beads for the antennae; that small detail is what makes it look alive.
A grosgrain ribbon works as the body or trim if you’d rather not use more tabs. Kids can finish this one without help, so I’d hand it to them and save the fish for yourself.
Small Holders and Purses
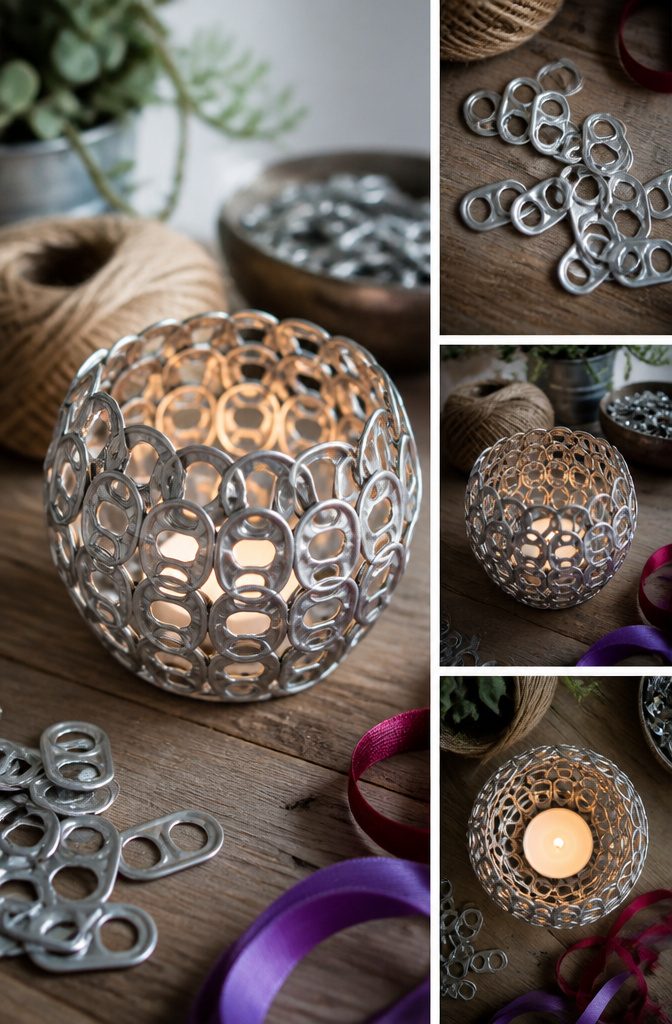
Tea light holders are the easiest of the three to get right.
Join a short chain of tabs with jewelry jump rings or the chain mail method, and size the loop a little larger than the tea light’s diameter so the candle drops in without wobbling.
The result looks industrial, which I prefer to anything glittery. Aluminum tabs also float, so a holder can sit in a water-filled vase as a centerpiece.
Water bottle holders follow the same logic, just scaled up: a longer chain of tabs wrapped around the bottle’s width. The passages give no measurements for them, so size yours to the bottle in hand.
Coin purses are the one to crochet. Tabs worked into a crochet pattern make a small, jingly purse, though I would skip it unless you already crochet.
Tensioners and DIY Chains
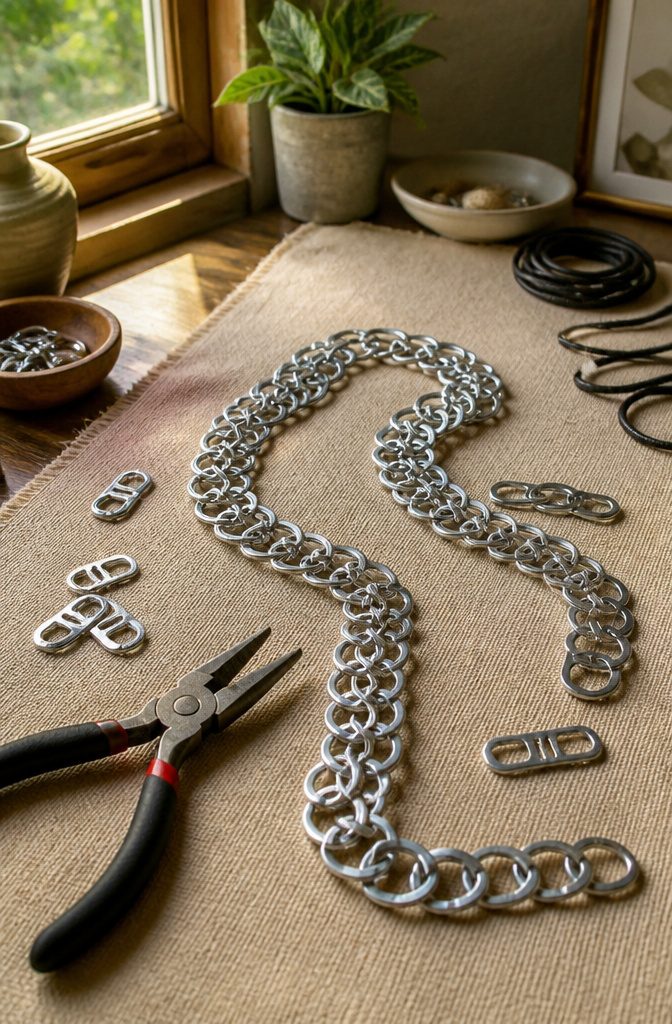
A soda can tab works as a tensioner because it has two loops.
Pull your cord through one loop, then back through the other, and finish with an overhand knot. That is the whole build, and it comes in handy for bungee-style setups or a camping tarp.
Plain tab chains are the same idea stretched out: hook one tab through the next until the line reaches the length you want.
Quantity is what makes a chain strong, because the resistance comes from how many tabs share the load.
A heavy-duty version will take a healthy pile, and it can stand in for a bike chain once you hook a lock onto the end.
I treat the basic chain as the starting point for most other tab projects. Learn it first, and the fancier pieces mostly come down to chain plus finishing.
Materials and Tools
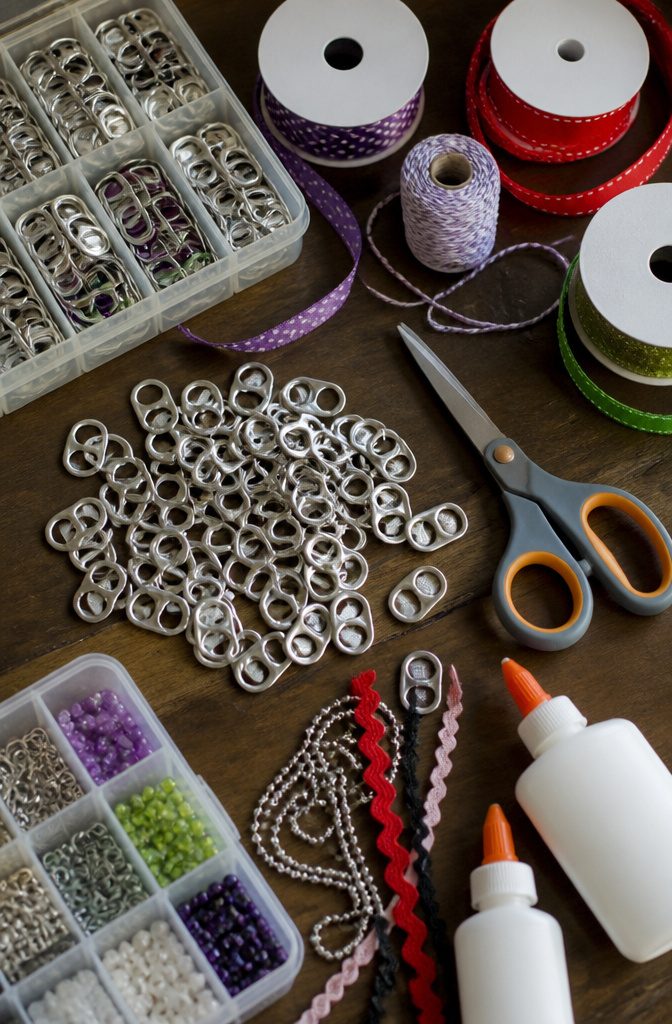
Most pop tab crafts need only six supplies, and each project leans on one or two of them.
- Pop tabs: Rinse them and let them dry. Every project here starts with a saved-up pile.
- Jump rings: These link tab to tab for armor-style costumes and tea light chains, and they are the only supply the costume needs beyond the tabs.
- Ribbon: It weaves through the tab holes for bracelets. Crossed in an "X" on the front, it locks the tabs together.
- Glue: Hot glue or crazy glue holds tabs to a flat surface, such as a picture frame.
- Scissors: I use them only to trim ribbon ends once the bracelet is tied.
- Jewelry pliers: They open and close jump rings, so skip the pliers only if you’re gluing or weaving.
Linking, Gluing and Crocheting
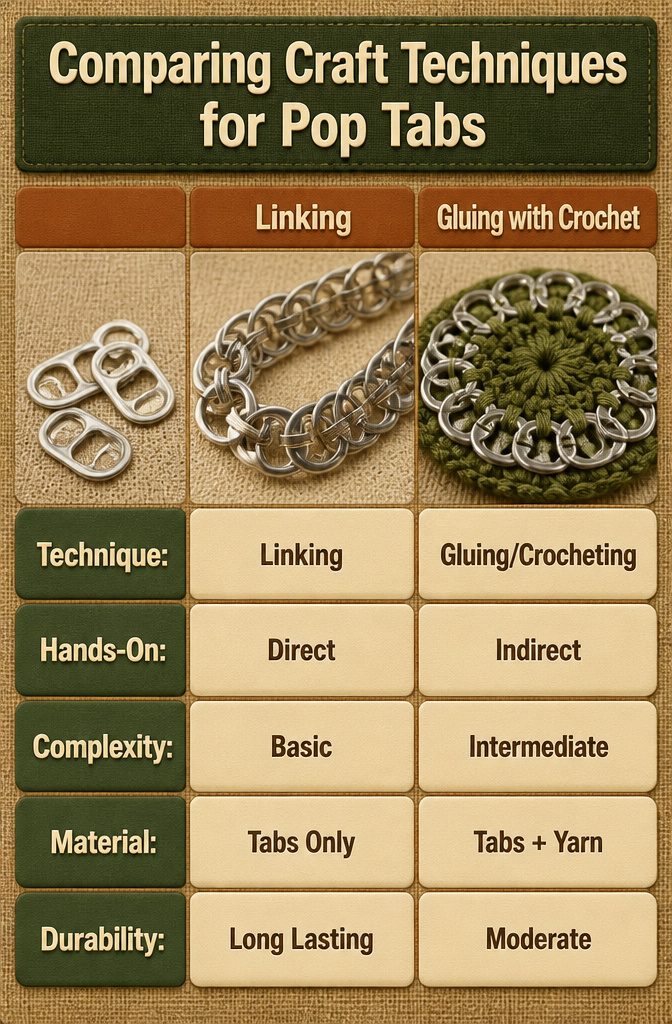
Linking is the technique I’d teach first: tabs hooked straight into each other make a metal chain with no supplies beyond the tabs, and it suits keychains, belts-on-jeans chains and anything that needs to hang.
Flipping the direction of tabs as you go changes the look.
Threading with ribbon is gentler on the hands. Every other tab flips the opposite way, and the ribbon crosses in an "X" when it passes through the front and runs straight across at the back.
Alternate the tabs and cross the ribbon on the front for a bracelet that lies flat.
Crocheting works on the tab itself, so the metal acts as your guide, and yarn gives you color choice. It suits coasters and beginners best.
Gluing and chainmail I’d skip for a first project.
Why Upcycle Pop Tabs
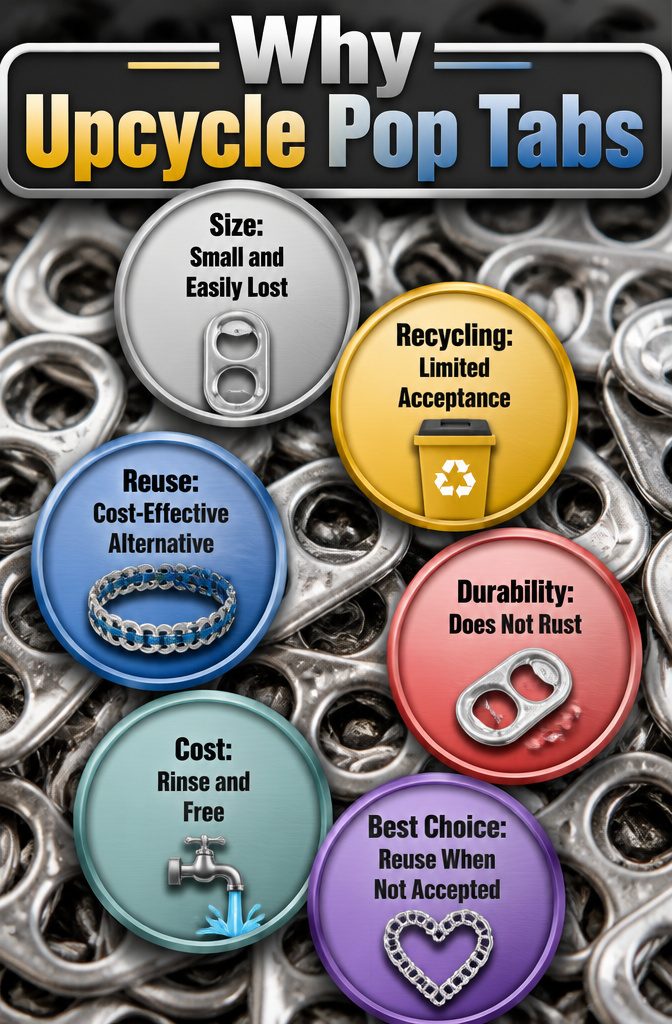
Aluminum tabs are small, and that is exactly why they get lost. Many curbside programs and sorting facilities can’t catch pieces this size, so a loose tab can fall through the screens and end up as waste instead of metal.
Some recycling centers do take them, but policies vary, so a quick call to yours settles it.
Reuse sidesteps the question.
A tab you turn into a bracelet link or a coaster stitch stays out of the trash, and it saves you from buying new beads, rings or chain. Aluminum also doesn’t rust, so a finished piece holds up for years.
I think reuse is the better route whenever your local center won’t take tabs. Rinse them, and they cost nothing.
Frequently Asked Questions
What can you make with pop tabs?
Pop tabs work for bracelets, necklaces, keychains, zipper pulls, lampshades, wall art, coasters, picture frames, handbags and clutches, and even costume armor.
Keychains and bracelets are the easiest places to start. Larger pieces like lampshades and armor take a big saved-up pile of tabs.
How do you make a pop tab bracelet?
Thread ribbon through the holes of tabs that overlap by half, flipping every other tab the opposite way.
Where the ribbon passes through the front it crosses in an X, and across the back it runs straight. Finish by tying a bow or knot at your wrist so the size is right, then trim the ribbon ends.
How many pop tabs do you need for a bracelet?
An average woman’s bracelet takes 12 tabs. The jump-ring version uses 27 rings instead, and it gives you an all-metal chain with no fabric showing.
Are pop tabs recyclable?
Often yes, but policies vary. Tabs are small enough to fall through sorting screens, and some are steel rather than aluminum, which certain programs won’t take.
Call your local center to check, and if it won’t take them, turning them into a craft keeps them out of the trash.





