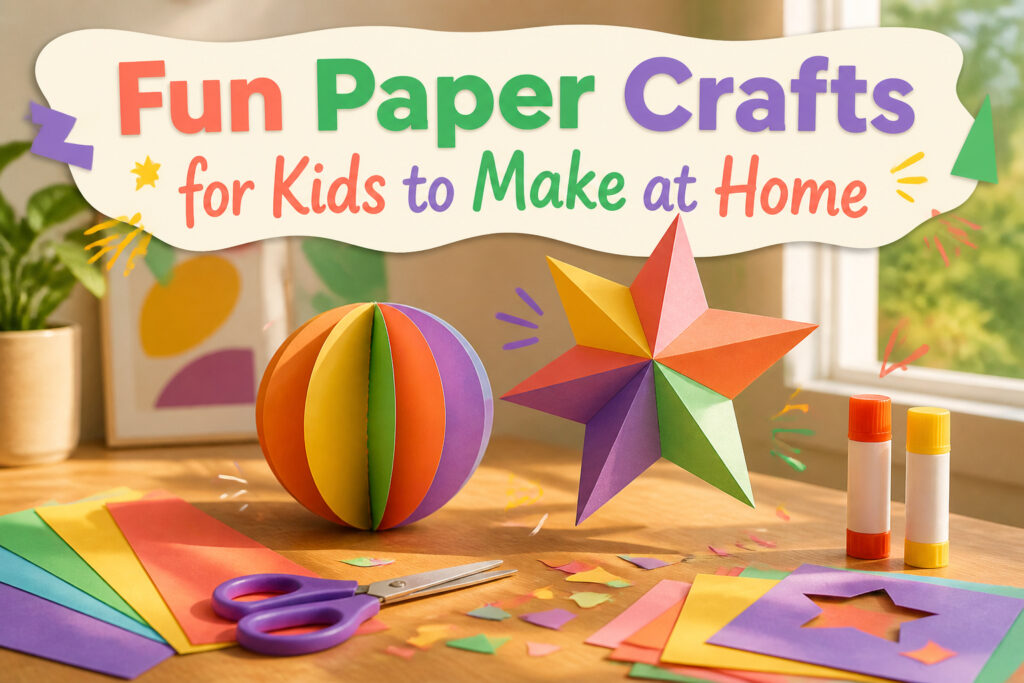
Fun paper crafts for kids work best when the materials are already in the house. The twenty projects below all run on paper, scissors, and glue, with a few pulling in beads, wire, or a spent toilet paper roll. A preschooler can fold paper strips into a ball garland while an older child scores cardstock for a 3D star that actually holds its shape.
Paper Ball Garland
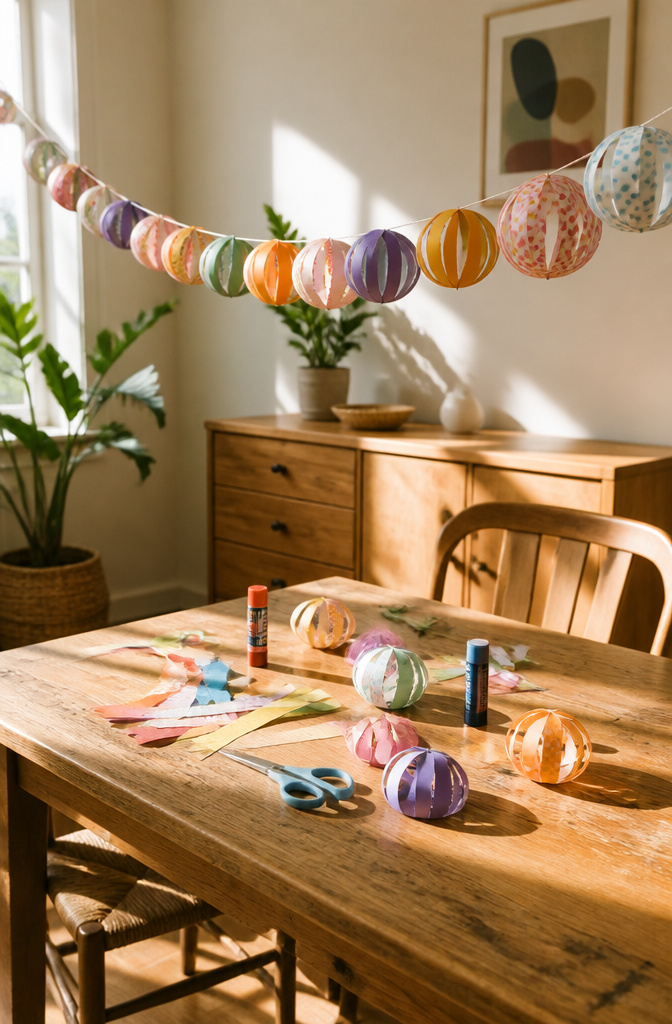
Paper strips give this garland its structure, and the math is forgiving. Cut narrow strips from multicolored paper, crease each one in half, and glue two into a cross at the center. Two more strips turn that cross into an x, and from there the ball builds itself. Fold the ends of every strip toward the middle, gluing the tips down as you go, and a sphere pops into shape. Longer strips make bigger balls, so one length keeps the garland even, or vary them on purpose for a bobbled look.
A preschooler can manage the folding and gluing if an adult handles the scissors. String the finished balls onto yarn, running it through the gaps between strips, and hang it across a wall or doorway. The gaps let you space the balls wherever you want, so nothing slides into a clump at one end.
I have seen versions pitched for Christmas and versions pitched for birthday parties year-round, and both work because the paper does the heavy lifting. The materials stay basic: paper, scissors, glue, string. No specialty tools, no drying time to speak of, and the kind of repetition that lets a kid find their rhythm.
Paper Flowers

Paper flowers show up in more craft roundups than any other project for a reason. A toddler can layer tissue-paper circles with a glue stick while an older kid handles overlapping scored petals and a dab of craft glue to hold the curl. The templates help, but freehand cutting works too, and a bowl set on top while the layers dry keeps the shape flat without any clamping. Bright cardstock stands out better than construction paper for the finished bloom, and a yellow paper circle in the center finishes it. My own preference runs to the simpler builds: the 3D tulips take a minute to fold right, but once a kid cracks that first one they tend to make a whole windowsill’s worth. For the youngest ones, skip the scoring and curling entirely. Cut petals, stack them, glue the center. Done. Same bouquet, no wilting, and none of the mess of real stems.
Paper Chain Snake

The paper chain snake takes a craft most of us made in grade school and gives it just enough structure to hold a kid’s attention start to finish. Construction paper gets cut into strips, looped and glued into a chain, with a printed head and tail glued to either end. Some templates add a separate top, tummy, and side pieces so the snake gets a little dimension; others keep it flat with a single paper color and let markers do the work.
What makes this one stick is the fine motor practice hiding in the fun. Looping strips, dabbing glue, and waiting for it to set before the next link builds patience along with hand control. Two pieces of A4 paper yields plenty of chain, and a 10-by-10 cm scrap is enough for head details. Googly eyes spare you the marker work if you’ve got them, though felt tips do fine in a pinch. The snake springs and slithers when you lift it, which is the payoff that keeps younger kids looping strip after strip when the plain chain would have lost them ten minutes ago.
Toilet Roll Creatures

The cardboard tube from a finished toilet paper roll is already the perfect body for a small creature. Folded paper ears, wings, or limbs attach with glue, and the whole thing turns into something a child names and keeps. Butterflies, ants, aliens, robots, whatever they are building that week.
Paper, scissors, and glue are the core. Googly eyes, tissue paper, construction paper, pipe cleaners, foil, and pom poms add personality if they are around, but they are optional. The point is the tube was heading for the bin anyway.
This is where the recycling angle pays off for real. A child who has watched a cardboard tube become a creature starts saving the next one before anyone asks. The materials were already in the house, and the project finishes in an afternoon. My own preference is to keep the paper additions simple. Too many layers and the tube collapses under the weight of its own decorations. Two or three features, glued flat, last longer than a grand design that tips over.
Beaded Paper Butterflies

Scrapbook paper wings get their shape from a simple accordion fold. Score parallel lines one inch apart, fold back and forth, then pinch the center so the wings fan out. A length of craft wire binds the middle and leaves two short ends poking up for antennae.
The wire does more than hold things together. It becomes the body, and beads strung onto that center section give the butterfly actual weight and dimension. A pipe cleaner works just as well if craft wire is not in the supply drawer; the fuzzy surface even grips the beads without slipping. Either way, adding beads means this is not strictly a paper craft, which slows the project down by one step but also means the finished butterfly survives being dropped or carried around in a pocket.
Patterned scrapbook paper is the usual choice, though the same folding method handles solid colors or paper the kids have painted themselves. The antennae can stay bare wire or take a few extra beads at the tips for more color. Someone will try to skip the scoring step and fold freehand. The wings come out uneven every time.
Paper Wreath

A paper wreath teaches the circle as a form you build, not buy. The quickest version starts with a ring cut from cardboard, then dozens of folded paper cuts tucked in like shingles so the edges flare outward. The layered shapes hide the backing completely, and a preschooler can manage the gluing if someone else stacks the pieces ready.
Seasons turn on the paper you choose. Patterned wrapping paper in reds and greens reads Christmas; swap in pastels for spring or black and orange for Halloween without changing the method at all. Solid colored cardstock or textured paper each give a totally different finished feel, so the same directions produce a door hanger or a bedroom decoration depending on what is already in the house.
The other build uses strips looped around a styrofoam wreath form, ends pressed together before the rest of the strip sticks to itself. Three to four sheets of patterned paper cover the form, with a V-cut at each strip’s top to mimic ribbon ends. A Creative Station with permanent adhesive keeps the mess low and the hold strong, though regular glue works if you have patience for dry time. Either way, the wreath hangs year-round, not just when the holidays hit.
3D Paper Stars

A 3D paper star lives or dies by the score line. Without that shallow crease pressed into the cardstock first, the fold stays soft and the star looks like a crumpled envelope. Score before you fold, and fold toward the score — mountain or valley, but commit to one direction and stay consistent across every point.
The sources split on how you get there. One route runs the paper through a Cricut or Silhouette with a scoring wheel, which handles the precision and makes this doable for kids old enough to manage the machine with supervision. The other route is scissors and a straightedge, scoring by hand with a dull knife or the back of a spoon. Hand-cutting takes longer and the points rarely match perfectly, which matters less than you’d think once the thing is hung up.
Coated cardstock holds the crease better than plain, but plain works if you press hard enough. Younger kids can try the folding part with help, though the crispness of the finished star depends on how accurately they line up each edge. The real age divider is patience, not skill; a seven-year-old who likes exactness will finish faster than a ten-year-old who rushes.
Two stars slot together to make a standing ornament, or punch holes and drop in a battery tea light for a luminary. Both versions need the same base skill: that scored fold, sharp and repeated.
Chinese Lanterns

Red construction paper folds into an accordion body that springs open the moment you let go, which is half the fun of making these. The accordion pleats catch air and let the lantern sway, but the real payoff is the cutwork: triangles, half-moons, or simple slits along the folded edges become glowing windows once you hang the lantern and slide a battery tea light inside. Light passes through those openings and throws patterns on the wall, something a solid-wall craft never manages.
This craft carries its history lightly, which I like. The round shape and cut openings echo traditional Chinese lanterns used in Lunar New Year celebrations, so you can mention the connection without turning an afternoon project into a homework assignment. Kids respond to the story more when the lantern is already in their hands.
A strip of matching paper across the top and bottom, taped into a ring, holds the accordion open. Thread a pipe cleaner through the top ring for a handle. The whole thing collapses flat for storage, then pops back into shape when you pull the rings apart. Use a battery light, not a real flame: paper and hot bulbs do not mix, and the cut openings make it worse, not better.
Origami Fish
Japanese paper folding carries a quiet discipline that still feels like a small miracle when a flat square turns into something alive. The origami fish lands right in that sweet spot for kids old enough to follow a crease pattern, maybe seven or up, though a simpler version with fewer folds works for younger hands too.
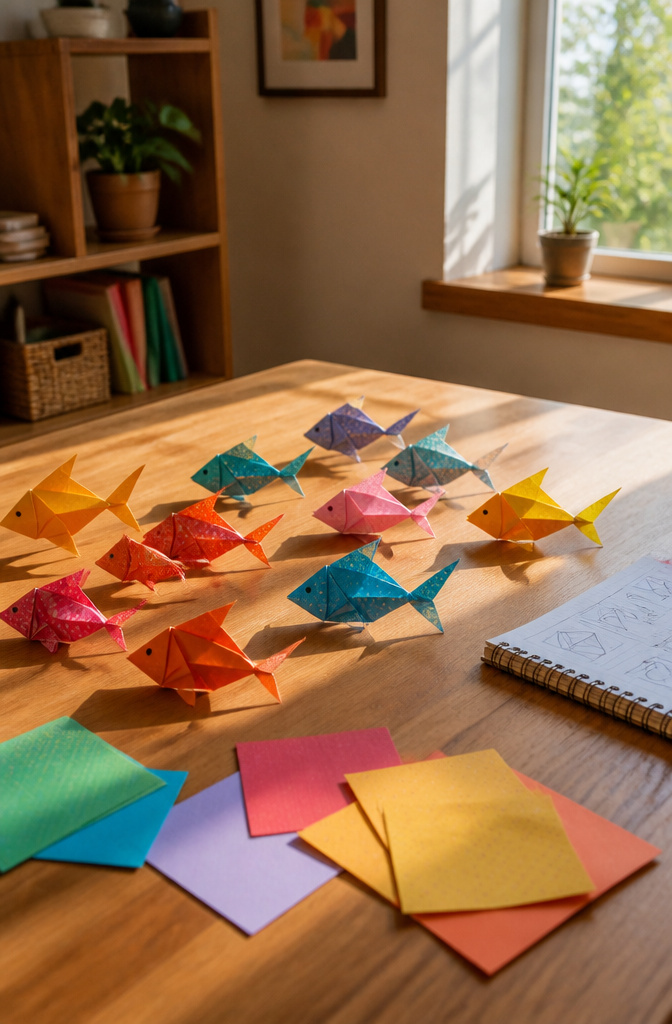
The classic sequence runs through a diagonal fold, then two corners to the center to shape the body, with a reverse fold at one end to lift the tail. Sources call for 6 inch square origami paper, the weight and size that holds a sharp edge without tearing under small fingers. Construction paper will do in a pinch, though it buckles more and the finished fish sit flatter. A pair of scissors and a dab of glue come in handy for some variations, like the Ocean Child version that adds a cut mouth.
What hooks most kids is running the sequence twice, then a dozen times, until a whole school of fish swims across the table in staggered colors. The repetition trains the fingers without boring the mind, each fold a little faster, a little cleaner. That school-of-fish payoff is where this project earns its afternoon, not in the single fold but in the crowd.
Paper Pinwheels

A paper pinwheel earns its keep because it actually moves. You cut a square toward the center from each corner, stopping well before you reach the middle, then fold every other point inward so the blades overlap at the center. A push pin or small brad through those gathered points and into a wooden dowel lets the thing spin when the wind hits it. That motion sets it apart from every static craft on this list.
The supplies stay basic: paper, scissors, something to draw a circle with if you want a neat center, and that pin or brad plus a stick. Some versions use metallic paper for extra flash, but construction paper works fine. The brad has to go through all five holes — the four blade points plus the center of the square — or the pinwheel falls apart the first time it turns.
One way to play this: glue the brad flat to a dowel, which is fast but stiff. Another way leaves the brad clasp loose enough to spin freely, which means more motion for your afternoon. The loose clasp wins if you want the thing to actually work as a toy rather than sit pretty in a plant pot.
Napkin Holder

A woven paper napkin holder puts something genuinely useful on the table, not just another decoration to store after the holiday. The craft starts with a rectangle of construction paper folded lengthwise, then cut with five or six slits from the fold, stopping about two centimeters from the open edge. Strips in a second color weave through those slits, over and under like a tiny basket, and a glue stick locks the ends. The finished band wraps around a toilet paper roll and tapes in place, giving the tube a second life as the inner frame.
No pumpkin faces or snowflakes required. The colors can match Easter brunch, a summer cookout, or an ordinary Tuesday dinner, which is rare in a category where most projects lean hard on seasonal themes. Two colors of construction paper and a finished toilet roll are enough to get started; the scissors, glue, and tape are already in the junk drawer. The weaving itself takes steady fingers but no advanced skill, so a second-grader can manage the over-under rhythm while an adult handles the taping.
Paper Ice Cream Banner

The paper ice cream banner lands squarely in that sweet spot where summer nostalgia meets an afternoon project short enough to finish before anyone melts down. A printable template traces the cone shape onto tan or brown paper, while the scoops come together as paper rosettes. Cut 1.5 by 11-inch strips from pastel patterned cardstock, score them at every ¼ inch, then accordion fold and join the ends into loops. A small square hot-glued in the center pulls each loop into a scalloped dome, and a matching circle on top hides the seam.
Stringing the finished cones into a banner takes foam tape and a hole punch. Punch two holes in a cardstock circle, tape it to the back of each cone, and thread pink yarn through. The whole thing hangs in about the time it takes to explain it, which is why it works for birthday parties or just a splash of summer magic on a Tuesday.
Rainbow Paper Chain Wall Hanging

A single paper chain drapes across a mantel and disappears. String a dozen of them in graduated rows from a dowel, and you have a wall hanging that actually fills the space above a bed or a reading nook. The rainbow version works because the color sequence does the decorating for you: tan arches across the top, then light pink, coral, mustard yellow, and whatever comes next in the stack you cut. Each strip measures about 6 by 1 inch, and each square on the template holds two links, so the math stacks up fast. This is not a one-sheet project. A single chain might empty half a page of cardstock; the full rainbow rows will clear a whole pack or close to it. The tradeoff is real estate. A paper chain snakes around a lampshade. The wall hanging turns a blank wall into the thing a kid points at when friends come over. Slide the top loops onto a dowel, knot a length of sturdy string at each end, and hang it like a curtain rod. Hot glue seals each ring, though a careful kid with patience can loop and press without it.
Creative Collage

A collage clears the scrap bin faster than any other paper craft. Old magazines, wrapping paper remnants, and the patterned paper left from other projects all find a home here. The recycling angle is built in: the finished piece looks better when the materials already carried someone else’s design.
Glue stick, base paper, and scraps are all you need. Torn edges work as well as cut ones, so scissors are optional. That openness is why the project suits any age. A three-year-old can layer torn color blocks until the page is full. A ten-year-old can plan a mosaic apple from red and green squares, or build a fox from layered simple shapes.
The lack of a fixed endpoint is the point. One rainy afternoon my neighbor’s kid spent forty minutes on a "snowman" that was mostly white paper stripes and one orange triangle nose. She called it finished when the glue dried, not when it matched any template. Collage absorbs whatever time and scraps the afternoon offers, then releases both when something else looks more interesting.
Paper Butterflies

A folded paper butterfly lands somewhere between origami and freeform cutting, which makes it the better starting point for kids under six who do not yet have the patience for beading wire. Printer paper or construction paper both work; the lighter the sheet, the easier the creases hold. I fold the paper in half lengthwise, cut a wing shape through both layers so the halves match, then open it to a single symmetrical butterfly. A pipe cleaner or scrap of craft wire twisted at the center gives you antennae without any beads to chase under the couch.
The circle-cut version from preschool classrooms builds the same symmetry lesson into something even simpler. Kids trace a cup or lid for four matching circles, fold each one in half, and glue the straight edges together down the center line so the curves fan out as upper and lower wings. No scoring tool required, no accordion folds to line up. Scrapbook paper adds pattern if you have it, but plain construction paper colored with crayons works just as well and takes the pressure off perfection.
What this version sacrifices in dimension it gains in speed. A child can finish two or three in the time it takes to thread beads for one of the fancier craft-wire versions, and that matters when the goal is an afternoon project rather than a weekend commitment.
Hot Air Balloon

A 3D paper hot air balloon starts with five identical balloon shapes cut from multicolored paper. Fold each one down the center, then glue them together in a stack so the shape opens into a rounded form that actually holds air, or at least looks like it could. The trick that makes this work is gluing the stacked halves onto light blue cardstock as a sky backdrop, with white paper clouds scattered around so the balloon has somewhere to float.
The basket is tan cardstock, a simple square traced from the template, with baker’s twine run between balloon bottom and basket to sell the illusion. Tacky glue holds the twine in place; a glue stick handles the paper layers. Five stacked pieces is the minimum for a rounded form that reads as dimensional rather than flat — fewer and the curve collapses into a fan.
This one earns its keep after the glue dries. Hang several in a corner at different heights and they become a mobile that shifts with air currents. The sources disagree on the best display: one treats it as wall art glued flat to cardstock, while the other skips the background entirely and strings balloons solo for party decor. The mobile approach splits the difference and gives kids the payoff of something that moves.
Fruit Slice Bookmarks

Fruit slice bookmarks start with a folded corner clip that actually gets used once the glue dries. The pocket comes from folding a small square piece of paper diagonally, then tucking the top triangle into itself to catch the page corner. Layer the paper in rings, watermelon style: green rind on the outside, pink center, black seeds on top. Each slice sits on a white origami base so the colors read as fruit, not just stripes. One 15 cm square makes the clip; scraps of multicolor craft paper handle the rest. My take: skip the printable template and let the kid cut freehand. The seeds will be uneven, the rind will wobble, and that bookmark will outlast every perfect one in the house because they made it themselves.
Flamingo Craft

A half paper plate makes the body of this flamingo, which sits nicely on a shelf or gets tucked into a tropical-themed party display. Pink napkins, cut into large squares and taped to the plate, give the feathers their texture. The long curved neck and head come from pink glitter cardboard, while the leg, beak, and eye are cut from silver glitter cardboard. Tape the head to the top of the plate and the leg to the bottom, then glue the beak and eye in place. The glitter cardboard is what makes this read as a finished piece of decor rather than a rainy-day experiment. Glue works for the small details, but tape holds the larger pieces more reliably on the curved plate surface. A child can manage most of the cutting if you draw the shapes first, though the eye piece is small enough that an adult hand helps. The whole build finishes in under an afternoon.
3D Picture Frame

A 3D picture frame starts with a piece of cardstock and a pencil you already own. You cut the center square for the photo, then roll each edge tightly around the pencil so the pattern faces outward. Slide the pencil out and the curled lip lifts the frame off the page, giving it real depth.
This one demands more patience than flat paper crafts. The rolling step needs even pressure or the edge comes out lopsided, and younger kids may need a hand keeping the curl tight. I have watched a six-year-old manage it fine once she saw the motion, but a four-year-old handed me the pencil and asked me to finish.
Cardstock weight matters here. Printer paper wilts; construction paper holds up better but still softens after a day. Heavier cardstock keeps that lift. The template from the Kitchen Table Classroom approach lets kids pick their own color scheme, and the decorating happens before the rolling, so markers have time to dry.
The finished frame sits on a shelf instead of hanging flat. That small change, a frame with actual shadow lines behind it, makes kids treat their chosen photo like something worth displaying.
Paper Beads

Paper beads turn leftover magazine pages or origami scraps into something a child can actually wear. The trick is cutting long isosceles triangles, not rectangles. A wider base wraps into a thicker bead, a narrower one into something delicate enough for a bracelet. Roll them tight around a skewer starting from the wide end, and a dab of glue at the tip seals the spiral before it springs open.
Finished beads string onto cord for necklaces or bracelets, and they pair naturally with the beaded paper butterflies if you are making both. They also stand alone as a satisfying afternoon project, especially since the materials cost nothing but time a kid would spend anyway. Old magazines work as well as origami paper; the glossier the page, the sturdier the bead. My preference runs toward matte paper for paint or glitter that actually sticks.
Frequently Asked Questions
What are some easy paper crafts for kids?
Paper flowers, paper chain snakes, toilet roll creatures, and origami fish are all easy starting points. Most need only paper, scissors, and glue, and many can be scaled up or down depending on the child’s age. The paper ball garland and paper butterflies are especially forgiving for younger hands.
What materials do I need for paper crafts?
The core supplies are paper, scissors, and glue. Construction paper, cardstock, tissue paper, and scrapbook paper all work well. Many projects in this list also use household extras like toilet paper rolls, yarn, pipe cleaners, or craft wire, but none require specialty tools.
Are these crafts suitable for all ages?
Most are, with adjustments. Preschoolers can handle gluing pre-cut pieces and simple folding with adult help on scissors. Older kids manage scoring, precise folds, and tools like a Cricut with supervision. The article flags specific age breaks: origami fish suits seven and up, while paper butterflies work better for kids under six than beaded wire versions.