
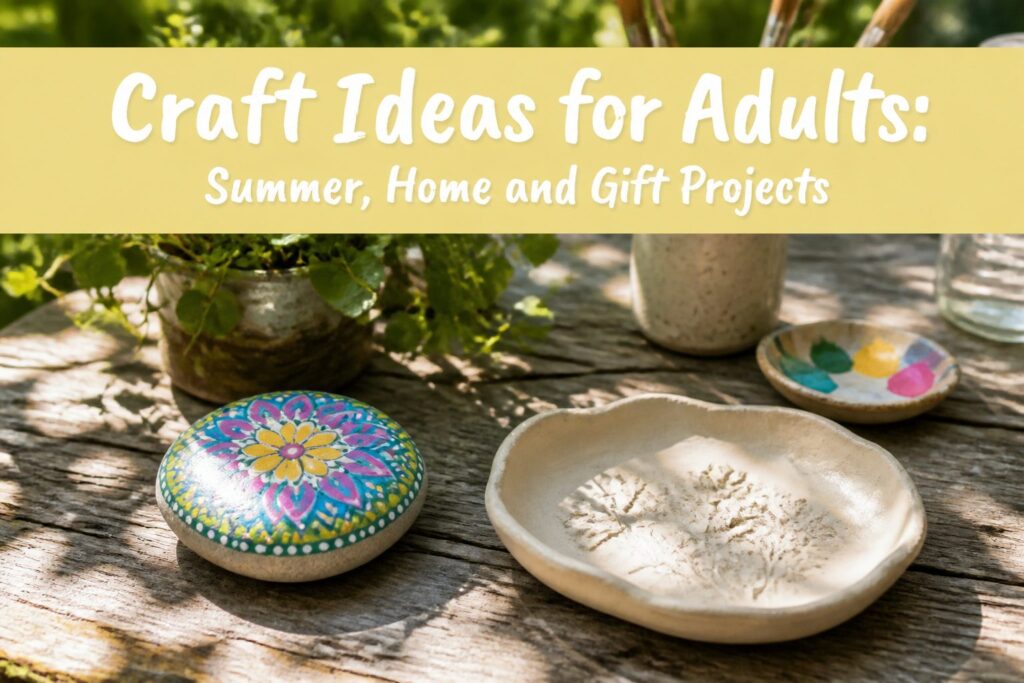
These projects run from a free painted rock to a sewn beach bag, and the deciding factor is how much patience you have for drying time.
Pressed flowers need 2–3 weeks before you can touch them, while air-dry clay dishes finish in an afternoon with no kiln. Start with a rock or a clay dish if you want results today.
1. Sea Glass Bottles
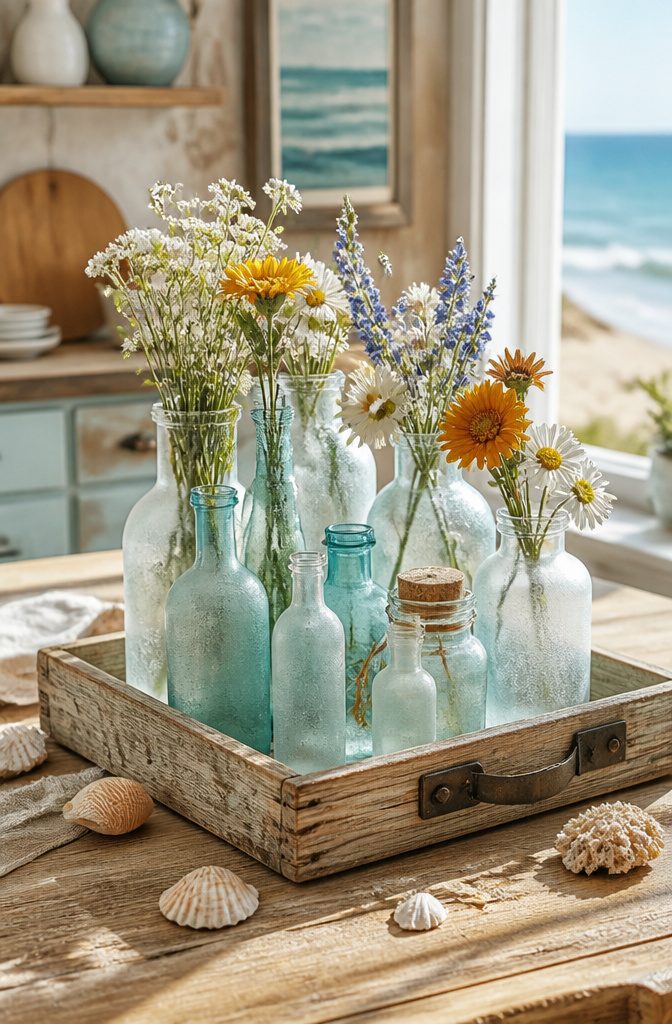
Sea glass bottles borrow the look of something you’d comb a beach for, which makes them one of the easier ways to bring a summer theme indoors.
The finish is frosted, soft and slightly cloudy, like glass that has spent years tumbling in surf. Everyday jars and bottles are the starting point, so the cost is close to nothing if you save what comes through your kitchen.
I’d pick clear or lightly tinted glass bottles and jars over anything heavily textured, since the frost reads best on smooth surfaces.
Set a few together in a tray, or fill one with summer blooms. A jar can also become a rope lantern, which suits a porch or patio table.
2. Seashell Candles
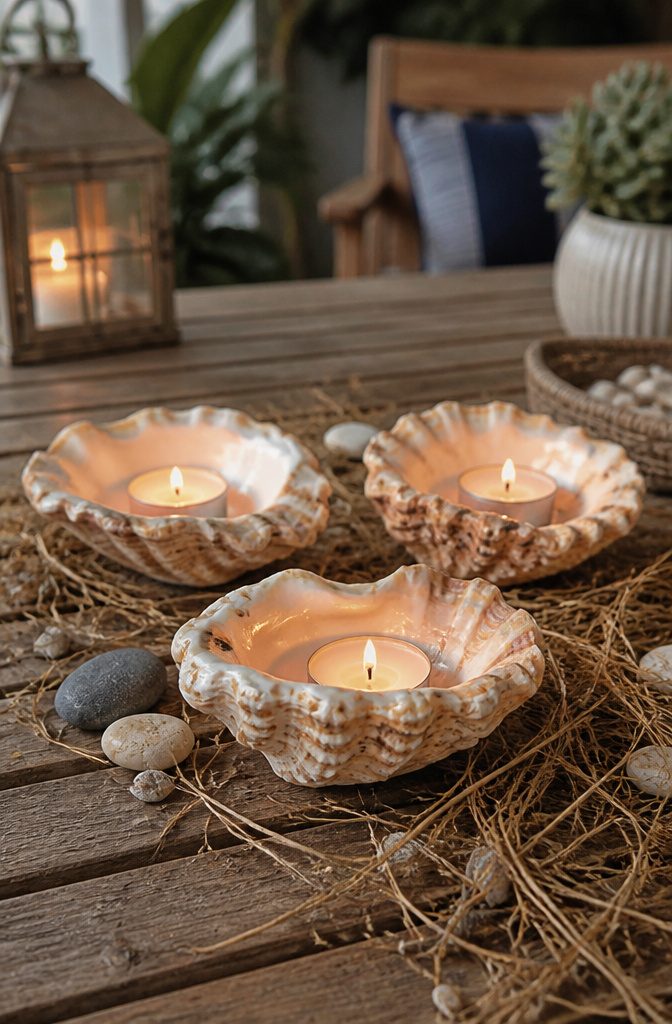
Tea lights are what make this project easy. Set one inside a large shell and you skip the wick entirely, which is the step that makes first-time candle makers nervous.
Pour melted wax around the tea light so it sits embedded in the shell, and the little metal cup disappears into the fill.
Scent is where you get to personalize it.
Stir a few drops of essential oil into the wax before you pour, and a plain beach find becomes something worth giving. I’d pick the biggest, deepest shells you have, since a shallow one leaves little room for wax.
Embed a tea light instead of threading a wick and you can finish a set in an afternoon. A few of them in a small box make a good summer gift.
3. Painted Citrus Serving Tray
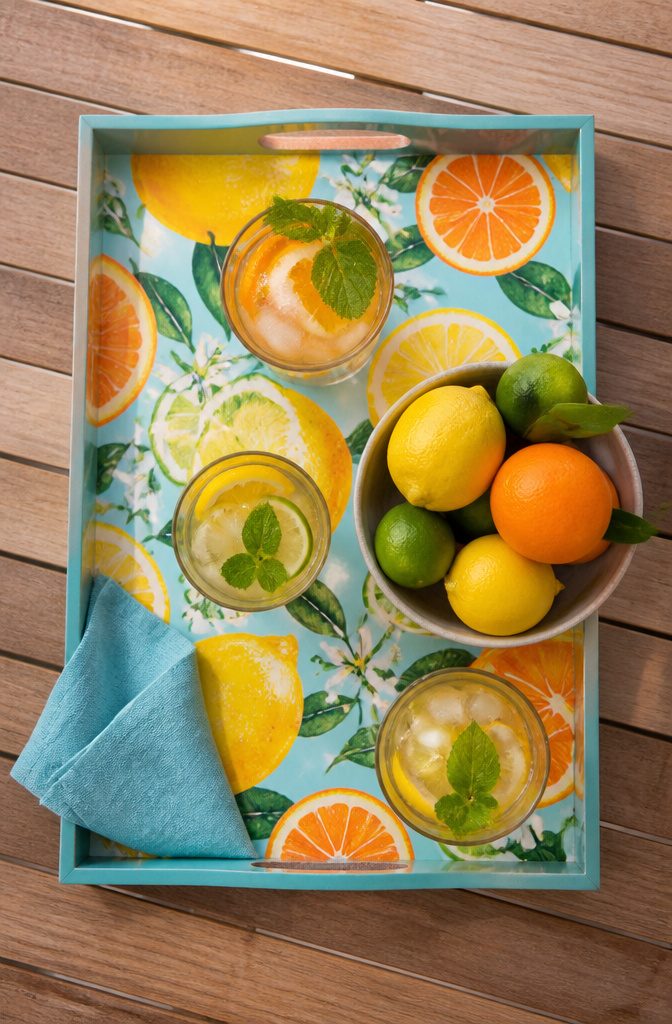
A painted citrus tray works best when the fruit does the talking and the rest stays quiet.
Bright oranges, lemons and limes read well against a plain base, so I’d keep the tray itself simple and let the paint carry the color.
Skip the freehand anxiety by using a stencil for the citrus outline, then fill it in. Going freehand is fine if you like a looser, wobblier look, and on a serving tray that charm usually works in your favor.
This is a summer entertaining piece first. Set it out with drinks on the patio, or leave it on a dining or coffee table as the base of a summer vignette with a bowl of real fruit on top.
Plan on using it for dry or lightly wiped-down serving, since paint on a surface people touch and clean won’t love a soak.
4. Pressed Flower Coasters
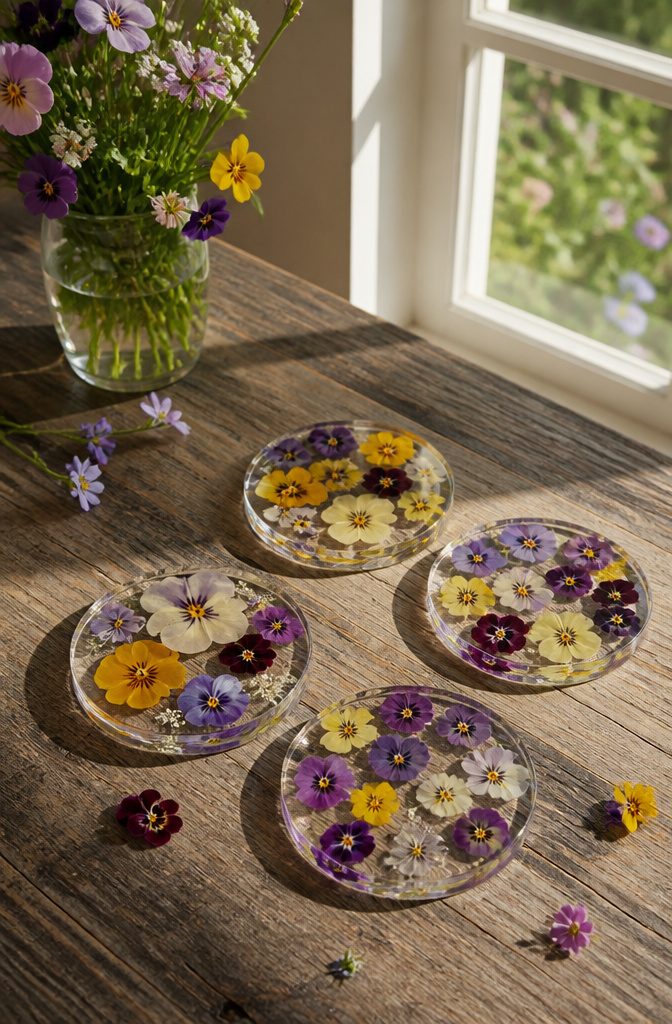
Pressed flowers lose their thickness but not their fragility, so the layer on top does most of the work.
Resin is the usual choice for coasters: pour a thin coat over the dried blooms and it cures into a hard, clear, wipeable surface.
Mod Podge and sealed tile blanks are cheaper, though they scratch sooner and handle hot mugs worse.
Pick flowers that are fully dry before you start.
Any trace of moisture under the seal turns brown and cloudy, and you can’t fix it afterward. Small, flat blooms like pansies, violets and larkspur sit best; a thick rose will lift at the edges.
A set of four tied with twine makes a good gift, and it’s a fair excuse to start pressing flowers from your own garden a few weeks ahead.
5. DIY Beach Bag
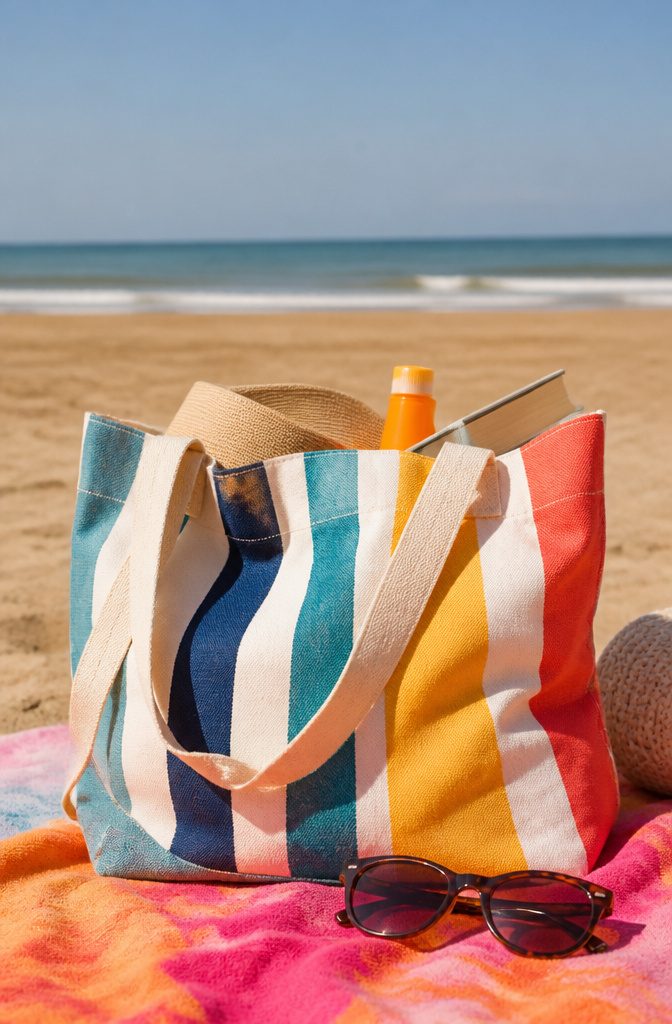
A beach bag is about as forgiving as sewing gets. It’s mostly straight seams: two panels, a bottom, and two handles, so a basic machine and a few hours are plenty.
I’d pick a sturdy cotton canvas or duck cloth over quilting cotton, because sand, wet towels and sunscreen bottles will sag a thin fabric within a week.
Cut the handle straps longer than you think you need, since a bag that sits high on the shoulder is the one people actually carry.
Stitch the handles on twice, in a box with an X through it, because that spot takes the most strain.
Lining the bag is optional, and I’d skip it for a first try. Finish the inside seams with a zigzag stitch instead.
For a gift, a bold stripe or a fun print says summer right away. Tuck in a sunscreen and a paperback.
6. Crochet Edge Beach Towel
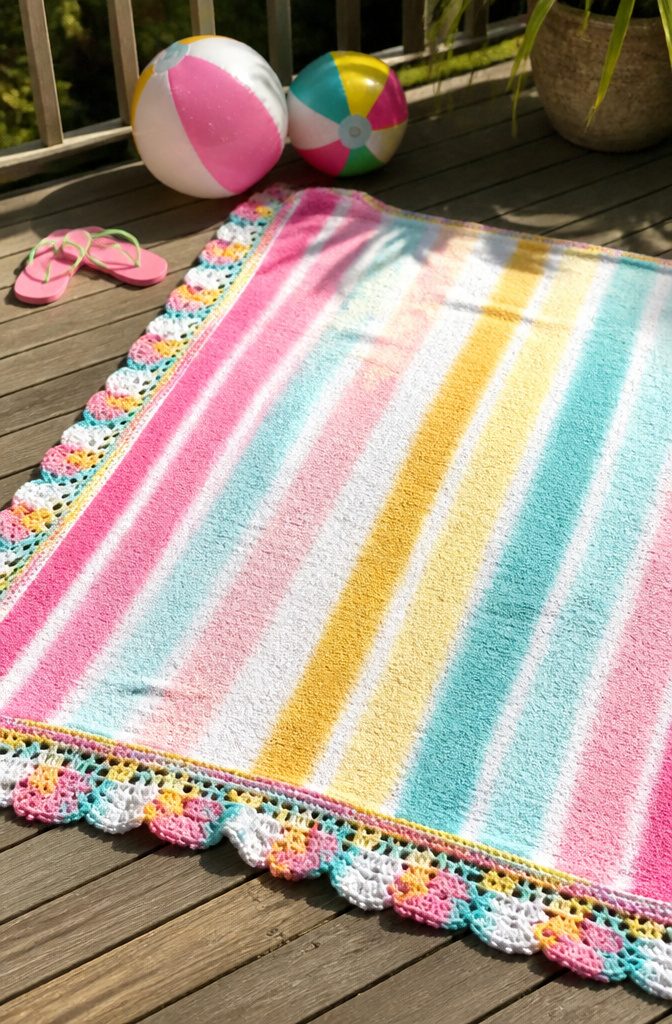
A plain cotton towel is the best canvas for a crochet border, because the yarn has to match the fabric’s habits: it gets wet, sandy and tossed in the wash.
That’s why I’d pick cotton yarn over acrylic or wool. Cotton holds up to laundering and doesn’t turn stiff or fuzzy after a day at the water.
You need three things: a beach towel, cotton yarn and a crochet hook. The border adds a hand-finished look to something that usually costs very little, and a contrasting color gives a flat towel a defined, scalloped or ruffled frame.
It also makes the towel easy to spot on a crowded stretch of sand.
I’d keep the stitch simple. A basic single crochet edge is quick enough for an afternoon and looks tidy, while fancier shells take longer and show off more.
Choose a hook that fits your yarn, and work evenly around all four sides so the edge doesn’t pucker.
7. Wooden Lawn Dice Game
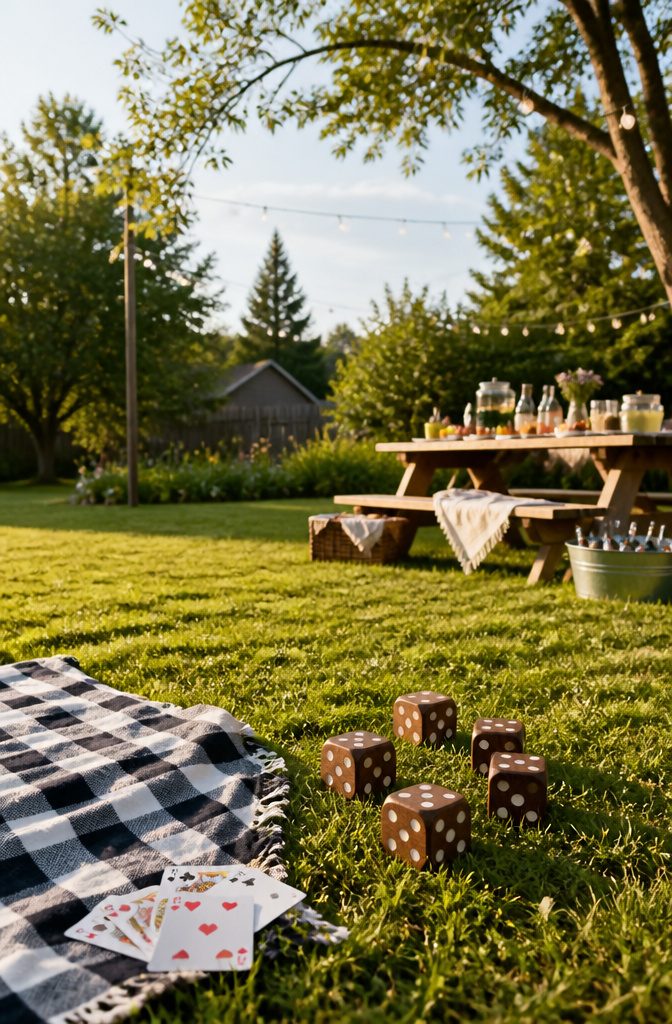
Scrap 4×4 lumber is the whole shopping list for this one: cut it into cubes, stain the wood, and paint the pips white.
If you have offcuts in the garage, the dice cost nothing. A 4×4 is a square post, so each cube already has six equal faces once you cut the lengths to match its width.
Stain first and let it dry before any white goes on, because paint over wet stain beads and streaks.
Dark stain with white pips gives the best contrast from across a lawn. I’d skip a fancy stencil and trace a jar lid or a bottle cap for each dot.
Roll them on grass at a summer party, and keep opposite faces adding up to 7 so the dice play fairly.
8. Citronella Torches
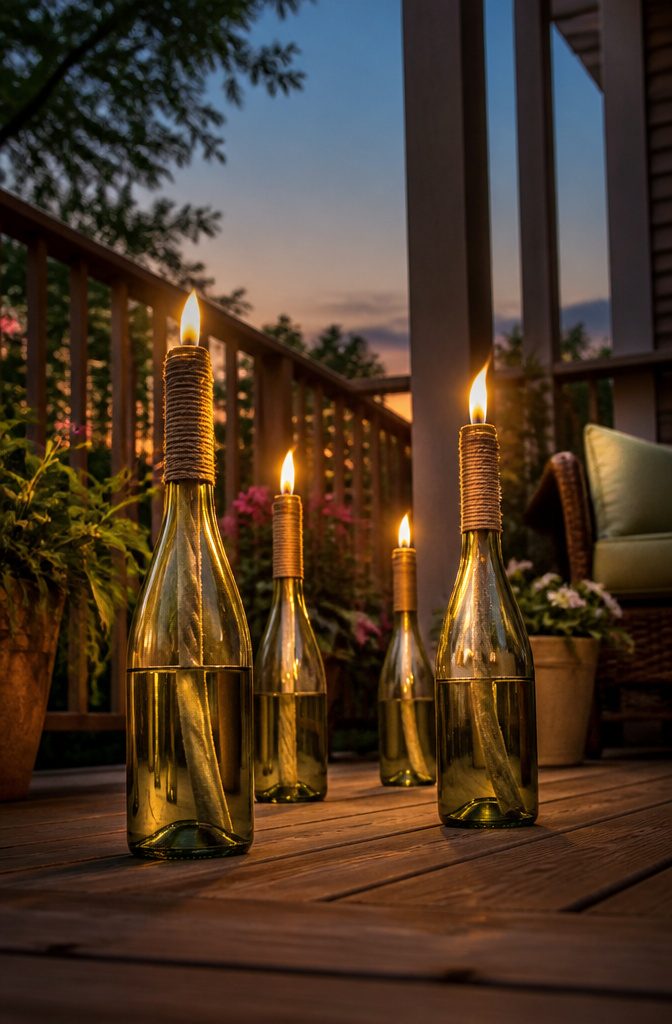
A citronella torch is a glass jar or bottle, a wick, and citronella lamp oil, and that combination is what makes it work on a patio.
Wine bottles, mason jars and small metal buckets all hold fuel well. Pick one with a mouth wide enough to seat a fiberglass wick and a metal wick holder.
Fill the container with citronella oil, not candle wax, and keep it well below the rim so the oil never touches the lip. Paint the outside or wrap the neck in twine for a finish that suits a deck table.
I’d skip anything thin or cracked, since glass sits close to the flame.
The scent is mild, so treat it as a pleasant touch rather than a bug barrier. Set torches on a flat, stable surface, away from dry plants and awnings, and let them cool before you refill.
9. Candle Making
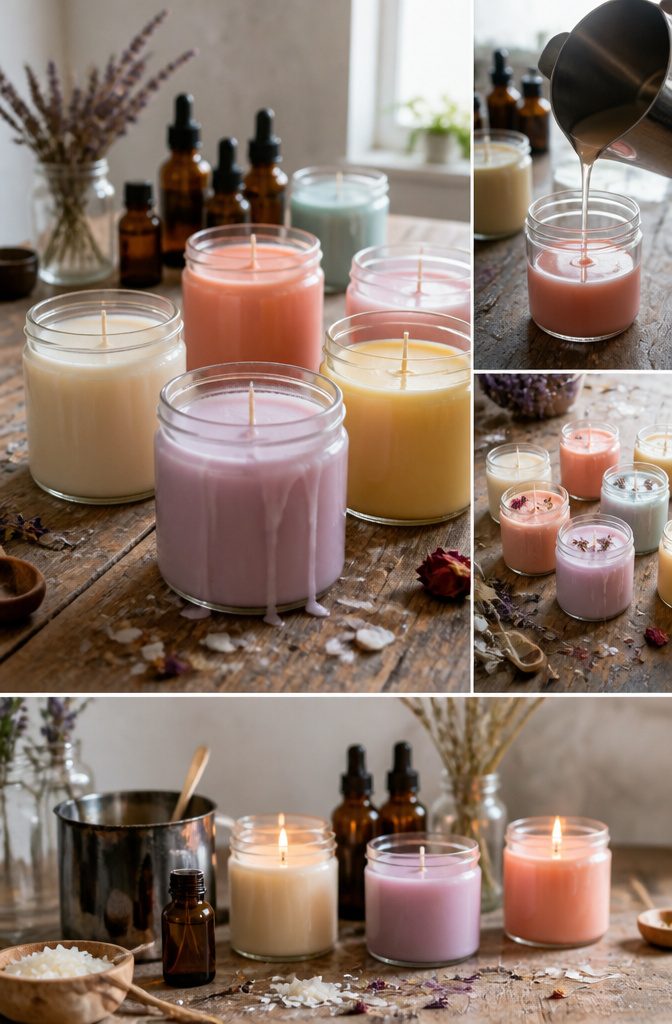
Candle making is about as forgiving as a craft gets: melt wax, pour it into a heat-safe vessel, add fragrance if you like, and let it set.
That short list is why I’d hand it to a first-timer before almost anything else here, and why it’s easy to repeat once the supplies are on your shelf.
Wax is the choice that shapes the rest. Beeswax burns clean and is non-toxic, which matters if pets share your house.
Pick a container that can take the heat, like a sturdy jar, and decide on scent last. Lavender is the soothing pick; leather-bound books is the cozy one.
Finishing touches are where a candle becomes a gift.
Wrap the jar in fabric, carve or decorate a label, or tuck in crystals. Choose a heat-safe jar and a scent you’d keep for yourself, since the best gifts are the ones you’d be sad to give away.
10. Macramé Wall Hanging
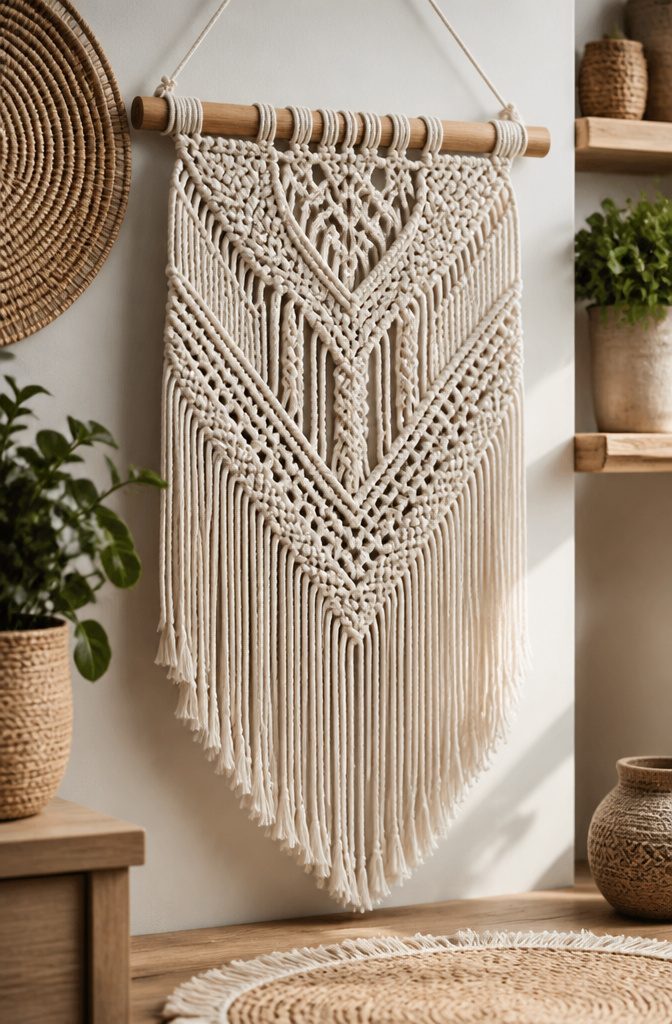
A macramé wall hanging takes two supplies: cord and a dowel.
The rest is knots, and a handful of basic ones will carry you through a whole piece. That makes it one of the easiest craft ideas for adults who have never touched fiber work.
Start with a stick or a ring, whichever you like looking at, and tie your cord on.
Pastels read romantic and earthy tones feel grounded, so pick the mood before you buy. Plan on one afternoon, since a first piece fits comfortably in that window.
I’d skip beads and mixed cord thicknesses on the first try.
Add them once the knots feel automatic, because they’re easier to place when your hands already know the rhythm. If you’d rather not shop for pieces, starter kits online come with the right amount of cord.
11. Jewelry Making
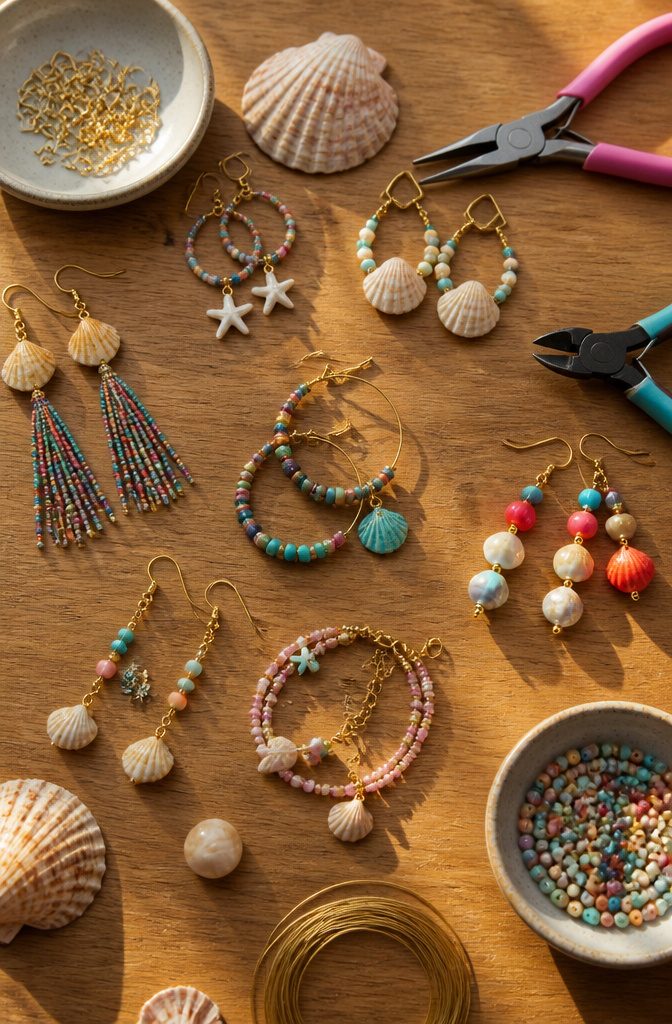
Beads, wire and clasps are the whole kit, and the clasps are where a handmade piece starts to look finished.
Jewelry findings, the catch-all name for clasps and the small hardware that joins a piece, cost little and decide whether a bracelet looks homemade or store-bought.
Shells make a good first project because they are free if you’ve been to the beach.
Pair them with beads for a colorful bracelet, or use a tiny drill bit to put a hole in each shell and hang it as a charm.
I’d pick the charm version first: it needs only a handful of materials and you can finish it in one sitting.
The craft scales well. Beginners can string beads, while wire wrapping and resin casting suit people who want more of a challenge.
Free tutorials from Beadaholique and Jewellery Making Journal cover both. A finished piece also makes an easy gift.
12. Wreath Making
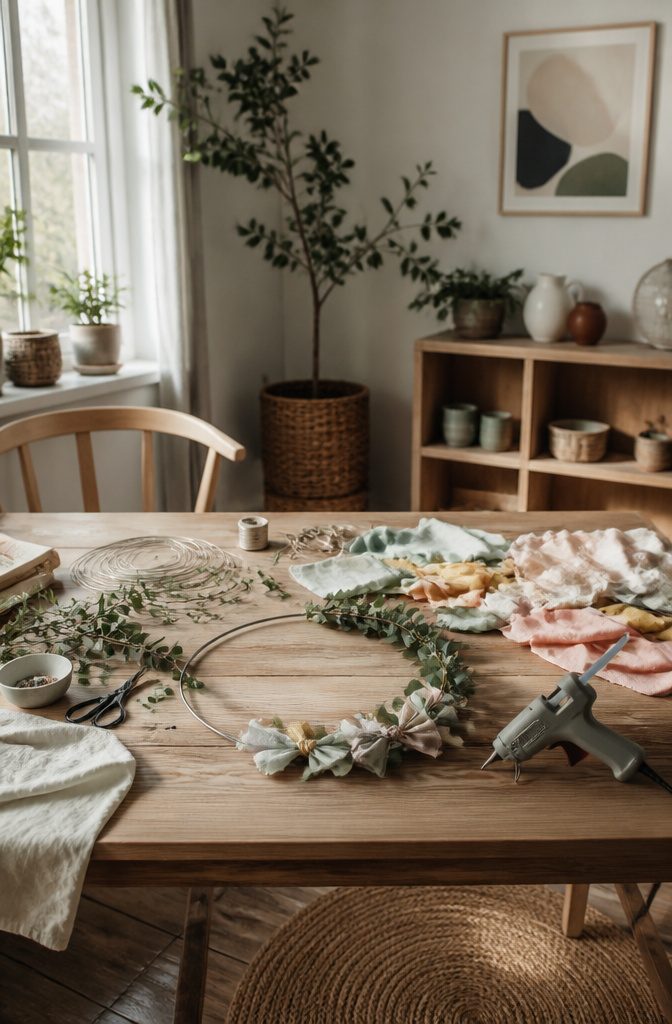
A wreath needs just two things: a base ring and something to cover it.
For the base, I like an embroidery hoop, metal or wooden, because it weighs almost nothing and suits a bedroom wall or hallway better than a bulky front-door form. A standard wreath form gives you the fuller, door-ready look.
Cover it with faux eucalyptus, dried flowers, ribbon, or scraps of fabric, and secure each piece with wire or a dab of hot glue.
Wire holds heavier stems better than glue, and it lets you rework a spot without peeling anything off.
The same ring works in any season: pastels for spring, lemon shades for summer, berries and velvet for Christmas. Layering a second hoop in a different size adds depth.
13. Beer Can Planters
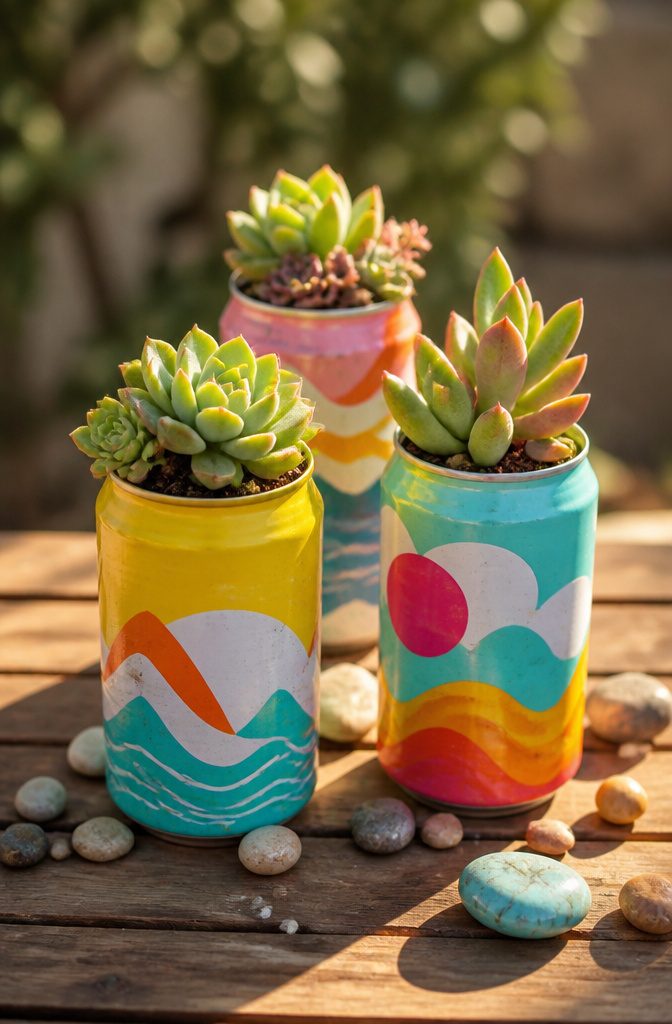
Beer cans suit this project because nearly every house has a few, and the printed art on a good one can stay visible as part of the finished planter.
Pick a can with cool graphics, then rinse it well so no sticky residue is left inside. Cut the top off with a can opener or snips, and sand or fold down the rim so it can’t scratch your fingers.
If the can’s art isn’t worth keeping, paint it. Spray paint in a solid color gives the cleanest coat, and thin layers drip less than one heavy pass.
Fill it with potting mix and tuck in a small succulent. The can sits happily on a windowsill, and the cost is a plant and a little paint, since the rest is already in your recycling bin.
14. Painted Rocks
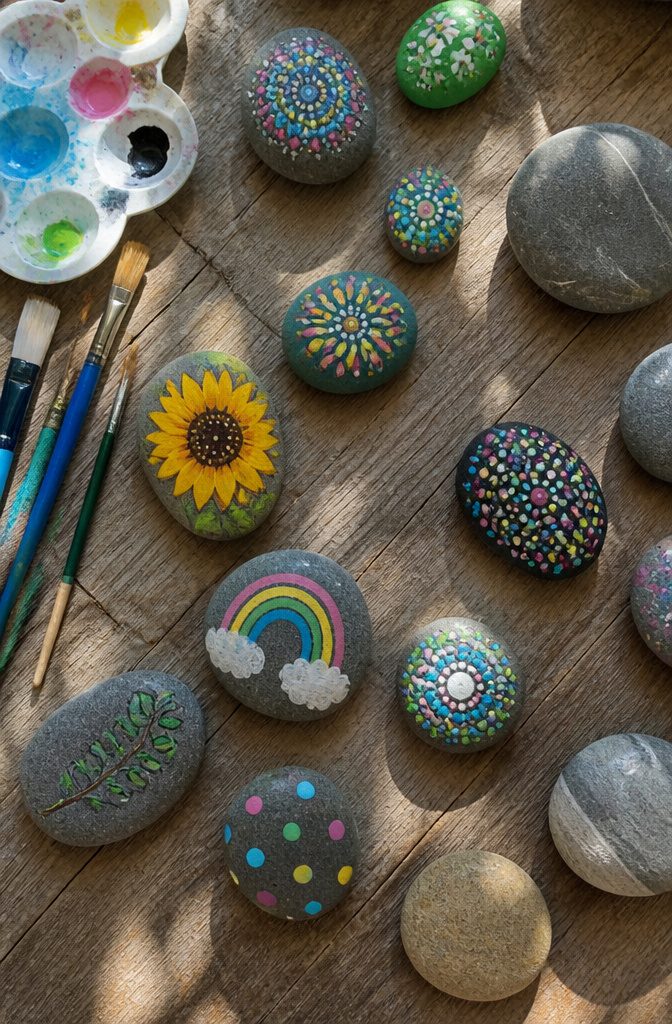
Smooth, flat-ish stones take paint best, because a rough or pitted surface soaks up color and leaves the finish patchy.
River rocks and beach stones are free if you gather them where collecting is allowed, and craft stores sell bags of them if you’d rather not hunt.
Wash each one with soap and water and let it dry fully before you start.
Acrylic paint is the one to buy. It covers well, dries fast, and a small set of basic colors goes a long way.
Lay down a base coat and let it dry before adding any detail, or the colors smear together. A sealer on top keeps the paint from chipping if the rock ends up outdoors.
I’d call this the easiest project on the list for a first-timer. It’s quiet, cheap, and forgiving: a wobbly dot pattern still looks good on a stone.
15. Succulent Planters
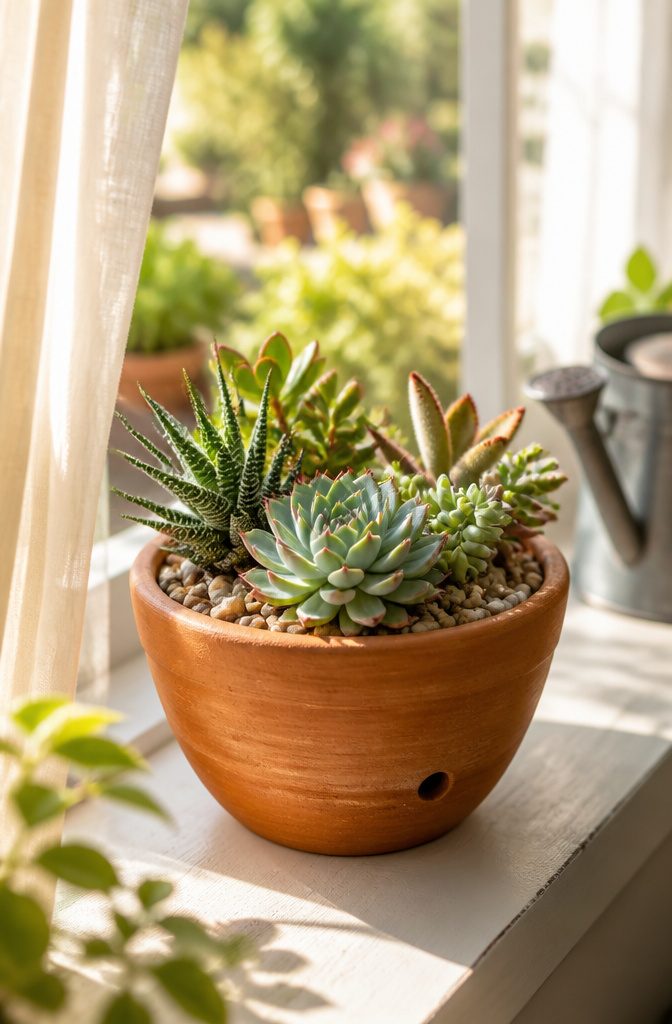
Drainage decides whether a succulent planter lives or rots, so pick the container with that in mind.
A terracotta pot with a hole in the bottom is the safest choice. If you want a teacup or a ceramic bowl without a hole, use a masonry bit to drill one, or plan on watering with a spoon.
Cactus mix drains faster than regular potting soil, and a handful of coarse sand or perlite makes it faster still.
Choose small plants with different leaf shapes and colors, and leave about an inch of room between them so they can grow. Top the soil with pebbles for a finished look.
A single small pot makes an easy gift. A grouping of three on a windowsill works as home decor.
16. Embroidered Hats
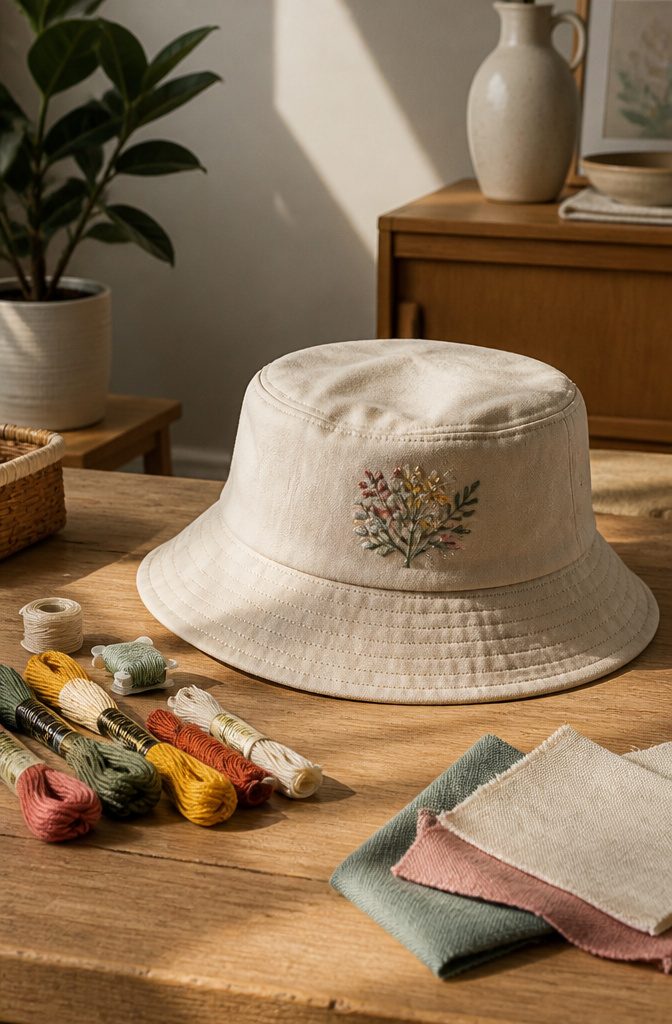
A plain hat takes embroidery better than you might expect, and the supplies are short: a hat, embroidery floss and Fabri-Solvy. The Fabri-Solvy is a water-soluble stabilizer.
You trace or print your design onto it, stick it to the hat, stitch right through it, then rinse it away. That beats drawing on the fabric, since there’s no pen line to chase out later.
A hat is a good beginner stitch project because the design can stay small and simple.
I’d pick a single motif, like the one that suits a gardening hat, and fill it with basic stitches in a few colors of floss.
Keep the design to one small spot on the front or side, where the fabric is easiest to hold flat.
It also makes a gift that people actually wear, which most handmade gifts can’t claim.
17. Tie-Dye T-Shirts
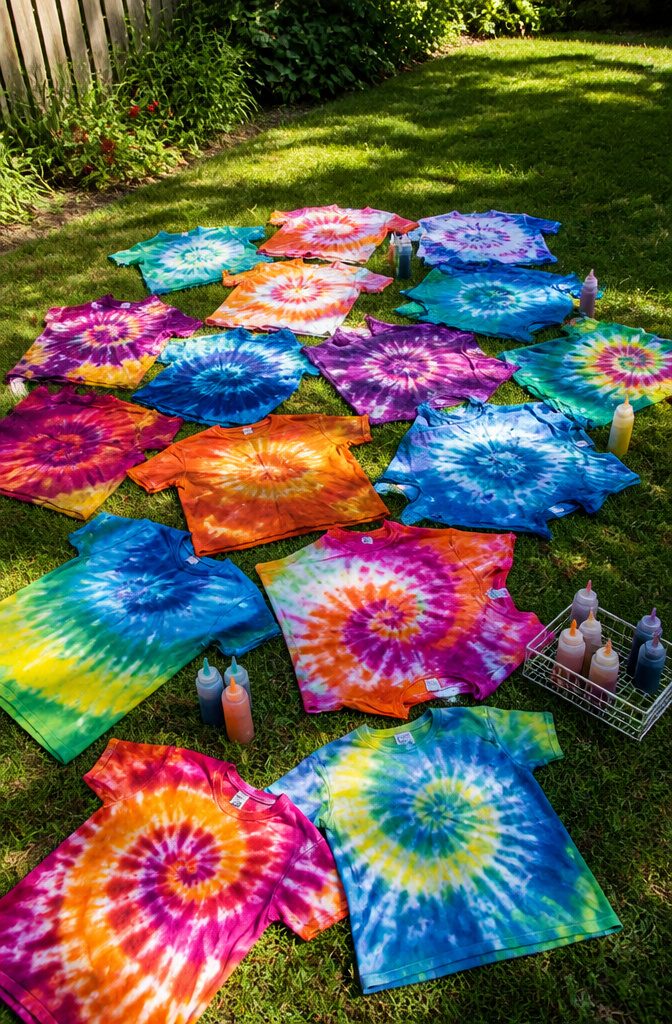
Natural fibers take dye best, so start with 100% cotton shirts, ideally white or very pale, and wash them first to strip off any factory finish.
Leave them damp when you fold and tie. Polyester barely takes fiber-reactive dye, and blends come out washed-out and faded.
Folding decides the look. A spiral, made by pinching the center and twisting until the shirt forms a flat wheel, then held with rubber bands into wedges, gives the classic pinwheel.
Crumpling and banding gives a looser, mottled pattern. Pleated stripes need accordion folds.
Wear gloves, cover the table with plastic, and give each person a squeeze bottle per color. I’d skip more than three colors per shirt, since neighbors blend into mud.
Let the dyed shirts sit wrapped in plastic for several hours before rinsing; rushing it is what dulls the colors. It’s a good backyard project because it’s messy and sociable.
18. Flower Pressing
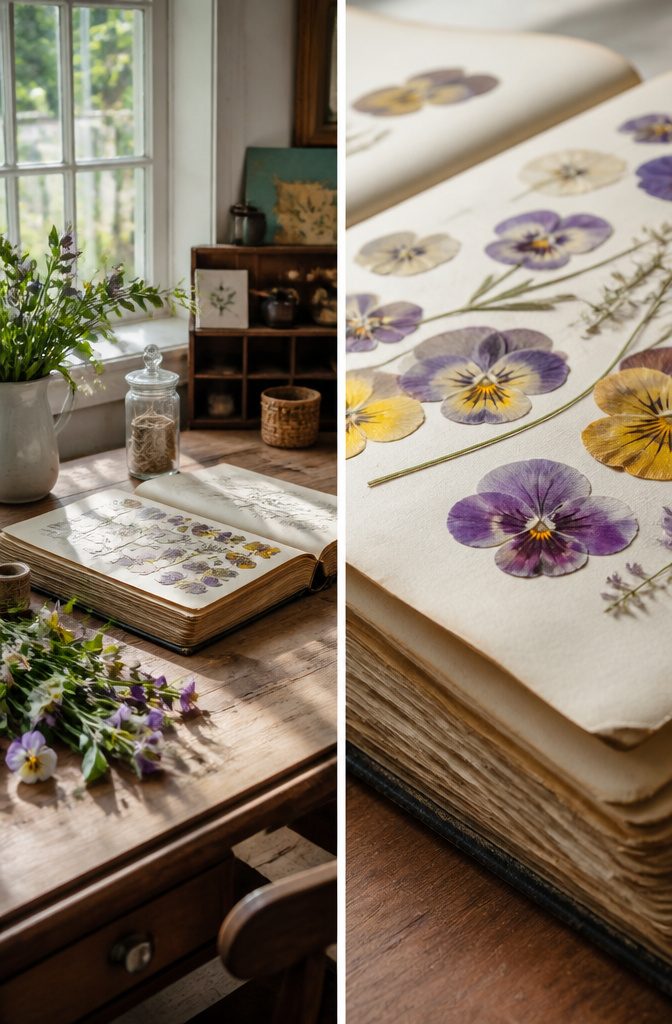
Flowers press best when they are picked dry, after the morning dew has burned off, and laid flat between sheets of plain paper inside a heavy book.
Flat, thin blooms like pansies, violets and cosmos dry cleanly. Thick ones like roses and peonies hold moisture and tend to brown, so I’d pull the petals apart or skip them.
Weight and patience do the work. Stack more books on top and leave the whole thing alone for at least two to three weeks before peeking, because a bloom that still feels cool or limp will mold in storage.
Once the petals are papery, they keep for months in a flat folder. They become coasters, cards and framed pieces, and I’d press a few extra since some always tear.
19. Memory Boards
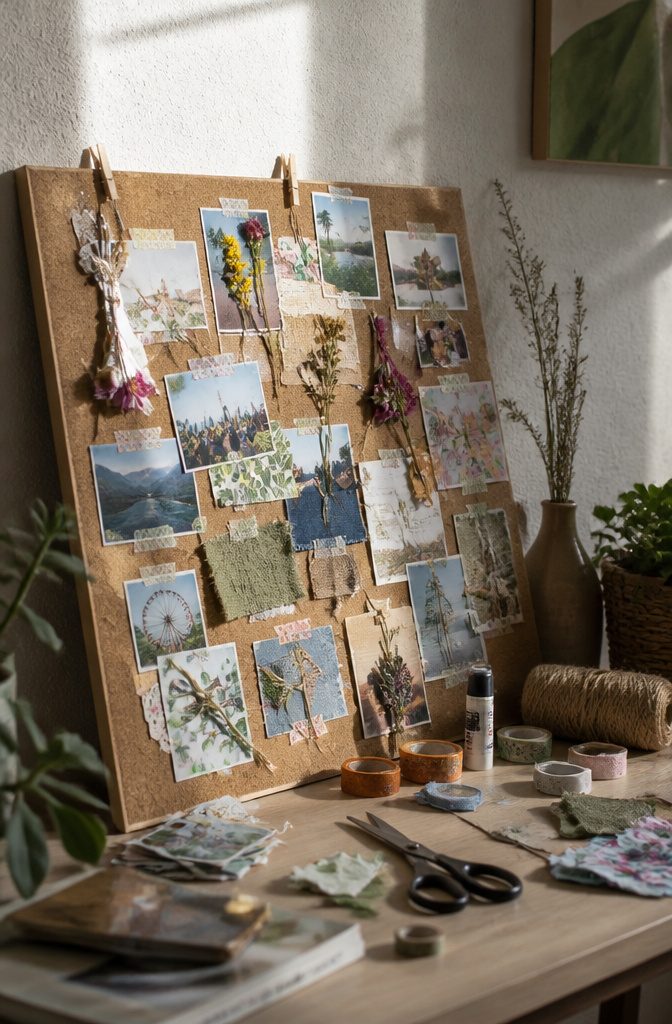
A memory board holds more than photos. Ticket stubs, handwritten notes, pressed flowers, fabric scraps and small painted details all earn a spot, and that mix is what separates it from a plain collage.
Start with a board, a piece of card or a frame backing, then layer paper and ribbon over it so the keepsakes sit at different heights.
I’d pick one event and stick to it: a trip, a wedding, a summer of events.
A board built around a single occasion reads as a story, while a board of everything reads as clutter. Lay it all out dry before gluing anything.
As a gift, it works best when the person has a hand in nothing. Use their engagement photos, a baby’s first weeks or a college send-off, and the sentiment does the rest.
20. Decorative Clay Items
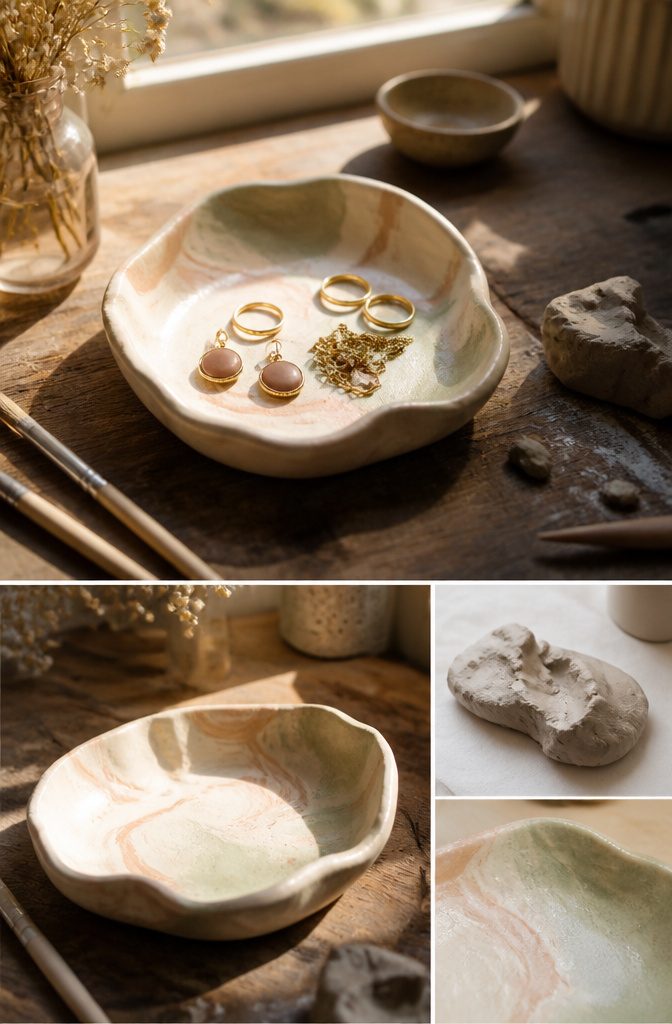
A trinket dish is the best first project in air-dry clay, because you can roll, pinch or mold it into a soft, uneven shape and nobody expects it to be perfect.
Dried, it holds rings, keys and other small odds and ends on a desk or bedside table.
Painting happens after the clay dries.
Soft neutrals look calm, stripes are playful, and a painted flower or vintage border makes a plain dish look store-bought. Ornaments and small trinkets work the same way, so one block of clay covers a whole afternoon.
No kiln is needed, just drying time, so the project fits a kitchen table. One limit: air-dry clay is not food-safe, so keep every dish decorative only.
21. Seasonal Wreaths
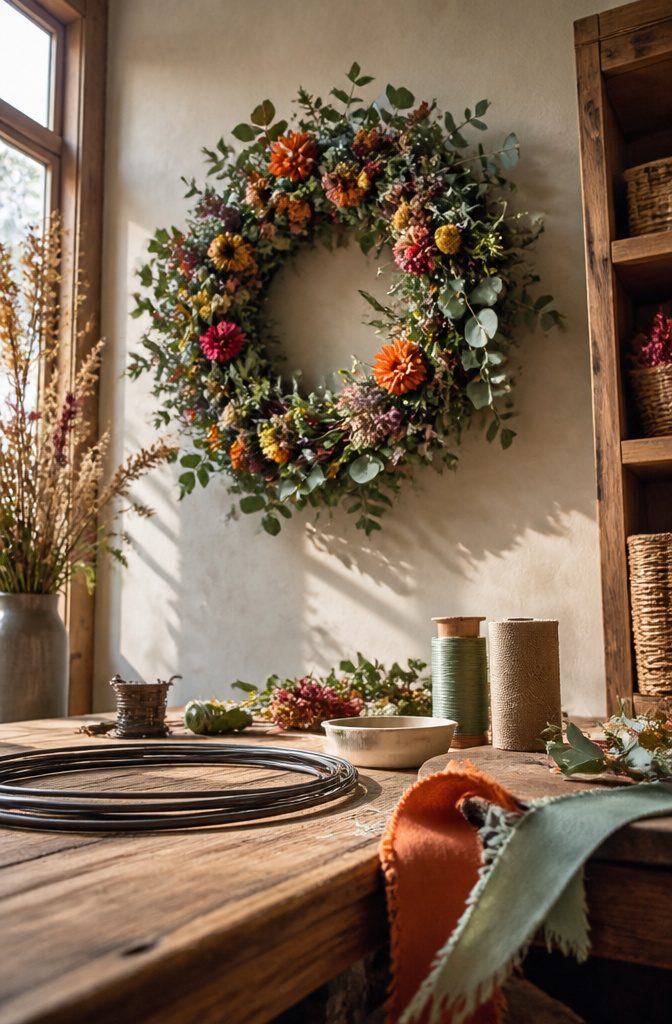
A wreath form does the same job in every season, so the swap happens in what you wind onto it.
Spring wants pastel tones, summer can run to lemon shades or wildflower colors, and Christmas goes fuller and richer with berries, bells and velvet. Fall belongs to eucalyptus arrangements, which hold their shape well on a form.
I would build each season as a separate dressing rather than a separate wreath.
Attach the pieces with wire instead of glue, and they come off clean when the calendar turns. Hot glue is faster, but it fuses everything to the form for good.
A seasonal wreath also makes a decent housewarming gift, since the recipient can restyle it themselves.
Materials and Skill Levels
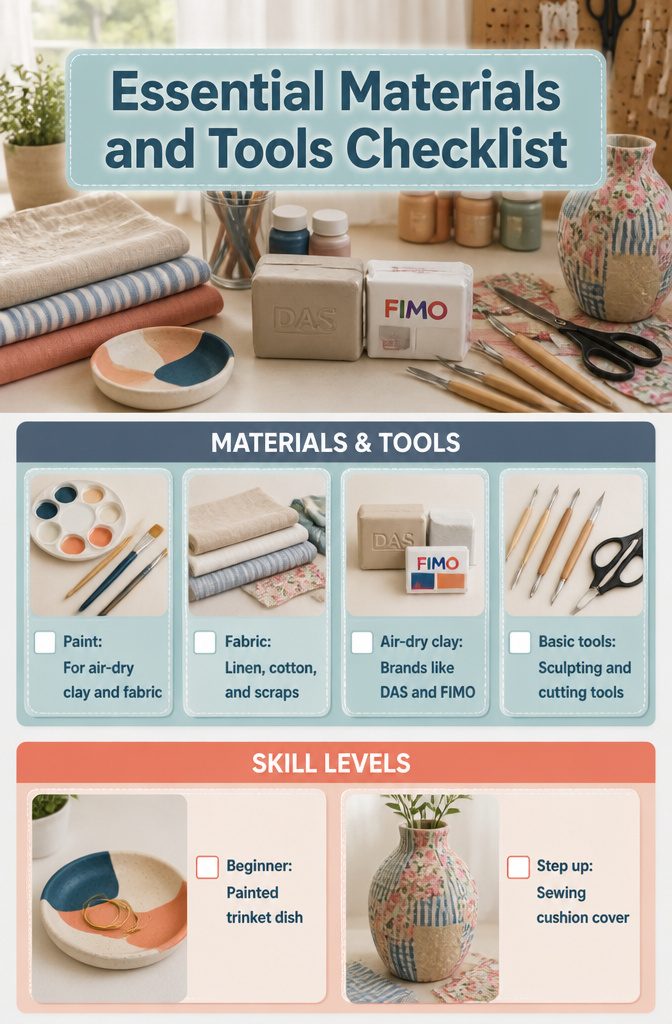
Most projects on this list come back to the same short supply run:
- Paint: it finishes air-dry clay pieces and also works on fabric details. Soft neutrals, stripes and bold color blocks all suit a clay dish.
- Fabric: linen, cotton or striped cloth for cushion covers, table runners and banners. Old shirts and scraps also cover a vase through decoupage.
- Air-dry clay: no kiln, no wheel. DAS and FIMO are the brands to look for at Michaels or a local art shop.
- Basic tools: sculpting tools for clay, plus whatever you already have for cutting and stitching.
Skill levels sort out like this:
- Beginner: a painted trinket dish. You roll, pinch or mold it, let it dry, then paint. It looks premium and asks very little of you.
- Beginner: a fabric-scrap decoupage vase, since it upcycles an old vase and shirt.
- Step up: sewing a cushion cover or wall hanging. I’d start with a table runner, because the difficulty scales with how confident you feel.
Crafting as Therapy
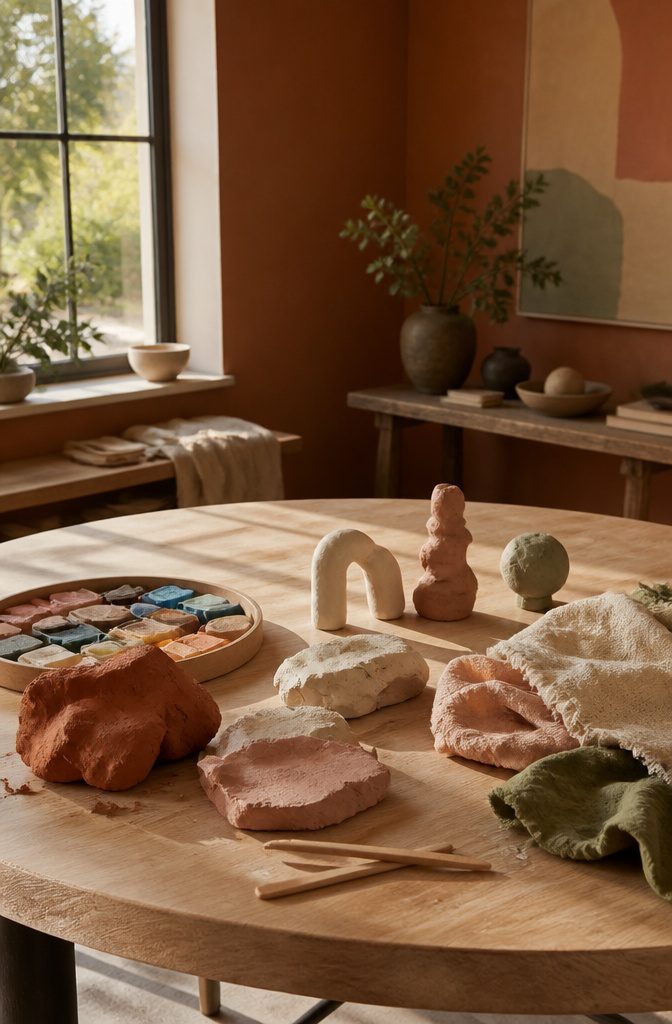
Crafting works as stress relief because it asks your hands and eyes to stay on one small task. That is a different kind of rest from scrolling, and it leaves you with something to show for the hour.
Projects with no strict outcome seem to help most. Abstract paint panels are a good example: paper, board or canvas and a few shades of paint, with no pressure to get a shape right.
For mindfulness, I’d pick a tactile, forgiving material like air-dry clay, since it holds your attention without demanding advanced skill.
Skip anything that needs precise sewing or painting if you’re after a switch-off after work. Perfection isn’t the point, and a project that makes you anxious defeats the purpose.
Handmade Gift Ideas
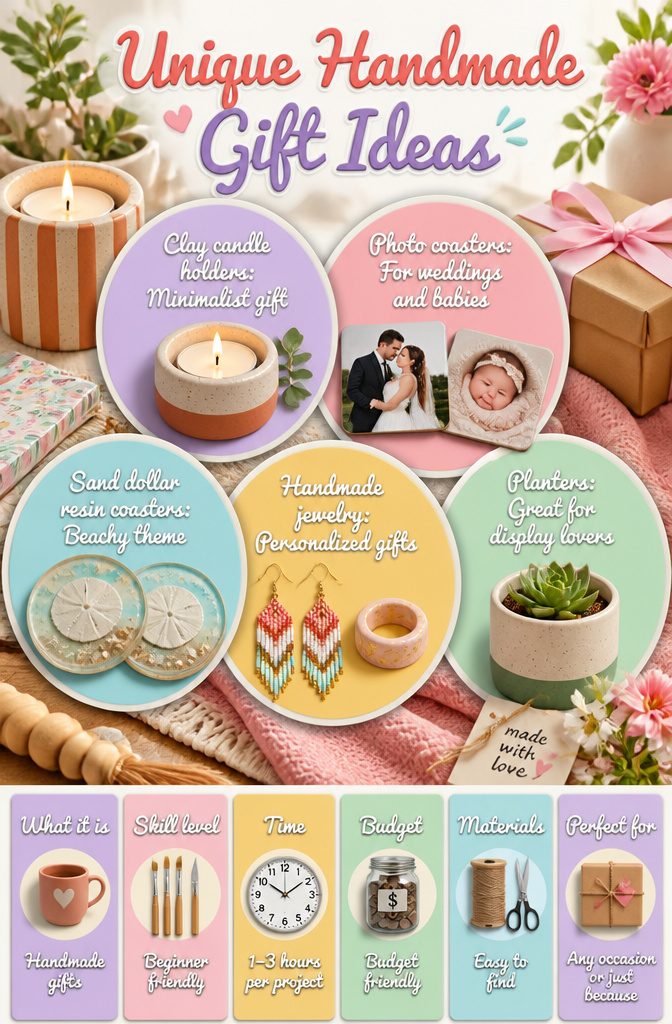
Five projects from this list hold up as gifts, and each suits a different person:
- Clay candle holders suit the minimalist friend. Air-dry clay shaped around a tealight, then painted in earthy tones, stripes or a speckle, looks store-bought. Pair one with a set of candles and the gift is done.
- Photo coasters fit weddings, new babies and graduations. Engagement photos make the easiest version, and they hold up as a keepsake.
- Sand dollar resin coasters are better for a beachy home. Resin lasts for decades.
- Handmade jewelry, such as beaded earrings or clay rings, gets the "I made it" line every time it’s complimented.
- Planters and memory boards work for people who like to display things.
Frequently Asked Questions
What are some easy craft ideas for adults?
Painted rocks, candle making, macramé wall hangings and air-dry clay trinket dishes are the easiest starting points.
Each needs only a short supply list and forgives wobbly results, so a first attempt still looks good. Painted rocks are the cheapest and quietest of the group.
What materials do I need for adult crafts?
Most projects come back to four basics: paint, fabric, air-dry clay and a few simple tools.
Clay needs no kiln or wheel, and the tools can be whatever you already own for cutting and stitching. Michaels or a local art shop carries most of it.
Are there craft projects suitable for beginners?
Yes. A painted clay trinket dish and a fabric-scrap decoupage vase are both beginner projects, and candle making and painted rocks are easy to repeat once you own the supplies.
Sewing a cushion cover or wall hanging is a step up, so start with a table runner if you want to try fabric.
What are some good craft items for adults to make as gifts?
Candles, coasters, handmade jewelry, planters and memory boards all work well.
Clay candle holders suit a minimalist friend, while photo coasters fit weddings, new babies and graduations. A set of four coasters tied with twine looks finished without much extra effort.
What is the hottest craft right now for adults?
Air-dry clay is one of the most popular choices.
It feels tactile, suits beginners and needs no special equipment, only drying time. Trinket dishes, candle holders and small ornaments all come from the same block of clay.





