
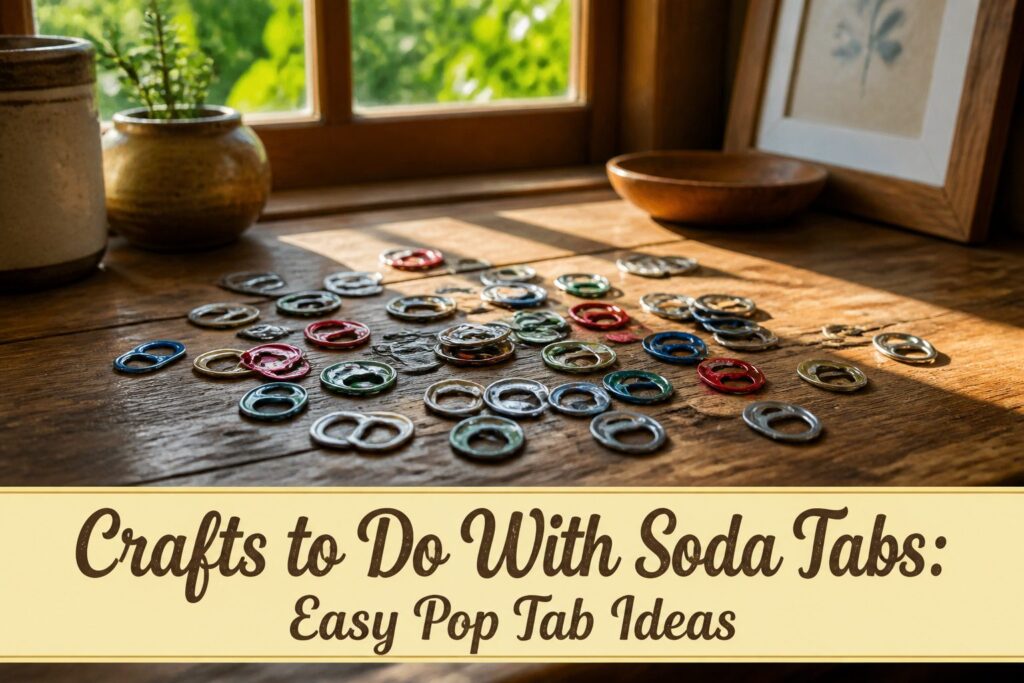
The projects run from a 1-minute zipper pull made with a single tab to a purse that takes 500 to over 1,500 tabs and a full weekend.
Pick by how many tabs you’ve saved. Whatever you choose, run a fingertip along every edge first, because a bent or rough tab belongs in a project nobody wears.
1. Woven Bracelet
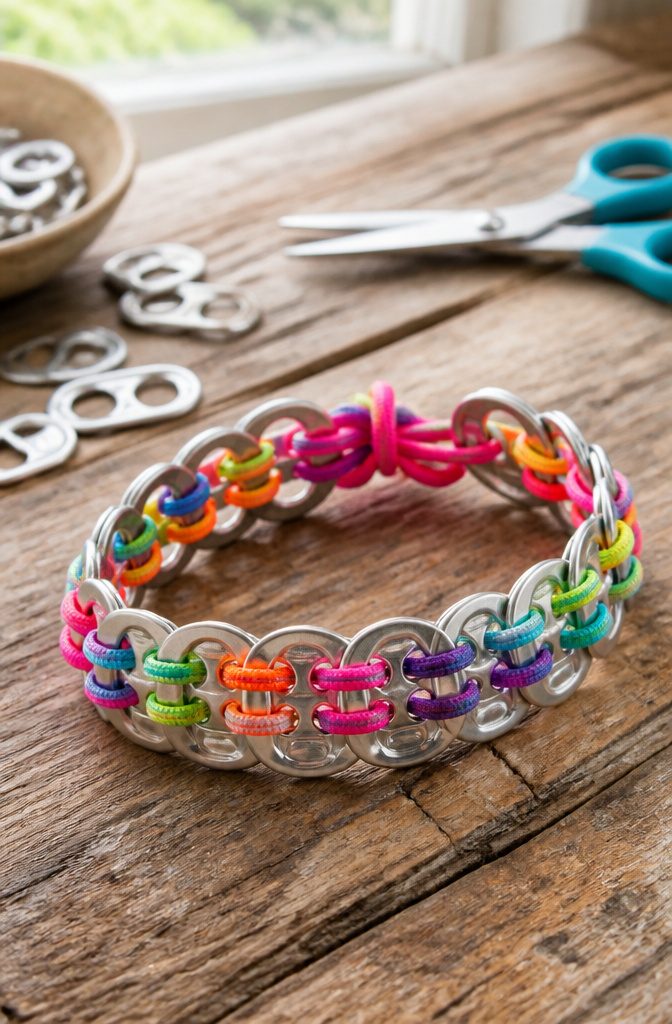
Most adults need 18–22 tabs for one bracelet, and a first attempt runs 30–60 minutes. Elastic cord is the material that makes it work, since it lets the finished band stretch over a hand.
The tabs sit in two staggered rows. Cord crosses in an X over the front tabs, then passes straight behind the back tabs, and that alternation locks each tab against its neighbors.
The first four tabs ask for the most attention. After that the pattern repeats and your hands can run it while you talk or watch something.
Scissors and a few tabs are all the tools it takes.
Bright cord against silver tabs looks sharp, and a few colored tabs make good accents. It suits beginners, teens and craft-night gifts.
2. Pop Tab Keychain
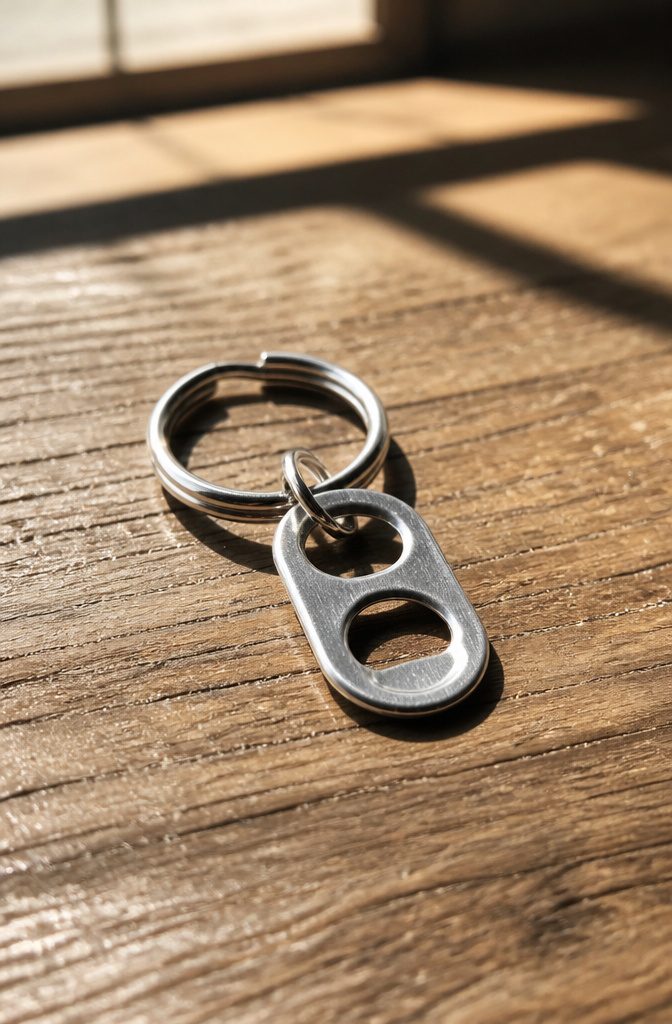
One tab, one jump ring and one split key ring make the whole keychain, and it takes 5–15 minutes with 1–3 tabs. That makes it the fastest project in this article and the one I’d start with.
Open the jump ring sideways with two pairs of jewelry pliers, twisting one side toward you and the other away. Loop it through the tab and the key ring, then twist it shut.
Pulling the ring open into a C shape makes it hard to close cleanly, and a ring that won’t meet flush is the usual reason these keychains fail.
A second tab, a bead, a tassel or a short woven cord adds personality. For party favors or a first project with kids, I’d keep it to one tab and let each person pick the extra.
3. Lightweight Earrings
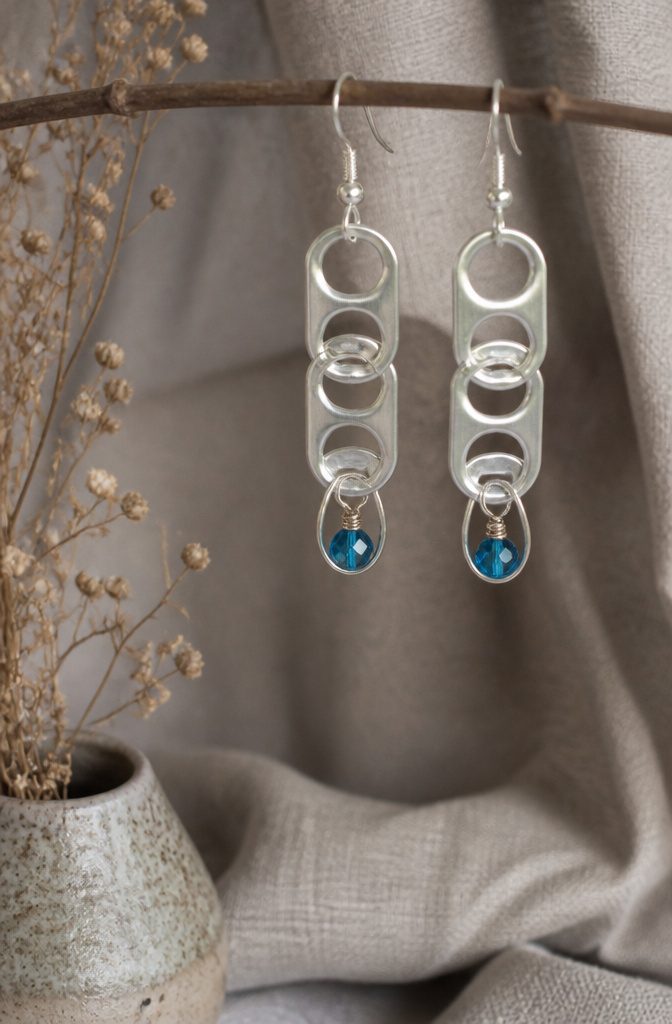
Two to six tabs make a pair, and most pairs take 15–30 minutes. Aluminum is why this works: a tab weighs so little that even a small chandelier of them won’t drag on an earlobe the way brass or glass would.
Start with two tabs of similar shape, one per ear. Attach each to an ear wire with a jump ring, then hang a bead or charm through the lower opening.
Keep that first pair plain, because you can judge the weight and swing before stacking tabs into a chandelier. Use only ear wires made for earrings.
Run a fingertip along every tab edge and each connection before you wear them. Any rough spot or loose ring means that pair stays on the table.
4. Ribbon Bookmark
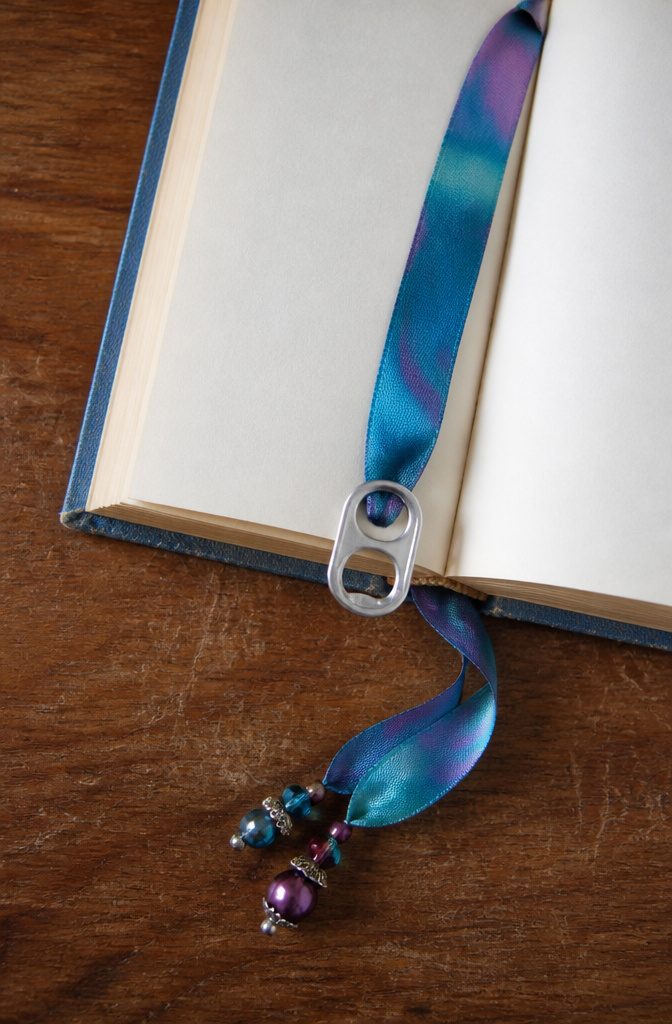
A single tab is enough for this one, which makes it the right home for that one odd colored tab you’ve been saving.
Cut 12–16 inches of ribbon, fold it through one opening of the tab, and tie it off tightly or stitch it down. A double knot holds for kids; stitching looks neater if an adult is handling the needle.
Add a bead or charm at the opposite end of the ribbon so it has some weight and a finished look.
The tab stays outside the book while the ribbon lies between the pages, so the metal never presses on the paper.
That placement is why I like this design for a classroom or book club: the whole thing takes about 10 minutes, and it still works as a handmade gift.
5. Metallic Gift Tag
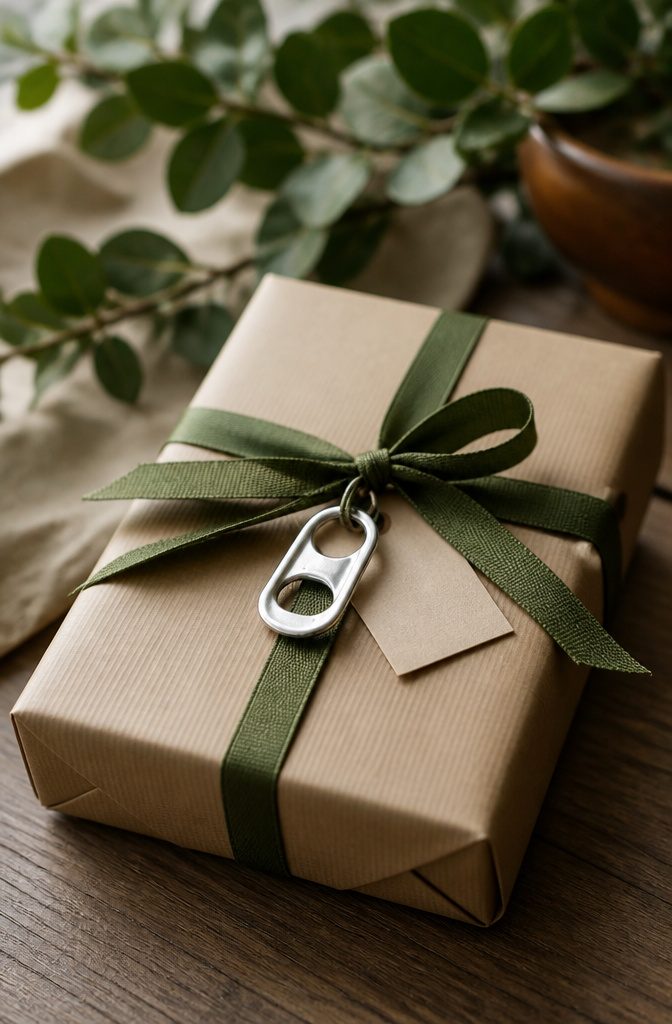
A tab tied into the ribbon of a wrapped gift does two jobs: it catches the light, and it outlasts the wrapping paper.
Thread it onto the ribbon before you knot the bow, then slip a small paper name tag onto the same ribbon so everything hangs from one spot.
One tab is enough for a plain look; up to 4 tabs works if you want more shine.
For a fancier version, overlap three tabs into a small cluster and join them with thin cord.
I’d choose the cluster for party tables and the single tab for a gift going into a bag, since the cluster can snag on tissue paper.
Plan on 10–20 minutes. The recipient gets a keepsake they can reuse, which a stick-on bow never offers.
6. Pop Tab Ornament
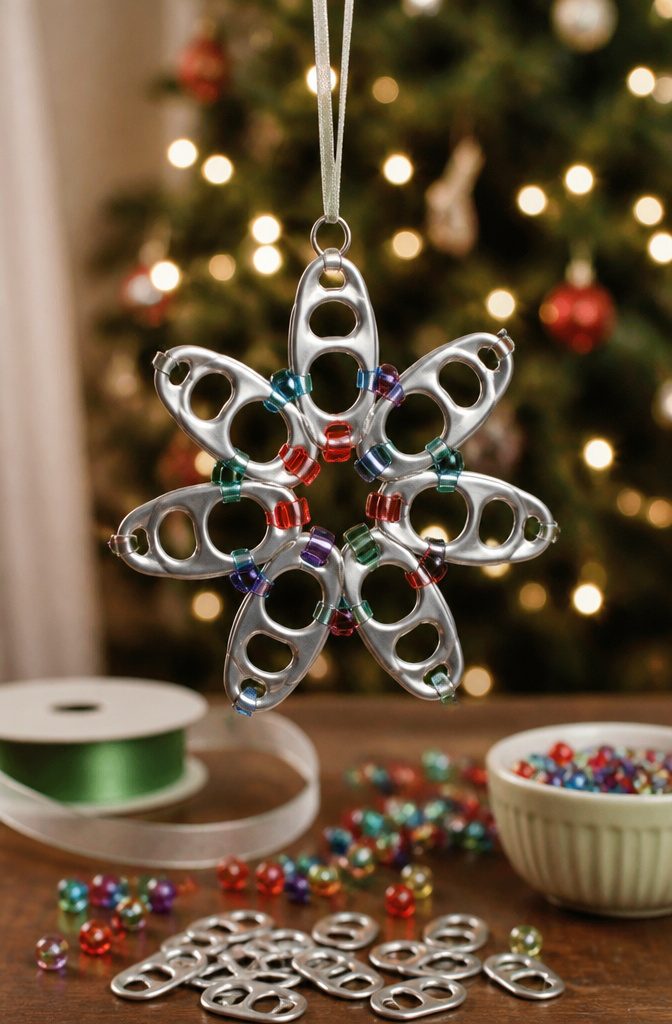
A pop tab ornament runs 3–12 tabs and takes 20–45 minutes, which makes it one of the few projects here you can finish before the cocoa cools.
A tree, star, snowflake or plain hanging cluster all work, joined with ribbon, jump rings or thin craft wire.
Before connecting anything, lay the whole shape out on paper and snap a photo.
Tabs slide around once you start joining them, and the picture lets you rebuild the pattern after a bump. Then connect one section at a time.
I’d skip painting every tab. Threading on beads or tying in colored ribbon is faster, cleaner, and still gives you a clear color scheme.
Make one sample first if you’re prepping for a group. Six extra tabs per ornament adds up fast across 30 kids.
7. Pop Tab Flower
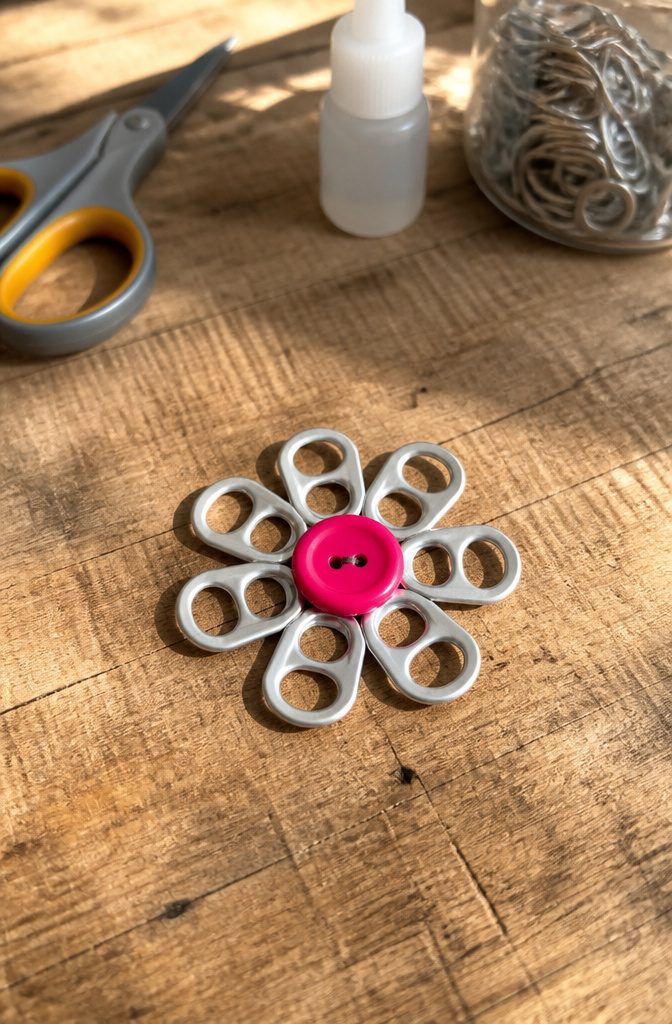
A pop tab flower needs only 5–9 tabs, and it comes together in 20–40 minutes. Set the tabs around a center such as a button, a bead or a small cardboard circle, so the ring reads as petals.
Face the wider ends outward for soft, rounded petals.
Alternate the direction of every other tab and the flower looks more mechanical, almost like a gear. I prefer the rounded version for a first flower, since it looks like a flower right away.
Glue everything to a sturdy backing, using an adhesive rated for both metal and the base material. Plain craft glue won’t hold metal, so check the label before you start.
One flower becomes a magnet. Twenty make a classroom garden.
8. Butterfly or Dragonfly
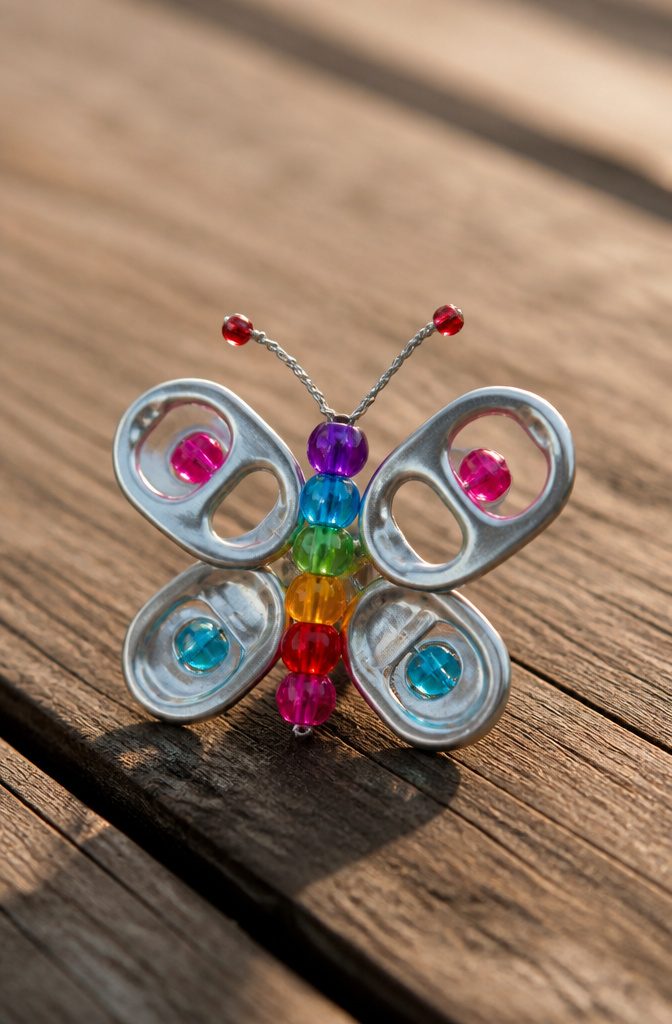
A butterfly needs only 4–6 tabs: two for the upper wings, two for the lower, and something narrow down the middle for the body.
Beads, cord or a thin strip of cardboard all work as a body, and I lean toward beads because they add color without any paint. Plan on 20–45 minutes.
Color is what makes a pile of aluminum read as an insect. Bright beads or colored ribbon do that faster and with less mess than painting each tab.
Antennae are optional. If you add thin wire with beads on the ends, bend the cut ends inward and keep the wire cutting at an adult-supervised station.
Make several in different sizes, then glue or tie them to a canvas, or hang them from a branch as a light mobile. A dragonfly follows the same plan with a longer body.
9. Linked Garland
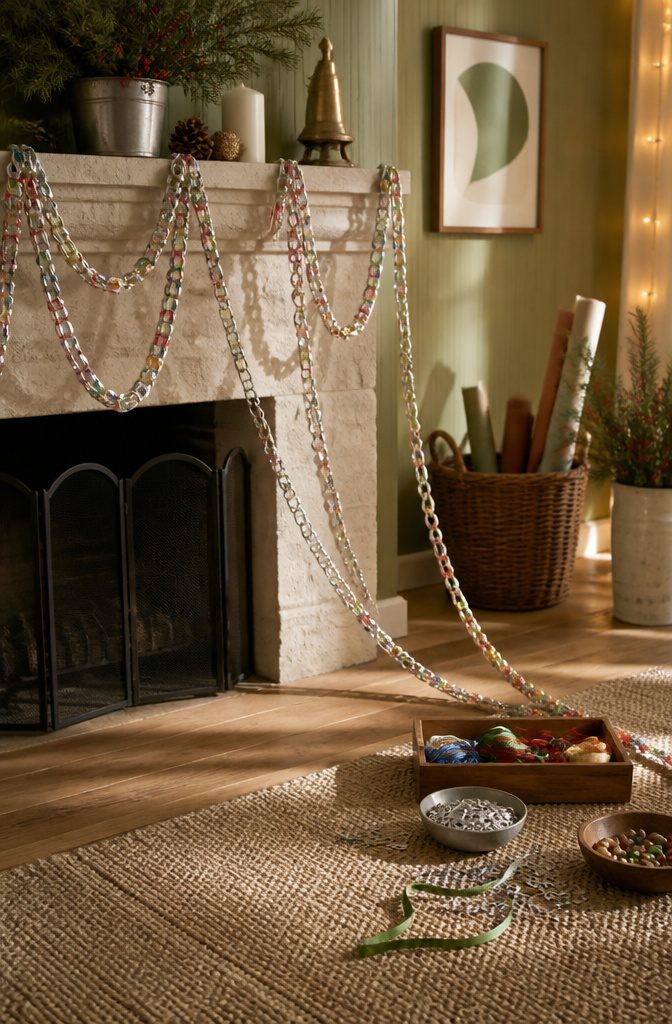
A linked garland takes 25 to 100+ tabs and 45 minutes at the least, and it stretches to whatever length your mantel or party wall needs. Join the tabs with jump rings, wire loops or short ties of cord.
Build in sections of 10–20 tabs, then join the sections at the end. A full-length strand piled on your lap tangles and drags across the table like a metallic tail.
For variety, I like breaking up the metal with ribbon, wooden beads or paper shapes between the tab sections. Garlands forgive a lot.
A slightly different tab style looks deliberate once it repeats along a long strand, so mismatched colors are no problem. Closed jump rings hold better than loose cord knots if the garland will hang for a whole season.
10. Mixed-Media Wall Art
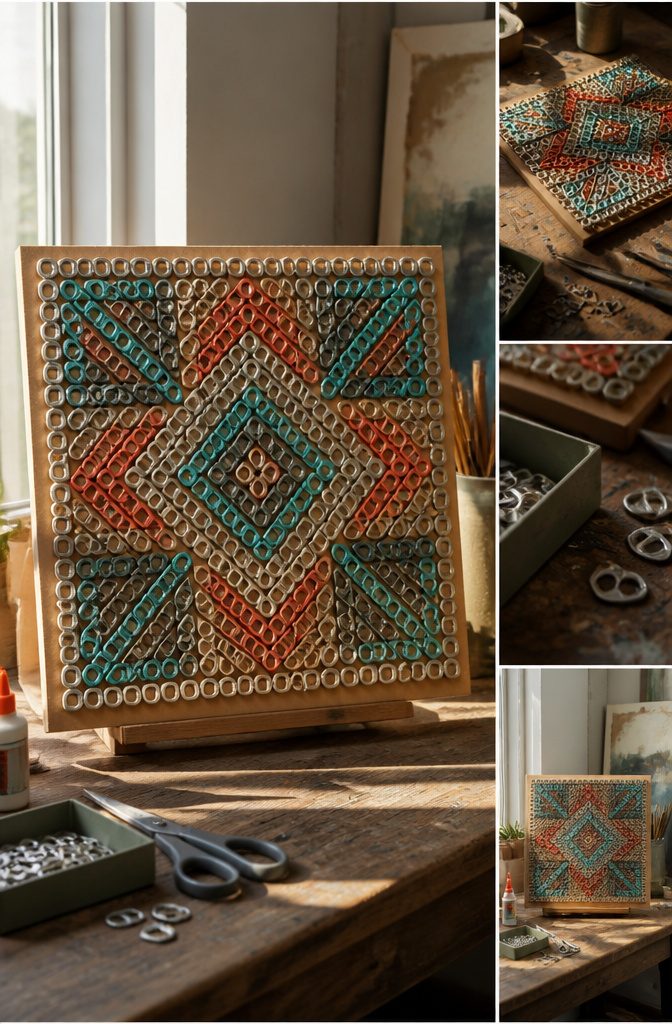
Plan on 50–500+ tabs, depending on how big you go, and on anything from one afternoon to several sessions.
Sketch a letter, heart or geometric pattern on sturdy cardboard, wood or canvas, then lay the tabs out dry before any glue touches them.
Starting at the outside edge gives a crisp silhouette, and starting at the center gives a radiating pattern. I prefer the edge for letters and hearts, since a ragged outline shows from across the room.
For a classroom or family project, divide the design into numbered sections so each table or person finishes one piece and the sections come together at the end. Nobody has to share one bottle of glue.
Canvas is the lightest of the three surfaces, which matters for a large piece.
11. Belt or Chain
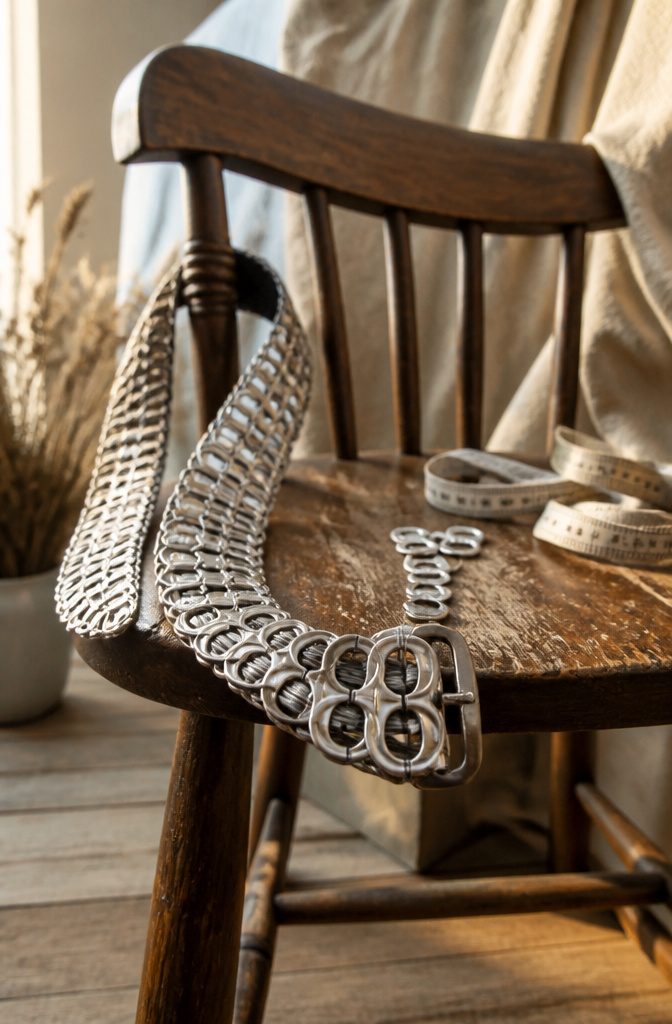
A belt takes 80–250+ tabs and several hours, so the first move is a 6-inch sample strip.
Check whether it lies flat, bends comfortably and snags on clothing before you commit to the full length. Then measure the finished length you need and repeat the same construction.
For anything worn at the waist, I’d back it with fabric. A fabric-backed belt is easier to wear than an all-metal one, since the backing keeps the strip from catching on your clothes.
A loose linked chain suits décor or a bag strap better, and there the connections matter most.
Close every link fully, because a strap that carries weight will find the one that’s still open. Quantity also gives a chain its strength and resistance, so don’t cut the count short.
12. Purse or Bag Panel
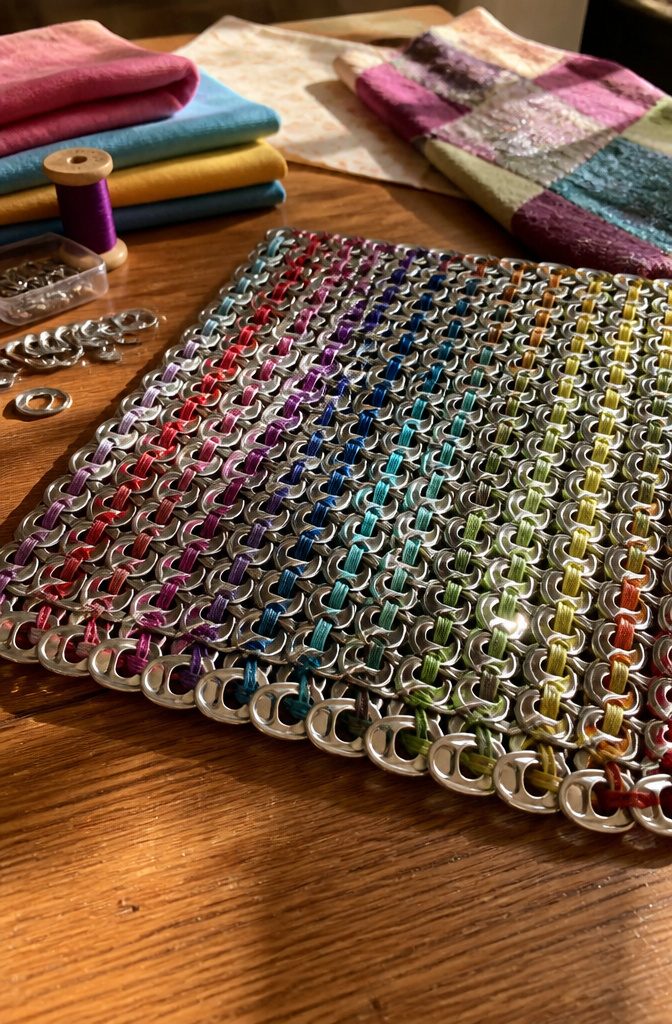
Finished purses run from roughly 500 to well over 1,500 tabs, and one finished purse I read about used 727. Plan on a full weekend, or several evenings, and a lot of can-drinking or a friend with a recycling bin.
Weave a small sample first and measure how many tabs fit across one inch. Then calculate the front, back, sides and strap separately, so you know the count before you start collecting.
The tabs make the showy outer panel, but the lining, closure, reinforced seams and handle make it usable.
Start with a coin purse or clutch before committing to a full-size tote. A tote is where the tab count, and your patience, runs out.
13. Crocheted Lampshade and Coasters
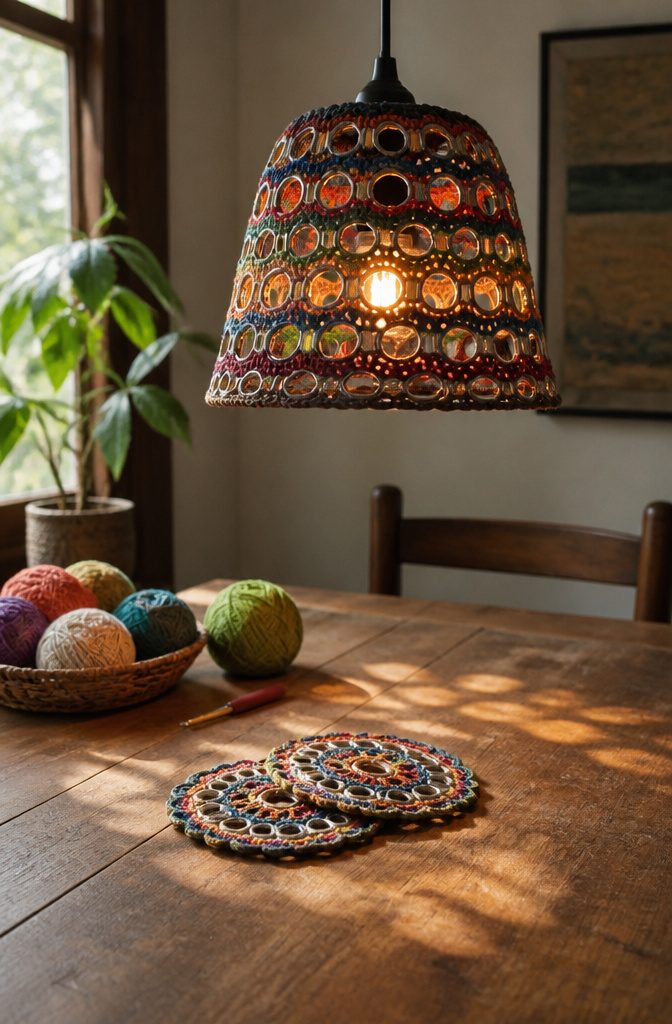
Crocheting right onto the tabs is the easiest way into this craft, because the tab itself is the guide: you work yarn around the metal and the stitches have a fixed shape to follow.
Coasters are the better first project. They stay small, and you can pick any yarn colors you like.
A lampshade is the bigger project, and the one that gets the most use once it’s finished. A tab shade needs no frame at all: join tabs into a sheet and fit it around wire rings.
Mixing tab colors from different soda brands gives you the rainbow effect without any paint, though you can paint tabs if a color is missing.
I’d skip a ribbon grid unless you want a textured, woven look. Plain crochet joins read cleaner on a lamp.
14. Zipper Pull
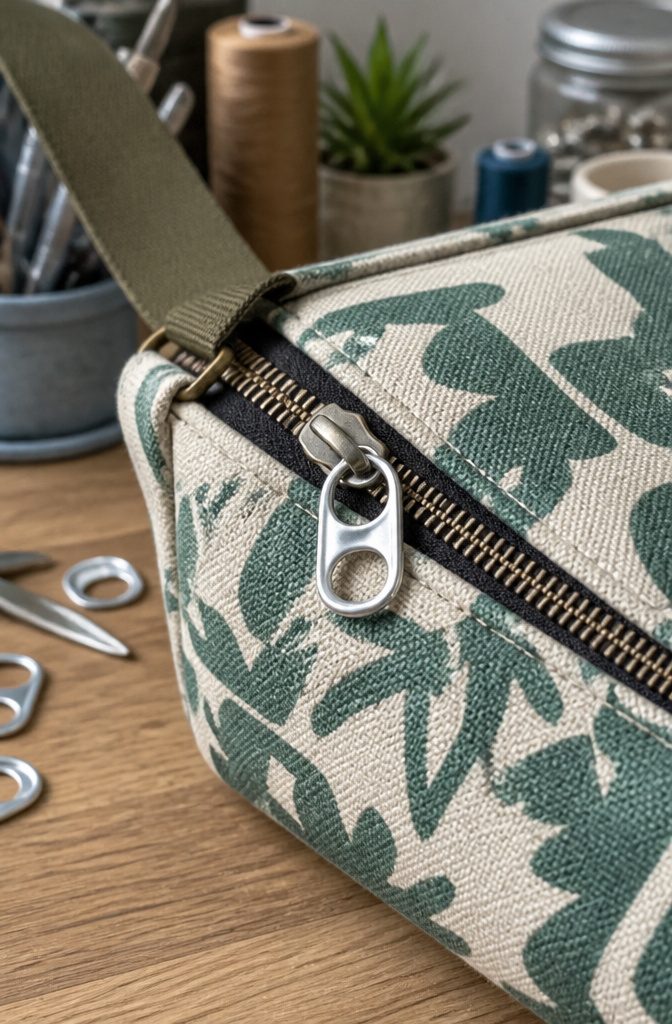
A soda tab works as a stand-in zipper pull because it has the same basic shape as the loop it replaces.
Cut a single slit into one side of the tab, then slide it onto the zipper’s slider loop. It sits a little larger than most factory pulls, which makes it easier to grab with cold fingers or a full hand.
This fix suits jackets, hoodies, and bags, anywhere a pull has snapped off and you still need the zipper to work today.
Cut only one side of the tab, since a second cut leaves nothing to hold it on the loop. I would treat it as a stopgap more than a permanent repair, but it costs nothing and takes about a minute.
15. Picture Frame Decoration
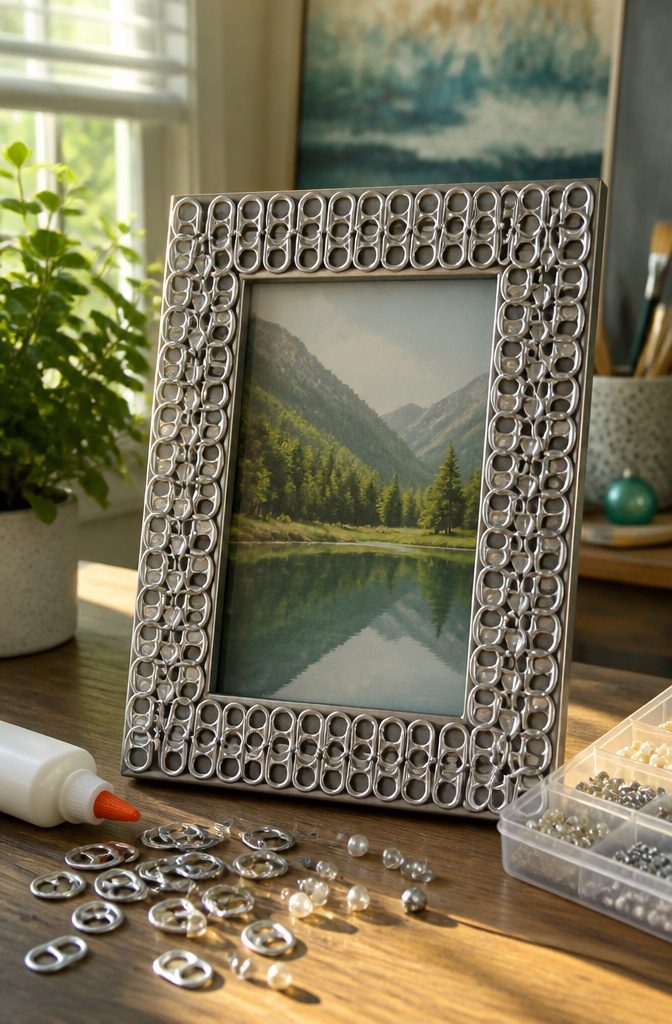
A plain, generic frame is the best candidate for this project, since the tabs supply all the texture. Hot glue or crazy glue holds them, and the only other supplies are the frame and your saved tabs.
Lay the tabs out in a pattern around the frame before you glue anything, so the rhythm stays even and you don’t run out of room at the last corner.
Leave the tabs metallic if you want a quiet border.
For a bolder look, paint the tabs different colors before gluing them down, which turns a dull frame into something that reads as a statement piece. Painted tabs need to dry fully first, or the paint smears under the glue.
I’d pick a frame you were about to donate, since the tabs add dimension and hide a lot of dull flaws.
16. Headphone Wire Organizer
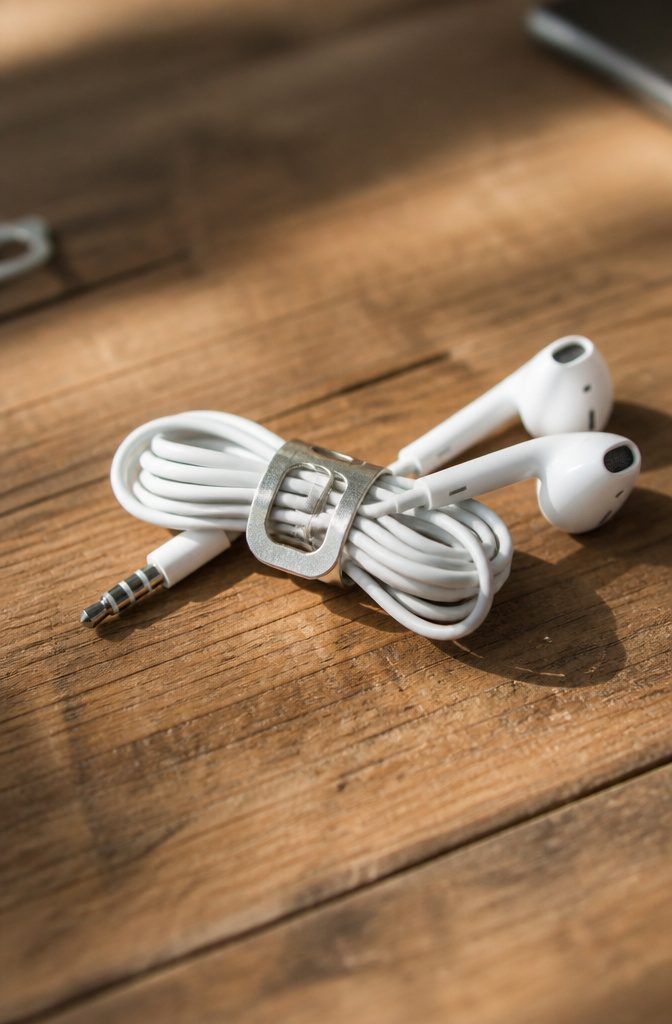
A soda tab works as a cord keeper because it slips over a bundle and holds it snug.
Fold the earbud wire back and forth over itself, gather the loops into a tight bunch, then push the tab down over the whole thing.
The cord stays put in a pocket or a bag, and nothing knots up while you dig for your keys.
I’d go with this one over a twist tie or rubber band, since the tab costs nothing and doesn’t stretch out or snap.
Slide the tab over the folded bundle, not around a single strand, so the loops stay pinned together.
The same move works on phone chargers and other wired gadgets. Strings of holiday lights and garlands also stay straight when you tab them up before storage.
17. DIY Tensioner
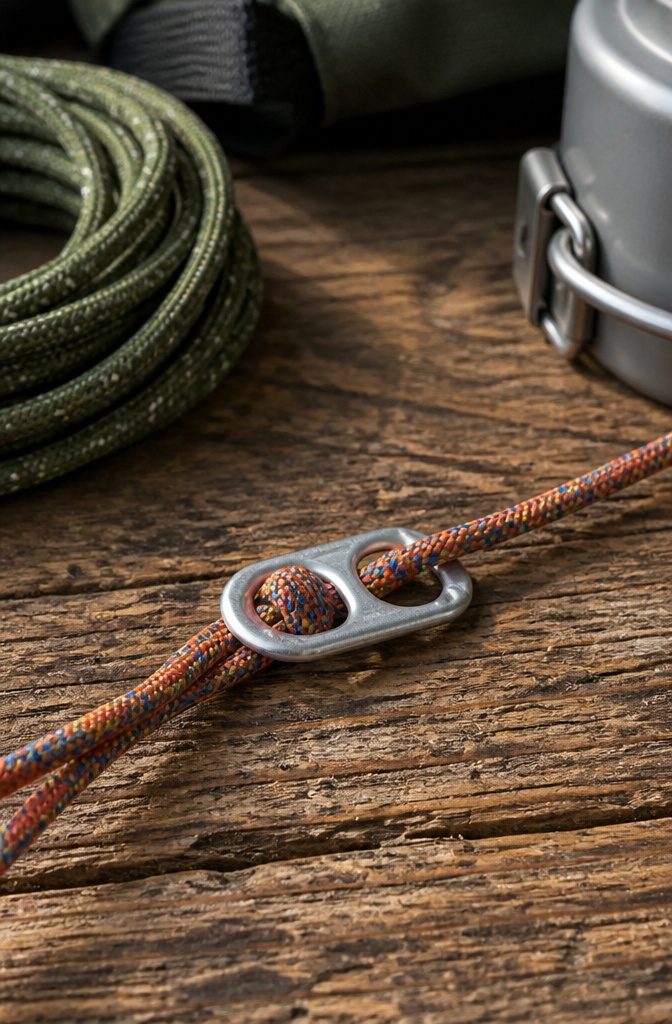
A soda tab works as a small tensioner because it has two openings, and a cord can weave through both.
Thread the cord through one loop, bring it back through the other, then finish with an overhand knot. The knot holds the tab in place, and the tab gives you a spot to pull against and take up slack.
I’d use it for bungee-style bundling or for camp lines, where you need a quick adjustment and don’t want to buy hardware.
Run the cord through both loops before you knot, or the tab just slides along the line and tightens nothing.
It is a light-duty fix. For anything heavy, like a loaded tarp, I’d trust proper hardware over a pull tab.
18. Improvised Fishhook
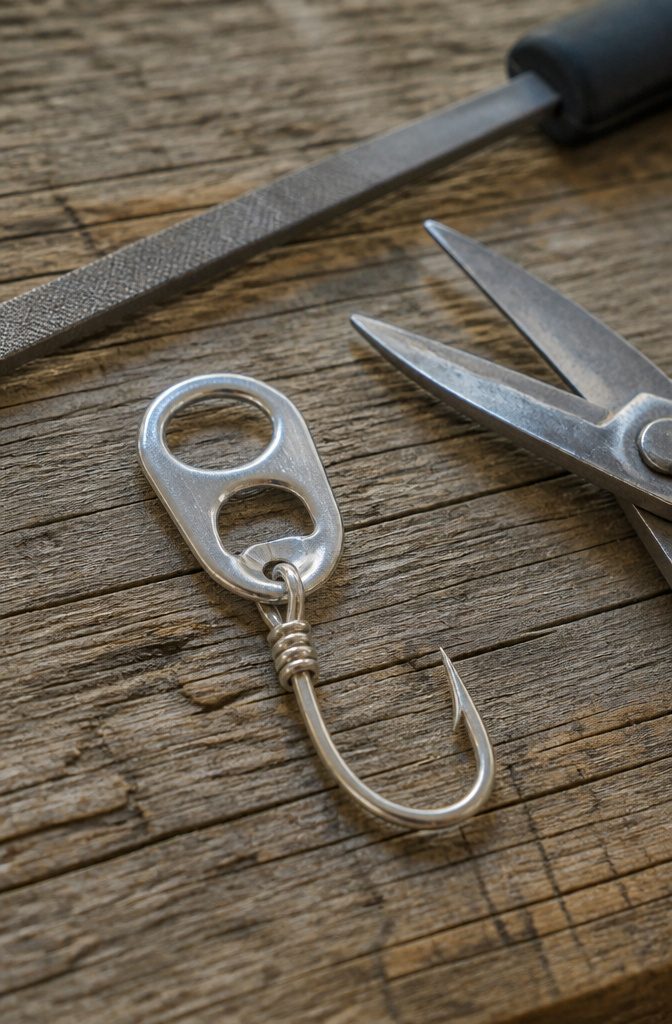
A soda tab makes a hook by way of a cut and a bend: you make an incision in the tab, then work the metal into a curve with a point at one end.
Filing or grinding that point is the step that turns a bent scrap into something that could catch anything. The aluminum edges are sharp before you touch them, so wear gloves while cutting and sharpening.
I’d file this under novelty and backup gear. A tab is thin, and a hook you shaped by hand won’t match a store-bought one, so I wouldn’t count on it for a trophy fish.
It does make a fun backyard project for older kids, and it’s a handy trick to know if you run out of hooks on a fishing trip.
19. Decorative Baskets
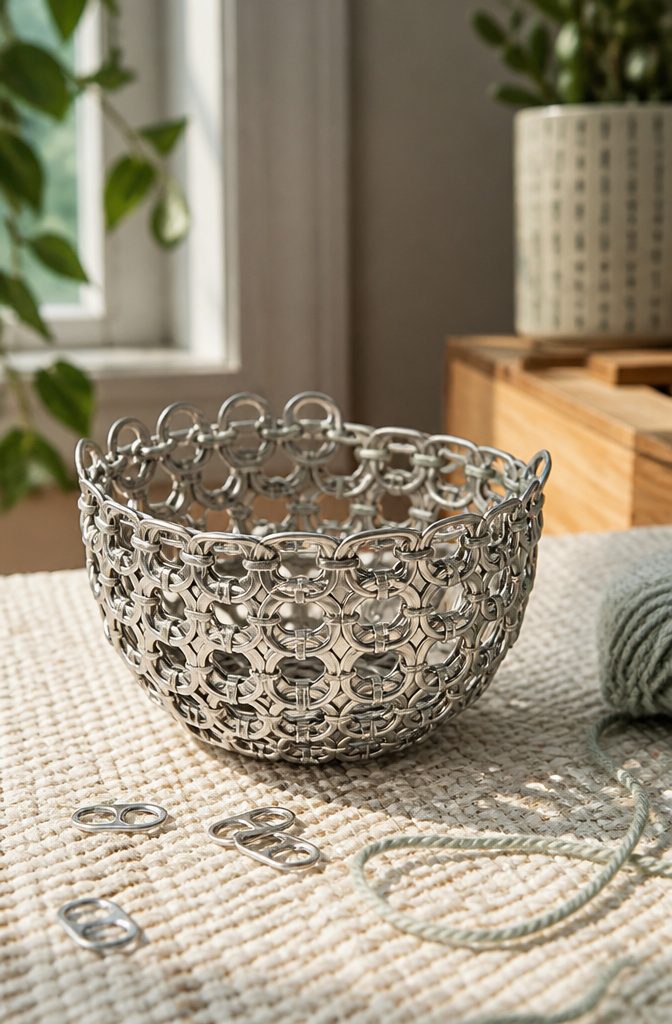
Tabs linked into a small basket make the most of the one thing a pop tab does well: it hooks onto its neighbor.
Chain the tabs into rows, then join the rows side by side and curve them upward to form walls.
A more ambitious version uses crochet, with the tabs serving as a guide for the stitch pattern. That route is slower and takes patience, but the result looks like real home décor and not a pile of recycled metal.
For an afternoon project, I’d go with the linked version and skip the crochet unless you already hold a hook.
Keep the basket small, because a big one sags without a lining or a stiff base. Swapping yarn colors by season turns one pattern into a gift.
20. Pop Tab Wall Art
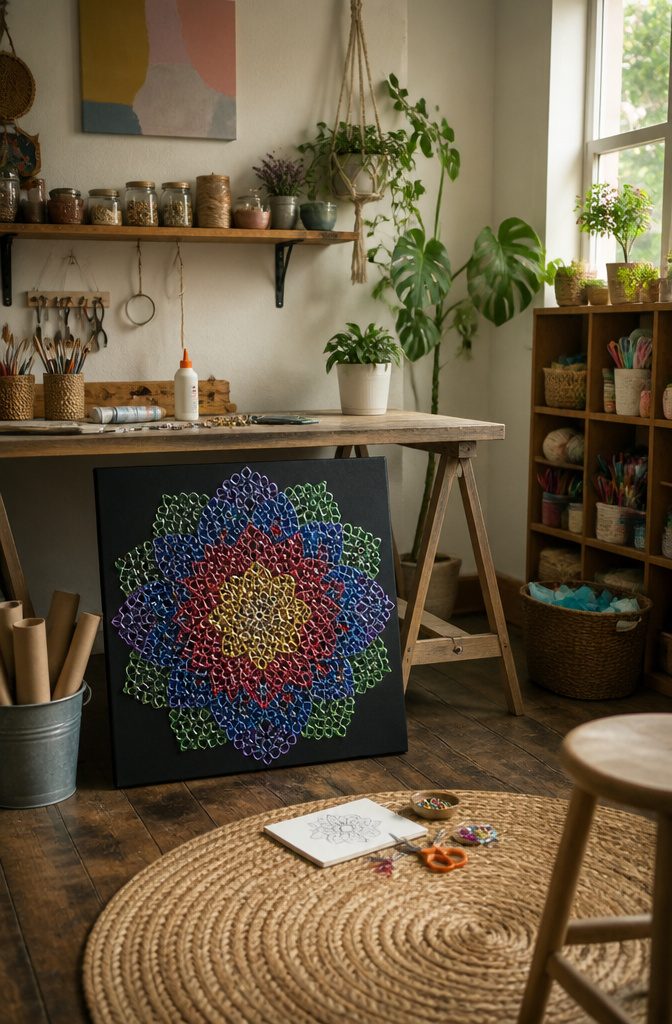
Sketch the design on sturdy cardboard, wood or canvas first, then lay the tabs over it dry before any glue comes out.
Starting at the outer edge gives a crisp silhouette, while starting at the center suits a radiating pattern, and I’d pick the edge for letters and hearts every time.
A small piece takes around 50 tabs. A statement piece can run past 500, which stretches the job from one afternoon to several sessions.
For a group project, divide the design into numbered sections and let each table finish one.
The pieces join at the end, and nobody fights over the glue bottle. Use an adhesive made for both metal and your backing, since tabs shed when the glue only suits the board.
Preparing the Tabs
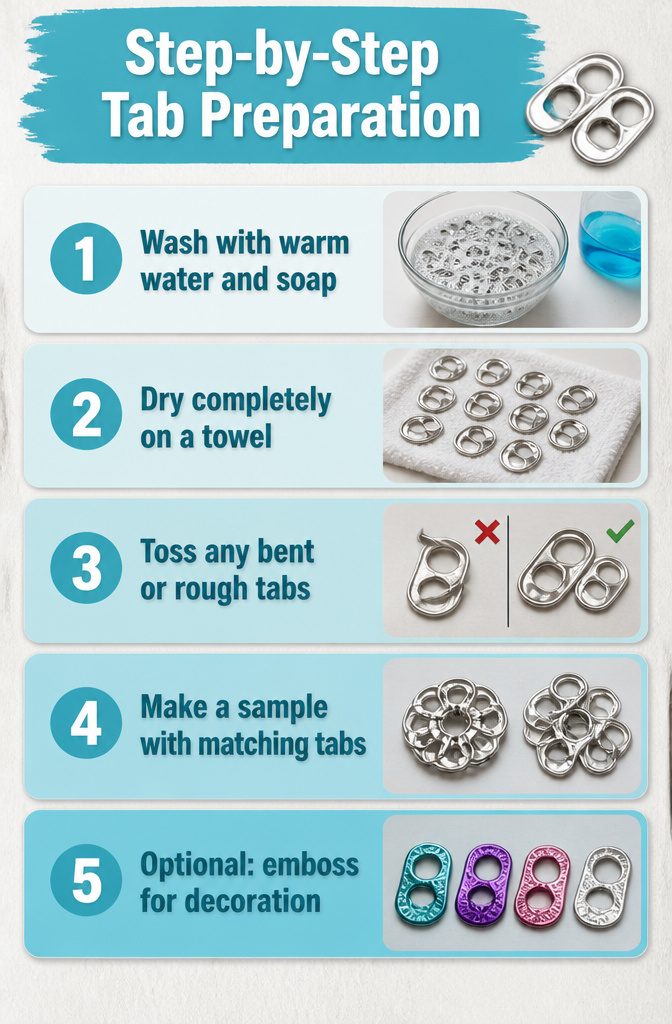
- Wash the tabs in warm water with a few drops of dish soap, then rinse. Collected tabs carry sticky soda residue, and glue and paint will not hold over it.
- Dry them completely on a towel. Trapped water leaves spots on metal and weakens adhesive.
- Pick through the pile and toss any tab that is bent or rough in a way the design can’t hide. Run a fingertip along each edge, especially for anything worn against skin.
- Pull out a handful of matching tabs and make one small sample before prepping a big batch. A 12-tab ornament and an 18-tab ornament look very different at 30 copies.
- Optional: emboss the clean tabs with colored powders for a decorative finish. I’d skip this for a first project and add it once the basic build works.
Safety With Tools and Edges
Pop tabs are small, and small parts need ground rules before the glue gets hot.
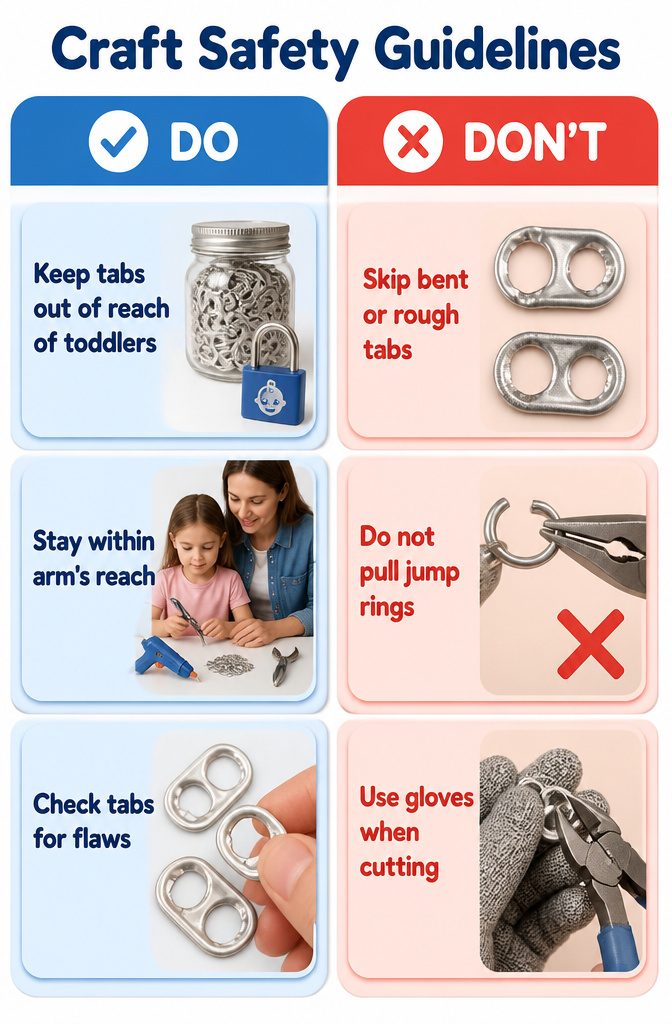
- Tabs are not appropriate for children under three, so keep them out of reach of toddlers.
- Watch kids with pliers, hot glue, wire, sharp findings and adhesives. Stay within arm’s reach for every one of those steps.
- Check each tab before it goes into a project. Skip any that are bent or rough, especially for jewelry that touches skin.
- Run a fingertip along the edges as you sort. If one catches, set it aside for a project nobody will wear or hold.
- Twist jump rings sideways with two pairs of jewelry pliers instead of pulling them into a C shape. It is safer for fingers and closes cleaner.
- Cutting or sharpening a tab, as with a fishhook, calls for gloves.
Donating Your Tabs
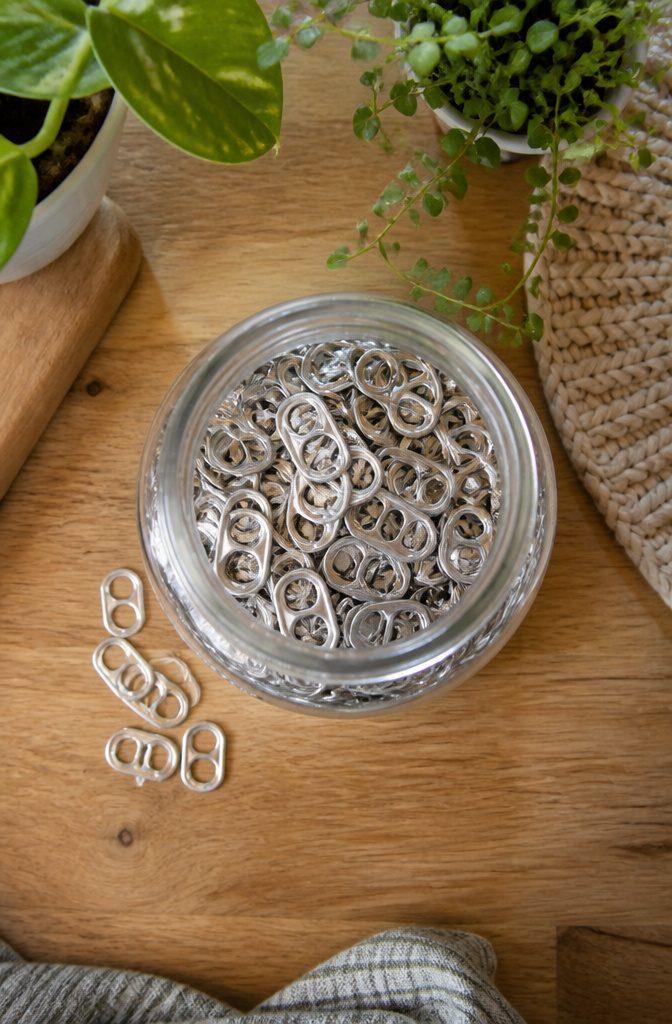
Pop tabs cost nothing if you already drink canned soda, and a jar on the counter fills faster than you’d expect.
Ronald McDonald House is the charity most often named for collections, and other children’s charities take them too. Call your local one before you start saving, since drop-off rules differ from place to place.
Making and selling tab crafts is another route. You can give a large percentage of the proceeds to a children’s charity, which turns a hobby into a fundraiser.
Two odd uses are worth knowing.
Homemade jar candle makers use tabs as weights for the wicks, which keeps the wick standing at the bottom of the jar. Tabs have also been strung together into a hammock, though I’d call that a very long project.
Frequently Asked Questions
What can you make with soda can tabs?
Soda tabs turn into bracelets, keychains, earrings, bookmarks, ornaments, flowers, garlands, wall art, belts and purses. Their two built-in openings let you thread, link or glue them, so projects range from a 5–15 minute keychain to a weekend purse.
What are some easy crafts to do with soda tabs?
A keychain is the easiest, needing 1–3 tabs, a jump ring and a split key ring for about 5–15 minutes. A ribbon bookmark (one tab, about 10 minutes) and a pair of lightweight earrings (2–6 tabs, 15–30 minutes) are also quick starters.
How do you make a purse out of soda tabs?
Weave or link roughly 500 to over 1,500 tabs into panels, then attach them to a fabric lining with a closure, reinforced seams and a handle.
Weave a small sample first and count how many tabs fit across 1 inch, so you can calculate the front, back, sides and strap before collecting.
Start with a coin purse or clutch if you’ve never done it, since a full tote takes a full weekend or several evenings.
What kind of art can be made from soda tabs?
Wall art is the main one: sketch a letter, heart or geometric pattern on cardboard, wood or canvas and glue the tabs on.
A small piece takes around 50 tabs, and a statement piece can pass 500. Flowers, butterflies and framed borders also work as tab art.





