
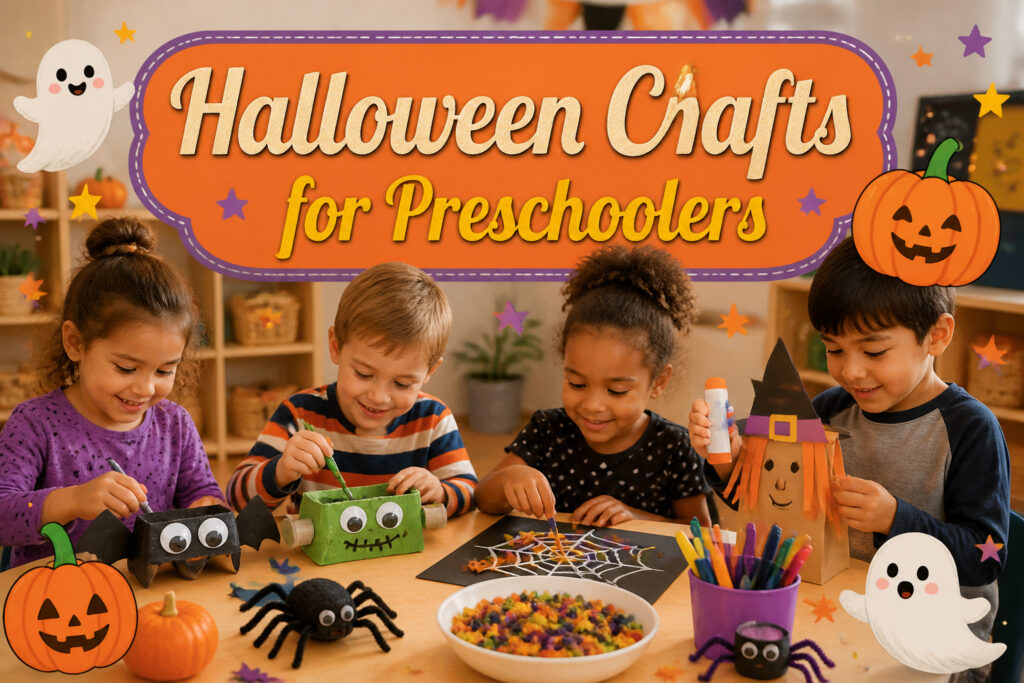
The best halloween crafts preschool teachers save for October are the ones that survive a three-year-old’s attention span without requiring a supply run. Most of these 20 projects use what is already in the kitchen drawer: straws, egg cartons, lunch bags, and table salt. The real dividing line is drying time. Acrylic paint on pasta wheels needs a snack break before assembly; glue-stick witches and pipe-cleaner spiders are playable before naptime ends.
1. Noodle Pumpkins
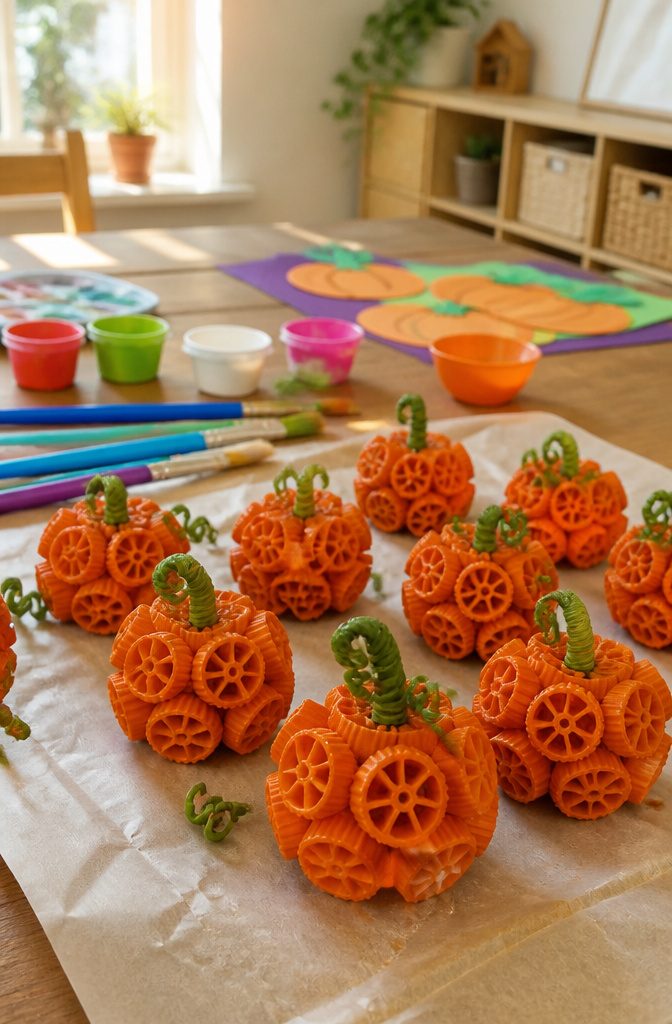
Dried pasta shapes turn into surprisingly plump little pumpkins with nothing more than paint and glue. Wheel pasta works best for the body, those ridged rounds catching light like real pumpkin grooves, while spiral noodles twist into convincing stems and vines.
The painting method matters more than preschool patience usually allows. Dumping wheels into a ziplock bag with acrylic paint and shaking gets most of the surface covered fast, but the holes stay pale and need a quick touch-up by hand once the noodles hit parchment paper to dry. Spirals can go straight to the brush. While everything dries, draw orange pumpkin bodies on paper or cardboard, then let the kids glue their painted noodles into place. Googly eyes and crooked marker mouths finish the faces.
Acrylic paint holds up once dry, but the drying window is the real trick with three-year-olds. Paint the pasta first, snack time second, assembly third. Rushing it means orange fingerprints on the stem and a frustrated kid who watched their wheels slide right off wet glue.

SUPER VALUE SET. 36 Pieces Halloween Theme Party Supplies Mix and Match Decoration Stickers. Pack Includes 9 Different Pumpkin Facial Expression.

Halloween Crafts for Kids Toddlers: Get ready for Halloween fun with Cracoring's halloween crafts set! Everything in one kit - A complete pom pom art and craft kit: 12 pattern cards, 300 pom poms in 11 colors, 300 easy-peel dot stickers and 12 gift bags for instant Halloween fun. Halloween trick or treat toy can be a fun way for kids to enjoy creating art and have fun at the same time!

2. Leaf Ghosts
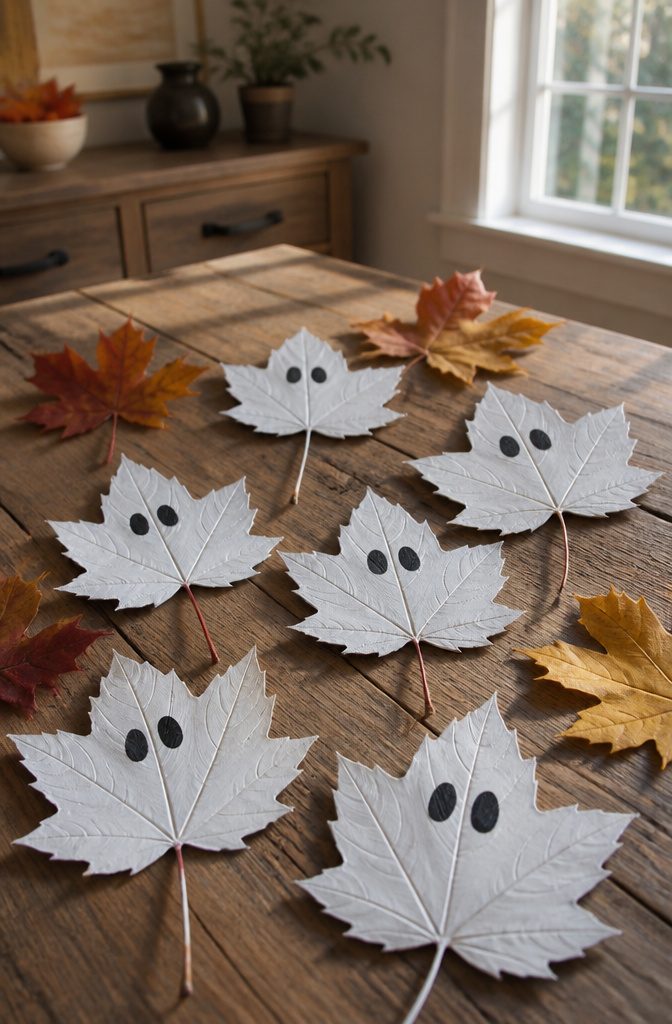
Maple leaves make the best ghost shape, but any leaf works once the stem becomes a little dangling body. The walk outside to collect them is half the point; preschoolers notice which ones are already dry and curling, and which still bend without cracking. That seasonal step grounds the craft in something real before the paint even opens.
White acrylic covers the leaf surface in one coat if the brush loads thick. The ribs underneath stay slightly visible, which reads more like a real ghost than a perfect blank. A marker adds the face after the paint sets; two dots and an oval mouth are enough, though some kids draw the whole expression themselves. The leaf stem stays its natural brown, and that contrast against the white is what makes the figure read instantly.
Let the paint dry to the touch before drawing faces, or the marker bleeds into wet acrylic and the eyes slide into one smear.

DUAL TIP FOR PRECISE & CREATIVE WORK: Each acrylic paint marker features a 1 mm fine tip for detailed lines, writing, and outlining, plus a 1–5 mm dot tip for bold dots, patterns, decorative accents, and creative designs. Easily switch between precision details and eye-catching dot art with one versatile marker.

Acrylic Paint Set with 12 Brushes: Caliart acrylic painting kit comes with 36 colors paints in 2 oz bottles, including metallic gold and silver colors, our artist quality acrylic paint features smooth, highly pigmented color to produce vibrant, consistent shades. Come with 12 paint brush set, whether you are new to acrylic painting or a seasoned artist, you can start painting right away, and they will set fire to your imagination.

Quantity: 27 Sets Halloween Suncatcher Kit includes 27 pcs suncatchers in 9 assorted Halloween designs, each design has 3 pcs. Package also contains 300 pcs colorful acrylic beads, 1 set of 8-color acrylic paints, 2 rolls of fishing threads and 27 pcs suction hooks.
3. Bat Handprint Craft
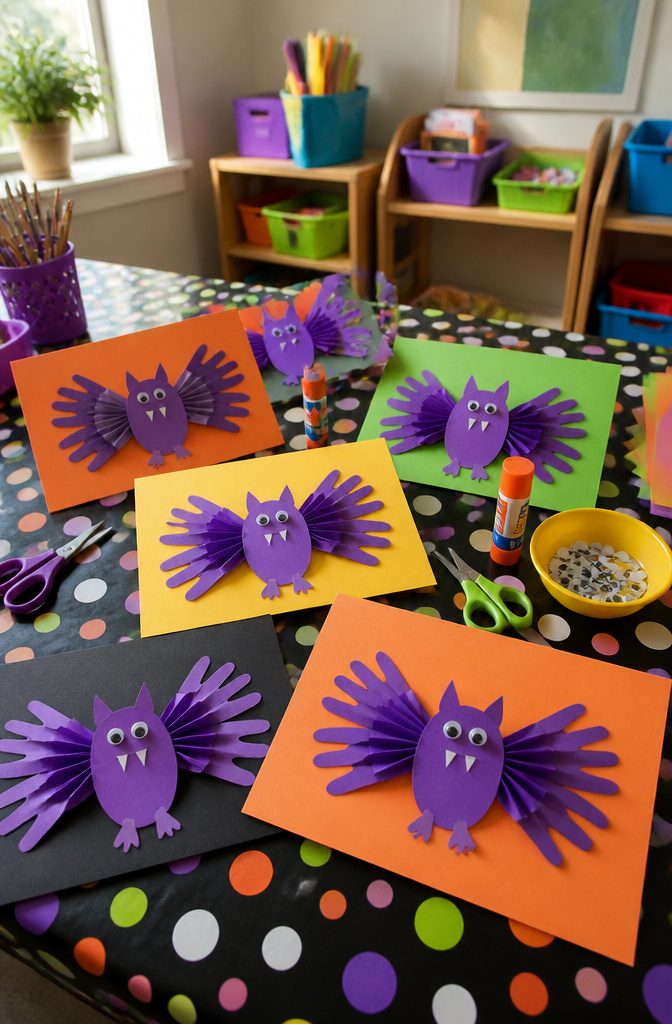
A handprint bat craft folds a child’s traced hand into wings that actually flap, which is why preschool teachers keep coming back to it. The appeal is simple: you trace, cut, fold, and glue. But the folding matters more than the tracing. Folding the cardstock back and forth in an accordion pleat gives the wings their lift, and that repeated back-and-forth motion is what builds the fine motor control preschoolers need for later writing. The sources note that .75 inch and 1 inch googly eyes both work, so the size choice becomes a judgment call based on how big the handprint turned out.
Card stock in purple or black holds the creases better than construction paper, and a glue stick is enough to anchor everything without the mess of liquid glue. The finished bat works as a puppet or a window decoration, which means the craft doesn’t end when the paint dries. Fold the wings at roughly half-inch intervals; too wide and they won’t spring, too narrow and little fingers lose patience. This is one of those projects where the mistake is usually in the folding pressure. Press hard enough to set the crease, but not so hard the paper fibers split.

MAKE HALLOWEEN MEMORIES THAT LAST A LIFETIME – This set includes 5 professionally printed Halloween handprint keepsake cards designed for toddlers, preschoolers, kindergarten students, and young children. Simply add your child's painted handprint to create a personalized Halloween keepsake the whole family will treasure.

DESCRIPTION: Material: Wood. Size: Approx. 3.94x2x0.1 inch / 10x5.2x0.25 cm. Made of good natural wood with ropes, laser cut and polished.

Halloween Handprint Art Cards – Includes 10 large 8.5" x 11" sheets, create festive Halloween memories with a hands-on activity that encourages creativity and imagination.
4. Straw Skeletons
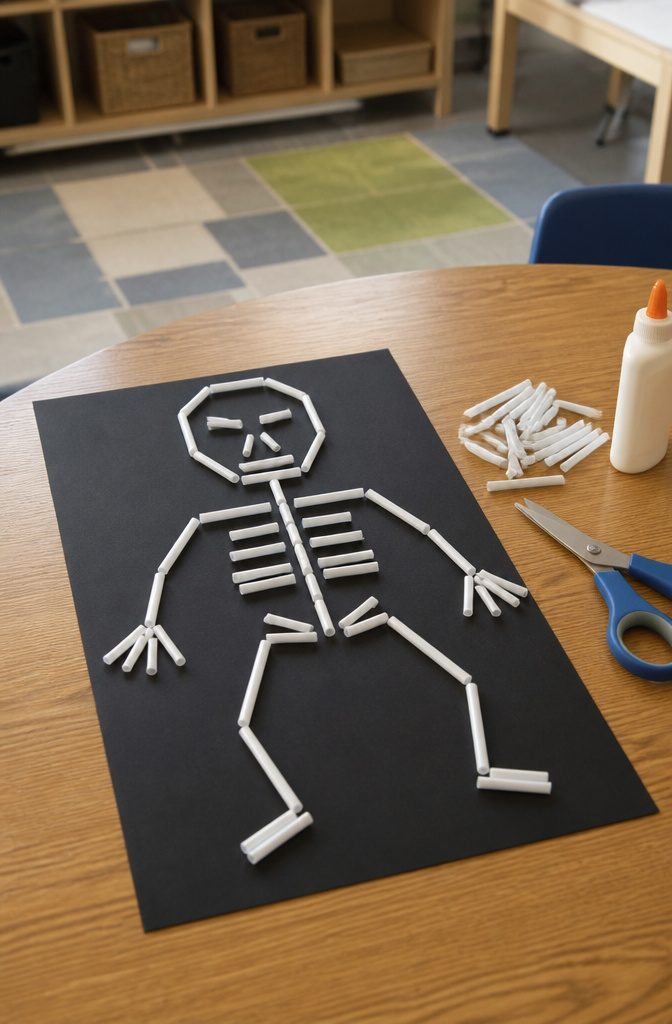
White plastic drinking straws, a pair of scissors, and dark construction paper are all you need. The straws fly everywhere when you cut them, so cutting over a bag keeps the pieces from scattering across the floor. Glue the short straw segments onto black or purple paper to build a skeleton figure, and the bones practically name themselves as you work. A skull, a spine, ribs, arms, legs. Preschoolers start counting without being asked, four pieces for the arms, two for each leg, and they figure out where the body parts belong by matching their own. Scrapbook paper bows or bow ties dress the skeleton up for a Halloween party, and the whole thing finishes fast enough that nobody loses interest. The craft works because the materials are already in most kitchen drawers, and the learning happens while their hands are busy.

4mm-18mm) – Easy-Peel Craft Eyes for Kids & Adults DIY Projects

Rich Sizes and sufficient quantity: A box contains 764 pcs wiggle eyes in 7 different sizes--4mm 6mm 8mm 10mm 12mm 15mm and 20mm. Multiple sizes and sufficient quantity for your choice.

Rich Sizes and colors: A box contains 600 pcs wiggle eyes in 5 different sizes -- 6mm 8mm 10mm 12mm 15mm. 5 sizes and 6 colors sufficient quantity for your choice.
5. Salt Painted Spiderwebs
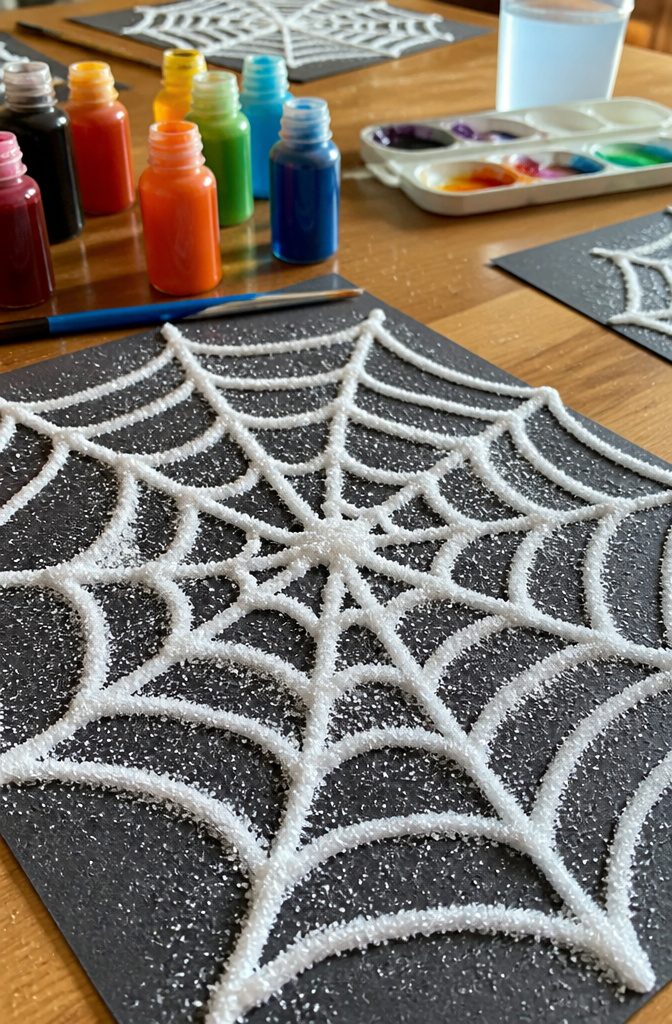
Raised salt painting turns a simple spiderweb drawing into something preschoolers can feel as well as see. Squiggles of white school glue trace the web’s lines on dark construction paper; a heavy layer of table salt goes over top, with the excess shaken off into the trash. The salt crystals cling to the glue and dry into a rough, crystalline ridge that catches light even before paint touches it.
Watercolors brushed across those ridges do something ordinary painting doesn’t. The color travels along the salt channels instead of soaking flat into paper, sending thin tendrils of orange or purple creeping down each web strand while kids watch it spread. The sensory payoff comes in layers: the gritty drag of salt under the brush, the slight crunch if a finger tests a ridge too soon, the visual surprise of a color that seemed to move on its own. Halloween palettes work well here, though most preschoolers will insist on their own combinations.
Waiting for the glue to dry first gives cleaner color, but painting while everything is still wet creates messier, more dramatic blooms. Both ways hold a three-year-old’s attention; the wetter version just finishes faster.
FUN SHAPES KIDS LOVE TO EAT fall festival pasta with cute pumpkin and leaf shapes that are easy to make and fun to serve, your kids will gobble them up

FUN SHAPED PASTA THAT KIDS LOVE TO EAT: Pastabilities Halloween Shapes Pasta is Kosher certified, all-natural GMO. Kids will love the fun shaped pasta featuring pumpkins, ghost, spiders! Perfect for kids, Halloween, crafts and more

FALL-THEMED SHAPES: Colorful pasta shaped like pumpkins and autumn leaves, perfect for seasonal meals and celebrations.
6. Frankenstein Handprints
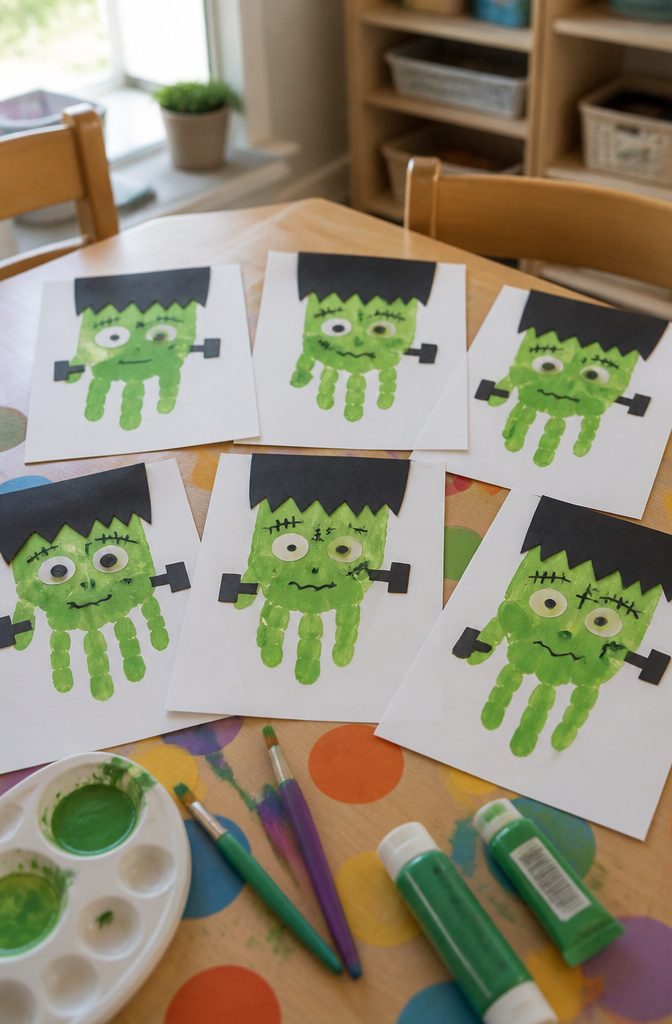
Green tempera paint on a preschool palm makes a perfect Frankenstein head shape, the fingers becoming the squared-off jawline without any cutting needed. Press the hand onto white construction paper, then flip the print so the fingers point up; the thumb side becomes the flat-top hairline that defines the monster. A black marker draws the mouth stitches and two mismatched eyes, while a rectangle of dark paper glued across the top finishes the hair. Construction paper bolts stick out from either side of the neck with a glue stick, though tape loops work better if the glue hasn’t set by the time small hands lose interest. The paint layer should stay thin; thick tempera cracks when it dries and the handprint warps. Two prints fit on a standard sheet if you rotate the paper, which matters when you’re managing a class of twenty and the drying rack holds half that much.

Great Value Set: The 332PCS Halloween foam pumpkins crafts set included 200 pcs Halloween Foam Stickers, 40pcs Halloween Foam Craft Pumpkins(8 kind of pumpkin), 24pcs wiggle googly eyes, 10pcs expression stickers, 12pcs accessory stickers, 40pcs Black Cords and 6 Color Pens (Black, Red, Purple, Green, Blue, Orange) in a paper box.

900PCS HALLOWEEN CRAFT PACK: Share more spooky creativity with Halloween Foam Stickers for Kids, Halloween Stickers Bulk, and Stickers Bulk, Halloween Crafts Bulk for classrooms and parties

😈【Rich Combination for DIY】This Halloween pumpkin decorating carft kit includes 16 blank foam pumpkin and 16 self-adhesive expression stickers with different patterns like black cat,monster,vampire,clown,pirate, spooky ghost and so on, adequate quantity to meet your daily life using and decorating needs.
7. Paper Bag Haunted Houses
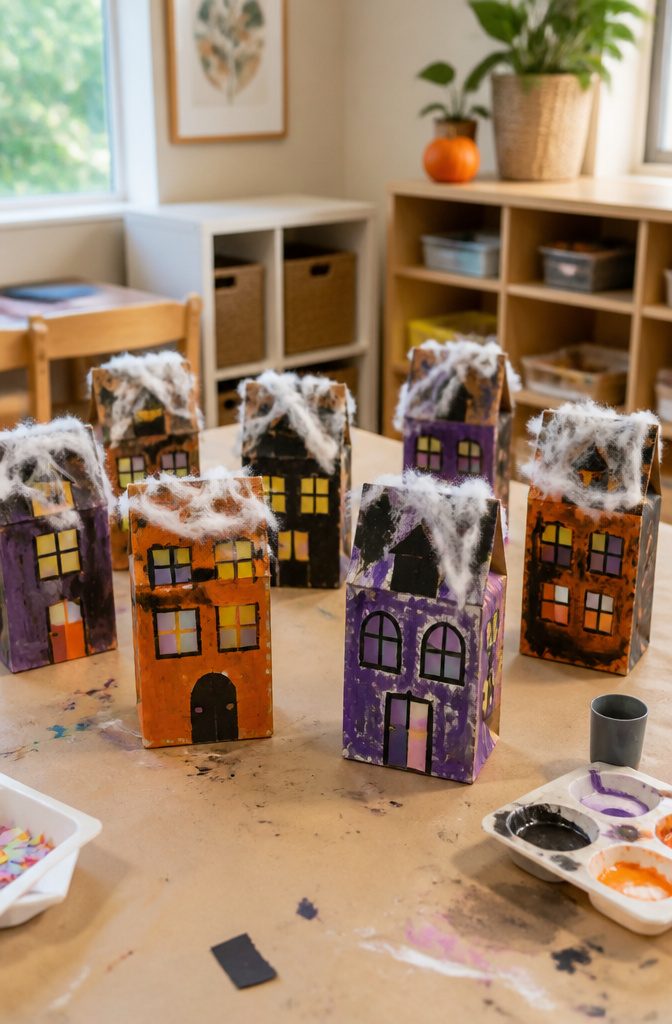
Lunch bags make a solid base for a haunted house because the construction is already half done. One seam runs up the back, and the flat bottom folds into a floor plan that stands on its own once you open it. I like that part because it means the bag itself is recycled material, not something you had to buy fresh for the project.
Acrylic paint works best here; the colors read bold against the brown paper. While that first coat dries, cut four windows from cardstock, two rectangles and two semi-circles. Scrapbook paper cut smaller makes the window panes inside. A roof piece cut slightly larger than the bag opening gets attached with a hot glue gun, and broken cotton balls stretch across it for spider webs. Small spiders pressed into that glue finish the roof. A chimney rectangle glues to the back with a glue stick, and a ghost shape on the front covers the door.
The hot glue steps are for the adult; preschoolers handle the painting, tearing cotton, and placing the ghost.

CONVENIENT SIZE - This Apple Barrel Acrylic Paint comes in a versatile 2 oz size that is great for basecoating, stenciling, and so much more

BRUSH + FINE DUAL TIP: Switch easily between detailed lines and expressive strokes with a 1 mm fine tip and a flexible 1–5 mm brush tip. These water-based acrylic paint markers are ideal for lettering, sketching, coloring, illustrations, and DIY art projects.

8. Paper Witch Craft
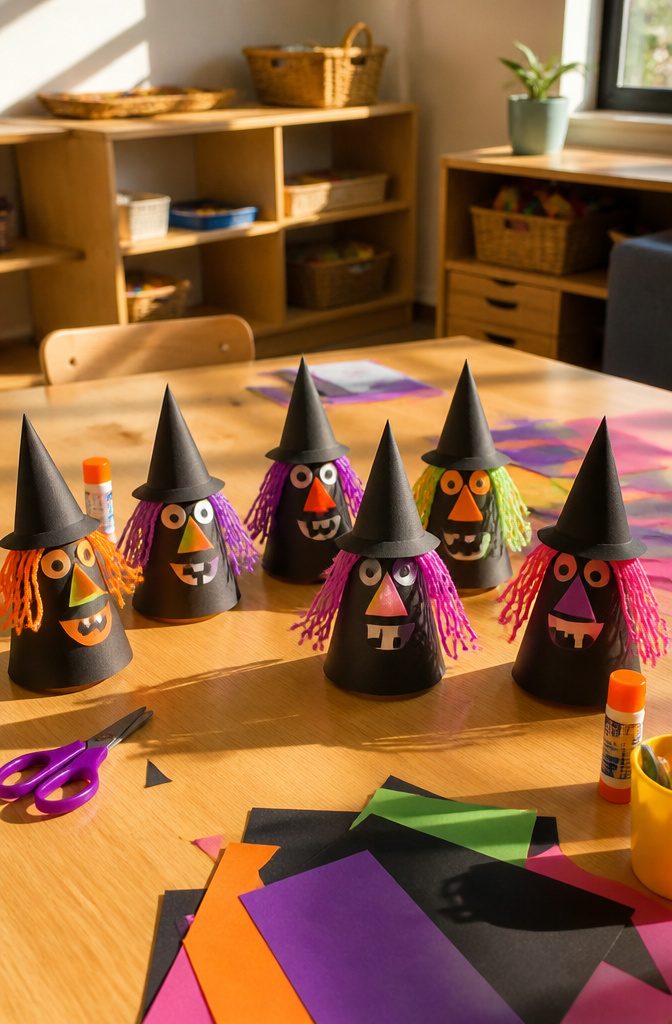
A paper witch starts with a black construction paper body, which preschool hands can cut as a simple rounded rectangle or oval. The real skill work comes in the details: two eyes, a triangle nose, and triangle teeth all give scissors practice without demanding straight lines. Strips of paper for the hair let kids cut across the page, a motion most three- and four-year-olds have already met.
The hat is a cone over a circle brim, taped inside so it keeps its shape. Yarn works better than paper strips for hair if you want something that moves; loop it over the top of the head and tape underneath. The sources mention a pleated paper skirt as an option, but for an afternoon finish with preschoolers, the basic shape pasted flat keeps the project inside their attention span.
A line of glitter or sparkly gems across the hat band adds the reward at the end. The witch comes together with glue stick and tape, nothing wet that needs drying time, so the figure is playable before naptime ends.


Unique 3D Bats Shape Wood Crafts To Paint - These unfinished wood sheets are cut out to cute Halloween Bats patterns, in sufficient quantity, and suitable size for you to use on DIY craft projects, you can also share them with your families and friends.

MATERIAL: the Unfinished flying bats are made from good quality natural wood, Laser cut and polished.
9. Fingerprint Pumpkins
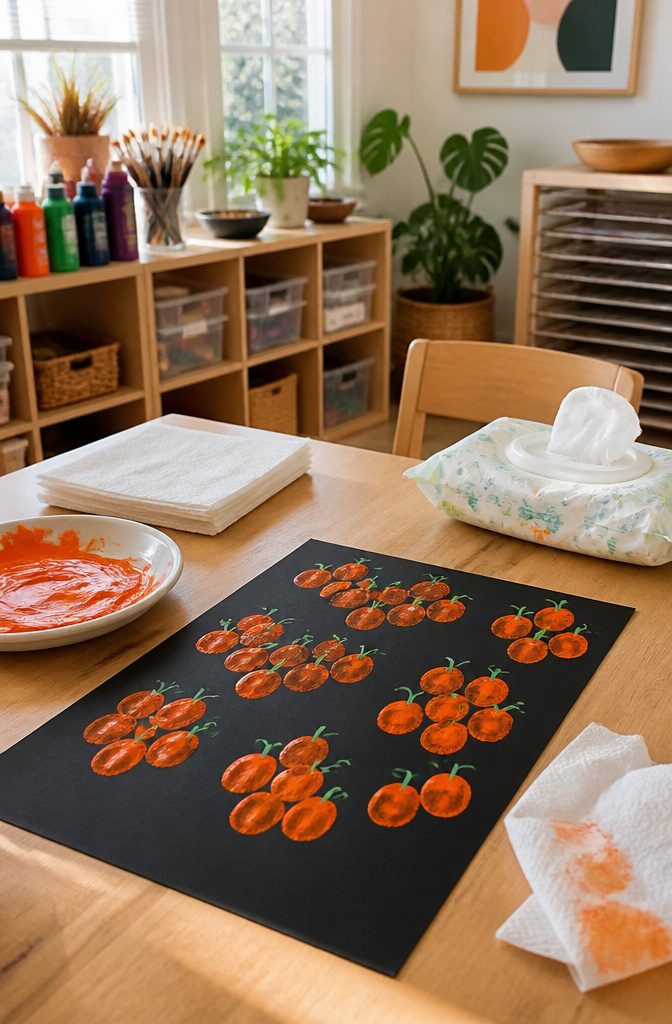
Orange paint on fingertips builds pumpkin clusters fast. The trick is pressing the pad, not the tip, so the print reads round. A stem and leaf drawn on with an acrylic paint marker after drying finishes each one.
Mess sits at medium level. Paint goes on hands, not clothes, if you keep the paper flat on the table and the paint dish close. A wet wipe bowl at the elbow saves the trip to the sink between colors. The prints made last year needed about ten minutes to dry before marker details would not smear.

🤩 𝗧𝗛𝗘 𝗨𝗟𝗧𝗜𝗠𝗔𝗧𝗘 𝗖𝗥𝗔𝗙𝗧 𝗦𝗘𝗧 - Blue Squid Craft Kit comes with over 1750+ pieces of arts & crafts supplies and materials, including: Colorful pompoms, Assorted buttons, Bright feathers, Shiny sequins, Fun foam stickers, Multicolor matchsticks, Multicolor popsicle sticks, Flexible pipe cleaners, Wiggly googly eyes. and much more!
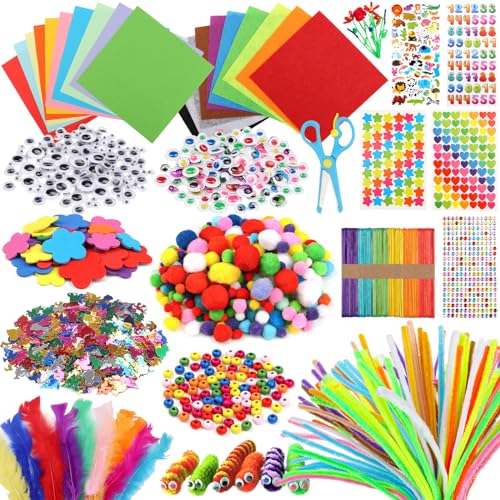
【Lots of Craft Kit Material for Children】 290 pompoms, 100 wiggly eyes, 100 pipe cleaners, 50 different colored feathers, 50 wooden rods, 30 Flowers EVA, 10 origami paper, 1 pack of sequins - Mixed shapes: butterfly, rabbit, elk, cat, 1 sheets of crystal diamond stickers: dots, love, 4 sheets of stickers: love, stars, letter, animals.

Product Details: You will receive 1,400pcs googly eyes in 8 different sizes, comprising: 500 x 4mm, 400 x 5mm, 200 x 6mm, 100 x 8mm, 100 x 10mm, 50 x 12mm, 30 x 15mm, 20 x 20mm, along with one pair of tweezers
10. Spider Suckers
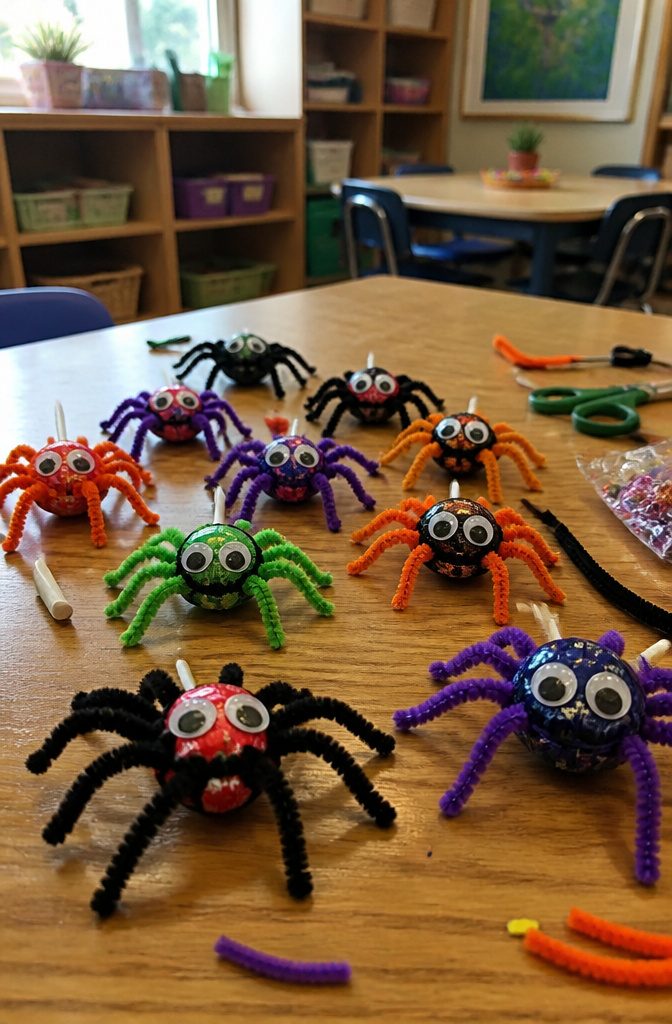
Four pipe cleaners and a lollipop make a spider that doubles as the treat itself. Lay the pipe cleaners side by side and set the lollipop about one third of the way in. Wrap the longer ends over the pop, crossing them so they hold tight, then spread the eight legs and bend each into an L at the bottom so they stand. Sticky googly eyes let preschoolers do the whole job; otherwise a dot of hot glue from an adult finishes the face.
Tootsie Pops or any round lollipop works. The finished spiders travel well in a bowl at a party or tucked into treat bags, though the legs snag on loose fabric so a short cup works better than a sack. With smaller children, keep an eye on the eye stickers so they do not wander toward mouths. The craft takes maybe ten minutes once the supplies are out, and the legs survive being rearranged several times before any candy gets unwrapped.

🎃 Spooky & Festive Shapes: Craft playful pumpkin, mushroom and leaf pasta shapes for a memorable fall celebration.

Thanksgiving Crafts Jigsaw Puzzle: Autumn Thanksgiving arts and crafts for adults include 12 styles, 24 sets of puzzle coloring, 24 colored pens, and reference pictures. With the theme of Thanksgiving crafts kits, with cute patterns such as owls, pumpkin carriages, turkeys, leaves, pinecones, etc, the rich creative options allow you to fully indulge your imagination and enjoy the unlimited fun of DIY. Whether a group activity or personal creation, it is a perfect choice

PERFECT FOR TINY HANDS: Each large foam pumpkin in this set measures a generous 8 inches in diameter, making them the ideal size for young crafters. The pack includes 24 foam pumpkins for crafts, perfect for halloween crafts for kids ages 8-12 classroom. These sturdy foam pumpkins provide a smooth surface that’s easy to decorate with foam pumpkin stickers or other embellishments.
11. Puffy Paint Ghosts
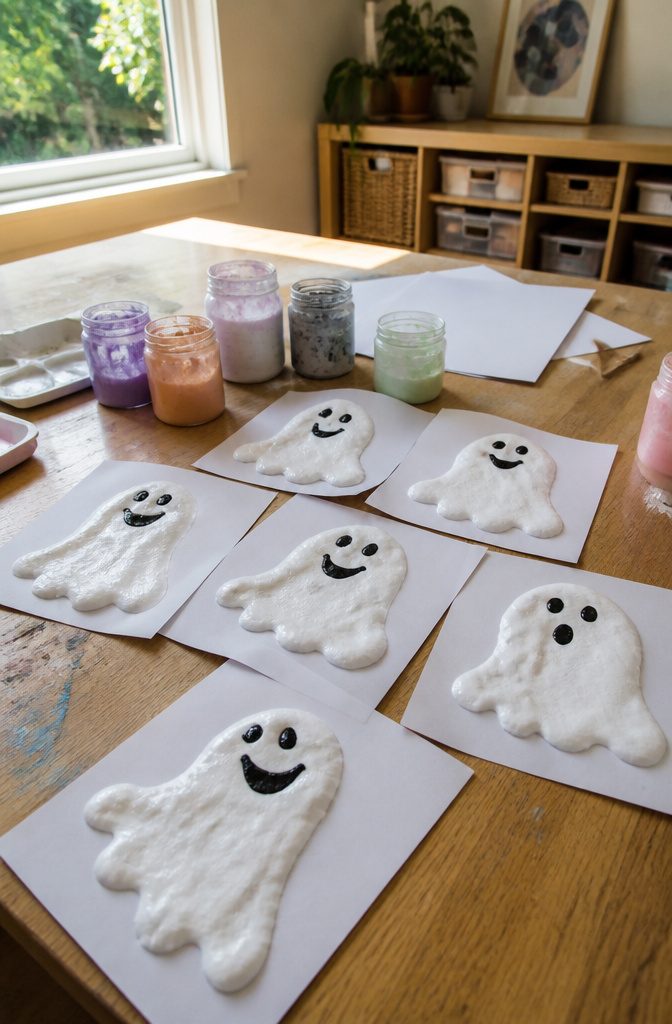
Puffy paint ghosts are one of those crafts where the drying process is half the point. The paint rises as it sets, leaving a raised, spongy surface that grabs a preschooler’s attention better than any flat drawing. You can mix your own with three ingredients you probably have in the kitchen right now, or buy a bottle ready to go if you would rather skip the measuring.
The sensory payoff comes after the paint is dry, not just during the squeezing. Kids run their fingers over the cooled, puffed shapes and get that unexpected texture, almost like soft foam. The ghost shape itself is simple enough for a three-year-old to outline, so there is no frustration with fine details. A black marker turns the blob into a face once the paint has fully set, and the whole thing stays dimensional enough to hang on a window without going flat.
Shaving cream in the homemade version makes this one predictably messy. The cleanup is worth it for how long the finished piece holds a child’s interest, which, for a preschool craft, is the real test.
12. Paper Bag Pumpkins
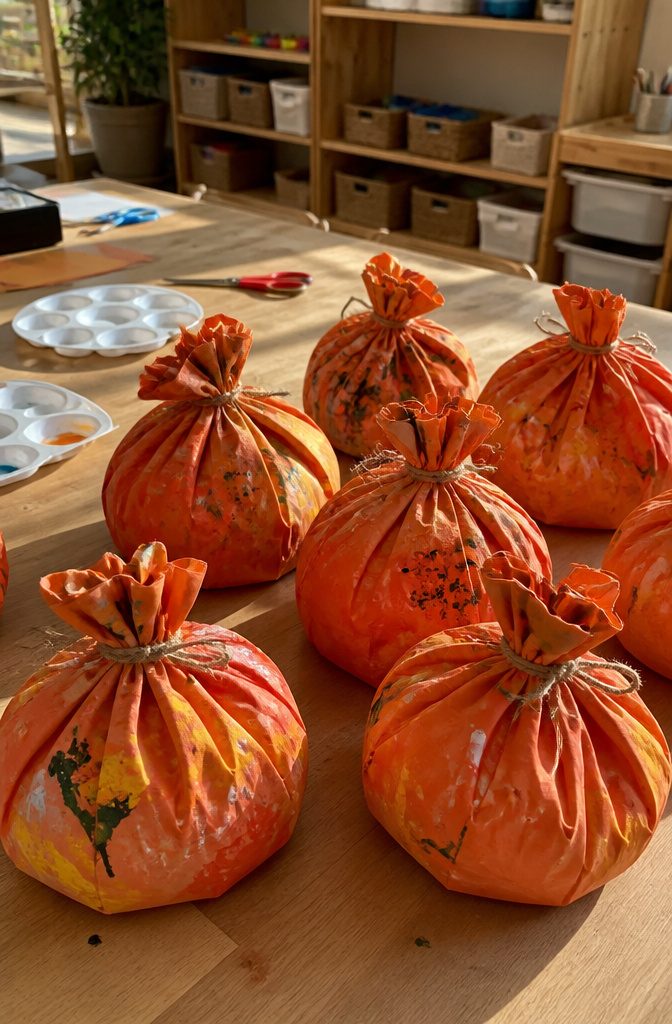
Lunch bags take on a rounder life with nothing but newspaper and twine inside. Stuff the bag about halfway full, enough to give it body without turning it into a sphere. Then scrunch the paper upward so the filled base bulges like a pumpkin while the gathered top shrinks into a stem. A piece of twine tied in a bow marks where one shape ends and the other begins.
The 3D result stands on its own and gives small hands something to grip. Standard lunch-bag size works fine; the proportions handle themselves once the stuffing settles. Paint the face after the form is set so the features follow the curve instead of fighting it. Acrylics grip the paper better than tempera, and a black Sharpie saves the smile for last when the orange is dry.
13. Handprint Pumpkins
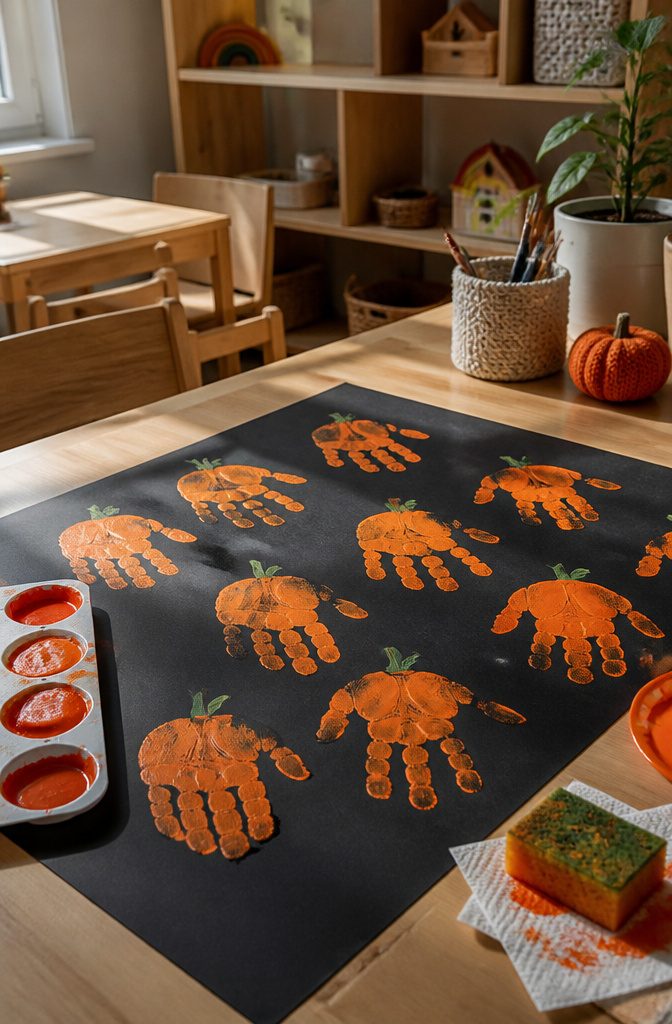
Orange paint spread across a preschooler’s palm is the fastest way to turn an afternoon into a pumpkin patch. Each handprint becomes one ridged globe; five or six clustered on black paper read instantly as a field at midnight. The fingers leave those natural grooves a real pumpkin has, so no extra drawing is needed unless someone wants to add a stem with a green thumbprint.
Group the prints in overlapping clusters of five or six and the whole thing looks intentional rather than scattered.
With more than one child, this becomes the rare craft that improves with quantity. Smaller handprints nest between larger ones, and the variation in size makes the patch look deeper, like real perspective. A whole classroom worth on a single sheet of butcher paper turns into a door decoration that actually holds up against the store-bought stuff.
The only real failure mode is too much paint. A thin, even layer on the palm gives the ridges; a gloppy coat fills them in and you lose the texture that sells the pumpkin shape.
14. Monster Teeth Count
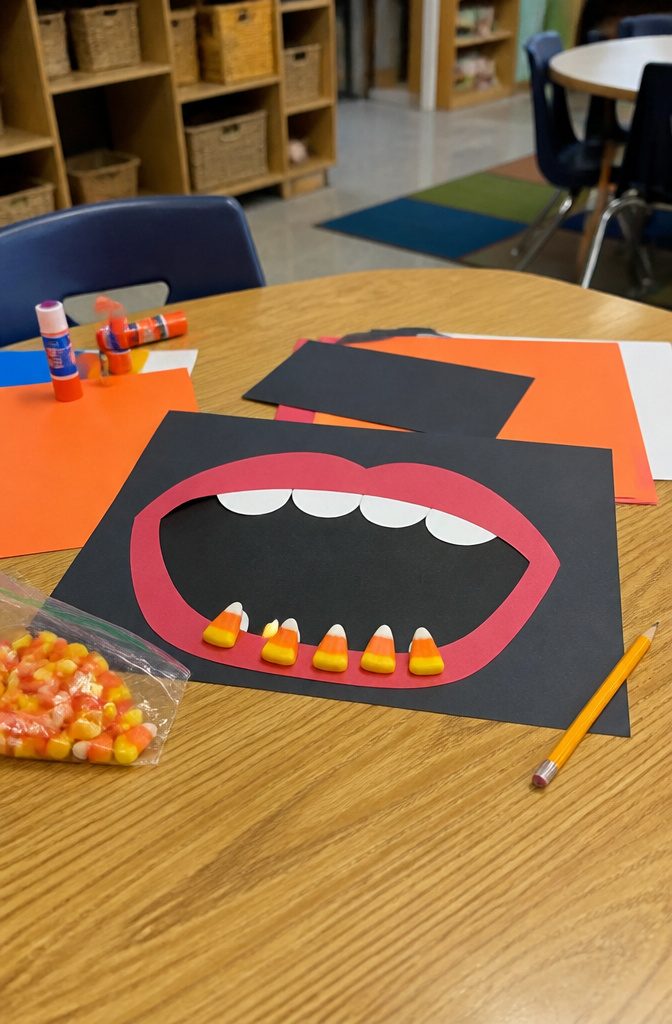
A paper mouth glued to a sheet of black construction paper becomes a counting station when you write a numeral beside it. The child counts out that many candy-corn pieces and presses them along the bottom lip as teeth, either sticking them in place or leaving them loose so the activity can repeat tomorrow with a different number.
White paper cut into triangles works too, and holds up better if you want the teeth to stay put through the week. Keep the numbers under ten for most three-year-olds; the one-to-one matching of object to numeral matters more than the size of the count.
The candy corn adds its own small lesson in self-control, since most preschoolers will want to eat the math tools before the equation is finished. Setting aside a separate portion for after the activity heads off that negotiation without much fuss.
15. Puffy Paint Pumpkins
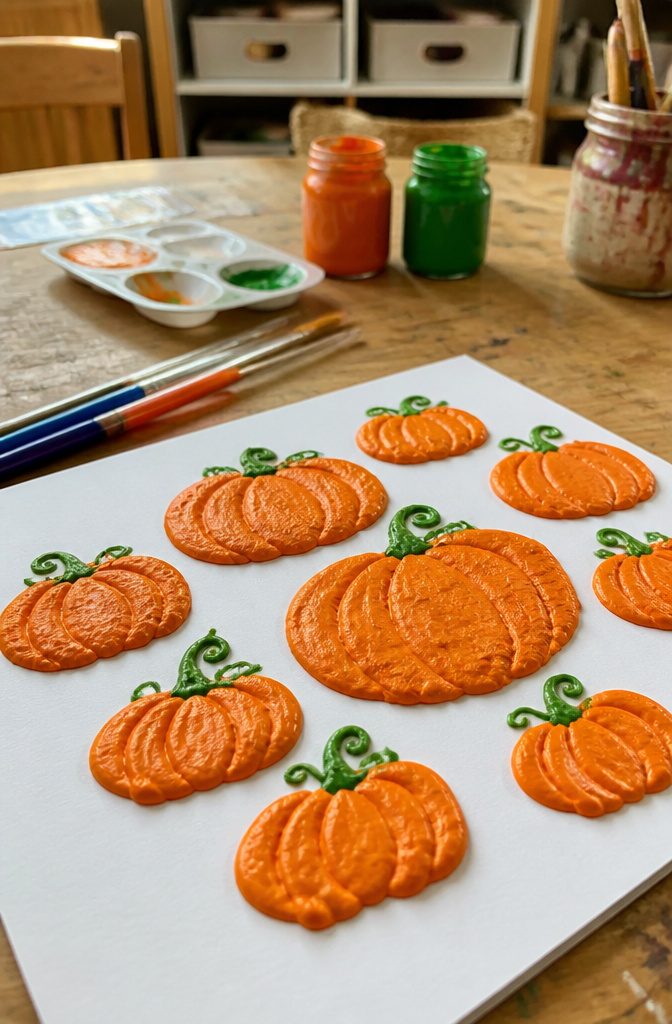
Puffy paint brings a real physical payoff to pumpkin crafts that flat paint never quite matches. The mixture puffs up as it dries, leaving raised ridges you can actually feel along the stem and curling vines. Preschoolers notice the difference immediately: run a finger across a finished piece and the stem sits higher than the orange flesh around it.
The paint itself comes together from three kitchen staples. Stirring the batch takes maybe two minutes, and the real work is in the squeezing. Little hands can trace a pumpkin outline, then go back to dot on bumps where the vine meets the fruit or add a stem that stands clear of the page. The texture variation is the whole point here. Where flat paint dries into a single plane, this stuff keeps its height, so the stem reads as a separate object and not just a different color.
Drying time stretches longer than standard paint, which is worth planning around. The thickness that creates the dimension needs overnight to fully set, and the surface stays slightly soft even then. That tactile finish makes this one of the better sensory crafts in the Halloween rotation, though it does mean finished pieces can’t go into a backpack right away.
16. Splat Pumpkins
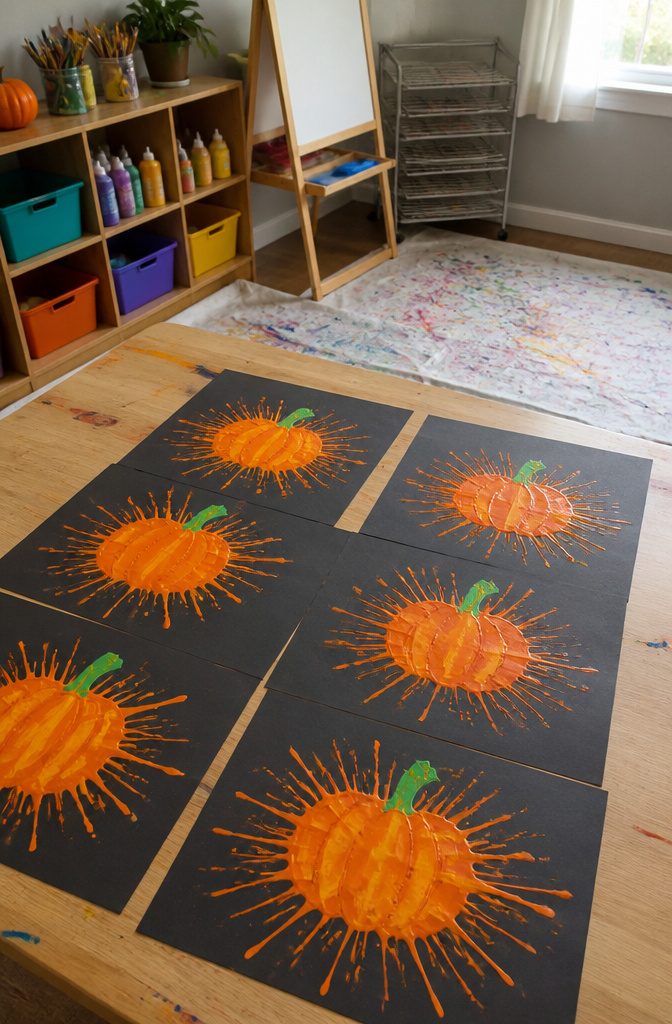
Paint flying through the air turns a calm afternoon into something preschoolers actually remember. The splat pumpkin starts with a blob of orange on paper, then the child raises their hand and brings it down hard. Paint sprays outward in tendrils and dots, and the shape that lands looks like a pumpkin if you squint, which is exactly the point.
Thick tempera works better than runny; it needs enough body to travel when it hits. A dropcloth or a lawn you do not care about saves the floor. The arm motion matters more than accuracy. A straight slam gives a starburst, a sideways swipe drags tails across the page. Let them do ten and pick the best, or call the whole stack a pumpkin patch.
The mess is the activity. By the third splat most kids have paint on their elbows and a reason to show off. Wet paper buckles, so tape the corners first or the splat slides off the edge and the pumpkin becomes a puddle. Once dry, a quick stem in brown marker finishes it, though plenty of three-year-olds skip that part and declare it done.
17. Frankenstein Cutting Craft
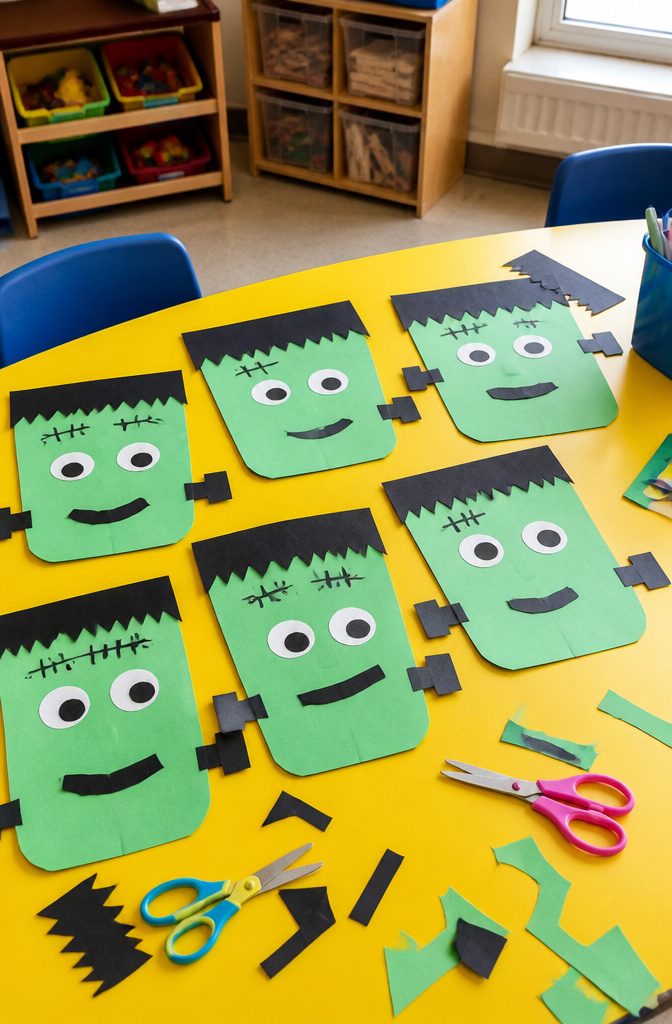
Green construction paper gives preschoolers something forgiving to cut while they build scissor skills. I draw a simple Frankenstein head outline, wide at the jaw with a flat top, then let the child cut along the edge. The straight top edge and angled jaw line mix two basic cutting motions, so the shape builds control without boring them with endless straight strips.
Once the head is free, scraps become the details. Thin rectangles for the hair, squares for the bolts, a small triangle nose if they are ready for corners. Each extra piece means more cutting practice disguised as decoration. Glue sticks hold it all together, and a marker finishes the face.
This craft works because the monster does not need to look perfect. A lopsided Frankenstein is still a Frankenstein, so the child keeps going instead of asking for a restart. The sources I looked at mentioned this as a scissor skills activity specifically, and that focus on the cutting rather than the end product is what makes it suited to three- and four-year-olds who are just getting the hang of opening and closing blades.
18. Spiderweb Popsicle Sticks
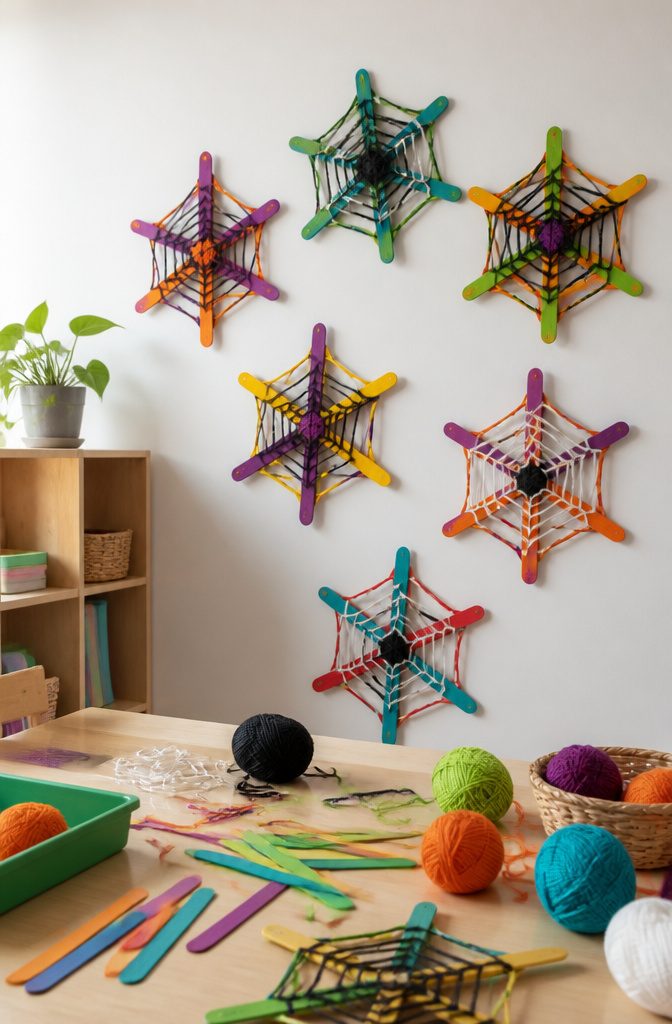
Four popsicle sticks and a skein of yarn are enough to keep a preschooler’s fingers busy for a solid afternoon. The sticks get a coat of acrylic paint first, whatever color the child insists on, and then sit for about 30 minutes until they are completely dry. An adult handles the hot-gluing: a plus sign first, then an X behind it so the frame looks like a wheel with eight spokes.
The real work, and the real challenge, is the weaving itself. The child loops yarn over one spoke, under the next, over, under, working around the frame in a pattern that slowly builds the web shape. The over-under rhythm is what trains the fine motor control, and the repeating pattern gives them a structure to follow without an adult hovering. Thread works too, though yarn is easier for small hands to grip.
Some kids will pull the loops tight and get a dense, convincing web. Others leave gaps you could drive a toy truck through. Both results hang fine in a window. What matters is that the child can see the pattern forming from their own repeated motion, which is more satisfying than most preschool crafts that end in a glued mess with no visible logic to them.
19. Egg Carton Spiders
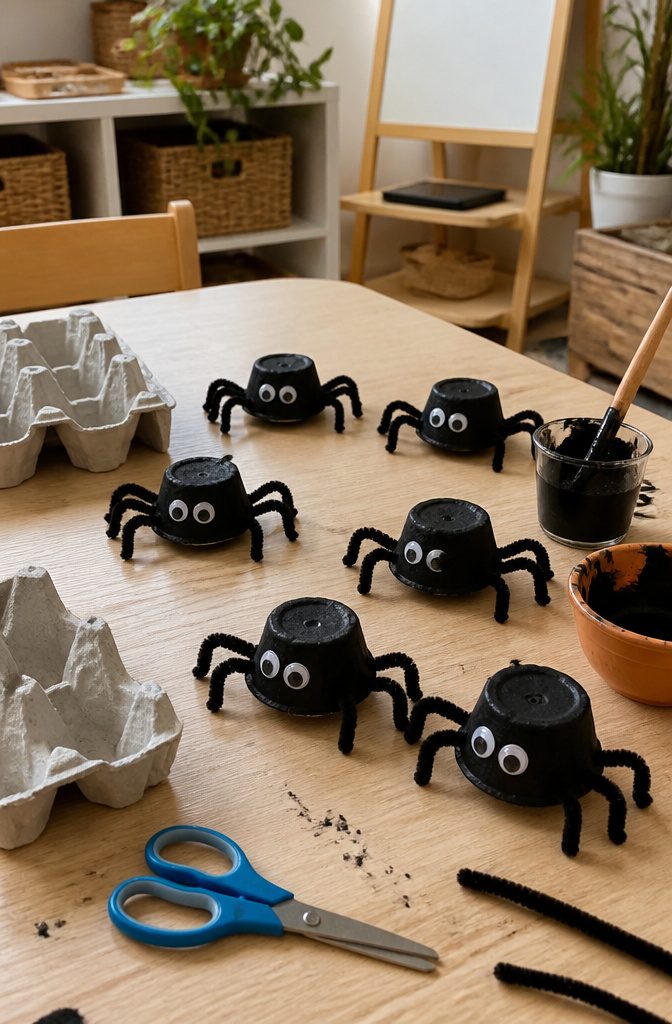
An egg carton from last week’s breakfast turns into the body of a spider my niece still keeps on her windowsill. Cut the cups apart so each one sits alone, then notch four holes on each side for the legs. Pipe cleaners thread through and bend into knees that actually grip a tabletop. Black tempera paint covers the cardboard in one coat if you thin it slightly; the ridges left from the egg pockets read as body segments once the paint dries. Googly eyes and a pinched pipe cleaner mouth finish the face.
KiwiCo lists these among projects for kids three and up, and the age floor matters more than it sounds. A three-year-old can push a pipe cleaner through a pre-poked hole but needs help starting the scissor cut through the carton ridge. Plan on holding the cup steady while they punch the holes, or the cup crumples and the project ends in tears.
Make kooky spiders from recycled egg cartons.
— KiwiCo
That "recycled" part is what saves this craft on a rainy October afternoon when the craft store run is not happening. The legs wobble, the paint flakes where the pipe cleaners exit, and none of that bothers a preschooler.
20. Paper Plate Monsters
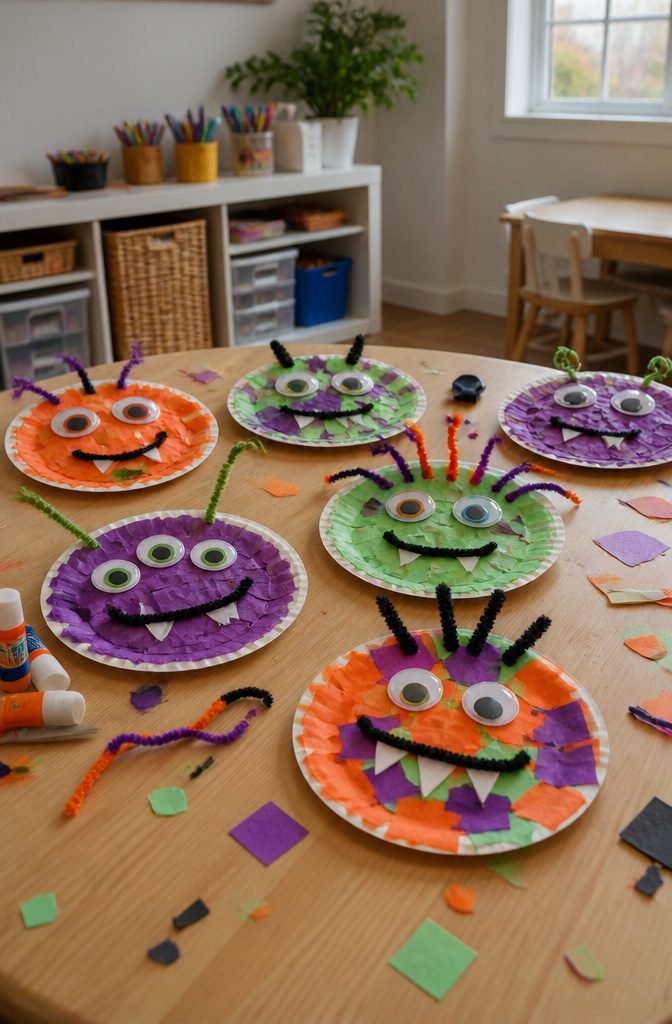
A paper plate is the right blank canvas for a preschooler because the ridges already suggest where eyes and a mouth might go. I like to lay out a pile of scraps and let the kid decide what a monster needs: tissue paper squares for fur, pipe cleaners twisted into antennae, or a single googly eye placed dead center. The supplies are already in most houses, and the open-ended setup means no two monsters come out alike, which matters more than whether the glue is in the right place. Last year my niece spent twenty minutes layering yellow tissue onto her plate and announced it was a "sun monster." That is the point of the craft. A few pre-cut construction paper shapes for teeth or ears help kids who freeze at a blank page, but the door stays open for the kid who wants three mouths and no eyes at all.
Frequently Asked Questions
What are some easy Halloween crafts for preschoolers?
Noodle pumpkins, leaf ghosts, bat handprints, straw skeletons, salt painted spiderwebs, and fingerprint pumpkins are all easy options that use simple materials and finish inside a preschool attention span. Most of these crafts need only paint, glue, and paper or household items like pasta, leaves, and lunch bags. The article lists twenty total projects, ranging from handprint art to puffy paint textures and egg carton spiders.
What materials do I need for Halloween crafts?
Construction paper, glue sticks, scissors, acrylic or tempera paint, and googly eyes form the core supply list across most projects. Many crafts also use household recyclables like egg cartons, paper bags, and plastic straws. Watercolors, yarn, pipe cleaners, and popsicle sticks appear repeatedly, but nothing requires a special trip to a craft store.
How can I make Halloween crafts fun for kids?
Let preschoolers handle the messy, hands-on parts themselves: shaking paint in bags, slamming paint for splat pumpkins, threading pipe cleaners, and deciding what their paper plate monster needs. Build in a walk to collect leaves or a snack break while paint dries so the activity paces itself to their energy. Open-ended choices, like what color yarn or how many googly eyes, keep them engaged longer than following exact steps.





