
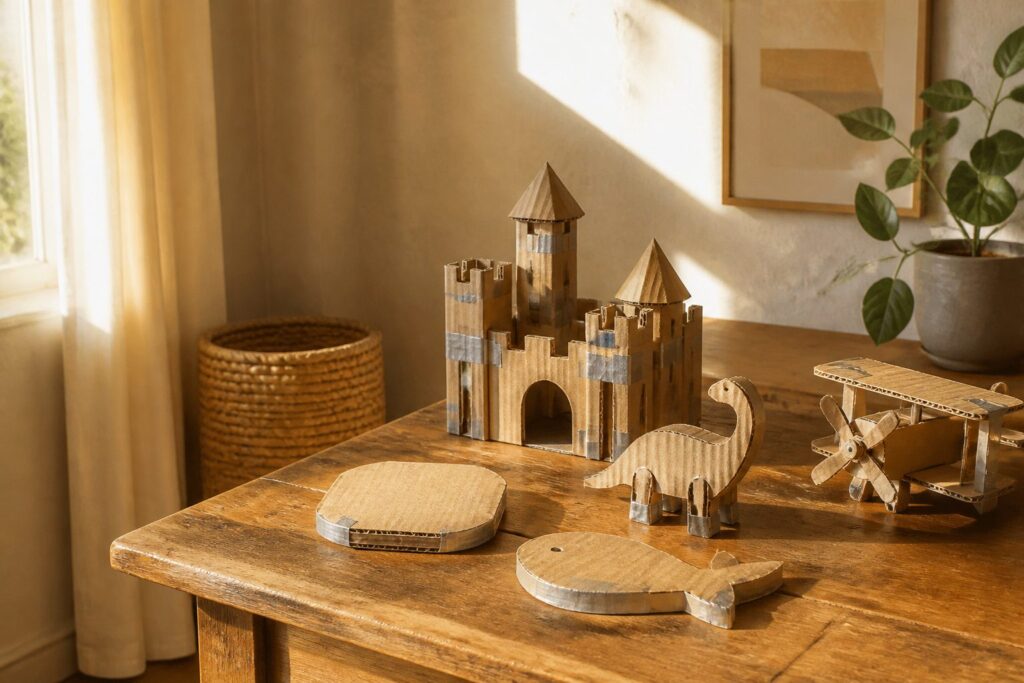
Projects here run from a coaster you can cut in minutes to a refrigerator-box castle, and the deciding factor is whether the thing will be handled, wet or leaned on.
Cardboard fails at its edges and corners. Seal coaster sides, not just faces, and run duct tape down every castle corner.
1. Coasters from Cardboard Boxes
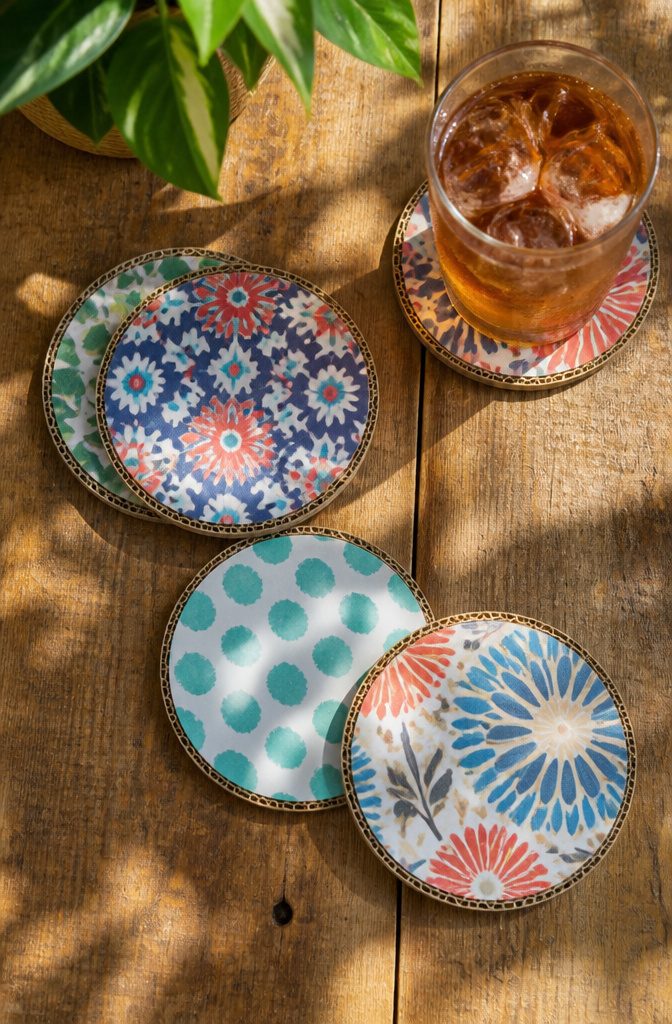
Cut circles from the flattest panels of a box, and save the ones with printed patterns or colored inner faces for the top layer.
Glue 3 or 4 circles together so the stack is thick enough to hold a glass without flexing, and press them under a book while the glue sets.
Raw corrugated edges are the weak point, because the flutes act like straws and wick up condensation. Decoupage the top, then seal the sides as well as the face, since a sealed top over bare edges still soaks through.
A waterproof coat such as UV resin works well. I’d skip a plain paper finish alone; it won’t survive a sweating glass for long.
For a party, brush on an initial before sealing. Once the coaster goes soft, it goes straight to the recycling bin.
2. DIY Fire Starters
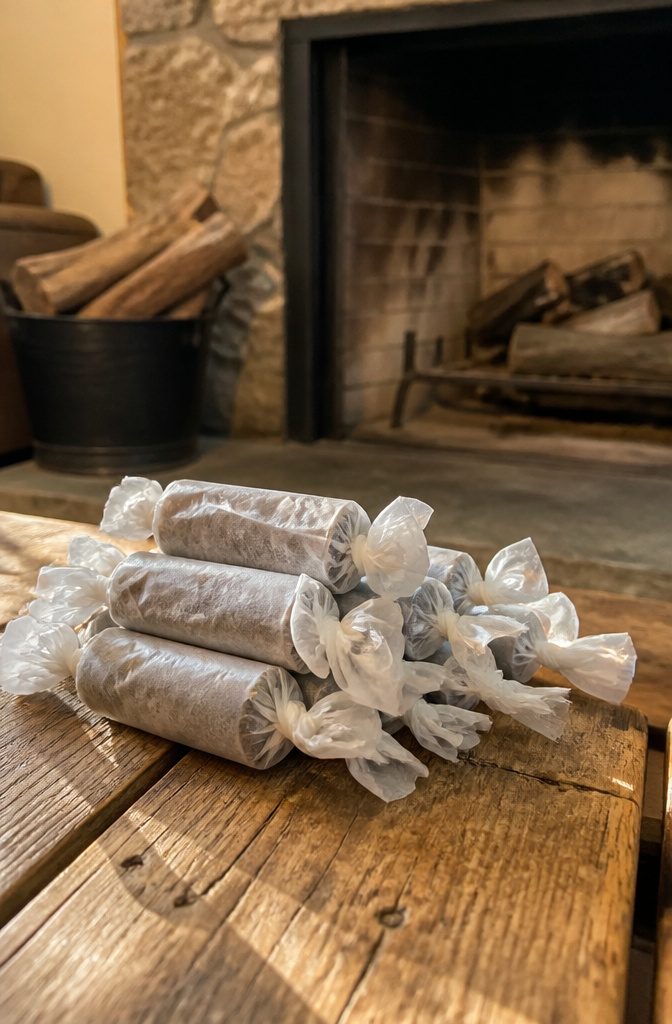
Dryer lint burns hot and fast, and a toilet tissue tube gives it a shape you can stack under kindling.
Pack the lint into the tube until it is full but not crushed, since loose fluff lights easier than a dense plug.
Then wrap the whole tube in wax paper and twist both ends shut, like a hard candy. The wax paper does the slow work: it catches first and holds the flame while the cardboard and lint underneath take over.
Newspaper will stand in for wax paper, but I would pick wax paper every time. Light the twisted end of the wrap, and set the tube under your logs, not on top.
Store them in a coffee can or a cardboard box with a lid, somewhere dry and away from the fireplace itself. Damp lint is useless.
3. Homemade Flower Press
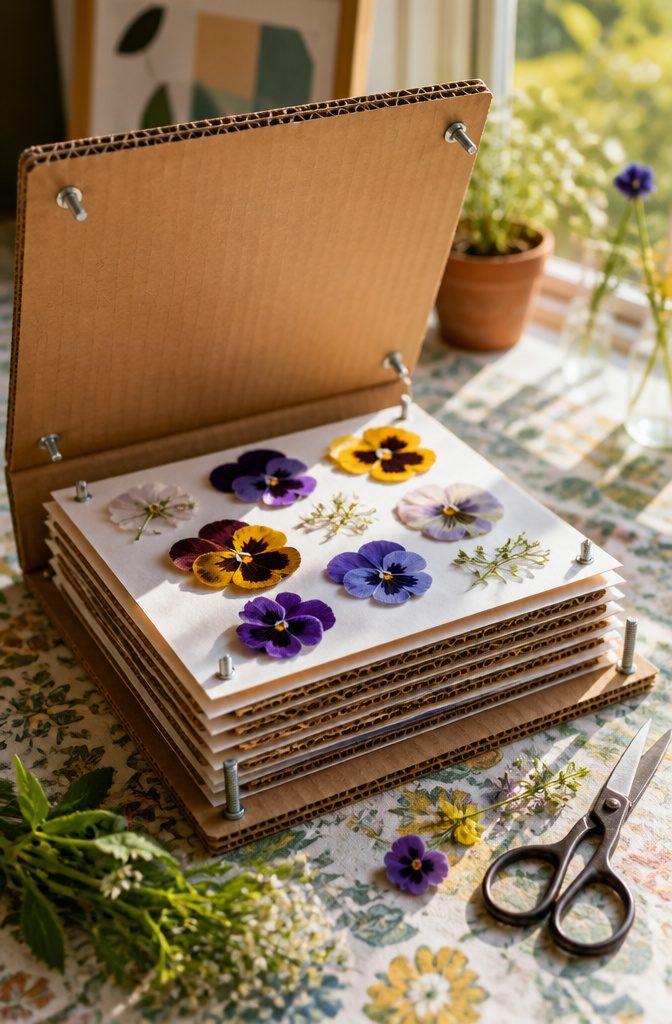
Two pieces of corrugated cardboard from a shipping box are all the frame a flower press needs. Cut them to the same size, then trace and cut a few extra layers to stack between them.
Flowers go between sheets of plain paper, laid face down and not touching, so each bloom dries flat.
Build the stack in order: cardboard, paper, flowers, paper, cardboard. Thin flowers like pansies and violas flatten best, while thick blossoms stay lumpy.
Bind the stack with rubber bands or a heavy book on top.
Pressing usually takes 2–4 weeks, and leaving the press closed until the petals feel papery keeps them from tearing or molding. Peeking early is the most common way to ruin a batch.
4. Spooky Halloween Candles
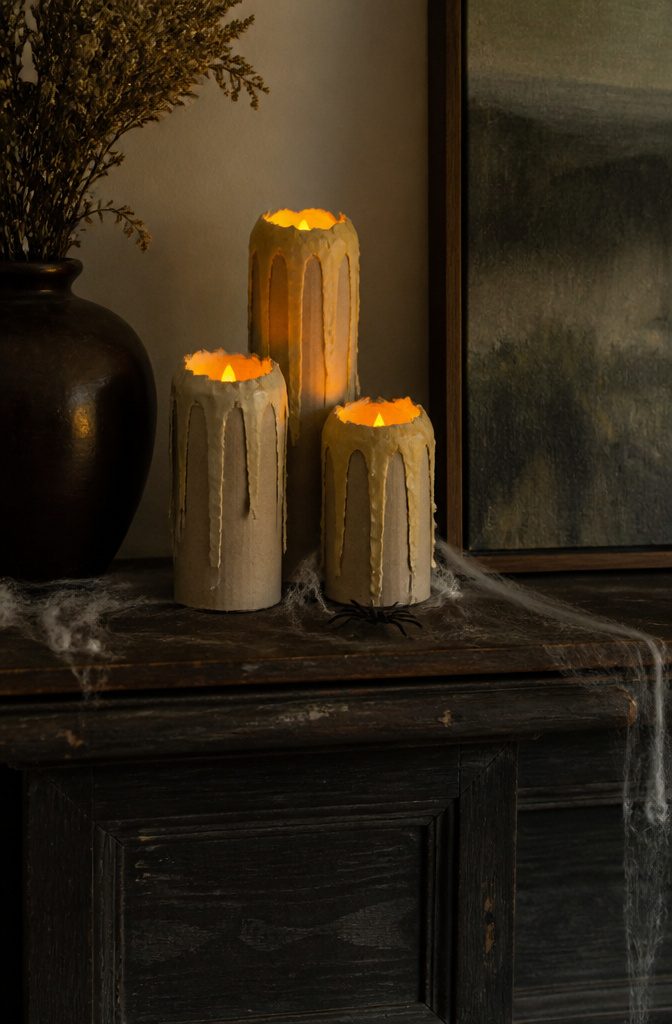
Paper tube candles are the cardboard project I would put on a Halloween mantel first, because the vintage look comes almost for free.
A tube already has the right proportions for a pillar candle, so the work is mostly in the finish.
Cut tubes to different heights and group them in odd numbers, so the cluster looks gathered rather than lined up.
The spooky details sell it: let paper "wax" drip down the sides in uneven runs, and give the tops a ragged, melted edge. Cobwebs and a plastic spider at the base push it further.
Orange LED lights set inside the tubes give an eerie glow with no flame near paper, which is the only choice I would make for a display that stays up for weeks.
5. Wall Decor Ideas
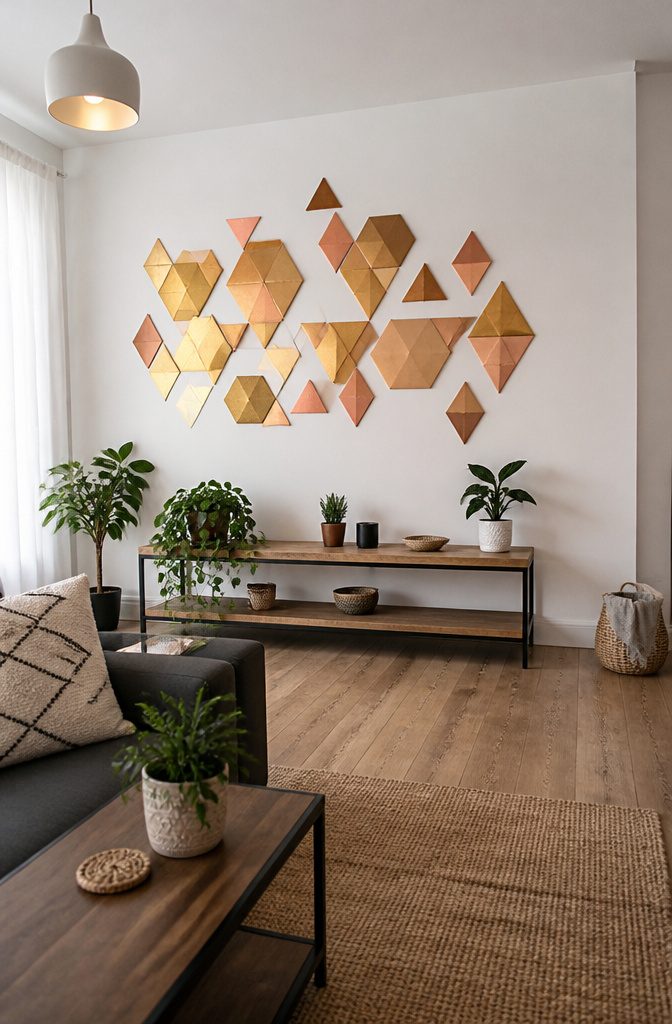
Geometric pieces are the easiest way into cardboard wall art. Cut triangles, hexagons and diamonds from sturdy board, then paint each one a different color.
Metallic spray looks best here, and a honeycomb of hexagons in gold, copper and rose gold reads as modern art from across the room. Mount them on foam board, or stick them straight to the wall with strong adhesive strips.
Layered pieces take more patience. A wall-mounted deer head needs several cut layers, with the antlers cut separately and attached afterward.
Space the layers on a backing board so the shadows give it depth, then paint the whole thing one color: white, gold or natural brown. I’d pick white, since it hides seams best.
6. Valentine’s Day Cardboard Crafts
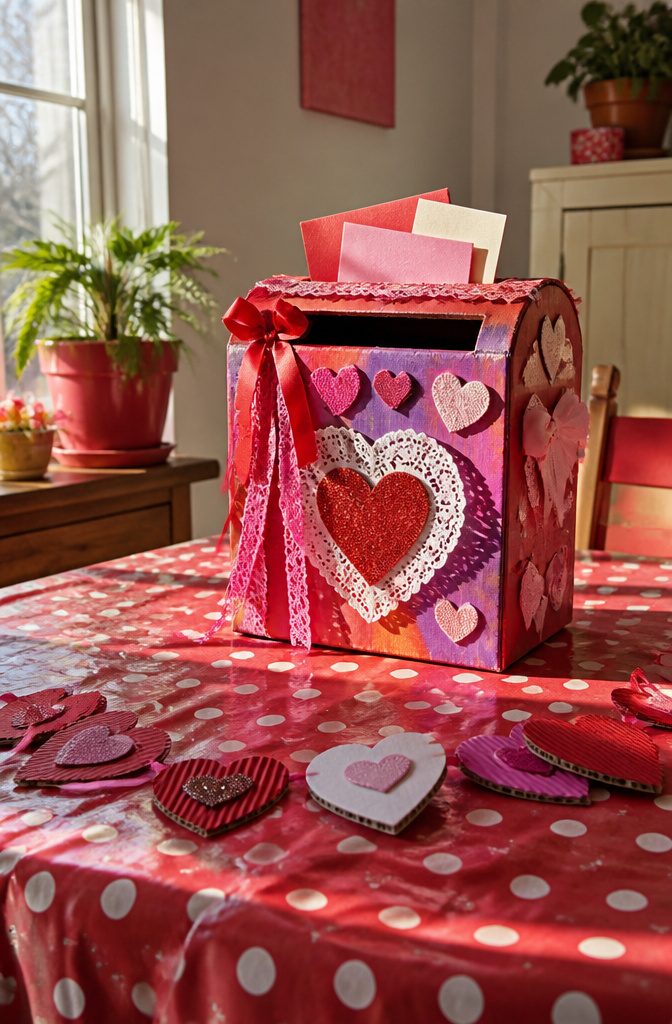
A shoebox or any small cardboard box makes a Valentine card mailbox with one cut: a slot in the lid for cards to drop through.
Paint it red, pink and white, then glue on hearts, lace doilies and ribbon. I’d pick this over a paper bag for classroom exchanges, since a painted box survives for years and a bag usually doesn’t survive the walk home.
Hearts also work as a garland. Cut cardboard hearts, string them together, and hang the line on a mantel or anywhere that needs a little color.
It’s a good use for flattened shipping boxes, and the hearts can stay up past February 14 if you skip any lettering.
7. No-Maintenance Cactus
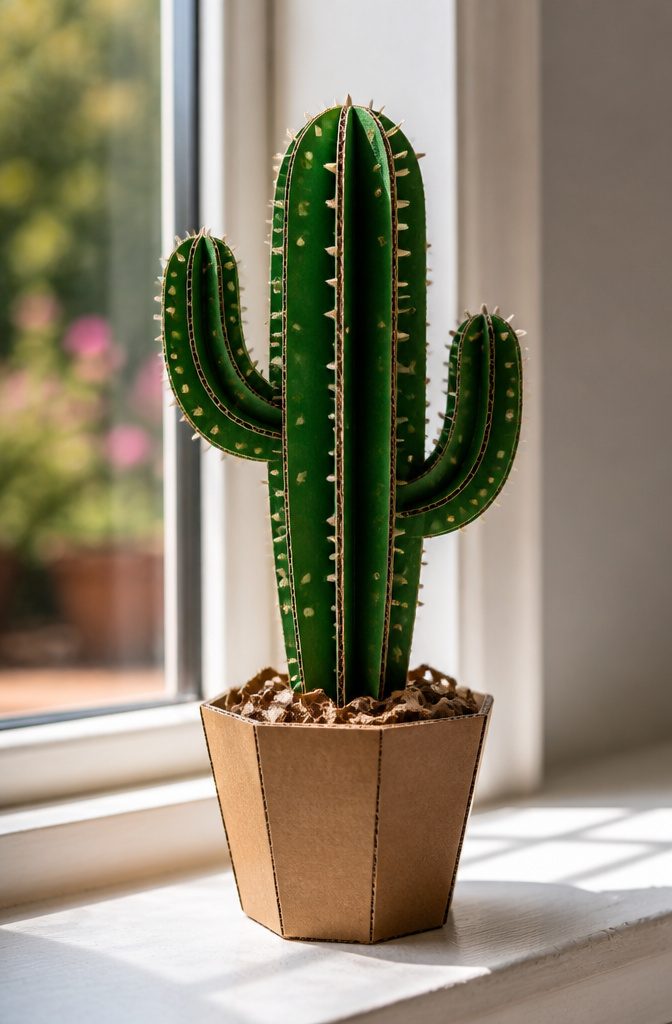
A cardboard cactus never needs watering, never drops a spine, and won’t scratch a toddler or a curious cat, which is the real argument for it over a live one.
The material comes straight from your recycling bin, so the cost is close to nothing.
I’d build it from layered cutouts: trace a tall, rounded cactus shape and a couple of arms, cut several copies, and glue them face to face.
Stacked layers make the body stiff and give it real thickness, so it stands without wobbling. Paint it green, then add spines with a marker or small paper slivers.
Set it in a small pot or basket, packed with crumpled paper. It sits well on a windowsill, a shelf, or a kid’s desk, where a real cactus would be a hazard.
8. Cat Cave in a Moving Box
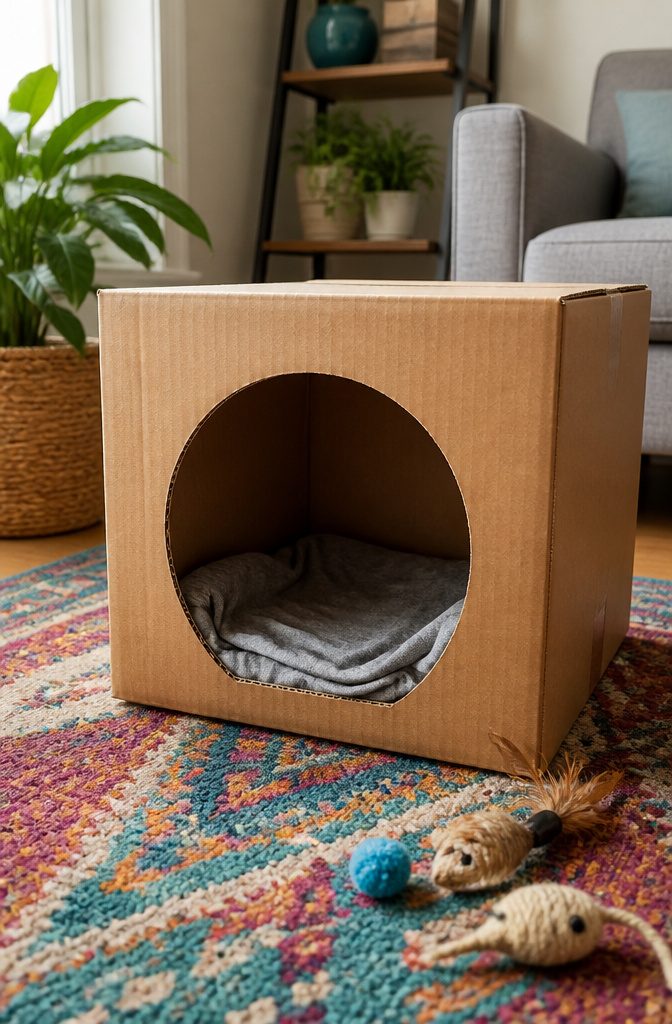
A cat will climb into the first cardboard box it finds, and a moving box is a better starting point than most because it is big enough for a grown cat to turn around in.
Tape the bottom flaps shut, then stand the box on its side so the open face becomes the doorway.
For the entry, I’d cut a single round or arched hole in one wall rather than leave the whole side open. A snug opening makes a cat feel covered, and that is why a hideout beats an open tray.
Trace a bowl, score the line with a utility knife, and sand or tape the cut edge so no rough cardboard rubs a whisker.
Line the floor with an old t-shirt. It holds your scent and gives the cave a soft bed.
9. Upcycling a Gift Box
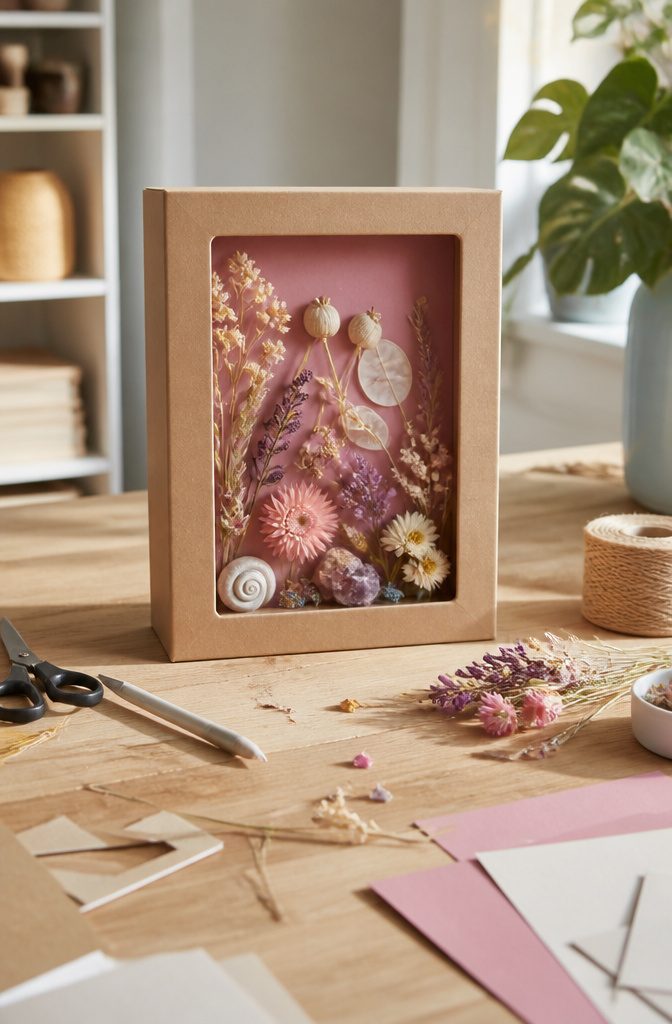
A used gift box already has the hard part done: the walls are square and the lid fits.
Turn it into a shadow box by cutting the front or lid so the box stands open, then fill it with a photo, miniatures or party favors.
If you want something that reads as a real display piece, build the depth up to 3–4 inches, add a backing board and a front frame opening, and paint it.
I like this better than buying a shadow box because you size it to the thing you’re keeping. Dried flowers, small collections and memorabilia all look better when you can arrange them at different depths.
For a container instead, cut the box to size and add dividers. Cords work well: give each one its own labeled compartment and cut holes on one side for the ends to exit.
10. Fabric Christmas Crackers

Fabric crackers use the same cardboard tube you already toss after a roll of paper towels or gift wrap, and old flannel shirts make a good wrapper.
Flannel is soft, forgiving and free if you have a worn-out shirt in the rag pile.
The big difference from paper-wrapped crackers is the sound. Fabric ones don’t have the traditional "pop," so they work as a surprise to open, not a bang.
In return, the whole thing is reusable: tube and fabric both come from things headed for the trash, and the cracker can be refilled next year.
I’d use these for small gifts or place settings at a dinner party. Full step-by-step instructions are in Sarah Ramberg’s book, Crafting with Flannel.
11. Cardboard Castle Playhouse
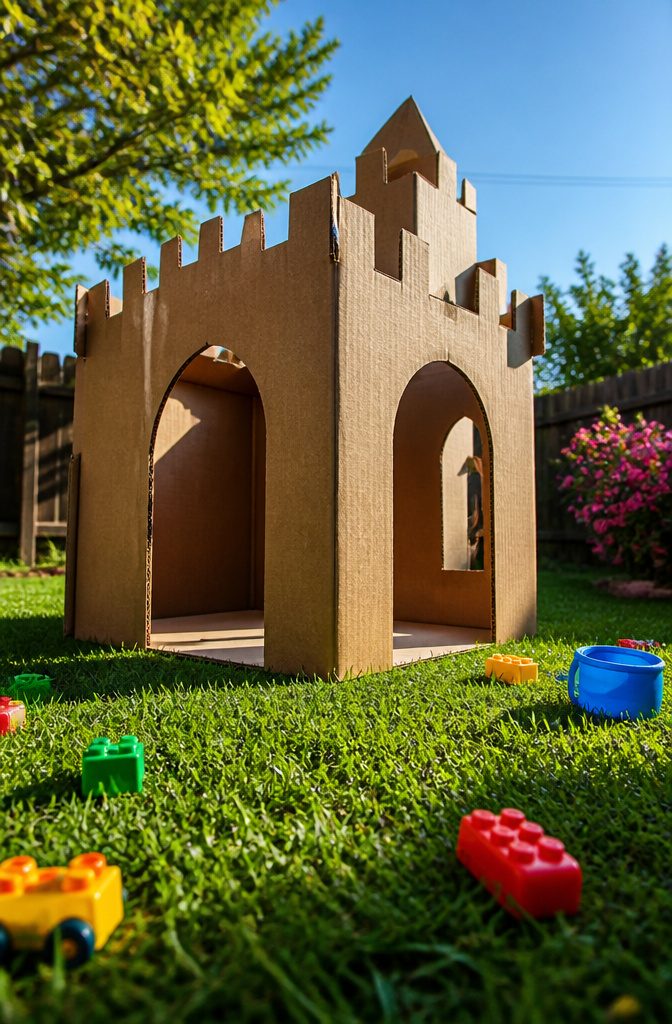
Refrigerator boxes are the best starting point for a castle, because one box gives you walls tall enough for a kid to stand inside.
Cut the doorways and windows with a box cutter, and keep that step for adults. Zigzag cuts along the top edges turn a plain box into battlements.
Before any child gets near it, run duct tape down every inside corner.
Corners are where a cardboard box fails first, and the tape adds months to its life. Tape on the inside also keeps the outside clean for paint.
Gray tempera works for stone walls, with darker gray bricks stamped on using a sponge.
Smaller boxes rolled into cylinders and hot-glued on make towers, and fabric scraps on dowels make flags. The whole build costs next to nothing.
12. Cardboard Sword and Shield Set
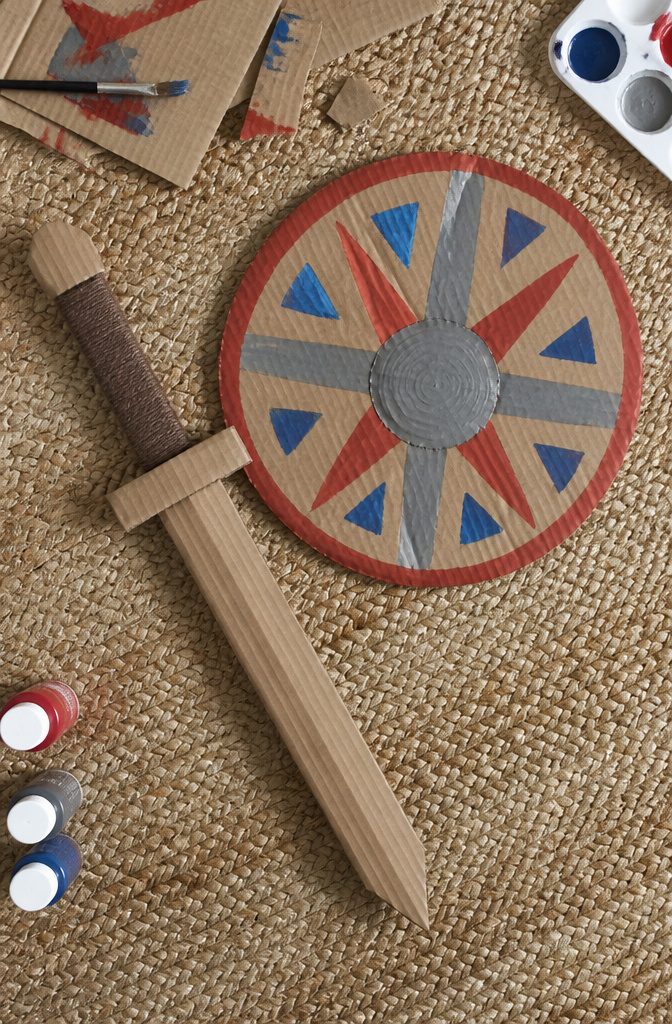
Glue two layers of cardboard together before you cut, because a single layer flops the first time a sword meets a shield.
Sketch the sword on the top piece, aiming for a blade of 18–24 inches and a handle about 6 inches long, then cut both layers as one.
Wrap the handle in duct tape or rope so it has some grip. For the shield, a big circle or a classic shield shape both work.
I like the circle because there are no corners to crumple. Staple or glue a strip of cardboard across the back as a handle, and let the kid draw a coat of arms in marker or paint.
Spray the finished set with clear acrylic sealer once the paint is dry. That coat is what lets them survive backyard battles.
13. Marble Run Tower
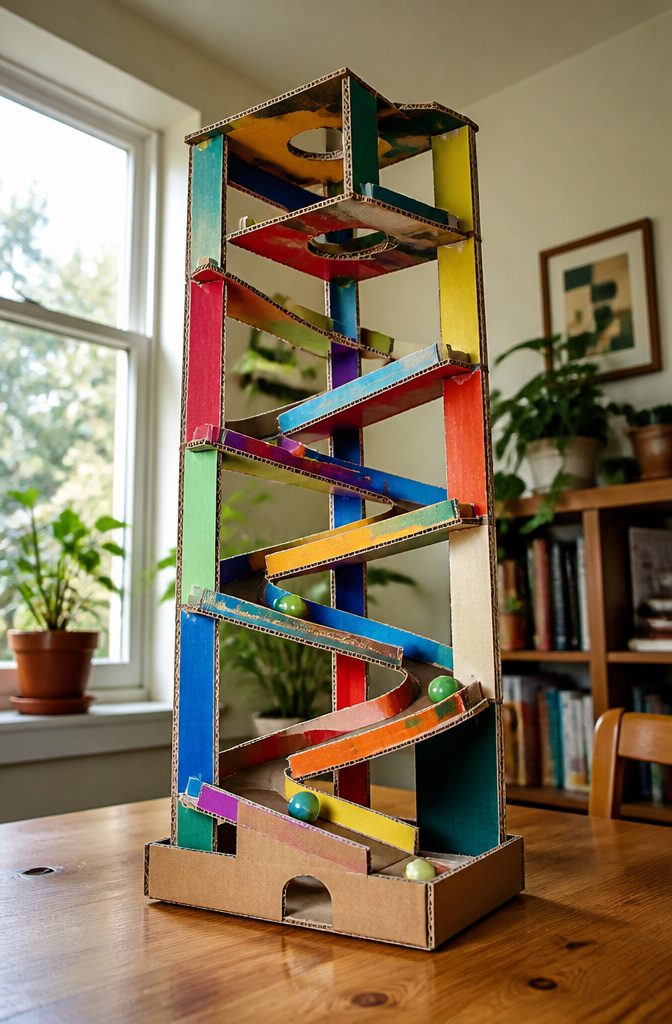
Ramp angle decides whether this build works, and steeper than you’d guess is the rule.
A marble on a shallow slope stalls halfway down, so tilt each ramp more than looks necessary. Cereal boxes cut into ramps and tunnels give you plenty of material, and a large box makes a stable base for the tower.
Hot glue holds the ramps inside the structure.
Cut an opening at the end of each level so marbles drop to the next one. A small box with a hole in its side works as a catcher: it holds a marble briefly, then releases it onto another ramp.
Masking tape tracks show the marble paths, and I’d add them before painting. Expect to re-tilt a few ramps once real marbles start rolling.
14. Cardboard Robot Costume
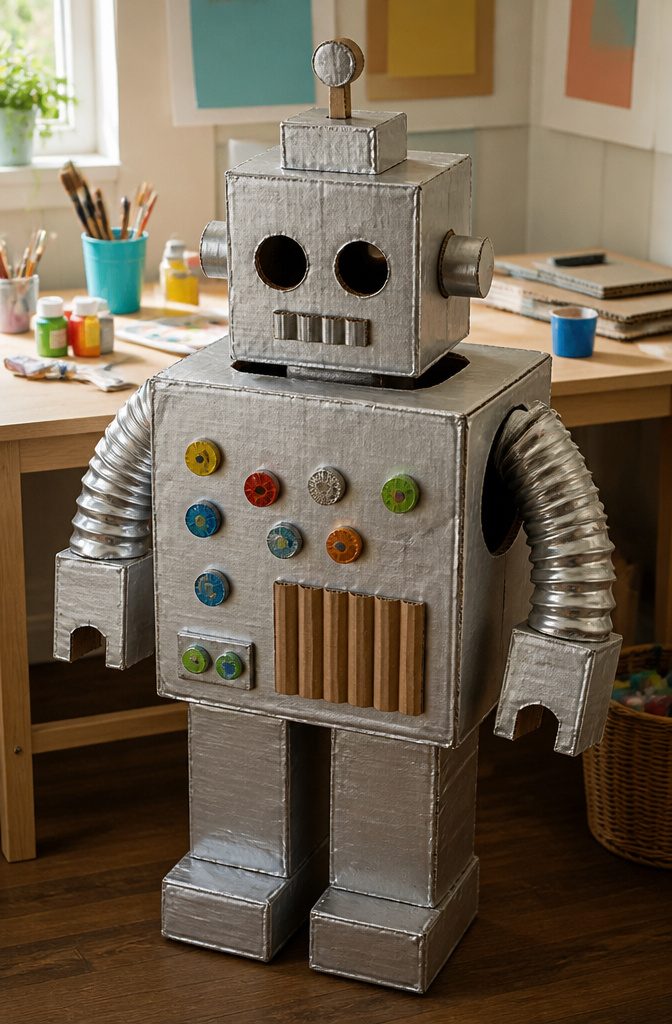
A robot costume starts with one box sized to sit over the torso.
Cut armholes in the sides and a neck hole in the top, then hold it up to the wearer before you decorate anything. Fixing a bad hole is easy now and a pain once the foil is on.
Cover the box with aluminum foil, or paint it silver or gray. I’d go with paint on a costume that has to survive a whole parade, since foil dents and tears at the corners.
A smaller box makes the head, with eye holes cut out.
Paper towel tubes work as arms, and bottle caps glued on become buttons and gauges. For the chest, cut a window, glue plastic wrap behind it, and tuck in a paper drawing of circuits.
Metallic tape adds detail, and pipe cleaners make antennas. Cardboard tubes attached to the shoes give you robot boots.
15. Cardboard Garage for Toy Cars
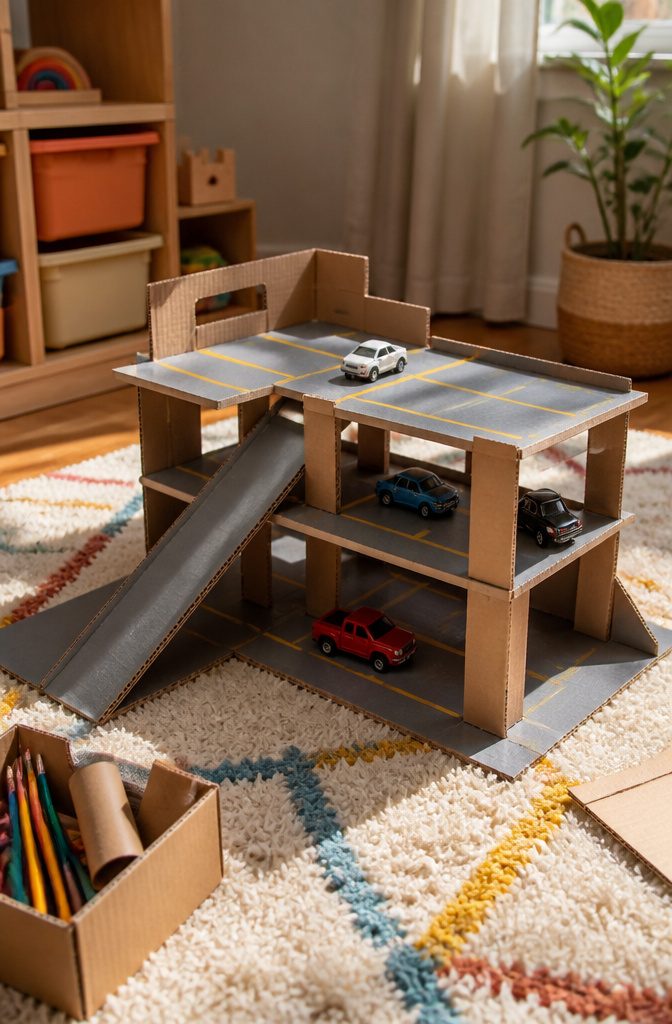
A shallow box about the size of a soda case works best for the base, because the low walls keep your hands inside the build while you glue.
Cut ramps from smaller cardboard pieces and set them at angles inside the box so each one leads up to a new parking level. Three levels hold about 30 cars, which is plenty for a Hot Wheels pile.
Paint the whole thing gray, then draw yellow parking lines with a marker and add small cardboard rectangles as numbered spots. Keep the ramp angles gentle, since a steep one sends cars tumbling instead of rolling.
For an elevator, run string through a paper towel tube and attach a small platform you can pull between floors.
16. Puppet Theater with Curtains
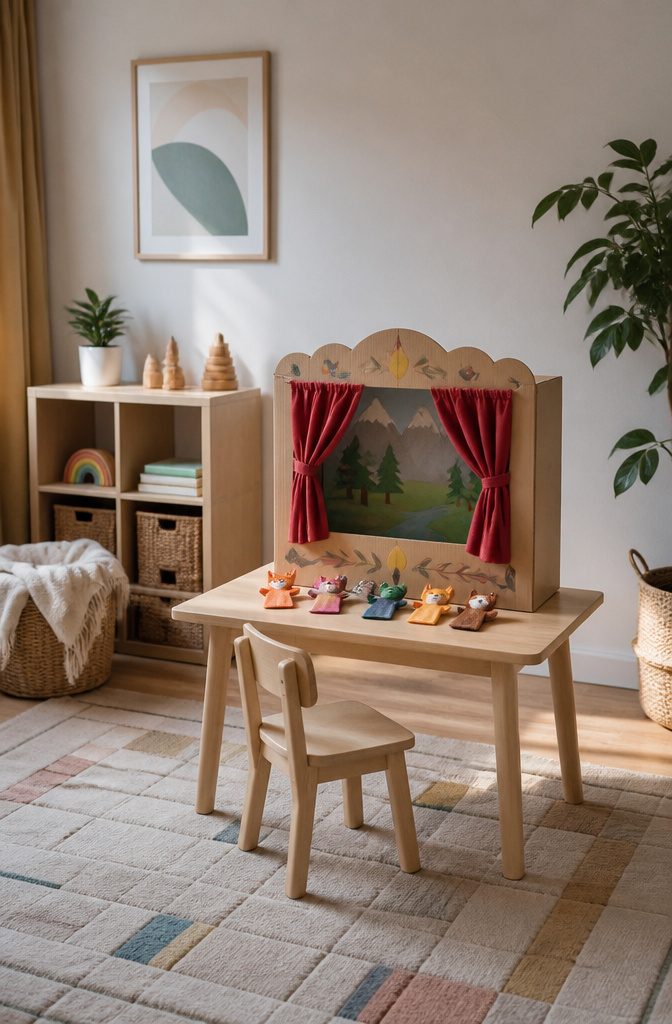
A stage window of about 18×12 inches is the size to cut into the front panel of a large box.
Leave the bottom and sides intact so the box stands as a booth, and a kid can crouch behind it with puppets overhead.
For curtains, fabric scraps work, and so does a cut-up old pillowcase.
Hot glue them along the top edge of the opening. If you want curtains that actually open and close, glue them to a wooden dowel instead, and the whole thing slides open like a real stage.
Paint is where the theater gets its personality. Red with a velvet look and gold trim reads as fancy for almost no cost.
I’d add a sign across the top with the child’s name, since that is the part kids show off first. The booth sits well on a table or propped against a couch.
17. Decorative Storage Boxes
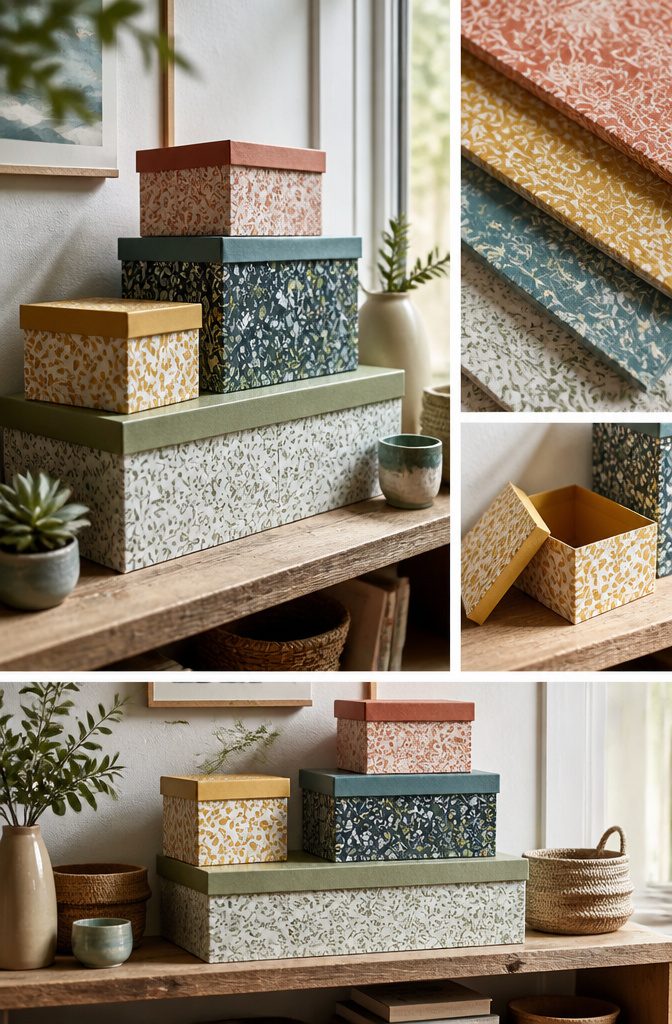
Shoe boxes or any set of matching boxes work best, because uniform sizes stack cleanly on an open shelf.
Cover each one completely in fabric, wrapping paper or thick decorative paper, and use spray adhesive so the surface goes on smooth. Brush-on glue tends to wrinkle thin paper.
A covered box looks intentional rather than cheap, and that is the whole reason to bother.
Wrap every side, lid included, with no printed cardboard showing at the edges. Lining the inside with a contrasting paper or fabric adds a small surprise when someone lifts the lid.
Add a label if the boxes hold different things, such as craft supplies, photos or holiday decorations. Long tissue boxes can get the same treatment, and once covered they read almost like baskets.
18. Cardboard Doll Furniture
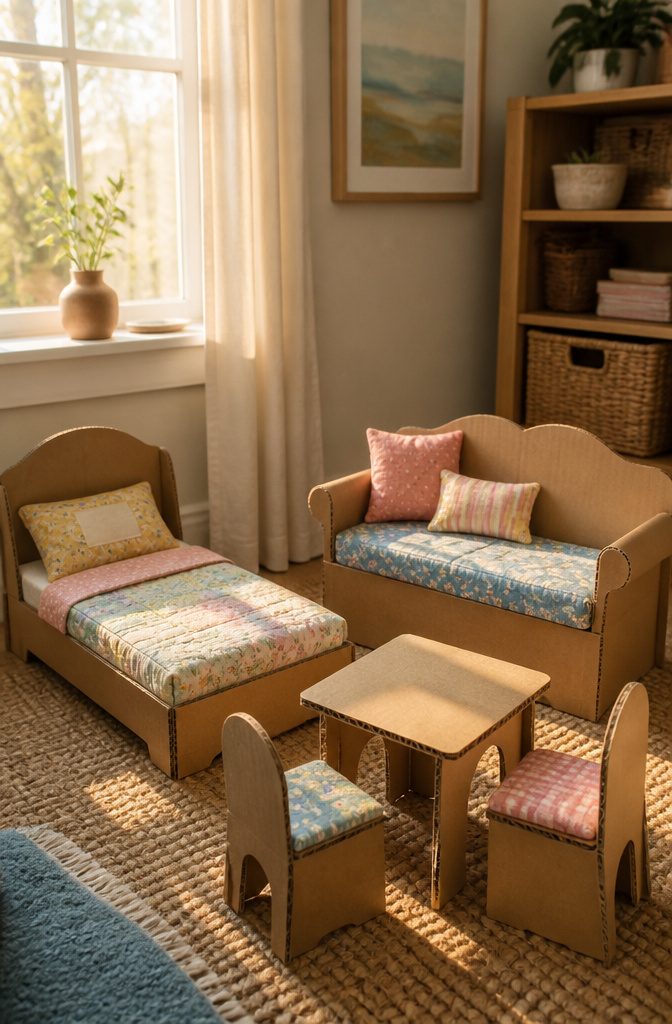
Doll furniture sized for 18-inch dolls is built the way real furniture is, just scaled down: a bed with a headboard, a couch, a table and chairs, all cut from flat cardboard and assembled.
I’d start with the bed, since the headboard teaches you the joint you’ll reuse on the couch back.
Cover every piece with fabric scraps.
Bare cardboard edges look unfinished, and fabric hides them while adding grip and color. Pillows are the easy win: sew small fabric pouches and stuff them with cotton balls.
The table and chairs take the least material, so they make a good afternoon-sized first set. Skip the couch if you’re short on time; the bed and headboard carry the room by themselves.
19. Cardboard City for Toy Cars

A cardboard city works best when everything is built flat on one board, so the roads, blocks and buildings stay put and the cars always have somewhere to go.
Paint the roads gray and add yellow lines down the middle; that one step makes the whole board read as a street map.
Cut and fold the buildings in different heights, because a skyline of matching boxes looks like a shelf.
Bridges and parking garages give the cars something to climb. Stop signs are cardboard squares taped to toothpicks, trees are painted cardboard, and a paper towel tube makes a ready-made tunnel.
Since the layout is permanent, I’d glue it down once and keep adding details over time.
20. Cardboard Loom
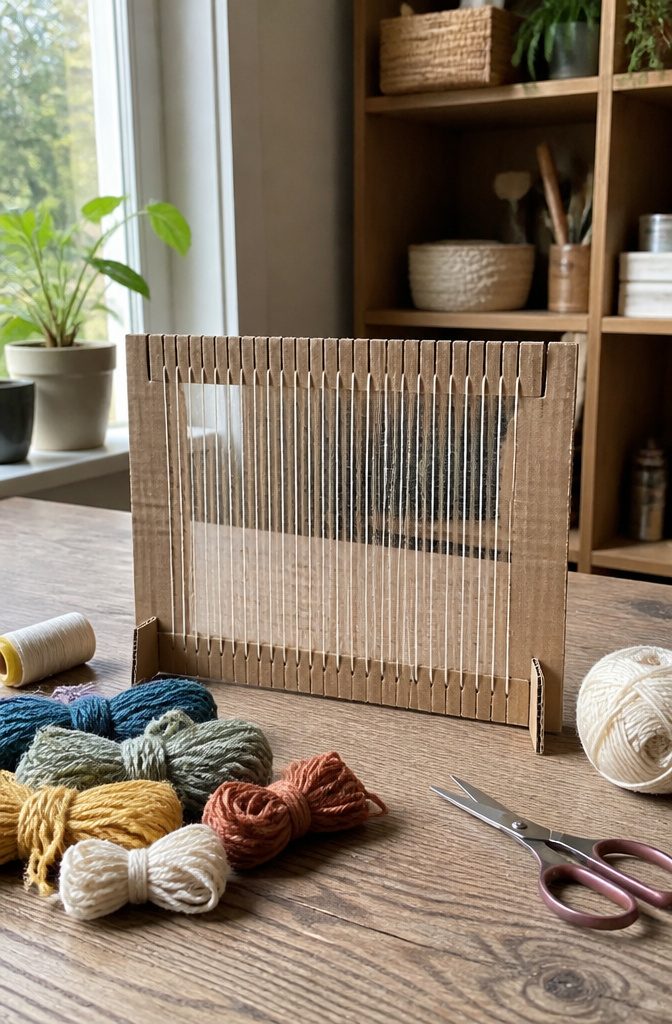
A cardboard loom is the cheapest way I know to find out whether you like weaving before you buy a real frame. Cut a rectangle from a sturdy box, then snip evenly spaced notches along the top and bottom edges.
Wind your warp thread from notch to notch around the whole piece, keeping it snug but not tight enough to bend the cardboard.
Corrugated board with the ridges running up and down resists warping best. Thin cereal-box card curls as soon as the yarn pulls on it, so I’d skip it.
For the weft, use a blunt plastic needle or a strip of cardboard as a shuttle, and go over one thread, under the next. Alternate the pattern on each row so the weave locks.
Pack each row down gently with a fork. Scrap yarn works fine.
21. Cardboard Guitars
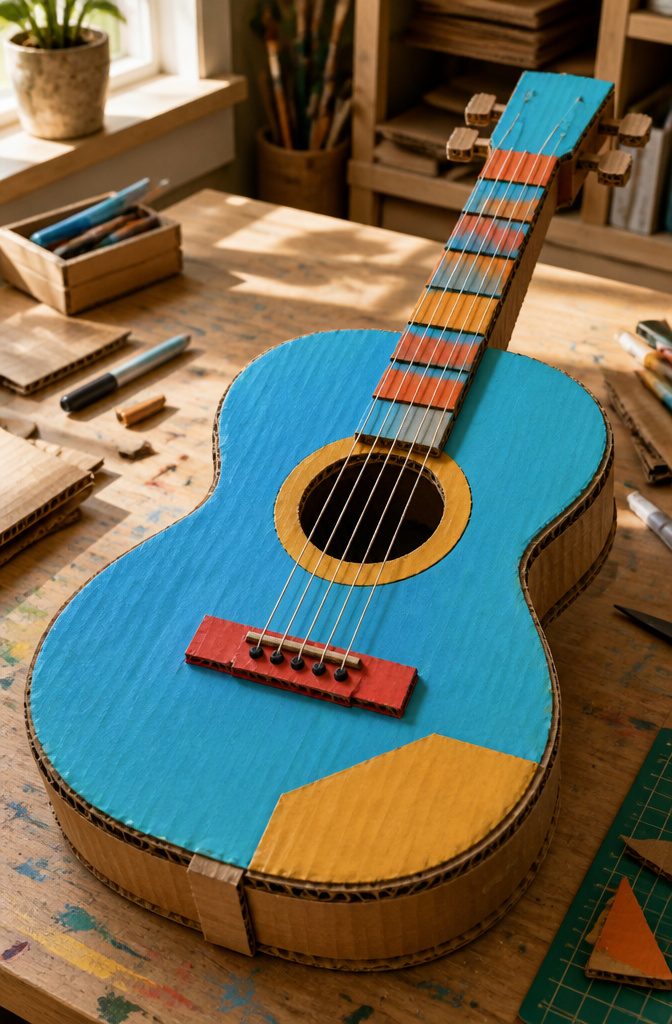
A cardboard guitar lives or dies on the body shape, so start there.
Fold a sheet of corrugated board in half, sketch half a guitar (a rounded upper bout, a pinched waist, a wider lower bout), and cut along the line through both layers.
Unfolded, the two sides match, which a freehand outline never manages.
For the neck, cut a long, narrow strip and glue it to a second strip so the flutes run in opposite directions.
Stacked that way, it resists bending far better than a single layer. Tuck the neck’s base between two body layers and glue it there; tape alone lets it wobble.
Cut a round sound hole, add a small rectangular bridge near the bottom, and stretch rubber bands for strings. A paint pen handles frets and tuning pegs.
22. Cardboard Ukulele Case
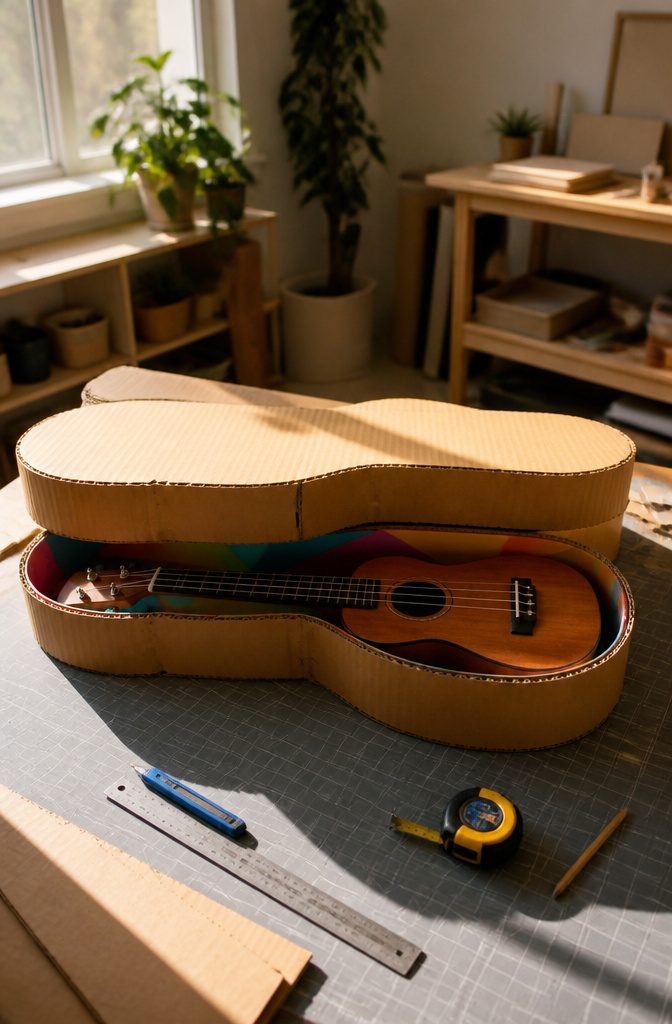
A ukulele case is one of the few cardboard projects where the size of the finished thing is set by something you already own.
Measure the instrument at its widest and deepest points before you cut anything, because a case built to a guess either rattles or won’t close.
The appeal is a tailor-made fit for far less than a store-bought case. The Instructables guide this idea comes from builds the whole thing around that custom shape.
I’d choose a snug fit with a soft lining over a roomy box.
A loose ukulele slides and knocks its headstock on the walls, while a tight one stays put. Tracing the outline on the cardboard first lets you see the curves before committing to a cut.
23. DIY Cat Scratcher
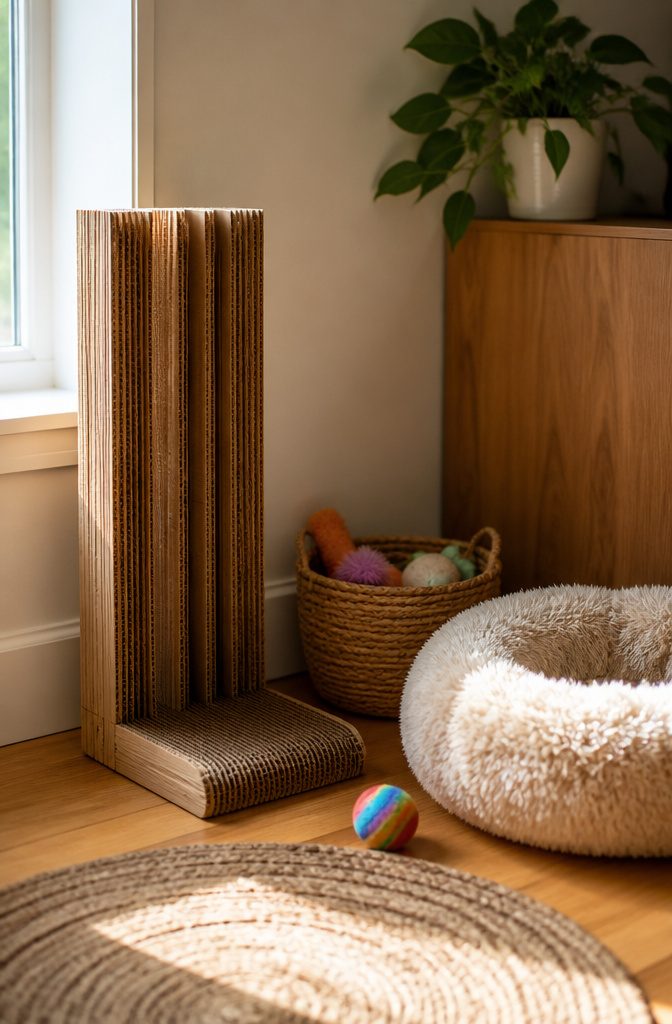
Corrugated cardboard has a wavy layer sandwiched between two flat layers of paper, and that ridged middle is what makes it a good scratcher. Claws catch in the grooves and drag, which is the grip cats want.
Cut strips with a box cutter or heavy duty shears, then stack them on edge, ridges facing up, so the claw meets the flutes instead of a flat face.
Glue the strips side by side until they fill a shallow box or a snug frame. Packed tight, they hold each other upright and the pad stays put under a hard pull.
Use clean, food-free cardboard, since cats will chew it. Stand the strips on edge rather than laying them flat; flat sheets shred in a week, while edge-on layers wear down slowly.
24. Cardboard Mailbox
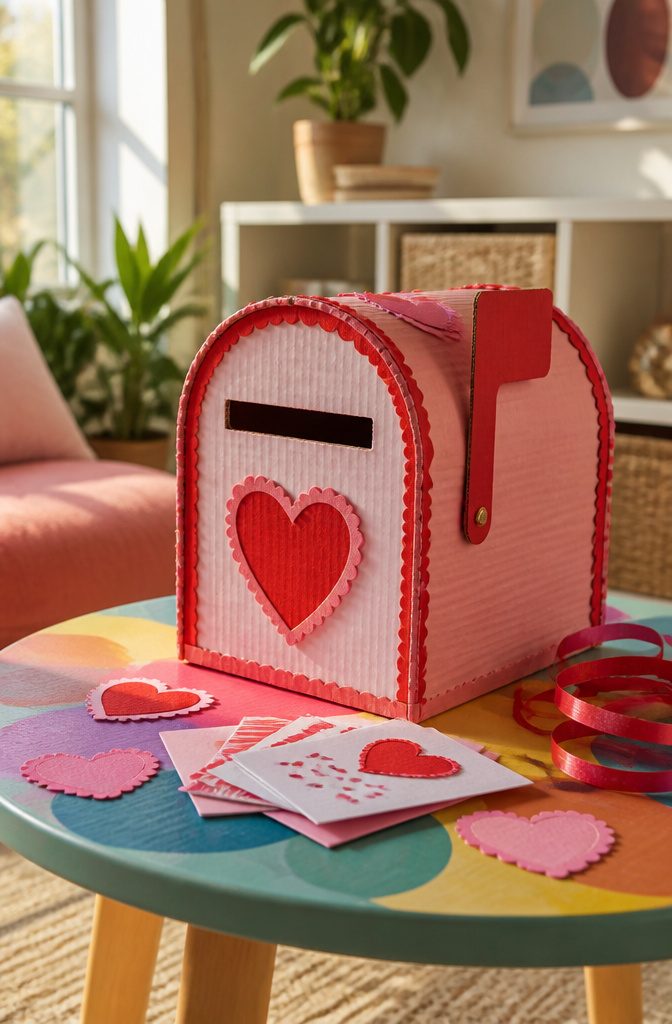
A shoebox or any small cardboard box makes the best mailbox body, because the lid or top panel is already flat and ready for a slot.
Cut the slot in the top, wide enough for a standard card to slide through, and test it with an actual envelope before you decorate.
For play, the child who will be the mail carrier cares most about delivery, so add a flap on one side that opens.
For letters, keep the slot on top and the box closed, so cards drop in and stay put until someone lifts the lid.
Paint comes before the extras.
Red, pink and white suit a Valentine version, with hearts, lace doilies and ribbon on top. A box like this lasts for years, and it beats a paper bag every time.
25. Cardboard Camera
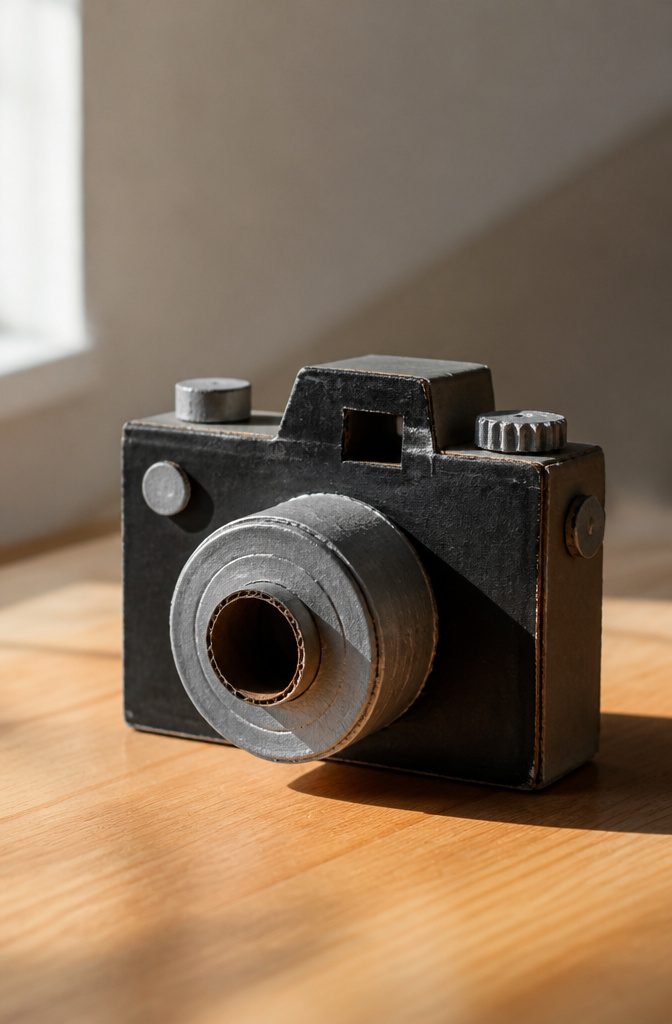
A small shoebox-style box makes the camera body, and a cardboard tube from a paper towel or toilet paper roll makes the lens.
Tape the tube to the front, then cut a small window in the top corner for the viewfinder. Kids care most about the lens, so give it the biggest tube you have.
Paint or marker does the rest.
Black on the body and silver on the lens ring reads as a real camera from across the room. Add a flat cardboard scrap on top as the shutter button, and a strip of paper for a neck strap.
I’d skip glue for the lens and use packing tape on the inside seam, since a camera gets dropped, swung and clicked constantly, and tape holds up better under that than white glue does.
Frequently Asked Questions
What can you make out of cardboard at home?
Almost anything from toys to home decor.
Popular picks include a castle playhouse, marble run, robot costume, cat scratcher, wall art, storage boxes and doll furniture. Shipping boxes, cereal boxes and paper towel tubes from your recycling bin cover most of the material.
How do you make a cardboard castle?
Start with a large appliance box, ideally a refrigerator box, and cut the doorways and windows with a box cutter, which is an adult-only step.
Cut zigzags along the top edges for battlements, then run duct tape down every inside corner before kids play with it. That tape adds months to its life.
What types of cardboard are best for crafts?
Corrugated cardboard is the strongest choice for building and sculpting, and it comes from shipping boxes.
Paperboard (cereal and shoe boxes) suits small painted crafts, and kraft cardboard works well for painting or drawing. Whatever you pick, use clean cardboard with no food contamination.
What are some ways to repurpose cardboard?
Turn shoe boxes into a Valentine mailbox or a covered storage box, and gift boxes into shadow boxes.
Tubes can become fire starters, candles, crackers or robot arms. Large boxes make a cat cave, a puppet theater or a playhouse instead of going to the bin.





