
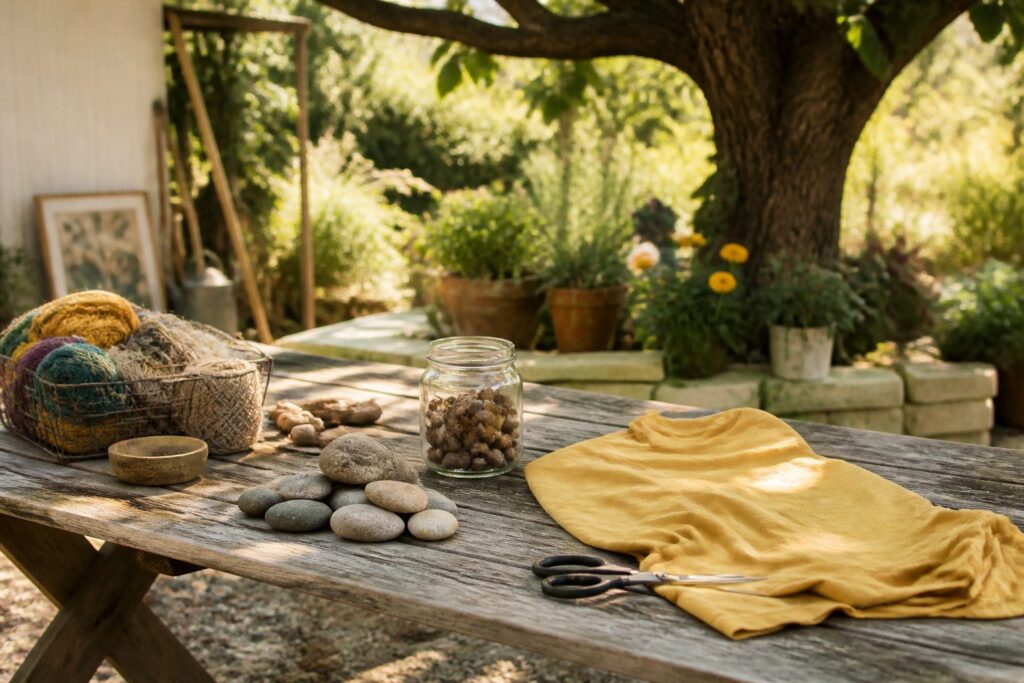
Most of these 16 projects cost close to nothing and finish in an afternoon, using rocks, acorns, yarn scraps, jars and old T-shirts.
Two ask more: wooden yard dice need a saw and sander, and the mason jar herb garden dies without drainage. Jars have no hole, so drill one or set a holed nursery pot inside.
1. DIY Halloween Magnets
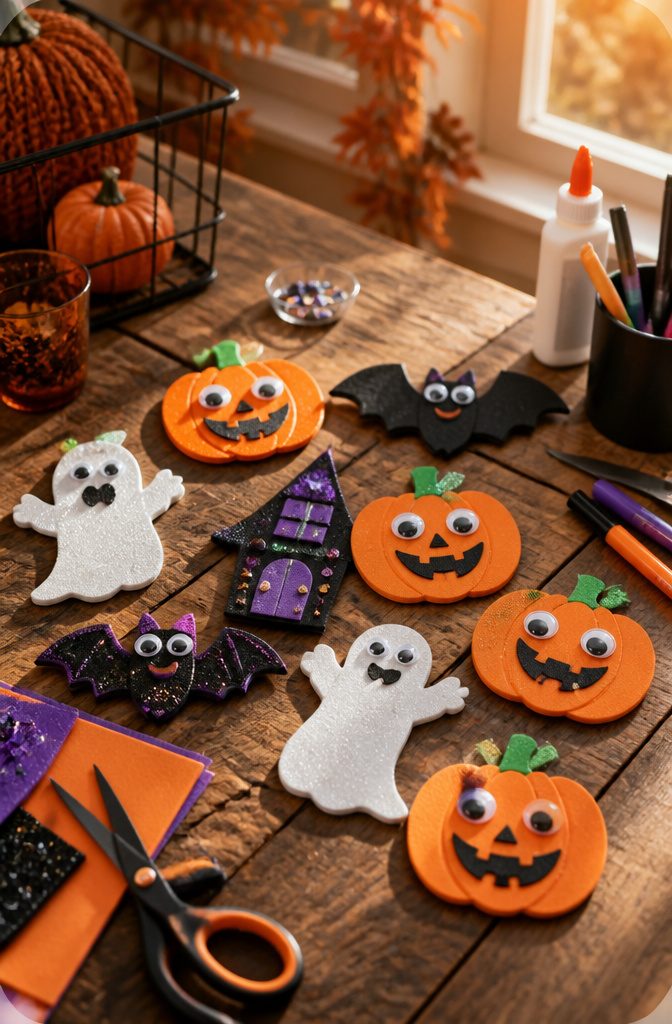
Halloween magnets are a good first project for kids because the build is only three moves: decorate a small flat shape, give it a face or pattern, and glue a magnet to the back.
Craft foam, cardboard, paper scraps, and old buttons all work as the base, and a toilet paper roll cut into rings makes a quick bat or pumpkin outline. Markers, paint, and googly eyes handle the details.
Use a strong craft glue for the magnet, not school glue, since the magnet is the part that fails first on a fridge door. Let the glue set fully before anyone sticks the magnet to the fridge.
I would pick sticky-back magnetic strips over loose magnets for younger kids, because there is nothing small to lose. An afternoon covers a whole batch of ghosts, pumpkins, and bats, and they make easy party favors.
2. Painted Acorns for Fall Decor
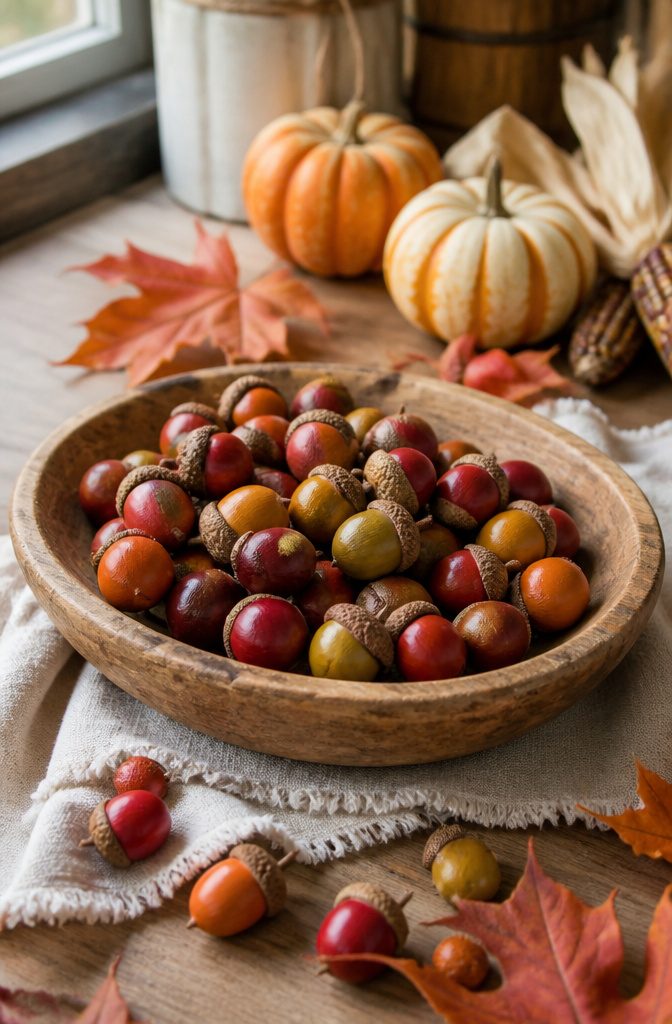
Painted acorns cost nothing but the walk to collect them, which is why I’d put them near the top of any fall craft list.
Gather them with the caps still attached, then let them dry out on a paper towel before you paint.
Acrylic craft paint is my pick: it covers the shell in one or two coats and dries fast enough to finish a batch in an afternoon.
Pick fall colors and keep the caps natural, or paint them too if you want a bolder look.
For display, pile them in a fall-themed bowl or scatter them down a Thanksgiving table as a natural accent. They work best in groups; a single acorn gets lost.
The limit is that natural material is unpredictable, so sizes and shapes won’t match.
3. Mason Jar Herb Garden
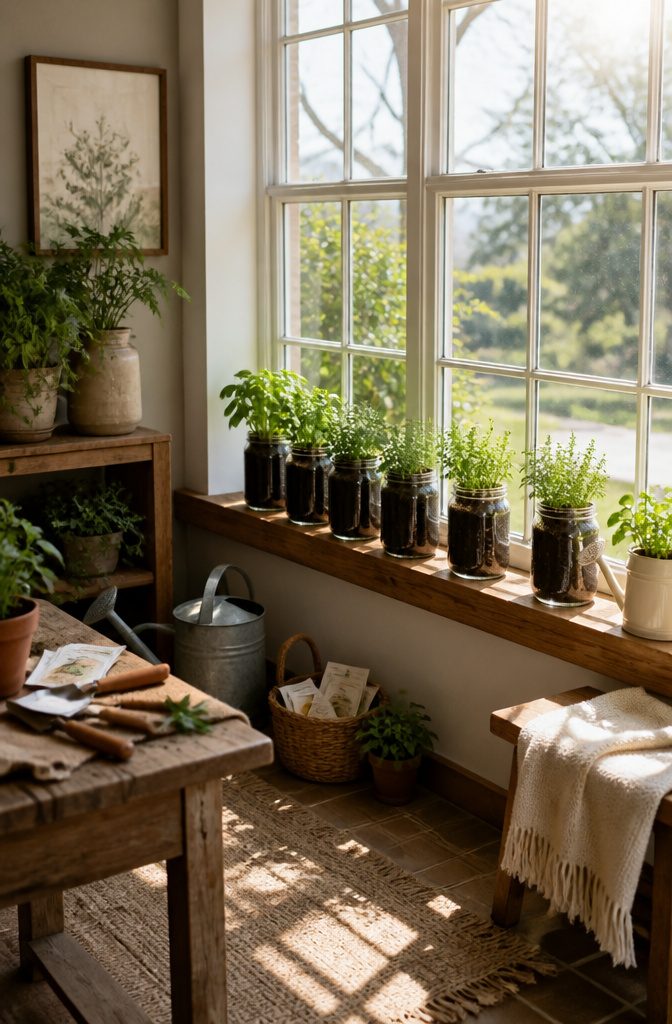
Mason jars suit a small herb crop because they hold only a little soil, which keeps the plant count low.
They work indoors or outdoors, as long as the setup has proper drainage. That one condition decides whether the project lives or rots.
A jar has no drainage hole, and I wouldn’t trust it to grow anything long term without a plan.
Either drill a hole in the bottom with a glass-and-tile bit, or treat the jar as a decorative sleeve and set a small pot with holes inside it.
The second route is safer for beginners and costs nothing extra if you have a nursery pot lying around.
As budget decor, a row of jars on a windowsill looks deliberate, and the jars are free if you’ve been saving pasta sauce or jam containers. Label each herb with a strip of tape or a chalkboard tag.
4. Pom Pom Yarn Flowers
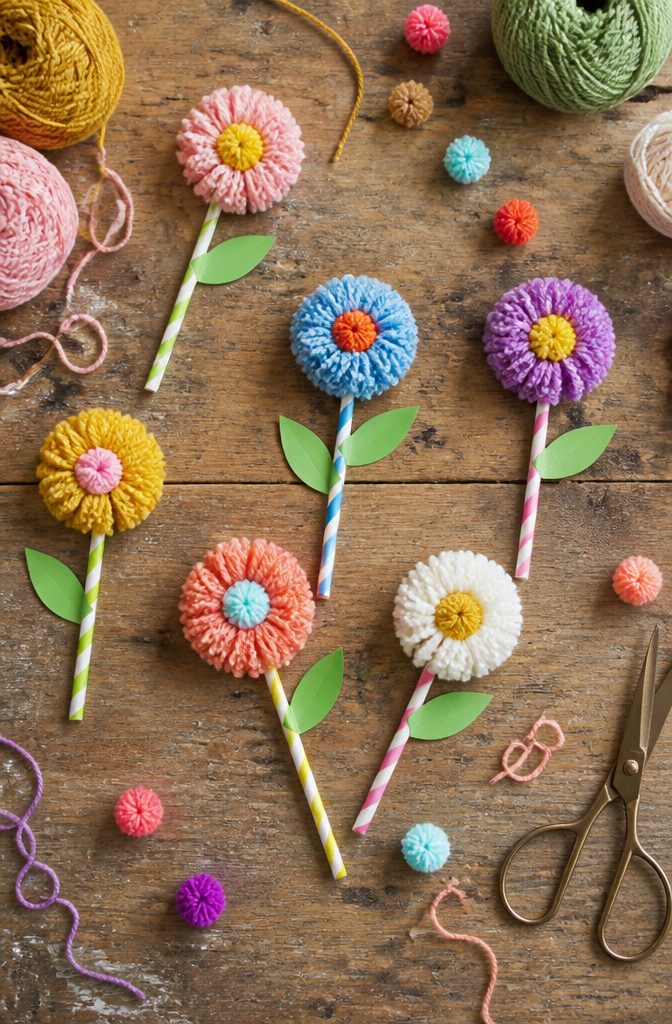
Pom pom flowers suit small hands because the hardest step is just wrapping yarn around a fork or a cardboard strip, and a kid can’t really do it wrong.
Wrap, tie the middle tight, snip the loops, and fluff. Younger kids can wrap while an adult handles the knot and the scissors.
Leftover yarn is the whole supply list. Odd ends from old projects work fine, and mixing two or three colors in one wrap gives a flower a speckled, uneven look I like better than a solid color.
Tie each pom pom onto a pipe cleaner or a paper-straw stem, then add paper leaves.
Wrap the yarn thickly and tie the center as tight as you can, or the pom pom sheds and goes flat. Short scraps are too fiddly to tie, so save those for gluing onto cardstock.
5. DIY Wooden Yard Dice
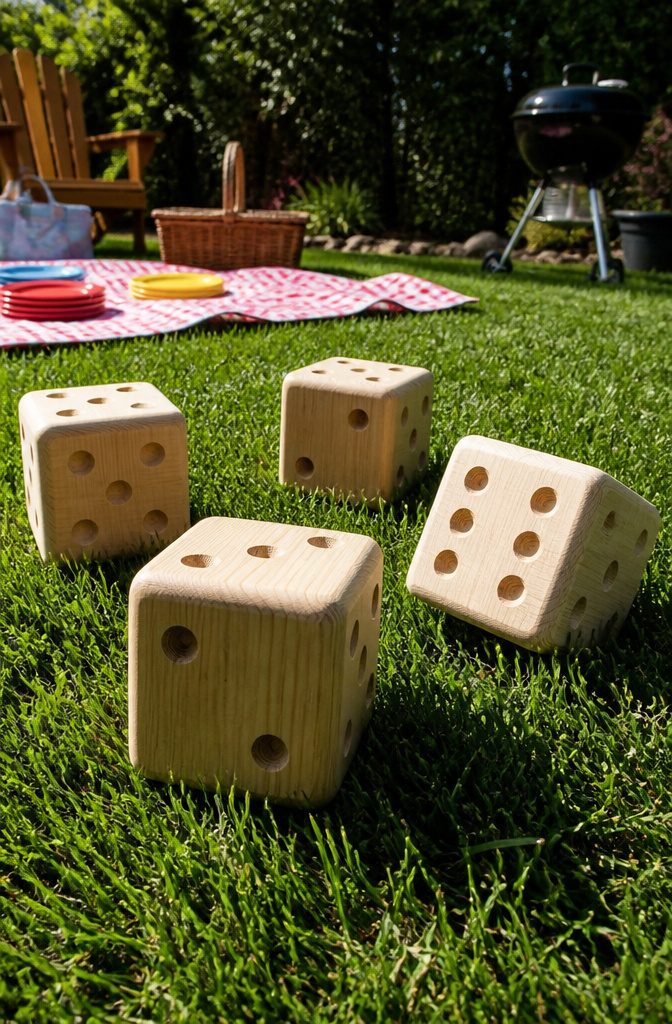
Wooden yard dice are the one project in this list that asks for real tools.
You’ll want a saw to cut the blocks and a sander to knock down the corners, and a drill helps for the pips. Paper crafts need none of that.
The material is plain lumber, and it earns its keep outdoors: wood is heavy enough to stay put on grass and tough enough to survive a tailgate.
Scale matters more than anything else. Cut the cubes big enough to roll across the lawn, because small ones vanish in the grass.
They work as a backyard game for a barbecue, a beach day or a party, and they look good stacked on a patio table when nobody is playing.
I’d say they win over any paper project for outdoor use. Making them costs you an afternoon of sawdust.
6. Leather O-Ring Bracelet
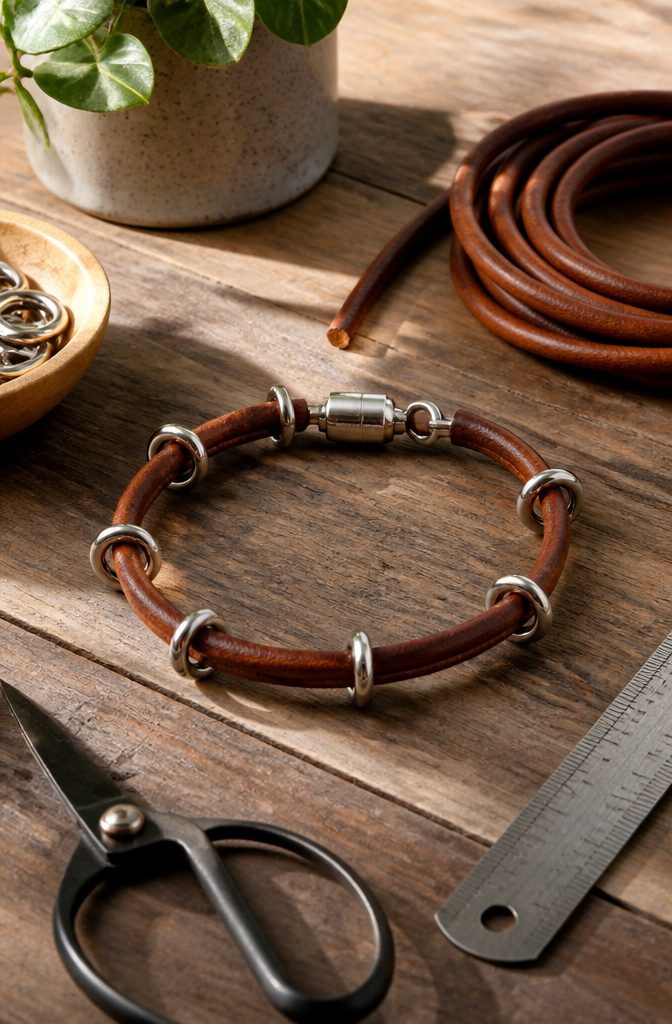
Leather cord, a handful of metal O-rings, and a clasp or knot are all this bracelet takes, which makes it one of the quicker wearables to finish in an afternoon.
The basic idea is to attach the rings to the cord so they sit in a row against your wrist, then close the ends so the whole thing slips on and off.
Choose rings that are all the same size so the row looks even.
Thread the cord through each ring, or loop it around, and keep the spacing consistent as you go, since uneven gaps are the first thing the eye catches on a finished piece.
I’d pick a soft cord over a stiff one.
It knots tighter and lies flatter on the skin. Test the fit around your wrist before you trim the ends, because you can cut a cord shorter but you can’t add length back.
7. Sea Glass Bottles
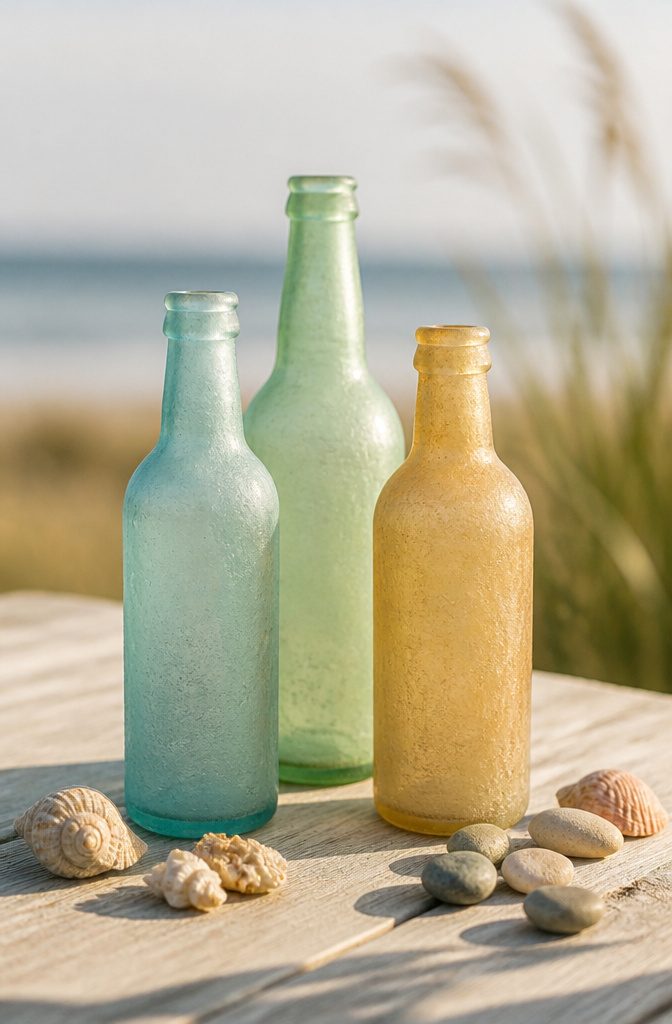
Sea glass bottles are the summer project I’d pick first from this list, because the whole idea is to make a recycled jar or bottle look like something the tide spent years smoothing.
The finish reads as soft, frosted and slightly cloudy, the way beach glass does, instead of shiny like a fresh bottle.
Display is where they work best.
A few grouped on a tray look lovely on their own, and filled with summer blooms they double as a centerpiece. I’d skip anything fussy and let the finish do the talking.
A bottle or jar can also become a rope lantern, which suits a porch or patio table.
Pick a clear bottle with a plain shape; busy embossing fights the soft look.
8. Painted Rocks
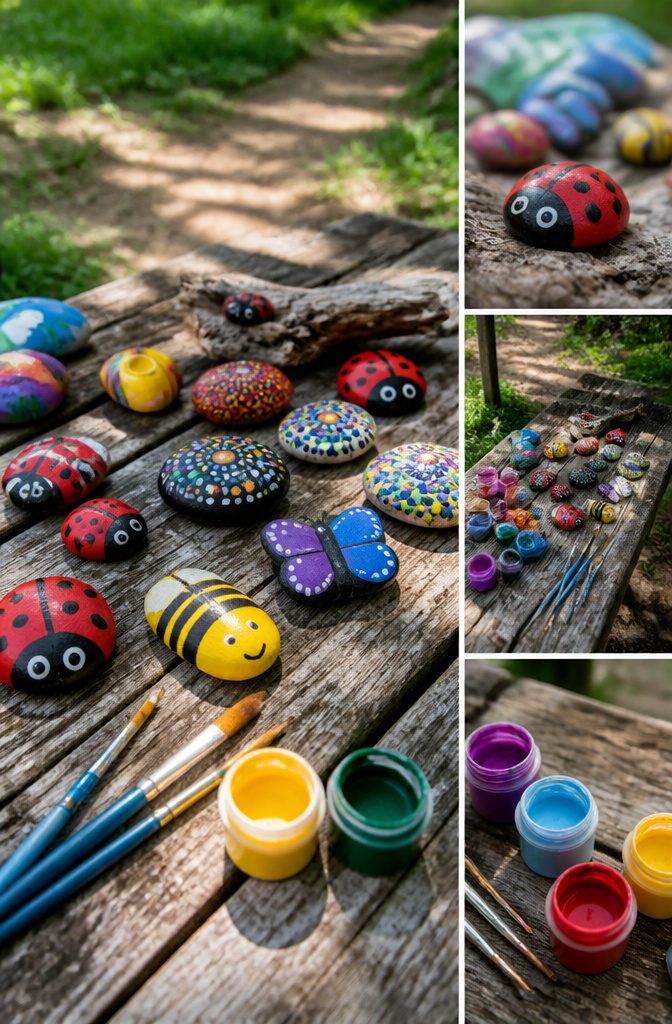
Painted rocks are the safest first pick on this list because any old rock and any type of paint will work.
Nothing needs buying, so a flop costs you nothing, and a kid can start the minute the rock is in hand.
The designs stretch as far as you want.
A vintage camper is a good one for adults. Words of encouragement suit kids, and you can leave the finished rocks along your path on a walk for the next person to find.
For a rainy afternoon, I’d paint a set of ladybugs and tadpoles and turn them into tic tac toe pieces.
A scrap of wood, a piece of cardboard or a patch of dirt all make a fine board. Stencils are worth trying if you want monograms, leaves or a team logo for a gift.
9. Seashell Candle Tutorial
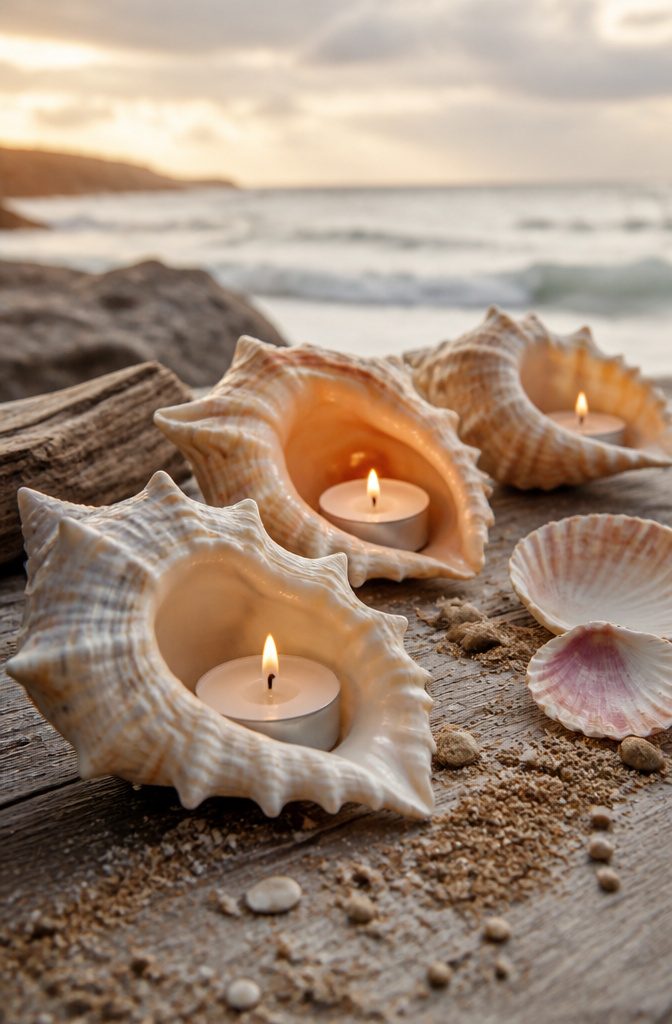
Tealights make this the easiest candle project I know of, because the wax and wick come already sealed in their little metal cups.
Set one inside a large shell, and the shell becomes the holder. No melting, no pouring, and it works as a last-minute summer table piece.
Choose shells with a deep, bowl-like cup so the tealight sits level and doesn’t tip. Wedge a pinch of sand or a bit of putty underneath if it rocks.
Candle work needs an adult watching the flame.
Keep paper, dried grasses and other decor well away from the shells, and never leave them lit in a room unattended. Skip paper-wrapped candles entirely, since they are a fire hazard.
If you ever pour your own wax, the wick has to match the vessel and the wax, and that takes testing. Tealights in shells skip that risk.
10. Pressed Flower Coasters
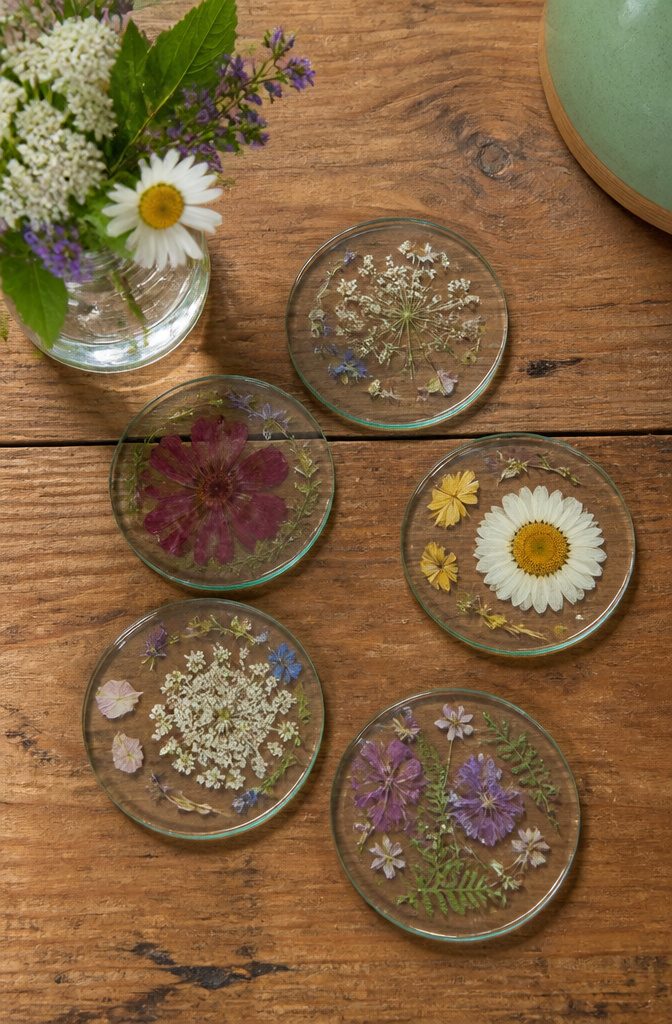
Pressed flower coasters bring a summer touch into a room without redecorating anything. A few dried blooms under a flat, hard surface do the work, and the cost is close to nothing if you grow or gather the flowers yourself.
They look best on a coffee table or side table, where the color catches light and the flat petals read like a small garden under glass.
I’d also set a stack on an outdoor porch or patio table, since they suit that casual, sunny setting just as well.
Pick flowers with thin, flat petals, because thick blooms leave a bump. Keep the design simple, with one flower or a small sprig per coaster, and leave a clear border around the edge so nothing peels at the rim.
11. Washer Necklace
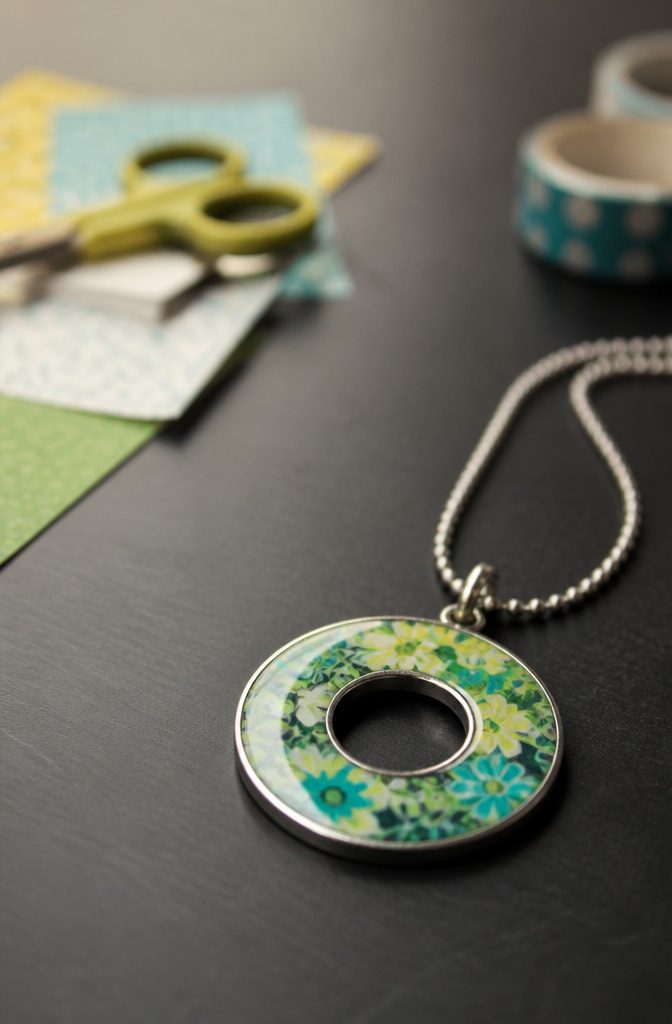
A washer necklace costs almost nothing because the main part comes from the hardware aisle: a flat metal washer, strung on a cord or chain.
Mod Podge and Dimensional Magic do the decorating. Glue paper or fabric inside the washer opening, then seal it with the glossy dome of Dimensional Magic so it looks like a tiny glass pendant.
I’d pick this over most bead jewelry for mixed-age crafting, since there’s no wire to bend and no knots to count.
A kid can glue a scrap of pattern into the hole, and an adult can do the same with a finer design. Let the Dimensional Magic dry fully before you thread the cord, or the dome will pick up fingerprints.
The finish is only as neat as your cut paper, so trim slowly.
12. Tie Dye Headbands from T-Shirts
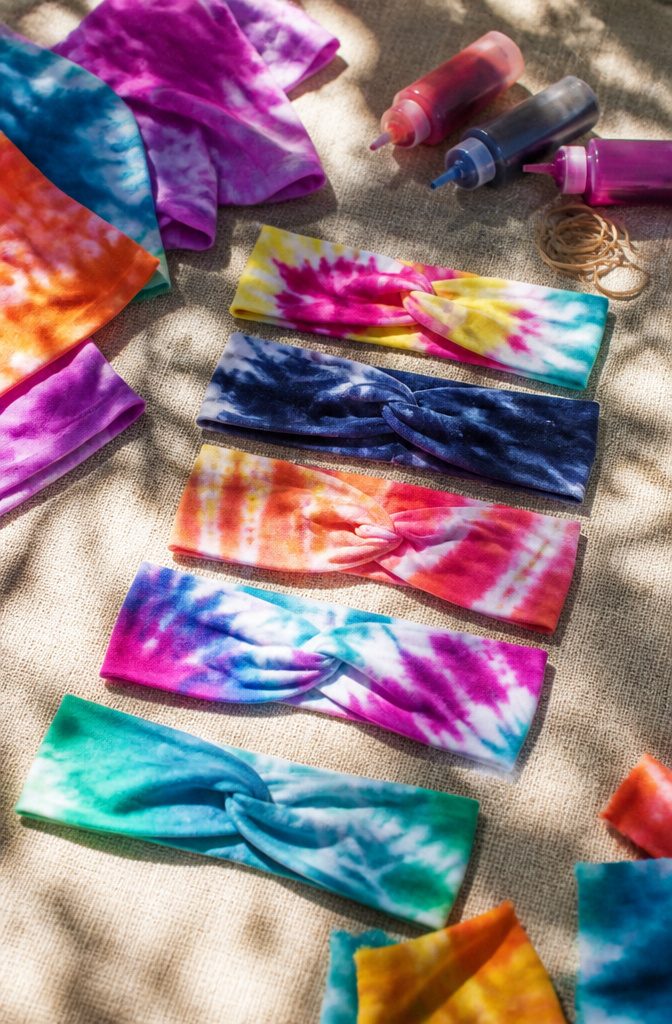
Old T-shirts make better headbands than most store-bought fabric, because jersey knit stretches and curls at the cut edge, so there is no hemming to do.
A tie dye headband is also one of the few projects where kids and teens end up wearing the result the same day, which is half the appeal.
The tutorial I’d point you to covers three methods, and the pick depends on the look.
For a spring or summer palette, choose the method that suits your skill level rather than the fanciest one: the simplest gives the most forgiving results on a stretchy knit.
Cut the strips from shirts that are already faded or stained, since dye hides both.
Teens like picking their own colors, and kids like the squeezing and twisting. Adults tend to join in.
13. Fruit Stamped Tea Towels
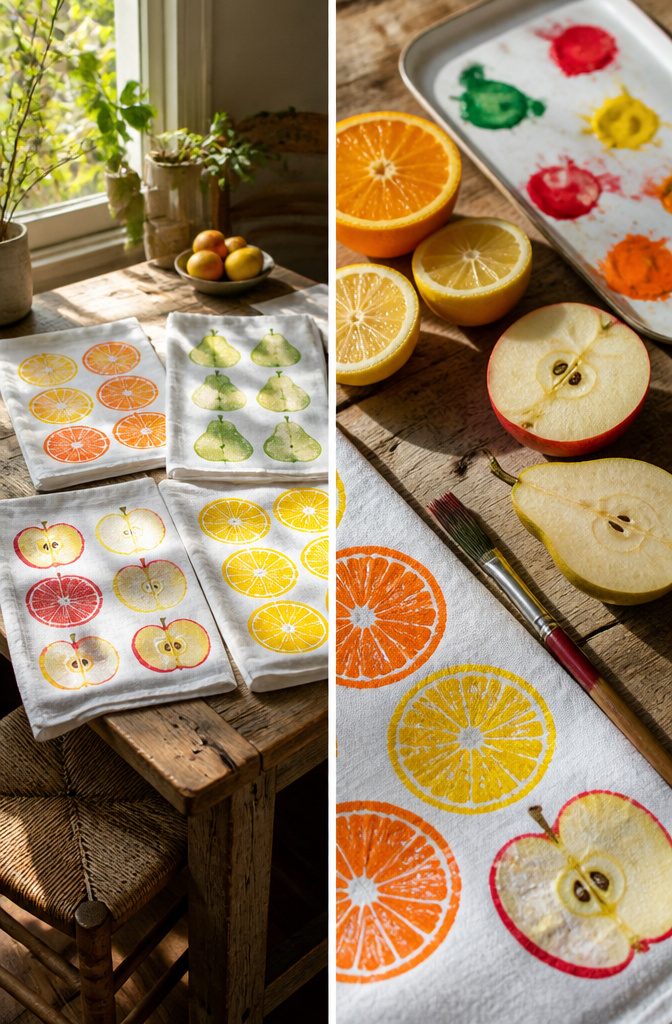
Real fruit makes the stamp, and a plain cotton tea towel makes the canvas.
Cut an apple or pear in half, or slice a citrus fruit across its middle, and the cut face leaves a shape you can’t buy in a craft store.
Pat the cut side dry with a paper towel before it touches paint, because juice thins the color and blurs the edges.
The technique is stamp painting. Brush a thin layer of fabric paint onto the fruit, press it straight down, and lift without twisting.
Slide a piece of cardboard inside the towel first so paint doesn’t bleed through to the back layer. I’d practice on scrap fabric, since the first print usually comes out heavier than the rest.
14. Paper Pinwheels
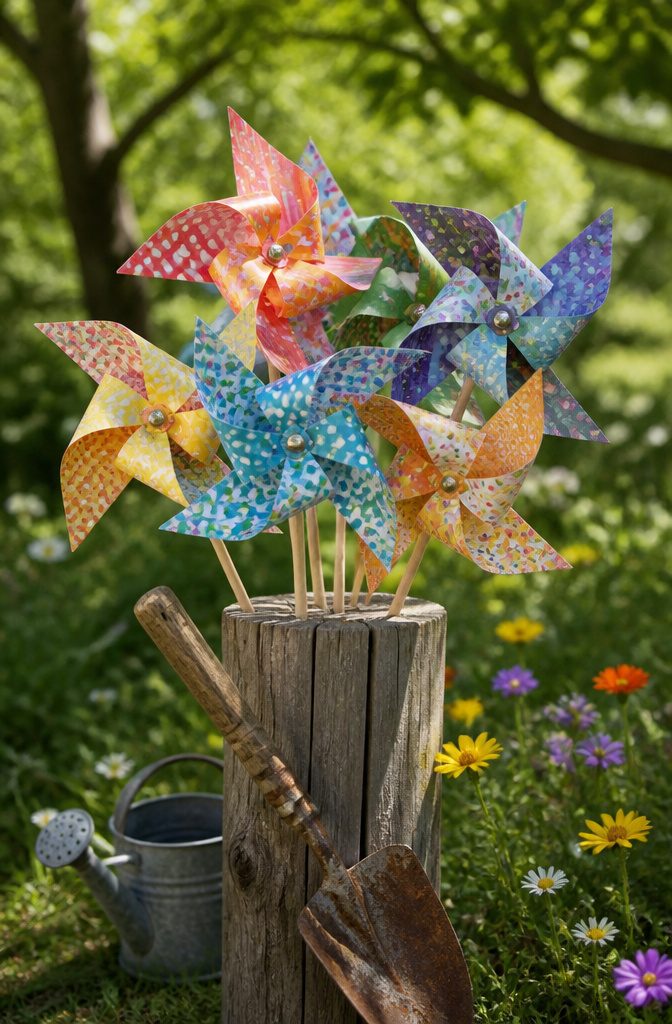
Paper and tape (or glue) are the whole shopping list for a pinwheel, which is why it works for a five-year-old and a grown-up with a free afternoon.
Patterned scrapbook paper gives the best look, but giftwrap, construction paper, coloring book pages and a child’s drawing all spin just as well. Turning a kid’s artwork into a pinwheel is the version I’d pick first.
Paper straws make a tidy handle, though a pencil, a dowel or a stick from the yard does the same job.
Skip the straw hunt and use whatever is already in the junk drawer. Pencils win for sturdiness; a yard stick wins for a rustic look.
15. Teacup Bird Feeder
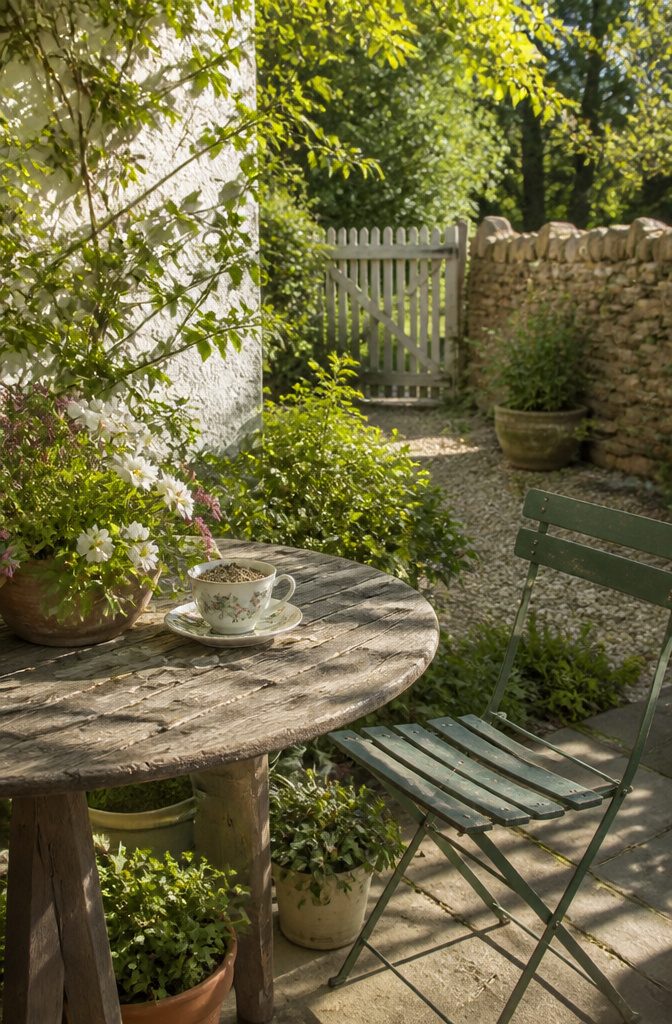
Glue decides whether this feeder lasts a season or falls apart by July.
An epoxy or polyethylene adhesive made for glass and ceramics, such as E-6000, 3M Ceramic or 3M Super Strength Adhesive, bonds the cup to the saucer and stays put outdoors.
Hot glue works in a pinch, but it can soften in the heat, so I would save it for a feeder that hangs in shade.
Pick a cup and saucer you already like looking at, since the pretty china is the garden decor.
Fill the cup with seeds or stale bread crumbs, and the birds will find it. This is a cup, a saucer and one good adhesive, which makes it one of the cheaper afternoon projects here.
16. Decoupaged Easter Eggs
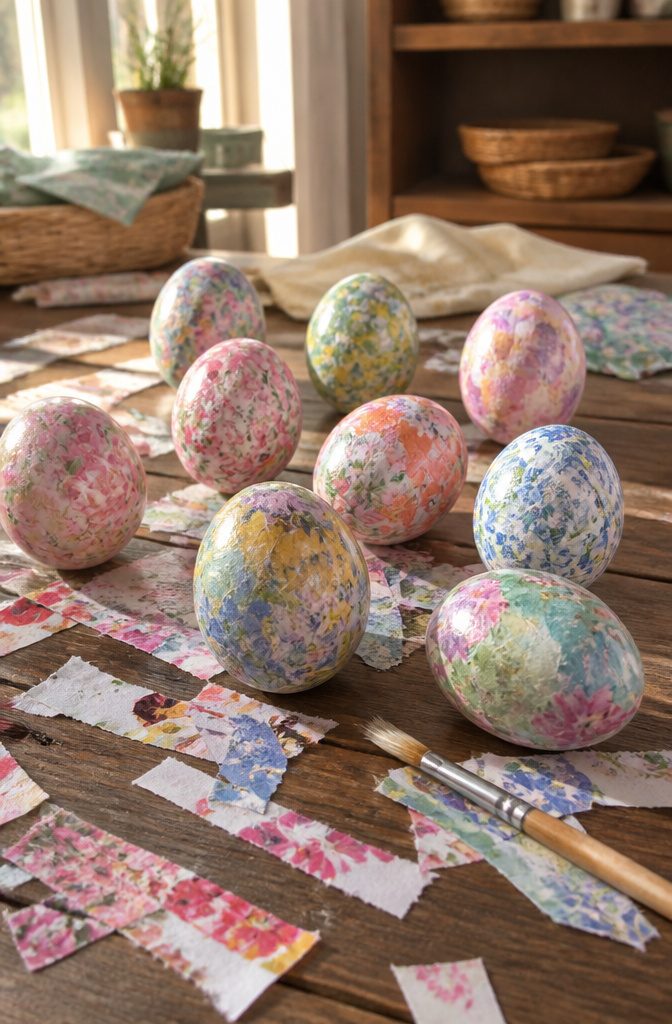
Decoupage is just paper glued to a surface and sealed with a coat of glue on top, and an egg is a forgiving place to practice it.
Faux, wooden, paper, plastic or real eggs all work, so I’d pick whichever your household already has. Wooden or plastic eggs hold up best if kids will handle them.
Napkins, book pages, coloring sheets, giftwrap and printed tissue paper all make good coverings. Tear the paper into small pieces instead of cutting it, because curved eggs make large sheets wrinkle.
Brush Mod Podge on the egg, press a piece down, then brush more over the top. Watered-down glue stands in for Mod Podge if the jar isn’t in your drawer.
I lean toward a single color scheme, like blue and white, since it looks planned even when the scraps aren’t.
Seasonal Crafts by Time of Year
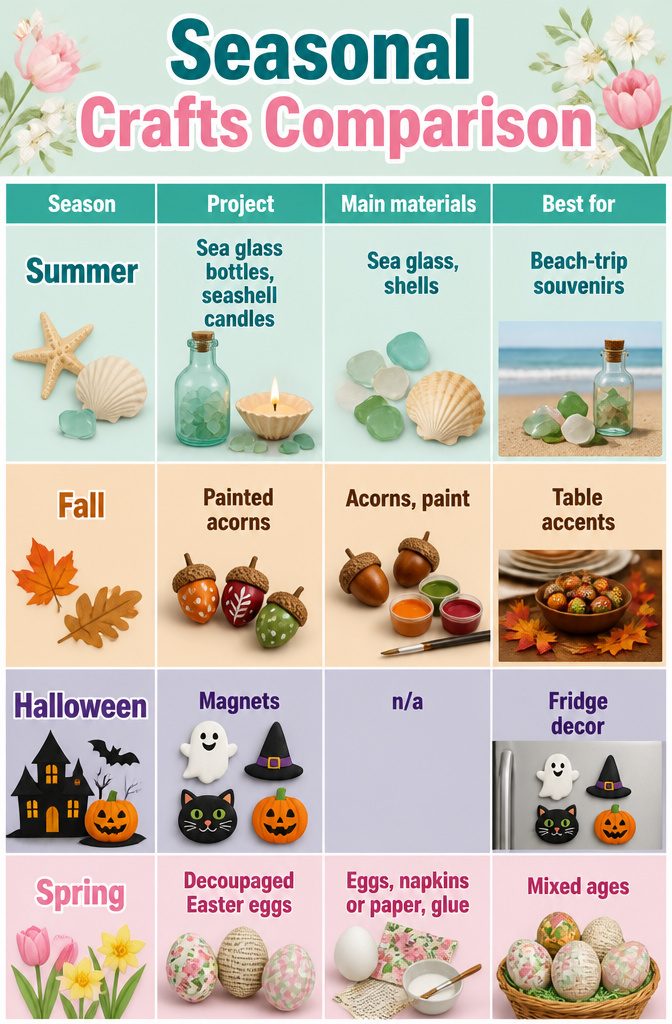
Fall and Easter projects are the ones to plan around the calendar, because the materials are cheap and the window is short.
Painted acorns are a September or October job, and they look best in a bowl or scattered down a Thanksgiving table.
Easter eggs can be decoupaged from napkins, book pages, giftwrap or coloring sheets, and watered-down glue stands in for Mod Podge.
Summer suits sea glass and seashell candles, and Halloween magnets are the one project here that works at any date before the holiday.
| Season | Project | Main materials | Best for |
|---|---|---|---|
| Summer | Sea glass bottles, seashell candles | Sea glass, shells | Beach-trip souvenirs |
| Fall | Painted acorns | Acorns, paint | Table accents |
| Halloween | Magnets | n/a | Fridge decor |
| Spring | Decoupaged Easter eggs | Eggs, napkins or paper, glue | Mixed ages |
I’d start with the eggs. Any egg type works, including plastic, wooden, paper, faux or real, so nothing needs to be bought fresh.
Everyday Materials You Already Own
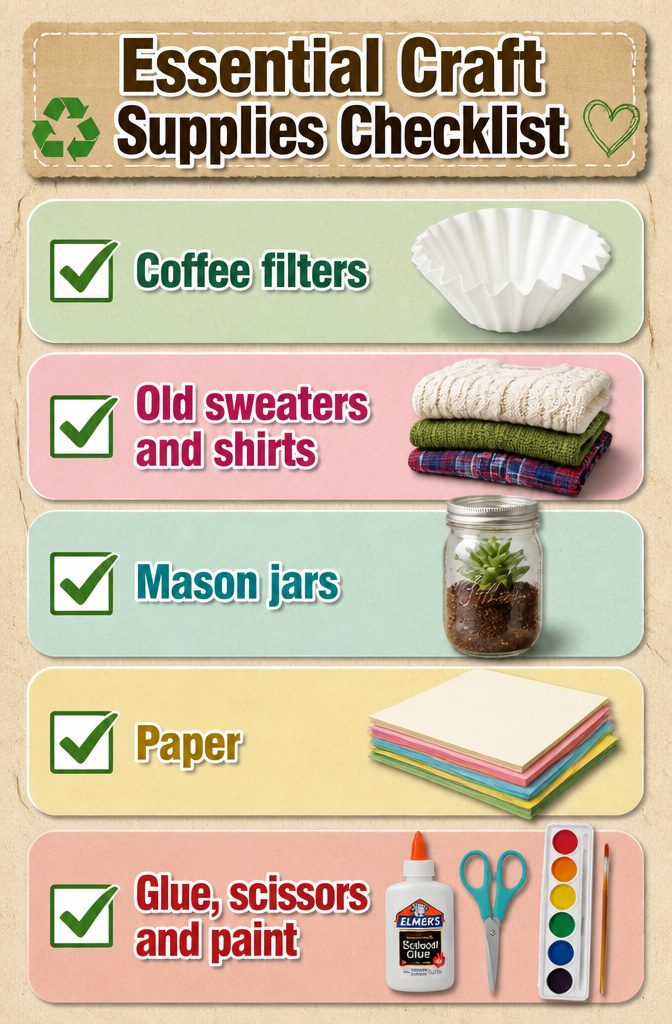
Most of these projects start in the recycling bin or the junk drawer, so check there before you shop.
- Coffee filters: They take dye well and stand in for tissue paper, gift wrap, notebook paper, kraft paper or computer paper if you’re out.
- Old sweaters and shirts: Fabric scraps from either cover a ceramic, glass, wood or plastic vase when decoupaged.
- Mason jars: Good planters, indoors or out, as long as the jar has proper drainage.
- Paper: Any kind works for most projects, so use what’s on hand.
- Glue, scissors and paint: These three do most of the work. Watered-down paint stands in for fabric dye or food coloring, and markers, colored pencils or crayons work too.
I’d skip special purchases until a project truly demands one.
Best Crafts for Kids
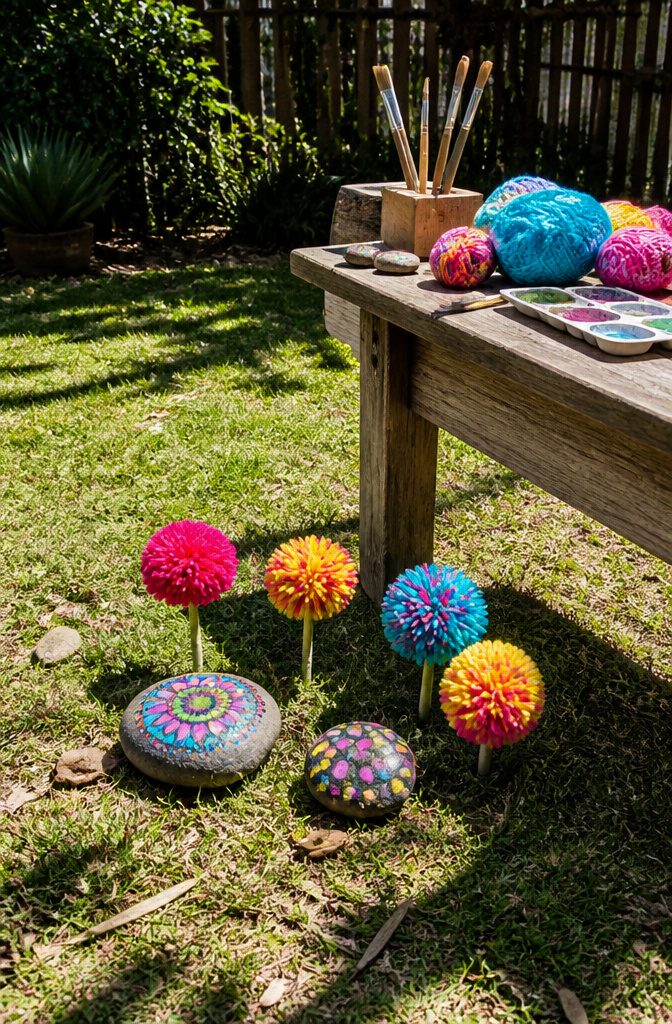
Pom pom flowers and painted rocks are my top picks for kids, and the reason is plain: both start with things most households already have.
A rock from the yard works, and any type of paint will do. Yarn for pom poms is the same story, so nobody has to make a shopping trip before the afternoon starts.
The steps stay short. Kids paint a design, or write a few words of encouragement, then leave the finished rocks along a walking path for the next people to find.
That gives the craft a second act, which keeps a child interested after the paint dries.
Pom poms win for the youngest crafters because wrapping and tying is forgiving.
A lopsided one still looks like a flower. I’d skip anything with a long drying step for small kids; those two crafts reward them within minutes.
Upcycling Old Items
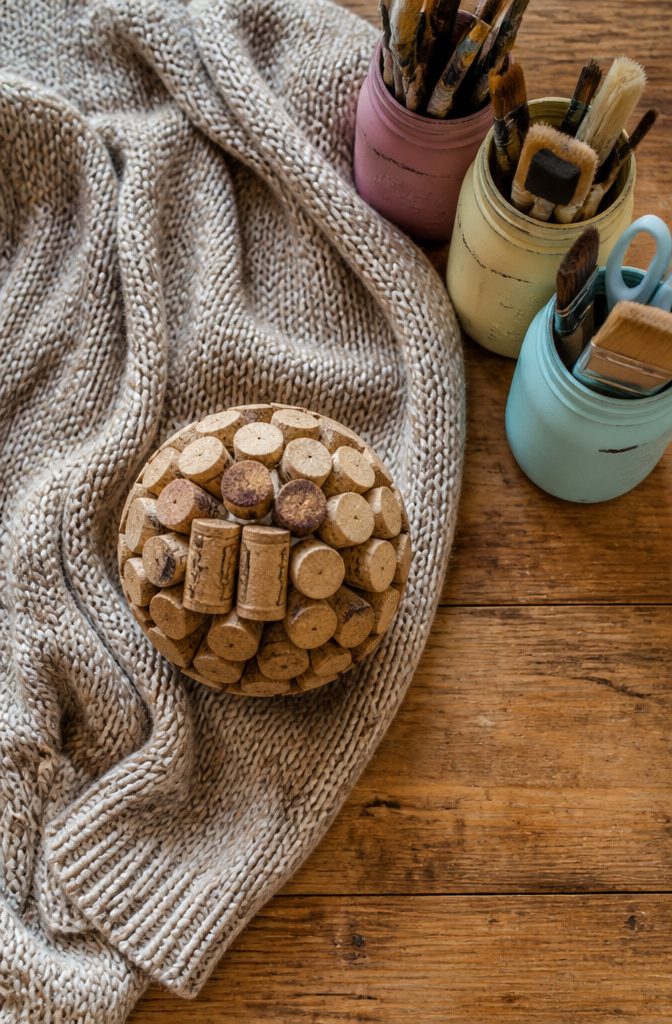
An old sweater holds more craft potential than most people give it credit for.
A sweater you no longer wear can become a pillow, a small Christmas tree or a wine bottle holder, and the knit does half the work because it needs no hemming to look finished at the edges.
Wine corks are the easiest place to start. Glue enough of them together and you get a cork ball that works as an ornament or a tabletop accent.
It goes together quickly and makes a decent gift, which is why I’d pick it over the sweater projects for a first try.
Jars and T-shirts are the other two I’d save from the donation bag. I’d skip any piece with stains across the front, since those show through.
Frequently Asked Questions
What are some easy DIY homemade crafts for kids?
Painted rocks and pom pom yarn flowers are the easiest picks.
Both use things most homes already have: any rock with any paint, or leftover yarn wrapped around a fork. Kids can finish either in minutes, and a lopsided result still looks charming.
What supplies do I need for DIY crafts?
Glue, scissors and paint cover most projects.
Add paper, markers, yarn or fabric scraps depending on what you make. Check the junk drawer and recycling bin first, since most projects here start with items you already own.
How can I use recycled materials for crafts?
Old jars, paper, fabric scraps and worn sweaters all work.
Pasta sauce jars become herb planters or sea glass bottles, and a sweater can become a pillow, a small Christmas tree or a wine bottle holder. Wine corks glued together make an ornament or tabletop accent.
What are fun crafts to make?
Halloween magnets, painted acorns, seashell candles, paper pinwheels and decoupaged Easter eggs are all fun, low-cost options.
Pick by season: acorns in fall, eggs in spring, sea glass and shell candles in summer. Painted rocks work any time of year.





